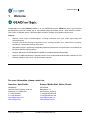
1
User’s Manual
GEARView Basic 1.0 Study and Report Viewer
PACSGEAR™
PACSGEAR
7020 Koll Center Parkway, Suite 100
Pleasanton, CA 94566 USA
T +1 925 846 9600
F +1 925 846 0435
[email protected]
www.pacsgear.com
GEARView Basic
Copyright © 2010 PACSGEAR, Inc.
All rights reserved. The information contained herein is confidential and is the sole property of PACSGEAR. None of the
information may be reproduced, copied and/or redistributed electronically, manually or otherwise to any person without
advance written permission from PACSGEAR, except as may be expressly authorized by contracts or other agreements
between PACSGEAR and its customers.
Trademarks
PACSGEAR, PacsSCAN, MediaWriter, PacsSCAN Film, Print2PACS, PacsSCAN Video, PacsConnect and GEARView
are trademarks of PACSGEAR in the United States and/or other countries. Acrobat, Adobe, DUET, eFilm Lite, Elesys,
MERGE, Microsoft, Windows, and other trademarks, registered trademarks, or service marks referred to in this document
are the property of their respective owners. The publisher and the authors make no claim to these trademarks.
While every precaution has been taken in the preparation of this document, the publisher and the authors assume no
responsibility for errors or omissions, or for damages resulting from the use of information contained in this document or
from the use of programs and source code that may accompany it. In no event shall the publisher and the authors be liable
for any loss of profit or any other commercial damage caused or alleged to have been caused directly or indirectly by this
document.
Printed: 2010 in Pleasanton, CA, USA
Indications for Use
GEARView Basic is intended to be used by patients and healthcare personnel to review medical images and related
results.
CAUTION: GEARView Basic is not labeled for diagnostic use.
PACSGEAR
7020 Koll Ctr. Pkwy, Ste. 100
Pleasanton, CA 94566 USA
2010-08
EMERGO EUROPE
Molenstraat 15
2513 BH, The Hague
The Netherlands
T +31.70.345.8570
F +31.70.346.7299
GEARView Basic iii
Contents
Contents
1Welcome
1.1 Conventions Used in This Manual.......................................................................................................... 2
1.2 Starting and Exiting GEARView Basic.................................................................................................... 3
2 Basic Operations
2.1Decryption............................................................................................................................................... 4
2.2 Patient List Tab........................................................................................................................................ 6
2.3 Patient Tabs............................................................................................................................................ 7
3 Viewing and Manipulating Images
3.1 Window Controls..................................................................................................................................... 9
3.2 Shortcut Menu Commands....................................................................................................................11
3.3 Keyboard Shortcuts............................................................................................................................... 18
4Support................................................................................................................ 19
© 2010 PACSGEAR, Inc.
PG-DOC-GVB-UM-EN-REV1.0A
GEARView Basic 1
1Welcome
Congratulations on adding GEARView Basic™ to your PACS/EHR system. GEARView Basic™ gives patients
and healthcare personnel a simple way to view medical images and related results. When burned to media—
CDs, DVDs, or USB flash drives—GEARView Basic creates a complete and portable medical record.
Features
•
Displays a wide range of DICOM objects, including multiframe video clips, visible light images and
structured reports.
•
Provides a robust set of image manipulation tools, including compare, cine, window/level, zoom/pan,
annotations, customizable overlays and presets.
•
Safeguards images in transit with configurable password-protection and encryption based on the Advanced
Encryption Standard (AES) algorithm.
•
Supports Web Access to DICOM Objects (WADO) for standards-based interoperability.
•
Requires no additional software or external licenses. Runs on Microsoft® Windows 2000, Windows XP, and
Windows Vista® for ease of use—no administration required.
For more information, please contact us:
Americas, Asia-Pacific
Europe, Middle East, Africa, Russia
PACSGEARPACSGEAR
7020 Koll Center Parkway, Suite 100
Balanstrasse 73
Pleasanton, CA 94566 USA
81541 Munich, Germany
T +1 925 846 9600
T +49 (0)89 450 807 600
F +1 925 846 0435
F +49 (0)89 450 807 605
[email protected]@pacsgear.com
www.pacsgear.comwww.pacsgear.com/de
© 2010 PACSGEAR, Inc.
PG-DOC-GVB-UM-EN-REV1.0A
2
GEARView Basic
1.1 Conventions Used in This Manual
Operating Procedures
Operating procedures employ the following conventions.
ConventionIndicates
Boldface type
Names of buttons.
Italic type
Names of on-screen objects other than buttons (usually menu commands).
Courier font
Typed text.
>
Sequence of procedures.
Clicking Cancel or No
This manual omits instructions on clicking Cancel or No buttons because it assumes that the user knows, or can
determine from context, the function of those buttons where they appear. In general, a Cancel or No button closes
the dialog box or screen without performing the operation indicated in the dialog box or screen.
Definitions, Acronyms, and Abbreviations
The following acronyms, abbreviations, and terminology are used in PACSGEAR manuals.
Accession number
A tracking or order number for patient studies.
AE
Application entity. A local or remote DICOM device.
Burner
A digital recording device such as a CD recorder that stores data on media.
DICOM
Digital imaging and communications in medicine. A networking standard for the
medical industry.
DOB
Date of birth.
DX
DICOM modality abbreviation for “digital mammography.”
EMR
Electronic medical record.
EHR
Electronic health record
LDAP
Lightweight directory access protocol. Used for looking up network services and
addresses.
Media
Electronic storage media, such as CD-ROM and DVD.
Modality
Sources of data, such as from ultrasonography, MRI, PET, and CT.
PACS
Picture archival and communication system.
PacsSCAN
General term for any PacsSCAN product (PacsSCAN Film, etc.)
PG-DOC-GVB-UM-EN-REV1.0A
© 2010 PACSGEAR, Inc.
GEARView Basic 3
Symbols
The following symbols are used in this manual.
CAUTION
Indicates information necessary to prevent damage or loss of data or equipment.
Consult instructions for use. Appears on the product CD.
Conformité Européenne: Indicates that the product complies with the
requirements of the 93/42/EEC Medical Device Directive.
Symbol for manufacturer.
Symbol for European authorized representative.
1.2 Starting and Exiting GEARView Basic
Starting GEARView Basic
If GEARView Basic was included on the CD or other medium that contains studies, the program will usually start
automatically when you insert the medium into a drive or port on the PC. If it does not start automatically, navigate
to the folder containing the studies, and run GEARView Basic.exe.
If viewing images through an EHR, the program will launch automatically from the EHR provider.
A graphic (the “splash screen”) will appear showing you the product name. If this graphic does not appear, please
contact PACSGEAR Support. After a few seconds, the splash screen disappears and either the Encryption
Password dialog box or the patient list tab of the main program appears (see next chapter).
Exiting GEARView Basic
Click the Windows close button
© 2010 PACSGEAR, Inc.
.
PG-DOC-GVB-UM-EN-REV1.0A
4
2
GEARView Basic
Basic Operations
If the medium you inserted into the PC contains only unencrypted studies, GEARView Basic automatically starts
and displays the studies in the Patient List tab (see section 2.2). If the medium contains encrypted studies, you
are prompted to decrypt the files according to the procedure below.
2.1Decryption
When you insert the medium into the PC, GEARView Basic starts and displays the Encryption Password dialog
box.
FIgure 2.1 Encryption Password dialog box
Enter the password (determined at burn time) into the box and click View. GEARView Basic decrypts the studies,
copies them from the medium to the folder where GEARView Basic was installed, and opens them in the Patient
List tab (see section 2.2). Alternately you can click Export to decrypt and copy the studies to a folder of your
choice and exit GEARView Basic. After export, the folder will contain DICOM files that can be imported to PACS.
Password
In the Password box, enter the password specified in MediaWriter’s Confirm Studies dialog box when the studies
were originally burned.
PG-DOC-GVB-UM-EN-REV1.0A
© 2010 PACSGEAR, Inc.
GEARView Basic 5
2.2 Patient List Tab
If studies on a burned medium are not encrypted, or if they have been decrypted as described in section 2.1
above, they are ready for viewing. When GEARView Basic first opens, the Patient List tab is displayed.
Figure 2.2 Patient List tab
The Patient List tab displays all of the studies that are available for viewing. Double-click any study in the Patient
List tab to view the study in a new patient tab (see next section).
© 2010 PACSGEAR, Inc.
PG-DOC-GVB-UM-EN-REV1.0A
6
GEARView Basic
2.3 Patient Tabs
Each time you double-click a study for a new patient in the Patient List tab, a new patient tab is opened.
A
C
B
D
E
F
L
G
H
I
J
K
Figure 2.3 GEARView Basic with patient tabs open
The contents of the patient tabs and other parts of the program screen are described as follows.
A Patient List tab. Click to display the patient list.
B Exam history icons. An icon is displayed for each exam associated with the patient. Each icon shows the
modality (VL, MR, CT, etc.) and date/time of the exam. Click an icon to display a new exam strip containing all
series in the exam. If an opened exam strip is off screen, you can jump to it by clicking its exam history icon.
C Patient tabs. Double-click a patient in the patient list to open a new tab. To switch between opened patient
tabs, simply click the desired tab. If a particular exam is not displayed in the tab, click one or more of the exam
history icons.
PG-DOC-GVB-UM-EN-REV1.0A
© 2010 PACSGEAR, Inc.
GEARView Basic 7
D Tab scroll buttons. Click to move open tabs to the left or right.
E Help icon. Click to view the user’s manual.
F Close button. Click to close the exam strip. At any time you can reopen the exam by clicking the appropriate
exam history icon.
G An overlay of the main study information.
H Exam strip. The horizontal area containing all series in an exam.
I Exam information (the date/time and name of the exam). Double-click this area to open a basic information
window.
J Series thumbnail (hereinafter, thumbnail). Each exam contains one or more series, and each series contains
one or more images. Each series is shown as a thumbnail in the exam strip.
K An overlay of the size of the currently displayed image (in pixels).
L An overlay of the number of the currently displayed image. If a series contains multiple images, you can scroll
through them using the mouse wheel.
Overlays
The text that is superimposed over images, such as in G, K, and L above, is called an overlay. To display or hide
overlays, right-click the study’s shortcut menu and click Text On/Off, or, press the A keyboard shortcut.
© 2010 PACSGEAR, Inc.
PG-DOC-GVB-UM-EN-REV1.0A
8
3
GEARView Basic
Viewing and Manipulating Images
GEARView Basic provides you with convenient tools to view and manipulate images. These tools differ depending
on the type of image.
3.1 Window Controls
The following window controls are available.
Full Screen
To open an image in a full-screen viewport, double-click its thumbnail in the exam strip or click
the Full Screen button (see figure 3.1).
A
B
C
Figure 3.1 A: Compare button; B: Full Screen button; and C: Close button. The Close
button is only visible if the image is dispalyed in Compare or Full Screen view.
Compare
Click the Compare button (see figure 3.2) to open the image in a half-screen viewport. Click
the Compare button of a second image to open the second image in a half-screen viewport in
the other half of the screen. This easily enables comparison of two images.
Figure 3.2 Compare view
PG-DOC-GVB-UM-EN-REV1.0A
© 2010 PACSGEAR, Inc.
GEARView Basic 9
Close
Any time an image is opened in a full-screen or compare viewport you can return to thumbnail
view by double-clicking the image again, or by clicking its Close button (see figure 3.1).
Cine Images
This button is only available if the series contains more than one image. Click to automatically
cine through all images in the series. After clicking, the button changes to a Pause button.
Click Pause to pause the cine. You can also press C on the keyboard to Cine/Pause images.
Cine slider
This slider is only available if the series contains more than one image. Drag the slider to the
right or left to manually cine forwards or backwards through images in the series.
B
A
FIgure 3.3 A: Cine Images button; and B: Cine slider
SR paging When a structured report (modality = SR) is opened in a full-screen viewport, two buttons
appear at the bottom of the screen for paging the report forward and backward.
Figure 3.4 Click the left and right arrow buttons to page forward and backward
Linking Series
When two series are opened in compare viewports, their scrolling behavior becomes linked by default if they
satisfy two conditions: 1) the series are from the same exam; and 2) the series reside on the same plane (as
determined by the relevant DICOM patient orientation tags). When two series are linked, scrolling performed
by the user on one of the series is likewise applied, to the extent possible, in the other series. Linked series are
identified by the word “Linked” appearing at the lower left of each series. When linking is enabled, a “Link “command
appears in each series’ shortcut menu that allows you to turn linking ON and OFF (see figure below).
© 2010 PACSGEAR, Inc.
PG-DOC-GVB-UM-EN-REV1.0A
10
GEARView Basic
Figure 3.5 Two linked series. The command "Link" becomes available in the shortcut menu.
PET-CT Fusion
When a PET series and CT series are opened side-by-side in compare viewports, GEARView Basic automatically
superimposes the PET series with a copy of the CT series (the left series in the figure below). This is called PETCT Fusion. You can select a transparency level (0%, 25%, 50%, 75%, or 100%) in the PET series shortcut submenu. To change the color schemes on the fused image, right-click and select a window/level preset.
Figure 3.6 PET-CT fusion
PG-DOC-GVB-UM-EN-REV1.0A
© 2010 PACSGEAR, Inc.
GEARView Basic 11
3.2 Shortcut Menu Commands
Open the shortcut menu by right-clicking an image or thumbnail.
Figure 3.7 Shortcut menu for images in studies
Reset
Resets rotation to none, window/level to its original values from the DICOM file, and the invert
state, and clears all measurements.
ToolsSee Tools Shortcut Menu below.
Flip/RotateSee Flip/Rotate Shortcut Menu below.
Layout
Only displayed when the image is open in a viewport. See Layout Shortcut Menu below.
Text On/Off
Displays or hides the text overlay.
Window/LevelSee Window/Level Presets Shortcut Menu below.
Image Details
Opens an Image Details window that displays patient, study, and other information associated
with the image (see figure 3.6 below). Each piece of information corresponds to standardized
DICOM fields, and is accompanied by the relevant field codes.
To search for information, type a keyword in the Find box and click Find Next as many times
as is necessary to jump to the desired item.
© 2010 PACSGEAR, Inc.
PG-DOC-GVB-UM-EN-REV1.0A
12
GEARView Basic
Figure 3.6 Image Details window
PG-DOC-GVB-UM-EN-REV1.0A
© 2010 PACSGEAR, Inc.
GEARView Basic 13
Tools Shortcut Menu
FIgure 3.7 Tools shortcut menu
Window/Level
Changes the cursor to the window/level cursor. Drag the cursor horizontally or vertically over
an image or thumbnail to adjust the window or level, respectively.
Zoom
Changes the cursor to the zoom cursor. Drag the cursor vertically over an image or thumbnail
to zoom in or out.
Pan
Changes the cursor to the pan cursor. Drag the pan cursor over an image or thumbnail to pan
(drag) the image in any direction. Note that you can only pan left and right in the full-screen
viewport.
Cine
Select this command to cine through images in a series. This command only works if the
series contains more than one image, and is open in compare or full-screen view.
Measure
After selecting this command, click two points on the image in succession: a start point and an
end point. A line appears between the two points with the distance between them measured
in units of pixels. After the first line is displayed, you can move either of the two points to new
locations in order to measure new distances.
FIgure 3.8 Use the Measure tool to measure portions of an image
© 2010 PACSGEAR, Inc.
PG-DOC-GVB-UM-EN-REV1.0A
14
GEARView Basic
Measure Pixel
After selecting this command, click and hold down the mouse button over any point on the
image to display the pixel value at that point. One value is shown for grayscale images, and
three points are shown (R, G, and B) for color images.
Measure Angle
After selecting this command, click three points on the image in succession: a start point, a
vertex, and an end point. Lines appear between the vertex and start and end points, and the
resultant angle is displayed in units of degrees. After the first angle is displayed, you can move
any of the three points to new locations in order to measure new angles.
FIgure 3.9 Use the Measure Angle tool to measure angles in images
Measure Cobb
Angle
After selecting this command, click four points on the image in succession: a start and end
point for line 1, and a start and end point for line 2. The two lines appear along with a third line between the first two lines, and the Cobb angle is displayed (the angle swept by the lines where the vertex is assumed).
FIgure 3.10 Use the Measure Cobb Angle tool to measure angles in images
Invert
Inverts black and white values on grayscale images. Has no effect on color images.
PG-DOC-GVB-UM-EN-REV1.0A
© 2010 PACSGEAR, Inc.
GEARView Basic 15
Flip/Rotate Shortcut Menu
FIgure 3.11 Flip/Rotate shortcut menu
Rotate Right 90 Rotates the image or thumbnail ninety degrees clockwise
Rotate Left 90
Rotates the image or thumbnail ninety degrees counterclockwise
Rotate 180
Rotates the image or thumbnail one hundred and eighty degrees
Flip Horizontal
Flips the image horizontally (on its vertical axis)
Flip Vertical
Flips the image vertically (on its horizontal axis)
Layout Shortcut Menu
The Layout shortcut menu is only visible when the study is displayed in a viewport, and is useful only if there is
more than one slice in the series. Select 1 x 1, 2 x 2, or 3 x 3 from the submenu to display a “tiled” layout of slices.
Use the Up/Down arrow keys to scroll slices one-by-one through the tiles, or use the Page Up/Page Down keys to
scroll them screen-by-screen.
Figure 3.12 Layout command with submenu
If there are not enough slices to fill the layout, portions of the layout are left blank.
© 2010 PACSGEAR, Inc.
PG-DOC-GVB-UM-EN-REV1.0A
16
GEARView Basic
Figure 3.13 A 3 x 3 layout. Each of eight slices are shown in a different tile of the layout.
PG-DOC-GVB-UM-EN-REV1.0A
© 2010 PACSGEAR, Inc.
GEARView Basic 17
Window/Level Presets Shortcut Menu
The Window/Level Presets shortcut menu contains a submenu with a selection of preset window/
level values appropriate for different body parts or viewing objectives. The presets displayed in the
submenu differ depending on the image. The figure below shows examples of two different possible
submenus. You can choose the preset most appropriate for your image, and then fine-tune the
window/level setting as desired by using the Window/Level tool described above.
Figure 3.14 Two examples of possible Window/Level Preset submenus
© 2010 PACSGEAR, Inc.
PG-DOC-GVB-UM-EN-REV1.0A
GEARView Basic 18
3.3 Keyboard Shortcuts
GEARView Basic provides many convenient keyboard shortcuts for efficient operation.
Window/Level Preset Shortcuts
The following are the default keyboard shortcuts for window/level presets. If desired, these can be edited directly
in the presets.xml file located in the GEARView Basic folder.
F4 Abdomen
F5
Bone
F6
Brain
F7 Liver
F8 Lung
F9
Mediastinum
F10
Myelogram
Other Shortcuts
Page Up
Scrolls up one screen in layout view
Page Down
Scrolls down one screen in layout view
Up
Scrolls up one image in layout view
Down
Scrolls down one image in layout view
Left
Jumps to the previous series in layout view
Right
Jumps to the next series in layout view
C
Starts/pauses the selected cine loop
A
Shows/hides overlays
W
Switches to the window/level tool
Z
Switches to the zoom tool
P
Switches to the pan tool
M
Switches to the measure line tool
N
Switches to the measure point tool
V
Switches to the measure angle tool
B
Switches to the measure Cobb angle tool
I
Inverts the current image (grayscale only)
R
Resets the current image
Home
Jumps to first image of the selected series
End
Jumps to last image of the selected series
Delete
Deletes the highlighted measurement overlay
© 2010 PACSGEAR, Inc.
PG-DOC-GVB-UM-EN-REV1.0A
GEARView Basic 19
4Support
At PACSGEAR, your success is our success. If you have any questions or problems, please do not hesitate to
contact us.
Customer Support (USA):
+1 925 846 9600 (8:00 am to 5:00 pm Pacific Time).
[email protected]
Customer Support (Europe):
+49 (0)89 450 807 600 (08:00 to 17:00 Central European Time).
[email protected]
© 2010 PACSGEAR, Inc.
PG-DOC-GVB-UM-EN-REV1.0A