1
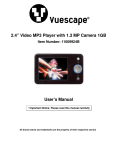
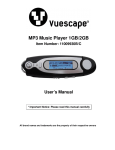
1.8”Video MP3 Player with FM Radio 1GB
Item Number: 11009932B
User’s Manual
* Important Notice: Please read this manual carefully
All brand names and trademarks are the property of their respective owners
FCC Norm
FCC
This equipment has been tested and complies with limits for Class B digital devices pursuant to Part 15
of Federal Communications Commission (FCC) rules.
FCC Compliance Statement
These limits are designed to provide reasonable protection against frequency interference in residential
installations. This equipment generates, and radiates radio frequency energy, and if not installed properly
or used in accordance with the instructions, may cause harmful interference to radio communication.
However, there is no guarantee that interference will not occur in television reception, which can be
determined by turning the equipment on and off. Interference may be corrected by one or more of the
following measures:
Reorient or relocate the receiving antenna.
Increase the separation between the equipment and the receiver.
Plug the equipment into an outlet on a circuit different from that to which the receiver is
connected.
CAUTION!
The Federal Communications Commission warns the user that changes or modifications to the unit not
expressly approved by the party responsible for compliance could void the user’s authority to operate the
equipment.
2
Important Information
1. Any disconnection of the unit in the process of formatting, uploading or downloading will lead to
program errors.
2. Remove the battery if the unit is not used for a long period of time to avoid any damage which may be
caused by battery leakage.
3. Avoid leaving the MP3 Player in especially hot, cold, dusty or humid conditions.
4. Change the battery as soon as possible in the following cases:
The battery indicator shows that the battery has run down.
The MP3 Player automatically shuts down or shuts down soon after restarting.
The MP3 Player will not turn on after the re-installation of the battery.
5. When it is used as a USB drive, please operate according to the file management software.
Control Buttons and Features
3
Getting Started
Step 1: Set up the software:
1: If your computer is running Windows 98, you should install the Windows 98 driver from the
software CD included with your MP3 Player. To do this insert the CD in your CD-ROM drive and follow the
steps below:
Double-click on the ”My Computer” icon, then double click on “Set-Up” to install the soft ware follow
the installation instructions.
After you finish the installation, you can find this file in your “Program files” in your “C” drive.
Note:
This MP3 Player will only support AMV video format files. You can set up this conversion tool by double
clicking on this software file and then following the instructions.
If your computer is running Windows ME/2000 /XP or Vista your MP3 player will be “seen” by the
computer upon plugging the unit into the computer via the USB cable connector. No extra set up steps
are necessary.
Step 2: Transferring music and content
Once your MP3 player is seen by the computer you may now begin to transfer music files onto the
device.
1: How to copy Music files from your PC to MP3 Player directly:
Select the music file by clicking on the file, - Choose “Copy” – then go to the MP3 player Icon and
choose “Paste”, it is that simple. Repeat this procedure to add the music files you want to listen to.
2: If you want to transfer music or individual songs from a CD, please use the Windows Media Player
software which may be on your computer to convert the CD file to MP3 music files. For the detailed
instructions of this procedure please check your Windows Media Player software guide for reference.
Step 3: Disconnect your player
When you have finished transferring files, disconnect your MP3 player.
Be careful not to disconnect your player while files are still being downloaded, otherwise you may lose or
damage the content being transferred.
Step 4: Playing media miles, listening to music
You are now ready to play media files on your player.
- Insert the earbuds into the earphone jack output.
(Play) button to turn the unit on,
- Slide the “ON/OFF” button to “ON” firstly! Firmly press the “
choose the “Music” then lightly depress the “M” (Mode) button to view the audio modes, press “Play”
button to activate the play mode.
- Press “
Vol +/ Vol -) when in play mode to adjust the volume.
- Enjoy your MP3 Player!
4
Understanding the Display Screen
Charging and Battery Level
When the battery icon is fully shaded in “ ” this indicates that the power of Battery is full.
When power runs out, the indicator will become blank, at this time you should re-charge your player.
Charging:
Charge by connecting the player to your PC with the included USB connector cable.
Please turn on the player before charging.
Please turn off the player when not using it.
Note: After you turn off the player by pressing ”Play/Pause” button, please also switch the “On/Off”
button to Off to save the power!
Operating the Processing Key
The main processing key operates in the following fashion;
Press: Press a key and release.
Press and Hold: Press a key and hold it at least 3 seconds.
Push: Push a key once.
Back to the master menu
When you try to back to master menu from submenu, press and hold “M” (mode) button, then you can
back to the master menu
5
Basic Functions
Entering into master menus
Turn on the power switch and then you will enter into the master menu.
Volume adjustment
Press “
(Vol +/ Vol -) to increase and decrease the volume.
Power On/Off
Slide the “On/Off” switch to the “On” position to turn on the player.
Slide the “On/Off” switch to the ”Off” position to turn off the player.
Play & Stop
In music mode, Press “
(Play) button to play music.
When playing music, press “
off the player.
Start / Stop recording
In recording mode, press “
(Play/Pause) to pause; press and hold for 5 seconds to stop and turn
(Play) to start, press “
(Play) to stop.
Playing Music
Steps:
Plug the earbuds into earphone jack
Slide the “On/Off” button in the “On” position to enter into master menus, press “M” button to enter into
music mode, and then press “
(Play) button.
Select music: press “ ”(Next) button to choose next music; “ “ (Prev) to previous music.
Repeat Mode:
While a music file is playing:
Press “M” (Mode) button to enter into submenu.
Press “
button to choose “Repeat” menu.
Press “M” (Mode)button to enter into “Repeat “menu.
You can choose one of several modes of “Repeat”:
Normal, Repeat One, Folder, Repeat Folder, Repeat All, Random and Intro.
Press the “M” (Mode) button to confirm your choice.
Equalizer Mode
While a music file is playing:
- Press “M” (Mode) button to enter into submenu;
button to choose “Equalizer” mode;
- Press “
- Press “M” (Mode) button to enter into “Equalizer” submenu.
- Select an equalizer mode:
-Natural, Rock, Pop, Classical, Soft, Jazz, or DBB.
- Press “
button to select an EQ and press “M” (Mode) button to confirm your choice.
Press the “M” (Mode) button to choose “Replay” submenu, Press “M” again, “A-B” on screen shall be
twinkling, press the “ ” (Next) to choose the segment, then it can be replay. Press “M” (mode) button
again and back to the normal music display mode !
6
Synchronous Lyric Display
The player supports lyric files with *.LRC suffix, and displays synchronously.
How to use lyric files
Please make sure the lyric file has the same name as the music file.
For example:
Music file: My heart will go on.mp3
Lyric file: My heart will go on.lrc
How will you know if the matching lyric is available?
If the lyrics are matched, a symbol “ ” will be shown bright on bottom-right in music mode.
When the matched lyrics are available press and hold “M” to enter into lyric interface, press “Menu”
return to music mode.
Replay
Press “M” (Mode) button to enter into replay, it will repeat one time.
Replay times
Press “M” (Mode) button to enter and choose how many times you want the song to repeat.
Replay gap
Press the “M” (Mode) button to enter and choose how long the song will be replayed.
Viewing Movies
Choose the “Movie” mode, Press “M” (Mode) button and then press “
video file
Note: this player only supports AMV video format
(Play) button to play the
Local folder
Press the “M” (Mode) button and a video file is paused, then you can see the root folder. Located in the
root folder are all of your movies for you to choose from to watch video.
Delete file
Press “M” (Mode) button when in pause, there are all your movies for you to choose to delete one by
one. Press “M” (mode) button again to delete it. Or you may leave it to back to the display mode after
few sec.
Delete all file
Press “M” (mode) button when in pause, if you want to delete all, choose “Delete all” and press the
mode button to confirm.
Repeat Mode:
While playing a video file:
Press “M” (mode) button to enter into “Repeat” mode.
You can choose the mode you want: Normal, Repeat One, Folder, Repeat Folder, Repeat All, Random.
Intro. Press “M” (mode) to confirm.
7
Voice Recording
How to enter into this function:
1. Press “ / ”(Prev/Next) button to choose “Record” mode
2. Press “M” (Mode) button to enter into “Record” mode
3. Press “Play” button to start recording.
4. Press “Play” button again when you want to pause
5. Press “Mode” button for 3 seconds to “Save File”.
Select Record Type
1. While in the interface of the “Record” function
2. Press “M” (Mode) button to enter into “Record” sub menu
button to select “REC Type” submenu, then press “
3. Press “
(Mode) button to confirm.
Fine REC
Long REC
Fine VOR
Long VOR
4. Press “
5. Press “
to select and press “M”
WAV file, fine quality
ACT file, normal quality
WAV file, (Hi-Quality sound recording
controlled by voice, pause when there is
no sound)
ACT file, (Long sound recording controlled
by voice, pause when there is no sound)
button to choose appropriate type and press “M” (Mode) button to confirm it
(Play) button to start recording.
Play Recorded Files
Enter into main menu
Press “ / ”(Prev/Next) button to choose ‘”Voice” menu
Press “M” (Mode) to enter into it
(Play) button to play the file.
Press “
How to choose voice record files
“ ” (Prev) : Select previous file
“ ” (Next) : Select next file
Listening to FM Radio
Note:
Plug earbuds into earphone Jack, it will be used as antenna when listening program
1. Enter into main menu;
2. Press “ / ”(Prev/Next) button to choose “FM Radio” menu
3. Press “M” (Mode) to enter
4. Automatic search mode--Keep pressing “ ” or “ ”(Prev or Next) button for three seconds, (or you can press “M” (Mode)
and enter submenu to choose “Search mode” “Auto Search”) then the player will search forward
or backward at the speed of 0.1 MHz/sec and stop at a radio station; if you want to stop searching,
shortly press “ ” or “ ”(Prev or Next) button.
8
5. Manual micro adjusting
Shortly press “ ” (Prev) button: 0.1MHz backward; shortly press “ ”(Next) button: 0.1MHz
forward.
6. Save current channel:
Press “M” (Mode) button to enter into FM submenu; Press “M” (Mode) again to save channel.
7. Listen to a saved channel:
You can listen to a saved channel by press “ ” or “ ”(Prev or Next) button.
20 channels can be saved each in the “Normal Brand” and the “Japan Brand”
Setup
1. You can set the overall system performance here, options may vary in different firmware versions.
Enter into main menu
Press “ / ”(Prev/Next) button to choose “Setup”, press “M” (Mode) to enter into it.
2. Options Menu:
Clock
LCD Set
Language
Power Off
Replay Mode
Online Mode
Memory Info
Firmware
Version
Firmware
Upgrade
Exit
Set date and time when saving
recorded file
Set screen saver or Brightness
Choose English or Spanish
Set a count down time, the player
will shut off when time out.
Set replay status
There are three option (Multi,
Normal, Encrypted)
Check memory space and usage
status
Version of player’s firmware
Use for upgrade firmware
Exit from Setting interface
1. Clock Setting
2. Press “M” (Mode) button to enter into “Clock” interface
VOL+) button to choose the Year/Month/Day/Hour/Minute/Sec and press “
Press “
/ ”(Prev/Next) button to modify the time.
After setting, press “M” (Mode) button to exit.
3. LCD Setting
Press “M” (Mode) button entry screen saver setting; press “
after setting,
Select “Exit” and press “M” (Mode) button to exit.
4. Language Setting
Press “M” (Mode) button to enter into language setting
Press “
VOL+/VOL-) button to choose
After setting, press “M” (Mode) button to exit.
5. Power Off Setting
9
VOL+/VOL-) button to choose
Please note:
You can set time in seconds on “Off Time“ mode, allow the player shut down automatically, this
function is unavailable if the time is 0.
You can set time on “Sleep Mode“, allow the player is shut down automatically. It is designed for
listening to music before sleeping.
Note: “Sleep Mode“ valid only once after setting, you have to set again if you want to use it next time.
6. Replay Mode
You can choose “Manual Replay” or “Auto Replay” here.
7. Memory Info
You can check total memory space and the percentage of usage.
8. Firmware Version
You can find the player’s firmware version.
9. Firmware Upgrade
Use for upgrade player’s firmware.
Tips: Press and hold “
(Play) button 3 sec and you can turn off the player quickly. This function is
valid on all other menus.
E-book: Can Read Text Files
1. On main menu, press “ / ”(Prev/Next) button to choose ‘E-book’ menu
2. Press “M” (Mode) button to enter into corresponding submenu:
3. Press “ / ”(Prev/Next) button to choose the document you want to read, and then press
“
(Play) button to open it.
Browsing Pictures
This function can support pictures of JPEG, GIF formats.
1. On main menu, press“ / ”(Prev/Next) button to choose “Photo” menu
2. Press “M” (Mode) button to enter into corresponding submenu:
3. Press“ / ”(Prev/Next) button to choose the document you want to look, and then press “
button to display it
(Play)
How to Install the CD Driver.
1. Please insert the CD to the CD-ROM, open the CD, double-click “setup.exe”, and then proceed
according to the instructions.
2. After the driver is set up successfully, by clicking the “Start Program MP3 Player Utilities”, you
can see some tools such as: AMV Convert Tool, AMV Player, MP3 Player Disk Tool, MP3 Player
Update Tool. Among of them, MP3 Player Disk Tool is for setting encrypted drive, MP3 Player Update
Tool is for updating the firmware/bios,
MP3 Player Disk Tool
After installing the utility from the CD, you can run MP3 Player Disk Tool to format the player and for the
encryption function
1 Format: You can format the player either by this program or by Windows.
2. Partition and Encrypt
You can divide USB disk into two parts by this tool, one is encrypted and the other is non-encrypted
Note: Windows 2K should be installed SP4 to support this function
10
Steps:
1. Connect the player with PC
2. Run MP3 Player Disk Tool
3. Select “Partition and Encryption”
4. Select a suitable space for encrypted disk and setup user name and password
5. Click “Start” and finish the partition
6. You will see two disks. Click encrypted disk "RdiskDecrypt “ and input user name and password in the
dialogue; if they are correct, you can open the disk and copy files in it.
7. Every time you connect the disk with your PC, you need input user name and password to open the
encrypted disk.
Warning: Divide one disk into parts will remove all data, and so does combine process.
Warning: Please remember username and password. If you forget it, you can only making combine
processing and you will loss all encrypted data.
AMV Files Conversion Software Tools.
The program can support AVI/WMV/RMVB/AMV formats, but you must convert them into AMV format by
using AMV convert Tool.
The following are the step by step instructions:
1. Open AMV convert Tool.
2. Select the files you need to convert.
3. Select a folder to save converted files.
11
4. Click “
” to start converting.
Troubleshooting
12
No Power
No sound
Strange characters
on display
FM radio reception
is poor
Cannot download
music
Make sure you have switched the
player on
1. Make sure volume is not on 0
position and the connection to
earbuds is complete.
2. Please make sure the earphone
jack is clean.
3. Damaged MP3 files may have
noise and even cannot be played.
Make sure you have chosen the
correct language.
1. Adjust the location of player and
earphone.
2. Switch off power appliances
running nearby
3. Earphones must be used as the
FM antenna.
1. Check USB cable, and make sure
the player is properly connected to
the PC.
2. Check if the driver is installed
correctly.
3. Check to see if there is any open
memory
A Note about Recycling
This product’s packaging materials are recyclable and can be reused. Please dispose of any materials in
accordance with your local recycling regulations.
This product consists of materials which can be recycled and reused if disassembled by a specialized
company.
Batteries should never be thrown away or incinerated but disposed of in accordance with your
local regulations concerning chemical wastes.
13
14
Customer Service
For information regarding the return or exchange of this item within 14 days of purchase , please
visit your Inkstop store location or go to www.inkstop.net to read the instructions regarding
customer service returns procedures. Click on the Satisfaction Guaranteed icon on the website.
For technical support in regards to operation and installation of this item please call the toll free number
below to obtain assistance. A customer service representative will assist you and provide operating
information on the product.
Please have the following information available when you contact technical support:
Your Name and Address
Date of Purchase
Model Number
Serial Number
Store Name and Address
Type of problem with the unit
To contact the technical support facility, please call
508-435-4830 or 800-639-3803.
Email Support: [email protected]
15
Warranty
90 Days Limited Warranty
This product is warranted to be free from defects in material and workmanship for a period of 90 days.
Warranty obligations are limited to replacement or repair of defective parts and components, at the option
of the manufacturer. If the original model is no longer available, we will substitute with a model of equal
or better value than the original item. The warranty of this product is null and void if the product is
subjected to negligence, abuse, modification, misuse, accident or if the customer uses the product for a
function it was not intended for. This warranty is only valid for the original purchaser of this product and
will not be honored if the product is resold. This warranty gives you specific legal rights, and you may also
have other rights which vary from state to state.
The manufacturer will not be liable for incidental or consequential damages caused by the use of this
product. The manufacturer will not be liable for any costs such as lost profits or revenues, cost of
temporary replacements, loss of data, loss of equipment or use of equipment or any claims by third
parties.
After 14 days from the purchase date of this product, please call the phone number listed below to obtain
service. A customer service representative will give you a return authorization (RA number) allowing you
to ship the product to the service center. The purchaser must have a copy of the original receipt for proof
of purchase within 90 days. The purchaser of this product is responsible for any shipping charges to the
repair facility. The manufacturer service center will repair or replace the unit in question and send it back
to the purchaser.
In order to contact the service facility, please call 508-435-4830 or 800-639-3803.
The address for this facility is:
Fourstar Group
26840 Fargo Ave.
Suite C
Bedford Heights, OH 44146
E-mail Support: [email protected]
16