1
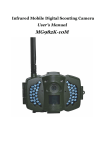
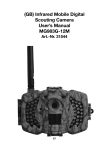
Infrared Mobile Digital Scouting Camera
User’s Manual
MG982K-10M
Content
1 Instruction ........................................................................................................... 1
1.1 General Description .................................................................................... 1
1.2 Application ................................................................................................... 1
1.3 Camera Overview ....................................................................................... 2
1.4 Shooting Information Display ................................................................. 4
1.5 Two way communication.......................................................................... 4
2 Cautions ............................................................................................................... 5
3 Quick Start Guide.............................................................................................. 6
3.1 Power Supply............................................................................................... 6
3.2 Insert SD card and SIM card................................................................... 6
3.3 Do the camera settings............................................................................. 6
3.4 Manually send a MMS or GPRS photo ................................................. 8
3.5 Enter work mode ........................................................................................8
3.6 SMS control................................................................................................. 8
4 Advanced Operations....................................................................................... 9
4.1 Work Mode.................................................................................................. 9
4.2 Settings Menu............................................................................................. 9
4.2.1 Setting Items ...................................................................................... 10
4.2.2 Default Set.......................................................................................... 14
4.3 Use the Remote control.......................................................................... 15
4.4 Load or remove a wireless sensor........................................................ 16
4.5 Change the settings via Android APP or SMS................................... 17
4.5.1 User level.......................................................................................... 17
4.5.2 Set administrator phone number.............................................. 18
4.5.3 Get on spot photo .......................................................................... 18
4.5.4 Use android APP ............................................................................ 19
4.5.5 SMS command list......................................................................... 19
5 Trouble shooting............................................................................................. 22
Appendix I: PIR Detection Zone..................................................................... 23
Appendix II: Error Code................................................................................... 25
Appendix Ⅲ: Technical Specifications.......................................................... 27
Appendix Ⅳ: Parts List ..................................................................................... 28
MG982K-10M
1 Instruction
1 Instruction
1.1 General Description
This camera, a digital scouting camera with MMS function,
is a digital infrared surveillance camera, triggered by any
movement of human or animal monitored by a high sensitive
Passive Infrared (PIR) motion sensor, and then automatically
captures high quality pictures (up to 10M pixels) or records
video clips (720P HD). It sends pictures instantly to your
mobile device or e-mail via GSM/GPRS/MMS network. You’ll
be alerted just when the camera is triggered or per custom
settings.
It takes color pictures or videos under sufficient daylight.
While at night, the built-in infrared LEDs can help to take clear
pictures or videos (monochrome).
There is a 3” color LCD display screen on the camera and a
sound recorder embedded in the camera. A laser pointer is used
to help target the photo area of the camera.
It is resistant against water and snow. The camera can also
be used as a portable digital camera.
1.2 Application
This camera can be used as an automatic surveillance
device for guarding and recording unexpected intrusion to
homes, shops, schools, depots, offices, taxis, work sites etc. It
can also be used as a trail camera for hunting or monitoring
animals by recording the traces of wild animals. It can be left
alone for weeks and months and it will save event records
automatically in digital format.
1.3 Camera Overview
Page 1
MG982K-10M
1 Instruction
Take a few moments to familiarize with the camera
controls and displays. It is helpful to bookmark this section and
refer to it when reading through the rest of the manual.
Figure 1 Diagram of camera functional indicators
Page 2
MG982K-10M
1 Instruction
Figure 2 Inner panel view
Figure 3 Diagram of camera interfaces
Page 3
MG982K-10M
1 Instruction
1.4 Shooting Information Display
When the camera is turned on (the power switch is slid to
TEST position), the current settings will be displayed on
screen.
Figure 4 Shooting information display
is the correct SIM card status and the available space of
SD card should be a none zero value.
1.5 Two way communication
When in Hunting mode, you can set SMS control submenu as
ON to open the two way communication function. Under this setting,
the camera can receive and response your SMS command or the
android APP command. And you can retrieve live pictures in this mode.
When in Security mode , the two way communication function is
enabled by default. Taking into account the power consumption, we
recommend to use the power adapter.
Page 4
MG982K-10M
2 Cautions
2 Cautions
Ø The working voltage of the camera is 6V. The camera
is supplied by 8 or 4 AA batteries.
Ø Please install batteries according to shown polarity.
Ø Must insert the SD card before power on camera.
The camera has no internal memory for saving images or
videos. The camera will not work if there is no SD
card.
Ø Must make sure that your SIM card supports the
GPRS data business.
Ø When going into the SETUP mode, allow
approximately 10-20 seconds for the camera to
acquire a signal.
Ø Please unlock the write-protect switch before inserting the
SD card.
Ø Please do not insert or take out the SD card when the power
switch is at ON position.
Ø It is recommended to format the SD card by the camera
when used for the first time. Many other SD cards formatted
by other cameras have poor compatibility with different
brands of cameras. So it is best to format the SD card with
this camera or on a computer.
Ø In the SETUP mode, the camera will shut down
automatically after 3 minutes if no operation is done.
Please turn on the power again if you want to continue to
work with the control.
Page 5
MG982K-10M
3 Quick Introductions
3 Quick Start Guide
3.1 Power Supply
Hunting mode or outdoor use: Use 8 or 4 AA batteries.
High-density and high-performance alkaline or lithium
batteries are recommended.
Security mode or indoor use: Use 6V/2A high quality
power adapter.
3.2 Insert SD card and SIM card
Insert an unlocked SD card and an available GPRS enabled
SIM card.
3.3 Do the camera settings
Down load the camera set up software from our website.
The specified website is written in the last page of the manual.
1)
Open the software and select camera model:
2) Set the camera parameters
Page 6
MG982K-10M
3 Quick Introductions
When you first use, we suggest you to use default
settings(step1). Then select your country and carriers(step2)
according to your SIM card and input your receive phone
number in “administrator number” and receive email address
in”Receive Email 1”(step3)
After finish settings, please save the GSM folder to the
root directory of your SD card(step4).
Page 7
MG982K-10M
3 Quick Introductions
3.4 Manually send a MMS or GPRS photo
After you generate a setting file in your SD card, please slip
the power switch to SETUP position. After the camera
acquiring the signal and the SIM card icon
appears, target
an object and press “? ” to take a photo manually.
Then press “OK ” to playback the photos, press “? ”and“? ”
to switch to previous or next photo. Press “MENU ” and you
can see a send Phone [MMS] interface, press “OK” to send
out the MMS.
After a few seconds, you will receive a MMS in your phone.
3.5 Enter work mode
For hunting use, you need to slide
the power switch to ON position to let
the camera start to work.
For security use, you need to click
“? ”in Setup mode to enter security
mode.
3.6 SMS control
When the camera is armed, you
can send text message “#T#” to your
camera’s SIM card number to get an
on spot image or use our android
application tools.
Down load the android control
software from our website. The
specified website is written in the last
page of the manual.
.
Page 8
MG982K-10M
4 Advanced Operations
4 Advanced Operations
This chapter explains the advanced operations for
customizing the camera settings.
4.1 Work Mode
Setup mode: to program camera, or to playback the
photos or video clips.
Hunting mode: when animal or
human occurs into the monitoring region
the camera will take pictures or videos
automatically according to the previous
programmed settings. After switching the
camera to ON position, the motion
indication LED(red) will blink for about 10
seconds. This time interval is for you to
position the camera for automatic surveillance operation.
Security mode: similar to
hunting mode, but need more
power to supply. So it’s suitable
for indoor use and need to use
the power adapter. Only in
security mode, you can use the
remote control to easily arm or
disarm.
If the power switch is in ON position and the Security
Mode is ON, the camera will work in Hunting Mode.
4.2 Settings Menu
Press MENU on the remote control to enter into the menu
setting. The settings menu will be shown on the LCD.
Use “? ” or “? ” key to select the sub-menu, use “? ” key to
select the different options, use “? ” to change different item
Page 9
MG982K-10M
4 Advanced Operations
page. Press “OK ” to save the settings.
4.2.1 Setting Items
Setting
Items
Description
Photo Size
There are three camera modes: Photo ,Video or
Pic+Video . You can enter the main menu to set the
camera mode. If you choose Pic+Video mode, the
camera takes a picture and a 10s video.
To set if you will use security mode. Security
mode is suitable for indoor use. You need to use
the power adapter to power supply. The
battery can be just a backup for urgency. Otherwise,
the battery will be quickly consumed. The remote
control is available only when Security Mode is
ON .
Choose the image size, e.g. 10 megapixels or 5
megapixels.
Video Size
Choose the video size,e.g. 1280x720 or 640x480.
Camera
Mode
Security
Mode
This parameter affects the number of pictures
Photo Burst taken for each triggering in camera mode. It’s from
“1 Photo” to “6 Photos”.
Choose duration of recording video. It’s from 10
Video
seconds to 180 seconds.
Length
Set camera date and time.
You can change the date and time by setting this
parameter when necessary, e.g., after every battery
Set Clock
change. The date format is month / day/ year, the
time format is hour : minute : second.
Time Lapse
Time lapse means the camera can capture images
or videos at a preset time interval regardless of
whether motions are detected. The default
parameter is Off, which means the timer function is
disabled. Changing this parameter to a non-zero
value turns on the Time Lapse mode, and camera
will take photos at given time interval.
Please note that if the PIR Trigger is set to
Page 10
MG982K-10M
4 Advanced Operations
Off, then the Time Lapse can’t be set to Off .
Choose sensitivity of the PIR. The higher
sensitivity indicates that the camera is more easily
triggered by motion and takes more pictures or
records more videos. It is recommended to use high
sensitivity in room or environment with little
PIR Trigger
interference, and to use lower sensitivity for outdoor
or environment with lots of interference like hot
wind, smoke, near window etc. For normal use of
the camera, the Normal mode is recommended
and is the default setting.
This parameter indicates how long the PIR
(Passive Infrared motion sensor) will be disabled
after each triggering in ON mode. During this time
the PIR of the device will not react to the motion of
PIR Interval human (or animal).
The minimum interval is 0 second. It means the
PIR can work all the time.
The maximum interval is 1 hour. It means the PIR
will be disabled for 1 hour after each triggering.
Choose the days of the week to let the camera
work.
Work Day
This item is available only in Security
Mode.
There are 4 Send to modes:
1 Phone MMS: send images to mobile phone.
2 Email MMS: send images to receiving e-mail
address via WAP.
3 Email GPRS: send images to a e-mail address
Send to
via GPRS.
4 Call: calling your preset phone number when
the camera is triggered.
You should set your receiving phone number or
your receiving e-mail address in the APP program to
function it.
There are 4 MMS modes: “Manual” works in
SETUP mode, “Daily report” and “Instant” work in
ON mode. “OFF” means to close the communicate
Page 11
MG982K-10M
Send
Mode
4 Advanced Operations
function.
1) “Manual”:
Choose “Manual” in SETUP mode. Please ensure
a SIM card is inserted properly; please note, only
photos can be sent in SETUP mode. Video
information can’t be sent in SETUP mode.
2) “Daily ” :
Daily Report means the camera will report the
summarized information at a preset time (if the
preset time is, eg.20:00PM) on how many pictures
it had taken per day. So, you will get a summarized
text message with the last picture taken until
20:00PM.
If it is on Camera mode, the camera will send a
MMS at the preset time. The MMS will show you the
latest photo and the total quantity of the pictures
taken. If it is on Video or Pic+Video mode, the
camera will send a SMS at the preset time. The SMS
will show you how many video clips the camera has
taken within 24 hours.
If you choose “Daily”, you need to set the daily
report time: xxH, xxM.
3) “Instant”:
Instant, just works in ON mode, which means the
camera will send a MMS instantly after it captures a
photo or a video clip. You can choose the number of
pictures you want it to send out per day.
If it is on Camera mode and you chose the Instant
MMS mode, and set the MAX number as 10, the
camera will send 10 MMS within 24 hours. And
then it continues to capture photos and save them
on the SD card. After 24 hours, the camera will send
MMS again when it captures photos. If it is on Video
mode, the Camera will send only SMS instead of
MMS.
If you choose “Instant”, you need to set how many
MMS you want to send for economic consideration.
4) “Off ”: to disable MMS function.
Page 12
MG982K-10M
4 Advanced Operations
SMS
Control
can
enable
two
way
communication function. It means if you choose
SMS Ctrl as ON , this camera can receive and
SMS Ctrl
respond your SMS command. Also you can retrieve
live pictures any time. But the power consumption
will be a little bigger than normal hunting status.
Please note this item is available only in
Hunting Mode.
It means this camera can play WAV format audio
file at a preset time clock for preset times.
The WAV format audio file mast save in
the directory of \DCIM\100BMCIM\.
Game Call
The WAV format audio file should be
renamed as AUDIO9999.WAV.
Please note this item is available only in Hunting
Mode.
It means to pair the camera with normal 433MHz
wireless device, such as infrared body sensor,
wireless door magnet, wireless smoke detector etc.
The normal wireless sensor can be set as part of the
alarm system.
Study Code
All the device should be paired with this camera
first. Please see 4.5 to find the method to connect or
remove a wireless sensor.
Please note this item is available only in
Security Mode.
Language
Display the supported languages.
Beep Sound
Enable or disable the beep sound.
You can set A-Z position for your camera, so that
Camera
you can distinguish which photo is taken by which
Posit
camera.
Format the SD card. All images and videos in the
Format SD
SD card will be deleted.
Default Set
Restore all customer settings to default values.
Version
Version information
Page 13
MG982K-10M
4 Advanced Operations
4.2.2 Default Set
Setting
Default
Options
Camera Mode
Photo
Video, Pic+Video
Security Mode
Off
On
Description
Items
Two way
communication
Photo Size
5MP
10MP
Video Size
1280x720
640x480
Photo Burst
1 Photo
2 -6 Photos
Video Length
10 sec
20-180 sec
Set Clock
Enter
Time Lapse
OFF
5Min-8H
PIR Trigger
Normal
High, Low
PIR Interval
5 Sec
0-55 Sec,
Adjust Clock
1-60 Min
Work Day
Enter
Send to
Phone
Email
MMS
GPRS,Call,Email
MMS,
Send Mode
Manual
Daily, Instant,
Off
Page 14
MG982K-10M
SMS Ctrl
4 Advanced Operations
Off
On
Two way
communication in
hunting mode
Game Call
Off
On
Set the time and
frequency of audio
playback
Study Code
Enter
RCH(wireless
control),
Zone1-Zone7
Language
English
Beep Sound
On
Off
Camera Posit
Off
A to Z Position
Format SD
Enter
Default Set
Save
Version
Enter
Yes, No
4.3 Use the Remote control
When it’s in Security Mode, you can use the remote
control to easily arm (button A) or disarm (button D). Also you
can dial the emergency numbers via button C in case of
Page 15
MG982K-10M
4 Advanced Operations
emergency. Press button B can open or close the laser (you can
easily mount the camera with the help of the laser pointer.).
Button A: Arm the camera;
Button D: Disarm the camera
Button C: Emergency call button
Button B: Laser pointer;
Setup status
Study Code Menu
Study Code Menu
Method to add remote control(s) to the camera:
Enter the Setup status, press Menu and enter the Study
Code submenu. Choose “RCH”, press OK button, then press
button A of the remote control. When it's successful, there will
be a "v ”before RCH.
4.4 Load or remove a wireless sensor
Any 433MHz wireless sensor, such as infrared body sensor,
wireless door magnet, wireless smoke detector, etc. can be set
as an alarm sensor of the camera.
Method to load or remove a wireless sensor:
1. Power on the wireless sensor.
2. Enter the Setup status, press Menu and enter into the
Study Code submenu. Choose a zone, for example Zone1,
press OK button, then trigger the wireless sensor to check if the
sensor is loaded successfully. When it's successful, there will be
a "v ” after the zone number.
For example,to load a infrared body sensor :
Firstly, choose a zone to start study code.
Page 16
MG982K-10M
4 Advanced Operations
Page 17
MG982K-10M
4 Advanced Operations
Secondly, Power on or trigger the wireless sensor to study
code.
Page 18
MG982K-10M
4 Advanced Operations
3. When you want to remove the wireless sensor, please
enter the study code menu, press “? ” or “? ” button to cancel
the “v ”.
Please note that the wireless sensors just can be used in
Security Mode. In Hunting Mode, the wireless sensors will
not function.
4.5 Change the settings via Android APP or SMS
When you are far away from your house, you can get spot
photos or change camera settings via our android application
tools or SMS.
Down load the android APP from our website. The
Page 19
MG982K-10M
4 Advanced Operations
specified website is written in the last page of the manual.
4.5.1
User level
There are two user levels: administrator and normal users.
Each user has a different authorization level:
Functions
User Level
Set
administrator
phone Only
administrator’s
number
password
Set administrator ‘s password
administrator
Set camera parameters
administrator
Set normal user
administrator
Receive emergency calling
administrator, normal user
Send SMS for on spot picture
administrator, normal user
Call the camera to listen in live administrator, normal user
voice
Receive MMS when triggered
administrator, normal user
Check camera status
administrator, normal user
Get help information
administrator, normal user
4.5.2
Set administrator phone number
You should set a administrator’s phone number to receive
MMS or change settings when you first use this camera.
Send
#MG982K#0000#administrator’s
phone
number# to your camera’s SIM card.
The following chart shows the meaning of each field.
Page 20
MG982K-10M
4 Advanced Operations
Here the “0000” is the original administrator’s password.
Please change the password ASPS.
Note:there is a “#”at the end of the commend.
If successful, reply SMS: Dear administrator, your
number is 13800138000 .
If failed, reply SMS: Please check the password.
4.5.3
Get on spot photo
Method: send SMS command:
Edit SMS #T# send to your camera’s SIM card.
If successful, the camera will take an on-spot picture and
send to your mobile phone.
If failed, reply SMS: Photo error: xx, Settings error:
xx, MMS error: xx or Time out!
4.5.4
Use android APP
It’s easy to use the android APP to communication with the
camera. So you don’t need to edit the SMS, you just need to
click the button to finish the operation.
Page 21
MG982K-10M
4.5.5
4 Advanced Operations
SMS command list
If you can’t use the android APP to easy operation, below
list all the SMS commands for you. You can control your
camera via SMS.
A. Set GSM Parameter
SMS Command
No
1
Function
2
#n#13800138001#13800138002#13800138003
#
#m#http://mmsc.monternet.com#10.0.0.172#80
#cmwap#name#password#
(The example
parameters are for the carrier of china mobile)
Set Email
#s#[email protected]#bmc123#25#cmnet
Parameters
#smtp.sina.com#name#password#
Set ReceiveEmail #r#[email protected] #
Address
[email protected]#[email protected] #
[email protected]#
3
4
5
Set administrator
Number
Set Normal Users
Phone Numer
Set MMS
Parameters
No Function
1
2
#mg982k#0000#13800138000#
B. Normal Control
SMS Command
Get on spot Photo #T#
Arm
#A#
Page 22
MG982K-10M
3
4
5
6
7
4 Advanced Operations
Disarm
Check camera
Settings
Format TF Card
Set
administrator’s
Password
Help
No Function
1
2
3
4
5
6
7
8
10
11
12
13
14
15
16
Change
Mode
Change
Size
Change
Burst
Change
Size
Change
length
Change
Time
Change
Lapse
Change
Trigger
Change
Interval
Change
Camera
#D#
#L#
#F#
#P#0000# (It’s suggest that the admin phone
number to change the administrators password
at the beginning )
#H#
C. Set Menu Parameter
SMS Command
Photo
#e#cp# (photo mode) or #e#cv# (video mode)
or #e#ct#(pic+video)
#e#s5# (5mp) or #e#s10# (10mp)
Photo
#e#b1# (1~6 photos)
Video
#e#fh#(720p) or #E#fl#(VGA)
Video
Date
#e#v10# or #E#v30# (The number after V is the
seconds)
#e#t# ( adjustment the time)
Time
#e#l1h# (1 hour) or #e#l5m# (5 min)
PIR
#e#po# (Off) or #e#ph# (High) or #e#pn#
(Normal) or #e#pl# (Low)
#e#i30m# (30min) or #e#i30s# (30sec)
PIR
Work Day #e#d1111111# (0000000~1111111 means
Sunday to Saturday )
Change Send To #e#mp# (phone) or #e#me# (email) or #e#mc#
(call) or #e#mg# (email gprs)
Change Send
#e#ed# (daily) or #e#ei10#(to set instant mode
Mode
and the max number per day) or #e#eo# (off) or
#e#em#
Change Game
#e#gon18:00[5]# or #e#goff#
Call
Change SMS Ctrl #e#zon# or #e#zoff#
Change Camera
#e#oa# (a~z) to set the camera position
Page 23
MG982K-10M
Position
4 Advanced Operations
function
#e#ooff#
to off the camera position function
Page 24
MG982K-10M
5 Trouble shooting
5 Trouble shooting
1 There is something in front of the camera lens.
Is the camera broken?
Figure 6 IR-cut filter
A: The camera is not broken. It’s an IR-cut filter. When the
camera is powered on, the IR-cut will be reset and cover the
lens. Only when the camera is powered off, the IR-cut will
be at a random place.
2 The camera controller is not working anymore.
A: Most likely, no SD card has been inserted in the camera
when it is turned on. Please make sure a working SD card
has been inserted in the camera before it is turned on.
3 The display screen is suddenly black.
A: To reduce power consumption, the camera will shut
down automatically after 3 minutes if no operation
is done. Please turn on the power again if you want to
continue to work with the control.
4 Why my phone can’t receive MMS?
A: MMS/GPRS function needs the SIM cards both in
camera and in your phone have balance and be opened the
data business.
Page 25
MG982K-10M
Appendix I: PIR Detection Zone
Appendix I: PIR Detection Zone
Figure 7 shows the detection range in different detection
angle. When the detection angle is 35°, the detection range is
50ft (15m). When the detection angle is 52°, the detection range
is 30ft (9m).
Figure 7 PIR Detection Zone
The PIR detection angle (a ) is just barely larger than the
field of view angle (ß). The advantage of this design is to avoid
empty pictures and get more available pictures.
Page 26
MG982K-10M
Appendix I: PIR Detection Zone
Figure 8 Detection angle vs. FOV angle
This camera has a new design of PIR and the new PIR is
patented. The new patented PIR’s detection range is ultra-long.
Figure 9 shows the compared detection zone between normal
PIR and the new patented PIR.
Figure 9 Comparison of Detection Zones of new and existing PIRs
Page 27
MG982K-10M
AppendixⅡ: Error Code
Appendix II: Error Code
Code
3915
3919
3926;
3927;
3928;
Meaning
Description
Possible cause:
1: The user forget to input the receiving
cellphone number;
Non-existent
2: The user forget to input the receiving Email
address
address;
Suggestion:
1: Check the MMS settings, input all the
necessary parameters;
Possible cause:
1: The file means the image file. It shows
that the system can’t find the image file
when sending the MMS. Just when the
system is unstable, it will happen. (very
very small probability)
File not found Suggestion:
1: When the GSM and GPRS signal are both ok,
please resend again;
2: When the GSM and GPRS signal are poor,
please change a place to try again;
3: If 1 and 2 do not work and the error code
3919 always appear, please send the camera
back for repairing;
Possible cause:
When start a new MMS sending
procedure, the previous MMS sending is
MMS busy;
not finished, so it will show these
Sending MMS information. This is a inner use error, we
stoped;
have the correct programmer design, so
Sending MMS won’t be happened in consumer side.
busy;
Suggestion:
If it always show 3926,3927 or 3928,maybe
there is a hardware defective, please send
camera back for repair.( very very small
probability )
Page 28
MG982K-10M
3939,
3941,
3942
Failed to open
network;
Network
no
deactivated;
Network error;
-85
Not
enough
balance in SIM
card;
MMS
Setting
error;
Other error code
AppendixⅡ: Error Code
Possible cause:
1: The GSM network is not good or not well
covered with the GPRS network
2: The instability in signal transmission lead to
some MMS setting parameters is missing,
when the GSM base station do the data
analysis. If for the incorrect transmission
reason, the camera may show various error
code.
Suggestion:
1: Contact the network provider if the GPRS
network is good covered in that area;
2: Change a place to try again. It’s better to try
in a public place, because the public place
always has good signal.
3: If the provider said there is GPRS signal
covered but the signal is weak. You can try to
use a enhanced antenna. Then enhanced
antenna should be SMA type and the antenna
gain should be 10db;
Possible cause:
1: The SIM-card is not enough balance;
2 Not correct settings.
3 The GSM network is not good lead to a
timeout problem.(very very small probability)
Suggestion:
1:Please check if your SIM-card is no money
and make sure it has enough balance.
2: Please check the MMS settings.
Many code in the list is used for product
design phase debug. Most of them will not be
showed to consumers. So please ignore the
other error codes and contract with us
directly.Thanks.
Page 29
MG982K-10M
Appendix Ⅲ: Technical Specifications
Appendix Ⅲ: Technical Specifications
5MP Color CMOS, 10MP
Interpolation
Lens
F/NO=3.0 FOV (Field of View)=52°
PIR detection range
30M/100F
Display Screen
3’’ LCD
Memory Card
From 8 MB to 32 GB
10MP = 3648× 2736
Picture Resolution
5MP = 2560×1920
720P (1280 × 720)(20fps)
Video Resolution
VGA (640× 480) (20fps)
PIR Sensor
Multi-zone
PIR Sensitivity
Adjustable (High / Normal / Low)
Trigger Time
1s
Weight
0.30 kg
Operation/Storage Tem.
-20 - +60°C / -30 - +70°C
PIR Interval
0s – 60 min.
Photo Burst
1–6
Video Length
10–180s
Power Supply
8×AA or 4×AA
Stand-by Current
< 0.25 mA (<6mAh / Day)
400 videos(interval=5 min, video
Power Consumption
length=10s)
>500 MMS (use 8*AA batteries)
Low Battery Alert
LED Indicator
Display Screen
LCD display on camera
Sound Recording
Available
850MHz, 900MHz, 1800MHz
Network Bands
and 1900MHz
Mounting
Rope / Belt / Python lock
Dimensions
140 x87 x55 mm
Operation Humidity
5% - 90%
Security authentication
FCC, CE, RoHS
*without battery
Image Sensor
Page 30
MG982K-10M
Appendix Ⅳ: Parts List
Appendix Ⅳ: Parts List
Part Name
Digital Camera
Wireless Remote Control
USB Cable
Belt
User’s Manual
Antenna
Quantity
One
two
One
One
One
One
Website Information:
Down load the camera easy set up software from here:
(version 1.3)
Page 31