1
MAUISAILS USER MANUAL
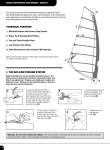
General Sail Maintenance
Please take extra care to keep your sail out of the sun when at rest or in storage. When the sun penetrates the film at
ninety degrees to the surface, it’s the most damaging, especially with long hours of exposure. The use of a rig cover will
prevent degradation.
• If you want to clean your sail, use fresh water and mild soap. Do not use harsh solvents or abrasive cleaners.
• Never sail with small holes or tears in the film portion, since this can easily enlarge the damage.
• Store your sail in the bag, clean and dry, rolled tightly. Try not to crush or crease it.
• For long-term storage, remove the tension on the battens.
Important Details
Batten Tension System
Correct batten tension is
applied by using the
stainless steel Allen key
supplied in the mesh
pouch in the tack fairing.
The screw should be
tightened clockwise to
remove wrinkles in the
pockets.
Over-tensioning the battens can damage the sail. For travel or longterm storage it’s recommended that tension be eased.
Removal and replacement of battens
1. Release tension with counter-clockwise turns of the tool.
2. Slip string off the tensioner.
3. Remove batten and tensioner.
To reinstall battens
1. Insert batten with tensioner on and the screw out of the piece.
Push the batten in as far as possible.
2. Slip the string up into the tensioner groove and install and
tighten the screw to restore normal batten tension.
Uphaul Access hole
There is a small opening on the
front of the sleeve near the tack
of the sail to insert your uphaul
attachment. The tensioner
key is stored in a mesh pouch
inside the fairing. This is also
good for containing the tail of
your downhaul rope.
Recommended mast
MauiSails’ testing and development has been done using the
MauiSails SRS Carbon masts. To get the most out of your new
sail, you should use one of these masts. Other masts with similar
diameters and bends will give acceptable but not necessarily
optimum performance.
Adjustable head system.
This is provided to allow the use of longer than recommended
masts. When using the mast of the correct length, pull the tip plug
as low into the sail as possible. To adjust the sail for a longer mast,
set the webbing very long and work the correct length down until
you have the correct downhaul and the pulley is block to block at
the bottom of the extension. You may need to go back up to the
head and make small adjustments to get it right.
6:1 Tack Pulley Fitting
Rig your pulley according to the instructions. If you take care
and get this right you will have the minimum of friction and
resistance. If you fail to observe the turning order, you will create
crossed leads and added friction.
You need to have a base cleat with at least 2 pulley’s and a
cleat. Take your downhaul line from the dead end on your
base to the same side of the forward pulley wheel, feeding up.
Then feed the rope into the pulley next to the cleat from down
to up.
1
Feed the rope up to the pulley wheel farthest from the
mast (towards the clew of the sail), inserting from the
same side, ie up to down. Then feed the rope back down the
pulley on the base which is farthest away from the cleat, from up
to down. This makes a correct lead with no twist.
2
Then go up and over the middle wheel and back into
the cleat. You are now ready to apply downhaul tension.
With some practice you will get this every time and never have
crossed lines.
3
Our Experience, Your Reward
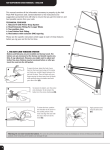
Rigging and Tuning of No Cam Sails
Legend - Global - Switch - Loco - Pursuit - Aloha - Rebel - Inspire
Observing and practising correct rigging procedure will help you get on the water with the minimum of hassle and the least amount of
wear and tear on your whole rig.
1
Get all your gear together and make sure
all parts are in good shape with no visible
damage.
Find a clean soft area, preferably grass, and
unroll the sail with the head downwind to
prevent flogging.
Fix the mast base and boom at the
recommended settings based on the
specifications listed on the sail bag or in
the lower tack section of the sail.
4
Using the allen key tool supplied with the
sail, tension all the battens as necessary to
remove all wrinkles.
2
3
Make sure your 2-pc. is fully connected at
the joint.
Fit the boom onto desired position on
the mast.
Insert the mast from the bottom of the sail
and continue working the mast into the
sleeve. Check that the mast is fully inserted
to the top of the sail.
Outhaul the sail slightly to fix the boom
from moving around.
Attach the downhaul to the sail and apply
medium tension (until the pulley is 4cm
from the bottom of the extension).
5
Downhaul the sail to maximum tension,
always looking up at the leech for the
correct looseness.
6
Stand the rig up and make sure you have
the boom at the correct height.
To de rig your sail, simply take off the
boom first, let off the downhaul and
remove the mast from the sleeve.
No Cam Sail Tuning Tips
• Sails that are under-tensioned will feel sluggish and heavy. The
balance will be poor, and the power will feel high up in the rig. If
you have too much tension, you will have very little power, and
it will be hard to get upwind.
• A properly tuned sail on the correct mast will be very loose along
the entire leech, becoming progressively looser as you move up
the sail.
• If you have trouble controlling the board, and can’t maintain
your desired course or are spinning out, try more downhaul.
If there is still too much pressure on your back hand, try more
outhaul.
• If you can’t get any drive upwind and the board won’t track or
lift, try less downhaul, or more outhaul.
• If you get pulled over the front, try more downhaul.
• Always remember that your fin is an important component of
board trim and that it should be related correctly in size to the sail
you use. A fin that is the wrong size will hurt the performance of
your sail.
• Harness lines should be set so there is equal pressure on both
hands and you can let go of your rig and the sail will stay upright
for a few seconds.
• Use shorter harness lines for lighter wind and flatter water. Longer
lines work well for being overpowered and in choppy conditions.
• Most of all, pay attention to your fellow sailors, respect the locals
and the environment, and have fun.
Get Your Reward, Get MauiSails
Sail Rolling Tips
In order to minimize wrinkling in the top sections of your sail we have developed a method of rolling the sail that will help to prevent this.
1
2
First, smash the head very flat. You will feel the webbing inside
crush flat. The reason you do this is to make it easier to do the next
fold, and to make the head of the sail more compact.
3
Next you fold the head piece hard over until the whole edge of
the upper leech is smooth and tight. Use some force and after it
gets bent a few times it will be easier. Hold the leech end of the
batten to tension the edge against. While the edge is straight like
this, start to roll it in.
4
Now holding the head tight in your left hand, roll the edge in and
continue to roll the sail around the top batten.
5
When you have a couple more turns and the roll is completely
inside and supported by the batten pocket you can ease off with
your left grip and roll the rest of the sail around itself.
6
Now roll parallel to the batten pockets down the sail.
Now find the Tie Me Up and the button. Hook the Tie Me Up elastic
loop over the black button on the tack fairing. Now it’s easy to put
the sail into the bag. Start thinking about more wind tomorrow.
Our Experience, Your Reward