1
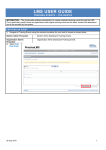
Division of Service Operations Bureau of Education & Testing Continuing Education Correspondence 1940 North Monroe Street Tallahassee, Florida 32399-1046 Phone: 850.921.8582 • Fax: 850.922.2316 Ken Lawson, Secretary Rick Scott, Governor Downloading, Installing and Using CPEFTP LICENSE EFFICIENTLY. REGULATE FAIRLY. WWW.MYFLORIDALICENSE.COM 2 TABLE OF CONTENTS I. Introduction……………………………………………………….3 II. Requirements…………………………………………………….4 III. Downloading Software ………………………………………….5 IV. File Format Overview…………………………………………....7 V. Option 1…………………………………………………………...9 VI. Option 2………………………………………………………….16 VII. Option 3………………………………………………………….19 VIII. Test File Procedure…...………………………………………..20 IX. Pass Code Procedure……………………………………….…20 X. Notes……………………………………………………………..22 3 INTRODUCTION Chapter 455, Florida Statutes, now requires the Department of Business and Professional Regulation (DBPR) to monitor all continuing education activities of licensees. As a result providers will now be required to submit student rosters electronically to the department. This will allow the department to monitor the continuing education practices of our licensees and lead to 100% compliance for all continuing education requirements. As you already know, if proof of required continuing education is not submitted prior to the renewal of the license, the licensee may be denied renewal. The new reporting system that we have implemented not only helps to prevent errors when submitting information to the department but it also offers a much quicker response time if an error is detected. You will receive confirmation within five minutes that the records were received safely. You also will be quickly and accurately informed if any errors occurred when the records are processed and how to correct them. Each provider must send an electronic attendance file to the DBPR. This file is referred to as the Provider Continuing Education Attendance File. Pursuant to Section 455.2178(1), Florida Statutes, continuing education providers must electronically submit licensee course completion information to the department no later than 30 calendar days thereafter or within 10-business days is the course is completed the same month of a licensee's expiration date. The law does not provide an exception or waiver to the reporting deadline. All education,including post licensing courses must be reported to the department.�� The provider has three options for creating and sending files. Option 1 is to use the DBPR application to create a file and to send the file. Option 2 is to use other software to create the file and then to use the DBPR application to send the file. Option 3 is to use other software to create the file and then to use other hardware to send the file. Approximately 90% of all providers prefer to use Option 1. 4 This document covers information on: • System requirements • The location of the application download on the DBPR website • File format overview • Test file procedures • Option 1 • Option 2 • Option 3 • Pass code procedure If the provider has any additional questions they should contact the Bureau of Education & Testing. REQUIREMENTS • Working knowledge of the PC, specifically creating folders, naming files, saving files, and retrieving files System Requirements • Windows 95, 98, NT, ME, 2000, Vista, or 7 • Connection to the Internet • 30 megabytes of free disk space on the C: drive • Macintosh users can only use the option of creating & sending file without DBPR software 5 Steps for downloading the reporting tool: 1. Go to http://www.MyFloridaLicense.com 2. Select “Doing Business With Us” from the top menu 3. Select “Education and Testing Services” from the menu 4. On the left hand side of the screen select “Providers/Instructors” 5. Select “Provider Continuing Education Download Software” This will initiate a download process, please follow the onscreen prompts you receive and install the program on your computer. 6 Installation is now complete. There will now be a new shortcut on your desktop. Double click the CPEFTP icon to run the application. Cpeftp.lnk 7 File Format Overview The file is the information that you will be submitting to the department. It contains information that will identify you are the provider, the courses that were taught and the licensees that attended your course. There are also built in error correction tools to reduce transmission errors and allow the department to respond quicker to any problems that are found. The information you submit to the department will be displayed as lines on your screen. Each line will have a number in front of it indicating what it represents. We refer to these line numbers as the record Type. There are five different record Types: 1 identifies the provider. 2 identifies the course. 3 identifies the attendees. 4 identifies the number of attendees in the course. 5 identifies the number of records on the file. Different courses and their attendees could be on a single file (total number of record Types 1-4). All files sent to the department will contain only one record Type 1 and one record Type 5. Please note that you may submit multiple courses on each file. If you choose to do this you will need to create a separate record Type 4 for each class you are reporting. Listed below is an example of a file that could have been sent by a provider. An explanation of the file follows the record example. [Type 1] 11234567ABC Education Consultants 1234 [Type 2] 2765432103/31/2000Construction101 [Type 3] 3CB 0059036Smith, John [Type 3] 3CS 0004021Smith, John [Type 3] 3CB 0000109Conner, Nancy [Type 4] 40003 [Type 2] 2234567804/01/2000Construction510 [Type 3] 3CB 0006780Johnson, John [Type 3] 3EC 0000098Johnson, John [Type 3] 3EY 0000187Garrett, Greg [Type 4] 40003 [Type 2] 2234567904/02/2000Plumbing and Wiring [Type 3] 3CB 0059036Smith, John [Type 3] 3CB 0006780Johnson, John [Type 4] 40002 [Type 5] 50016emailaddress.com *** please note the bold faced print will not be on the report itself *** There is one provider record (Type 1) from ABC Education Consultants (provider numbers: 1234567) with the pass code 1234. There are three course records (Type 2). ABC Education Consultants is submitting three courses entitled: Construction 101 (course number 7654321), Construction 510 (course number 2345678), and Plumbing and Wiring (course number 2345679). These courses were given on 3/31/2000, 04/01/2000, and 4/02/2000, respectively. 8 There are eight attendee records (Type 3). Construction 101 (course number 7654321) had three attendees. Construction 510 (course number 2345678) had three attendees. Plumbing and Wiring (course number 2345679) had two attendees. There are three course control records (Type 4). Construction 101 (course number 7654321) total attendee amount is three. Construction 510 (course number 2345678) total attendee amount is three. Plumbing and Wiring (course number 2345679) total attendee amount is two. There is one EOF (End OF File) record (Type 5). The total amount of records on the entire file including the type 5 (EOF record) is 16 and the confirmation Email address is emailaddress.com. The provider should report all of the attendee’s licenses if the course satisfies CE requirements for multiple licenses. For example: John Smith and Nancy Conner attended the first class but John Smith submitted two license numbers. He submitted both numbers because this class satisfied a CE requirement for each of his contractor licenses. The department can now give him attendance credit for each license. If the Provider Continuing Education Attendance File is not formatted correctly, the Bureau of Education & Testing will notify the provider. Education & Testing will work with the provider to correct the problem. After three incorrectly formatted production files, the department will review the provider’s file transfer history and possibly make recommendations for action against the provider. 9 Sending the file There are three options that you have to choose from as far as submitting your attendance files. The first one (option 1) uses the software we just downloaded to create and send the attendance file. The second (option 2) option requires you to make a program to create the attendance file and then use our software to send it. Finally, (option 3) you may choose to create and send (FTP) the file without the DBPR software. Option 1 This option offers a step-by-step method of building and sending the file. The application will edit the data to ensure that the file is in the proper format and sequence. The application has five tabs: Provider, Occupation, Courses, Reports, and FTP. The Occupation and Courses tabs will serve as an archive. Once you correctly enter the information you will not need to do it again. The following is a description of each tab, how they work and what the field attributes are (character limitations both length and content). To get started, enter the Provider information. PROVIDER TAB The Provider tab adds or changes your Provider information. This information will show on the Reports screen as a Record Type 1. There can be only one Provider record at a time. 1. Enter the provider’s Provider Number. 2. Enter provider’s Provider Name. 3. Enter the provider’s Pass code. 4. Enter the provider’s Email Address. 5. Click on Update Provider Information. Field attributes: Provider Number Provider Name Password Email Address length 7 length 45 length 4 length 73 Numbers and Uppercase Letters only Numbers and Uppercase Letters only Numbers only Numbers and Uppercase Letters and Lowercase Letters Note none of the fields may contain “special” characters Ex: @#$&... 10 OCCUPATION TAB The Occupation tab adds or deletes the Occupation information. This information will show on the Reports screen as a Record Type 3. The information entered is saved so you will only need to enter this information once. 1. Enter the licensee’s Occupation Code. 2. Enter the name of the licensee’s Occupation. 3. Click Add Occupation to List. 11 COURSES TAB The Courses tab adds or deletes the Course information. This information will show on the Reports screen as a Record Type 2. This information will also be saved so you will only need to enter this information once. 1. Enter the Course Number. 2. Enter the Course Name. 3. Click Add Course to List. Field attributes: Course Number Course Name length 7 length 60 Numeric Numeric and Uppercase Letters 12 REPORTS TAB Next, build the file using the Reports tab. The Reports tab creates the Provider Continuing Education Attendance File. If the screen buttons are not displayed, select File toolbar option and select “New.” 1. Add your provider information to the report. Your provider information will be displayed to the right of the Provider Record <1> button; this is the information that was entered on the Provider tab screen. Click on the Provider Record <1> button. 2. Add the course information to the report. This is the information that was entered on the Courses tab screen. 1) Select a Course Number and Course Title from the pull down menu. 2) Select the date that the course ended from the pull down menu. 3) Click the New Course Record <2> button. 3. Add an Occupation and Title. This is the information that was entered on the Occupation tab. Select an Occupation and Title from the pull down menu. The occupation code and the title of the occupation is associated with the attendee’s license and is usually the first two letters of the license number. 4. Add the attendee’s license number and name. 1) Enter the attendee’s license number. 2) Enter the attendee’s First Name, MI, and Last Name. 3) Click the Attendee Record <3> button. 5. Add the number of licenses for the course. This number should correspond to the number of licenses reported. 1) Enter the amount of type 3 records following the course record. 2) Click the End of Course Record <4> button. 6. Add the EOF (End Of File) record. The EOF record is always the last record on the file. The program will automatically calculate the correct amount of records. The EOF amount will be the number of records on the entire file including the EOF record. Click the EOF Record <5> button. 13 The records displayed on the Reports screen can be cut, moved or deleted by using the right mouse button. Highlight the record in the report to be edited and press the right mouse button. To insert a “Cut” record, highlight the record below the desired insert position and “Paste” the record. Records can be added and inserted into the report by clicking the “Select Insert Mode” button on the Reports screen. The mode “Insert” or “Add” can be viewed at the bottom right of the report screen. The “Add” mode will place selected record types at the bottom of the report. This is the usual mode that you should use to create the report. The “Insert” mode will insert selected record types at various positions within the report. 1) Click Select Insert Mode button to put the report into “Insert” mode. 2) Highlight the record below the desired insert position. 3) Enter the information (records 1-5) 4) Click on the corresponding button to move the information to the report. During the report creation process, the application can save and name the report (file) at certain timed intervals. Select the Setup tool bar option and then select “Timer” to set the timer to the desired time interval. Turning the timer to zero (0) will turn off the timer. The timer is helpful in saving the report (file) in case of sudden computer shutdowns. It is recommended that the timer be kept on. The report (file) can be saved and automatically named at any time during the report creation process by selecting File tool bar option and clicking “Save.” Finally, once the report is complete, you are ready to send the report (file). Select FTP tool bar option and send the report (file). When the file is sent, the application will name the file, if it has not already been named, and save the file in the C:Dpbrftp/Data Files directory. The file’s name begins with your provider number, followed by an underscore (_), followed by a seven digit number. The application determines the seven-digit number, which is based on a time of day algorithm (example 1234567_9296147.TXT). Because of this algorithm, a file should not be named more than every nine seconds. If more than one file is sent with the same name then the latter file will overwrite the prior file. Once sent, the application will move you to the FTP tab, the file name will be displayed in the gray area of the screen. The FTP log will display the status of the file transmission: “Upload Successful,” or “Upload Failure.” 14 15 If the transmission failed, you should check their Internet connection and try to send the file again. If the transmission still fails, you should try again in about 30 minutes; the DBPR FTP server may be down. If the problem persists then you should contact the Bureau of Education & Testing. After the file has been received by DBPR, an Email will be sent to you using the Email address on the EOF Record, Record Type 5. The Email will notify you that the file has been received and the total amount of records that were received. You should check the total amount received by DBPR and the total that you sent to ensure that the amounts match. If the file was transmitted and an Email was not received within 30 minutes or the total amount received was not correct you should contact the Bureau of Education & Testing. Once sent, the old file will be displayed on the Reports screen. To create a new file, select File on the toolbar option and select “New.” This will clear the Reports screen and ready the application to save the report (file) as a new file giving it a new name. You can correct files that have already been sent to the DBPR. The file must be corrected and resent in the same day. 1) Open the old file in the Reports screen. 2) Make the necessary modifications to the report (file). 3) Select FTP toolbar option and select “Send File.” The file will be retransmitted with the same name overwriting the prior file. If you need help entering data into the screens or understanding the process of creating the file, help is provided using the Help tool bar option. 16 Option 2 If you choose to create the electronic attendance file, Provider Continuing Education Attendance File, without using the application provided then specific file specifications must be met. Once the file has been created, it can be sent to DBPR’s FTP server using the application provided. The file must be a fixed length 78-character file. The file must be saved as a TEXT file (extension .txt) Record Type 1 (Provider Record) There is only one provider record per file. In Space(s): 1 2-8 9-53 54-57 58-63 64-78 Name Record Type Provider Number Provider Name Provider Pass Code Application Version Number Spaces Data Type Character Numeric Length 1 7 Character (CAPS) 45 Numeric 4 Description Will always be ‘1’ 7-digit provider number (i.e.: 1234567) Name of Provider (Remember that blanks count as spaces, too) 4 digit pass code Character 6 Will always be ‘V21030’ Character 15 Spaces Record Type 2 (Course Record) There will be a separate course record for each course. In Space(s): 1 Name Record Type Data Type Character Length 1 Description Will always be ‘2’ 2-8 9-18 19-78 Course Number Course Date Course Name Numeric Date Character (CAPS) 7 10 60 7-digit course number MM/DD/CCYY (ie:12/01/2001) Name of Course (Remember that blanks count as spaces, too) Record Type 3 (Attendee Record) For each course record there must be an attendee record. Attendee records always follow the course record to which they are related. In Space(s): 1 2-4 Name Record Type Occupation Data Type Character Character (CAPS) Length 1 3 5-14 15-59 License Number License Name Character (CAPS) Character (CAPS) 10 45 60-78 Spaces Character 19 Description Will always be ‘3’ Type of license (i.e.: CB, VM, CAM, BK, SL, etc.) 10-character license number Last, First Middle (i.e.: Smith, John Martin) Spaces 17 Record Type 4 (Course Control Record) For each course there must be a course control record. Course control records should always follow the attendee records. In Space(s): 1 2-5 6-78 Name Record Type Number of Attendees Spaces Data Type Character Numeric Length 1 4 Description Will always be ‘4’ Number of Attendees for one course Character 73 Spaces Record Type 5 (EOF (End of File) Record) There is only one EOF (End of File) record per file. The EOF record is always the last record on the file. In Space(s): 1 2-5 6-78 Name Record Type Number of records on the file Email address Data Type Character Numeric Length 1 4 Description Will always be ‘5’ Total number of records on the file including the EOF record Character 73 Receipt of file notification Email address The file naming convention is that the file name must begin with the provider number followed by an underscore (_) followed by a seven-digit number followed by .TXT. (Example 1234567_9296147.TXT) The correct file name is necessary in order to be processed on the DBPR’s FTP server. Each file sent must have a different name. Changing the last seven digits of the file name can create a different file name. If more than one file is sent with the same name, then the latter file will overwrite the prior file. Select the FTP tab. Next, select FILE from the tool bar option and click on OPEN. This will bring the selected file into the application and display the name in the gray area of the screen. When the desired file is displayed in the gray area of the FTP screen, from the tool bar option select file and click on SEND. This will automatically transmit the file DBPR FTP server. The application will perform limited edit checks. It will check to make sure that the record types are in the correct sequence and that the amount in the course control records is correct. 18 Once the file has been sent, the FTP log will display the status of the transmission: “Upload Successful,” or “Upload Failure.” If the transmission fails, you should check your Internet connection and try sending the file again. If the transmission still fails, you should try again in 30 minutes; the DBPR FTP server may be down. If the problem persists then you should contact the Bureau of Education & Testing. After the file has been received by DBPR, an Email will be sent to you using the Email address on the EOF Record, Record Type 5. The Email will notify you that the file has been received and the total amount of records that were received. You should check the total amount received by DBPR and the total you sent to ensure that the amounts match. If the file was transmitted and an Email was not received within 30 minutes or the total amount received was not correct, you should contact the Bureau of Education & Testing. You can correct files that have already been sent to the DBPR. The file must be corrected and resent in the same day. Transmitting a file with the same name will cause the subsequent file to overwrite the prior file. If you need help sending the file, help is provided using the Help tool bar option. 19 Option 3 If you choose to create and to send the electronic attendance file, Provider Continuing Education Attendance File, without using the application that is provided then specific instructions must be followed. The file must be created using the file formatting and file naming instructions in Option 2. Once the file has been created, the file must be sent to DBPR using the following FTP IP address, ID, and Password. ID & Password are case sensitive. Dbprftp.state.fl.us dbprven iPaf4u After the file has been received by DBPR, an Email will be sent to you using the Email address on the EOF Record, Record Type 5. The Email will notify you that the file has been received and the total amount of records that were received. You should check the total amount received by DBPR and the total you sent to ensure that the amounts match. If the file was transmitted and an Email was not received within 30 minutes or the total amount received was not correct; you should contact the Bureau of Education & Testing. You can correct files that have already been sent to the DBPR. The file must be corrected and resent in the same day. Transmitting a file with the same name will cause the subsequent file to overwrite the prior file. 20 Test File Procedure All providers who wish to send a test file must use the common provider number 9999999 and common pass code 9999. The file can be created and sent using Option 1, Option 2, or Option 3. You will receive an Email confirmation message informing you that the file has been received by DBPR. Pass Code Procedure PURPOSE: To ensure information received from providers is valid and accurate and that information is only disseminated to the proper persons. SCOPE: This applies to all continuing education providers and staff of the Division of Professions, DBPR. REFERENCES: Chapter 455, Florida Statutes, and Rule 61-6.015, Florida Administrative Code. DEFINITIONS: a. Provider: A person or entity approved by a board, council or department to conduct continuing education courses. b. Authorized representative or contact person: The person listed in the provider application to act on behalf of the provider. This person must sign the application as either the authorized representative or contact person. POLICY: Pass code information will only be released to authorized representatives or contact persons for the provider. PROCEDURES: Upon approval as a continuing education provider, the department will assign the provider a pass code. This pass code must be used each time course information is electronically transferred, pursuant to Rule 61-6.015, Florida Administrative Code, and the board/council rules under which the approval was obtained. If the provider is unable to remember the pass code, or wishes to change the pass code, the provider must submit a written request to the Bureau of Education & Testing. This can be done via mail, fax or Email. The written request must indicate whether the provider wants a new pass code or just needs its existing pass code. The authorized representative or contact person for the provider, as indicated on the provider application, must be identified on the request. Requests from any other individuals will be denied. If the request is to release the previously assigned number, the Bureau of Education & Testing will, within three working days, contact by phone the authorized representative/contact person for the provider at the telephone number listed on the application. Once contact with the authorized representative/contact person is made, the authorized representative/contact person will be verbally given the pass code. 21 If the request is for the issuance of a new pass code, the Bureau of Education & Testing will delete the previous pass code and a new number will be issued by mail to the provider within three working days. If an Email address or fax number is included on the provider application this will be done via Email or fax. It is imperative that providers keep their applications current with the Bureau of Education & Testing. If changes to any information on the application are made, the provider must immediately submit the changes to the Bureau of Education & Testing. Pass codes will only be issued to those listed as an authorized representative/contact person on the application. FYI The installation process creates the Folder DBPRFTP in computer’s C drive (double click on the “My computer” icon to find the C drive). If you click on this folder you will see the following subfolders. • • • • Date Files - Attendance files should be saved in this folder. Manuals – Contains user manual. Master Files Uninstall – Used to uninstall program. *** Do not rename or alter these folders. *** 22 Notes