1
Quick Start Guide: Installing Outlook Connector in a non-AD environment
NOTE: This procedure should be repeated manually on each machine on which you’d like to install the GFI MailArchiver Outlook Connector plugin.
Install GFI MailArchiver and set up a mail
server (if required)
1. Install GFI MailArchiver
2. Launch the GFI MailArchiver management console
from Start All Programs GFI MailArchiver GFI
MailArchiver
3. Expand the Configuration node and click on Mail
Servers to Archive
4. Click on Add Mail Server and follow the wizard to set
up at least one mail server
5. Click on Save Settings
For more information refer to the ‘Configuring the mail
servers to archive’ section in the server manual.
Prepare MS Exchange Server for use with
the GFI MailArchiver Outlook Connector
The GFI MailArchiver synchronisation process requires a
user with special authority on all user mailboxes. This user
must also have executable rights on the machine on which
GFI MailArchiver is installed.
Exchange 2000/2003
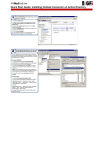
1. Launch Microsoft Exchange System Manager
2. Right click on the Servers node within the appropriate
Administrative Group and select Properties
3. Access the Security tab and click Add… to add the
user to whom you granted special authority on all user
mailboxes.
NOTE: It is recommended to create a non-realistic user
account (with no roaming profile) that is difficult to guess.
The username here is for illustration purposes only.
4. In the Permissions list, click Allow next to Full
Control.
Exchange 2007
1. Open the Exchange Management Shell
2. Run the following Windows PowerShell commandlet:
Add-ADPermission -<mailbox store name>
"Mailbox Store" -<username> "Trusted User"
-AccessRights GenericAll
Example:
Add-ADPermission -Identity "First Storage
Group" -User "master-domain\masynch" AccessRights GenericAll
3. Repeat the procedure above for each mailbox store
database required.
Configure user mailbox synchronization
from GFI MailArchiver
1. From the GFI MailArchiver management console,
expand the Configuration node and click on User
Mailbox Synchronization Settings
2. In the right pane, select Enable Microsoft Exchange
Server synchronization
3. Enter the Login Name and Password
4. Click on Test Access to Mailboxes
Installing GFI MailArchiver Outlook
Connector manually on client machines
To install the GFI MailArchiver Outlook Connector in an
environment with no Active Directory:
1. Copy MAR6OutlookConnector.exe located in:
C:\Program Files\GFI\MailArchiver\Outlook
to the client machines on which you would like to install
the GFI MailArchiver Outlook Connector
2. Double click on the file and follow the wizard to install
3. Once the installation is finished, you can verify that the
Outlook Connector has installed as follows:
i. Open Microsoft Outlook
ii. Check that a new folder called GFI MailArchiver
Mailbox has been created.
More advanced configuration
GFI MailArchiver ships with several pre-configurations
which you can customize to suit your requirements. For
more advanced configuration refer to the user manual at:
http://www.gfi.com/mailarchiver/mar6manual.pdf.