1
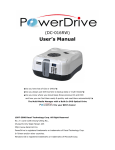
CD Library 101
For Windows
DC-300
1997-2003 Dacal Technology Corp. All Right Reserved.
No. 2-1, Lane 1206 Chung-Cheng Road
Chung-Ho City Taipei Taiwan 235
www.dacal.com.tw
CD Library is registered trademarks or trademarks of Dacal Technology Corp.
in Taiwan and/or other countries.
Windows OS is registered trademarks or trademarks of Microsoft Corp.
Content
Welcome to CD Library
Basic Knowledge
About this guide
Customer Support
Components in the box:
Computer System Requirement
Operating System Requirement
Safety Precautions
Hardware Installation
Test After Installation
Stand-Alone Machine Operation
Display Screen
Lock
Trouble Shooting
Software Guide for Windows O/S
Software Installation
Installation Guide
Software Operation
Warning Sign
Command
Backup Database
Restore Database
CD Edit
Acquire
Recently Used
Print
Exit
Function
1
1
2
2
2
2
2
3
3
5
5
5
6
6
10
10
10
10
11
13
13
14
15
15
16
16
16
16
Power On
Power Off
17
17
Reset
Set
Setup
Swap Device ID
Password
17
Multi selection
Panel
Add/Edit
Search
Content
Remark
Preview
17
18
18
19
20
21
21
22
23
24
25
CD Library
(DC-101)
Hardware Manual
Warning!!
This manual provides essential information for the protection of the
user and others possible injury and property damage.
manual before you use it.
Please read this
Always follow the instructions whenever
using this product to prevent any possible injury and property damage.
Welcome to CD Library, the CD storage device world!
Thank you for purchasing CD Library.
The CD Library, a CD/DVD storing
and retrieving system, can be controlled by PC with USB interface. The
included software is designed for easy and fast searching management.
Reading this manual is required before using CD Library.
Basic Knowledge
l
PC controls CD Library by USB interface.
Using the included
software to manage the machine would be a simple, fast, and
efficient method.
l
150 CD/DVD can be stored in a CD Library machine. By using USB
interface, one computer can connect up to 127 machines at the
same time. (Note: To connect more machines, USB HUB might be
required for connection.)
Thus, you can store 19050 CDs/DVD for
maximum.
l
The enclosed software “CD Library for Windows” has great function
to support you to manage your CDs. You can search the database
by multiple ways.
l
You can retrieve the name of the singers and name of the songs by
using our software for your music CDs. These information can
download from Internet. The software will save the information
into the database. (Please visit www.cddb.com for details if
necessary)
l
Images and short movies can be recorded in the software.
When
you don’t know the name of the discs, they can search CD/DVD in
this area. (This function is only available in Mac Version).
About this guide
This manual provides essential information for the protection of the user
and other possible injury and property damage.
Please read this
manual before you use it. Always follow the instructions whenever
using this product, to prevent any possible injury and property damage.
Customer Support
Customer services: [email protected]
Technical Support: [email protected]
Components in the box:
Please make sure the following goods in the package.
local dealer if you have found anything missing:
l
CD Library II Machine
l
CD Library software
l
AC adaptor
1 pc
l
USB cable
1 pc
l
User’s Manual
1 pc
l
Management Form
1 pc
l
Key
2 pc
1 pc
`
1 pc
Computer System Requirement
l
An Intel-compatible Pentium 90 or higher
l
64 MB of RAM or higher
l
Free space of 20MB for Hard Disk
l
A CD-ROM or DVD Drive
Operating System Requirement
Windows 98SE, ME, 2000 Professional, XP
Mac OS 10.2.2 or higher
Contact your
Note: CD Library software only works in Administrator mode in
Windows 2000 and XP. Since Windows 95 (Version A)/NT 4.0
does not support USB interface, CD Library software can not be
used in these 2 version of Windows.
Safety Precautions
This product is designed by well consideration of safety.
or electric shock will occur due to misuse.
However, a fire
To prevent these unexpected
situations happen, please must obey the following rules:
l
When you don’t understand some of these instructions, please stop
to use this product.
Please contact your local dealer nearest you.
l
Please stop using the product when you find any problem.
l
If you have found any strange things or rupture of electric wire, you
must stop to use this product and contact your local dealer.
l
IF you have found any weird sound, smell, or smoke, unplug the
adaptor immediately. Turn off the power and contact your local
dealer.
Hardware Installation
l
Single Unit Installation
l
Plug the adaptor into the power source socket at the
backside of the CD Library II and plug the other end of the
adaptor to the power source outlet.
l
Insert the squire end of the B-type SUB serial port cable
into the USB serial port at the backside of the rectangular
A-Type end into the USB port of the computer.
l
Multiple Units Installation
l
To complete the installation for multiple units, connect the
power cable and USB of each CD Library II the same way
as the installation for a single unit.
l
For multiple unit installation, the ID is determined by the
sequence of the installation. Please arrange the
machines in sequence before their installation.
l
Please see the following diagram to connect multiple
machines.
Note:
l
If Windows O/S asks the drivers when you plug in USB cable,
do not select HD drive or CD-ROM drive, system will find the
drivers from Windows O/S driver database. The machine use
default drivers in O/S.
l
Machines can be stacked to save space.
However, the
maximum quantity is recommended not exceed 3 sets of CD
Library.
4
Test After Installation
l
Plug the adaptor into the power socket, and other end into the
power outlet. If the LCD is on, the turntable will rotate and
automatically position itself. This action shows the power is
connected properly.
l
Plug the USB cable into the socket.
The machine will perform the
rotation for positioning once. This action shows the USB cable is
connected properly.
Stand-Alone Machine Operation
l
Saving Discs- Open the slide door, and fill the name of the disc in the
Management Form.
Turn the knob to the number according to the
one shown in the form. Press the knob and the machine will
automatically bring the disc into such position.
Insert the disc
through the middle of the door, and pres the knob to collect the disc.
l
Retrieving discs- Search the disc name which you wish to have in
the Management Form.
Turn the knob to that number.
The CD
Library will automatically bring the CD to such position. The disc
will be lifted automatically for you to take it out.
If you need to
choose another disc, just press the knob to get the retrieving rack
down before turning the knob again.
Display Screen
The number shown on the digital display screen will change when you
turning the knob. When you need to select a specific slot number, turning
the knob to the specific number and press the knob. The CD Library will
spin to the specific slot and pull out the CD for you.
When you another
CD, press the knob and turn the knob to the number you need.
the knob again.
Press
The CD Library will spin to another slot and pop up the
CD for you. To save power purpose, the display will shut down after a
Lock
For security purpose, turn the lock to the right for locking after closing
the door, and remove the key from the lock. After locking, both of the
door and the upper case can no be opened.
Trouble Shooting
l
Stuck by foreign matters
n
Open the upper case to remove the improper CD or foreign
article. After you remove the foreign article, put the upper
case back to CD Library and reset the machine.
l
l
Can not read the disk during software installation
n
Check if the bundled software disk is scratched or damaged.
n
Check if the CD-ROM drive skips tracks
Can not install software
n
Please check your computer if meets the basic computer
requirements for installation for CD Library.
l
Can not find machine after open the software
n
Check whether or not the system is power-on, the USB cable is
properly connected, the operating system has USB drive
program. After entering into the CD Library software, firstly
select machine ID number in the Search function. If there is
no number shown in the menu, then check if the USB cable is
connected properly.
l
The disc get stuck and can not be removed
n
Open the upper case to take out the optical disc. After
removing the above cause, cover the upper case back to CD
Library, and press reset. Reput the disc to CD Library
machine.
l
Jammed
n
Immediately send the machine to distributors for
maintenance.
l
Can not turn on power
n
Please check the socket if the power adaptor and DC connector
are plugged properly.
Please also check if the power cord is
short circuit, or the adaptor is damaged.
Note: If the occurrence cannot be found above, please kindly contact
your local dealer immediately.
Specification
l
Storage Type: Any kind of 12 cm discs (CD, CD-R, CD-RW, DVD)
l
Product Size: 350mmX180mm(H)
l
Total Capacity: 150 CDs
l
Port Type: USB Port
l
Software Language: English, Spanish, Italian, French, German,
Traditional Chinese, Simplified Chinese, Japanese & Korean.
l
Power: DC 9V/1 Amp
l
Computer Requirement:
n
Pentium 166 MHz or higher
n
USB Port
n
Microsoft Windows 98/2000/ME/XP
n
Minimum Memory Size: 8 MB
n
Minimum Hard Drive for installation: 16 MB
n
CD-ROM Drive
FCC Regulation
This machine has followed Chapter 15 of the FCC regulation regarding
the Class B digital device for testing, and it is confirmed that it meets the
requirement of the regulation. The foregoing regulation provides
proper protection for the user in residential areas from being interfere by
harmful electromagnetic wave. The design of the equipment will not
interfere electronic communications. If there is any doubt about the
interference source, please shut down the machine and test if there is
any interference coming from this machine.
CE Standard
This machine passes the test of the European CE product certification,
and will not generate electromagnetic interference (EMI) or will not be
affected by EMI.
Using the product indoor
This product is designed as an electronic product for indoor use. Any
damage caused by using the product outdoors is not our responsibility
and such damage will not be covered by our guarantee or warranty.
Recommendations for this machine
To protect your precious disk from being damaged or scratched during its
removal, please follow the instruction as shown in Figure A and try to
hold the disk b its edge as much as possible.
After finished using the disk, remember to put it back to the original
position for an easy retrieval next time.
When the machine is not in use, please shut it down and close the door
to prevent your discs from being contaminated by dust.
Cautious Items
Follow the instructions below or your safety and the protection of your
property.
$
CD Library
(DC-101)
Software Manual
Warning!!
This manual provides essential information for the protection of
the user and others possible injury and property damage.
Please read this manual before you use it. Always follow the
instructions whenever using this product to prevent any possible
injury and property damage.
Software Guide for Windows O/S
Software Installation
To fully utilize the functions of your CD Library, you should install the
bundled software after the computer connection in order to effectively
manage the discs for your computer. This software supports Windows
98/ME/2000/XP systems.
Note 1: CD Library software only works in 「Administrator」 mode in
Windows 2000 and XP.
Note 2: Since Windows 95(version A)/NT 4.0 does not support USB
interface; CD Library software can not be used in these 2 versions of
O/S.
Installation Guide
1. Insert the bundled CD Library software disc into your CD-ROM drive
first.
2. Autorun.exe will be executed automatically. If not, use explorer and
go to CD-Rom drive. You can find this file in the folder named 「CD
Library For Windows」. At the meantime, there is a file called
「Setup.exe」 in the folder. Click it to start installation.
3. Complete the installation according to the instruction shown in the
monitor.
4. After the installation, remove the CD Library software disc. It is
recommended to put the disc in CD Library machine for future use.
Software Operation
Starting Software
After software installation has completed, it will automatically
generate an icon on the desktop. You may directly click such
icon to run CD Library software.
CD Library software icon
10
Warning Sign
This warning sign will appear due to these reasons:
1. CD Library machine has no power (Solution: Plug in AC
adapter)
2. CD Library machine USB cable does not connect to the
computer. (Solution: Plug in USB cable in the computer)
3. Your computer does not recognize this device.
1) Make sure the USB slot on your motherboard is
working properly.
If you are not sure about this,
please ask someone who is familiar with computer
hardware.
2) Check「Device Manager」 if the 「USB Human
Interface Device」 has appeared or not.
11
Software Setup
Adjust the language to English, and then select font. You also can select
the database backup directory.
12
Command
1.File
Backup Database
After you have keyed in a large amount of data, you may select this
function, the program will backup all the data in the directory by
generating BAK files. You can find them in C:\Program Files\CD Library
(See picture below).
database.
All the folders in the 「CD Library」 folder are
When the original database is damaged, the program will use
the BAK folders to replace them (non BAK folders) automatically. It is for
emergency situation only. Please see following detail description:
13
Important!! You need copy these 「all」 database folders to
another directory, once you want to re-install the software or
you want to use the same database in other computer, just
install CD Library software and then copy these folders to
the same directory. You can use the old database without
typing again.
Restore Database
If you want to use previous backup database, you can click
「Restore Database」 manually. The database will back to
the database before you backup.
14
CD Edit
Maybe you want to edit a lot of CDs at one time; it is not so convenient
if you use 「Add/Edit」 and type in information one by one. You can use
this 「CD Edit」 function to edit numbers of CDs at one time.
Note!! When you click 【OK】, it will appear 「Data not complete」,
which is normal, do not worry.
Acquire
This function brings you scanner program, when you want to add more
pictures on 「Preview」 tab, you can use this function.
15
Recently Used
This function allows you to choose last 10 used CDs, the top item is the
last CD, and the bottom item is the last 10 CD.
Print
To print CDs’ titles in the database by machine’s ID on A4 paper.
Exit
Click Exit to close the software.
2. Function
16
Power On
When the power is OFF, use the function to let LCD digital display on and
the CD Library machine will be ready to use.
Power Off
When the power is ON, use this function to let LCD digital display off, the
machine will lower the retrieving rack and shut down.
Reset
Shut down the machine and then reset it. If there is any abnormal
situation, select this function to resume to original atus.
3. Set
17
Setup
1. Language: You can select language to change the interface language.
(Traditional Chinese, Simplified Chinese, English, French, German,
Italian, Spanish, Korean, and Japanese)
2. Font: Change the font to fit your monitor display.
3. Backup Directory: Change the backup files directory.
Swap Device ID
Each CD Library has a unique ID number in the chip ( or machine),
software will grab the ID number and save it in the file called 「dbid.txt」,
the location is C:\Program Files\CD Library\dbid.txt
18
EX. You have 3 CD Library machines, each ID number is saved in dbid.txt,
and your database ID1 controls 16007(first CD Library), database ID2
controls 978266(second CD Library), database ID3 controls 55678(third
CD Library)
You can change the position manually to let database ID1 control 16007
(first CD Library) or 978266 (second CD Library). Using Swap Device ID
is another way to change position.
Password
Set up a password to prevent strangers from looking at your database.
19
Multi selection
If you want to pick up many CDs at one time, you can use this function.
Select the CDs you want, and click 「Eject」, CD Library will go to slot 5,
pop up the CD, wait for 3~5 seconds, then go to slot 7, pop up the CD,
wait for 3~5 seconds
Using 「Next」 to force CD Library go to next slot quickly.
Panel
1. Add/Edit
Start the Add/Edit for the database form on the screen, and enter into
the form. After filling and confirming the information as needed in each
column, a new record of data is added or edited. You must input the
machine number and the slot position. You may pull down the Category
menu. The slot number runs from 1 to 150 only, and error message for
ejection will show if you input a number out of this range.
21
Double click Category, you can edit the CD’s category.
2. Search
1. To quickly search the page, fill in the condition in the column, the
database will find the data that fits the conditions. You may key in a
single condition of multiple of conditions for search.
Click “Clear” to
return to the display of the database of all information in the disc and
provide a listing.
2. If 「Match Any Position」 is checked, the text with any part of the
string will show.
If it is not checked, the text having the first same
alphabet will show.
22
3. Content
Step 1. Select the slot from database by click. The content information will
be added into this slot.
Step 2. Select CD-Rom drive
Step 3. Press 「Get」, software will read all the data from the CD.
23
Right Click to select other function.
4. Remark
If the title is not able to fully describe what it contains, we may select this
page to remark the contents of the disc, and more particularly for
musical CD, since the names of the songs can be input for easy search,
or make a record on the person who has borrowed that CD.
24
5. Preview
Step 1. Select the slot you want to input picture
Step 2. Press 「File」, then click 「Acquire」, it brings you scanner program,
of course you need to have scanner to input pictures.
Step 3. Right Click you can have other functions.
Double click on Preview to import x.bmp file into the software
25
Description:
Select this function to enter into the function of browsing picture. You
may press 「Get Image」 to start scanner program.
Insert the printed
side of the CD or the cover surface for scanning and saving it in the
database.
Whenever you search or see any image you want, click such
image and you can retrieve the disc. You may also double click the
miniature picture to open the dialogue window for you to directly
place .BMP picture into the database. Press the right button of the
mouse when your cursor is at the miniature picture, select 「List」 to list
all picture files in the database in the form of small pictures.
See what
you want, and press the picture once to get that disc. You may use
「Up」, 「Down」, 「Left」, 「Right」, 「Enter」 on the keyboard to select
miniature picture.
26