Download Database User Manual - WICHE Internet Course Exchange Catalog
Transcript
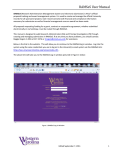
WICHE ICE Database System User Manual Updated 10-9-2015 Table of Contents Introduction…………………………………………………………………………………………. I. Log Into WICHE ICE Database……………………………………………………………….. II. Control Panel Definitions……………………………………………………………………. III. Course Set-up ……………………………………………………………………………….. IV. Activate Course to Offer Seats……………………………………………………………….. V. Update/Edit Course Information…………………………………………………………….. VI. Search for Course Seats……………………………………………………………………… VII. Request a Seat………………………………………………………………………………. VIII. Grant a Seat Request…………………………………………………………………………. IX. Inactivate Course…………………………………………………………………………….. X. Delete Course ……………………………………………………………………………….. XI. View Roster…………………………………………………………………………………… XII. Enter student information …………………………………………………………………… XIII. Enroll Student/s……………………………………………………………………………… XIV. Enter Grades………………………………………………………………………………….. XV. View Grades………………………………………………………………………………… XVI. Un-enroll a Student From a Course………………………………………………………….. XVII. Return Unused Seats………………………………………………………………………….. XVIII. Request Additional Seats…………………………………………………………………… XIX. Delete a Student Profile………...…………………………………………………………….. XX. Needed Courses………………………………………………………………………………. XXI. Member Profile………………………………………………………………………………. XXII. Program Maintenance……………………………………………………………………….. XXIII. Add Proposed Program……………………………………………………………………….. 3 4 5 6 7 9 10 10 11 11 12 13 14 14 15 16 16 17 17 18 19 20 21 22 Appendices A. Import Roster………………………………………………………………………………… 24 Page 2 of 25 This manual has been created to assist member institutions and their respective WICHE ICE Program Information Coordinator (ICE PIC) to utilize the WICHE ICE Database System for an online course exchange between Teaching and Enrolling Institutions. Processes to be completed in database by: Teaching Institution (TI) Complete Course Set-up then offer seats for a particular semester/quarter (activate) Update/Edit course information Grant seat requests by other institutions View class roster Enter grades on roster after course ends Inactivate course for semester/quarter (if there are no seats requested) Delete course (if there were no seat requests ever and you don’t plan to ever offer the course again). Enrolling Institution (EI) Search for course seats Request seats in a course Return seats not used Enter student bio/demo data Enroll student in a course View course roster Un-enroll student View course grades Delete student bio/demo data (if student has never enrolled in a course) Critical Notes: Do not inactivate or delete a course if there are seats granted or students enrolled. This will orphan data from other schools. Do not delete a student’s record if s/he was ever enrolled in a course. This will orphan data from other schools. Page 3 of 25 I. Log Into WICHE ICE Database System To complete any of the actions below, you must log into the database. ICE PIC must secure a login username and password from the WICHE ICE PIC Coordinator, Anna Galas, [email protected] Username will be your work email address unless you want to use a generic address created for all ICE related communications. 1. Go to https://www.wiche-ice.org/new/index.cfm . 2. Login in (select Login link on left side of screen) with user email address and assigned password. 3. Select [Dashboard] tab. 4. View all data management options from Control Panel Page 4 of 25 II. Control Panel Definitions Seat Requests o My Seat Requests = You have placed seat request for the following courses o Grant Seat Requests = Requests have been placed for your courses Course Management o Create New Course = Add New Course to the database for your institution o Edit/Update Course = Edit or add information about the courses you already entered o Manage Semester Seats = Offer seats in a course for a particular semester Needed Courses o Add New = What course(s) is your institution looking for? o Edit Needed Courses = Edit or delete a course you entered on the “needed” list o View Needed Courses = List of courses every institution placed on the “needed” list Rosters o My Rosters = Access course roster as the TI or the EI, Enroll/Unenroll, See grades o Student Manager = Enter one or multiple students to the database before enrolling in a course Course Catalog o General Course = Search/View all courses offered under this category o NEXus = Search/View all courses offered under this category o Social Work = Search/View all courses offered under this category o Consortium Exchange = Search/View all courses offered under this category Member Profile o Member Profile Information = Enter/Edit information about your institution and exchange priorities o Edit Your Campus Enrollment Info = Enter/Edit information such as semester or quarterly enrollment o Program Maintenance = Programs offered at your institution or proposed to be offered o Change Password There are also TABs that will move you between pages. Home = Login entry page GER ICE = Listing of all general education courses My Shared Courses = Add, Edit, Delete, Offer Seats in courses from your institution My Seat Requests = As EI what courses did you request seats in Grant Request = As TI what institutions requested seats Courses & Programs = Link to course categories, programs, needed courses, and rosters Rosters = Rosters for your institution as a TI or EI Page 5 of 25 III. Course Set-up From the Dashboard tab 1. Under the Course Management section, select Create New Course link. 2. Enter all information about the course. a. Course Title: full title b. Course Number: subject and catalog #, i.e. Math 104 c. Course Catalog URL: institution’s online catalog address d. Course Credits: credits assigned at your school e. Course Level: drop down list f. Program: select appropriate g. Campus: default entry based on your login h. CIP_Family (Classifications of Instructional Programs): if unsure, contact your Registrar i. Course Syllabus URL: even if not finalized, post data available. EI’s faculty needs this. j. Instructor Vitae: If same instructor will always teach this course, enter url showing info. Enter TBA if instructor will change. k. Description of Course: copy and paste from catalog Page 6 of 25 l. Prerequisites: enter course titles instead of subject and catalog number m. Method of Instruction: example — type of LMS platform, online, synchronous, asynchronous, or hybrid n. Campus Visits required: If there is any in-person meeting requirement for class o. Course Contact: should be ICE PIC (could be instructor) p. Contact e-mail: for above person q. Other / Additional information: special course requirements, etc. when course meets if synchronous, any special technology requirements 3. To submit the information, click on at the bottom of the document. 4. The course is in the database. 5. For the course to show up in the catalog you must activate seats. See IV. IV. Activate Course to Offer Seats From the Dashboard tab 1. Under the Course Management section, select Manage Semester Seats link. 2. In the Course field, select the course in which you wish to activate seats in. (You will see all courses set-up for your institution in the drop down list.) 3. In the Function field, select Semester Seats Maintenance from drop down list. 4. Click on Update this Course button. 5. You will see the course name and a table, Click on Add New Semester Seats button. Page 7 of 25 6. Enter the requested information. a. Section number: use section number from institution or you can use a new number if there will be multiple sections for same course offered. b. Course Start Date: must use this format mm/dd/yyyy c. Course End Date: must use this format mm/dd/yyyy d. Instructor: this is the person teaching the course during this semester. e. Special Comments: holidays for no class or closed campus. f. Maximum number of seats to share: enter number g. Seat Request Deadline (mm/dd/yyyy): This is the last day you will accept seat requests from EI. h. Return Seats by (mm/dd/yyyy): If the EI has not used all seats, you want the unused seats returned by this date. i. Semester Term: drop down list j. Semester Year: drop down list k. Exchange Price Category: select from the list (examples are provided but this will be customized for the consortium and preloaded for ICE PICs) a. Seat Exchange - Common Wholesale Price: select this category for most general listings. The Steering Board sets this price. Currently, it is $150/credit for undergrad, $200/credit for graduate. The price will be adjusted according to the institution’s status as semester or quarter system. Page 8 of 25 b. Course Exchange - Negotiated Wholesale Price: select this category if your institution has negotiated a different wholesale price with specific ICE members for this particular class. c. Joint Program Exchange - Common Retail Course Price: select if your institution is participating in a collaborative initiative with other ICE members to offer a jointly developed program and this is one of the courses in that program l. Price per Credit Hour: database requires you to enter an amount even it is 0, no dollar symbol ($) needed. Seat Exchange undergraduate course enter 150. Seat Exchange graduate course enter 200. (These are examples but this will be customized for the consortium and preloaded for ICE PICs) m. Seat Restricted: default to NO, only used for special programs 7. Click on to save and finish. 8. You will now see the table showing active semester information for this course. 9. In the Actions column, you can a. Edit (return to Semester Seat Maintenance page) or b. Delete these seats for this semester (does not delete course) or c. Send an email to all PICs indicating seats are now available. 10. If you click on the button under the table, you can create a second section of the same course and offer seats. NOTE: To offer seats for another course, select the [My Shared Courses] tab to see the Administer Your Shared Courses page. V. Update/Edit Course Information From the Dashboard tab 1. Under the Course Management section, select Edit/Update Course link. 2. In the Course field, select the course in which you wish to activate seats. (You will see all courses set-up for your institution in the drop down list.) 3. In the Function field, select Modify/Edit from drop down list. Page 9 of 25 4. Click on Update this Course button. 5. Edit data. 6. Click the button to save changes. VI. Search for Course Seats There are several paths to see course list: From the Home page, select links under the following categories of Individual Courses or Collaborative Initiatives. From the Dashboard tab, select links under the category of Course Catalog. From the Courses & Programs tab, select links under Course Maintenance. Once you see the Shared Distance Course Catalog: 1. Review offerings. 2. Sort by table column headings. 3. Enter data in the fields above table to search for a particular course. Must enter data in each field. VII. Request a Seat From the Shared Distance Course Catalog 1. Look through list of available courses. In the Course column, click on the course subject link you want to request seats for. 2. Review full course details page. 3. Scroll to the bottom of the page and click on Place a seat request link. 4. The next screen will show semester and a small box to enter the number of seats requested. 5. Click [Send] button. An email will go to the ICE PIC at the Teaching Institution. That person will go into WICHE ICE and grant your seats. An email will come back to you confirming the granted seats (see Grant seat request section). From: [email protected] Sent: Sat 6/15/13 2:06 PM To: A seat request has been placed for course TC 201 by Boise ICE PIC of Boise State University in the internet course exchange system. Please log in to grant seats for the request at the following url: Page 10 of 25 https://www.wiche-ice.org NOTE: Please do not reply to this email. Thank you for using WICHE-ICE. VIII. Grant a Seat Request From the Dashboard tab 1. Under the Seat Requests section, select Grant Seat Requests link. 2. Click on the course title link to view the details on the request. The most resent request will be at the top of list. 3. See the semester, institution requesting seats, and number of seats requested. 4. Type the number of seats you will grant to the EI in the box provided. 5. Comment space used to give a reason for granting fewer seats than requested or for explaining why no seats were given. 6. Click on the [Grant] button. Note: EI will receive email confirming granted seat request. From: [email protected] Sent: Sat 6/15/13 2:43 PM To: Your seat request for course number 222 you placed on Jun-15-2013 for 3 seat(s) has been reviewed. Seat(s) granted: 3 Special comments: Type your comments here Your seats have been granted. You may now login to https://www.wiche-ice.org, select Rosters in the Dashboard to enter your roster for this class. IX. Inactivate Course This does not delete the course. It will remove the course from the Course Catalog table because there will be no seats available. From the Dashboard tab 1. Under the Course Management section, select Manage Semester Seats link. 2. In the Course field, select the course in which you wish to activate seats in. (You will see all courses set-up for your institution in the drop down list.) Page 11 of 25 3. In the Function field, select Semester Seats Maintenance from drop down list. 4. Click on Update this Course button. 5. You will now see the table showing active semester information for this course. In the Actions column, you can Delete these seats for this semester (does not delete course) 6. NOTE: after any grade is entered for a student enrolled in the class, the class can’t be deleted from a semester. 7. You will be asked to confirm deletion. Click on the [Delete Semester Seats] button. X. Delete Course From the Dashboard tab NOTE: There must be no seats granted and no enrollments attached to this class. 1. Under the Course Management section, select Manage Semester Seats link. 2. In the Course field, select the course in which you wish to delete. (you will see all courses setup for your institution in the drop down list) 3. In the Function field, select Delete Course from drop down list. 4. Click on Update this Course button. 5. Verify it is the course you wish to delete from ICE Database 6. Click on button at the bottom of the page. Page 12 of 25 XI. View Roster The TI will be notified by EI when students are entered on a course roster. From: [email protected] Sent: Sat 6/15/13 12:48 PM To: Hello ICE PIC The student roster has been submitted for your course TC 201 SUMMER/2013 by TestU University in the internet course exchange system. NOTE: Please do not reply to this email. Thank you for using WICHE-ICE. From Rosters tab. 1. Or select [Dashboard] tab and then under the Roster section, select My Rosters link. 2. If you are currently involved in a seat exchange, you will see your courses as shown below. 3. If you are not currently involved in a seat exchange, you will get a notice saying that you are not engaged in any seat exchange. 4. This page shows a summary of the courses you are teaching and the course/s that you are enrolling students for. 5. The top table shows courses your institution is teaching. Click on the Roster link in far right column in the row of the desired course as illustrated above. 6. The TI can see list of enrolled students and enter grades from this page (See section XIV). 7. Using the mouse pointer, select first cell in first column and all data shown in the table. Select Ctrl + C to copy this data. Open an Excel spreadsheet and paste data into a worksheet. The TI can save the roster or convert to a CSV file for uploading students into LMS. Page 13 of 25 XII. Enter Student Information After receiving confirmation that seat request has been granted the EI can add students to the database and then enroll students into the course. From Rosters tab. Or select [Dashboard] tab and then under the Roster section, select Student Manager link. 1. Click Student Manager link. 2. In the Student Management page, click Add New link. 3. Fill all the fields in the “Add Student” form. (Note that the red labeled fields indicate that information for that field is mandatory. An error box will pop up if other fields are left empty.) a. Student ID -This is your campus student ID number b. First Name c. Middle Name d. Last Name e. Birth Date- (mm/dd/yyyy) i.e 12/05/2000 f. Last 4 of SSN g. Address h. City i. State j. Zip Code k. Day Phone l. Evening Phone m. Email Address n. Program o. Semester Status p. Comments 4. After entering all student information, click the [Add] button to save the information you entered. 5. To add more students, click the Add New button. To edit student information, choose the student from the drop down list then click the [Edit] button. 6. After you have entered all your students’ information, you are ready to enroll them in a course. (See Section XII) XIII. Enroll Student/s From Rosters tab. Or select [Dashboard] tab and then under the Roster section select My Rosters link. 1. If your school was granted seats in a course, you will see your courses as shown below. Page 14 of 25 2. Click on Roster for the course you want to enter students into. 3. The first time you need to enroll students into a class, on the next screen you will see this message “No students found in this course. Do you want to enter students now? Yes | No” under the class title. 4. If there are no students in your profile, you will be prompted to click Add New. You must have students in your profile before they can be enrolled in a class. (See section XI) 5. If there are students in your profile, you can select Enroll Students that are already in the system link. Next you will see student names in a dropdown list. Choose the student then click button. 6. The third option is to Import Student list through an formatted file. 7. Students from the EI are now enrolled in the course. 8. From this roster, you can enroll or Add more students and Unenroll students or go to Manage Students to add more students to profile. 9. The student’s name is also a link back to the student profile page. 10. At the bottom of the page, look for this statement: “When you are done adding all your students, you can click here to notify the Teaching Institution about your roster submission.” 11. Click the here link. XIV. Enter Grades From Rosters tab. Or select [Dashboard] tab and then under the Roster section select My Rosters link. 1. Click on the Roster link in far right column in the row of the desired course. Page 15 of 25 2. In Final Grade Column, click on Enter Grade link. 3. If a grade has been assigned, it can be modified by clicking the letter grade hyperlink (roll mouse pointer over grade). 4. Please take note of the following grading options seen in dropdown list. A – F and I for incomplete course NP = Not Posted W = Withdrawn DR = Dropped CN = Cancelled 5. Comments are needed if student received Incomplete, was Dropped or Withdrew because of Financial Aid repayment process. Enter date when incomplete contract must be completed or when student was dropped or withdrew. If CN was selected, enter comment if there was a special issue. 6. Click on button to save information and post to roster. NOTE: after any grade is entered for a student, that student can’t be unenrolled from a class. XV. View Grades 1. Go through steps 1-2 in section XI. 2. View the roster for grades. XVI. Un-enroll Student From a Course You may be able to un-enroll a student from a course if the grade has not been posted yet. If a grade has been posted by the Teaching Institution, you will not be able to remove the student from the course roster. Page 16 of 25 From Rosters tab. Or select [Dashboard] tab and then under the Roster section select My Rosters link. 1. Click on the Roster link in far right column in the row of the desired course. 2. From the class roster, you select Unenroll link in far right column. 3. A warning message will be shown to confirm unenrollment request. XVII. Return Unused Seats If you did not use all seats granted to your institution, return seats on or before the date TI requested return of unused seats. From the Dashboard tab 1. Under the Seat Requests section, select My Seat Requests link. 2. Look for the course for which seats will be returned. 3. At the far right of course name look for Return Seats link. 4. Enter the number of seats to be returned in box and select [Submit] XVIII. Request Additional Seats If you did not use all seats granted to your institution, return seats on or before the date TI requested return of unused seats. From the Dashboard tab 1. Under the Seat Requests section, select My Seat Requests link. 2. Look for the course for which seats will be returned. 3. At the far right of course name look for Add Seats link. Page 17 of 25 4. Enter the number of seats to be added and hit [send] XIX. Delete a Student Profile NOTE: You can delete a student’s record only if that student has never been enrolled in a course. From Rosters tab. select Student Manager link. Or select [Dashboard] tab and then under the Roster section, 1. Select student from drop down list 2. Click [Edit] button. 3. At the bottom of page look for this statement: “OR you can click here to delete this student from the database.” 4. Click on here link to delete this student. 5. A warning message will be shown to confirm request. Page 18 of 25 XX. Needed Courses When your institution wants to notify member institutions regarding your need to locate seats in a particular course, you can enter information about that course. From the Dashboard tab 1. Under the Needed Courses section, select Add New link. 2. Fill all the fields in the “Manage needed courses - Add New” form. (Note that the red labeled fields indicate that information for that field is mandatory. An error box will pop up if other fields are left empty.) Course Number: example: Math 101 Course Level: select from drop down list (Graduate Studies, Bachelors Degree, Associate Degree, Certificate) Course Title: example: Basic Algebra Course Description: from institution catalog Term: select from drop down list (SPRING, SUMMER, FALL, WINTER, Other) Semester Year: yyyy Anticipated Seats Needed: 3. After entering all student information, click the [Add] button to save the information you entered. 4. Next you will see the list of “My Needed Courses” 5. To add more courses, click the Add New button. To edit course information, choose the course from the list then click the [Edit] button. (or [Delete] button to remove from list) 6. After you have entered all your courses, you click link at bottom of page to Notify ICEPICs. Page 19 of 25 XXI. Member Profile You can enter information about your institution for other members to view when they log into the Database and select your institution’s name from the list of Participating Institutions on the Home page. From the Dashboard tab 1. Under the Member Profile section, select Member Profile Information link. 2. To edit information about the institution, select the pencil icon. 3. After entering all information, click on button to save information. 4. For the Participation and Collaboration Priorities section, you will enter Importing Priorities: o Courses: types of courses you want to import o Programs: types of program related courses you want to import Exporting Priorities: o Courses: : types of courses you want to export o Programs: types of program related courses you want to export Collaboration Priorities: in what programs would you like to collaborate with another institution Page 20 of 25 XXII. Program Maintenance You can enter information about all programs your institution offers or programs you are considering to offer. Members will view this information when they log into the Database and select your institution’s name from the list of Participating Institutions on the Home page. From the Dashboard tab 1. Under the Member Profile section, select Program Maintenance link. 2. Select Add New link under Existing Programs section 3. Enter program information (enter as much information as you can to help other institutions learn about the program Program Name: as see in your catalog Program Description: simple, 300 characters Certificate or Degree Level: select from dropdown list Website: where to find more details Total number of credits required: all credits for entire program, exclude pre-requisite courses % Online: how much of the program is offered online Program Area Title: See CIP family list here (https://www.wicheice.org/new/cipfamlist.html) CIP Code: Please enter the 6 digit CIP Code (http://nces.ed.gov/pubs2002/cip2000/ciplist.asp). For example (11.0972) Components not offered online: if the program is not 100% online, list and describe components with on-site requirements or other restrictions. Example: Student is required to intern in approved clinic for 6 hours credit Page 21 of 25 Tuition Instate: Per Credit hour Tuition Out of State: Per Credit hour Enrollment Capacity: if there are a limited number of students admitted in program, what is total number Capacity Filled: if there is a limited number of students admitted into the program, how much room is open each year for new students (average percentage) 4. After entering all information, click on button to save information. 5. Return to Program Maintenance page XXIII. Add Proposed Program 1. Select Add New Proposal link under Program Proposals section 2. Enter program information (enter as much information as you can to help other institutions learn about the program Proposed Program Name: Year to Debut: select from dropdown list Certificate or Degree Level: select from dropdown list Website: where to find more details Total number of credits required: all credits for entire program, exclude pre-requisite courses % Online: how much of the program is offered online Program Area Title: See CIP family list here (https://www.wicheice.org/new/cipfamlist.html) CIP Code: Please enter the 6 digit CIP Code (http://nces.ed.gov/pubs2002/cip2000/ciplist.asp). For example (11.0972) Program Description: simple, 300 characters Components not offered online: if the program is not 100% online, list and describe components with on-site requirements or other restrictions. Example: Student is required to intern in approved clinic for 6 hours credit Tuition Instate: Per Credit hour, if known Tuition Out of State: Per Credit hour, if known Page 22 of 25 Enrollment Capacity: if there is going to be a limited number of students admitted in program, what is total number Capacity Filled: leave blank 3. After entering all information, click on button to save information. 4. Return to Program Maintenance page 5. Go to the HOME page, select your institution’s name from the list of Participating Institutions and verify data entered. Page 23 of 25 Appendix A Import Roster The WICHE ICE database system’s roster import wizard is capable of importing student records into the system using comma delimited csv files. The csv file must contain the following information and must be separated by commas. Course_number, Student_ID_number, Student_LastName, Student_FirstName, Student_MiddleInitial, Student_Email_Address, Student_PhoneNumber, Street_Address, City, State, Zip_Code, DOB, Last4_of_SSN Example: NURS 779,56456A,Doe,John,B.,[email protected],9073345672,123 Drive Loop,Fairbanks,AK,99212,0712-1987,7769 ENGL 432,51436B,Doe,Jane,B.,[email protected],9073345672,123 Main St,Fairbanks,AK,99212,07-121987,7769 NURS 880,52356B,Trump,Dona,B.,[email protected],9073345672,123 First Ave.,Fairbanks,AK,99212,0712-1987,7769 Please ask help from your respective system administrator for help in extracting this information from your Student Information System. NOTE: Your csv file must be saved without column headings for the import to work properly. Important Note The import process analyzes the number of granted seats per shared seat. If the number of students to be imported from the csv file is greater than the granted seat for that course, the import will not go through. The import wizard also analyzes student records. If the student to be imported is not on the student database, it will add a new record. How to Import Rosters 1. 2. 3. 4. 5. Login to https://www.wiche-ice.org Click the Dashboard Under the Rosters section, click on My Roster In the list of courses, click the “Rosters” link of the course you want to import students to. Click Import Students (see Figure 1) to start the import process. Figure 1 6. On the next screen, you will be presented with an option to upload your csv file (see Figure 2). Click Browse to choose the csv file that contains student records. Page 24 of 25 Figure 2 7. After selecting the csv file, click “Upload” 8. You will be prompted if the file has been uploaded successfully (see Figure 3) then click “Process this file”.. Figure 3 9. The Import Wizard will present you with a post import check (see Figure 4), if everything looks good, click “Proceed with Import”. Figure 4 10. Click “Done” (see Figure 5) to review your imported student records on the class roster. Figure 5 Page 25 of 25


