Transcript
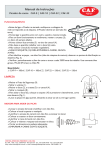
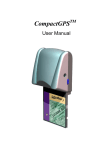
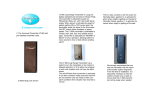
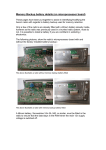
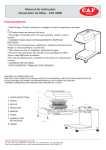
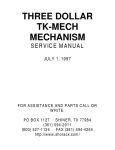
How to set the digit intensity
Features
To change the digit light intensity, switch ON the
chronometer while pushing the key MODE.
6
How to set the Clock
5
START
TIM E
STOP
RES ET
MO DE
START
T IM E
ST OP
RESET
M ODE
1
2
3
Digital Chronometer
RALLY MASTER
USER MANUAL
The RALLY MASTER digital chronometer is a highly
technological and flexible product, ideal for usage in
rally race.
The available functions are :
• Clock
• Chronometer with 0,01 sec. accuracy and 1 hour
max time
• Intermediate time
• Functions as a normal chronometer or a timer
with presettable starting time (reverse mode)
• High or low intensity for daylight or night vision
• 250 times memory
• Connection to PC or printer (RS232)
4
1. ON/OFF switch
2. Start/Stop
- Starts or stops the chronometer
3. Time/Reset
− If the chronometer is on “RUN”, it holds the
displayed value; pushing a second time it
shows the running time.
− If the chronometer
is on “STOP” in the normal
On) it resets the
mode (
chronometer
− If the chronometer is on “STOP” in the reverse
mode (Light “V” = On) it change the
chronometer value with the Preset time
4. MODE
− Switches from Normal Chronometer, Reverse
Timer, Clock.
− Holding the key for 3 seconds, you can change
the value of the PRESET (if in Reverse Mode)
or the value of CLOCK (if in Clock Mode) .
5. LIGHTS
a. Light “ ” = ON : Normal Mode
b. Light “V” = ON : Reverse Mode
c. All lights OFF : Clock Mode
6. DISPLAY (6 digit display)
a. minutes/seconds/cents (Chronometer)
b. Hours/minutes/seconds (Clock)
Switching OFF the chronometer, the time will be set
with the preset value programmed.
MEMORY
Every time you press “TIME/RESET” while the
chronometer runs, the value of the timer is saved in
memory (max 250 times).
When all the 250 values are used the next time will be
saved in the first memory location, so the chronometer
records always the last 250 times.
In order to view the recorded times, stop the
chronometer and then press and hold “TIME/RESET”
and “MODE” for 3 seconds.
•
•
•
•
•
•
•
•
•
Stop the chronometer
Select the CLOCK MODE
Press and hold “MODE” for 3 seconds
Enter the hours using “TIME/RESET”.
Press “MODE”
Enter the minutes using “TIME/RESET”.
Press “MODE”
Enter the seconds using “TIME/RESET”.
Press “MODE”
Normal Mode (INCREASE)
In Normal Mode (Light “ ” = ON) you can
Start,Stop,Clear or have an intermediate. The timer
increase till 1 hour, then it restart from 0. Switching
OFF the chronometer, the time will be cleared.
Reverse Mode (DECREASE)
In Reverse Mode (Light “V” = ON) you can Start, Stop,
Clear or have an intermediate.
The timer decrease from the preset value to 0.
Press “TIME/RESET” in order to set the time with the
preset value programmed.
How to set the PRESET
•
•
•
•
•
•
•
•
•
•
Stop the Chronometer
Select the “REVERSE MODE”
Press and hold “MODE” for 3 seconds
The preset value will be displayed
Enter the minutes using “TIME/RESET”
Press “MODE”
Enter the seconds using “TIME/RESET”
Press “MODE”
Enter the cents using “TIME/RESET”
Press “MODE”
Button “Start/Stop“
• Press this button to view the next time
• Press and hold for 2 seconds to view the
first time recorded
Replacing the Battery
Button “Time/Reset“
• Press this button to view the previous time
• Press and hold for 2 seconds to clear the
memory
The chronometer can be supplied by an external 12
Volt battery or by an internal 9 Volt (with less
autonomy). To remove the battery from the instrument
open the the rear shell and remove the battery.
Button “Mode“
• Press this button to return to the main
display mode
• Press and hold for 3 seconds to print all
the data recorded
3 Volt Clock Battery
9 Volt Battery
The internal litium 3 Volt battery is used to hold the
clock time. To remove the battery from the instrument
open the the rear shell and take off using the tweezers.
Use only 3Volt battery, mod. CR1220.
How to PRINT the recorded data
START
TIME
STOP
RESET
MODE
First the number of the record will be displayed
Connect the chronometer to the printer and then switch
ON. Enter the MEMORY mode and then press and
hold “MODE” for 3 seconds, untill 5 dots will be
displayed.
TIME
001 01:10.73
002 01:13.64
How to connect the Personal Computer
By connecting the Personal Computer to the
chronometer through the serial RS232 port you can
acquire and visualize all the data recorded.
and then the time recorded.
The + pole must be on the rear side of the case.
Do not dispose of batteries into household waste, fire
or water. Batteries should be collected, recycled or
disposed of in an environment-friendly manner.
Technical specifications
Weight :
Dimensions :
Power source :
Clock :
Current Drawn :
Connection :
When the memory is empty no data are displayed.
∗ Remember that the connection runs only if you are
not in MEMORY MODE
Memory :
Accuracy :
Max time :
100 g.
100 x 65 x 24 mm.
9 - 14 Vdc from external
battery
9 Volt from internal battery
3Volt CR1220 battery
80 mA with 14V supply
Serial RS-232
(9600bps-8Data-1Stop-0Par)
250 times
0,01 sec.
1 Hour