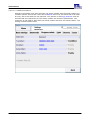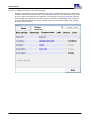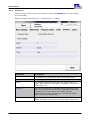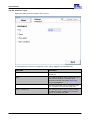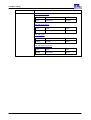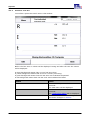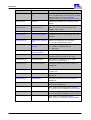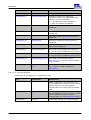
1
ATS400
ETL DataView 3
User Manual
Contents
Contents
1
Introduction
6
2
Administration
7
2.1
System setup
7
2.1.1
2.1.2
2.1.3
2.1.4
2.1.5
2.1.5.1
2.1.5.1.1
2.1.5.1.2
2.1.5.2
2.1.5.2.1
2.1.5.2.2
2.1.5.2.3
2.1.5.2.4
2.1.5.2.5
2.2
Windows users
Installing ETL DataView 3
Installing the PDF creator
Setting up the PDF creator
Adding to a network
Variants X6 or X8
Create network drive
Setup a network printer
Variants X4 oder X5
Network setup
Checking the network connection
Saving the settings
Checking the share
Configuration
Configuration
7
8
15
15
21
22
22
31
37
37
41
43
45
51
53
2.2.1
2.2.2
2.2.3
2.2.4
2.2.5
2.2.6
2.2.6.1
2.2.6.1.1
2.2.6.1.2
2.2.6.1.3
2.2.6.1.4
2.2.6.1.5
2.2.6.1.6
2.2.6.1.7
2.2.7
2.2.8
2.2.8.1
2.2.8.2
2.2.8.3
2.2.8.4
2.2.8.5
2.2.9
2.2.9.1
2.2.9.2
2.2.9.3
2.2.9.4
2.2.9.5
2.2.10
2.2.11
2.2.12
2.2.13
Setting up language
Naming the workstation
Signal tones
Safety cabinet
Startmode
Test plan selection
Examples
Article number
Article groups
Article- and serial number
Article groups and serial number
Combined entrance
Combined entrence with article groups
Variable sequence in one field
Dummy test
User administration
Add an new user
Enter password
Delete user
Assign rights
Automatic logout
File storage
Result files
Test plans
Network
Temporary files
Tool
Serial interface
Push button
Change voltage
Dummy test plan
54
55
55
57
58
60
61
62
63
64
65
66
67
68
69
71
72
72
72
72
73
74
74
77
78
79
80
80
82
83
83
User Manual ATS400
Version 3.14.41 - 1
2
Contents
2.2.14
Printserver configuration
87
3
Test plan editing
3.1
Administering test plans
90
3.2
Changing test plans
92
3.3
Test types
93
3.3.1
3.3.1.1
3.3.1.2
3.3.1.3
3.3.1.4
3.3.1.5
3.3.1.6
3.3.1.7
3.3.2
3.3.3
3.3.4
3.3.5
3.3.6
3.3.7
3.3.7.1
3.3.7.2
3.3.7.3
3.3.7.4
3.3.8
3.3.9
3.3.10
3.3.11
3.3.12
3.4
Common dialogs
Ramp
Start conditions
Matrix
Jump
Text
Multitest
Create log
Protective Earth test
High voltage AC
High voltage DC
Insulation test
Function test
Leakage current test
Testing modules
Supply options
Polarity for protective conducter
Polarity for touch current
Batch
Data input
Resistance
Matrix
Continuity test
Test plan settings
94
94
95
97
98
99
100
102
103
104
105
107
108
110
115
117
119
121
124
125
126
127
129
130
3.4.1
3.4.2
3.4.3
3.4.4
3.4.5
Text
Identification
Report options
Info
Options
131
132
133
137
138
4
Inspector
4.1
Test individual
139
4.1.1
4.2
Protective earth test
Test plan
140
141
4.2.1
4.2.2
4.3
Manual test plan selection
Automatic test plan selection
Safety cabinet
142
143
144
5
Report creation
5.1
Creating templates
146
5.1.1
5.1.1.1
5.1.1.2
5.1.1.2.1
Key
Key
Key
Key
146
146
149
151
90
139
146
words
words of the results data
words of the test step parameters
words of the Protective earth test type
User Manual ATS400
Version 3.14.41 - 1
3
Contents
5.1.1.2.2 Key words of the High Voltage AC test type
5.1.1.2.3 Key words of the High voltage DC test type
5.1.1.2.4 Key words of the Insulation test type
5.1.1.2.5 Key words of the FCT-Current test type
5.1.1.2.6 Key words of the Leakage current test type
5.1.1.2.7 Key words of the Sight check test type
5.1.1.2.8 Key words of the Data input test type
5.1.1.2.9 Key words of the Batch run test type
5.1.1.2.10Key words of the User-Interface test type
5.1.1.2.11Key words of the Resistance test type
5.1.1.2.12Key words of the Continuity test type
5.1.1.2.13Key words of the PT100 test type
5.1.1.2.14Key words of the Lightcontrol test type
5.1.1.2.15Key words of the Dummy load test type
5.1.1.2.16Key words of the Light Filament current test type
5.1.1.2.17Key words of the External programm test type
5.1.1.3
Key words of the test step measurement values
5.1.1.4
Key words of the multiple test values test step
5.1.1.5
Key words of the test step advices
5.1.1.6
Key words of the test step process control
5.1.2
HTML templates
5.1.2.1
Creation with Microsoft Word 2012
5.1.3
CSV templates
5.1.3.1
Creation with Microsoft Excel 2010
152
153
154
155
157
158
158
158
158
159
159
160
160
160
161
162
162
163
163
166
167
168
172
173
6
Reference
176
6.1
Patterns
176
6.2
Protective earth test
177
6.2.1
6.3
Leading of the cable
High voltage test
178
180
6.3.1
6.3.1.1
6.3.1.2
6.3.1.3
6.3.1.4
6.4
Evaluation of the measurement
Error messages for high voltage AC
Error messages for high voltage DC
Test for required voltage
Current error at upper limit
Results files
180
180
180
181
181
181
6.4.1
Header
6.4.2
Identification
6.4.3
Teststeps
6.4.3.1
TestStep
6.4.3.1.1 Protective Earth
6.4.3.1.2 High voltage AC
6.4.3.1.3 High voltage DC
6.4.3.1.4 Insulation
6.4.3.1.5 FCT-Current
6.4.3.1.6 Leakage current
6.4.3.1.7 Sight check
6.4.3.1.8 Data input
6.4.3.1.9 Batch run
6.4.3.1.10User-Interface
6.4.3.1.11Resistance
6.4.3.1.12Continuity test
User Manual ATS400
182
183
183
183
188
190
193
196
199
202
204
205
207
208
210
212
Version 3.14.41 - 1
4
Contents
6.4.3.1.13PT 100
6.4.3.1.14Light control
6.4.3.1.15Dummy load
6.4.3.1.16Light filament current
6.4.3.1.17External program
6.4.4
Result
6.4.5
PlanOptionen
6.4.5.1
ReportOptionen
6.4.5.1.1 ReportOption
214
216
217
219
221
223
224
224
224
6.4.6
6.5
Validation
Plan files
225
225
6.6
Printserver configuration
225
6.7
Matrix
226
6.7.1
6.7.2
RelaisMatrix.cfg
ExtendedRelais.conf
226
227
User Manual ATS400
Version 3.14.41 - 1
5
Introduction
1
Introduction
This manual describes the functions of ETL DataView 3.
This manual is aimed at various roles, which use ETL DataView 3. This manual
differentiates between the roles of administration, test plan editing, inspector and
report creation. Furthermore, the manual contains a reference about the tests, for the
files used and created by ETL DataView 3.
Note
This manual has the status in progress. All details are correct to the best of
knowledge, but may be incomplete. The information in this manual
supplements and replaces the existing documentation.
All text in Courier New blue is either text as shown in the user interface or keywords
in files.
Note
This manual is aimed to be used with an ATS400. When using devices of
Series 36 not all chapters are applicapable. There will be no note on this fact.
User Manual ATS400
Version 3.14.41 - 1
6
Administration
2
Administration
This part of the manual is aimed at system administrators.
It describes information that is necessary to set up and operate ETL DataView 3.
It describes activities that a system administrator must carry out if he wants to
install ETL DataView 3 on his own PC.
All instructions and screenshots refer to the operating system Windows 7 SP1 32 bit
English.
Section you will only need if you are installing ETL DataView 3 on your own computer:
Installing ETL DataView 3
Installing the PDF-Creator
Setting up the PDF Creator
You must also consider all other sections when changing the system environment, e.g.
want to integrate the ATS400 in a network environment.
2.1
System setup
In this chapter the work is described which must be done by a Windows system
administrator.
2.1.1
Windows users
On the variants X4 and X5 of the ATS400 no users can be created on system level
since Windows CE does not have users.
On the variants X6 and X8 of the ATS400 one user with the name ATS400 is created
as adminstrator. This user has no password and is logged on automatically.
You can make the ATS400 part of a domain and allow to log in with domain accounts.
You need additional users only when making the ATS400 part of a network and the
logged in user will use windows explorer or other applications using the network.
ETL DataView 3 will not make use of Windows users and does not support single sign
on.
Important
If reports will be created and you will use multiple printers, e. g. for local
printing and creating a PDF-file, the logged in user must have local
adminstrative rights.
For each user logged into Windows the configuration of the PDF-Creator must
be applied again, see here
User Manual ATS400
Version 3.14.41 - 1
7
Administration
In chapter Create network drive is described how to use a ATS400 without adding to
a domain to use test plans and store results in a network.
2.1.2
Installing ETL DataView 3
For the here describes installation of ETL DataView 3 into the programs folder the
following conditions must be met:
You must have local adminstration rights.
You must have ETL DataView 3 on an data storage.
You must have aknowledgement of using Windows Explorer.
On a Windows 7 64Bit system the programs folder is named Program Files (X86)
instead of Program Files.
Dependend on the settings of the User Account Control additional dialogs may be
opened. These are not displayed in the following instruction. Additionally some buttons
may be overlayed by the administrator symbol.
Create a new folder ETL in the programs folder of the PC.
User Manual ATS400
Version 3.14.41 - 1
8
Administration
Open using the contex menu the dialog Properties and step to the property page
Security. Click on the button Edit....
Click in the following dialog on the button Add....
User Manual ATS400
Version 3.14.41 - 1
9
Administration
Enter Everyone and close the dialog with the button OK.
Activate for Everyone the checkbox Full control in column Allow.
Close both dialogs with the button OK.
User Manual ATS400
Version 3.14.41 - 1
10
Administration
Navigate to the folder ETL and create a new folder DataView 3.
Copy the files for ETL DataView 3 from your data storage to DataView 3.
User Manual ATS400
Version 3.14.41 - 1
11
Administration
This folder should now contain the files like in the following screenshot.
User Manual ATS400
Version 3.14.41 - 1
12
Administration
Create a shortcut for ETL DataView 3.
Rename the shortcut into ETL DataView 3.
Allow Windows Explorer to show hidden files and folders. Open under Organize the
Folder and Searchoptions. Step to property page View.
User Manual ATS400
Version 3.14.41 - 1
13
Administration
Activate the radio button Show hidden files, folders and drives. Close the
dialog with the button OK.
To offer a start from the desktop copy the shortcut to the folder C: -> Users ->
Public -> Public Desktop.
To enable a start when a user logs in copy the shortcut to the folder C: ->
ProgramData -> Microsoft -> Windows -> Start Menu -> Programs -> Startup.
Important
Before using ETL DataView 3 you must configure the serial port.
User Manual ATS400
Version 3.14.41 - 1
14
Administration
2.1.3
Installing the PDF creator
ETL Prüftechnik uses the PDF creator in version 1.6.2 to create PDF documents.
The PDF creator is already installed on the ATS400 variants X6 and X8. For the
ATS400 variants X4 and X5, it is not possible to install the PDF creator.
You only need to carry out the activities in this section if you are installing
ETL DataView 3 on your own PC and want to use the creation of PDF files as the
report option.
Download the PDF creator from the site ftp://ETL-FTP:[email protected]/
Tools/PDFCreator-1_6_2_setup.exe.
Copy the downloaded setup program to the computer to be used. To this end, we
recommend using the C:\Setups folder. If the device is connected to a company
network, please disconnect the network connection by removing the cable. This
means that you will not need to reply to additional dialogues, and no further
unnecessary components will be installed.
Start the setup by right clicking on the file and selecting Run as an administrator.
Then follow the standard setup. Part of the dialogues are not displayed if the
computer is not connected to a network.
2.1.4
Setting up the PDF creator
To automatically save the PDF files, the PDF creator needs to be set up accordingly. A
corresponding printer profile is created.
Important
For every user logged into Windows, this setup will partly have to be made
separately.
User Manual ATS400
Version 3.14.41 - 1
15
Administration
Start the setup by right clicking on the desktop on the PDF creator icon. Select Run
as an administrator from the menu.
Select Printer -> Options from the menu.
User Manual ATS400
Version 3.14.41 - 1
16
Administration
Create a new profile by clicking on the button with the plus symbol.
A window Profile opens, enter ETL and confirm with Ok.
User Manual ATS400
Version 3.14.41 - 1
17
Administration
In the list box, in addition to Standard, ETL is now also included as a profile. Select
ETL to change the settings.
For the ETL DataView 3 to automatically create PDF files, the Auto-save tab needs
to be saved. The file name and the directory must be stated precisely in doing so.
User Manual ATS400
Version 3.14.41 - 1
18
Administration
Activate the Use 'Auto-save' checkbox.
Enter the etl_dataview value in the Filename field.
Activate the Use this directory for auto-save checkbox. Select the C:\Program
Files\ETL\DataView 3\Printing folder in the relevant field.
End the dialogue with the Save button. The window will close.
User Manual ATS400
Version 3.14.41 - 1
19
Administration
Select from the Printer -> Printers menu.
In the New printer name field, enter ETLPrinter and confirm the Add printer
button. If the Add printer button cannot be selected, the setup program was not
started with administrator rights.
User Manual ATS400
Version 3.14.41 - 1
20
Administration
Change the profile of the ETLPrinter to ETL.
End the dialogue with the Save button.
2.1.5
Adding to a network
ETL DataView 3 is able to store test plans and result files in a mapped network drive.
You can use one share to store all files or two separate shares for test plans and
result files. You can use different hosts for test plans and result files. Preparing you
need the following details:
When using a fixed IP address:
- IP address of the DNS server, z. B. 10.2.1.50
- IP address of the locale system, z. B. 10.2.1.186
- Subnetmask of the network, z. B. 255.255.255.0
In all cases:
- Name of the
- Name of the
- Name of the
- Name of the
- Name of the
- Password of
host, e. g. etldats
share for the test plans, e. g. etl_nobackup
share for the result files, e. g. etl_nobackup
domain, e. g. etl.local
user with sufficent rights for the share
the user with sufficent rights for the share
To do the work you need a USB-keyboard an propably a mouse. Be aware that on the
variants X4 and X5 you can use only the left USB connector of the system. To
User Manual ATS400
Version 3.14.41 - 1
21
Administration
connect more than one device you also need an USB-hub.
With the variants X4 or X5 the integration is done in ETL DataView 3.
With the variants X6 or X8 the integration can be done in ETL DataView 3. It is also
possilble to do the integration using a network drive.
2.1.5.1 Variants X6 or X8
2.1.5.1.1 Create network drive
It is not neccessary to integrate the ATS400 into a domain to load test plans or store
result files on to a network drive.
You must know the domain name, the share name, the user and the password.
If you want to use any drive letter you map it in Windows Explorer.
Select in the folder view the entry Computer and choose for the menu bar Map
network drive.... Enter into the following dialog your connection an user data.
Activate the checkboxes like displayed.
User Manual ATS400
Version 3.14.41 - 1
22
Administration
Alternativelly you can map the drive using a batch file in the startup folder. This
integration must be done by your system administrator.
You cannot setup this configuration in ETL DataView 3. You must apply this settings
manually. In the following example it is assusmed that you will store the test plans on
drive N:\ and the result files on drive M:\.
Check in ETL DataView 3 that under Settings -> File storage -> Results ->
Storage the radio button Local is activated.
User Manual ATS400
Version 3.14.41 - 1
23
Administration
Navigate in Windows Explorer to the folder C:\Program Files\ETL\DataView 3.
Open the file Settings.conf with the Windows Notepad.
Open the file with a double click and select in the opening dialog Select a program
from a list of installed programs and close it with the button OK.
In the next dialog choose Notepad and close the dialog with the button OK.
User Manual ATS400
Version 3.14.41 - 1
24
Administration
Windows Notepad will open. Find the line with the entry strPath_Plans.
User Manual ATS400
Version 3.14.41 - 1
25
Administration
Change the text Plans\ into N:\. Be carefull not to forget the ending character \.
User Manual ATS400
Version 3.14.41 - 1
26
Administration
Find the line with the entry strPath_Results.
User Manual ATS400
Version 3.14.41 - 1
27
Administration
Change the text Results\ into M:\. Be carefull not to forget the ending character \.
Save the file and close Notepad.
User Manual ATS400
Version 3.14.41 - 1
28
Administration
In ETL DataView 3 the entries are now visible under Settings -> File storage.
User Manual ATS400
Version 3.14.41 - 1
29
Administration
User Manual ATS400
Version 3.14.41 - 1
30
Administration
2.1.5.1.2 Setup a network printer
If you want to use a network printer you must setup the printer in Windows.
Open Devices and Printers from the start menu. Chose from the menu bar Add a
printer. In the opening dialog choose Add a network, wireless or Bluetooth
printer.
User Manual ATS400
Version 3.14.41 - 1
31
Administration
Now the avalable network printers are searched and will be displyed in a list box.
Choose the printer from the list box.
User Manual ATS400
Version 3.14.41 - 1
32
Administration
You will be asked to install a driver. Choose the corresponding driver.
User Manual ATS400
Version 3.14.41 - 1
33
Administration
After the installation of the printer driver you can enter a name for the printer.
User Manual ATS400
Version 3.14.41 - 1
34
Administration
Do not share the printer.
User Manual ATS400
Version 3.14.41 - 1
35
Administration
After that dialog the printer will be diplayed in the list of the local printers.
User Manual ATS400
Version 3.14.41 - 1
36
Administration
2.1.5.2 Variants X4 oder X5
2.1.5.2.1 Network setup
After powering on the system end ETL DataView 3 using the buttons Workstation,
Exit Dataview and close the opening dialog with Yes.
Chosse from start menu Settings -> Network and Dial-up Connections.
User Manual ATS400
Version 3.14.41 - 1
37
Administration
Then chosse the network adapter and open it with a double click.
User Manual ATS400
Version 3.14.41 - 1
38
Administration
In the opening dialog enter the desired settings. On the property page IP Address
you choose using a DHCP-server or a fix IP address.
User Manual ATS400
Version 3.14.41 - 1
39
Administration
If you are using a fix IP address you must supply the address of the name server on
the property page Name Servers.
Close the dialog using button OK.
User Manual ATS400
Version 3.14.41 - 1
40
Administration
2.1.5.2.2 Checking the network connection
Next you will check if the host can be reached over the network. For that the ATS400
must be connected with the network. You need to open a Command Prompt window.
User Manual ATS400
Version 3.14.41 - 1
41
Administration
In the opening windows enter ping <hostname>. Replace <hostname> with the name
of the host you will connect, in the example etldats. If there is a connection the
answer is like displyed below.
There are two errors which can occur.
First ping cannot resolve the name of the host. In this case you get a message that
the host could not be reached.
Second there is no connection. In this case data pakets are lost. In both cases
contact your network admninistrator.
Close the window entering Exit.
User Manual ATS400
Version 3.14.41 - 1
42
Administration
2.1.5.2.3 Saving the settings
The settings are not persistant and must be saved. Open the Run… dialog.
User Manual ATS400
Version 3.14.41 - 1
43
Administration
In Run dialog enter ndcucfg and press the Enter key.
User Manual ATS400
Version 3.14.41 - 1
44
Administration
A new window will open. Enter reg save into the window and press the Enter key.
Close the window entering quit.
2.1.5.2.4 Checking the share
The share can now be checked. You must open Command Prompt again as described
above.
Enter into the window net use Plans \\<Hostname>\<share name>. Replace
<Hostname> with the name of the host, in the example etldats, and <Share name>
with the share name for test plans in the example etl_nobackup.
User Manual ATS400
Version 3.14.41 - 1
45
Administration
User Manual ATS400
Version 3.14.41 - 1
46
Administration
The dialog with the account data for logon will be opened. Enter user name, password
and domain.
User Manual ATS400
Version 3.14.41 - 1
47
Administration
Next you will be asked if you want the data to be stored. If you store the data you
will never be asked again for the logon data.
User Manual ATS400
Version 3.14.41 - 1
48
Administration
The successfully mapping wil be displayed.
If you get the message Command failed: status 53 the share can not be used.
Contact in this case your network administrator.
User Manual ATS400
Version 3.14.41 - 1
49
Administration
Delete the mapping with net use Plans /d.
Close the window with exit.
User Manual ATS400
Version 3.14.41 - 1
50
Administration
2.1.5.2.5 Configuration
So ETL DataView 3 can connect with the host it needs the corresponding information.
Enter these in Settings -> File storage in the property pages Network -> Shared
folder -> Result rsp. Test plan.
After entering the data you can establish a connection clicking on button Connect. If
the connection is successfull the text changes from Not connected to Connected.
User Manual ATS400
Version 3.14.41 - 1
51
Administration
You can check a succefull connection by opening Windows Explorer.
User Manual ATS400
Version 3.14.41 - 1
52
Administration
In Windows Explorer click on the icon Network. The mappe dfolders will be displayed.
2.2
Configuration
This chapter covers work to be done for configuring ETL DataView 3.
User Manual ATS400
Version 3.14.41 - 1
53
Administration
2.2.1
Setting up language
Open the dialog choosing Settings -> Language.
Select in the list the desired language. Click on button OK to apply the language. This
setting will be stored in file Settings.conf. The language will be active immediately
for most of the dialogs. The dialog will be closed and the window Settings will be
displayed again.
With a click on the button Menu the change will be lost. The dialog will be closed and
the window Mainmenu will be displayed again.
User Manual ATS400
Version 3.14.41 - 1
54
Administration
2.2.2
Naming the workstation
Open the dialog choosing Settings -> Workstation -> Base settings.
Click into the field right of Name. A keyboard window will be opened. Enter the name of
the workstation. Click on one of the buttons Back or Menu. The settings will be stored
in the file Settings.conf.
When creating reports you can access the field with the keyword WORKSTATION.
2.2.3
Signal tones
Additional to the signal tones generated for the overall result also signal tones can be
given for each test step. The duration of the tone is according to the setting for the
overall result.
User Manual ATS400
Version 3.14.41 - 1
55
Administration
Open the dialog choosing Settings -> Workstation -> Base settings.
These setting is done by the 4 top checkboxes. Click on one of the buttons Back or
Menu. The settings will be stored in the file Settings.conf.
Selection
Behaviour
Buzzer Individual test IO
Is the result of a test step IO a signal
tone is generated. This is independent
from the fact of the test step is part of a
multi test step or not.
Buzzer Individual test NIO
Is the result of a test step NIO a signal
tone is generated. This is independent
from the fact of the test step is part of a
multi test step or not.
Buzzer Multi testIO
Is the result of a test step IO a signal
tone is generated. This is done only when
the test step is part of a multi test step.
Buzzer Multi test NIO
Is the result of a test step NIO a signal
tone is generated. This is done only when
the test step is part of a multi test step.
User Manual ATS400
Version 3.14.41 - 1
56
Administration
2.2.4
Safety cabinet
When using a safety cabinet you can choose several settings. To use this settings it
is neccessary to use a safety cabinet support the signals IN OP and Locking on the
ETL-Interfaces of the ATS400.
This setting applies to the workstation and is valid for all test plans.
Open the dialog choosing Settings -> Workstation -> Base settings.
Choose a value from the list Safety cabinet. This will change the behaviour of the
signal Out 6 on the ETL-Interface. Click on one of the buttons Back or Menu. The
settings will be stored in the file Settings.conf.
Selection
Behaviour
No cabinet
The signal has the meaning READY FOR
OPERATION and behaves as described in
the base device manual in chapter ETLInterface for Selection and
Operation Panels.
Locked during plan
The signal has the meaning Locking. The
safety cabinet will not open as long as a
User Manual ATS400
Version 3.14.41 - 1
57
Administration
Selection
Behaviour
test is running. After the test the safety
cabinet can be opened independent from
the overall result of the test.
Unlock on pass
2.2.5
The signal has the meaning Locking. The
safety cabinet can not be opened as long
as the overall result is not passed. Will
the safety cabinet stay locked a message
is displayed. You can unlock the safety
cabinet with a button on the screen or
the signal Button Stop on the ETLInterface.
Startmode
You can define which window will be displayed after starting ETL DataView 3.
Open the dialog choosing Settings -> Worksation -> Startmode.
Dependend from the selection in Startup mode additional controls may be displayed.
These are labeld as Individual Test or as Plan.
User Manual ATS400
Version 3.14.41 - 1
58
Administration
Selection
Behaviour
Main menu
The main menu will be displayed.
Select plan by ID
The window Select ID will be displayed.
Start in batch mode
The window Test batch will be displayed.
Select plan manually
The window Select manual will be
displayed.
Individual test
Additionally the selection Individual
Test will be displayed. You can select
which test type will be started. You can
only select enabled test types. The test
will be started immediatelly after the
start.
Menu individual test
The window Test individual will be
displayed.
Plan
Additionally the selection Plan will be
displayed. You can select one of the test
plans. This test plan will be running
immediatelly after the start. Will the test
plan be renamed or deleted you get a
message and the main menu will be
displayed.
Important
Having user administration active all user should have the right to use the
window configured as start up window.
User Manual ATS400
Version 3.14.41 - 1
59
Administration
2.2.6
Test plan selection
You can determine how to enter data during automatic test plan selection.
Open the dialog choosing Settings -> Workstation -> Program select.
Dependend from the selection in Select plan are the controls operational.
With the drop down box Select plan you can choose from which source the selection
will be taken.
Choosing ETL-Interface the test plan will be selected by applying a number at the
ETL-Interface and active the acquisition. Details are described in the base device
manual.
Choosing Keyboard a window will be displayed. Into this window a ID will be entered
which is used to select the test plan.
Choosing File Plan.ID a file with the name Plan.ID must be created in the plans
folder. This file contains a line with the ID which is used to select a test plan. Optional
in a second line a serial number and in a third line a article description can be given.
The contents of the file will be periodically checked.
Using this selection the checkbox Delete Plan.ID is operational. Is this check box
active the file will be deleted after it has been processed.
User Manual ATS400
Version 3.14.41 - 1
60
Administration
The fields Typ-Pattern, ID-Pattern, Serial-Pattern and Article-Pattern as well
as the corresponding check boxes are operational if Keyboard is selected in Select
plan. With the other selections the controls are disabled.
In the field Typ-Pattern is the pattern which is used to test the entered data using
automatic test plan selection. This pattern must be meet to have a valid entered
data. The entered data will be in the result file as tag TYPE.
The check box Combibox indicates that the field Typ-Pattern contains two parts.
When Combibox is active the fields ID-Pattern and Serial-Pattern are getting
operational, the check boxes Enable will both be activated and disabled.
In the field ID-Pattern is the pattern which will be used to extract the type from the
entered data. The extracted value will be in the result file as tag USEDID.
The corresponding check box Enabled indicates that the entrance contains a type.
In the field Serial-Pattern is the pattern which will be used to extract a serial
number. The extracted value will be in the result file as tag SERIALNUMBER.
The corresponding check box Enabled indicates that the entrance contains a serial
number.
In the field Article-Pattern is the pattern which will be used to extract additional
article data. The extracted value will be in the result file as tag ARTICLE.
The corresponding check box Enabled indicates that the entrance contains additonal
article data.
Details how to enter pattern are in topic Patterns.
2.2.6.1 Examples
The following examples shows possible settings at hand of the number scheme used
by ETL. This scheme consist of a article number with 6 ciphers followed by a blank and
the serial number. The serial number consists of 4 ciphers for the production month a
blank and 4 ciphers for a number. This leads to following pattern:
000000\ 0000\ 0000
An example number is 205589 0515 1000. The corresponding aricle description is UGP5025.
Other examples will show additional possibilities.
User Manual ATS400
Version 3.14.41 - 1
61
Administration
2.2.6.1.1 Article number
Should for automatic test plan selection only the article number be used the pattern
has to be given in field Typ-Pattern. The check boxes remain inactive and the other
fields remain empty.
User Manual ATS400
Version 3.14.41 - 1
62
Administration
2.2.6.1.2 Article groups
Should for automatic test plan selection only the article number be used the pattern
has to be given in field Typ-Pattern. The check boxes remain inactive and the other
fields remain empty. The pattern must be entered that the characters for the group
are included in paranthesis. In the test plan only the article group ist entered for the
identification.
User Manual ATS400
Version 3.14.41 - 1
63
Administration
2.2.6.1.3 Article- and serial number
Should for automatic test plan selection the article number and the serial number in
sepearate fields be entered both check boxes for ID-Pattern and Serial-Pattern
must be activated. In the fields Typ-Pattern and Serial-Pattern the patterns are
entered. There is no need to enter something in ID-Pattern because this pattern is
identical with the pattern in Typ-Pattern. The check box Combibox remains inactive.
User Manual ATS400
Version 3.14.41 - 1
64
Administration
2.2.6.1.4 Article groups and serial number
Should for automatic test plan selection the article number and the serial number in
sepearate fields be entered both check boxes for ID-Pattern and Serial-Pattern
must be activated. In the fields Typ-Pattern and Serial-Pattern the patterns are
entered. The pattern must be entered that the characters for the group are included
in paranthesis. In the test plan only the article group ist entered for the identification.
There is no need to enter something in ID-Pattern because this pattern is identical
with the pattern in Typ-Pattern. The check box Combibox remains inactive.
User Manual ATS400
Version 3.14.41 - 1
65
Administration
2.2.6.1.5 Combined entrance
Should for automatic test plan selection the article number and the serial number in a
common field be entered the check box Combibox has to be activated and in all fields
an entry has to be made for the patterns. The pattern in field Typ-Pattern must be
entered that the characters for the article number are include in paranthesis. The
sequence of the fields is fixed first the article number and then the serial number. The
setting look like shown below.
User Manual ATS400
Version 3.14.41 - 1
66
Administration
2.2.6.1.6 Combined entrence with article groups
Should for automatic test plan selection the article number and the serial number in a
common field be entered the check box Combibox has to be activated and in all fields
an entry has to be made for the patterns. The pattern in field Typ-Pattern must be
entered that the characters for the group are included in paranthesis. The sequence
of the fields is fixed first the article number and then the serial number. The setting
looks like shown below.
User Manual ATS400
Version 3.14.41 - 1
67
Administration
2.2.6.1.7 Variable sequence in one field
Is the sequence of the fields undetermined so the fields must be separated by a
character. The pattern for the type and the serial number must be different.
Otherwise the fields cannot be separated. In this case the setting looks like shown
below.
User Manual ATS400
Version 3.14.41 - 1
68
Administration
2.2.7
Dummy test
These settings must be done if you want to check the ATS400 and the test station
for functionality.
Open the Dialog using Settings -> Workstation -> Dummy.
Parameter
Description
Program Start
The dummy test will be done when the program starts.
User Change
The dummy test will be done after a user logs in.
Count
The dummy test will be done after the given number of
tests. When opening a test plan or changing it the counter
will be reset to 0.
Interval
Time interval between two dummy tests. Checking for the
end of the interval will be done when waiting for the start
condition of the test step or when waiting for the
identification of the unit under test. The intervall starts
after a successfull dummy test.
Time
Up to 5 points in time can be defined when a dummy test
will be performed. Checking for the time will be done when
User Manual ATS400
Version 3.14.41 - 1
69
Administration
Parameter
Description
waiting for the start condition of the test step or when
waiting for the identification of the unit under test. The
times will be repeated for each day.
Automatical dummy
This checkbox must be set when an automatic dummy will
be used.
Any combination can be configured despite of such a setting makes sense.
Important
The name of the result file and the report files are according to the same rules
as with normal test plans.
Will in the file name not choose to use DateTime only the last dummy test will
be recorded. Will the dummy test be executed after a certain amount of tests
the result file and the report of the last test will be overwritten.
Will by creating the folder name a preset keyword or a keyword from the test
type Data input be used invalid folder names may arise when they should be
stored in subfolders.
Will Program Start be used together with Time the following rule applies:
The dummy test of the next point in time in the future will not be executed.
Example:
The points in time 8:00 and 16:00 are configured. The successfull dummy test when
starting the program was at 7:55. Therefore the dummy test at 8:00 will not be
executed. The next dummy test will be at 16:00.
Will Program Start be used together with User Change then after the start of the
program and loging in of the user the dummy test will be executed only once.
Following settings are recommended if no other rules apply:
Scenario
Setting
Laboratory use or single
shift
Device will be powerd off.
Select Programm Start.
Two shifts without user
administration
Device will be powerd off
Select Program Start and two times when the shifts
begin.
Multiple shifts with user
administration
Select User Change.
User Manual ATS400
Version 3.14.41 - 1
70
Administration
2.2.8
Scenario
Setting
Different Windows user
Select Programm Start.
User administration
With the user administration you can limit the possibilities of the users in
ETL DataView 3.
Open the dialog choosing Settings -> User administration.
The check box User administration determins if you have user administration
active. Is the check box active user administration is also active.
The check box Enable anonymous user determins if a user must log in. Is this check
box active this user will be logged in automatically.
ETL DataView 3 has two user as default which cannot be deleted.
First this is ADMIN, who holds all rights as default. This user is provided to get access
to the system without help from ETL Prüftechnik in the case the password has been
forgotten. This user cannot be deleted. The factory default password for ADMIN is
ETL. This can be changed but it is recommended to keep it.
User Manual ATS400
Version 3.14.41 - 1
71
Administration
Second this is Anonymous which allows to log in without displaying a login dialog. The
factory default is that this user has no rights.
Important
As factory default the anonymous user has no rights. He cannot run a test,
make settings or exit ETL DataView 3. This should be taken into
consideration when choosing the startup mode.
2.2.8.1 Add an new user
Click on the button New to create an new user.
A new windows is opened to enter the user name. leaving with OK the user will be
created and he will be added to the list.
The user name and the password are case sensitive.
2.2.8.2 Enter password
Select the user in the list and click on the button Password to add or change the
password.
The user name and the password are case sensitive.
The password is encrypted an cannot be restored.
2.2.8.3 Delete user
Select the user in the list. Click on the button Delete. A confirmation dialog is
displayed. If you confirm the user will be deleted.
2.2.8.4 Assign rights
Select the user in the list. Activate or unactivate the check boxes on the right side to
allow or deny the desired rights.
Important
Be carefull to give all users the right to use the window defined in Startup
mode.
User Manual ATS400
Version 3.14.41 - 1
72
Administration
2.2.8.5 Automatic logout
Open the dialog with the button Autologout.
In this dialog the rules are configured a user will be logged out automatically.
Selection
Behaviour
Time
Determines the time interval the user is
logged off.
Menu
The time intervall is active when the user
is in a menu window. All menus and
windows reached via button Settings
are not considered.
Plan select
The time intervalis active when the user
is in a window for test plan selection.
Start condition
The time intervall is active when waiting
to read the start conditions of the first
step in a running test plan.
User Manual ATS400
Version 3.14.41 - 1
73
Administration
2.2.9
File storage
In this menu you can setup additonal to the storage places for result files and test
plans also the network settings. Furthermore temporary options for storage of result
files experiencing problems with the storage media and release storage place on the
internal storage media.
Open the dialog choosing Settings -> File storage.
2.2.9.1 Result files
On the property page Result you can define in which cases result files will be stored
and on which media.
In the upper part of the property page Storage you can select in which cases result
files will be stored. There are three possibilities and you can choose one or multiple of
them.
With Test IO
result files will be stored in the case the overall result is passed.
With Test NIO
result files will be stored in the case the overall result is failed.
User Manual ATS400
Version 3.14.41 - 1
74
Administration
Wiht Not tested (Error)
result files will be stored in the case the test was aborted by the user or by a problem
arising from the system, e. g. overtemperature.
In the lower part of the property page Storage you can select the media to store the
files on. Selecting Local the media of the system will be used. With variants X4 and
X5 this is the buildt in SD-Card and with variants X6 and X8 this is the internal hard
disk.
On the property Path you can define the naming of a folder for the result files and the
report files.
On the property page Path you can make additional settings for the folder where
result files and report files are stored. If you select _NONE in all fields no subfolder is
created.
You can select from the keywords PlanName, PlanID, Workstation, Type, UsedID,
SerialNumber and Article. PlanID is the identifikation of the test plan and
PlanName the name of the test plan. Workstation is the name of the workstation.
Type, UsedID, SerialNumber and Article result from the automatic plan selection.
The checkbox Create Subdirs determins how the fields are used. Is the checkbox
inactive one subfolder will be created where its name is concatenated from the
User Manual ATS400
Version 3.14.41 - 1
75
Administration
diferrent fields. Is the checkbox active for each field a new subfolder is created in a
hierarchical manner.
The combined path is displayed in the text field at the bottom.
On the Property page Filename you can define the name of the result file and report
file.
The above dispayed setting is factory default. The combined file name is displayed in
the text field at the bottom.
User Manual ATS400
Version 3.14.41 - 1
76
Administration
2.2.9.2 Test plans
You can select the storage of the test plans.
On the property page Test Plan you can select the storage media. You can select
from one of the medias Local, USB or LAN.
Is the checkbox Save after Execution active the test plan will also be stored after
executing a test. This will preserve data entered by the tester as default when using
the test plan again.
User Manual ATS400
Version 3.14.41 - 1
77
Administration
2.2.9.3 Network
On the property page Network you must make the settings when chossing LAN for
result files or test plans. The settings have to be made in similar way for result files
and test plans.
Refer to the chapters in Adding to a network on how to use this dialog.
User Manual ATS400
Version 3.14.41 - 1
78
Administration
2.2.9.4 Temporary files
On the property page Temp you define when temporary stored result files and report
files will be moved to their original destination folder.
This setting is only valid whe the storage media is set to USB or LAN. In this case
there is the possibility that the storage media is not available when storing result files
or report files. In this case the files will be stored locally. These files will be moved in
the case the storage media is available again. Since there is the possibility that a
larger amount of data must be moved and you cannot test during that activity you
can define when and how much files will be moved. Factory default is If destination
available.
With If destination available the files will be moved after the next test.
With On exit testplan the files will be moved the test plan will be exited.
With On startup only (All files) all files will be moved when ETL DataView 3 is
starting.
The radio button below Files to move are only valid when If destination
available or On exit testplan is selected.
You can define that all files or a limited number of files should be moved.
User Manual ATS400
Version 3.14.41 - 1
79
Administration
2.2.9.5 Tool
On the property page Tool you can permanently delete files. There will be no
confirmation dialog.
With the button Delete Results the localy stored result files and report files will be
deleted.
With the button Delete Temp Results the temporary stored result files and report
files will be deleted.
With the button Delete Individual Tests the settings for the single step test will
be reset to factory default.
2.2.10 Serial interface
For ETL Dataview 3 can connect to the device the serial interface must be
configured. You must do this only when installing ETL Dataview 3 on your own
system.
User Manual ATS400
Version 3.14.41 - 1
80
Administration
Important
With the variants ATS400 X8 and X6 the serial interface is set to COM2 as
factory default. With the variants ATS400 X5 and X4 the serial interface
cannot be configured.
Open the dialog choosing Settings -> Workstation -> COM.
All available serial interfaces on the system will be displayed. Choose those interface
the ATS400 is connected with.
After clicking on the button Connect the serial interface will be opened and tried to
connect to the device. Is a connectin established the LED Remote at the front of the
ATS400 is on.
Close the dialog with the button Back and exit ETL DataView 3.
User Manual ATS400
Version 3.14.41 - 1
81
Administration
2.2.11 Push button
Using a second front together with variant X2 it is nesseccary to deactivate the push
button on the front.
Open the dialog choosing Settings -> Workstation -> Base settings.
Is the checkbox Wheel active the push button can be used. This setting is stored in
the file Settings.conf.
User Manual ATS400
Version 3.14.41 - 1
82
Administration
2.2.12 Change voltage
There is the possibility to change the voltage of a high voltage test during the test
using the push button. This possibility must be activated.
Open the dialog choosing Settings -> Workstation -> Base settings.
Is the checkbox Change voltage active you can use the push button to change the
voltage during a test. This setting is stored in the file Settings.conf.
2.2.13 Dummy test plan
The dummy test plan is created by ETL Prüftechnik and will be delivered with the
dummy. You can use only one dummy test plan. The dummy test plan is stored in the
subfolder DummyPlan of the ETL DataView 3 folder. There must only one file with the
extention .plan in this folder.
The dummy test plan will be used as a normal test plan. A result file will be created
according to the settings in Settings -> File Storage.
As factory default a dummy test plan doesn't create a report file.
The execution of the dummy test plan is done manually or according to the settings in
Dummy test.
User Manual ATS400
Version 3.14.41 - 1
83
Administration
Caution
The following procedure is not covered by any rights within ETL DataView 3.
The work described here can be done by any user having the right to change
test plans.
Important
The name of the result file and the report files are according to the same rules
as with normal test plans.
Will in the file name not choose to use DateTime only the last dummy test will
be recorded. Will the dummy test be executed after a certain amount of tests
the result file and the report of the last test will be overwritten.
Will by creating the folder name a preset keyword or a keyword from the test
type Data input be used invalid folder names may arise when they should be
stored in subfolders.
Exit a running ETL DataView 3.
Copy the dummy test plan for Subfolder DummyPlan into the folder where your test
plans are located.Be carefull not to overwrite an existing test plan.
User Manual ATS400
Version 3.14.41 - 1
84
Administration
Navigate in Windows Explorer to the folder C:\Programm files\ETL\DataView 3.
Open the file Settings.conf with the Windows Editor.
Open the file with a double click and select in the opening dialog Select a program
from a list of installed programs and close it with the button OK.
In the next dialog choose Notepad and close the dialog with the button OK.
User Manual ATS400
Version 3.14.41 - 1
85
Administration
Windows Notepad will open. Find the line with the entry Edit_Invalid_Enabled.
User Manual ATS400
Version 3.14.41 - 1
86
Administration
Change the value from false into true.
Save the file and close the editor.
Start ETL DataView 3 again.
Change the dummy test plan by adding the desired report options. Exit
ETL DataView 3 again.
Change in the subfolder DummyPlan the extension of the file from .plan into .plan$.
Move the dummy test plan from the folder with your test plans into the subfolder
DummyPlan.
Change the value in Edit_Invalid_Enabled in the file Settings.conf from true to
false.
2.2.14 Printserver configuration
For configuring the print server the configuration file must be present. You can
configure that the files from the report creation will be stored in a different location as
the result files, the behaviour how to deal with unknown keywords in the report und
the timeout for waiting on PDF-reports or printing.
User Manual ATS400
Version 3.14.41 - 1
87
Administration
Important
In the case the configured folder is on an external storage media, e. g. a
memory stick or network, this media must be present before the first report
will be created. The tester will see a runtime message and the file will not be
stored.
This settings must be made manually and are not supported by ETL DataView 3.
Exit ETL DataView 3. The configuration will only be read during startup.
Navigate in Windows Explorer to the folder C:\Programm Files\ETL\DataView 3.
Open the file Printserver.conf with Notepad.
Open the file with a double click and select in the opening dialog Select a program
from a list of installed programs and close it with the button OK.
User Manual ATS400
Version 3.14.41 - 1
88
Administration
In the next dialog choose Notepad and close the dialog with the button OK.
For configuring an alternative folder you must change the entry for the report type.
The file contains for each report type an empty element. You must create an opening
and closing element.
Add a folder name or change an existing folder name. In this example for the report
type PDF to folder N:\.
To change the timeout for the report file you must change one of the existing
numbers. Be aware that the time is in milliseconds.
With the element Debug the output can be changed if an unknown keyword is found.
The element PdfTimeout is a time within the PDF-file must be created. Is the file
created before this time is elasped the next report can be created.
The element PrintTimeout is a wait time. The complete time will be waited before the
next report can be created.
Save the file and close Notepad. Start ETL DataView 3 again.
User Manual ATS400
Version 3.14.41 - 1
89
Test plan editing
3
Test plan editing
This part of the manual is aimed at the persons who create and edit the test plans.
It contains all information that is necessary to create the test plans in accordance
with the requirements for the test and the existing test types.
All illustrations and options refer to the Windows variant that you receive with the
ATS400 variants X2, X6 and X8. The Windows CE variants with the ATS400 variants
X4 and X5 do not contain all options.
3.1
Administering test plans
Open the dialog choosing Test plan -> Create / Edit.
On the left side a list of the currently available test plans is displayed.
In the midth upper part the test steps in the selected test plan are displayed. Is no
test plan selected the list is empty.
In the midth lower part the data for the test step is displayed. Is no test plan or no
test step selected the list is empty.
User Manual ATS400
Version 3.14.41 - 1
90
Test plan editing
Button
Action
Change plan
The window for Changing test plans will
be displayed and the selected test plan
can be changed.
New Plan
A new plan will be created. Details for this
you will find in the quick start guide.
Copy plan
The selected test plan will be copied. You
must enter a new name.
Delete plan
After a confirmation dialog the test plan
will be deleted permanently if you confirm
this.
Plan information
The window for Plan options will be
opened.
In this mode no changes can be made.
Test
The window Test plan will be opened.
Back
The window will be closed.
User Manual ATS400
Version 3.14.41 - 1
91
Test plan editing
3.2
Changing test plans
Open the dialog choosing Test plan -> Create / Edit -> Change plan.
On the left side a list with the currently present test steps is displayed. The test
steps can be expanded or collapsed.
Button
Action
Edit
This button is available in the case a test
step is selected.
The window for configuring the test step
will be displayed.
Add
A new test step will be created. Details
can be found in the quick start guide.
Delete
This button is available in the case a test
step is selected.
After a confirmation dialog the test step
will be deleted permanently.
Copy
This button is available in the case a test
step is selected.
The test step will be copyed to the
User Manual ATS400
Version 3.14.41 - 1
92
Test plan editing
Button
Action
internal clip board.
3.3
Cut
This button is available in the case a test
step is selected.
After a confirmation dialog the test step
will be copied to the internal clip board
and then will be deleted permanently.
Paste
This button is available when a test step
is present in the internal clip board.
This test step will be inserted below the
seleted test step. Jump targets of
existing test steps will be adapted
automatically. The Jump targets of the
inserted test step will be set to default
values.
Up
This button is available in the case a test
step is selected.
The selected test step will be moved one
position upwards. Jump targets will be
adapted automatically.
down
This button is available in the case a test
step is selected.
The selected test step will be moved one
position downwards. Jump targets will be
adapted automatically.
Expand
All test steps of the test plan will be
expanded. The text changes to
Collapse.
Collapse
All test steps of the test plan will be
collapsed. The text changes to Expand.
Test
The window Test will be opened.
Close
The window will be closed.
Plan Options
The window for Plan options will be
opened.
In this mode changes can be done.
Test types
For each test type exists specific parameters and common parameters. The specific
parameters are unique for each test type and the common parameters are the same
for all test types. Not all common parmeters are present for every test type and may
not be present when configuring a single test step.
Common parameters are:
Ramp
Start conditions
Matrix
User Manual ATS400
Version 3.14.41 - 1
93
Test plan editing
Jump
Text
Multitest
Create log
3.3.1
Common dialogs
3.3.1.1 Ramp
The ramp configuration describes the ramp parameters.
Factroy default is that no ramp is used.
Ramp: Turns the ramp on and off. The other parameters can be changed when ramp is
turned on.
Start: Voltage with that the ramp will start.
Up: Time in seconds from the start voltage up to the test voltage.
Test: Test time in seconds. This is the time the test voltage is applied to the unit
under test. This is the same value a parameter t in the configuration dialog.
Down: Time in seconds from the test voltage to the end voltage.
User Manual ATS400
Version 3.14.41 - 1
94
Test plan editing
3.3.1.2 Start conditions
The start conditions describe under which cirumstances the test will start.
Each signal can have one of four states.
Active: The signal must be set to provide a start.
Not Active: The signal must not be set to provide a start.
Ignore: The signal will be ignored.
Monitored: The signal must be set. It will be monitored that the signal will be set in
the case all other signals with state Active are alredy set. Will the signal not be set
within the configured time the test will be evaluated as failed and will be aborted. Are
multiple signals with state Monitored the first signal reaching the time will fail and
abort the test.
To select the state Monitored at least one other signal must have state Active.
Is there only one signal with state Active and no other signal has state Monitored,
the state of that signal cannot be changed.
It is under the responsibility of the test plan editor to choose a combination that
makes sense for his scenario.
The signal Start-Button allows the start with the Starttaste at the front or the
signal Button Start on the ETL Interface or the Start button on the screen.
User Manual ATS400
Version 3.14.41 - 1
95
Test plan editing
The signal PE-Testprobe allows the start with the button at the PE-Testprobe.
The signal Contact Monitoring allows the start with contacting, e. g. with test
pistols.
The singal Safety Circuit HV allows the start with closing the safety circuit. For the
test type HV-AC this value is always Active and cannot be changed. For the test
types HV-DC and ISO it depends from the settings in the ATS400. If the value can be
changed. Factory default is the value Active and cannot be changed.
Statechange requires that at least one of the signals with state Active or Monitored
must change its state from not set to set to provide a start. When manually
contacting the unit under test it ensures that the new test point has been contated.
This checkbox is not visible on single test and the first test step in a test plan and is
always set.
Delay will delay the start of the test after the start conditions are meet.
Repeating allows to execute test steps only once, each time or nth time to execute.
Is the value 0 the test step will only be executed once. Is the value 1 it will be
executed each time. For all other values the test step will be executed the first time
and then be omited for n-1 times. This parameter will not be displayed for single test.
Buttons is a combobox. You have four selections. This combobox is not visible for
single test and set to None.
None dosn't show any buttons.
Skip allows the tester to omit the current test step. It will be evaluated as passed for
the overall result.
Start allows to start the test step.
Start and skip shows the skip and the start button.
User Manual ATS400
Version 3.14.41 - 1
96
Test plan editing
3.3.1.3 Matrix
With this property page the settings of a matrix will be configured.
Shown is the dialog in the case a configuration file is present.
Parameter
Description
Off
Both outputs of the ETL-Interface are off and all relais of a
matrix are in default position.
Matrix ETLInterface
The ETL-Ingterface will be used. This setting is only
possible if in Settings -> I/O-Interface the check box
Disable SC, Con is active.
ETL-IO: Out 7
(Pin9)
This check box determines the state of the output Out7 of
the ETL-Interface.
ETL-IO: Out 8
(Pin10)
This check box determines the state of the output Out8 of
the ETL-Interface.
Matrix CAN
This checkbox can be selected in the case a cofiguration
file for a matrix is existent. If the checkbox is active the
matrix can be configured.
On the sub property page Relaismatrix are controls to configure the matrix.
User Manual ATS400
Version 3.14.41 - 1
97
Test plan editing
Parameter
Description
Bank
With the buttons it can be switched between the banks of
the different outputs. If there is a non default setting in a
bank a yellow field will be displayed near the button.
Reset
Sets als outputs to the default setting.
HV1
If a button in this line is set the wire HV1 is switched to the
coresponding output.
In this line the number of the outputs of the active bank are
displayed.
HV2
If a button in this line is set the wire HV2 is switched to the
coresponding output.
In the example above the output 1 is connected to wire HV1 and output 2 is
connected to wire HV2.
3.3.1.4 Jump
On this property page jumps are configured.
User Manual ATS400
Version 3.14.41 - 1
98
Test plan editing
On the property page Jump conditions can be configured how the test plan will select
the next test step. For the test steps can provide thre different results you have one
property page for each different result. The settings are the same for each result.
On property page IO. you define the target if a test has ended with passed.
On property page NIO you define the target if a test has ended with failed.
On property page Cancel you define the target ist a test has been aborted.
You can select Next and the test plan will proceed with the next step.
You can select End and the test plan will end.
You can select Jump and you can select a test step in the drop down box. The stet
plan will proceed with this test step.
3.3.1.5 Text
On this property page user advices are configured.
On the propety page Text an text or picture can been shown before, during or on an
erroneous test.
User Manual ATS400
Version 3.14.41 - 1
99
Test plan editing
The text can be entered by a click on the white edit box and activated by setting the
checkbox Show. The hight of the font can be changed in the drop down box.
Will an advice been shown Before it will be visible until the start conditions are meet.
Will an advice been shown During a test it will be visible until the test step ends.
Will an advice been shown on Error it will be visible until the dialog will be confirmed.
On Cont. On Error you can configure when the advice on Error will be confirmed.
You can use the same conditions as for start conditions.
On variant ATS400 X4 there isn't the possibility to use pictures. The corresponding
controls aren't visible.
3.3.1.6 Multitest
On this property page the multi test parameters are configured.
To summarize multiple test points into one result, e. g. the number of test points is
different for different units under test, you can use Multitest.
User Manual ATS400
Version 3.14.41 - 1
100
Test plan editing
Parameter
Description
Enable
Enables multi test behaviour.
Result
Configures how the results of the test are summarized.
Worstcase: The worst measurement will be used.
Mode
Configures the end of a multi test.
# of Measurements: You must have the numer of tests
with result passed as given in Count.
Button Pass: The multi test ends when the pass button is
pressed. It dosn't matter if this is coming from the front of
the ATS400, the button on the screen or from the ETLInterface.
Count
Configures how much tests must be done when used in
mode # of Measurements. This parameter is only be visible
when in Mode the value # of Measurements is selected.
Pass button visible
Configures to show the button Pass on the screen. This
parameter is only be visible when in Mode the value Button
Pass is selected.
Show
Configures that a user advice will be shown between two
tests of a multi test.
Size
Configures the hight of the font of the text of the user
advice.
Text of the user advice.
Text
The text will be shown as user advice.
Image
A picture will be shown as user advice.
Search
Shows the file select dialog to select the picture. This
button is available when Image is selected.
On variant ATS400 X4 there isn't the possibility to use pictures. The corresponding
controls aren't visible.
User Manual ATS400
Version 3.14.41 - 1
101
Test plan editing
3.3.1.7 Create log
On this property page the logging is configured.
To log measurements during a test logging can be activated.
Parameter
Description
Enable
Activates the logging.
Time interval
Configures how often measurements are stored.
For each test step a file will be created. The rule for the base name is according to
the result file. The number of the test step is added to the base name.
The file is a test file in csv-format and can be imported to other applications. The
exact format depends on the test type.
User Manual ATS400
Version 3.14.41 - 1
102
Test plan editing
3.3.2
Protective Earth test
The protective earth test will be configured using the following dialog.
Parameter
Description
t
Test time in seconds. The test time is the time the current
is flowing through the unit under test.
I
Test current in A. This current is flowing through the unit
under test for the test time.
U
Open circuit voltage in Volt. This voltage is applied to the
unit under test or the contacts in the case no current is
flowing through the unit under test.
R max
Maximum allowed resistance for evaluation.
User Manual ATS400
Version 3.14.41 - 1
103
Test plan editing
3.3.3
High voltage AC
The high voltage AC test will be configured using the following dialog.
Parameter
Description
t
Test time in seconds. The test time is the time the testing
voltage is applied to the unit under test. The times for
powering on and off and the ramp times are not part of the
test time.
U
Testing voltage in kilovolt. This voltage is applied to the unit
under test for the test time.
I min
Minimum test current. This current must be flowing through
the unit under test during the test time. If the current fallse
below this limit the test is evaluated as not ok.
I max
Maximum test current. The current must not exceed this
limit during the test time. If the current exceeds this limit
the test will be evaluated as not ok.
f
Frequency in Hertz. Frequency of the testing voltage.
Result
You can select how the evaluation is done. Selecting Test
User Manual ATS400
Version 3.14.41 - 1
104
Test plan editing
Parameter
Description
Time the test ends after the test time. Selecting StartButton the evaluation ends with pressing the start button
again.
Sparc detection
This parameter will only be visible when the ATS400 is
supporting this function.
You can select if spark detection is disabled resp. how
sensitive it is. Spark detection evaluates the break down of
the measured voltage regarding to size and gradient.
Selecting Off spark detection is disabled. Selecting Coarse
a large spark will be detected, selecting Normal the
sensitivity is medium and selecting Fine small sparks will be
detected.
Additional informations about the behaviour of the high voltage test, the error
messages and the evaluation you will find in the Reference.
3.3.4
High voltage DC
The high voltage DC test will be configured using the following dialog.
User Manual ATS400
Version 3.14.41 - 1
105
Test plan editing
Parameter
Description
t
Test time in seconds. The test time is the time the testing
voltage is applied to the unit under test. The times for
powering on and off and the ramp times are not part of the
test time.
U
Testing voltage in Volt. This voltage is applied to the unit
under test for the test time.
I min
Minimum test current. This current must be flowing through
the unit under test during the test time. If the current fallse
below this limit the test is evaluated as not ok.
I max
Maximum test current. The current must not exceed this
limit during the test time. If the current exceeds this limit
the test will be evaluated as not ok.
Result
You can select how the evaluation is done. Selecting Test
Time the test ends after the test time. Selecting StartButton the evaluation ends with pressing the start button
again.
U Discharge
Discharge voltage is the voltage which must be fallen short
of after the test before the test step ends.
Sparc detection
This parameter will only be visible when the ATS400 is
supporting this function.
You can select if spark detection is disabled resp. how
sensitive it is. Spark detection evaluates the break down of
the measured voltage regarding to size and gradient.
Selecting Off spark detection is disabled. Selecting Coarse
a large spark will be detected, selecting Normal the
sensitivity is medium and selecting Fine small sparks will be
detected.
Additional informations about the behaviour of the high voltage test, the error
messages and the evaluation you will find in the Reference.
User Manual ATS400
Version 3.14.41 - 1
106
Test plan editing
3.3.5
Insulation test
The insulation test will be configured using the following dialog.
Parameter
Description
t
Test time in seconds. The test time is the time the testing
voltage is applied to the unit under test. The times for
powering on and off and the ramp times are not part of the
test time.
U
Testing voltage in Volt. This voltage is applied to the unit
under test for the test time.
R min
Minimung allowed resistance for the evaluation.
Result
You can select how the evaluation is done. Selecting Test
Time the test ends after the test time. Selecting StartButton the evaluation ends with pressing the start button
again.
User Manual ATS400
Version 3.14.41 - 1
107
Test plan editing
3.3.6
Function test
The function test will be configured using the following dialog.
Parameter
Description
U
Test voltage in Volt. This voltage is applied to the unit
under test. This parameter will be ignored if the source is
external.
f
Frequency of the test voltage. This parameter will be
ignored if the source is a direct current source or external.
t
Test time in seconds. The test time is the time the
evaluation is done against the limits. This time starts after
the conditions for evaluation start is meet. This parameter
will be ignored when Button Pass/Fail is selected.
I min
Minimum current. Is the current below this limit the test is
evaluated as failed. This parameter will be shown when
Current is selected as measuring channel. This parameter
will be ignored when Button Pass/Fail is selected.
I max
Maximum current. Is the current above this limit the test is
User Manual ATS400
Version 3.14.41 - 1
108
Test plan editing
Parameter
Description
evaluated as failed. This parameter will be shown when
Current is selected as measuring channel. This parameter
will be ignored when Button Pass/Fail is selected.
U min
Minimum voltage. Is the voltage below this limit the test is
evaluated as failed. This parameter will be shown when
Current is not selected as measuring channel. This
parameter will be ignored when Button Pass/Fail is
selected.
U max
Maximum voltage. Is the voltage above this limit the test is
evaluated as failed. This parameter will be shown when
Current is not selected as measuring channel. This
parameter will be ignored when Button Pass/Fail is
selected.
Result
Here are two entries possible. In the the upper drop down
box the method can been choosen. You can select
between Measuring canal und Button Pass/Fail. In the
lower drop down box the channel for evaluation is selected
when Measuring canal is selected. Is Button Pass/Fail
selected as method no evaluation is done and the
parameters I min, I max, U min, U max and the
paremeters for Start will be ignored.
Graphic
You can select if a graphic will be diplayed and if it will be
stored. Selecting None no graphic will be displayed and
stored. Selecting Show only the graphic will only be
displayed. Selecting Show and Save the graphic will be
shown and saved.
Source
Source for suppling the unit under test. The possible
sources are dependent from your device. Is an external
source selected you can configure if the source is a direct
current source with the checkbox Source is DC.
Voltage
Drop down box how the supplyment of the unit under test is
to handle. Selecting Turn off after test the voltage will
be turn off when test has finished. Selecting
Leave on after test the voltage will remain on when the
test has finished. Selecting Turn off dosn't do a test. Only
the voltage will be turned off. Selecting
Turn off if test N.I.O. the voltage will be turned off
when the test is evaluated as failed. Selecting Turn on
dosn't do a test. Only the voltage will be turned on.
Start
Setting when the evaluation against the limits will start.
This parameter and the dependent parameters will be
ignored when Result ist set to Button Pass/Fail. With
the setting After Delay the evaluation begins after the
time in Delay has passed. With the seting > min the
evaluation begins when the measurement is above the limit
in I min rsp. U min. With the setting Delay and > min the
User Manual ATS400
Version 3.14.41 - 1
109
Test plan editing
Parameter
Description
time in Delay must have passed and the measurement is
above the limit in I min rsp. U min. With the setting
Gradient the gradinet of the measurements must have
fallen below the value in Gradient. With the setting < max
the evaluation begins when the mesurement has fallen
below the limit in I max rsp. U max. With the setting
Delay und < max the time in Delay must ahve passed and
the measurement is fallen below the limit in I max rsp.
U max. With the setting > min, Gradient and < max the
evaluation must start before expiring the time in Timeout.
Otherwise the test is evaluated as failed.
3.3.7
Leakage current test
The leakage current test will be configured using the following dialog.
These parameters are relevant for checking.
Parameter
Description
Delay
This parameter is not used.
User Manual ATS400
Version 3.14.41 - 1
110
Test plan editing
Parameter
Description
t
Time used for checking against the limits. If you are using a
polarity with automatic change the time is valid for each
polarity.
I max
Maximum allow leakage current.
I min
Minimum leakage current which must be reached.
Result
Type of the channel. There are the following selesctions:
I AC rms: Effective value of the AC-fraction
I DC: DC-fraction of the leakage current
I min: Lowest value of the current leakage current
I max: Highest value of the current leakage current
I rms: Effective value of the DC- and AC-fraction
These parameters are relevant for suppling the unit under test.
Parameter
Description
U
Voltage the device under test will be supplied.
f
Frequency of the supply voltage for the device under test.
triple phase
The unit under test is supplyed with triple phase. This radio
button is active only on a test rig configured for such units
under test.
sisngle phase
Teh unit under test is supplyed with a single phase.
Source
There are several sources available. The sources are
explained in detail in chapter Supply options.
Source for the supply of the device under test.
Mains voltage: The supply is taken from the mains voltage
of the ATS400.
AC 0..270V: The supply is taken from the power converter
of the ATS400.
External: The supply is taken from an external source.
Voltage
Defines how after a test the supply for the device under
test is handeled.
Turn off after Test: After the test the supply will be
turned off.
This setting is fixed and cannot be changed.
These parameters are relevant for the test setup.
Parameter
Description
Testing Modul
There are several testing moduls available. the testing
modules are explained in detail in chapter Testing modules.
IEC 60990 Pic 3: Unweighted touch current
IEC 60990 Pic 4: Touch current weighted for reaction
IEC 60990 Pic 5: Touch current weighted for to let loose
User Manual ATS400
Version 3.14.41 - 1
111
Test plan editing
Parameter
Description
IEC 60601 Basic: Unweighted leakage current
IEC 60601 Pic 12: Weighted leakage current
Testing method
Selects which testing method will be used.
Protective conducter current: The current in the
protective conducter will be meassured. This method is
named earth leakage current in EN 60601-1:2013-12.
Touch current: The current over the housing will be
measured. For this measurement the PE-probe must be
used. This method is named contact current in EN 606011:2013-12.
Polarity
Determines the connection of the unit unde rtest and the
test setup. The contacting depends form the testing
method. The contacting for the protective conducter
current are explained in chapter Polarity for protective
conducter, for the touch current in chapter Polarity for
touch current.
In some selections the word „Auto“ is used. With this
setting the change of the polarity is done automatically
within one test step.
Using testing method Protective conductor current
following connections are available:
Auto
n/S1
p/S5
Closed
Normal/Switched
L1->PE
n/S1
p/S5
Closed
Normal
L2-> PE
n/S1
p/S5
Closed
Switched
Auto with SFC
User Manual ATS400
n/S1
p/S5
Open
Normal/Switched
Version 3.14.41 - 1
112
Test plan editing
Parameter
Description
L1->PE with SFC
n/S1
p/S5
Open
Normal
L2-> PE with SFC
n/S1
p/S5
Open
Switched
Using testing method touch current following connections
are available:
Auto
n/S1
p/S5
e/S7
Closed
Normal/Switched
Closed
n/S1
p/S5
e/S7
Closed
Normal
Closed
n/S1
p/S5
e/S7
Closed
Switched
Closed
L1->PE
L2-> PE
Auto with SFC
n/S1
p/S5
e/S7
Open
Normal/Switched
Closed
L1->PE with SFC
User Manual ATS400
n/S1
p/S5
e/S7
Open
Normal
Closed
Version 3.14.41 - 1
113
Test plan editing
Parameter
Description
L2-> PE with SFC
n/S1
p/S5
e/S7
Open
Switched
Closed
SFC PE Open Auto
n/S1
p/S5
e/S7
Closed
Normal/Switched
Open
n/S1
p/S5
e/S7
Closed
Normal
Open
SFC PE Open
SFC PE Open reverse
User Manual ATS400
n/S1
p/S5
e/S7
Closed
Switched
Open
Version 3.14.41 - 1
114
Test plan editing
3.3.7.1 Testing modules
IEC60990 Pic 3
Measuring circuit for unweighted touch current (corresponds EN61010-1 Pic A.3)
This measuring model emulates the impedance of the human body. This allows sto
measure the current flowing through a human body touching the unit under test in a
similar way.
IEC60990 Pic 4
Measuring circuit for touch current weighted for reaction (corresponds EN61010 Pic
A1)
Reaction in the human body results from the current flowing within the body. The
measuring circuit according to picture 4 emulates the impedance of the body and
User Manual ATS400
Version 3.14.41 - 1
115
Test plan editing
weight the reaction depended from the current causing an unwanted reaction.
IEC60990 Pic 5
Measuring circuit for touch current weighted for let loose
The inability to let loose the unit under test results from a current flow within the
human body (e.g. through muscles). the influence of the frequency for let losse is
different from the influence for reaction. this is significant for frequencies above 1 kHz.
IEC 60601 Basic
Measuring circuit
This measuring circuit corresponds to the requirement of DIN EN 60601-1:2013-12
chapter 8.7.3 part e.
User Manual ATS400
Version 3.14.41 - 1
116
Test plan editing
IEC 60601 Pic 12
Measuring circuit with weighting
This measuring circuit corresponds to the requirement of DIN EN 60601-1:2013-12
chapter 8.7.3 part a - d.
3.3.7.2 Supply options
Mains voltage
The unit under test is supplied from the mains voltage of the ATS400.
There is no isolation from the mains voltage.
User Manual ATS400
Version 3.14.41 - 1
117
Test plan editing
AC 0..270V
The unit under test is supplied by the power converter in the ATS400.
The isolation is within the ATS400.
Extern
The unit under test is supplied over an external input.
An insulation can be done by an external transfomer.
User Manual ATS400
Version 3.14.41 - 1
118
Test plan editing
3.3.7.3 Polarity for protective conducter
The following polarities are available with the measuring method protective
conducter current.
L1->PE resp. 1. phase Auto
L2->PE resp. 2. phase Auto
User Manual ATS400
Version 3.14.41 - 1
119
Test plan editing
L1->PE with SFC resp. 1. phase Auto with SFC
L2->PE with SFC reap. 2. phase Auto with SFC
User Manual ATS400
Version 3.14.41 - 1
120
Test plan editing
3.3.7.4 Polarity for touch current
The following polarities are available with the measuring method touch current.
L1->PE resp. 1. phase Auto
L2->PE resp. 2. phase Auto
User Manual ATS400
Version 3.14.41 - 1
121
Test plan editing
L1->PE with Auto resp. 1. phase Auto with Auto
L2->PE with Auto resp. 2. phase Auto with Auto
User Manual ATS400
Version 3.14.41 - 1
122
Test plan editing
SFC PE Open resp. 1. phase SFC PE Open Auto
SFC PE Open reverse resp. 2. Phase SFC PE Open Auto
User Manual ATS400
Version 3.14.41 - 1
123
Test plan editing
3.3.8
Batch
The batch data will be configured using the following dialog.
With the test step Batch you can enter data for a charge.
The entered data will be stored in the result file and report file and can be printed
locally. This test type can be configured individually. In the top most entry field a
preset user can be entered or by activating the checkbox from Username the
currently logged in user will be used. Also the entry field Test equipment can be
preset or the name of the worksation can be used. In the both middle fields a type
and ordern number can be preset. To generate a sequential serial number you can
preset the first serial number. The serial number can be automatical increased on
passed and/or failed tests. In this case the serial numer must not contain any
alphabetic characters. The start conditions can be set as usual.
Using the additional checkboxes the fields can provided with Patterns. This allows the
input to be checked for plausibility.
User Manual ATS400
Version 3.14.41 - 1
124
Test plan editing
3.3.9
Data input
The data input will be configured using the following dialog.
You can configure up to 5 fields to enter any data. Is the corresponding checkbox
Pattern active the preset will be used as a Pattern. This allows the input to be
checked for plausibility.
User Manual ATS400
Version 3.14.41 - 1
125
Test plan editing
3.3.10 Resistance
The resistance test will be configured using the following dialog.
Depending on the configuration and firmware of the ATS 400 not all parameters will be
displayed.
Parameter
Description
t
Test time, the evaluation will be done
when it is elapsed.
R min
Lower limit for the evaluation.
R max
Upper limit for the evaluation.
R offset
Offset to compensate the resistance of
the measurement cables. This value will
be subtracted from the measurement
value before evaluation.
Timeout
Time within that valid measurements must
be present.
Measuring range
Selection for the measurement range.
0: Automatic
User Manual ATS400
Version 3.14.41 - 1
126
Test plan editing
Parameter
Description
Other values depends from the
configuration of the ATS 400.
3.3.11 Matrix
The matrix test step will be configured using the following dialog.
This step can only be chossen in the case a configuration file for a matrix is present.
Parameter
Description
Off
Both outputs of the ETL-Interface are off and all relais of a
matrix are in default position.
Matrix ETLInterface
This checkbox is always disabled.
ETL-IO: Out 7
(Pin9)
This checkbox is always disabled.
ETL-IO: Out 8
(Pin10)
This checkbox is always disabled.
User Manual ATS400
Version 3.14.41 - 1
127
Test plan editing
Parameter
Description
Matrix CAN
This checkbox can be selected in the case a cofiguration
file for a matrix is existent. If the checkbox is active the
matrix can be configured.
t
This time determines how long the step will be executed.
This can be used to make external measurements.
On the sub property page Relaismatrix are controls to configure the matrix.
Parameter
Description
Bank
With the buttons it can be switched between the banks of
the different outputs. If there is a non default setting in a
bank a yellow field will be displayed near the button.
Reset
Sets als outputs to the default setting.
HV1
If a button in this line is set the wire HV1 is switched to the
coresponding output.
In this line the number of the outputs of the active bank are
displayed.
HV2
If a button in this line is set the wire HV2 is switched to the
coresponding output.
In the example above the output 1 is connected to wire HV1 and output 2 is
connected to wire HV2.
User Manual ATS400
Version 3.14.41 - 1
128
Test plan editing
3.3.12 Continuity test
The continuity test will be configured using the following dialog.
Parameter
Description
Interpretation
Closed: The test will be evaluated as passed if a resistance
lower than Limit will be measured.
Open: The test will be evaluated as passed if a resistance
higher than Limit will be measured.
Limit
Limit for the evaluation.
Test time
Time after that the measurement will be evaluated.
Test voltage
Maximum test voltage used for the measurement.
Max. test current
Maximum current during the test.
User Manual ATS400
Version 3.14.41 - 1
129
Test plan editing
3.4
Test plan settings
This section discusses the settings that are valid for the entire test plan.
The associated window can be opened using the Plan Options button in the
Create / Edit window.
The window with the Planoptions opens.
User Manual ATS400
Version 3.14.41 - 1
130
Test plan editing
3.4.1
Text
You can enter a free text here.
User Manual ATS400
Version 3.14.41 - 1
131
Test plan editing
3.4.2
Identification
Here you can configure identifications which are used for automatic plan selection.
With the button New you can enter an new idetification.
With the button Delete the selected identification will be deleted.
The identifications will be used for automatic plan selection.
User Manual ATS400
Version 3.14.41 - 1
132
Test plan editing
3.4.3
Report options
The report options provide the possibility to convert the results data into another
format. For part of the options, templates need to be created.
When calling up for the first time, no report options are yet active.
User Manual ATS400
Version 3.14.41 - 1
133
Test plan editing
Click on the Change button. The dialogue changes, which means that the report
selected can be edited.
Activate one or more of the IO, NIO or Error checkboxes so that the report is
created for the corresponding overall result.
User Manual ATS400
Version 3.14.41 - 1
134
Test plan editing
Select the desired report type from the dropdown box.
For the Printer, Save as HTML and Save as PDF options, you need to select an
HTML template.
With the Save as XML option, you can select a style sheet.
With the Save as CSV option you need to select a CSV template.
With the Print on Zebra Lableprinter option, you need to select a ZPL file.
With the Printer and Print on Zebra Lableprinter options, you can additionally
select a printer. If you do not select a printer, the current standard printer is used to
print.
User Manual ATS400
Version 3.14.41 - 1
135
Test plan editing
When clicking on the Template or Printer fields, the corresponding standard dialogue of
Windows opens.
With the Ok button, you can assume the data from the report selected. With the
Cancel button, the changes are dismissed.
With the Save as HTML, Save as PDF, Save as XML und Save as CSV options a new
file is created. The place of saving and the file name are guided by the settings in
Settings -> File storage -> Result.
User Manual ATS400
Version 3.14.41 - 1
136
Test plan editing
3.4.4
Info
Here it will displayed when and on which workstation and which user the test plan was
created or changed. If there was no workstation name configured rsp. the user
administration was not active the according fields are empty.
User Manual ATS400
Version 3.14.41 - 1
137
Test plan editing
3.4.5
Options
This option will not be used any more. This option has expanded and is now part of
the Start conditions.
User Manual ATS400
Version 3.14.41 - 1
138
Inspector
4
Inspector
This part of the manual is aimed for those persons using the program for testing.
This part described the general procedures for using. Regarding to the different
situations this part cannot describe the concrete situation at a test station.
4.1
Test individual
Open the dialog choosing Test individual.
There is a button for each test type. The buttons for the available test types on your
ATS400 are operational.
The window for each test type is the same. In the following this is described with the
protective earth test as an example.
User Manual ATS400
Version 3.14.41 - 1
139
Inspector
4.1.1
Protective earth test
You will do a protective earth test in this window.
Before the first test no values will be displayed. During and after the test the values
will be displayed.
A
A
A
A
white background means that no test has been done.
yellow background means that a test is currently executing.
green background means that the last test was evaluated as passed.
red background means that the last test was evaluated as failed.
Button
Action
Menu
This button is operational when no test is
executed.
The main menu will be displayed.
Edit
This button is operational when no test is
executed.
The configuration dialog will be displayed.
Back
The window will be closed. During a test
the button changes to Cancel.
User Manual ATS400
Version 3.14.41 - 1
140
Inspector
4.2
Button
Action
Cancel
The currently running test will be aborted.
The test will be evaluated as failed. The
button changes to Back.
Test plan
Open the dialog choosing Test plan.
Button
Action
Menu
The main menu will be displayed.
Select manual
The window for manual test plan selection
will be opened.
Select ID
The window for automatic test plan
selection will be opened. Using this
selection the test plan will be closed after
the test of one unit under test.
Test batch
The window for automatic test plan
selection will be opened. Using this
User Manual ATS400
Version 3.14.41 - 1
141
Inspector
Button
Action
selection the test plan will be closed by
the tester.
This button is not operational when the
workstation is setup to use ETLInterface or File Plan.ID for
automatic test plan selection.
4.2.1
Create / Edit
The window for test plan administering
will be opened.
Dummytest
This button is operational when a dummy
test plan is present. A dummy test will be
done.
Main menu
The main menu will be displayed.
Manual test plan selection
Open the dialog choosing Test plan -> Select manual.
On the left side the list of the existing test plans are displayed.
In the midth upper part the test steps in the selected test plan are displayed. Is no
User Manual ATS400
Version 3.14.41 - 1
142
Inspector
test plan selected the list is empty.
In the midth lower part the data for the test step is displayed. Is no test plan or no
test step selected the list is empty.
4.2.2
Button
Action
Menu
The main menu will be displayed.
Test
The window Test plan will be opened.
Plan information
The window for Plan options will be
opened.
In this mode you cannot do any
changes.
Back
The window will be closed.
Automatic test plan selection
Open the dialog choosing Test plan -> Select ID or Test plan -> Test batch.
The number of the displayed fields depends on how the automatic test plan selection
is configured. In this example the maximum number of fields is displayed and is
acccording to the example Article number and serial number with additionally activated
User Manual ATS400
Version 3.14.41 - 1
143
Inspector
checkbox for the article description.
4.3
Button
Action
Menu
The main menu will be displayed.
Back
The window will be closed.
Safety cabinet
The safety cabinets are built this way that they are locked when they are not supplied
by the ATS400. After powering on the ATS400 they are unlocked and can be opened.
Depending how the ATS400 is setup in the administration ETL DataView 3 behaves
different together with the safety cabinet.
The setting Locked during plan prevents an influence during executing a test plan.
The safety cabinet can be opened after the test plan has completed.
The setting Unlock on pass also contains a process control. In the case a test will
be evaluated as failed the safety cabinet will be unlocked after a second action for
unlocking. Dependend from the configuration of the saftey cabinet this can be done
with the button Cancel and always with the button Unlock in ETL DataView 3.
User Manual ATS400
Version 3.14.41 - 1
144
Inspector
When the safety cabinet is unlocked the message Open safety cabinet will be
displayed until the safety cabinet has been opened.
User Manual ATS400
Version 3.14.41 - 1
145
Report creation
5
Report creation
This part of the manual is aimed at the persons who create and edit the report
templates.
It contains information that is necessary to create report templates that are required
for the individual report options.
5.1
Creating templates
For the use of the Printer, Save as HTML and Save as PDF report options, you need
to create an HTML template.
When using the Save as XML report option, you can create a style sheet.
To use the Save As CSV report option, you need to create a CSV template.
To use the Print on Zebra Lableprinter option, you need to create a ZPL file as a
template.
All templates have in common that the data can be accessed via key words.
5.1.1
Key words
You can access the data of the results files via key words. The key words always
consist of prefix TAG_ and the postfix _TAG.They are not displayed in the following
tables. Upper and lower case is considered for the key words. Assume the key words
in the way as they are written in the following tables.
Key words that apply for the entire test plan have the form TAG_<key word>_TAG.
Key words that apply for a test view have the form TAG_<step>_<key word>_TAG. In
doing so, it is defined in <step> what test step is accessed. If <step> has the value
## , every test step of the test plan is accessed. In this case, the key word must
exist in a cell of a table. If <step> has the value #n, while n is a number counted from
1, precisely this step is accessed. In this case, the key word can also be used outside
a table.
Key words that refer to the multiple test data of a test step have the form
TAG_<step>_Multitest_<Multitest>_<key word>_TAG. In doing so, it is defined in
<Multitest> what multiple test is accessed. If <Multitest> has the value ## , every
multiple test is accessed. In this case, the key word must exist in a cell of a table. If
<Multitest> has the value #n, while n is a number counted from 1, precisely this
multiple test is accessed.
5.1.1.1 Key words of the results data
This section describes all key words that apply for the total test plan and are
addressed with the form TAG_<key word>_TAG .
Key words that are part of every results file:
Key word
Explanation
DataView_Version
Version of ETL DataView 3 with which this file
User Manual ATS400
Version 3.14.41 - 1
146
Report creation
Key word
Explanation
was created.
PlanName
Name of the test plan, is filled with the file
name when being created.
PlanPath
Relative path to the application where the test
plan was saved.
PlanDescription
Description of the test plan. This value can be
entered by the user in Settings -> Text.
PlanCreatedByUser
User who created the test plan first. If user
administration is not active, the field is empty.
PlanCreatedByWorkstation
Test station where the test plan was created.
The name of the test station can be stated in
Settings -> Workstation -> Base settings.
PlanCreatedOnDate
Date of creating the test plan. The date is in
the format in accordance with the country
settings valid at this moment in time.
PlanEditedByUser
User who modified the test plan last. If user
administration is not active, the field is empty.
PlanEditedByWorkstation
Test station where the test plan was modified
last. The name of the test station can be
stated in Settings -> Workstation ->
Base settings.
PlanEditedOnDate
Date of modifying the test plan. The date is in
the format in accordance with the country
settings valid at this moment in time.
PlanIdentificationEnabled The <ResultData>\<Identification> block
exists.
PlanBatchEnabled
Intended for future purposes.
PlanTestSteps
Number of test steps in the test plan.
PlanSelectMode
Selection method for plan selection via
identification
PlanSelectPatternID
Template to identify the PlanID
PlanSelectPatternTyp
Template to identify the type if it is entered
with the ID.
PlanSelectPatternSerie
Template to identify the serial number if it is
entered with the ID.
PlanSelectPatternMask
Bit template:
1: Combined field (2+4)
2: Entry type
4: Entry series
8: Entry articelnumber
DATE
Date of the test in the local date format.
User Manual ATS400
Version 3.14.41 - 1
147
Report creation
Key word
Explanation
TIME
Time of the test in the local time format.
TESTER
User logged in.
PLAN_NAME
Name of the test plan used.
WORKSTATION
Name of the test station.
USEDID
ID used for the automatic test plan selection.
RESULT
Total result of the plan.
Passed -> The test item has passed the test.
Failed -> the test item has not passed the
test or the test was cancelled.
FileSavedByUser
User who saved the test plan or the result file.
FileSavedByWorkstation
Test station where the test plan or the result
file was saved. The name of the test station
can be stated in Settings -> Workstation ->
Base settings.
FileSavedOnDate
Date of saving the test plan or the result file.
The date is in the format in accordance with
the country settings valid at this moment in
time.
Count_Tests
Number of tests that were carried out since
starting the test plan.
Count_IO
Number of IO results of the test since starting
the test plan.
Count_NIO
Number of NIO results of the test since starting
the test plan.
Count_ERROR
Number of errors of the test since starting the
test plan.
PlanCycleTime
Duration for carrying out the test. The value is
always 0.
PlanStandbyTime
Duration between the end of the prior test and
the start of the current test.
IDs
Number of IDs.
ID_n
Identification for the test plan. The tags are
numbered from 0 to the number of IDs - 1, i.e.
have the values ID_0, ID_1, etc.
Key words that are part of the Batch run test step:
Key word
Explanation
Benutzer
User field, can be adopted from the
login.
Pruefplatz
Test station field, can be adopted from
User Manual ATS400
Version 3.14.41 - 1
148
Report creation
Key word
Explanation
the workstation settings.
Typ
Type, can already be entered during
the automatic test plan selection.
Auftragsnummer
Order number
Seriennummer
Serial number, can already be entered
during the automatic test plan
selection. If this value is numerical, it
can be automatically increased for IO or
NIO.
Key words that are entered via the automatic test plan selection:
Key word
Explanation
TYPE
Type of the test item, is only filled in if
the combibox is active.
USEDID
ID used to select the test plan, is only
filled in when the ID-Pattern field is
active.
SERIALNUMBER
Serial number of the test item, is only
filled in if the Serial-Pattern field is
active.
ARTICLE
Article name, is only filled in if the
Article-Pattern field is active.
5.1.1.2 Key words of the test step parameters
The following key words are common for all test steps. These key words are addressed
with the form TAG_<step>_<key word>_TAG.
Key words for the parameters:
Key word
Explanation
UNIT
Unit of the measurement value
UNIT2
Unit of the test size
MIN
Minimum value of the measurement
value.
MAX
Maximum value of the measurement
value.
StartCondition
Start conditions of the test step. The
start conditions are saved in a bitcoded manner and can only be analysed
together with the StartConditionMask
field.
User Manual ATS400
Version 3.14.41 - 1
149
Report creation
Key word
Explanation
StartConditionMask
Start conditions of the test step. The
start conditions are saved in a bitcoded manner and can only be analysed
together with the StartCondition
field.
t_delay
Start delay between fulfilling the start
condition and the start of the test.
StateChangeBits
Always 0, never used.
StartStateChange
Indicates whether the switching
condition needs to be maintained when
testing the start conditions.
0 = no waiting for switch condition
1 = Wait for switching condition
StartStateJump
Indicates whether the Jump button is
displayed.
Repeating
Indicates how often the test step is
carried out.
StartButton
Indicates whether the Start button is
displayed.
PassButton
Indicates whether the Pass button is
displayed.
StartandJump
Indicates whether the Start and Jump
buttons are displayed.
The Batch run, Data Input, Dummy load, External program, FCT-Current, High
Voltage AC, High voltage DC, Insulation, Leakage current, Matrix, Light
Filament current, Protective earth, PT100, Resistance and User-Interface
test types use the following parameters in addition:
Key word
Explanation
Polung
Contacting setting of an external relay
matrix.
PolungCAN_00 bis PolungCAN_15
Setting of the relay matrix in
accordance with the choice in the
program. The display is bit coded.
Multitest_Enable
Multitest is active, if the value does not
equal 0.
Multitest_Auswertung
Method of analysing the multitest.
0 = worst measurement value.
Multitest_Endekriterium
Method of ending the multitest.
0 = number of measurements
User Manual ATS400
Version 3.14.41 - 1
150
Report creation
Key word
Explanation
1 = pass key
Multitest_Endekriterium_Anzahl
Number of multitest inspections.
The Lightcontrol, Data Input, External program, FCT-Current, High Voltage
AC, High voltage DC, Insulation, Leakage current, Matrix, Light Filament
current,Protective earth, PT100, Resistance and User-Interface test types use
the following parameters in addition:
Key word
Explanation
ErrorStartCondition
Condition for switching forward in the
event of an error.
ErrorStartConditionMask
Mask for the condition for switching
further in the event of an error.
ErrorStateChangeBits
Always 0, never used.
ErrorWSBDelay
Delay of switching further in the event
of an error.
ErrorWSBTimeValid
Delay time active.
5.1.1.2.1 Key words of the Protective earth test type
The Protective earth test type additionally uses the following key words:
Key word
Explanation
U
Idle voltage
I
Test current
R_max
Upper threshold value of the resistance.
t
Test time
f
Frequency of the voltage
EN60204
Indication whether the test is performed
in accordance with EN 60204.
Always 0.
DC_Enable
Indicates whether the test is carried
out with direct current voltage.
0: Alternating current
1: Direct current
User Manual ATS400
Version 3.14.41 - 1
151
Report creation
5.1.1.2.2 Key words of the High Voltage AC test type
The High voltage AC test type additionally uses the following key words:
Key word
Explanation
U
Test voltage
I_min
Lower threshold
I_max
Upper threshold
t
Test duration
Ramp
Indicates whether the ramp is active.
U_start
Start voltage
t_up
Increase time of the ramp. This
parameter is only valid if the ramp is
active.
t_down
Drop time of the ramp. This parameter is
only valid if the ramp is active.
f
Frequency of the voltage
Quelle
Selected current source.
This parameter is only used in the event
of a hot high voltage.
f_Source
Frequency of the source.
This parameter is only used in the event
of a hot high voltage.
U_Source
Voltage of the source.
This parameter is only used in the event
of a hot high voltage.
Management
Indicates how the supply of the test
item is to be carried out.
0: Power off after test
1: Keep power on after test
2: Only power off
3: Power off only on error
4: Only power on
Auswertung
Type of the analysis of the test.
0 = end the test time
1 = end with start signal
CreateLog
Indicates whether a log file will be
created.
0 = No log file will be created
1 = A log file be created
Timeinterval
Time interval between two samples
which will be written to the log file. The
value is in seconds.
This value will only be used in case the
value in CreateLog is 1.
User Manual ATS400
Version 3.14.41 - 1
152
Report creation
5.1.1.2.3 Key words of the High voltage DC test type
The High voltage DC test type additionally uses the following key words:
Key word
Explanation
U
Test voltage
I_min
Lower threshold
I_max
Upper threshold
t
Test duration
Ramp
Indicates whether the ramp is active.
U_start
Start voltage
t_up
Increase time of the ramp. This
parameter is only valid if the ramp is
active.
t_down
Drop time of the ramp. This parameter is
only valid if the ramp is active.
U_discharge
Discharge voltage
Quelle
Selected current source.
This parameter is only used in the event
of a hot high voltage.
f_Source
Frequency of the source.
This parameter is only used in the event
of a hot high voltage.
U_Source
Voltage of the source.
This parameter is only used in the event
of a hot high voltage.
Management
Indicates how the supply of the test
item is to be carried out.
0: Power off after test
1: Keep power on after test
2: Only power off
3: Power off only on error
4: Only power on
Auswertung
Type of the analysis of the test.
0 = end the test time
1 = end with start signal
CreateLog
Indicates whether a log file will be
created.
0 = No log file will be created
1 = A log file be created
Timeinterval
Time interval between two samples
which will be written to the log file. The
User Manual ATS400
Version 3.14.41 - 1
153
Report creation
Key word
Explanation
value is in seconds.
This value will only be used in case the
value in CreateLog is 1.
During a HVDC7 test the current will be
checked against the limit Imax also
during executing a ramp.
CheckCurrentInRamp
5.1.1.2.4 Key words of the Insulation test type
The Insulation test type additionally uses the following key words:
Key word
Explanation
U
Test voltage
R_min
Lower threshold of the insulation
resistance.
t
Test duration
Ramp
Indicates whether the ramp is active.
U_start
Start voltage
t_up
Increase time of the ramp. This
parameter is only valid if the ramp is
active.
t_down
Drop time of the ramp. This parameter is
only valid if the ramp is active.
U_discharge
Discharge voltage
Quelle
Selected current source.
This parameter is only used in the event
of a hot high voltage.
f_Source
Frequency of the source.
This parameter is only used in the event
of a hot high voltage.
U_Source
Voltage of the source.
This parameter is only used in the event
of a hot high voltage.
Management
Indicates how the supply of the test
item is to be carried out.
0: Power off after test
1: Keep power on after test
2: Only power off
3: Power off only on error
4: Only power on
Auswertung
Type of the analysis of the test.
0 = end the test time
1 = end with start signal
User Manual ATS400
Version 3.14.41 - 1
154
Report creation
Key word
Explanation
CreateLog
Indicates whether a log file will be
created.
0 = No log file will be created
1 = A log file be created
Timeinterval
Time interval between two samples
which will be written to the log file. The
value is in seconds.
This value will only be used in case the
value in CreateLog is 1.
5.1.1.2.5 Key words of the FCT-Current test type
The FCT-Current test type additionally uses the following key words:
Key word
Explanation
U_Source
Source of the test supply.
U
Voltage of the test item supply
I_min
Lower threshold value during the
analysis. Not valid if the analysis is set
to Pass/Fail. The unit and thresholds
depend on the channel.
I_max
Upper threshold value during the
analysis. Not valid if the analysis is set
to Pass/Fail. The unit and thresholds
depend on the channel.
t
Test time
f
Frequency of the voltage
t_start
Delay time for the start scenario when
starting the test until starting the
analysis. This value is not valid for all
start scenarios.
t_timeout
Timeout for the start of the analysis.
The value is not used for all start
scenarios.
Gradient
Gradient for the start of the analysis.
This value is not used for all start
scenarios.
Management
Indicates how the supply of the test
item is to be carried out.
0: Power off after test
1: Keep power on after test
2: Only power off
3: Power off only on error
4: Only power on
User Manual ATS400
Version 3.14.41 - 1
155
Report creation
Key word
Explanation
Scenario
Type of the start of the analysis
Auswertung
Type of the analysis
0 = measurement
1 = Pass/Fail button
Kanal
Measurement channel
0 = current
1 = analogue channel1
2 = analogue channel2
3 = analogue channel3
4 = analogue channel4
5 = voltage measurement
SourceIsDC
External source provides direct current
voltage
Graphic
Type of the graphics settings
0 = no graphics
1 = only display graphic
2 = display and save graphic
CreateLog
Indicates whether a log file will be
created.
0 = No log file will be created
1 = A log file be created
Timeinterval
Time interval between two samples
which will be written to the log file. The
value is in seconds.
This value will only be used in case the
value in CreateLog is 1.
UseAnalogConversion
This check box inidcates whether the
analog input will be converted to
customer specific units.
0 = No conversion
1 = Do conversion
ConversionOffset
Value of the physical value when the
voltage has valaue 0.
This field is only valid when
UseAnalogConversion has the value 1.
ConversionGradient
Slope for the conversion of the voltage
into the physical value.
This field is only valid when
UseAnalogConversion has the value 1.
PhysicalUnit
Physical unit of the customer specific
conversion.
This field is only valid when
UseAnalogConversion has the value 1.
User Manual ATS400
Version 3.14.41 - 1
156
Report creation
5.1.1.2.6 Key words of the Leakage current test type
The Leakage current test type additionally uses the following key words:
Key word
Explanation
Messmodell
Measurement model used.
Messmethode
Measurement method used.
0: Protective conductor current
1: Housing discharge current
Management
Indicates how the supply of the test
item is to be carried out.
0: Power off after test
1: Keep power on after test
2: Only power off
3: Power off only on error
4: Only power on
U_Source
Source of the test supply.
U
Voltage of the test item supply
I_max
Upper threshold for the discharge
current.
t
Test time
f
Frequency of the voltage
t_start
Will not be used.
Auswertung
Measurement channel used for the test:
0: I AC rms
1: I DC
2: I min
3: I max
4: I rms
Polaritaet
Polarity used of the supply of the test
item.
For single-phase test item:
0: Automotive
1: L1-> PE
2: L2-> PE
3: Mode B
4: Automatic with first error
5: L1 -> PE with first error
6: L2 -> PE with first error
With three-phase test item:
0: Clockwise rotation
1: Counterclockwise rotation
SelftestMode
Always 0
I_min
Lower threshold for the discharge
User Manual ATS400
Version 3.14.41 - 1
157
Report creation
Key word
Explanation
current.
Phase
Number of phases of the test item.
CreateLog
Indicates whether a log file will be
created.
0 = No log file will be created
1 = A log file be created
Timeinterval
Time interval between two samples
which will be written to the log file. The
value is in seconds.
This value will only be used in case the
value in CreateLog is 1.
5.1.1.2.7 Key words of the Sight check test type
The Sight check test type additionally uses the following key words:
Key word
Explanation
Abfrage
Mode for termination.
5.1.1.2.8 Key words of the Data input test type
The Data input test type additionally uses the following key words:
Key word
Explanation
EingabeMasken
Bit samples containing screen fields
instead of requirements.
5.1.1.2.9 Key words of the Batch run test type
The Batch run test type additionally uses the following key words:
Key word
Explanation
SettingFlags
Settings that indicate that certain fields
are configured at other locations. This
field is bit coded.
EingabeMasken
Bit samples containing screen fields
instead of requirements.
5.1.1.2.10 Key words of the User-Interface test type
The User-Interface test type additionally uses the following key words:
Key word
Explanation
In
Entry bits
User Manual ATS400
Version 3.14.41 - 1
158
Report creation
Key word
Explanation
InMask
Mask for entry bits.
Out
Output bits
OutMask
Mask for output bits.
Duration
Duration of the output pulse.
Timeout
Timeout when waiting for the status of
the entry bits.
This parameter is only valid if the
TimeoutEnable parameter is set.
TimeoutEnable
States whether timeout is used.
0: Timeout is not used
1: Timeout is used
NumInterface
Number of the user IO interface used.
0: User-IO Interface of the internal IOCPU
1: User-IO Interface of the external IOCPU
5.1.1.2.11 Key words of the Resistance test type
The Resistance test type additionally uses the following key words:
Key word
Explanation
t
Test time
R_min
Lower threshold value of the resistance.
R_max
Upper threshold value of the resistance.
R_offset
Resistance of the measurement
structure.
t_timeout
Maximum time after starting until the
first measurement value is recorded.
5.1.1.2.12 Key words of the Continuity test type
The Continuity test type additionally uses the following key words:
Key word
Explanation
TestVoltage
Maximum test voltage used for the
measurement.
TestTime
Time after that the measurement will be
evaluated.
MaxTestCurrent
Maximum current during the test.
Limit
Limit for the evaluation.
User Manual ATS400
Version 3.14.41 - 1
159
Report creation
Interpretation
Evaluation of the measurement:
1: Pass on continuity
2: Pass on discontinuity
TypeOfSource
Type of the used source:
0: Alternating current
1: direct current
5.1.1.2.13 Key words of the PT100 test type
The PT100 test type additionally uses the following key words:
Key word
Explanation
T_min
Lower threshold for the temperature.
T_max
Upper threshold for the temperature.
R_offset
Resistance of the measurement
structure.
R0
Basic resistance of the measurement
sensor.
5.1.1.2.14 Key words of the Lightcontrol test type
The Lightcontrol test type additionally uses the following key words:
Key word
Explanation
Leuchte_ART
Type of the light
Leuchte_BEFEHL
Command to the light
Leuchte_DIM
Dim value
Leuchte_DALIC
DALIC
Leuchte_DALIV
DALIV
Leuchte_DIMT
DIMT
5.1.1.2.15 Key words of the Dummy load test type
The Dummy load test type additionally uses the following key words:
Key word
Explanation
Management
Indicates how the supply of the test
item is to be carried out.
0: Power off after test
1: Keep power on after test
2: Only power off
3: Power off only on error
4: Only power on
U_Source
Source of the test supply.
User Manual ATS400
Version 3.14.41 - 1
160
Report creation
Key word
Explanation
U
Voltage of the test item supply
f
Frequency of the voltage
Channels
Number of channels
RGas
Gas resistance
RCoil
Coil resistance
Filament_enable
Active flame
Filament_t
Active flame
Filament_delay
Flame delay
Filament_I
Current of the flame
Ignition_enable
Ignition available
Ignition_t
Ignition time
Ignition_delay
Ignition delay
Ignition_U
Ignition voltage
Fct_enable
Function available
Fct_t
Duration of the function
Fct_delay
Delay of the analysis
Fct_Imin
Lower threshold value of the current
Fct_Imax
Upper threshold value of the current
t_timeout
Always 0
Filament_Imax
Max. current of the flame
5.1.1.2.16 Key words of the Light Filament current test type
The Light Filament current test type additionally uses the following key words:
Key word
Explanation
Management
Indicates how to proceed after the test
with supplying the test item.
0: Deactivate
1: Activate
Filament_enable
Active flame
Filament_t
Active flame
Filament_delay
Flame delay
Filament_I
Current of the flame
Filament_Imax
Max. current of the flame
User Manual ATS400
Version 3.14.41 - 1
161
Report creation
5.1.1.2.17 Key words of the External programm test type
The External program test type additionally uses the following key words:
Key word
Explanation
SettingFlags
Settings
5.1.1.3 Key words of the test step measurement values
Every test step has the following fields:
Key word
Explanation
COUNTIO
Number of times this step was
successfully carried out.
COUNTNIO
Number of times not carried out
successfully.
COUNTERR
Number of cancelled tests.
CountTests
Total number of tests carried out.
StepCycleTime
Duration of the test.
Result
Result of the test step:
UnTested -> This test step was not
carried out during this test.
Active -> Test step is active, cannot
occur in the file.
IO -> This test step was rated as IO.
NIO -> This test step was rated as NIO.
ERROR -> This test step was cancelled
with an error.
Jumped -> This test step was skipped.
dblResultValue1
Numeric measurement value in SI unit.
dblResultValue2
Numeric value of the test size in SI
units.
strResultValue1
Formatted measurement value with a
unit.
strResultValue2
Formatted test value with a unit.
strResultTestTime
Formatted duration of the test in
seconds.
ERROR
Indication of the error when cancelling
the measurement.
None -> No error
Timeout_StartMeasurement -> Time
error when starting the measurement
Timeout_SetPassFail -> not used
Timeout_MeasureTimeOvershoot ->
measurement time exceeded
User Manual ATS400
Version 3.14.41 - 1
162
Report creation
Key word
Explanation
Invalid_TestState -> invalid test
status
Invalid_TestResult -> invalid test
result
Invalid_PVSteuerLT -> invalid control
word
Invalid_PVStatusPruefung -> invalid
status of the test
Invalid_TestParameter -> invalid test
parameter
Cancel -> cancelled
ERRORinfo
Expanded error number.
TestingUser
User loged in during the test step.
SightCheckInputText
User entry during the visual inspection.
5.1.1.4 Key words of the multiple test values test step
Every multiple test has the following fields:
Key word
Explanation
dblTestResult
Result value of the multiple test in the
SI unit. This field contains only a figure
value.
strTestResult
Result value as text.
TestPoint
User input for the multitest.
MultitestUser
User loged in during the multitest.
5.1.1.5 Key words of the test step advices
Every test step has the following fields:
Key word
Explanation
TextCount
Always 3
Text_0
Text to be output with indication
beforehand.
TextEnable_0
Activation of the output with indication
beforehand.
TextSize_0
Font size with indication beforehand.
Picture_0
File name of the image with indication
beforehand.
If the file can be reached via a relative
path from the folder of the plan files,
User Manual ATS400
Version 3.14.41 - 1
163
Report creation
Key word
Explanation
the relative path is entered, otherwise
the absolute path is entered.
Outputtype_0
Image or text display with indication
beforehand.
Values used:
Text displays the text only.
Bild displays the image only.
TextBild displays the text and the
image.
TextWithInputField displays the text
and an input field.
OutputSize_0
Small or large display with indication
beforehand
Values used:
TextKlein displays the small window for
the text.
TextGroß displays the large window for
the text.
BildKlein displays the small window
with the image.
BildGroß displays the large window
with the image.
TextMitEingabeFeldKlein displays the
small window for the text and the input
field.
TextMitEingabeFeldGroß displays the
large window for the text and the input
field.
Nichts displays no field.
Text_1
Text to be output with indication during.
TextEnable_1
Activation of the output with indication
during.
TextSize_1
Font size with indication during.
Picture_1
File name of the image with indication
during.
If the file can be reached via a relative
path from the folder of the plan files,
the relative path is entered, otherwise
the absolute path is entered.
Outputtype_1
Image or text display with indication
during
Values used:
Text displays the text only.
Bild displays the image only.
TextBild displays the text and the
image.
User Manual ATS400
Version 3.14.41 - 1
164
Report creation
Key word
Explanation
TextWithInputField displays the text
and an input field.
OutputSize_1
Small or large display with indication
during.
Values used:
TextKlein displays the small window for
the text.
TextGroß displays the large window for
the text.
BildKlein displays the small window
with the image.
BildGroß displays the large window
with the image.
TextMitEingabeFeldKlein displays the
small window for the text and the input
field.
TextMitEingabeFeldGroß displays the
large window for the text and the input
field.
Nichts displays no field.
Text_2
Text to be issued in the event of error.
TextEnable_2
Activation of the output in the event of
an error.
TextSize_2
Font size in the event of an error.
Picture_2
File name of the image in the event of
an error.
If the file can be reached via a relative
path from the folder of the plan files,
the relative path is entered, otherwise
the absolute path is entered.
Outputtype_2
Image or text display in the event of an
error.
Values used:
Text displays the text only.
Bild displays the image only.
TextBild displays the text and the
image.
TextWithInputField displays the text
and an input field.
OutputSize_2
Small or large display in the event of an
error.
Values used:
TextKlein displays the small window for
the text.
TextGroß displays the large window for
the text.
User Manual ATS400
Version 3.14.41 - 1
165
Report creation
Key word
Explanation
BildKlein displays the small window
with the image.
BildGroß displays the large window
with the image.
TextMitEingabeFeldKlein displays the
small window for the text and the input
field.
TextMitEingabeFeldGroß displays the
large window for the text and the input
field.
Nichts displays no field.
5.1.1.6 Key words of the test step process control
Every test step has the following fields:
Key word
Explanation
Test
Non-localised name of the test step.
TestName
Localised name of the test step.
TestNameAbbr
Short name of the test step.
Execute
Indicates whether the test step is to
be carried out. The value is always
true. The value is reserved for future
purposes.
InvertResult
The result valuation IO and NIO is
replaced. This field is only used for
dummy tests.
View
Indicates whether the test step is to
be displayed. The value is reserved for
future purposes.
Jump_IO_Mode
Indicates how the jump is to be carried
out in the event of an IO event of the
test step.
0 -> Next step
1 -> Go to the end
2 -> Go to a jump destination
Jump_IO_Jump
Indicates the jump destination in the
event of an IO result of the test step.
Jump_IO_Repeat
Indicates how often the test step is to
be repeated in the event of an IO
result of the test step. This value is
always 0.
Jump_NIO_Mode
Indicates how the jump is to be carried
out in the event of an NIO event of
the test step.
User Manual ATS400
Version 3.14.41 - 1
166
Report creation
Key word
Explanation
0 -> Next step
1 -> Go to the end
2 -> Go to a jump destination
5.1.2
Jump_NIO_Jump
Indicates the jump destination in the
event of an NIO result of the test
step.
Jump_NIO_Repeat
Indicates how often the test step is to
be repeated in the event of an NIO
result of the test step.
Jump_Error_Mode
Indicates how the jump is to be carried
out in the event of an error of the test
step.
0 -> Next step
1 -> Go to the end
2 -> Go to a jump destination
This value is always 1.
Jump_Error_Jump
Indicates the jump destination in the
event of an error of the test step.
Jump_Error_Repeat
Indicates how often the test step is to
be repeated in the event of an error of
the test step. This value is always 0.
Jump_Cancel_Mode
Indicates how the jump is to be carried
out in the event of a cancellation of
the test step.
0 -> Next step
1 -> Go to the end
2 -> Go to a jump destination
Jump_Cancel_Jump
Indicates the jump destination in the
event of a cancellation of the test
step.
Jump_Cancel_Repeat
Indicates how often the test step is to
be repeated in the event of a
cancellation of the test step. This
value is always 0.
TestStep
Sequential number of the step.
HTML templates
HTML templates can be created and edited with any program that is able to save in
the file type. Depending on the program, you must observe corresponding framework
conditions.
Problematic in this context is that some programmes break down the key words into
parts when editing them and insert formatting instructions. In this case, the key word
is no longer identified.
User Manual ATS400
Version 3.14.41 - 1
167
Report creation
Use the HTML template; for the Printer or Save as PDF report option, the settings
of the local Internet Explorer and of the printer are also required. The header and
footer can be configured in the Internet Explorer in the Page Setup dialogue. The
settings for the side orientation and paper size are made in the printer. The side edges
must be set in the registration database with the RegEdit program from Microsoft
Windows.
Creation with Microsoft Word 2010
Creation with Open Office Writer
5.1.2.1 Creation with Microsoft Word 2012
Create a new empty document or use a template already created by you.
Save this document with Save as as a Website, filtered (*.htm;*.html) oder
website (*.htm;*.html). Note that you must edit the extension suggested from htm
to html after setting all options.
User Manual ATS400
Version 3.14.41 - 1
168
Report creation
Under Tools open the dialogue Web options....
In the Browser tab, deactivate the Save new websites as websites in a file
option.
User Manual ATS400
Version 3.14.41 - 1
169
Report creation
In the Files tab, activate the Save help files in a folder option.
In the Coding tab, select from the Save document as selection the Unicode (UTF8)
entry.
If you have selected Website, filtered (*.htm;*.html) you are given the
User Manual ATS400
Version 3.14.41 - 1
170
Report creation
following warning. Click on the Yes button.
Create your report.
If you save the report, you are given a file and a folder. The help files can be found in
the folder. If you need to copy or move the template, you always also need to copy or
move the folder with it.
User Manual ATS400
Version 3.14.41 - 1
171
Report creation
5.1.3
CSV templates
CSV is a text-based table format. You can edit it with every text editor or with most
table calculations. If you do not use Microsoft Excel, it must be ensured that ISO8859-15 is used as the character coding. If you create CSV files with the ATS400 X4
or ATS400 X5 device variants, it must be a 7-bit ASCII, which means that the
illustration is compatible. In this case, no umlauts may be used.
Creation with Microsoft Excel 2010
Creation with Open Office Calc
User Manual ATS400
Version 3.14.41 - 1
172
Report creation
5.1.3.1 Creation with Microsoft Excel 2010
Create a new empty document or use a template already created by you.
Delete all worksheets except for the first one.
Save this document using Save as as a CSV (separator-separated) (*.csv).
User Manual ATS400
Version 3.14.41 - 1
173
Report creation
Create your report.
When saving, information is displayed to you. Click on the Ok button to save.
User Manual ATS400
Version 3.14.41 - 1
174
Report creation
User Manual ATS400
Version 3.14.41 - 1
175
Reference
6
Reference
This area describes all files used by ETL DataView 3 that are managed or created
within ETL DataView 3.
Results files
Plan files
Printserverkonfiguration
Matrixkonfiguration
6.1
Patterns
At various places in the configuration patterns can be used. This patterns are used
similar to regular expressions.
A pattern consists of characters which have a special meaning. The following patterns
are defined:
CDescription
h
a
r
a
c
t
e
r
? one character, e. g. A
*a string, e. g. Text
Aa letter (a-z, A-Z)
0a cipher (0-9)
Wan alphanumerical letter (a-z, A-Z, 0-9, _)
\ exact this character, e. g. \W at tis place a W is expected
( Extract the enclosed characters. Is used in the automatic test plan selection. It is
) not allowed to nest parantheses into each other.
Examples:
PDescription
a
t
t
e
r
n
0 It is expected to enter 6 ciphers, e. g. 202201
0
User Manual ATS400
Version 3.14.41 - 1
176
Reference
PDescription
a
t
t
e
r
n
0
0
0
0
0 It is expected to enter 4 ciphers, a space and 4 ciphers, e. g. 0112 1000
0
0
0
\
0
0
0
0
0 It is expected to enter 6 ciphers, a space, 4 ciphers, a space and 4 ciphers, e. g.
0 202201 0112 1000
0
0
0
0
\
0
0
0
0
\
0
0
0
0
AIt is expected to enter 3 letters and two ciphers , e. g. Typ25
A
A
0
0
6.2
Protective earth test
The PE-measurement is realized int 4-wire technic. This means that the measurement
cables have different wires for the current (source) and the voltage measurement
(sense). These are connected together directly at the measurement point. Therefore
the resistance of the measurement cable does not influence the result. This is true
only for the effective resistance of the measurement cable but not for the inductivity
and the resulting apperent resistance. Especially with small test resistance and
User Manual ATS400
Version 3.14.41 - 1
177
Reference
unfavourable installation could this lead to measure an increased resistance.
The resistance of the unit under test is normally a effective resistance. Errors resulting
from the inductivity of the measurement cables will decrease with higer resistance of
the unit under test. An apperent resistance of 10 mΩ for the measurement cable and
10 mΩ for the unit under test results in a measurement of 14 mΩ. With a unit under
test of 50 mΩ the result will be 51 mΩ and with 100 mΩ it will be 100,5 mΩ.
In the case the inductivity of the measurement cable is disturbant the inductivity
should be kept small. To achive this keep the aerea between the measurement cables
small.
Additonally you must take care of a sufficent contact pressure to keep the contact
resistance small.
6.2.1
Leading of the cable
Some examples for leading of the wires.
User Manual ATS400
Version 3.14.41 - 1
178
Reference
Unfavourable leading of the measurement cable. A large aerea is spanned between the
both measurement cables and therefore the apperant resistance will increase.
Also unfavourable leading of the measurement cables. The aerea between the
measurement cables is smaller but the apperant resistance will increase due to the
loop.
Favourable leading of the measurement wires. The aerea between the measurement
cables is small keeping the apperant resistane small.
User Manual ATS400
Version 3.14.41 - 1
179
Reference
6.3
High voltage test
For the ATS400 three groups of high voltage test modules are offered. These will be
named in the following with there short names. The short name HVDC will be used if
the text is valid for the HVDC7 and HVDC3 module.
Short name
Module
HVAC
Test with alternate current.
HVDC7
Test with direct current. These modules have a testing
voltage of 5 KV or more.
HVDC3
Test with direct current. These modules have a testing
voltage up to 3600 Volt and are current limited.
Informations for configuration of the high voltage test you will find for HVAC-Test, the
HVDC7-Test and the HVDC3-Test in the part test plan editing.
6.3.1
Evaluation of the measurement
6.3.1.1 Error messages for high voltage AC
Value
Description
0
No error
16
Upper current limit exceeded.
17
Break through deteced with peak current.
18
Testing voltage not reached.
19
Lower current limit not reached.
20
Break through in ramp. Limit for spark detection exceeded.
21
Upper current during ramp exceeded.
22
Break through during static phase. Limit for spark detection
exceeded.
23
Upper current limit during static phase exceeded.
24
Break through in ramp. Gradient for spark detection
exceeded.
25
Break through during static phase. Gradient for spark
detection exceeded.
6.3.1.2 Error messages for high voltage DC
Value
Description
0
No error
32
Upper current limit exceeded.
33
Break through deteced with peak current.
User Manual ATS400
Version 3.14.41 - 1
180
Reference
Value
Description
34
Lower current limit not reached.
35
Break through.
36
Testing voltage not reached.
37
Break through in ramp. Limit for spark detection exceeded.
38
Upper current during ramp exceeded.
39
Break through during static phase. Limit for spark detection
exceeded.
40
Upper current limit during static phase exceeded.
41
Break through in ramp. Gradient for spark detection
exceeded.
42
Break through during static phase. Gradient for spark
detection exceeded.
6.3.1.3 Test for required voltage
After powering on resp. at the end of the ramp when the current voltage does not
change any more it is checked that the current voltage has reached more than 95% of
the voltage in parameter Test voltage.
6.3.1.4 Current error at upper limit
This error will be detected when the measured current exceeds the current in
parameter Maximum Current.
This evaluation will be done in the following cases:
6.4
Phase
HVAC
HVDC
Rising ramp
Yes
No
Static
Yes
Yes
Falling ramp
Yes
No
Results files
The results files have the extension .result. The place of saving and the file name
result from the details in Settings -> File storage -> Result. This file has the
format of an XML file with UTF-8 coding with BOM.
<ResultData> is the enclosing tag.
<ResultData>/<Header> contains the header data.
<ResultData>/<Identification> contains the identifications.
<ResultData>/<TestSteps> contains the list of test steps.
<ResultData>/<TestSteps>/<TestStep Index="n"> contains a test step. The
number in Index is incremented for every test step.
<ResultData>/<Result> contains the overall result as well as the data of the
User Manual ATS400
Version 3.14.41 - 1
181
Reference
automatic test plan selection.
<ResultData>/PlanOptionen> contains the options of the test plan.
<ResultData>/PlanOptionen>/<ReportOptionen> contains the list of reports to be
created.
<ResultData>/PlanOptionen>/<ReportOptionen>/<ReportOption> contains the
report settings for a report.
<ResultData>/<Validation> contains validation data.
6.4.1
Header
The data in this block can be found under <ResultData>/<Header>.
Tag
Explanation
DataView_Version
Version of ETL DataView 3 with which this file was
created.
TestPlan_Version
Version of the format of the file.
PlanName
Name of the test plan, is filled with the file name
when being created.
PlanPath
Relative path to the application where the test plan
was saved.
PlanDescription
Description of the test plan. This value can be
entered by the user in Settings -> Text.
PlanCreatedByUser
User who created the test plan first. If user
administration is not active, the field is empty.
PlanCreatedByWorkstation
Test station where the test plan was created. The
name of the test station can be stated in Settings > Workstation -> Base settings.
PlanCreatedOnDate
Date of creating the test plan. The date is in the
format in accordance with the country settings valid
at this moment in time.
PlanEditedByUser
User who modified the test plan last. If user
administration is not active, the field is empty.
PlanEditedByWorkstation
Test station where the test plan was modified last.
The name of the test station can be stated in
Settings -> Workstation -> Base settings.
PlanEditedOnDate
Date of modifying the test plan. The date is in the
format in accordance with the country settings valid
at this moment in time.
FileSavedByUser
User who saved the test plan or the result file.
FileSavedByWorkstation
Test station where the test plan or the result file was
saved. The name of the test station can be stated
in Settings -> Workstation -> Base settings.
FileSavedOnDate
Date of saving the test plan or the result file. The
date is in the format in accordance with the country
User Manual ATS400
Version 3.14.41 - 1
182
Reference
Tag
Explanation
settings valid at this moment in time.
PlanIdentificationEnabled The <ResultData>\<Identification> block exists.
6.4.2
PlanBatchEnabled
Intended for future purposes.
PlanTestSteps
Number of test steps in the test plan.
Identification
The data in this block can be found under <ResultData>/<Identification>.
6.4.3
Tag
Explanation
IDs
Number of IDs.
ID_n
Identification for the test plan. The tags are numbered
from 0 to the number of IDs - 1, i.e. have the values
ID_0, ID_1, etc.
Teststeps
The data in this block can be found under <ResultData>/<TestSteps>.
This block contains a list of the individual test steps. Every test step is a block of its
own.
6.4.3.1 TestStep
The data in this block can be found under <ResultData>/<TestSteps>/<TestStep
Index="n">.
Attribute
Explanation
Index
Index of the test step, counting starts from 0
Tag
Explanation
Test
ID of the test type
TestName
Non-localised name of the test step.
Execute
Indicates whether the test step is to be carried out.
The value is always true. The value is reserved for
future purposes.
InvertResult
The result valuation IO and NIO is replaced. This field is
only used for dummy tests.
View
Indicates whether the test step is to be displayed. The
value is reserved for future purposes.
Parameter
Number of parameters of this test step. The number of
parameters depends on the test step.
User Manual ATS400
Version 3.14.41 - 1
183
Reference
Tag
Explanation
Parameter_n
Parameter of the test step. These parameters are
explained individually for every test type.
Jump
This fields always has the value Jump.
Jump_IO_Mode
Indicates how the jump is to be carried out in the event
of an IO event of the test step.
0 -> Next step
1 -> Go to the end
2 -> Go to a jump destination
Jump_IO_Jump
Indicates the jump destination in the event of an IO
result of the test step.
Jump_IO_Repeat
Indicates how often the test step is to be repeated in
the event of an IO result of the test step. This value is
always 0.
Jump_NIO_Mode
Indicates how the jump is to be carried out in the event
of an NIO event of the test step.
0 -> Next step
1 -> Go to the end
2 -> Go to a jump destination
Jump_NIO_Jump
Indicates the jump destination in the event of an NIO
result of the test step.
Jump_NIO_Repeat
Indicates how often the test step is to be repeated in
the event of an NIO result of the test step.
Jump_Error_Mode
Indicates how the jump is to be carried out in the event
of an error of the test step.
0 -> Next step
1 -> Go to the end
2 -> Go to a jump destination
This value is always 1.
Jump_Error_Jump
Indicates the jump destination in the event of an error
of the test step.
Jump_Error_Repeat
Indicates how often the test step is to be repeated in
the event of an error of the test step. This value is
always 0.
Jump_Cancel_Mode
Indicates how the jump is to be carried out in the event
of a cancellation of the test step.
0 -> Next step
1 -> Go to the end
2 -> Go to a jump destination
Jump_Cancel_Jump
Indicates the jump destination in the event of a
cancellation of the test step.
Jump_Cancel_Repeat
Indicates how often the test step is to be repeated in
the event of a cancellation of the test step. This value
is always 0.
Text
Immer 3.
User Manual ATS400
Version 3.14.41 - 1
184
Reference
Tag
Explanation
Text_0
Text to be output with indication beforehand.
TextEnable_0
Activation of the output with indication beforehand.
TextSize_0
Font size with indication beforehand.
Picture_0
File name of the image with indication beforehand.
If the file can be reached via a relative path from the
folder of the plan files, the relative path is entered,
otherwise the absolute path is entered.
Outputtype_0
Image or text display with indication beforehand.
Values used:
Text displays the text only.
Bild displays the image only.
TextBild displays the text and the image.
TextWithInputField displays the text and an input
field.
OutputSize_0
Small or large display with indication beforehand
Values used:
TextKlein displays the small window for the text.
TextGroß displays the large window for the text.
BildKlein displays the small window with the image.
BildGroß displays the large window with the image.
TextMitEingabeFeldKlein displays the small window
for the text and the input field.
TextMitEingabeFeldGroß displays the large window for
the text and the input field.
Nichts displays no field.
Text_1
Text to be output with indication during.
TextEnable_1
Activation of the output with indication during.
TextSize_1
Font size with indication during.
Picture_1
File name of the image with indication during.
If the file can be reached via a relative path from the
folder of the plan files, the relative path is entered,
otherwise the absolute path is entered.
Outputtype_1
Image or text display with indication during
Values used:
Text displays the text only.
Bild displays the image only.
TextBild displays the text and the image.
TextWithInputField displays the text and an input
field.
OutputSize_1
Small or large display with indication during.
Values used:
TextKlein displays the small window for the text.
TextGroß displays the large window for the text.
BildKlein displays the small window with the image.
User Manual ATS400
Version 3.14.41 - 1
185
Reference
Tag
Explanation
BildGroß displays the large window with the image.
TextMitEingabeFeldKlein displays the small window
for the text and the input field.
TextMitEingabeFeldGroß displays the large window for
the text and the input field.
Nichts displays no field.
Text_2
Text to be issued in the event of error.
TextEnable_2
Activation of the output in the event of an error.
TextSize_2
Font size in the event of an error.
Picture_2
File name of the image in the event of an error.
If the file can be reached via a relative path from the
folder of the plan files, the relative path is entered,
otherwise the absolute path is entered.
Outputtype_2
Image or text display in the event of an error.
Values used:
Text displays the text only.
Bild displays the image only.
TextBild displays the text and the image.
TextWithInputField displays the text and an input
field.
OutputSize_2
Small or large display in the event of an error.
Values used:
TextKlein displays the small window for the text.
TextGroß displays the large window for the text.
BildKlein displays the small window with the image.
BildGroß displays the large window with the image.
TextMitEingabeFeldKlein displays the small window
for the text and the input field.
TextMitEingabeFeldGroß displays the large window for
the text and the input field.
Nichts displays no field.
Tags
Number of the field names of the test step. This value is
0, except for the batch and data input test steps.
TagName_n
Name of the field. The n postfix corresponds to the
number of the field counted from 0. This entry only
exists if Tags is not equal to 0.
TagData_n
Pre-occupation or sample of the field. The n postfix
corresponds to the number of the field counted from 0.
This entry only exists if Tags is not equal to 0.
Template
Outdated, is no longer used.
Show
Indicates whether a user notice is displayed before the
multiple test.
Size
Font size of the text for a multiple test.
User Manual ATS400
Version 3.14.41 - 1
186
Reference
Tag
Explanation
Text
Text to be issued in the event of a multiple test.
Display
Image or text display in the event of a multiple test.
Values used:
Text displays the text only.
Bild displays the image only.
TextBild displays the text and the image.
TextWithInputField displays the text and an input
field.
PicturePath
File name of the image in the event of a multiple test.
If the file can be reached via a relative path from the
folder of the plan files, the relative path is entered,
otherwise the absolute path is entered.
StepCycleTime
Duration of the test.
Count_Tests
Total number of tests carried out.
Count_IO
Number of times this step was successfully carried out.
Count_NIO
Number of times not carried out successfully.
Count_ERROR
Number of cancelled tests.
Result
Result of the test step:
UnTested -> This test step was not carried out during
this test.
Active -> Test step is active, cannot occur in the file.
IO -> This test step was rated as IO.
NIO -> This test step was rated as NIO.
ERROR -> This test step was cancelled with an error.
Jumped -> This test step was skipped.
ResultValue_1
Numeric measurement value in SI unit.
ResultValue_2
Numeric value of the test size in SI units.
TestTime
Formatted duration of the test in seconds.
Error
Indication of the error when cancelling the
measurement.
None -> No error
Timeout_StartMeasurement -> Time error when
starting the measurement
Timeout_SetPassFail -> not used
Timeout_MeasureTimeOvershoot -> measurement time
exceeded
Invalid_TestState -> invalid test status
Invalid_TestResult -> invalid test result
Invalid_PVSteuerLT -> invalid control word
Invalid_PVStatusPruefung -> invalid status of the
test
Invalid_TestParameter -> invalid test parameter
Cancel -> cancelled
User Manual ATS400
Version 3.14.41 - 1
187
Reference
Tag
Explanation
ErrorInfo
Expanded error number.
TestPoint_n
User input for the multitest.
The n post fix is counted upwards from 0.
TestingUser
User loged in during the test step.
SightCheckInputText
User entry during the visual inspection.
MultitestUser_n
User loged in during the multitest.
The n post fix is counted upwards from 0.
6.4.3.1.1 Protective Earth
Parameters of the Protective Earth test step.
Tag
Parameter
Explanation
Parameter_0
StartCondition
Start conditions of the test step. The
start conditions are saved in a bit-coded
manner and can only be analysed
together with the StartConditionMask
field.
Parameter_1
StartConditionMas
k
Start conditions of the test step. The
start conditions are saved in a bit-coded
manner and can only be analysed
together with the StartCondition field.
Parameter_2
U
Idle voltage
Parameter_3
I
Test current
Parameter_4
R_max
Upper threshold value of the resistance.
Parameter_5
t
Test time
Parameter_6
t_delay
Start delay between fulfilling the start
condition and the start of the test.
Parameter_7
f
Frequency of the voltage
Parameter_8
t_start
Delay time for the start scenario when
starting the test until starting the
analysis. This value is not valid for all
start scenarios.
Parameter_9
EN60204
Indication whether the test is performed
in accordance with EN 60204.
Always 0.
Parameter_10
Polung
Contacting setting of an external relay
matrix.
Parameter_11 bis
Parameter_26
PolungCAN_00 bis
PolungCan_15
Setting of the relay matrix in accordance
with the choice in the program. The
User Manual ATS400
Version 3.14.41 - 1
188
Reference
Tag
Parameter
Explanation
display is bit coded.
Parameter_27
StateChangeBits
Always 0, never used.
Parameter_28
Multitest_Enable
Multitest is active, if the value does not
equal 0.
Parameter_29
Multitest_Auswert
ung
Method of analysing the multitest.
0 = worst measurement value.
Parameter_30
Multitest_Endekri
terium
Method of ending the multitest.
0 = number of measurements
1 = pass key
Parameter_31
Multitest_Endekri
terium_Anzahl
Number of multitest inspections.
Parameter_32
ErrorStartConditi
on
Condition for switching forward in the
event of an error.
Parameter_33
ErrorStartConditi
onMask
Mask for the condition for switching
further in the event of an error.
Parameter_34
ErrorStateChangeB
its
Always 0, never used.
Parameter_35
ErrorWSBDelay
Delay of switching further in the event of
an error.
Parameter_36
ErrorWSBTimeValid
Delay time active.
Parameter_37
StartStateChange
Indicates whether the switching
condition needs to be maintained when
testing the start conditions.
0 = no waiting for switch condition
1 = Wait for switching condition
Parameter_38
DC_Enable
Indicates whether the test is carried out
with direct current voltage.
0: Alternating current
1: Direct current
Parameter_39
StartStateJump
Indicates whether the Jump button is
displayed.
Parameter_40
Repeating
Indicates how often the test step is
carried out.
Parameter_41
StartButton
Indicates whether the Start button is
displayed.
Parameter_42
PassButton
Indicates whether the Pass button is
displayed.
Parameter_43
StartandJump
Indicates whether the Start and Jump
buttons are displayed.
User Manual ATS400
Version 3.14.41 - 1
189
Reference
Tag
Parameter
Explanation
Parameter_44
StartTime_Delay
Wait time for the signal Start-Button,
in case the start condition is monitored.
Parameter_45
StartPETime_Delay
Wait time for the signal Contact
Monitoring, in case the start condition
is monitored.
Parameter_46
StartKUTime_Delay
Wait time for the signal Contact
Monitoring, in case the start condition
is monitored.
Parameter_47
StartSHKHVTime_De
lay
Wait time for the signal Safety Circuit
HV, in case the start condition is
monitored.
Parameter_48
PassButtonVisible
Indicates whether the button Pass will
be shown during a Multitest.
6.4.3.1.2 High voltage AC
Parameters of the High voltage AC test step.
Tag
Parameter
Explanation
Parameter_0
StartCondition
Start conditions of the test step. The
start conditions are saved in a bit-coded
manner and can only be analysed
together with the StartConditionMask
field.
Parameter_1
StartConditionMas
k
Start conditions of the test step. The
start conditions are saved in a bit-coded
manner and can only be analysed
together with the StartCondition field.
Parameter_2
U
Test voltage
Parameter_3
I_min
Lower threshold
Parameter_4
I_max
Upper threshold
Parameter_5
t
Test duration
Parameter_6
t_delay
Start delay between fulfilling the start
condition and the start of the test.
Parameter_7
Ramp
Indicates whether the ramp is active.
Parameter_8
U_start
Start voltage
Parameter_9
t_up
Increase time of the ramp. This
parameter is only valid if the ramp is
active.
Parameter_10
t_down
Drop time of the ramp. This parameter is
only valid if the ramp is active.
User Manual ATS400
Version 3.14.41 - 1
190
Reference
Tag
Parameter
Explanation
Parameter_11
f
Frequency of the voltage
Parameter_12
t_start
Delay time for the start scenario when
starting the test until starting the
analysis. This value is not valid for all
start scenarios.
Parameter_13
Polung
Contacting setting of an external relay
matrix.
Parameter_14 bis
Parameter_29
PolungCAN_00 bis
PolungCan_15
Setting of the relay matrix in accordance
with the choice in the program. The
display is bit coded.
Parameter_30
StateChangeBits
Always 0, never used.
Parameter_31
Multitest_Enable
Multitest is active, if the value does not
equal 0.
Parameter_32
Multitest_Auswert
ung
Method of analysing the multitest.
0 = worst measurement value.
Parameter_33
Multitest_Endekri
terium
Method of ending the multitest.
0 = number of measurements
1 = pass key
Parameter_34
Multitest_Endekri
terium_Anzahl
Number of multitest inspections.
Parameter_35
Offset
Always 0, will not be used.
Parameter_36
ErrorStartConditi
on
Condition for switching forward in the
event of an error.
Parameter_37
ErrorStartConditi
onMask
Mask for the condition for switching
further in the event of an error.
Parameter_38
ErrorStateChangeB
its
Always 0, never used.
Parameter_39
ErrorWSBDelay
Delay of switching further in the event of
an error.
Parameter_40
ErrorWSBTimeValid
Delay time active.
Parameter_41
StartStateChange
Indicates whether the switching
condition needs to be maintained when
testing the start conditions.
0 = no waiting for switch condition
1 = Wait for switching condition
Parameter_42
Quelle
Selected current source.
This parameter is only used in the event
of a hot high voltage.
Parameter_43
f_Source
Frequency of the source.
This parameter is only used in the event
of a hot high voltage.
User Manual ATS400
Version 3.14.41 - 1
191
Reference
Tag
Parameter
Explanation
Parameter_44
U_Source
Voltage of the source.
This parameter is only used in the event
of a hot high voltage.
Parameter_45
StartStateJump
Indicates whether the Jump button is
displayed.
Parameter_46
Management
Indicates how the supply of the test
item is to be carried out.
0: Power off after test
1: Keep power on after test
2: Only power off
3: Power off only on error
4: Only power on
Parameter_47
Auswertung
Type of the analysis of the test.
0 = end the test time
1 = end with start signal
Parameter_48
Repeating
Indicates how often the test step is
carried out.
Parameter_49
StartButton
Indicates whether the Start button is
displayed.
Parameter_50
PassButton
Indicates whether the Pass button is
displayed.
Parameter_51
StartandJump
Indicates whether the Start and Jump
buttons are displayed.
Parameter_52
StartandJump
Indicates whether the Start and Jump
buttons are displayed.
Parameter_53
CreateLog
Indicates whether a log file will be
created.
0 = No log file will be created
1 = A log file be created
Parameter_54
Timeinterval
Time interval between two samples
which will be written to the log file. The
value is in seconds.
This value will only be used in case the
value in CreateLog is 1.
Parameter_55
StartTime_Delay
Wait time for the signal Start-Button,
in case the start condition is monitored.
Parameter_56
StartPETime_Delay
Wait time for the signal PE-Testprobe,
in case the start condition is monitored.
Parameter_57
StartKUTime_Delay
Wait time for the signal Contact
Monitoring, in case the start condition
is monitored.
Parameter_58
StartSHKHVTime_De
Wait time for the signal Safety Circuit
User Manual ATS400
Version 3.14.41 - 1
192
Reference
Tag
Parameter
Explanation
lay
HV, in case the start condition is
monitored.
Parameter_59
PassButtonVisible
Indicates whether the button Pass will
be shown during a Multitest.
Parameter_60
SparkDetection
This parameter is only valid on deivices
with HVdc7/8 module and a HMP
supporting spark detection.
Setting of the spark detection.
0 = Off
1 = Coarse
2 = Normal
3 = Fine
Parameter_61
ContinousRamp
Indicates that the rampe will be
continued after the test step.
This parameter is only valid for the
variant for KWP protocol and high
voltage tester of Series 36.
0: Ramp will not be continued
1: Ramp will be continued
6.4.3.1.3 High voltage DC
Parameters of the High voltage DC test step.
Tag
Parameter
Explanation
Parameter_0
StartCondition
Start conditions of the test step. The
start conditions are saved in a bit-coded
manner and can only be analysed
together with the StartConditionMask
field.
Parameter_1
StartConditionMas
k
Start conditions of the test step. The
start conditions are saved in a bit-coded
manner and can only be analysed
together with the StartCondition field.
Parameter_2
U
Test voltage
Parameter_3
I_min
Lower threshold
Parameter_4
I_max
Upper threshold
Parameter_5
t
Test duration
Parameter_6
t_delay
Start delay between fulfilling the start
condition and the start of the test.
Parameter_7
Ramp
Indicates whether the ramp is active.
Parameter_8
U_start
Start voltage
Parameter_9
t_up
Increase time of the ramp. This
User Manual ATS400
Version 3.14.41 - 1
193
Reference
Tag
Parameter
Explanation
parameter is only valid if the ramp is
active.
Parameter_10
t_down
Drop time of the ramp. This parameter is
only valid if the ramp is active.
Parameter_11
t_start
Delay time for the start scenario when
starting the test until starting the
analysis. This value is not valid for all
start scenarios.
Parameter_12
U_discharge
Discharge voltage
Parameter_13
Polung
Contacting setting of an external relay
matrix.
Parameter_14 bis
Parameter_29
PolungCAN_00 bis
PolungCan_15
Setting of the relay matrix in accordance
with the choice in the program. The
display is bit coded.
Parameter_30
StateChangeBits
Always 0, never used.
Parameter_31
Multitest_Enable
Multitest is active, if the value does not
equal 0.
Parameter_32
Multitest_Auswert
ung
Method of analysing the multitest.
0 = worst measurement value.
Parameter_33
Multitest_Endekri
terium
Method of ending the multitest.
0 = number of measurements
1 = pass key
Parameter_34
Multitest_Endekri
terium_Anzahl
Number of multitest inspections.
Parameter_35
ErrorStartConditi
on
Condition for switching forward in the
event of an error.
Parameter_36
ErrorStartConditi
onMask
Mask for the condition for switching
further in the event of an error.
Parameter_37
ErrorStateChangeB
its
Always 0, never used.
Parameter_38
ErrorWSBDelay
Delay of switching further in the event of
an error.
Parameter_39
ErrorWSBTimeValid
Delay time active.
Parameter_40
StartStateChange
Indicates whether the switching
condition needs to be maintained when
testing the start conditions.
0 = no waiting for switch condition
1 = Wait for switching condition
Parameter_41
Quelle
Selected current source.
This parameter is only used in the event
of a hot high voltage.
User Manual ATS400
Version 3.14.41 - 1
194
Reference
Tag
Parameter
Explanation
Parameter_42
f_Source
Frequency of the source.
This parameter is only used in the event
of a hot high voltage.
Parameter_43
U_Source
Voltage of the source.
This parameter is only used in the event
of a hot high voltage.
Parameter_44
StartStateJump
Indicates whether the Jump button is
displayed.
Parameter_45
Management
Indicates how the supply of the test
item is to be carried out.
0: Power off after test
1: Keep power on after test
2: Only power off
3: Power off only on error
4: Only power on
Parameter_46
Auswertung
Type of the analysis of the test.
0 = end the test time
1 = end with start signal
Parameter_47
Repeating
Indicates how often the test step is
carried out.
Parameter_48
StartButton
Indicates whether the Start button is
displayed.
Parameter_49
PassButton
Indicates whether the Pass button is
displayed.
Parameter_50
StartandJump
Indicates whether the Start and Jump
buttons are displayed.
Parameter_51
CreateLog
Indicates whether a log file will be
created.
0 = No log file will be created
1 = A log file be created
Parameter_52
Timeinterval
Time interval between two samples
which will be written to the log file. The
value is in seconds.
This value will only be used in case the
value in CreateLog is 1.
Parameter_53
StartTime_Delay
Wait time for the signal Start-Button,
in case the start condition is monitored.
Parameter_54
StartPETime_Delay
Wait time for the signal PE-Testprobe,
in case the start condition is monitored.
Parameter_55
StartKUTime_Delay
Wait time for the signal Contact
Monitoring, in case the start condition
is monitored.
User Manual ATS400
Version 3.14.41 - 1
195
Reference
Tag
Parameter
Explanation
Parameter_56
StartSHKHVTime_De
lay
Wait time for the signal Safety Circuit
HV, in case the start condition is
monitored.
Parameter_57
PassButtonVisible
Indicates whether the button Pass will
be shown during a Multitest.
Parameter_58
SparkDetection
This parameter is only valid on deivices
with HVdc7/8 module and a HMP
supporting spark detection.
Setting of the spark detection.
0 = Off
1 = Coarse
2 = Normal
3 = Fine
Parameter_59
ContinousRamp
Indicates that the rampe will be
continued after the test step.
This parameter is only valid for the
variant for KWP protocol and high
voltage tester of Series 36.
0: Ramp will not be continued
1: Ramp will be continued
6.4.3.1.4 Insulation
Parameters of the Insulation test step.
Tag
Parameter
Explanation
Parameter_0
StartCondition
Start conditions of the test step. The
start conditions are saved in a bit-coded
manner and can only be analysed
together with the StartConditionMask
field.
Parameter_1
StartConditionMas
k
Start conditions of the test step. The
start conditions are saved in a bit-coded
manner and can only be analysed
together with the StartCondition field.
Parameter_2
U
Test voltage
Parameter_3
R_min
Lower threshold of the insulation
resistance.
Parameter_4
t
Test duration
Parameter_5
t_delay
Start delay between fulfilling the start
condition and the start of the test.
Parameter_6
Ramp
Indicates whether the ramp is active.
Parameter_7
U_start
Start voltage
Parameter_8
t_up
Increase time of the ramp. This
User Manual ATS400
Version 3.14.41 - 1
196
Reference
Tag
Parameter
Explanation
parameter is only valid if the ramp is
active.
Parameter_9
t_down
Drop time of the ramp. This parameter is
only valid if the ramp is active.
Parameter_10
t_start
Delay time for the start scenario when
starting the test until starting the
analysis. This value is not valid for all
start scenarios.
Parameter_11
U_discharge
Discharge voltage
Parameter_12
Polung
Contacting setting of an external relay
matrix.
Parameter_13 bis
Parameter_28
PolungCAN_00 bis
PolungCan_15
Setting of the relay matrix in accordance
with the choice in the program. The
display is bit coded.
Parameter_29
StateChangeBits
Always 0, never used.
Parameter_30
Multitest_Enable
Multitest is active, if the value does not
equal 0.
Parameter_31
Multitest_Auswert
ung
Method of analysing the multitest.
0 = worst measurement value.
Parameter_32
Multitest_Endekri
terium
Method of ending the multitest.
0 = number of measurements
1 = pass key
Parameter_33
Multitest_Endekri
terium_Anzahl
Number of multitest inspections.
Parameter_34
ErrorStartConditi
on
Condition for switching forward in the
event of an error.
Parameter_35
ErrorStartConditi
onMask
Mask for the condition for switching
further in the event of an error.
Parameter_36
ErrorStateChangeB
its
Always 0, never used.
Parameter_37
ErrorWSBDelay
Delay of switching further in the event of
an error.
Parameter_38
ErrorWSBTimeValid
Delay time active.
Parameter_39
StartStateChange
Indicates whether the switching
condition needs to be maintained when
testing the start conditions.
0 = no waiting for switch condition
1 = Wait for switching condition
Parameter_40
Quelle
Selected current source.
This parameter is only used in the event
of a hot high voltage.
User Manual ATS400
Version 3.14.41 - 1
197
Reference
Tag
Parameter
Explanation
Parameter_41
f_Source
Frequency of the source.
This parameter is only used in the event
of a hot high voltage.
Parameter_42
U_Source
Voltage of the source.
This parameter is only used in the event
of a hot high voltage.
Parameter_43
StartStateJump
Indicates whether the Jump button is
displayed.
Parameter_44
Management
Indicates how the supply of the test
item is to be carried out.
0: Power off after test
1: Keep power on after test
2: Only power off
3: Power off only on error
4: Only power on
Parameter_45
Auswertung
Type of the analysis of the test.
0 = end the test time
1 = end with start signal
Parameter_46
Repeating
Indicates how often the test step is
carried out.
Parameter_47
StartButton
Indicates whether the Start button is
displayed.
Parameter_48
PassButton
Indicates whether the Pass button is
displayed.
Parameter_49
StartandJump
Indicates whether the Start and Jump
buttons are displayed.
Parameter_50
CreateLog
Indicates whether a log file will be
created.
0 = No log file will be created
1 = A log file be created
Parameter_51
Timeinterval
Time interval between two samples
which will be written to the log file. The
value is in seconds.
This value will only be used in case the
value in CreateLog is 1.
Parameter_52
StartTime_Delay
Wait time for the signal Start-Button,
in case the start condition is monitored.
Parameter_53
StartPETime_Delay
Wait time for the signal PE-Testprobe,
in case the start condition is monitored.
Parameter_54
StartKUTime_Delay
Wait time for the signal Contact
Monitoring, in case the start condition
is monitored.
User Manual ATS400
Version 3.14.41 - 1
198
Reference
Tag
Parameter
Explanation
Parameter_55
StartSHKHVTime_De
lay
Wait time for the signal Safety Circuit
HV, in case the start condition is
monitored.
Parameter_56
PassButtonVisible
Indicates whether the button Pass will
be shown during a Multitest.
6.4.3.1.5 FCT-Current
Parameters of the FCT-Current test step.
Tag
Parameter
Explanation
Parameter_0
StartCondition
Start conditions of the test step. The
start conditions are saved in a bit-coded
manner and can only be analysed
together with the StartConditionMask
field.
Parameter_1
StartConditionMas
k
Start conditions of the test step. The
start conditions are saved in a bit-coded
manner and can only be analysed
together with the StartCondition field.
Parameter_2
U_Source
Source of the test supply.
Parameter_3
U
Voltage of the test item supply
Parameter_4
I_min
Lower threshold value during the
analysis. Not valid if the analysis is set
to Pass/Fail. The unit and thresholds
depend on the channel.
Parameter_5
I_max
Upper threshold value during the
analysis. Not valid if the analysis is set
to Pass/Fail. The unit and thresholds
depend on the channel.
Parameter_6
t
Test time
Parameter_7
t_delay
Start delay between fulfilling the start
condition and the start of the test.
Parameter_8
f
Frequency of the voltage
Parameter_9
t_start
Delay time for the start scenario when
starting the test until starting the
analysis. This value is not valid for all
start scenarios.
Parameter_10
t_timeout
Timeout for the start of the analysis.
The value is not used for all start
scenarios.
Parameter_11
Gradient
Gradient for the start of the analysis.
This value is not used for all start
User Manual ATS400
Version 3.14.41 - 1
199
Reference
Tag
Parameter
Explanation
scenarios.
Parameter_12
Management
Indicates how the supply of the test
item is to be carried out.
0: Power off after test
1: Keep power on after test
2: Only power off
3: Power off only on error
4: Only power on
Parameter_13
Scenario
Type of the start of the analysis
Parameter_14
Polung
Contacting setting of an external relay
matrix.
Parameter_15 bis
Parameter_30
PolungCAN_00 bis
PolungCan_15
Setting of the relay matrix in accordance
with the choice in the program. The
display is bit coded.
Parameter_31
Auswertung
Type of the analysis
0 = measurement
1 = Pass/Fail button
Parameter_32
StateChangeBits
Always 0, never used.
Parameter_33
Multitest_Enable
Multitest is active, if the value does not
equal 0.
Parameter_34
Multitest_Auswert
ung
Method of analysing the multitest.
0 = worst measurement value.
Parameter_35
Multitest_Endekri
terium
Method of ending the multitest.
0 = number of measurements
1 = pass key
Parameter_36
Multitest_Endekri
terium_Anzahl
Number of multitest inspections.
Parameter_37
ErrorStartConditi
on
Condition for switching forward in the
event of an error.
Parameter_38
ErrorStartConditi
onMask
Mask for the condition for switching
further in the event of an error.
Parameter_39
ErrorStateChangeB
its
Always 0, never used.
Parameter_40
ErrorWSBDelay
Delay of switching further in the event of
an error.
Parameter_41
ErrorWSBTimeValid
Delay time active.
Parameter_42
Kanal
Measurement channel
0 = current
1 = analogue channel1
2 = analogue channel2
3 = analogue channel3
4 = analogue channel4
User Manual ATS400
Version 3.14.41 - 1
200
Reference
Tag
Parameter
Explanation
5 = voltage measurement
Parameter_43
SourceIsDC
External source provides direct current
voltage
Parameter_44
StartStateChange
Indicates whether the switching
condition needs to be maintained when
testing the start conditions.
0 = no waiting for switch condition
1 = Wait for switching condition
Parameter_45
StartStateJump
Indicates whether the Jump button is
displayed.
Parameter_46
Graphic
Type of the graphics settings
0 = no graphics
1 = only display graphic
2 = display and save graphic
Parameter_47
Repeating
Indicates how often the test step is
carried out.
Parameter_48
StartButton
Indicates whether the Start button is
displayed.
Parameter_49
PassButton
Indicates whether the Pass button is
displayed.
Parameter_50
StartandJump
Indicates whether the Start and Jump
buttons are displayed.
Parameter_51
CreateLog
Indicates whether a log file will be
created.
0 = No log file will be created
1 = A log file be created
Parameter_52
Timeinterval
Time interval between two samples
which will be written to the log file. The
value is in seconds.
This value will only be used in case the
value in CreateLog is 1.
Parameter_53
StartTime_Delay
Wait time for the signal Start-Button,
in case the start condition is monitored.
Parameter_54
StartPETime_Delay
Wait time for the signal PE-Testprobe,
in case the start condition is monitored.
Parameter_55
StartKUTime_Delay
Wait time for the signal Contact
Monitoring, in case the start condition
is monitored.
Parameter_56
StartSHKHVTime_De
lay
Wait time for the signal Safety Circuit
HV, in case the start condition is
monitored.
User Manual ATS400
Version 3.14.41 - 1
201
Reference
6.4.3.1.6 Leakage current
Parameters of the Leakage current test step.
Tag
Parameter
Explanation
Parameter_0
StartCondition
Start conditions of the test step. The
start conditions are saved in a bit-coded
manner and can only be analysed
together with the StartConditionMask
field.
Parameter_1
StartConditionMas
k
Start conditions of the test step. The
start conditions are saved in a bit-coded
manner and can only be analysed
together with the StartCondition field.
Parameter_2
Messmodell
Measurement model used.
Parameter_3
Messmethode
Measurement method used.
0: Protective conductor current
1: Housing discharge current
Parameter_4
Management
Indicates how the supply of the test
item is to be carried out.
0: Power off after test
1: Keep power on after test
2: Only power off
3: Power off only on error
4: Only power on
Parameter_5
U_Source
Source of the test supply.
Parameter_6
U
Voltage of the test item supply
Parameter_7
I_max
Upper threshold for the discharge
current.
Parameter_8
t
Test time
Parameter_9
t_delay
Start delay between fulfilling the start
condition and the start of the test.
Parameter_10
f
Frequency of the voltage
Parameter_11
t_start
Will not be used.
Parameter_12
Auswertung
Measurement channel used for the test:
0: I AC rms
1: I DC
2: I min
3: I max
4: I rms
Parameter_13
Polaritaet
Polarity used of the supply of the test
item.
For single-phase test item:
0: Automotive
User Manual ATS400
Version 3.14.41 - 1
202
Reference
Tag
Parameter
Explanation
1:
2:
3:
4:
5:
6:
L1-> PE
L2-> PE
Mode B
Automatic with first error
L1 -> PE with first error
L2 -> PE with first error
With three-phase test item:
0: Clockwise rotation
1: Counterclockwise rotation
Parameter_14
SelftestMode
Always 0.
Parameter_15
Polung
Contacting setting of an external relay
matrix.
Parameter_16 bis
Parameter_31
PolungCAN_00 bis
PolungCan_15
Setting of the relay matrix in accordance
with the choice in the program. The
display is bit coded.
Parameter_32
StateChangeBits
Always 0, never used.
Parameter_33
Multitest_Enable
Multitest is active, if the value does not
equal 0.
Parameter_34
Multitest_Auswert
ung
Method of analysing the multitest.
0 = worst measurement value.
Parameter_35
Multitest_Endekri
terium
Method of ending the multitest.
0 = number of measurements
1 = pass key
Parameter_36
Multitest_Endekri
terium_Anzahl
Number of multitest inspections.
Parameter_37
I_Min
Lower threshold for the discharge
current.
Parameter_38
ErrorStartConditi
on
Condition for switching forward in the
event of an error.
Parameter_39
ErrorStartConditi
onMask
Mask for the condition for switching
further in the event of an error.
Parameter_40
ErrorStateChangeB
its
Always 0, never used.
Parameter_41
ErrorWSBDelay
Delay of switching further in the event of
an error.
Parameter_42
ErrorWSBTimeValid
Delay time active.
Parameter_43
StartStateChange
Indicates whether the switching
condition needs to be maintained when
testing the start conditions.
0 = no waiting for switch condition
1 = Wait for switching condition
User Manual ATS400
Version 3.14.41 - 1
203
Reference
Tag
Parameter
Explanation
Parameter_44
Phase
Number of phases of the test item.
Parameter_45
StartStateJump
Indicates whether the Jump button is
displayed.
Parameter_46
Repeating
Indicates how often the test step is
carried out.
Parameter_47
StartButton
Indicates whether the Start button is
displayed.
Parameter_48
PassButton
Indicates whether the Pass button is
displayed.
Parameter_49
StartandJump
Indicates whether the Start and Jump
buttons are displayed.
Parameter_50
CreateLog
Indicates whether a log file will be
created.
0 = No log file will be created
1 = A log file be created
Parameter_51
Timeinterval
Time interval between two samples
which will be written to the log file. The
value is in seconds.
This value will only be used in case the
value in CreateLog is 1.
Parameter_52
StartTime_Delay
Wait time for the signal Start-Button,
in case the start condition is monitored.
Parameter_53
StartPETime_Delay
Wait time for the signal PE-Testprobe,
in case the start condition is monitored.
Parameter_54
StartKUTime_Delay
Wait time for the signal Contact
Monitoring, in case the start condition
is monitored.
Parameter_55
StartSHKHVTime_De
lay
Wait time for the signal Safety Circuit
HV, in case the start condition is
monitored.
6.4.3.1.7 Sight check
Parameters of the Sight check test step.
Tag
Parameter
Explanation
Parameter_0
StartCondition
Start conditions of the test step. The
start conditions are saved in a bit-coded
manner and can only be analysed
together with the StartConditionMask
field.
Parameter_1
StartConditionMas
Start conditions of the test step. The
User Manual ATS400
Version 3.14.41 - 1
204
Reference
Tag
Parameter
Explanation
k
start conditions are saved in a bit-coded
manner and can only be analysed
together with the StartCondition field.
Parameter_2
t_delay
Start delay between fulfilling the start
condition and the start of the test.
Parameter_3
StateChangeBits
Always 0, never used.
Parameter_4
Abfrage
Mode for termination.
Parameter_5
StartStateChange
Indicates whether the switching
condition needs to be maintained when
testing the start conditions.
0 = no waiting for switch condition
1 = Wait for switching condition
Parameter_6
StartStateJump
Indicates whether the Jump button is
displayed.
Parameter_7
Repeating
Indicates how often the test step is
carried out.
Parameter_8
StartButton
Indicates whether the Start button is
displayed.
Parameter_9
StartandJump
Indicates whether the Start and Jump
buttons are displayed.
Parameter_10
StartTime_Delay
Wait time for the signal Start-Button,
in case the start condition is monitored.
Parameter_11
StartPETime_Delay
Wait time for the signal PE-Testprobe,
in case the start condition is monitored.
Parameter_12
StartKUTime_Delay
Wait time for the signal Contact
Monitoring, in case the start condition
is monitored.
Parameter_13
StartSHKHVTime_De
lay
Wait time for the signal Safety Circuit
HV, in case the start condition is
monitored.
6.4.3.1.8 Data input
Parameters of the Data Input test step.
Tag
Parameter
Explanation
Parameter_0
StartCondition
Start conditions of the test step. The
start conditions are saved in a bit-coded
manner and can only be analysed
together with the StartConditionMask
field.
User Manual ATS400
Version 3.14.41 - 1
205
Reference
Tag
Parameter
Explanation
Parameter_1
StartConditionMas
k
Start conditions of the test step. The
start conditions are saved in a bit-coded
manner and can only be analysed
together with the StartCondition field.
Parameter_2
Polung
Contacting setting of an external relay
matrix.
Parameter_3 bis
Parameter_17
PolungCAN_00 bis
PolungCan_15
Setting of the relay matrix in accordance
with the choice in the program. The
display is bit coded.
Parameter_18
StateChangeBits
Always 0, never used.
Parameter_19
Multitest_Enable
Multitest is active, if the value does not
equal 0.
Parameter_20
Multitest_Auswert
ung
Method of analysing the multitest.
0 = worst measurement value.
Parameter_21
Multitest_Endekri
terium
Method of ending the multitest.
0 = number of measurements
1 = pass key
Parameter_22
Multitest_Endekri
terium_Anzahl
Number of multitest inspections.
Parameter_23
t_delay
Start delay between fulfilling the start
condition and the start of the test.
Parameter_24
Eingabmasken
Bit samples containing screen fields
instead of requirements.
Parameter_25
StartStateJump
Indicates whether the Jump button is
displayed.
Parameter_26
Repeating
Indicates how often the test step is
carried out.
Parameter_27
StartButton
Indicates whether the Start button is
displayed.
Parameter_28
PassButton
Indicates whether the Pass button is
displayed.
Parameter_29
StartandJump
Indicates whether the Start and Jump
buttons are displayed.
Parameter_30
StartTime_Delay
Wait time for the signal Start-Button,
in case the start condition is monitored.
Parameter_31
StartPETime_Delay
Wait time for the signal PE-Testprobe,
in case the start condition is monitored.
Parameter_32
StartTimeKU_Delay
Wait time for the signal Contact
Monitoring, in case the start condition
User Manual ATS400
Version 3.14.41 - 1
206
Reference
Tag
Parameter
Explanation
is monitored.
Parameter_33
StartTimeSHKHV_De
lay
Wait time for the signal Safety Circuit
HV, in case the start condition is
monitored.
6.4.3.1.9 Batch run
Parameters of the Batch run test step.
Tag
Parameter
Explanation
Parameter_0
StartCondition
Start conditions of the test step. The
start conditions are saved in a bit-coded
manner and can only be analysed
together with the StartConditionMask
field.
Parameter_1
StartConditionMas
k
Start conditions of the test step. The
start conditions are saved in a bit-coded
manner and can only be analysed
together with the StartCondition field.
Parameter_2
Polung
Contacting setting of an external relay
matrix.
Parameter_3 bis
Parameter_18
PolungCAN_00 bis
PolungCan_15
Setting of the relay matrix in accordance
with the choice in the program. The
display is bit coded.
Parameter_19
StateChangeBits
Always 0, never used.
Parameter_20
SettingFlags
Settings that indicate that certain fields
are configured at other locations. This
field is bit coded.
Parameter_21
Multitest_Enable
Multitest is active, if the value does not
equal 0.
Parameter_22
Multitest_Auswert
ung
Method of analysing the multitest.
0 = worst measurement value.
Parameter_23
Multitest_Endekri
terium
Method of ending the multitest.
0 = number of measurements
1 = pass key
Parameter_24
Multitest_Endekri
terium_Anzahl
Number of multitest inspections.
Parameter_23
t_delay
Start delay between fulfilling the start
condition and the start of the test.
Parameter_26
Eingabmasken
Bit samples containing screen fields
instead of requirements.
User Manual ATS400
Version 3.14.41 - 1
207
Reference
Tag
Parameter
Explanation
Parameter_27
StartStateJump
Indicates whether the Jump button is
displayed.
Parameter_28
Repeating
Indicates how often the test step is
carried out.
Parameter_29
StartButton
Indicates whether the Start button is
displayed.
Parameter_30
PassButton
Indicates whether the Pass button is
displayed.
Parameter_31
StartandJump
Indicates whether the Start and Jump
buttons are displayed.
Parameter_32
StartTime_Delay
Wait time for the signal Start-Button,
in case the start condition is monitored.
Parameter_33
StartPETime_Delay
Wait time for the signal PE-Testprobe,
in case the start condition is monitored.
Parameter_34
StartKUTime_Delay
Wait time for the signal Contact
Monitoring, in case the start condition
is monitored.
Parameter_35
StartSHKHVTime_De
lay
Wait time for the signal Safety Circuit
HV, in case the start condition is
monitored.
6.4.3.1.10 User-Interface
Parameters of the User-Interface test step.
Tag
Parameter
Explanation
Parameter_0
StartCondition
Start conditions of the test step. The
start conditions are saved in a bit-coded
manner and can only be analysed
together with the StartConditionMask
field.
Parameter_1
StartConditionMas
k
Start conditions of the test step. The
start conditions are saved in a bit-coded
manner and can only be analysed
together with the StartCondition field.
Parameter_2
In
Entry bits
Parameter_3
InMask
Mask for entry bits.
Parameter_4
Out
Output bits
Parameter_5
OutMask
Mask for output bits.
Parameter_6
Duration
Duration of the output pulse.
User Manual ATS400
Version 3.14.41 - 1
208
Reference
Tag
Parameter
Explanation
Parameter_7
Timeout
Timeout when waiting for the status of
the entry bits.
This parameter is only valid if the
TimeoutEnable parameter is set.
Parameter_8
TimeoutEnable
States whether timeout is used.
0: Timeout is not used
1: Timeout is used
Parameter_9
t_delay
Start delay between fulfilling the start
condition and the start of the test.
Parameter_10
Polung
Contacting setting of an external relay
matrix.
Parameter_11 bis
Parameter_26
PolungCAN_00 bis
PolungCan_15
Setting of the relay matrix in accordance
with the choice in the program. The
display is bit coded.
Parameter_27
StateChangeBits
Always 0, never used.
Parameter_28
Multitest_Enable
Multitest is active, if the value does not
equal 0.
Parameter_29
Multitest_Auswert
ung
Method of analysing the multitest.
0 = worst measurement value.
Parameter_30
Multitest_Endekri
terium
Method of ending the multitest.
0 = number of measurements
1 = pass key
Parameter_31
Multitest_Endekri
terium_Anzahl
Number of multitest inspections.
Parameter_32
ErrorStartConditi
on
Condition for switching forward in the
event of an error.
Parameter_33
ErrorStartConditi
onMask
Mask for the condition for switching
further in the event of an error.
Parameter_34
ErrorStateChangeB
its
Always 0, never used.
Parameter_35
ErrorWSBDelay
Delay of switching further in the event of
an error.
Parameter_36
ErrorWSBTimeValid
Delay time active.
Parameter_37
NumInterface
Number of the user IO interface used.
0: User-IO Interface of the internal IOCPU
1: User-IO Interface of the external IOCPU
Parameter_38
StartStateChange
Indicates whether the switching
condition needs to be maintained when
testing the start conditions.
0 = no waiting for switch condition
User Manual ATS400
Version 3.14.41 - 1
209
Reference
Tag
Parameter
Explanation
1 = Wait for switching condition
Parameter_39
StartStateJump
Indicates whether the Jump button is
displayed.
Parameter_40
Repeating
Indicates how often the test step is
carried out.
Parameter_41
StartButton
Indicates whether the Start button is
displayed.
Parameter_42
PassButton
Indicates whether the Pass button is
displayed.
Parameter_43
StartandJump
Indicates whether the Start and Jump
buttons are displayed.
Parameter_44
StartTime_Delay
Wait time for the signal Start-Button,
in case the start condition is monitored.
Parameter_45
StartPETme_Delay
Wait time for the signal PE-Testprobe,
in case the start condition is monitored.
Parameter_46
StartKUTime_Delay
Wait time for the signal Contact
Monitoring, in case the start condition
is monitored.
Parameter_47
StartSHKHVTime_De
lay
Wait time for the signal Safety Circuit
HV, in case the start condition is
monitored.
6.4.3.1.11 Resistance
Parameters of the Resistance test step.
Tag
Parameter
Explanation
Parameter_0
StartCondition
Start conditions of the test step. The
start conditions are saved in a bit-coded
manner and can only be analysed
together with the StartConditionMask
field.
Parameter_1
StartConditionMas
k
Start conditions of the test step. The
start conditions are saved in a bit-coded
manner and can only be analysed
together with the StartCondition field.
Parameter_2
t
Test time
Parameter_3
t_start
Delay time for the start scenario when
starting the test until starting the
analysis. This value is not valid for all
start scenarios.
User Manual ATS400
Version 3.14.41 - 1
210
Reference
Tag
Parameter
Explanation
Parameter_4
t_delay
Start delay between fulfilling the start
condition and the start of the test.
Parameter_5
R_min
Lower threshold value of the resistance.
Parameter_6
R_max
Upper threshold value of the resistance.
Parameter_7
Polung
Contacting setting of an external relay
matrix.
Parameter_8 bis
Parameter_23
PolungCAN_00 bis
PolungCan_15
Setting of the relay matrix in accordance
with the choice in the program. The
display is bit coded.
Parameter_24
StateChangeBits
Always 0, never used.
Parameter_25
Multitest_Enable
Multitest is active, if the value does not
equal 0.
Parameter_26
Multitest_Auswert
ung
Method of analysing the multitest.
0 = worst measurement value.
Parameter_27
Multitest_Endekri
terium
Method of ending the multitest.
0 = number of measurements
1 = pass key
Parameter_28
Multitest_Endekri
terium_Anzahl
Number of multitest inspections.
Parameter_29
ErrorStartConditi
on
Condition for switching forward in the
event of an error.
Parameter_30
ErrorStartConditi
onMask
Mask for the condition for switching
further in the event of an error.
Parameter_31
ErrorStateChangeB
its
Always 0, never used.
Parameter_32
ErrorWSBDelay
Delay of switching further in the event of
an error.
Parameter_33
ErrorWSBTimeValid
Delay time active.
Parameter_34
R_offset
Resistance of the measurement
structure.
Parameter_35
StartStateChange
Indicates whether the switching
condition needs to be maintained when
testing the start conditions.
0 = no waiting for switch condition
1 = Wait for switching condition
Parameter_36
StartStateJump
Indicates whether the Jump button is
displayed.
Parameter_37
Repeating
Indicates how often the test step is
carried out.
User Manual ATS400
Version 3.14.41 - 1
211
Reference
Tag
Parameter
Explanation
Parameter_38
StartButton
Indicates whether the Start button is
displayed.
Parameter_39
PassButton
Indicates whether the Pass button is
displayed.
Parameter_40
t_timeout
Maximum time after starting until the
first measurement value is recorded.
Parameter_41
StartandJump
Indicates whether the Start and Jump
buttons are displayed.
Parameter_42
StartTime_Delay
Wait time for the signal Start-Button,
in case the start condition is monitored.
Parameter_43
StartPETime_Delay
Wait time for the signal PE-Testprobe,
in case the start condition is monitored.
Parameter_44
StartKUTime_Delay
Wait time for the signal Contact
Monitoring, in case the start condition
is monitored.
Parameter_45
StartSHKHVTime_De
lay
Wait time for the signal Safety Circuit
HV, in case the start condition is
monitored.
6.4.3.1.12 Continuity test
Parameter of the Continuity test step.
Tag
Parameter
Explanation
Parameter_0
StartCondition
Start conditions of the test step. The
start conditions are saved in a bit-coded
manner and can only be analysed
together with the StartConditionMask
field.
Parameter_1
StartConditionMas
k
Start conditions of the test step. The
start conditions are saved in a bit-coded
manner and can only be analysed
together with the StartCondition field.
Parameter_2
TestVoltage
Maximum test voltage used for the
measurement.
Parameter_3
TestTime
Time after that the measurement will be
evaluated.
Parameter_4
MaxTestCurrent
Maximum current during the test.
Parameter_5
t_delay
Start delay between fulfilling the start
condition and the start of the test.
Parameter_6
Limit
Limit for the evaluation.
Parameter_7
Interpretation
Evaluation of the measurement:
User Manual ATS400
Version 3.14.41 - 1
212
Reference
Tag
Parameter
Explanation
1: Pass on continuity
2: Pass on discontinuity
Parameter_8
TypeOfSource
Type of the used source:
0: Alternating current
1: direct current
Parameter_9
Polung
Contacting setting of an external relay
matrix.
Parameter_10 bis
Parameter_25
PolungCAN_00 bis
PolungCan_15
Setting of the relay matrix in accordance
with the choice in the program. The
display is bit coded.
Parameter_26
StateChangeBits
Always 0, never used.
Parameter_27
Multitest_Enable
Multitest is active, if the value does not
equal 0.
Parameter_28
Multitest_Auswert
ung
Method of analysing the multitest.
0 = worst measurement value.
Parameter_29
Multitest_Endekri
terium
Method of ending the multitest.
0 = number of measurements
1 = pass key
Parameter_30
Multitest_Endekri
terium_Anzahl
Number of multitest inspections.
Parameter_31
ErrorStartConditi
on
Condition for switching forward in the
event of an error.
Parameter_32
ErrorStartConditi
onMask
Mask for the condition for switching
further in the event of an error.
Parameter_33
ErrorStateChangeB
its
Always 0, never used.
Parameter_34
ErrorWSBDelay
Delay of switching further in the event of
an error.
Parameter_35
ErrorWSBTimeValid
Delay time active.
Parameter_36
StartStateChange
Indicates whether the switching
condition needs to be maintained when
testing the start conditions.
0 = no waiting for switch condition
1 = Wait for switching condition
Parameter_37
StartStateJump
Indicates whether the Jump button is
displayed.
Parameter_38
Repeating
Indicates how often the test step is
carried out.
Parameter_39
StartButton
Indicates whether the Start button is
displayed.
User Manual ATS400
Version 3.14.41 - 1
213
Reference
Tag
Parameter
Explanation
Parameter_40
PassButton
Indicates whether the Pass button is
displayed.
Parameter_41
StartandJump
Indicates whether the Start and Jump
buttons are displayed.
Parameter_42
StartTime_Delay
Wait time for the signal Start-Button,
in case the start condition is monitored.
Parameter_43
StartPETime_Delay
Wait time for the signal PE-Testprobe,
in case the start condition is monitored.
Parameter_44
StartKUTime_Delay
Wait time for the signal Contact
Monitoring, in case the start condition
is monitored.
Parameter_45
StartSHKHVTime_De
lay
Wait time for the signal Safety Circuit
HV, in case the start condition is
monitored.
6.4.3.1.13 PT 100
Parameters of the PT 100 test step.
Tag
Parameter
Explanation
Parameter_0
StartCondition
Start conditions of the test step. The
start conditions are saved in a bit-coded
manner and can only be analysed
together with the StartConditionMask
field.
Parameter_1
StartConditionMas
k
Start conditions of the test step. The
start conditions are saved in a bit-coded
manner and can only be analysed
together with the StartCondition field.
Parameter_2
t
Test time
Parameter_3
t_start
Delay time for the start scenario when
starting the test until starting the
analysis. This value is not valid for all
start scenarios.
Parameter_4
t_delay
Start delay between fulfilling the start
condition and the start of the test.
Parameter_5
T_min
Lower threshold for the temperature.
Parameter_6
T_max
Upper threshold for the temperature.
Parameter_7
Polung
Contacting setting of an external relay
matrix.
Parameter_8 bis
Parameter_23
PolungCAN_00 bis
PolungCan_15
Setting of the relay matrix in accordance
with the choice in the program. The
User Manual ATS400
Version 3.14.41 - 1
214
Reference
Tag
Parameter
Explanation
display is bit coded.
Parameter_24
StateChangeBits
Always 0, never used.
Parameter_25
Multitest_Enable
Multitest is active, if the value does not
equal 0.
Parameter_26
Multitest_Auswert
ung
Method of analysing the multitest.
0 = worst measurement value.
Parameter_27
Multitest_Endekri
terium
Method of ending the multitest.
0 = number of measurements
1 = pass key
Parameter_28
Multitest_Endekri
terium_Anzahl
Number of multitest inspections.
Parameter_29
ErrorStartConditi
on
Condition for switching forward in the
event of an error.
Parameter_30
ErrorStartConditi
onMask
Mask for the condition for switching
further in the event of an error.
Parameter_31
ErrorStateChangeB
its
Always 0, never used.
Parameter_32
ErrorWSBDelay
Delay of switching further in the event of
an error.
Parameter_33
ErrorWSBTimeValid
Delay time active.
Parameter_34
R_offset
Resistance of the measurement
structure.
Parameter_35
StartStateChange
Indicates whether the switching
condition needs to be maintained when
testing the start conditions.
0 = no waiting for switch condition
1 = Wait for switching condition
Parameter_36
StartStateJump
Indicates whether the Jump button is
displayed.
Parameter_37
R0
Basic resistance of the measurement
sensor.
Parameter_38
Repeating
Indicates how often the test step is
carried out.
Parameter_39
StartButton
Indicates whether the Start button is
displayed.
Parameter_40
PassButton
Indicates whether the Pass button is
displayed.
Parameter_41
StartandJump
Indicates whether the Start and Jump
buttons are displayed.
User Manual ATS400
Version 3.14.41 - 1
215
Reference
Tag
Parameter
Explanation
Parameter_42
StartTime_Delay
Wait time for the signal Start-Button,
in case the start condition is monitored.
Parameter_43
StartPETime_Delay
Wait time for the signal PE-Testprobe,
in case the start condition is monitored.
Parameter_44
StartKUTime_Delay
Wait time for the signal Contact
Monitoring, in case the start condition
is monitored.
Parameter_45
StartSHKHVTime_De
lay
Wait time for the signal Safety Circuit
HV, in case the start condition is
monitored.
6.4.3.1.14 Light control
Parameters of the Light control test step.
Tag
Parameter
Explanation
Parameter_0
StartCondition
Start conditions of the test step. The
start conditions are saved in a bit-coded
manner and can only be analysed
together with the StartConditionMask
field.
Parameter_1
StartConditionMas
k
Start conditions of the test step. The
start conditions are saved in a bit-coded
manner and can only be analysed
together with the StartCondition field.
Parameter_2
t_delay
Start delay between fulfilling the start
condition and the start of the test.
Parameter_3
StateChangeBits
Always 0, never used.
Parameter_4
Leuchte_ART
Type of the light
Parameter_5
Leuchte_Befehl
Command to the light
Parameter_6
Leuchte_DIM
Dim value
Parameter_7
Leuchte_DALIC
DALIC
Parameter_8
Leuchte_DALIV
DALIV
Parameter_9
Leuchte_DIMT
DIMT
Parameter_10
ErrorStartConditi
on
Condition for switching forward in the
event of an error.
Parameter_11
ErrorStartConditi
onMask
Mask for the condition for switching
further in the event of an error.
Parameter_12
ErrorStateChangeB
its
Always 0, never used.
Parameter_13
ErrorWSBDelay
Delay of switching further in the event of
User Manual ATS400
Version 3.14.41 - 1
216
Reference
Tag
Parameter
Explanation
an error.
Parameter_14
ErrorWSBTimeValid
Delay time active.
Parameter_15
StartStateChange
Indicates whether the switching
condition needs to be maintained when
testing the start conditions.
0 = no waiting for switch condition
1 = Wait for switching condition
Parameter_16
StartStateJump
Indicates whether the Jump button is
displayed.
Parameter_17
Repeating
Indicates how often the test step is
carried out.
Parameter_18
StartButton
Indicates whether the Start button is
displayed.
Parameter_19
StartandJump
Indicates whether the Start and Jump
buttons are displayed.
Parameter_20
StartTime_Delay
Wait time for the signal Start-Button,
in case the start condition is monitored.
Parameter_21
StartPETime_Delay
Wait time for the signal PE-Testprobe,
in case the start condition is monitored.
Parameter_22
StartKUTime_Delay
Wait time for the signal Contact
Monitoring, in case the start condition
is monitored.
Parameter_23
StartSHKHVTime_De
lay
Wait time for the signal Safety Circuit
HV, in case the start condition is
monitored.
6.4.3.1.15 Dummy load
Parameters of the Dummy load test step.
Tag
Parameter
Explanation
Parameter_0
StartCondition
Start conditions of the test step. The
start conditions are saved in a bit-coded
manner and can only be analysed
together with the StartConditionMask
field.
Parameter_1
StartConditionMas
k
Start conditions of the test step. The
start conditions are saved in a bit-coded
manner and can only be analysed
together with the StartCondition field.
Parameter_2
Management
Indicates how the supply of the test
item is to be carried out.
User Manual ATS400
Version 3.14.41 - 1
217
Reference
Tag
Parameter
Explanation
0:
1:
2:
3:
4:
Power off after test
Keep power on after test
Only power off
Power off only on error
Only power on
Parameter_3
U_Source
Source of the test supply.
Parameter_4
U
Voltage of the test item supply
Parameter_5
f
Frequency of the voltage
Parameter_6
Channels
Number of channels
Parameter_7
RGas
Gas resistance
Parameter_8
RCoil
Coil resistance
Parameter_9
Filament_enable
Active flame
Parameter_10
Filament_t
Active flame
Parameter_11
Filament_delay
Flame delay
Parameter_12
Filament_I
Current of the flame
Parameter_13
Ignition_enable
Ignition available
Parameter_14
Ignition_t
Ignition time
Parameter_15
Igniton_delay
Ignition delay
Parameter_16
Ignition_U
Ignition voltage
Parameter_17
Fct_Enable
Function available
Parameter_18
Fct_t
Duration of the function
Parameter_19
Fct_delay
Delay of the analysis
Parameter_20
Fct_Imin
Lower threshold value of the current
Parameter_21
Fct_Imax
Upper threshold value of the current
Parameter_22
t_timeout
Always 0
Parameter_23
Polung
Contacting setting of an external relay
matrix.
Parameter_24 bis
Parameter_39
PolungCAN_00 bis
PolungCan_15
Setting of the relay matrix in accordance
with the choice in the program. The
display is bit coded.
Parameter_40
StateChangeBits
Always 0, never used.
Parameter_41
Multitest_Enable
Multitest is active, if the value does not
equal 0.
Parameter_42
Multitest_Auswert
ung
Method of analysing the multitest.
0 = worst measurement value.
Parameter_43
Multitest_Endekri
terium
Method of ending the multitest.
0 = number of measurements
User Manual ATS400
Version 3.14.41 - 1
218
Reference
Tag
Parameter
Explanation
1 = pass key
Parameter_44
Multitest_Endekri
terium_Anzahl
Number of multitest inspections.
Parameter_45
ErrorStartConditi
on
Condition for switching forward in the
event of an error.
Parameter_46
ErrorStartConditi
onMask
Mask for the condition for switching
further in the event of an error.
Parameter_47
ErrorStateChangeB
its
Always 0, never used.
Parameter_48
ErrorWSBDelay
Delay of switching further in the event of
an error.
Parameter_49
ErrorWSBTimeValid
Delay time active.
Parameter_50
Filament_Imax
Max. current of the flame
Parameter_51
StartStateJump
Indicates whether the Jump button is
displayed.
Parameter_52
Repeating
Indicates how often the test step is
carried out.
Parameter_53
StartButton
Indicates whether the Start button is
displayed.
Parameter_54
PassButton
Indicates whether the Pass button is
displayed.
Parameter_55
StartandJump
Indicates whether the Start and Jump
buttons are displayed.
Parameter_56
StartTime_Delay
Wait time for the signal Start-Button,
in case the start condition is monitored.
Parameter_57
StartPETime_Delay
Wait time for the signal PE-Testprobe,
in case the start condition is monitored.
Parameter_58
StartKUTime_Delay
Wait time for the signal Contact
Monitoring, in case the start condition
is monitored.
Parameter_59
StartSHKHVTime_De
lay
Wait time for the signal Safety Circuit
HV, in case the start condition is
monitored.
6.4.3.1.16 Light filament current
Parameters of the Light filament current test step.
Tag
Parameter
Explanation
Parameter_0
StartCondition
Start conditions of the test step. The
User Manual ATS400
Version 3.14.41 - 1
219
Reference
Tag
Parameter
Explanation
start conditions are saved in a bit-coded
manner and can only be analysed
together with the StartConditionMask
field.
Parameter_1
StartConditionMas
k
Start conditions of the test step. The
start conditions are saved in a bit-coded
manner and can only be analysed
together with the StartCondition field.
Parameter_2
Management
Indicates how to proceed after the test
with supplying the test item.
0: Deactivate
1: Activate
Parameter_3
Filament_enable
Active flame
Parameter_4
Filament_t
Active flame
Parameter_5
Filament_delay
Flame delay
Parameter_6
Filament_I
Current of the flame
Parameter_7
Polung
Contacting setting of an external relay
matrix.
Parameter_8 bis
Parameter_23
PolungCAN_00 bis
PolungCan_15
Setting of the relay matrix in accordance
with the choice in the program. The
display is bit coded.
Parameter_24
StateChangeBits
Always 0, never used.
Parameter_25
Multitest_Enable
Multitest is active, if the value does not
equal 0.
Parameter_26
Multitest_Auswert
ung
Method of analysing the multitest.
0 = worst measurement value.
Parameter_27
Multitest_Endekri
terium
Method of ending the multitest.
0 = number of measurements
1 = pass key
Parameter_28
Multitest_Endekri
terium_Anzahl
Number of multitest inspections.
Parameter_29
ErrorStartConditi
on
Condition for switching forward in the
event of an error.
Parameter_30
ErrorStartConditi
onMask
Mask for the condition for switching
further in the event of an error.
Parameter_31
ErrorStateChangeB
its
Always 0, never used.
Parameter_32
ErrorWSBDelay
Delay of switching further in the event of
an error.
Parameter_33
ErrorWSBTimeValid
Delay time active.
User Manual ATS400
Version 3.14.41 - 1
220
Reference
Tag
Parameter
Explanation
Parameter_34
Filament_Imax
Max. current of the flame
Parameter_35
StartStateChange
Indicates whether the switching
condition needs to be maintained when
testing the start conditions.
0 = no waiting for switch condition
1 = Wait for switching condition
Parameter_36
StartStateJump
Indicates whether the Jump button is
displayed.
Parameter_37
Repeating
Indicates how often the test step is
carried out.
Parameter_38
StartButton
Indicates whether the Start button is
displayed.
Parameter_39
PassButton
Indicates whether the Pass button is
displayed.
Parameter_40
StartandJump
Indicates whether the Start and Jump
buttons are displayed.
Parameter_41
StartTime_Delay
Wait time for the signal Start-Button,
in case the start condition is monitored.
Parameter_42
StartPETime_Delay
Wait time for the signal PE-Testprobe,
in case the start condition is monitored.
Parameter_43
StartKUTime_Delay
Wait time for the signal Contact
Monitoring, in case the start condition
is monitored.
Parameter_44
StartSHKHVTime_De
lay
Wait time for the signal Safety Circuit
HV, in case the start condition is
monitored.
6.4.3.1.17 External program
Parameters of the External program test step.
Tag
Parameter
Explanation
Parameter_0
StartCondition
Start conditions of the test step. The
start conditions are saved in a bit-coded
manner and can only be analysed
together with the StartConditionMask
field.
Parameter_1
StartConditionMas
k
Start conditions of the test step. The
start conditions are saved in a bit-coded
manner and can only be analysed
together with the StartCondition field.
Parameter_3
Polung
Contacting setting of an external relay
User Manual ATS400
Version 3.14.41 - 1
221
Reference
Tag
Parameter
Explanation
matrix.
Parameter_4 bis
Parameter_19
PolungCAN_00 bis
PolungCan_15
Setting of the relay matrix in accordance
with the choice in the program. The
display is bit coded.
Parameter_20
StateChangeBits
Always 0, never used.
Parameter_21
Multitest_Enable
Multitest is active, if the value does not
equal 0.
Parameter_22
Multitest_Auswert
ung
Method of analysing the multitest.
0 = worst measurement value.
Parameter_23
Multitest_Endekri
terium
Method of ending the multitest.
0 = number of measurements
1 = pass key
Parameter_24
Multitest_Endekri
terium_Anzahl
Number of multitest inspections.
Parameter_25
SettingsFlags
Settings
Parameter_26
t_delay
Start delay between fulfilling the start
condition and the start of the test.
Parameter_27
ErrorStartConditi
on
Condition for switching forward in the
event of an error.
Parameter_28
ErrorStartConditi
onMask
Mask for the condition for switching
further in the event of an error.
Parameter_29
ErrorStateChangeB
its
Always 0, never used.
Parameter_30
ErrorWSBDelay
Delay of switching further in the event of
an error.
Parameter_31
ErrorWSBTimeValid
Delay time active.
Parameter_32
StartStateJump
Indicates whether the Jump button is
displayed.
Parameter_33
Repeating
Indicates how often the test step is
carried out.
Parameter_34
StartButton
Indicates whether the Start button is
displayed.
Parameter_35
PassButton
Indicates whether the Pass button is
displayed.
Parameter_36
StartandJump
Indicates whether the Start and Jump
buttons are displayed.
Parameter_37
StartTime_Delay
Wait time for the signal Start-Button,
in case the start condition is monitored.
User Manual ATS400
Version 3.14.41 - 1
222
Reference
6.4.4
Tag
Parameter
Explanation
Parameter_38
StartPETime_Delay
Wait time for the signal PE-Testprobe,
in case the start condition is monitored.
Parameter_39
StartKUTime_Delay
Wait time for the signal Contact
Monitoring, in case the start condition
is monitored.
Parameter_40
StartSHKHVTime_De
lay
Wait time for the signal Safety Circuit
HV, in case the start condition is
monitored.
Result
The data in this block can be found under <ResultData>/<Result>.
Tag
Explanation
Count_Tests
Number of tests that were carried out since starting the
test plan.
Count_IO
Number of IO results of the test since starting the test
plan.
Count_NIO
Number of NIO results of the test since starting the test
plan.
Count_ERROR
Number of errors of the test since starting the test plan.
PlanCycleTime
Duration for carrying out the test. The value is always
0.
PlanStandbyTime
Duration between the end of the prior test and the start
of the current test.
Result
Total result of the plan.
Passed -> The test item has passed the test.
Failed -> the test item has not passed the test or the
test was cancelled.
Type
Type of the test item, is only filled in if the combibox is
active.
UsedID
ID used to select the test plan, is only filled in when
the ID-Pattern field is active.
SerialNumber
Serial number of the test item, is only filled in if the
Serial-Pattern field is active.
Article
Article name, is only filled in if the Article-Pattern
field is active.
User Manual ATS400
Version 3.14.41 - 1
223
Reference
6.4.5
PlanOptionen
The data in this block can be found under <ResultData>/<PlanOptionen>.
This block contains the subblock for the ReportOptionen and subsequent entries.
Tag
Explanation
Start_Timeout
If the vlaue is not 0 it will be checked that all other
start conditions are meet after the start condition start
signal is set.
6.4.5.1 ReportOptionen
The data in this block can be found under <ResultData>/<PlanOptionen>/
<ReportOptionen>.
This block contains a list of the individual report options. Every report option is a block
of its own.
6.4.5.1.1 ReportOption
The data in this block can be found under <ResultData>/<PlanOptionen>/
<ReportOptionen>/<ReportOption>.
This block contains the subblock for the output data and subsequent entries.
Tag
Explanation
PrintFlags
Indicates for what overall result the report is to be
created. The indication is bit-coded.
6.4.5.1.1.1 SpoolData
The data in this block can be found under <ResultData>/<PlanOptionen>/
<ReportOptionen>/<ReportOption>/<SpoolData>.
Tag
Explanation
Template
File name of the template.
If the file can be reached via a relative path from the
folder of the plan files, the relative path is entered,
otherwise the absolute path is entered.
Output
Indication where the report is to be sent. This indication
is only filled in if the report is to be issued on a printer.
ConversionType
Indicates what report is to be created.
printer -> printout on a printer using an HTML
template
html -> creation of an HTML file using an HTML
template
User Manual ATS400
Version 3.14.41 - 1
224
Reference
Tag
Explanation
pdf -> creation of a PDF file using an HTML template
xml -> creation of an XML file
csv -> creation of a CSV file using a CSV template
zebra -> printout on a zebra printer using a ZPL
template
6.4.6
Validation
The data in this block can be found under <ResultData>/<Validation>.
6.5
Tag
Explanation
Checksum
Not used, always 42.
Plan files
The plan files have the extension .plan. The place of saving and the file name result
from the details in Settings -> File storage -> Test plan. This file has the format
of an XML file with UTF-8 coding with BOM.
The plan files are largely identical to the result files. They differ by the encompassing
PlanData tag instead of ResultData. Furthermore, the result fields in the individual
test steps and the Result block do not apply.
6.6
Printserver configuration
This file has the name PrintServer.conf and resides in the working folder. This file
must not be present and will not be created automatically.
In this file are settings which are used only by the printserver. These settings are for
the storage of the report files, handling missing keywords and timeouts. It is possible
to configure an alternative folder for each report type.
The file is in XML-format and the main tag is Settings.
Tag
Explanation
HTML
Alternative folder for the report type html.
PDF
Alternative folder for the report type pdf.
XML
Alternative folder for the report type xml.
CSV
Alternative folder for the report type csv.
Debug
false: Will a keyword not be recognized no text be
generated.
true: Will a keyword not be recognized the keyword
in parantheseis will be generated.
Default setting is false.
User Manual ATS400
Version 3.14.41 - 1
225
Reference
Tag
Explanation
PdfTimeout
Time within the PDF-document must be generated.
The value is in milliseconds.
Default is 6 seconds.
PrintTimeout
time within the printing on the printer must be
completed. The value is in milliseconds.
Default is 10 seconds.
6.7
Matrix
6.7.1
RelaisMatrix.cfg
This file will be used for all relais matrix types und describes which relais will be
switched for the different outputs and wires. For the types 3 and 4 also the file for
the additional relais is neccessary.
Description: Relais Matrix, 8Channel, 1xRelais_Platine, 1xLT_CPU
MatrixTyp: 1
MatrixNum: 1
Channels: 2
----------------------------Channel 1
A: 1, 2,
B: 1,
0:
----------------------------Channel 2
A: 3, 4,
B: 3,
0:
-----------------------------
Tag
Description
Description
Comment which will not be proccessed.
MatrixTyp
Determines the different modules.
1: Matrix with max. 24 relais for each board
2: Matrix with max. 8 relais for each board
3: Matrix with max. 16 relais for each board
4: Matrix with max. 32 relais for each board
MatrixNum
Number of boards in the matrix.
Channels
Number of channels in the matrix.
Between the header and the first channel resp. between the channels is a separator
line. After the last channel the seperator line must be present.
Each channel consists of 4 Lines. There must be configured as much lines as set in
Channels.
User Manual ATS400
Version 3.14.41 - 1
226
Reference
Tag
Description
Comment which will not be proccessed.
6.7.2
A:
These relais will be switched in the case wire HV1 will
connected to the apropiate output.
B:
These relais will be switched in the case wire HV2 will
connected to the apropiate output.
0:
These relais will be switched in the case none of the
wires will be connected to an output.
ExtendedRelais.conf
This file is neccessary when a matrix of type MatrixTyp 3 or 4 will be used.
This file is in XML-Format. For each test type as much lines must be present as boards
are used according to the value MatrixNum in the file RelaisMatrix.cfg. The values in
the tag unsignedInt have a range from 0 ... 3.
Value
Description
0
No additional relais switched.
1
Additional relais K1 switched.
2
Additional relais K2 switched.
3
Both additional relais switched.
User Manual ATS400
Version 3.14.41 - 1
227
Reference
<?xml version="1.0" encoding="utf-8"?>
<ExtendedRelais xmlns:xsi="http://www.w3.org/2001/XMLSchema-instance" xmlns:xsd="ht
<!-- Für jede Prüfart müssen so viele Zeilen vorhanden sein, wie Platinen verbaut s
0 = Kein Relais geschaltet, 1 = K1 geschaltet, 2 = K2 geschaltet, 3 = beide ge
<HV_AC>
<unsignedInt>0</unsignedInt>
</HV_AC>
<HV_DC>
<unsignedInt>0</unsignedInt>
</HV_DC>
<ISO>
<unsignedInt>0</unsignedInt>
</ISO>
<PE>
<unsignedInt>0</unsignedInt>
</PE>
<FCT_Current>
<unsignedInt>0</unsignedInt>
</FCT_Current>
<Resistance>
<unsignedInt>0</unsignedInt>
</Resistance>
<LeakageCurrent>
<unsignedInt>0</unsignedInt>
</LeakageCurrent>
<DummyLoad>
<unsignedInt>0</unsignedInt>
</DummyLoad>
<FCT_Extern>
<unsignedInt>0</unsignedInt>
</FCT_Extern>
<Notlicht>
<unsignedInt>0</unsignedInt>
</Notlicht>
<PT100>
<unsignedInt>0</unsignedInt>
</PT100>
<Matrix>
<unsignedInt>0</unsignedInt>
</Matrix>
</ExtendedRelais>
User Manual ATS400
Version 3.14.41 - 1
228
Lembergstr. 23
70825 Korntal
Phone:
Fax:
Internet:
E-Mail:
+49 711 83 99 39-0
+49 711 83 99 39-9
www.etl-prueftechnik.de
[email protected]