1
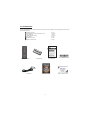
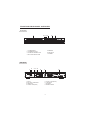
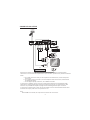
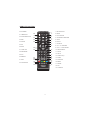
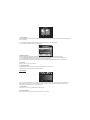
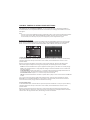
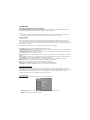
DVS1000HD
DVD/DVB-T Combo Player
WARRANTY PROCEDURE
v1.5.2: DEC 2011
Please read the owner’s manual carefully and ensure that you have followed the correct installation and operating
procedures.
1.
2.
3.
Please read this warranty card.
Keep your purchase receipt to enable you to proceed quickly in the event of a Warranty Service.
If you require Warranty Service, please contact the TEAC Customer Support Hotline at 1300 553 315 for
assistance. Please ensure that you have the model number, serial number and purchase receipt ready when
you call.
Please complete the section below and keep this information for your own records.
Owner’s Name
Owner’s Address
Postcode
Model Name/No.
Serial No.
Dealer’s Name
Dealer’s Address
Postcode
NSW
151 Arthur Street
Homebush West, NSW 2140
Queensland
Unit 1, 320 Curtin Ave West
Eagle Farm, QLD 4009
South Australia
11 McInnes Street
Ridleyton, SA 5008
Victoria
282 Normanby Road
South Melbourne, VIC 3205
Western Australia
Unit 2, 50 Pilbara Street
Welshpool, WA 6106
Thank you for selecting a TEAC product .
If you should require assistance with your product regarding its setup
or operation, or if any difficulties arise, please call us directly for advice
between Monday to Friday at 8.30AM – 6PM AEST at the
TEAC Customer Support Hotline
1300 553 315
[email protected]
www.teac.com.au
WARRANTY INFORMATION
v1.5.2: DEC 2011
Our goods come w ith guarantees that cannot be excluded under the Australian Consumer Law . You are
entitled to a replacement or refund for a major failure and for compensation for any other reasonably
foreseeable loss or damage. You are also entitled to have the goods repaired or replaced if the goods fail
to be of acceptable quality and the failure does not amount to a major failure.
Warranty Terms & Conditions
1.
TEAC warrants that this product is free from defects in material and workmanship under normal domestic use with
reasonable care and skill. Maintenance and cleaning (i.e. laser head) is not covered by this warranty. The TEAC
warranty only applies to TEAC products purchased, used and serviced in Australia.
2.
The benefits to the consumer given by this Warranty are in addition to other rights and remedies of the consumer
under a law in relation to goods or services to which the warranty relates, being the Australian Consumer Law.
3.
Refund or replacement via your retailer is available for a period of 14 days after purchase for goods that have been
inspected and determined to have a major failure. Refund and exchange is not applicable for change of mind.
4.
Subject to the terms herein, this warranty effectively covers the equipment as specified in the Warranty Periods
Table below from the date of purchase.
TEAC PRODUCT
LED/LCD TV 32” (80 cm) and above
All other TEAC products
5.
WARRANTY PERIOD
1 Year (In-Home Service/ Pick up Available)*
1 Year (Carry-in Service)
In Home Service/Pick up* Service
This service will only be provided as part of this warranty if all the following conditions are met;
a) The product is indicated in the Warranty Period Table.
b) The product is within the warranty period.
c) The product is located within the normal service area of the local TEAC Authorised Service Centre.
If TEAC determines that the product is not repairable on site, TEAC can complete the repair by taking the product to
a TEAC Authorised Service Centre.
Carry-in Service
Where In-Home service/Pick up* is not available, the purchaser is required to send the product to the nearest TEAC
Authorised Service Centre for repair. In this event, proof of purchase is required to support a warranty claim. After
the repair, the product will be available for collection by or return to the purchaser at a fee upon request. TEAC inhome service can be made available at a fee upon request.
6.
A 12-month replacement warranty is applicable to all Accessories such as Remote, Power Adaptors and Cables.
7.
TEAC will ensure to the best of its abilities that all required parts are made available for any required service/repair.
8.
TEAC Australia Pty Ltd and its Authorised Service Centres will use their best endeavours to complete product
repairs within a reasonable period based on available resources and workload during the time when service is
requested and performed.
9.
Refurbished parts may be used to repair the product. In the case of a replacement, the product may be replaced,
with a refurbished unit of the same type or, if one is unavailable, a similar refurbished model with equal or better
features & specifications.
10.
Please be advised that if the product presented for repair is capable of retaining user-generated data, the data may
be lost during servicing. Customers are strongly encouraged to back up all important information/data before
sending the product in for service/repair.
11.
Service will be provided only during normal business hours and under safety conditions and circumstances. TEAC
and its authorised service agents can refuse any repair if safety, in relation to OH&S, becomes a concern to its staff
or authorised service agents’ personnel.
12.
The warranty is void and warranty claims may be refused, subject to the Australian Consumer Law, if:
a) The product was not transported, installed, operated or maintained according to manufacturer instruction, or
b) The product was abused, damaged, tampered, altered or repaired by any unauthorised persons, or
c) Product failure is due to accidents during use, installation or transit, power surges, use of defective or
incompatible external devices, exposure to abnormal conditions such as excessive temperatures or humidity, or
entry of liquids, objects or creatures into the product.
13.
No one is authorised to assume any liability on behalf of TEAC or impose any obligation on it, in connection with the
sale of any equipment other than as stated in this warranty and outlined above.
14.
TEAC reserves the right to inspect and verify whether the product is exhibiting a major failure as claimed by
customers/retailers.
15.
LCD dead pixel policy, please contact TEAC Customer Support Hotline on 1300 553 315 for assistance.
TABLE OF CONTENTS
IMPORTANT SAFETY INSTRUCTIONS----------------------------------------------------------------- 1
ACCESSORIES---------------------------------------------------------------------------------------------- 2
FRONT AND REAR PANEL OVERVIEW-----------------------------------------------------------------3
CONNECTION SETUP------------------------------------------------------------------------------------- 4
REMOTE CONTROL---------------------------------------------------------------------------------------- 5
Inserting Batteries---------------------------------------------------------------------------------------- 7
Using the Remote Control------------------------------------------------------------------------------- 7
DVB (DIGITAL TV) MODE-----------------------------------------------7
BASIC OPERATION AND SETTINGS--------------------------------------------------------------------7
Initial Setup and Channel Tuning-----------------------------------------------------------------------7
Program Settings------------------------------------------------------------------------------------------7
1. Program Edit------------------------------------------------------------------------------------------7
2. Electronic Program Guide (EPG)----------------------------------------------------------------- 9
3. Sort-----------------------------------------------------------------------------------------------------9
4. LCN (Logical Channel Number)------------------------------------------------------------------10
Picture Setting------------------------------------------------------------------------------------------- 10
1. Aspect Ratio-----------------------------------------------------------------------------------------10
2. Resolution------------------------------------------------------------------------------------------- 10
3. TV format-------------------------------------------------------------------------------------------- 10
Channel Search------------------------------------------------------------------------------------------10
1. Auto Search------------------------------------------------------------------------------------------11
2. Manual Search-------------------------------------------------------------------------------------- 11
3. Country----------------------------------------------------------------------------------------------- 11
4. Antenna power-------------------------------------------------------------------------------------- 11
Time Setting---------------------------------------------------------------------------------------------- 11
1. Time Offset------------------------------------------------------------------------------------------ 11
2. Country Region------------------------------------------------------------------------------------- 11
3. Time Zone------------------------------------------------------------------------------------------- 12
4. Sleep------------------------------------------------------------------------------------------------- 12
Option Menu----------------------------------------------------------------------------------------------12
1. OSD Language--------------------------------------------------------------------------------------12
2. Audio Language------------------------------------------------------------------------------------ 12
3. Subtitle Language----------------------------------------------------------------------------------12
4. Digital Audio-----------------------------------------------------------------------------------------12
System Menu---------------------------------------------------------------------------------------------12
1. Parental Guidance--------------------------------------------------------------------------------- 12
2. Set Password--------------------------------------------------------------------------------------- 13
3. Factory Default------------------------------------------------------------------------------------- 13
4. Information------------------------------------------------------------------------------------------ 13
PERSONAL VIDEO RECORDING (PVR) OPERATION--------------------------------------------- 13
PVR Configure------------------------------------------------------------------------------------------- 13
Scheduled Recording/Viewing Using the EPG----------------------------------------------------- 14
Schedule List--------------------------------------------------------------------------------------------- 14
Time shift--------------------------------------------------------------------------------------------------15
Playback/Recorded File List---------------------------------------------------------------------------15
USB MULTIMEDIA PLAYBACK AND SETTINGS-----------------------------------------------------16
1.Music Playback--------------------------------------------------------------------------------------16
2.Picture slide show-----------------------------------------------------------------------------------16
3.Movie Playback--------------------------------------------------------------------------------------17
Photo Setting-------------------------------------------------------------------------------------------17
Movie Configure--------------------------------------------------------------------------------------- 17
DVD MODE-----------------------------------------------------------------18
SWITCHING BETWEEN DVB AND DVD MODES-------------------------------------------------------18
DVD PLAYBACK----------------------------------------------------------------------------------------------18
DVD MENU OPERATION----------------------------------------------------------------------------------- 18
Language Setup------------------------------------------------------------------------------------------- 18
Video Setup ------------------------------------------------------------------------------------------------ 19
Audio Setup-------------------------------------------------------------------------------------------------19
Rating Setup------------------------------------------------------------------------------------------------20
Misc Setup----------------------------------------------------------------------------------------------------- 20
MP3/WMA/JPEG/MPEG4 DISC PLAYBACK-------------------------------------------------------------21
Edit Playlist------------------------------------------------------------------------------------------------- 21
PICTURE CD PLAYBACK----------------------------------------------------------------------------------- 22
TROUBLESHOOTING --------------------------------------------------------------------------------------- 23
SPECIFICATIONS--------------------------------------------------------------------------------------------24
IMPORTANT SAFETY INSTRUCTIONS
1) Read these instructions.
2) Keep these instructions.
3) Heed all warnings.
4) Follow all instructions.
5) Do not use this device near water.
6) Clean only with dry cloth.
7) Do not block any ventilation openings, install in accordance with the instructions.
8) Do not install near any heat sources such as radiators, heat registers, stoves, or other devices
(including amplifiers) that produce heat.
9) Do not defeat the safety purpose of the polarized plug. If the provided plug does not fit into your
outlet, consult an electrician for replacement of the obsolete outlet. Protect the power cord
from being walked on or pinched particularly at plugs, convenience receptacles, and the point
where they exit from the device.
10) Only use attachments/accessories specified by the manufacturer.
11) Unplug this device during lightning storms or when unused for long periods of time.
12) Refer all servicing to qualified service personnel. Servicing is required when the device has
been damaged in any way, such as when the power supply cord or plug is damaged, liquid has
been spilled or objects have fallen into the device, the device has been exposed to rain or
moisture, does not operate normally, or has been dropped.
13) The AC power plug is used to disconnect the device completely from power and must be
easily accessible at all times.
14) The ventilation should not be impeded by covering the ventilation openings with items, such
as newspapers, tablecloths, curtains, etc.
15) No naked flame sources, such as lighted candles, should be placed on the device.
16) Take notice of the environmental aspects of battery disposal.
17) Use this device in moderate climates.
18) The device shall not be exposed to dripping or splashing and that no objects filled with
liquids, such as vases, shall be placed on the device.
WARNING: To reduce the risk of fire or electric shock, do not expose this device to rain or moisture.
WARNING: Do not expose the batteries to excessive heat such as sunshine, fire or the like.
This symbol indicates that dangerous voltages constituting a risk of electric shock are
present within this unit.
This symbol indicates that this product uses double insulation between hazardous mains
voltage and user accessible parts.
When servicing use only identical replacement parts.
Plug the USB memory stick directly into the unit instead of using USB extension cables in order to
avoid interference and failure during data transfer.
The electrostatic loads may cause the device to malfunction. If this happens, reset the device.
1
ACCESSORIES
Before installing the unit, please check the contents of the package. The package should contain
the following items:
1
2
3
4
5
6
7
Remote Control
AAA Battery for the Remote Control
User Manual
Serial Number label
AV cables
Cables Brochure
TEAC contact card
Remote Control
AV cables
X1 pc
X1 pair
X1pc
X 2 pcs
X 1pc
X 1pc
X 1pc
AAA Battery
User Manual
Cables Brochure
2
Serial Number label
TEAC contact card
FRONT AND REAR PANEL OVERVIEW
Front panel
234 5
1
1. CABIN DOOR
2. POWER BUTTON
3. OPEN/CLOSE BUTTON
4. PLAY/PAUSE BUTTON
6
7
5.SENSOR
6.USB JACK
7. POWER
Rear panel
1 2
3 4 5
6
7
8
100-240V~
50/60Hz
S/ N:
RF IN
RF LOOP
THROUGH
DVD/DVB-T COMBO PLAYER
MODEL: DVS1000HD
100-240V~ 50/60HZ 15W
Made in China
APN:
HDMI OUT
1. RF IN
2. RF LOOP THROUGH
3. HDMI OUT
4. VIDEO JACK(RCA)
5. Pr,Pb,Y JACK(RCA)
6. L/R AUDIO
7. COAXIAL
8. MAINS CABLE
3
4
CONNECTION SETUP
TV Aerial
10 0- 24 0V ~
50 /6 0H z
S/ N :
RF IN
RF LO OP
TH RO UG H
DVD/DVB-T COMBO PLAYER
MODEL: DVS1000HD
100-240V~ 50/60HZ 15W
Made in China
APN:
HDMI OUT
4
Coaxial
VOLUME
INPUT SELECTOR
POWER
YELLOW
(Video)
(Audio)
BYPASS
PRO LOGIC
3 STEREO
MODE
TEST
CHANNEL
KARAOKE
MUTE
UP
DOWN
BASS
1
MIC
2
1
MIC VOL
2
MIC
TREBLE
ECHO
EXCITE
Composite
VIDEO IN
Pr
Pb
HDMI
VCR
Please ensure that the power is completely disconnected before making or changing cable
connections. To connect the Set Top Box unit to your television, please use any one of the methods
below:
a. For a basic connection from your Set Top Box to the television set, use the Composite
Connection.
b. For a higher quality connection, use the Component Video Connection, combined with
the Audio Connection.
c. For the highest quality connection, use a HDMI connection.
To connect to an amplifier, plug one end of a coaxial audio cable into the coaxial digital audio
socket on the unit and plug the other end into the matching socket on your audio receiver. This
feature is only available for amplifiers equipped with coaxial digital audio input connectors.
To connect to a DVD recorder or VCR, use the AV cables to connect the external DVD recorder or
VCR to the AV output jacks on the rear panel of the unit.
Note:
· While HDMI is connected, the Composite Connection will not be active.
4
REMOTE CONTROL
20. STANDBY
STANDBY TIMER LIST RECORD LIST MUTE
SCAN/SKIP BACK
22. SCAN/SKIP BACK
20
21
22
23. REC
23
REC
21. TIMER LIST
24. SETUP
24
SCAN/SKIP FORWARD
STOP
EJECT
SETUP
CH+
SOURCE
25. OK
26. INFO
27. TITLE/TTX
OK
VOL
-
VOL
+
25
26
1. RECORD LIST
2. MUTE
3. PLAY/PAUSE
4. SCAN/SKIP FORWARD
5. STOP
6. EJECT
7
8
7. SOURCE
9
8. CH+/- or UP/DOWN
9. COL+/- or LEFT/RIGHT
10
CH-
INFO
1
28. PROGRAM
1
2
3
4
5
6
2
RETURN/EXIT
3
10. RETURN/EXIT
11
11. SLOW
12
12. GOTO
SLOW
4
29. A-B
5
6
GOTO
30. REPEAT
31. EPG
32. FAVOURITE
27
28
29
30
31
32
7
REPEAT
EPG
8
9
0
TITLE/TTX
AUDIO
SUBTITLE
A-B
MENU
ANGLE
FAVORITE TV/RADIO
P/N
13
14
15
16
17
18
19
13. Number Keys
14. AUDIO
15. SUBTITLE
16. MENU
17. ANGLE
18. P/N
DVS1000HD
19. TV/RADIO
5
Button Functions
1. RECORD LIST
BUTTON
DVB MODE
Display Recorded File List
DVD MODE
2. MUTE
Silence audio output. Press again or press Vol+/- to unmute
3. PLAY/PAUSE
Start or pause file/DVD playback
4. SCAN/SKIP FWD
5. STOP
Tap once to skip to next track. Press and hold to fast forward. For
different speeds up to 16x, repeat this motion.
Stop recording or playback
Stop playback
6. EJECT
-
7. SOURCE
Switch between DVB and DVD mode
-
Open/close disc tray
8. CH+/- or UP/DOWN
Change TV channels or
Navigate menus
navigate menus
9. VOL+/- or LEFT/RIGHT Change volume or navigate menus
Exit menus
10. RETURN/EXIT
Slow motion video playback,
11. SLOW
Press again for different speeds
Jump to a specified time in the
Jump to a specific track in the
12. GOTO
current video/audio track
disc
Key in numbers for channel changing or certain menu settings
13. Number Keys
14. AUDIO
Select available audio tracks
15. SUBTITLE
Select available subtitles
16. MENU
-
17. ANGLE
-
Display last DVD submenu or
file browser
Select available camera angles
18. P/N
Select picture resolutions
Zoom in/out
19. TV/RADIO
20. STANDBY
Switch between TV and Radio
channels
Turn the unit on/off Standby Mode
21. TIMER LIST
Display Schedule List
22. SCAN/SKIP BACK
23. REC
Tap once to skip to previous track. Press and hold to fast rewind.
For different speeds up to 16x, repeat this motion.
Start recording TV program
-
24. SETUP
Access DVB settings menu
25. OK
Confirm a selected setting, or play a selected channel/file
26. INFO
Show/hide detailed information on currently playing media
27. TITLE/TTX
28. PROGRAM
Display Teletext (subject to
availability from broadcaster)
-
29. A-B
-
30. REPEAT
-
31. EPG
Display the Electronic Program
Guide (EPG)
Display your Favourite Channel
List
32. FAVOURITE
6
-
Access DVD settings menu
Display main (root) DVD menu
(subject to availability on DVD)
Program a playlist for DVD
tracks by Title and Chapter
Press during playback to set
points A and B for looping
playback
Toggle Repeat modes: Single,
Folder, Off
-
Note:
· In order to operate any of the remote control functions, the Set Top Box must be powered on.
· When changing between DVB and DVD modes, the Set Top Box will take a few seconds to reboot.
Inserting Batteries
Remove the battery cover from the rear of the Remote Control and place two AAA size batteries
inside the compartment. Please make sure that the battery polarities match the polarity markings as
marked in the compartment.
Using the Remote Control
To use the Remote Control, point it towards the front of the Digital Set Top Box as illustrated in the
image below. The Remote Control has a range of up to 7 meters from the Set Top Box at an angle of
up to 60 degrees.
Note:
· The Remote Control will not operate if its path is blocked.
· Direct sunlight or very bright light will decrease the sensitivity of the Remote Control.
DVB (DIGITAL TV) MODE
BASIC OPERATION AND SETTINGS
Initial Setup and Channel Tuning
After ensuring all connections are correct and secure, switch on the power supply and switch on the
TV. Press the Power button to switch on the Digital Set Top Box. If you are using the receiver for the
first time or have restored the unit settings to Factory Default, the INSTALLATION GUIDE will appear
on your TV screen.
OSD Language: Press the RIGHT/LEFT key to select a language
Country: Press the RIGHT/LEFT key to select your country of residence
Channel: Search Press the RIGHT or OK key to begin Automatic channel search
Once channel tuning is complete, you can start watching TV. If no channels were found, please
check your external antenna setup. For detailed instructions on Auto or Manual Channel Tuning,
please see the Channel Search section.
Note:
· Enable Antenna Power if an external active antenna is connected by accessing the Channel
Search menu.
Program Settings
First, press the SETUP button. To manage your TV channels, access the Program tab and navigate
with the directional buttons. Select an option and press OK or RIGHT to adjust that setting. Press the
EXIT button to exit the Menu.
1. Program Edit
To edit channel preferences, enter the Program Edit Menu. This Menu requires a password to be
accessed. The default password is '000000'. If you have lost your password, use the Master unlock
password '888888'.
7
EPG
While in the Program Edit menu, follow the hints on the bottom of the screen to select actions for a
currently highlighted channel. After you have finished making changes, press EXIT to save and quit
the menu. Available actions are described below.
Set a Favourite Channel:
Create a shortlist of favourite channels for easy access with these steps:
1. Select a preferred channel, and then press the FAVOURITE button.
2. A heart-shaped symbol will appear and the channel is marked as a favourite.
3. Repeat the previous steps to list more Favourite channels.
To unlist a channel as a Favourite, select that channel and press the FAVOURITE button again.
Press the FAVOURITE button while watching TV to show the Favourite channel list.
Delete a TV or Radio Channel:
1. Select the channel to delete, and then press the BLUE button. A confirmation message will appear.
2. Press OK to delete or EXIT to cancel the deletion.
3. Repeat the previous steps to delete more channels.
Skip a TV or Radio Channel:
1. Select the channel to be skipped, and then press the GREEN button. This channel is marked with a
skip symbol and will be skipped during channel browsing.
2. Repeat the previous step to skip more channels.
To unlist a channel as a skipped channel, select that channel and press the GREEN button again.
Move a TV or Radio Channel:
1. Select the channel to be moved, and then press the RED button. A move symbol will appear.
2. Press UP/DOWN to move the channel's position.
3. Press OK to confirm the new position.
4. Repeat the previous steps to move more channels.
Lock a Channel:
Restrict access to specific channels by setting a password lock.
1. Select the preferred channel, and then press the YELLOW button. A lock symbol will appear and
the channel is now locked.
2.Repeat the previous steps to lock more channels.
8
To remove a lock, select the locked channel and press the YELLOW button again.
The current password is required to view locked programs. The default password is '000000'. If you
have lost your password, the Master unlock password is '888888'.
2. Electronic Program Guide (EPG)
The EPG is an on-screen TV guide that shows scheduled programs seven days in advance. Press the
EPG button on the Remote Control while watching TV to access the guide directly. EPG controls with
the Remote Control are as follows:
LEFT/RIGHT button: Browse previous/next channel schedule
UP/DOWN button: Browse previous/next program on the schedule
GREEN button: Browse next day's schedule
RED button: Browse previous day's schedule
BLUE button: View detailed program information in full screen
For instructions on recording from the EPG, please see the PVR section.
3. Sort
Sort channels using the following options:
LCN: Sort channels in ascending order
Name: Sort channels in alphabetical order
Service ID: Sort channels according to the station ID
ONID: Sort channels according to ONID.
9
4. LCN (Logical Channel Number)
Set LCN on or off.
Picture Setting
First, press the SETUP button. Access the Picture Setting menu by navigating to the Picture tab with
the LEFT/RIGHT buttons. Press UP/DOWN to select an option and press OK or RIGHT to adjust that
setting. Press the EXIT button to exit the Menu.
1. Aspect Ratio
Change this setting if the picture does not appear to fit the screen correctly.
AUTO: This setting will automatically select the best ratio to match the broadcast
picture with your TV.
The following choices are also available: 4:3 Full, 4:3 Pan& Scan, 4:3 Letter Box,
16:9 Wide Screen.
Note: Press the YELLOW button in TV viewing mode to cycle through aspect ratio.
2. Resolution
Change this setting if the picture resolution does not appear to be correct.
This setting is to match the most common settings if a HDMI cord is used.
480P: for NTSC system TV.
576i: for PAL system TV.
576P: for PAL system TV.
720P: for NTSC or PAL system TV.
1080i: for NTSC or PAL system TV.
3. TV format
If the picture does not appear correctly, you need to change the settings. This should match the most
common setting for TVs in your country.
NTSC: for NTSC system TV.
PAL: for PAL system TV.
Channel Search
First, press the SETUP button. Access the Channel Search menu by navigating to the Channel
Search tab with the LEFT/RIGHT buttons. Press UP/DOWN to select an option and press OK or
RIGHT to adjust that setting. Press the EXIT button to exit the Menu.
10
1 . Auto Search
Automatically search for and save channels. All previously saved channels and channel settings will
be overwritten.
1. Select [Auto Search] and press OK or RIGHT to start the channel search.
2. To cancel the channel search, press EXIT.
2. Manual Search
Add new channels manually with this option without changing the current channel list.
1. Select [Manual Search] then press OK or RIGHT. The channel search screen will appear.
2. Press the RIGHT/LEFT key to select the channel frequency.
3. Press OK to start searching. Detected channels will be saved and added to the channel list.
3. Country
Select your country of residence.
4. Antenna power
Enable Antenna Power if an external active antenna is connected.
setting. Press the EXIT button to exit the Menu.
Time Setting
Time
Auto
Time Offset
Country Region
western Australia
Time Zone
GMT +1
Sleep
off
EXIT
Return
OK
Confirm
First, press the SETUP button. Access the Time Setting menu by navigating to the Time tab with the
LEFT/RIGHT buttons. Press UP/DOWN to select an option and press OK or RIGHT to adjust that
setting. Press the EXIT button to exit the Menu.
1. Time Offset
Select auto or manual for GMT offset adjustments.
2. Country Region
Select the Country Region when [Time Offset] is set to Auto.
11
3. Time Zone
Select the Time Zone Offset when [Time Offset] is set to Manual.
4. Auto Sleep
If this setting is off, this function does not work. If this setting is not off, a message will pop up
after your preferred time to inform you, that the device will go in to sleep mode.This message will
appear under no any operation. Standard setting is 3 hours. Press STANDBY button to exit sleep
/ auto-off mode.
Option Menu
First, press the SETUP button. Access the Option menu by navigating to the Time tab with the
LEFT/RIGHT buttons. The menu provides options to adjust the OSD Language, Subtitle Language
and Audio Language. Press UP/DOWN to select an option and press OK or RIGHT to adjust that
setting. Press the EXIT button to exit the Menu.
1. OSD Language
Select a language for the device's OSD menu.
2. Audio Language
Select the preferred audio language for watching TV channels. If the language is not available, the
default program language will be used. Availability of this feature is dependent on the broadcasted
service.
3. Subtitle Language
Select the preferred subtitle language. Availability of this feature is dependent on the broadcasted
service.
4. Digital Audio
Select digital audio output mode.
System Menu
First, press the SETUP button. Access the System menu by navigating to the System tab with the
LEFT/RIGHT buttons. The menu provides options to adjust the system settings. Press the
UP/DOWN key to select an option and press RIGHT/LEFT to adjust the setting. Press EXIT to exit
the Menu.
1. Parental Guidance
You can restrict access to channels that are unsuitable for children according to the channel rating.
All channels and recordings that have ratings higher than the set limit will be locked and require
password access using the current or Master password. Scheduled recordings for a locked channel
will record normally, but also require password access as long as the restriction is in place.
12
2. Set Password
Set or change the password for locked channels.
1. Enter your old password or the default password '000000'.
2. Enter your new password.
3. Re-enter your new password to confirm. After that, press EXIT to exit the Menu.
3. Factory Default
Reset your Set Top Box to the Default Factory Settings.
1. In the System Menu, select [Factory Default] and press OK or RIGHT to select.
2. Enter the current password and press OK to confirm.
Note:
· This action will delete all saved channels and settings.
4. Information
View model, hardware and software information.
PERSONAL VIDEO RECORDING (PVR) OPERATION
Press the REC button to record TV programs directly from the current viewed TV channel. Subchannels from the same frequency are still available for viewing while recording is in progress, but
recording must be stopped in order to change to channels from a different frequency. Functions
including MENU and EPG are also not available while recording is still in progress.
PVR Configure
Select or format the connected USB device for recording. To access this menu, press the SETUP
button, navigate to the USB tab with the LEFT/RIGHT buttons, and enter the PVR Configure menu
with the OK button.
13
1. Record Device
Select the disk for the record.
2. Format
Format the selected disk.
WARNING: This will erase all data on the disk. Please back up all valuable information before
reformatting a disk.
Note:
· TEAC cannot guarantee compatibility (operation and/or bus power) with all USB storage devices
and holds no responsibility for any loss of data on storage devices that may occur when connected
to this unit.
· It may take longer for the system to read the contents of a USB device if it contains large amounts
of data.
· Some USB devices and external hard drives may not be properly recognised.
· Even when they are in a supported format, some files may not play or display depending on the
content.
Scheduled Recording/Viewing Using the EPG
Automatically record or switch to a specific program at a set time by setting a schedule.
1. Access the EPG by pressing the EPG button on the remote control.
2. Select the desired TV program and press OK.
3. In the pop-up window, you can adjust the channel type, channel number, start and end time, repeat
mode, and Record/View mode if needed.
4. Press OK to confirm the scheduling. The Schedule List will be displayed.
5. Press EXIT to return to watching TV.
Note:
· Ensure that a USB storage device is connected and formatted correctly before recording a
program. Please see PVR Configure instructions above for details.
Schedule List
All scheduled recordings and viewing events are listed in the Schedule List. To view the Schedule
List, press the TIMER LIST button while watching TV. Recording events are marked in orange, and
viewing events are marked in green.
14
Time shift
If a USB device is connected and ready for recording, you can pause live broadcasts if you are
interrupted while watching TV.
1. Press the PAUSE key during live TV broadcast to start Time Shift. A progress bar will appear
displaying the length of time the program has been time shifted.
2. To resume watching from the paused point, press the PLAY button. The unit continues to record
the current broadcast during Time Shift playback.
To exit Time Shift and return to the live TV broadcast, press the STOP button.
Note:
· If you Fast Forward and catch up to the current live broadcast, the unit will exit Time Shift
automatically and resume real time viewing.
· If the live broadcast is paused for a longer period than was set in the PVR menu and Time Shift
recording reaches its limit, the unit will return to live TV viewing.
· During Time Shifting, Scan Forward/Back and GOTO functions are available. Other actions
including channel change, MENU and EPG are not available.
Playback/Recorded File List
To view a list of recorded programs, press the RECORD LIST key on the remote control. Use the
UP/DOWN keys to highlight a program and access the following options:
Play File: Press PLAY or OK while the desired file is highlighted. During playback you can use the
PAUSE/STOP/SCAN FORWARD/SCAN BACK keys.
Preview File: Press the RED button during playback to go back to a thumbnail view. Press
repeatedly to switch between preview and full screen playback.
Delete File: Press the YELLOW button. A message will appear on the screen asking you to confirm
or exit.
Rename File: Press the GREEN button. An on-screen alphanumeric keypad will appear. Use the
ARROW buttons to navigate around the keypad and press OK to select the keys you desire. Select
“OK" on the keypad to save and exit.
15
USB MULTIMEDIA PLAYBACK AND SETTINGS
This feature is only available in DVB Mode. To play multimedia files, a compatible USB device
must be attached. If no compatible USB device is connected, the message 'No USB device is Found'
will appear.
Note:
· This unit only supports USB devices with a FAT32 file system. It will not support NTFS file systems.
· This unit supports AVI, Mp3, JPEG and BMP file playback. However, due to other variations
in file formats, some files may not play even though they are the supported file types.
Multimedia File Playback
First, press the SETUP button. Select the USB tab using the LEFT/RIGHT buttons to enter the USB
Menu. Select the Multimedia option and press OK to enter the Multimedia Menu. In the Multimedia
Menu, choose from the different multimedia playback options: Music, Photo, Movie and PVR.
1. Music Playback
In the Multimedia Menu, select the Music option and press the OK button. Locate your music files by
navigating with the arrow keys. Press OK to enter a folder, and the BLUE button to return to the
previous folder.
When a music file is highlighted, press PLAY to start music playback. All music files listed in the
folder will be played in sequence. During music playback, the following actions are available.
Pause: Press the PAUSE button to pause playback. Press again or press PLAY to resume playing.
Stop: Press the STOP button to stop playback. Exiting to the main USB menu or the TV mode will
also stop playback.
Forward/Rewind: Press and hold the <</>> buttons to fast forward/rewind. Repeat this motion to
increase the speed. The max speed is 32x. Press PLAY to resume playing.
Previous/Next track: Tap the <</>> buttons for previous/next track.
GOTO: Press the GOTO button and enter a specific time to jump to in the current track in HH:MM:SS
format.
Tip: To play music and a picture slide show simultaneously, start the music playback first. Press
RETURN to go to the Multimedia Menu, and navigate to the image files per the instructions below.
The music will continue playing while the slide show is running.
2. Picture slide show
In the Multimedia Menu, select the Photo option and press the OK button. Locate your picture files by
navigating with the arrow keys. Press OK to enter a folder, and the BLUE button to return to the
previous folder.
When a picture file is selected, press PLAY to start the slide show and all picture files listed in the
folder will be played in sequence. If OK is pressed, the selected picture is displayed without the slide
show function. During the slide show, the following actions are available.
16
Pause: Press the PAUSE button to pause playback. Press again or press PLAY to resume playing.
Stop: Press the STOP or EXIT button to stop playback.
Previous/Next track: Tap the <</>> buttons for previous/next track.
3. Movie Playback
In the Multimedia Menu, select the Movie option and press the OK button. Select your desired movie
file by navigating with the arrow keys. Press OK to enter a folder, and the BLUE button to return to
the previous folder. When a movie file is highlighted, press PLAY to start movie playback. When the
movie ends, the next movie file will play automatically if there are other compatible movie files in the
folder.
During movie playback, the following actions are available.
Pause: Press the PAUSE button to pause playback. Press again or press PLAY to resume playing.
Stop: Press the STOP button to stop playback. Exiting to the main USB menu or the TV mode will
also stop playback.
Forward/Rewind: Press and hold the <</>> buttons to fast forward/rewind. Repeat this motion to
Previous/Next track: Tap the <</>> buttons for previous/next track.
GOTO: Press the GOTO button and enter a specific time to jump to in the current track in HH:MM:SS
format.
Subtitle: Press SUBTITLE to choose subtitles (subject to availability from the movie file)
Photo Setting
Select and set preferences for the picture display and slide show function with the directional
buttons.
Slide Time: Set slide show interval between 1~8 seconds.
Slide Mode: Set slide show transition effects from modes 0-59 or random.
Aspect Ratio: Display pictures in their original aspects (Keep) or in full screen (Discard).
Movie Configure
Select and set preferences for USB movie playback with the directional buttons.
Aspect Ratio: Play movies in their original aspects (Keep) or in full screen (Discard).
Subtitle Font: Choose the subtitle font size from Normal, Big, Small.
Subtitle BG: Choose the subtitle font background from Transparent, Grey, Yellowgreen, White.
Subtitle Color: Choose the subtitle font color from White, Black, Red, Blue, Green.
17
DVD MODE
SWITCHING BETWEEN DVB AND DVD MODES
Press the SOURCE button on the remote control to switch between DVB and DVD Modes. The Set
Top Box will take a few seconds to reboot while it changes functions.
Note:
·Settings and passwords used in DVB and DVD Modes are mutually exclusive and do not affect
each other. The default settings and passwords may be different from each other.
DVD PLAYBACK
Press the EJECT button to open the disk tray and place a DVD with the label side facing up on the
tray. Press EJECT again to close. The DVD will load automatically and display its main (root) menu
on the screen. These menus vary for each DVD. Use the directional buttons to navigate the menu and
the OK button to select.
During DVD movie playback, the following playback options are available.
Pause/Play: Pause or resume playback with the PLAY button
Scan/Skip Forward: Tap once to skip to next track. Press and hold to fast forward. For different fast
forward speeds up to 16x, repeat this motion.
Scan/Skip Back: Tap once to skip to previous track. Press and hold to fast rewind. For different fast
rewind speeds up to 16x, repeat this motion.
Slow motion: Press the SLOW button for slow motion video playback. Press repeatedly for different
speeds.
A-B Looping: Press once to set Point A, and a second time to set Point B. Playback will start looping
from Points A-B. To exit looping playback, press PLAY or STOP.
Camera Angle: Press the ANGLE button to switch angles (subject to availability on the DVD)
Subtitles: Press to choose a subtitle (subject to availability on the DVD)
Zoom: Press the P/N button repeatedly for different zoomed views.
Menu: Press the MENU buttons to return to the last used DVD submenu.
Title Menu: Press the TITLE button to return to the main (root) DVD menu.
DVD MENU OPERATION
In DVD Mode, press the SETUP button on the remote control to access the Setup Menu. Use the
UP/DOWN buttons to select a desired tab, and the OK button to access the submenu. Press the LEFT
button to return to the previous menu. To exit the Setup Menu, press the SETUP button again.
The options available in the Setup Menu are described below.
Language Setup
Select the Language tab in the Setup Menu to access this submenu.
OSD Language: Set a language for the Setup Menu and On Screen Display.
Subtitle: Set the default subtitle language.
18
MPEG4 Subtitle: Set the MPEG4 subtitle encoding.
Audio: Set the default built-in audio language.
DVD Menu: Set the default DVD menu language.
Note:
·All DVD language features are subject to availability on the DVD used.
Video Setup
Select the Video tab in the Setup Menu to access this submenu.
Aspect Ratio: Set the picture's aspect ratio to 4:3 Letter Box, 4:3 Pan Scan or 16:9.
TV System: Set the TV format to Auto, PAL or NTSC.
Video Out: Set the video output format.
Smart picture: Set picture display settings to Standard, Bright, Soft or Dynamic.
HD Resolution: After you set the video output to HD output, you can choose the
resolution of HDMI output.
Notes:
·As DVD picture aspect ratios are subject to the recorded disc format, some DVDs may not
display images correctly in the aspect ratio set on the Set Top Box.
·If a disc recorded in 4:3 format is played on a wide screen TV, black bars will appear on the left
and right side of the screen.
·Please adjust the video settings depending on the type of DVD and TV used.
Audio Setup
Select the Audio tab in the Setup Menu to access this submenu.
Digital output: Adjust the coaxial audio output to suit an external audio device connected to the
player.
Down sampling: Turn the down sampling function On or Off.
Smart sound: Set audio output settings to Off, Classical, Rock, Jazz or Pop.
19
Rating Setup
Select the Rating tab in the Setup Menu to access this submenu.
Parental Control: Set a rating limit for restricted viewing. DVDs above the limit will require a
password to be played. This feature is dependent on the DVDs used. Before using this feature,
please set a password.
Set Password: Set or change a custom password with the following steps:
1. Key in the current password and press the OK button. If this is the first time a password is being
set, use the Master Password '6666'.
2. Press OK again to start keying in your new password. Press OK.
3. Key in the new password again to confirm. Press OK. The new password is saved when a Success
message is displayed.
Note: If you have lost your password, please use the Master Password '6666' to unlock.
Misc Setup
Select the MISC tab in the Setup Menu to access this submenu.
Use Default Settings: Reset DVD player settings to factory default values. This will not reset your
custom password.
Screen Saver: Enable/disable the screen saver function.
20
MP3/WMA/AVI/JPEG CD PLAYBACK
After the MP3/WMA/AVI/JPEG CD is loaded, the CD contents will be displayed in a file browser as
shown above. Navigate folders and files using the directional buttons. Press OK on a folder to enter
the folder. Press OK on the 'Up Folder' icon on the top to return to the previous directory. Press OK or
PLAY on a selected music or movie file to play it.
Filter: Choose different file types to be displayed in the file browser.
Repeat: Toggle between different repeat modes.
Mode: Choose from different playback modes, listed below.
a. Normal: Play files from the folder in a normal sequence.
b. Shuffle: Play files in shuffle mode. All tracks will be played once in a random sequence.
c. Music Intro: Play only the first 10 seconds of each track.
Edit Mode: Program a playlist by following the instructions below.
Program View: Display playlist.
Browser View: Display file directory.
Add to Program: Add a track to the programmed playlist.
Clear Program: When playback is stopped completely (press the STOP button twice), use this option
to delete tracks from the programmed playlist.
Edit Playlist
Enter Edit Mode to program a playlist from available tracks. Exit Edit Mode to play from the playlist.
1. Select the Edit Mode option and press OK to enter Edit Mode.
2. Press the LEFT button to start browsing files.
3. Press OK on desired tracks in the desired playback sequence.
4. Select Add to Program to save the selected files into the playlist.
5. Select the Program View option and press OK to view the playlist.
6. Before starting playback, exit Edit Mode by selecting the Edit Mode option and pressing OK again.
To remove tracks from the playlist, select tracks while in Edit Mode, then choose Clear Program.
21
PICTURE CD PLAYBACK
After the Picture CD is loaded, the CD contents will be displayed in a file browser as shown above.
Navigate folders and files using the directional buttons. Press OK on a folder to enter the folder.
Press OK on the 'Up Folder' icon on the top to return to the previous directory. Press OK or PLAY on a
selected picture file to view it.
Picture Rotation: Press the directional buttons to rotate the picture.
Picture Scan: Press the ANGLE button to change picture scan mode.
22
TROUBLESHOOTING
If you experience problems with this Set Top Box or its installation, please read the relevant sections of this
User Manual and this Troubleshooting section carefully.
Problem
Standby light is not lit
No signal or channels
found
Sound but no picture
Distorted or freezing
picture
Scrambled channel
message
Possible cause
Power cable is unplugged
Power fuse is blown
What to do
Check the AC power
connection
Check fuse
Aerial is disconnected
Aerial is damaged/misaligned
Check aerial connection and
condition
Out of digital signal area
Check with dealer
Tuned to digital Teletext
channel
Aerial may not be compatible
Retune to another channel
Check aerial
Channel is scrambled
Select an alternative channel
Retune channels to erase
channel lock
Forgotten channel lock
password
No response to remote
control
Lost channel reception
after moving the unit to
another room
'Bad disc' is displayed
'No disc' is displayed
Unit is turned off
Remote control not aimed
correctly
Obstructions between remote
control and front panel receiver
Remote control batteries are
incorrectly inserted
Remote control batteries are flat
Plug in power and turn unit on
Aim remote control at the unit
Remove obstructions
Reinstall batteries according
to correct polarities
Replace remote control
batteries
Try a direct feed from the
antenna
The aerial feed may come
through a distribution system
which may reduce the digital
signal now received by the
receiver
Ensure the disc is not warped, damaged, stained or deformed.
Ensure the disc format is compatible with the player.
Please check whether you have tried to play a software CD, If
so, please restart the player.
Ensure that you have inserted the disc correctly with the right
side up.
Ensure the disc is not distorted, stained or scratched.
23
SPECIFICATIONS
Item
General
Tuner
Specification
Power Requirement
Max Power Consumption
Weight
Dimensions
Frequency Range
Demodulation
Input impedance
Signal Input Level
Bandwidth
Demodulator
OFDM Modulation
Packet Carries
Guard interval
Output
VIDEO
100-240V~ 50/60Hz
15W
1.3KG
320x38x200mm
VHF: 174MHz to 230MHz
UHF: 470MHz to 862 MHZ
75 Ohms unbalanced
-78 ~ -25DBM
7/8MHz
COFDM
2K, 8K FFT, SFN and MFN
2K/8K
1/4, 1/8, 1/16, 1/32
Composite (Analogue)
Component (Pr/Pb/Y),
HDMI
Audio L/R (Analogue) Coaxial
RCA for SPDIF digital audio
AUDIO
RF IN
IEC 169-2 female connector
RF LOOPTHROUGH
IEC 165-2 male connector
USB
USB2.0
Display
Decoder module
Resolution
Aspect Ratio
PAL, NTSC
576P, 720P, 1080i
4:3(Letterbox, Pan & Scan),
16:9
Decoding
Video
Audio
Compliance
MPEG2 Transport MP@M
MPEG2 Audio layer I&II
ETSI EN 300 744 DVB-T
Compliance
Right, Left, Stereo
Input
Others
Sound Mode
DVD Player Supported
Formats
DVD/VCD/CD-R/CD-RW/DVD±RW/AVI/MP3/JPEG
<CT1106>
* Specifications are subject to change without notice.
* Weight and dimensions are approximate.
24