1
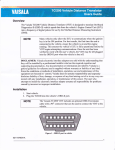
MH Corbin Vehicle Distance Translator Overview The M.H. Corbin Vehicle Distance Translator (VDT) is designed to translate On-Board Diagnostics-II (OBD-II) vehicle speed data from the vehicle’s Engine Control Unit (ECU) into a frequency of digital pulses for use by the NiteStar Distance Measuring Instrument (DMI). NOTE Many vehicles only allow the ECU to communicate when the ignition key is in the ON position. For best results, the first time the unit is connected to the vehicle, ensure the vehicle is on and the engine running. This ensures the vehicle’s ECU is fully operational before the VDT begins attempting communications. Once the unit has been verified to work with the user’s vehicle, the VDT may be left plugged into the OBD-II port when the vehicle is shut off. DISCLAIMER: M.H. Corbin electronic interface adapters are sold with the understanding that they will be installed by a professional installer who has the required expertise and supporting documentation. Any documentation or information provided by M.H. Corbin is a general guideline for reference and is supplied without warranty or liability of any kind. Since the conditions or methods of installation, operation, use and maintenance of this equipment are beyond its’ control, M.H. Corbin does not assume responsibility and expressly disclaims liability of loss, damage, or expense of any kind arising out of or in any way connected with any installation, operation, or maintenance of this sensor. The user who attempts to install the electronic interface adapter assumes all responsibility for problems caused by incorrect or improper installation. 8355 Rausch Drive | Plain City, OH | 43064 | 800-380-1718 | 614-873-8095 fax Installation 1. Start vehicle. 2. Plug the VDT into the vehicle’s OBD-II port. NOTE The M.H. Corbin VDT includes an optional OBD-II extension cable with a 90° connector that can be used to connect the VDT to the vehicle. Figure 1 - OBD-II port in vehicle 3. Plug the RJ-11 end of the cable from the VDT into the “Power” port of the NiteStar DMI. 4. Power on the NiteStar DMI. 5. Set the NiteStar DMI calibration value to “911”. 6. Start driving. The DMI should start counting. If the DMI does not count or only counts at higher speeds, see the Troubleshooting section of this document for more information. Configuring the NiteStar DMI The VDT outputs one pulse per kilometer-per-hour that the vehicle ECU reports the car is travelling. For example, if the vehicle is travelling 60 Miles Per Hour, the vehicle ECU speed would read between 96 and 97 Kilometers Per Hour. Because one KPH is equivalent to 0.9113444 feet per second, if the DMI’s calibration number is set to “911” (0.911 feet are travelled per pulse received), then the DMI will track distance as accurately as the car’s internal Odometer (±5% for speeds over 20MPH) The following user calibration procedure can be used to improve the measurement accuracy from ±5% to ±2% for specific vehicle types and driving styles: 1. Start vehicle. 2. Plug the VDT into the vehicle’s OBD-II port. 3. Plug the RJ-11 end of the cable from the OBD-II VDT into the "Power" port of the NiteStar DMI. 8355 Rausch Drive | Plain City, OH | 43064 | 800-380-1718 | 614-873-8095 fax 4. 5. 6. 7. Power on the NiteStar DMI. Set the NiteStar DMI calibration value to "911". Proceed to a known measured course Measure the known distance while driving the vehicle as you would during normal use. Remember that vehicle speeds should be maintained above 15MPH. 8. With the measured distance from the last step above, calculate a new calibration value using the following formula: New Cal = Current Calibration Value × (DMI measured distance / actual distance) 9. Enter this New Cal value into the DMI as its new calibration value. 10. Repeat this procedure starting at step 3 until the DMI measured distance is approximately equal to the actual distance. If the DMI is used in more than one vehicle, this procedure should be repeated for each vehicle the VDT is used with. NOTE Once this procedure has been performed, record the calibration value that was produced for the vehicle so that if the unit is removed and later returned, the same calibration can be reentered without having to perform this procedure over again. Concept of Operation The VDT board connects via OBD-II port to the vehicle’s ECU, and via a cable to the DMI. Approximately every 500ms, the VDT polls the vehicle’s speed from the ECU via the OBD- II port. The VDT calculates rate of distance being travelled using this speed data from the ECU. The VDT triggers periodic digital pulses (1 pulse per 0.9113444 feet travelled) to the DMI based on the vehicle speed. As the vehicle decelerates/accelerates, the period of the digital pulses is adjusted to reflect this change in rate at which distance is travelled. The DMI utilizes digital pulses to record total distance traveled. The VDT detects when vehicle has been turned off/on so that the user can leave the device plugged in without draining battery. Recommended Operation of the Vehicle Some makes of vehicles contain ECUs which do not report the speed of travel 8355 Rausch Drive | Plain City, OH | 43064 | 800-380-1718 | 614-873-8095 fax in real time. Because the VDT operates using the speed reported by the ECU, the user may notice that the speed readout on the NiteStar DMI is slightly delayed from the speed the vehicle is actually travelling; especially during acceleration or braking. For example, if the user is watching the distance and speed readout on the NiteStar DMI while starting to drive from a standstill, the distance may not begin registering until a few seconds after the user has started driving. This is normal operation of the vehicle’s ECU and is not an indication of a defective unit. Similarly, if the user is slowing the vehicle down, the distance readout on the NiteStar DMI will continue incrementing for a few seconds, even after the vehicle has come to a complete stop. This is normal operation of the vehicle’s ECU and is not an indication of a defective unit. For vehicles with a delayed speed readout, the user is recommended to operate the vehicle within the following guidelines to ensure accurate measurements: The user ends measurement when the vehicle is travelling approximately the same speed as when measurement was initiated. The user brakes/accelerates the vehicle with approximately the same force. Examples of advisable operation: 1. Matt wants to measure the length of a guard rail. Matt pulls up on the side of the road to the start of the guard rail and configures his NiteStar DMI to start recording distance. Matt drives to the end of the guard rail, stops, and takes a reading after the NiteStar DMI has stopped recording distance. 2. Mike wants to measure the length of a guard rail. Mike is on the highway travelling 50-60mph and does not want to pull over to make a measurement. Mike begins measurement of the guard rail, and ends measurement while still travelling 50-60mph. Examples of incorrect operation: 1. Matt wants to measure the length of a guard rail. Matt pulls up on the side of the road to the start of the guard rail and configures his NiteStar DMI to start recording distance. Matt accelerates to 55mph and drives past the end of the guard rail, stopping measurement and taking a reading as he passes the end. 2. Mike wants to measure the length of the guard rail. Mike is on the highway travelling 50-60mph and does not want to pull over to make a 8355 Rausch Drive | Plain City, OH | 43064 | 800-380-1718 | 614-873-8095 fax measurement. Mike starts measurement as he passes the beginning of the guard rail, and decides to pull over at the end of the guard rail. Mike brings the vehicle to an aggressive stop engaging the antilock brakes on the vehicle or causing the tires to skid, immediately stops measurement before the NighStar DMI has finished incrementing distance, and takes a reading from the NiteStar DMI. In the scenarios listed as inadvisable operation, the trip is not “complete” from the perspective of the NiteStar DMI due to the delay that exists between a change in the vehicle’s actual speed, and when the vehicle’s ECU has recognized this new speed Troubleshooting Guide Recommendations to troubleshoot several potential issues are presented below: NiteStar DMI is not registering distance Please perform these steps: 1. 2. 3. 4. Ensure the vehicle is in the on state and engine running. Unplug the VDT from the vehicle, Wait 5 seconds, and plug it back in. Next, ensure the VDT is plugged into NiteStar DMI’s “POWER” port and not “DATA” port. 5. Ensure the NiteStar DMI is not displaying “Count Hold” or “Display Hold” and is otherwise operating properly (see your NiteStar DMI operation guide / user’s manual to verify proper configuration). 6. Drive vehicle. If NiteStar DMI is still not registering distance, follow the steps listed in the “Technical Support and Product Returns” section to have the user return the device to the dealer for a replacement. If the replacement also does not work, the vehicle may not be supported (unless the vehicle was manufactured prior to January 1st, 2000, this is unlikely). If the replacement does not work, the dealer should record the make, model and year of the vehicle the user is using the device in, and inform M.H. Corbin of this data. User must perform the steps listed above every time vehicle is shut off Dealer should record the make, model and year of the vehicle the user is using the device in. In addition, if possible, obtain a voltmeter reading of the battery voltage of the vehicle while it is running, and after the engine has been shut off. Notify M.H. Corbin of the vehicle data. 8355 Rausch Drive | Plain City, OH | 43064 | 800-380-1718 | 614-873-8095 fax Technical Support and Product Returns For technical questions or product returns, contact M.H. Corbin at 1-877-5277755. Provide the following supporting information and request either service or product return: Name and model of the product in question Serial number of the product Name and location of the installation site Name and contact information of a technically competent person who can provide further information on the problem. Make, model, and year of vehicle Please perform the following steps before returning the device to M.H. Corbin: 1. 2. 3. 4. 5. Start the vehicle. Allow the vehicle to run for 15 seconds. Plug the VDT into the vehicle. Wait 30 seconds. Unplug the VDT from the vehicle. These steps will ensure the VDT is storing the most up-to-date messages and records from the vehicle, which will later be analyzed by M.H. Corbin to determine the source of malfunction. If the device has not been plugged into any other vehicle besides the one in which the user desires to use the device with, performing these steps is not mandatory. 8355 Rausch Drive | Plain City, OH | 43064 | 800-380-1718 | 614-873-8095 fax