1
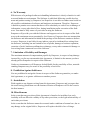
WorldCard Mac
User Manual
Release: July, 2011
Version: 2.3
Edition: 1
Penpower Technology Ltd.
Software User License Agreement
You are licensed to legally use this software program (“the Software”) by Penpower
Technology Ltd (“Penpower”) under this license agreement (“The Agreement”). If you do
not agree with any of the provisions in this Agreement, please do not install, copy or use
the Software. By using the Software, you are deemed to fully understand and accept the
provisions of this Agreement.
1. Intellectual Property
All intellectual property rights in the Software, together with all information and documents included in the packaging for the Software (including but not limited to copyrights), are property of Penpower, and are protected by relevant laws and regulations.
2. License to Use
You are authorized to use the Software on one (1) single computer only. You may not use
the Software on any other machines other than the said single computer.
3. Authority to Copy
The Software and all documents included with the Software, and copyright thereof, are
property of Penpower. You are licensed to make one (1) copy of the Software for your
personal backup purposes. All other acts of copying are strictly prohibited.
You may not sell, lease, dissemble, reverse engineer, copy, translate, adapt or derive the
Software, or obtain the source code of the Software by any other means. You may not use
the Software for any purposes other than those permitted under this Agreement.
4. Business Users
If you need to install or use the Software on more than one (1) computer, please contact
Penpower or our local distributor to purchase a license for the additional use.
5. Liability
You agree to indemnify Penpower against all losses, costs, debts, settlement payments or
other expenses (including but not limited to attorneys fees) arising from your breach of
this Agreement, and you agree to compensate Penpower for all of the abovementioned
damages.
6. No Warranty
Effectiveness of a packaged software in handling information is closely related to its software and hardware environment. The Software is published following careful development and product testing by Penpower, but Penpower is not able to conduct tests based on
all possible combinations of software and hardware environment. Therefore, Penpower
is unable to promise nor warrant that there will be absolutely no risk of loss or damage of
information, or any other kind of loss, during installation and/or execution of the Software. You must be fully aware of your risks in using the Software.
Penpower will provide you with the Software and support services in respect of the Software to the maximum extent permitted by law. However, Penpower does not warrant that
the Software and information included in the package of the Software contain no defects
or errors. Penpower is not liable for any indirect, special or incidental loss arising from
the Software, including but not limited to loss of profits, damage to business reputation,
cessation of work, hardware malfunction or damage, or any other commercial damage or
loss arising from commercial use of the Software.
7. Limitation of Liability and Damages
The maximum amount of compensation payable by Penpower, in respect of any damage
incurred by you for any reason under this Agreement, is limited to the amount you have
already paid to Penpower in respect of the Software.
Under no circumstances will Penpower be held liable for the possibility of loss, notwithstanding Penpower may be aware of the possibility of such loss.
8. Prohibition Against Sublicense
You are prohibited to assign the license in respect of the Software granted to you under
this Agreement, or to grant a sublicense to another person.
9. Jurisdiction
With regards to any disputes arising from this Agreement, Penpower and you agree that
the court having jurisdiction over the business location of Penpower will be the court in
the first instance.
10. Miscellaneous
In the event that any provision of this Agreement is found to be invalid at law, such
invalidity will not affect the validity of any other provisions, or the legal enforceability of
such other provisions.
In the event that the Software cannot be executed under conditions of normal use, due to
any damage to the original disk/s, Penpower will replace the disk/s free of charge.
Contents
Chapter 1 Product Introduction................................................... 1-1
1.1 Product Features...................................................................................1 - 1
1.2 Hardware Introduction ........................................................................1 - 2
1.2.1 Elegant Stylish Design...........................................................................1 - 2
1.2.2 Specification...........................................................................................1 - 2
Chapter 2 Getting Started............................................................. 2-1
2.1 System Requirements...........................................................................2 - 1
2.2 Installation............................................................................................2 - 1
2.3 Starting WorldCard Mac......................................................................2 - 2
2.5 Registration..........................................................................................2 - 2
2.5 Calibration............................................................................................2 - 3
Chapter 3 User Interface............................................................... 3-1
3.1 User Interface.......................................................................................3 - 1
3.2 Toolbar.................................................................................................3 - 2
Chapter 4 Scanning Business Cards............................................ 4-1
4.1 Scanning a Business Card....................................................................4 - 1
4.2 Browsing Contacts...............................................................................4 - 1
4.3 Editing Contacts...................................................................................4 - 2
4.4 Scan Wizard.........................................................................................4 - 2
Chapter 5 Editing Contacts........................................................... 5-1
5.1 Edit Mode.............................................................................................5 - 1
5.2 Business Card Image............................................................................5 - 2
5.3 Editing Business Card Images.............................................................5 - 2
Chapter 6 Managing Contacts...................................................... 6-1
6.1 Categorizing Cards...............................................................................6 - 1
6.1.1 Adding and Deleting Categories............................................................6 - 1
6.1.2 Categorizing from Browse Mode...........................................................6 - 1
6.2 Searching Contacts...............................................................................6 - 2
6.2.1 Text Search.............................................................................................6 - 2
6.2.2 Advanced Search....................................................................................6 - 2
6.2.3 Search for Duplicate Contacts ..............................................................6 - 2
6.3 Adding Cards.......................................................................................6 - 3
6.4 Settings.................................................................................................6 - 3
6.5 Importing Contacts...............................................................................6 - 4
6.6 Exporting Contacts...............................................................................6 - 5
6.7 Exchange Contacts with WorldCard Series products .........................6 - 7
6.7.1 Import contacts from other WorldCard Series products ..................6 - 7
6.7.2 Export contacts from other WorldCard Series products ..................6 - 8
6.8 Sending Emails..................................................................................6 - 11
6.9 Visiting Website.................................................................................6 - 11
6.10 Online Map......................................................................................6 - 11
6-11 Getting Direction.............................................................................6 - 1 2
6-12 Backup Contact Information...........................................................6 - 1 3
6-13 Restore Contact Information...........................................................6 - 1 3
6-14 Create Empty...................................................................................6 - 1 4
WorldCard Mac FAQ.............................................................. FAQ-1
There may be newer versions of the software that was released during or after this product’s
manufacturing date. If the content in the User Manual differs from the on-screen interface,
please follow the instructions on the on-screen interface instead of the User Manual.
Chapter1 Product Introduction
Chapter 1 Product Introduction
The WorldCard Mac provides you a total business card management solution by
integrating card recognition, management and transmission functions in a single digitizing
unit. You can find your business cards anytime and anywhere when you need them.
1.1 Product Features
Digitize business cards in seconds
WorldCard Mac scans and recognizes business cards, then saves contact information
into Address Book or Microsoft Entourage; turns business cards into accurate digital format in a few seconds.
Support multiple languages
Recognize business cards in different languages, including English, French, German,
Italian, Dutch, Swedish, Norwegian, Danish, Finnish, Russian, Polish, Turkish, Hungarian, Spanish(Spain and Mexico) Portuguese(Portugal and Brazil), Greek, Czech, Slovak,
Traditional Chinese, Simplified Chinese, Japanese, Korean and many more to come..
Business card management
Complete sets of management functions, including for editing of information, assigning
multiple categories.
Quick and efficient searching
Find your contacts quickly and efficiently with WorldCard Text Search and Advanced
Search Functions.
Direct link to website and online maps
Clicking the address or website button will link to the map and contact’s website directly and search the address of the contact from the internet map service website.
Sending e-mail
Quickly send e-mail to multiple contacts in one click.
Data exchange
Exchange data with Address Book, vCard, Text, Microsoft Entourage, Microsoft
Outlook, HTML, image file format, and WorldCard series, such as WorldCard windows
versions, WorldCard Mobile versions ( WorldCArd Mobile and WorldCard Contacs).
1-1
WorldCard Mac
1.2 Hardware Introduction
1.2.1 Elegant Stylish Design
The intelligent mailbox concept with indication light, guides you to scan business cards
in the easiest way that you have never experienced.
Intuitive LED Indicator
Business Card Placement
Hardware Operation
1. Business card placement: Insert card with the information side facing up.
2. Intuitive LED indicator: LED indicator blinks when a card is inserted. It blinks faster
during scanning.
Tip
WorldCard Mac plus has the new open/close design. Be sure to open the
WorldCard Mac plus card scanner, before you start to scan. When the scanner is not used, please close it to avoid dust getting into it.
1.2.2 Specification
1. Dimensions:
106 x 53 x 27 mm
2. Weight:
160 g
3. Resolution:
600 dpi
4. Interface:
USB
5. Image:
Color
1-2
Chapter 2 Getting Started
Chapter 2 Getting Started
2.1 System Requirements
1. Mac OS X Version 10.5 or later
2. 512 MB of RAM
3. 200 MB of available hard disk space
4. Intel based Macintosh
5. USB port
2.2 Installation
Step1 : Insert the software CD.
Step2 : Click Install WorldCard Mac, follow the instructions to install WorldCard Mac
software.
Step3 : Connect the WorldCard Mac scanner to your Mac.
2-1
WorldCard Mac
2.3 Starting WorldCard Mac
After installation, you may find
folder under Applications. Double click to open
the folder. Click
to run WorldCard Mac.
2.5 Registration
When you first time run the WorldCard Mac, a registration reminder will appear. Please
click on [Register Now] to register and ensure the warranty service. You can also click
[Register Later] to close the reminder. When you need to register, click [Help] on the
toolbar and select [Registration] from the toolbar to register. If you have registered, please
tap [Registered, skip it].
Tip: If you do not need to be reminded again, you can check [Never display the
registering window in future].
2-2
Chapter 2 Getting Started
2.5 Calibration
The WorldCard Mac plus scanner doesn’t need initial calibration, but if there is any color
distortion please insert the blank side of the card face up to calibrate it.
1. In case the calibration card is lost, you can use any same size white card
for calibration.
Tip
2. If there is any color distortion after scanning a card, you can calibrate
the scanner by clicking Run\Calibration from the menu or the Calibration
button on the Scan Wizard.
2-3
Chapter 3 User Interface
Chapter 3 User Interface
3.1 User Interface
1
2
3
5
4
7
6
1. Menu: Provide File, Edit, Settings, Window, Run and Help menu.
2. Toolbar: Refer to Chapter 3.2 Toolbar.
3. Category/Search tab: Category
tab helps you to manage your contacts. Search
tab provides advanced search function.
4. Alphabet index: Help you to find your contacts by indexing the first letter of their names.
5. Browse/Edit mode: Browse
mode lists the contact information and business
card image. Edit
mode lets you verify and edit the contact information.
6. Add / Delete contact: Click
person.
to add a contact person. Click
to delete a contact
7. Hardware connection status: Show the connection status of the scanner.
3-1
WorldCard Mac
3.2 Toolbar
1
1. Scan
2
3
4
5
6
7
8
9
: Open the Scan Wizard to scan business cards.
2. New card
: Create a new contact.
3. Settings
: Scan settings.
4. Import
: Import contacts from other resources.
5. Export
: Export contacts to other application or other formats.
6. Email
10
: Send an email to the selected contact.
7. Map
: Search the address of the selected contact from the internet map service and
connect the route between two contacts.
8. Web
: Browse the website of the selected contact
9. Delete card
10. Text Search
: Delete the selected contact.
: Help you to quickly find the specific contacts.
Refer to Chapter 6 Managing Business Cards for detailed explanation.
3-2
Chapter 4 Scanning Business Cards
Chapter 4 Scanning Business Cards
4.1 Scanning a Business Card
To scan a business card, insert the business card into your scanner with the card information facing up. The scanner will begin scanning and recognizing the business card after
detecting the business card.
4.2 Browsing Contacts
If you did not assign a category, the scanned business card information is organized into
the Unfiled category. You can also find the scanned business card information in the All
Records. Click the Unfiled category or All Records from the left side pane and click the
Browse mode
, the scanned contact information will be listed in the right pane.
4-1
WorldCard Mac
4.3 Editing Contacts
After adding business cards, you may verify the contact information in the Edit mode
.
The information is categorized in fields such as Name, Company, Position,
Department, Address, Tel., E-mail, Mobile, Fax and Web Site...etc. Click the field that
you want to correct, and then modify the information manually. Or you can adjust the business card image and recognize again to get the better recognition results. Please refer to
Chapter 5 Editing Contacts for detailed explanation.
4.4 Scan Wizard
If you have various business cards, you can click the Scan button
from the toolbar
to launch the Scan Wizard and follow the steps below to set the parameters and scan business cards.
4-2
Chapter 4 Scanning Business Cards
Step1
Step2
Step3
Step4
Step5
Step1 : Select Single or Double sided business card.
Step2 : Select the language of the business card. If the business card is double-sided, select
the languages of the both sides.
Step3 : If you want to automatically scan when the business card is inserted, click Auto
Scan. If you want the business card information to be automatically recognized and
added to your file after scanning, click Auto recognition after scanning.
Step4 : Insert the business card into your scanner with the card information face up. Click
Scan button to begin scanning the business card.
Step5 : Click Exit to exit the scan wizard and see the recognition results.
When you scan Double-sided business card and want to preview the
scanned image before recognition, do not select Auto recognition after
Tips scanning.
4-3
WorldCard Mac
4-4
Chapter 5 Editing Contacts
Chapter 5 Editing Contacts
5.1 Edit Mode
Select one or multi-contacts and click Edit Mode
to enter the Edit Mode.
3
4
1
2
1. Contact information editing area: Provide the information of Name, Company, Position,
Department, Address, Tel., E-mail, Mobile, Fax and Web Site...etc. You may edit and
verify the contact information in this area. Click to add a field. Click to delete field.
2. Business card image editing area: Provide View mode, Partial recognize, Zoom in,
Zoom out, Save picture, Rotate, Exchange card, Rescan and Recognize again functions for editing the business card image.
3. Add contact: Click
to add a new contact person.
4. Previous / Next: Display the order and amount of the selected contacts. If you select more
than one contact, the Previous
and Next
button show up for editing other contacts.
5-1
WorldCard Mac
5.2 Business Card Image
1
3
2
4
1. Front side or back side image: Click Front side
or Back side
icon to see the different side of scanned business card image.
2. Business card image: Display the scanned business card image.
3. Recognition language and region: Show the recognition language
and region
.
4. Toolbar: Provide View mode, Partial recognize, Zoom in, Zoom out, Save picture,
Rotate, Exchange card, Rescan and Recognize again functions for editing business
card images.
5.3 Editing Business Card Images
1. View mode
: View the business card image.
2. Partial recognize
: Partially recognize the selected information. You may select a specific area that contains the correct data, and then select the appropriate field. The information will be recognized to the assigned field directly.
5-2
Chapter 5 Editing Contacts
You can click View mode
to view business card image.
Tip
3. Zoom In
: Zoom in the business card image.
4. Zoom Out
: Zoom out the business card image.
5. Save picture
: Save the business card image to .bmp file.
6. Rotate
: If the business card image shows in an incorrect orientation, you can use
the Rotate function to properly align the business card orientation. Once you click the
Rotate
button, the business card image will rotate to 90°.
90°
7. Exchange card
: Exchange the front side and back side of business card image.
8. Rescan
: If the scanned image quality is not good and it influences the recognition
result, you can use the Rescan function by clicking on the Rescan
button to scan the
business card again.
9. Recognize again
: After a card image has been edited, it may be necessary to recognize the card data again. You may select the appropriate language of the business card and
the correct region. Then recognize again by clicking on the Recognize again
button.
Attention
The existing information will be cleaned when using Recognize again
function.
5-3
WorldCard Mac
5-4
Chapter 6 Managing Contacts
Chapter 6 Managing Contacts
The management functions allow you to categorize contacts, search contacts, add new
cards, import contacts from other sources, export contacts to other applications, search
contacts by various data fields or full text, send e-mail by contacts or group functions, visit
web site of contacts and search the address from the internet map...etc.
6.1 Categorizing Cards
WorldCard Mac allows you to manage
your business cards by storing them in the category groups. After installing the WorldCard
Mac, you will find All Records and Unfiled
category on the left side of the Category pane.
6.1.1 Adding and Deleting Categories
You can add as many user-specified categories as you choose to manage your business
cards. Click
from the left side bottom to
add a category and type a category name. You
can also click
to delete your category.
6.1.2 Categorizing from Browse Mode
From Browse mode pane, select the contact you want to categorize, drag it directly into
a category on the left side of the Category pane.
1. Contacts in each category can be easily moved from one category to
another by dragging.
Tips
2. Each contact can be set to multi-categories. You can also find it in All
Records.
3. To save time, you can also select one category and then scan business
cards into that category.
4. You can also right click on contact and then set the category.
6-1
WorldCard Mac
6.2 Searching Contacts
You can quickly and efficiently find your contacts with Text Search and Advanced
Search features.
6.2.1 Text Search
The Text Search
function provides you to quickly find the specific contacts. To use the Text Search function, enter a key word in the Text Search box, the system
will search the contacts immediately and display the search results in the Browse mode
pane.
6.2.2 Advanced Search
WorldCard Mac also offers an
Advanced Search function for you to
search the contacts who match with the
specific fields. Click Advanced Search
button, the Advanced Search
pane will appear in the left side pane.
Select the field name that you want to
search, and enter a key word in the Search
box and click the Search
button. The search results will display in the
Browse mode pane.
6.2.3 Search for Duplicate Contacts
To find duplicate contacts, you just need to click Run\Duplicates Data from the menu.
The duplicate contacts will then be listed in the right pane for you to delete or modify.
6-2
Chapter 6 Managing Contacts
6.3 Adding Cards
WorldCard Mac offers two methods to adding new contacts. You can add a new contacts by scanning business cards as the explanation of 4.1 Scan a Business Card. You can
also click New Card
button to create a new contact manually.
6.4 Settings
WorldCard Mac provides Settings for configuring the operational functions of Scan
options. Click Settings
button or Settings\Scan option from the menu to open the
Settings.
The default configuration as seen in the preceding picture, you may define Card Style,
Language and Chinese character option. Check Capitalize the first letter of name to
recognize the first letter of the contact’s name to a capital letter. The other letters of the
name will be recognized to lowercase letters. Click OK for the settings to take effect.
Tip
When scanning a Chinese business card, the system will accord to the Output charset to display Chinese character.
6-3
WorldCard Mac
6.5 Importing Contacts
WorldCard Mac allows you to import valuable contact information from Address
Book, Image File, VCard, WorldCard file, or WorldCard series data exchange file to
WorldCard Mac database.
1. Click Import
button or File\Import function from the menu. You will see the pulldown menu as below.
1. The imported image files allow .JPG and .BMP only.
Note
2. To learn how to use WorldCard series data exchange file, please
refer Setcion 6.7 for further information.
2. Select the import source, the contacts will be imported to WorldCard Mac. For example,
choose Address Book. A note window will appear to confirm importing all cards. Click
OK to continue.
3. A note window will appear to show the import results when it is done.
4. The imported contacts will be shown in the Browse pane.
6-4
Chapter 6 Managing Contacts
6.6 Exporting Contacts
WorldCard Mac allows you to export the selected contacts or all records to other application or file formats such as Address Book, Html File, Microsoft Entourage 2004,
Microsoft Entourage 2008, Text File, Vcard File, WorldCard File, and WorldCard
series data exchange file.
1. Select the contacts which you want to export and click Export
button or File\
Export function from the menu. Select the export application or file format, for example
Address Book.
To learn how to export contacts as WorldCard series data exchange
file, please refer Setcion 6.7 for further information.
Note
2. Select All cards or Selected cards.
3. A note window will appear to show the export results when it is done.
6-5
WorldCard Mac
4. You can find the exported contact inforamtion in the Address Book.
Follow the steps below, you can sync. Address Book with your iPhone or
iPod:
1. Connect iPhone to your computer and open iTunes (if it doesn’t open
automatically).
2. In iTunes, select iPhone or iPod in the sidebar.
3. Configure the sync settings in each of the settings panes.
4. Select “Automatically sync when this iPhone is connected” to have
iTunes sync iPhone automatically whenever you connect it to your computer.
Tips
6-6
5. Click Info pane and check contacts.
Please refer to iTunes User Guide for details.
Chapter 6 Managing Contacts
6.7 Exchange Contacts with WorldCard Series products
The new data exchanging function in WorldCard Mac allows you to export contacts to
another WorldCard series product, such as WorldCard Mobile, and import them from
any other WorldCard series product, such as WorldCard Contacts. WorldCard Mac will
convert the selected contacts in the WorldCard Mac to a new WCXF format, whicn is
compatible with all WorldCard Series products.
Notes
1. Only WorldCard Mobile 3.1.0 or later supports the WCXF format.
2. Only WorldCard Contacts 2.3.0 or later supports the WCXF format.
6.7.1 Import contacts from other WorldCard Series products
1. Click Import
button or File\
Import function from the menu. Select
WorldCard series data exchange file from
the drop-down menu.
2. Locate the WCXF contact file you want
to import, and then click Choose button.
3. A note window will appear to ask
whether you want to import category or
not. Click Yes to import categories or
vice versa.
4. The new contacts should appear in the Browse pane.
6-7
WorldCard Mac
6.7.2 Export contacts to other WorldCard Series products
You need to export contacts from WorldCard Mac first before you share them. These
contacts will be bundled and saved as WCXF format, which can be shared by all WorldCard
Series products via email or iTunes File Sharing.
1. Select the contacts which you want to export and click Export
button or File\Export
function from the menu. Select WorldCard series data exchange file.
2. Select All cards or Selected cards.
3. Input the file name of the exporting file and where you want to save the exporitng file.
4. A note window will appear telling you that the export process has completed. Click OK to
close.
6-8
Chapter 6 Managing Contacts
5. You can share the WCXF ontact file by attaching it to an email message and then share
the WCXF file with other WorldCard series prducts.
To share the WCXF file with WorldCard(PC or Mac Version), please follow the steps below:
Step1
Open email with a WCXF file. Then save the WCXF file to your computer.
Step2
Lauch WorldCard.
Step3 Click the import button of on the toolbar.
Step4 Select WorldCard series data exchange files and follow the importing process to
import the WCXF file into WorldCard.
To share the WCXF file with WorldCard Mobile or WorldCard Contacts, please follow the
steps below:
Step1 Open email with a WCXF file
and tap the WCXF file.
Step2 Select Open In and then select the
App that you want to share the WCXF
with. Then contacts int the app will open
instantly and the contacts in the WCXF
file will be imported into the app at the
same time.
6-9
WorldCard Mac
6. You can share the WCXF ontact file by attaching it to an email message or share the
WCXF file with WorldCard Mobile or WorldCard Contacts on your iPhone via iTunes
File Sharing.
Notes
iTunes File Sharing requires:
1. iTunes version 9.1 or later.
2. Mac OS version 10.5.8 or later.
3. iPhone iOS version 4 or later.
step 1 Connect your iPhone to your computer, launching iTunes on your computer, and
then selecting your iPhone from the Device section of iTunes
step 2 Select Apps tab and scroll down to the bottom of the page. You will see the File
Sharing section.
step 3 You will find a list of apps that
are installed on your iPhone that supports
File Sharing function. Select the app that
you want to share the WCXF contact
file with. Take WorldCard Mobile for
example. You will find the right Document area lists the file that can share with
your computer.
6-10
Chapter 6 Managing Contacts
step 4 Please click Add... and locate the WCXF file that you want to copy from your
computer and click Choose. This WCXF file wiill be copied in the Documents sharing
area immediately.
You can click [Add ...] to add the file in the document file to your computer.
Tip
step 5 Return to your iPhone. Choose
WorldCard Mobile on your iPhone and
select Settings\Import from iTunes file
sharing.
step 6 Tap WCXF file that you want to
import into WorldCard Mobile and then
tap Import. The contacts in the WCXF
file will then be imported into Card Holer
of WorldCard Mobile.
6-11
WorldCard Mac
6.8 Sending Emails
To send email to the selected contacts, select the contacts and click the Email
button or the Run\E-mail function from the menu, or right click on the contact and choose
Send E-mail. Then choose whether you want to to put the contacts into To, From, BCC,
or Attatchment field. WordCard Mac will open the Email editing window of your default
Email software, and add the Email addresses into the corresponding field.
If you put the contacts into the Attachment filed, both the image and the text
information of the contact will be included in the mail as attachment.
Note
6.9 Visiting Website
To visit the Website of the selected contact person, select a contact and click the Web
button or the Run\Web function from the menu. WordCard Mac will open your default
Internet browser and browse the Website of the contact person.
6.10 Online Map
WorldCard Mac offers you online map with a click of your mouse. Select a contact
and click Map
button and select Display Map of Address or the Run\Display Map of
Address function from the menu.
Select the region of the address. If the contact has more than one address, you can select
an address of the contact. Click OK. WordCard Mac will open your default internet
browser to search the address of the contact from the Internet map service website.
6-12
Chapter 6 Managing Contacts
6-11 Getting Direction
WorldCard provides Get Direction function through map service websites for looking
up the route between two contacts or between your location and a specific contact address.
1. Right click on a contact and select Get direction/Direction from here from the the popup menu.
Tip
You can also click the Map
from here function.
button to selct the Get direction/Direction
2. Right click on another contact and select Get direction/Direction to here from the popup
menu.
3. After setting the Direction from here and Direction to here, a Get Direction window
will pop up. You can also enter your personal address in the the start location or
destination.
1. If the contact contains more than one address, you can select the other
address from the pulldown menu.
Tip
2. You can select Personal Address to edit your personl address. WorldCard
can save five lists of address.
6-13
WorldCard Mac
6-12 Backup Contact Information
Backup and Restore features help you to keep your data safe. Click File\Backup from
the menu and enter the file name to backup your contact information. The backup file will
be saved as .wmf file format.
6-13 Restore Contact Information
You can restore your contact information by clicking File\Restore from the menu. In
order to protect your current data, WorldCard Mac will ask you to backup your contact
information.
6-14
Chapter 6 Managing Contacts
Click OK to backup your contact information. Then select a .wmf backup file to restore
your contact information.
1. The restore function will over write the current contact information,
please use it with care.
Attention
2. WorldCard Mac saves the database in the Documents/My Business
Card. Please do not delete or modify it with other programs.
6-14 Create Empty
If you wish to create a new database, you may backup your current contact information
and click File\Create Empty from the menu. All the contact information will be deleted
after executing the Create Empty function.
Attention
The Create Empty function will delete the current contact information.
Please use it carefully.
6-15
WorldCard Mac
6-16
CE Conformity and FCC Statement
This equipment has been tested and found to comply with the limits of the European
Council Directive on the approximation of the member states relating to electromagnetic
compatibility according to EN 55022/55024 Part 15 B.
This equipment has been tested and found to comply with the limits for a Class B
digital device, pursuant to Part 15 of the FCC Rules. These limits are designed to provide
reasonable protection against harmful interference in a residential energy and, if not
installed and used in accordance with the instructions, may cause harmful interference
to radio communications. However, there is no guarantee that interference will not occur
in a particular installation. If this equipment does cause harmful interference to radio or
television reception, which can be determined by turning the equipment off and on, the user
is encouraged to try to correct the interference by one or more of the following measures:
Reorient the receiving antenna
Increase the separation between the equipment and receiver
Move the computer away from the receiver
Connect the equipment into an outlet on a circuit different from that to which the receiver
is connected
•
•
•
•
WorldCard Mac User Manual
Manufacturer: Penpower Technology Ltd.
Release: July, 2011
Version: 2.2
Edition: 1
WorldCard Mac FAQ
WorldCard Mac FAQ
Q. I installed WorldCard Mac, but how to launch it?
A: You may find WorldCard Mac folder under Applications. Double click to open
the folder. Click WorldCard Mac to start WorldCard Mac.
Q. How to save business card information to my Address Book?
A: You can click the Export
button and choose Address Book to export the
contacts to the Address Book.
Q: If some information is not recognized completely, what can I do?
A: You may use the Partially Select and Recognize function
in Edit Window
to select a specific area and assign to the proper field.
Q: Can I sync. contacts with my Palm device?
A: You can use iSync and HotSync to sync contacts from your address book to
your Palm device. Please visit http://www.apple.com/support/ for more information.
Q: Can WorldCard Mac be used in Power PC-based Mac?
A: WorldCard Mac only supports Intel-based Mac, and it supports Mac OS X
10.4 or later version.
Q: When scanning business cards, the scanner makes loud noise.
A: Some of USB ports may result in loud noise with the design of USB port, please
try to connect the USB cable of the scanner to another USB port.
WorldCard Mac