1
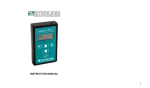
Twin Stim® Plus 3rd Edition
Combo Stimulator
INSTRUCTION MANUAL
This manual is valid for the
Twin Stim® Plus 3rd Edition Combo Stimulator
This user manual is published by Roscoe Medical, Inc.
Roscoe Medical, Inc. does not guarantee its contents and reserves the
right to improve and amend it at any time without prior notice.
Amendments may however be published in new editions of this manual.
All Rights Reserved.Rev.V1.0 © 2013, 20130719
United States Federal Law restricts this device to sale by or
on the order of a physician or licensed practitioner.
Declaration of conformity:
Roscoe Medical, Inc. declares that the device complies with following
normative documents:
IEC60601-1, IEC60601-1-2, IEC60601-1-11, IEC60601-2-10,
ISO10993-1, ISO10993-5, ISO10993-10, ISO14971
2
TABLE OF CONTENTS
Chapter 1: GENERAL DESCRIPTION................................................... 4
Chapter 2: INTRODUCTION........................................................................ 5
Chapter 3: IMPORTANT SAFETY INFORMATION......................... 8
Chapter 4: CONSTRUCTION....................................................................12
Chapter 5: TECHNICAL SPECIFICATIONS.......................................15
Chapter 6: THERAPY PROGRAM AND WAVEFORMS.............17
Chapter 7: UNIT AND ACCESSORIES............................................... 24
Chapter 8: OPERATING INSTRUCTIONS........................................ 25
Chapter 9: PARAMETER CONTROLS................................................ 29
Chapter 10: PATIENT COMPLIANCE METER.................................. 32
Chapter 11: MAINTENANCE AND STORAGE...................................33
Chapter 12: TROUBLESHOOTING......................................................... 34
Chapter 13: NORMALIZED SYMBOLS................................................. 36
Chapter 14: WARRANTY.............................................................................. 37
3
Chapter 1: GENERAL DESCRIPTION
The Twin Stim® Plus 3rd Edition Combo Stimulator is a battery operated
pulse generator that sends electrical impulses electrodes to the body and
reaches the nerves and underlying muscle group. This unit is a combination
stimulator of TENS, EMS, IF (Interferential) and RUSSIAN which can be
used for muscle stimulation and pain relief. The device is provided with four
controllable output channels, each independent of each other. An electrode
pair can be connected to each output channel. The intensity level is
controlled by press buttons.
4
Chapter 2: INTRODUCTION
EXPLANATION OF PAIN
Pain is a warning system and the body’s method of telling us that something
is wrong. Pain is important; without it abnormal conditions may go
undetected, causing damage or injury to vital parts of our bodies. Even
though pain is a necessary warning signal of trauma or malfunction in the
body, nature may have gone too far in its design. Aside from its value in
diagnosis, long-lasting persistent pain serves no useful purpose. Pain does
not begin until coded message travels to the brain where it is decoded,
analyzed, and then reacted to. The pain message travels from the injured
area along the small nerves leading to the spinal cord. Here the message
is switched to different nerves that travel up the spinal cord to the brain.
The pain message is then interpreted, referred back and the pain is felt.
EXPLANATION OF TENS
Transcutaneous Electrical Nerve Stimulation is a non-invasive, drug free
method of controlling pain. TENS uses tiny electrical impulses sent through
the skin to nerves to modify your pain perception. TENS does not cure any
physiological problem; it only helps control the pain. TENS does not work
for everyone; however, in most patients it is effective in reducing or
eliminating the pain, allowing for a return to normal activity.
HOW TENS WORKS
There is nothing “magic” about Transcutaneous Electrical Nerve Stimulation
(TENS). TENS is intended to be used to relieve pain. The TENS unit sends
comfortable impulses through the skin that stimulate the nerve (or nerves)
in the treatment area. In many cases, this stimulation will greatly reduce
or eliminate the pain sensation the patient feels. Pain relief varies by
individual patient, mode selected for therapy, and the type of pain. In many
patients, the reduction or elimination of pain lasts longer than the actual
period of stimulation (sometimes as much as three to four times longer).
In others, pain is only modified while stimulation actually occurs. You may
want to discuss this therapy option with your physician or therapist to see
if it will benefit your pain management needs.
5
EXPLANATION OF EMS
Electrical Muscle Stimulation is an internationally accepted and proven
way of treating muscular injuries. It works by sending electronic pulses to
the muscle needing treatment; this causes the muscle to exercise passively.
It is a product derived from the square waveform, originally invented by
John Faraday in 1831. Through the square wave pattern it is able to work
directly on muscle motor neurons. The Twin Stim® Plus 3rd Edition Combo
Stimulator has low frequency and this in conjunction with the square wave
pattern allows direct work on muscle groupings. This is being widely used
in hospitals and sports clinics for the treatment of muscular injuries and
for the re-education of paralyzed muscles, to prevent atrophy in affected
muscles and improving muscle tone and blood circulation.
HOW EMS WORKS
The EMS units send comfortable impulses through the skin that stimulate
the nerves in the treatment area. When the muscle receives this signal it
contracts as if the brain has sent the signal itself. As the signal strength
increases, the muscle flexes as in physical exercise. Then when the pulse
ceases, the muscle relaxes and the cycle starts over again, (Stimulation,
Contraction and Relaxation.) Powered muscle stimulators should only be
used under medical supervision for adjunctive therapy for the treatment
of medical diseases and conditions.
EXPLANATION OF IF (Interferential)
Interferential Stimulation (IF) is an anti-inflammatory based treatment
modality. Interferential stimulation is characterized by two alternatingcurrent sine waves or square waves of differing frequencies that “work”
together to produce an interferential current that is also known as a beat
pulse or alternating modulation frequency. One of the two currents is
usually held at 4,000 Hz, and the other can be held constant or varied
over a range of 4,001 to 4,150 Hz. Because of the frequency, the
interferential wave meets low impedance when crossing the skin to enter
deep into soft tissues. The interferential currents reportedly can stimulate
sensory, motor, and pain fibers. These large impulse fibers interfere with
the transmission of pain messages at the spinal cord level. This deep
tissue penetration stimulates parasympathetic nerve fibers for increased
blood flow and edema reduction. It utilizes the low electric-current to
6
stimulate muscle nerves to achieve the symptomatic relief of chronic
intractable pain, post-traumatic pain, and post-surgical pain.
EXPLANATION OF RUSSIAN
Russian stimulation uses medium frequencies to provide electrical stimulation
to muscle groups and is used to reduce muscle spasms as well as for muscle
strengthening. Russian stimulation is a specific form of electro-stimulation
with a Symmetrical Biphasic Square waveform produced by dividing a
2500Hz carrier frequency into 20~80Hz packets. This method was claimed
by its author (Kots) to produce maximal muscle strengthening effects
without significant discomfort to the patient.
INDICATION FOR USE
For TENS and IF (Interferential):
► Symptomatic relief of chronic intractable pain;
► Reduction of inflammation;
► Post-traumatic acute pain and edema;
► Post-surgical acute pain and edema.
For EMS and Russian:
► Relaxation of Muscle spasms and edema reduction;
► Prevention or retardation of disuse atrophy;
► Increasing local blood circulation;
► Muscle re-education;
► Maintaining or increasing range of motion;
► Immediate postsurgical stimulation of calf muscles to prevent venous
thrombosis.
7
Chapter 3:
IMPORTANT SAFETY INFORMATION
Read instruction manual before operation. Be sure to comply with all
“Contraindications”, “Warnings”, “Cautions” and “Adverse reactions” in the
manual. Failure to follow instructions can cause harm to user or device.
3.1 Contraindications
1) This device should not be used for symptomatic local pain relief unless
etiology is established or unless a pain syndrome has been diagnosed.
2) This device should not be used when cancerous lesions are present
in the treatment area.
3) Stimulation should not be applied over swollen, infected, inflamed areas
or skin eruptions (e.g. phlebitis, thrombophlebitis, varicose veins, etc.).
4) Electrodes must not be applied to sites that might cause current/
stimulation to flow through the carotid sinus region (anterior neck) or
trans-cerebrally (through the head).
5) Do not use this device if the patient has a demand-type cardiac
pacemaker or any implanted defibrillator.
6) This device should not be used over poorly enervated areas.
7) This device should not be used on patients with epilepsy.
8) This device should not be used on patients with serious arterial
circulatory problems in the lower limbs.
9) This device should not be used on patients with abdominal or inguinal
hernia.
10) Do not use this device if you have heart disease without consulting
your physician.
3.2 Warnings, cautions and adverse reactions
Warnings
1)
2)
This device should be used only under the continued supervision of
a licensed physician.
The long-term effects of chronic electrical stimulation are unknown.
Electrical stimulation devices do not have any curative value.
8
3)
4)
5)
6)
7)
8)
9)
10)
11)
12)
13)
14)
15)
16)
17)
18)
19)
20)
TENS is a symptomatic treatment and, as such, suppresses the sensation
of pain, which would otherwise serve as a protective mechanism.
Safety has not been established for the use of therapeutic electrical
stimulation during pregnancy. Do not use during pregnancy unless
directed by your physician.
Electrical stimulation is not effective for pain of central origin.
Electronic monitoring equipment (such as ECG monitors and ECG
alarms) may not operate properly when electrical stimulation is in use.
Stimulation should not be applied over the carotid sinus nerves,
particularly in patients with a known sensitivity to the carotid sinus reflex.
Stimulation should not be applied over the anterior neck or mouth.
Severe spasm of the laryngeal and pharyngeal muscles may occur
and the contractions may be strong enough to close the airway or
cause difficulty in breathing.
Stimulation should not be applied transthoracically in that the introduction
of electrical current into the heart may cause cardiac arrhythmias.
Stimulation should not take place while the user is connected to highfrequency surgical equipment, it may cause burn injuries on the skin
under the electrodes, as well as problems with the stimulator.
Do not use the stimulator in the vicinity of shortwave or microwave
therapy equipment, since this may affect the output power of the
stimulator.
Never use in environments with high humidity such as in the bathroom
or when having a bath or shower.
Caution should be used in applying electrical stimulation to patients
suspected of having heart disease. Further clinical data is needed to
show there are no adverse results.
Never use near the heart. Stimulation electrodes should never be
placed anywhere on the front of the thorax (marked by ribs and
breastbone), but above all not on the two large pectoral muscles. Here
it can increase the risk of ventricular fibrillation and lead to cardiac arrest.
Electrodes should not be placed over the eyes, in the mouth, near the
genitals or internally.
Never use on the areas of the skin which lack normal sensation.
Apply the electrodes to clean, dry, and unbroken skin only.
Keep electrodes separate during treatment, electrodes in contact with
other could result in improper stimulation or skin burns.
Keep the stimulator out of reach of children.
Consult your doctor if you are in any doubt whatsoever.
9
Cautions:
1) Federal law (USA) restricts this device to sale by or on the order of a
physician.
2) For single patient use only.
3) Keep yourself informed of the contraindications.
4) This stimulator is not intended for unattended, personal use by patients
who have noncompliant, emotionally disturbed, dementia, or low IQ.
5) Read, understand, and practice the warnings, cautions and operating
instructions. Know the limitations and hazards associated with using
any device. Observe the precautionary and operational decals placed
on the unit. Always follow the operating instructions prescribed by your
healthcare practitioner.
6) The instruction of use was listed; any improper use may be dangerous.
7) Do not use this device for undiagnosed pain syndromes until consulting
a physician.
8) Patients with an implanted electronic device, such as a cardiac
pacemaker, implanted defibrillator, or any other metallic or electronic
device should not use this device without first consulting a doctor.
9) Stimulation delivered by this device may be sufficient to cause
electrocution. Electrical current of this magnitude must not flow through
the thorax or across the chest because it may cause a cardiac arrhythmia.
10) Do not place electrodes on the front of the throat as spasm of the
Laryngeal and Pharyngeal muscle may occur. Stimulation over the
carotid sinus (neck region) may close the airways, make breathing
difficult, and may have adverse effects on the heart rhythm or blood
pressure.
11) Do not place electrodes on your head or at any sites that may cause
the electrical current to flow trans-cerebrally (through the head).
12) Patients with heart disease, epilepsy, cancer or any other health
condition should not use this device without first consulting a physician.
13) Some patients may experience skin irritation or hypersensitivity due to
the electrical stimulation or silicone rubber. If rash develops or pain
persists, discontinue use and consult a doctor.
14) Electrode placement and stimulation settings should be based on the
guidance of prescribing practitioner.
15) Effectiveness is highly dependent upon patient selection by a person
qualified in the management of pain afflicted patients.
10
16) Isolated cases of skin irritation may occur at the site of the electrode
placement following long-term application. If this occurs, discontinue
use and consult your physician.
17) The electrodes are only to be placed on healthy skin. Avoid skin
irritation by ensuring that good contact is achieved between electrodes
and skin.
18) If the stimulation levels are uncomfortable or become uncomfortable,
reduce the stimulation Intensity to a comfortable level and contact your
physician if problems persist.
19) This device should not be used while driving, operating machinery,
close to water, or during any activity in which involuntary muscle
contractions may put the user at undue risk of injury.
20) Never use the device in rooms where aerosols (sprays) are used or
pure oxygen is being administered.
21) Do not use it near any highly flammable substances, gases or explosives.
22) Do not use this device at the same time as other equipment which
sends electrical pulses to your body.
23) Do not confuse the electrode cables and contacts with your headphones
or other devices, and do not connect the electrodes to other devices.
24) Do not use sharp objects such as pencil point or ballpoint pen to operate
the buttons on the control panel.
25) Inspect Applicator cables and associated connectors before each use.
26) Turn the device off before applying or removing electrodes.
27) Electrical stimulators should be used only with the leads and electrodes
recommended for use by the manufacturer.
28) This device has no AP/APG protection. Do not use it in the presence
of explosive atmosphere and flammable mixture.
Adverse reactions:
Skin irritation from the electrode gel and electrode burns are potential
adverse reactions. If skin irritation occurs, discontinue use and consult
your physician.
Note: Always use electrodes that are legally marketed and sold in the
United States under 510K guidelines.
11
Chapter 4: CONSTRUCTION
PANEL
1
2b
2c
2a
2d
CH1
CH2
CH3
CH4
3
12
11
10
Twin Stim® Plus 3rd Edition
9
4
8
5
7
6
12
13
14
15
Model: Twin Stim® Plus 3rd
Edition Combo Stimulator
Supply Voltage: DC 9V/0.8A adaptor or 4XAA 1.5V batteries
Caution: Federal law (USA) restricts this
device to sale by or on the order of a physician
Manufacturer for Roscoe Medical, Inc.
21973 Commerce Parkway, Strongsville, Ohio 44149
www.roscoemedical.com
1)
2)
3)
4)
5)
6)
7)
8)
9)
Lead connector
Channel 1, Channel 2, Channel 3 and Channel 4
Liquid crystal display
Panel cover
Mode control
Power on/off control
AC Adapter
Set control
Increment control – for Pulse Rate, Pulse Width and time indicators,
interference frequency
10) Decrement control – for Pulse Rate, Pulse Width and time indicators,
interference frequency
11) Intensity decrease control
12) Intensity increase control
13) Belt clip
14) Battery case
15) Battery cover
13
LCD
1
6
2
3
7
4
5
8
1) Output intensity from channel 1 to channel 4
2) TENS, EMS, IF (Interferential) and RUSS (Russian) mode
3) Therapy program
4) Time symbol
5) Pulse rate and pulse width indicator
6) Lock symbol
7) Low battery symbol
8) Time indicator
14
Chapter 5: TECHNICAL SPECIFICATIONS
The technical specification details of Twin Stim® Plus 3rd Edition Combo
stimulator are as follows:
No.
MECHANISM
TECHNICAL DESCRIPTION
01
Channel
Four, isolated between channels
02
Type of protection
against electric
shock
Class II Equipment
03
Output intensity
0~40Vpp (at 500 ohm load)
04
Waveform
Bi-Phasic Square Pulse
05
Power source
DC 6V, 4×AA 1.5V battery, or
AC Adapter output :DC 9V,800mA
06
Size
13.8cm(L)x7.8cm(W)x2.8cm(H)
07
Weight
425 grams with battery.
08
Pulse Rate
TENS/EMS: 2Hz~150Hz;
IF: 4000Hz~4150 Hz ;
RUSS:
fixed rate:2500 Hz; Burst rate:20Hz~80Hz
09
Pulse width
50μs~300μs
10
On Time
Adjustable, 2~90 seconds,1Sec./step
11
Off Time
Adjustable, 0~90 seconds,1Sec./step
12
Ramp Time
Adjustable, 1~8 seconds, 1 Sec./ step, The
“On” time will increase and decrease in the
setting value.
15
Two adjustable timers, from 1 to 60 minutes or
Continuous. Adjustable in 1 minute each step
from 1 to 15 minutes, and 5 minutes each step
from 15 to 60 minutes. Treatment time
countdown automatically.
13
Treatment time
14
Patient Compliance This unit can store 60 sets of operation records.
Meter
Total recorded time is 999 hours.
15
Low battery symbol
A low battery symbol will show up when the
battery is low.
16
Operating
conditions
Temperature: 0°C ~40°C
Relative Humidity: 30%~75%
Atmosphere Pressure: 700hPa~1060hPa
17
Temperature:-10°C~50°C
Storage conditions Relative humidity:10%~90%
Atmospheric pressure: 700hPa ~ 1060hPa
16
Chapter 6:
THERAPY PROGRAM AND WAVEFORMS
TENS PROGRAM
No.
MECHANISM
TECHNICAL DESCRIPTION
01
Program
Five TENS program: B(Burst), N(Normal),
M(Modulation),SD1(Strength Duration 1),
SD2 (Strength Duration 2)
02
Burst rate: Adjustable, 0.5 ~ 5Hz
Burst program (B) Pulse width adjustable, 50~300μs
Frequency fixed = 100 Hz
03
Normal program
(N)
The pulse rate and pulse width are adjustable.
It generates continuous stimulation based on
the setting value.
Modulation
program (M)
Modulation mode is a combination of pulse rate
and pulse width modulation. The pulse rate and
width are automatically varied in a cycle pattern.
The pulse width is decreased by 50% from its
original setting in 0.5s, and then the pulse rate
is decreased by 50% from its original setting in
0.5 seconds. Total cycle time is 1 second. In
this mode, pulse rate (2~150Hz) and pulse
width (50~300μs) are fully adjustable.
Strength-Duration
program (SD1)
The SD1(Strength-Duration) mode consists of
automatic modulation intensity and pulse width
in 40% range. The intensity is always increasing
while the pulse width is decreasing and viceversa. The intensity is decreased by 40% while
the pulse width is increased by 40% in 5
seconds. In the next 5 seconds, the intensity
is increased by 40% while the pulse width is
decreased by 40%. Total cycle time is 10
04
05
17
seconds. Pulse rate (2~150Hz) and pulse
width (50~300μs) are fully adjustable.
06
The SD2(Strength-Duration) mode consists
of automatic modulation intensity and pulse
width in 70% range. The intensity is always
increasing while the pulse width is decreasing
and vice-versa. The intensity is decreased by
Strength-Duration
70% while the pulse width is increased by
program (SD2)
70% in 5 seconds. In the next 5 seconds, the
intensity is increased by 70% while the pulse
width is decreased by 70%. Total cycle time is
10 seconds. Pulse rate (2~150Hz) and pulse
width (50~300μs) are fully adjustable.
TENS WAVEFORMS
1.Burst
Burst Frequency
2. Normal
18
3. Modulation
Cycle time
4. Strength-Duration
EMS PROGRAM
No.
MECHANISM
TECHNICAL DESCRIPTION
01
Program
Three EMS Modes:
C(Constant), S(Synchronous), A(Alternate)
02
Constant
program (C)
Constant stimulation based on setting value.
Only pulse width, pulse rate and timer are
adjustable in this mode. “Constant” is equal
to the “Normal” mode in TENS.
Synchronous
program (S)
Stimulation of both channels occurs
synchronously. The “ON” time including “Ramp
up” and “Ramp down” time. Therefore, the
setting ON time should be no less than two
times the “Ramp” time in this mode.
ON time≥Ramp up + Ramp down
03
19
04
The stimulation of the CH2 will occur after the
1st contraction of CH1 is completed. In this
mode, the setting of ON time should be no less
than two times of the “Ramp” time. The OFF
time should be equal or more than the ON time.
ON time ≥Ramp up + Ramp down
OFF time ≥ON time
Alternate
program (A)
EMS WAVEFORMS
Constant (C)
Synchronous (S)
CH1
CH2
ON TIME
OFF TIME
20
Alternate (A)
CH1
CH2
IF (Interferential) PROGRAM
No.
MECHANISM
TECHNICAL DESCRIPTION
01
Program
Three IF Modes: N (Normal), M (Modulation)
and M1 (Modulation 1)
Normal
program (N)
The pulse rates of the CH1 and CH3 are fixed
in 4000Hz; The interference frequencies of CH2
and CH4 are adjustable from 1Hz to 150Hz.
The pulse rates of CH2 and CH4 are based on
the setting value and fixed frequency (4000Hz),
means that pulse rate=4000Hz+Interference
frequency.
Modulation
program (M)
The pulse rates of the CH1 and CH3 is fixed
in 4000Hz; The pulse rates of CH2 and CH4
are based on the interference frequencies and
fixed frequency (4000Hz), means that pulse
rate = 4000Hz+Interference frequency. The
interference frequencies are adjustable from
1Hz to 80Hz.
The pulse rates of CH2 and CH4 are modulated
between setting value and 4001Hz in 10 seconds.
02
03
21
04
Modulation
program (M1)
The pulse rates of the CH1 and CH3 is fixed
in 4000Hz; The pulse rates of CH2 and CH4
are based on the interference frequencies and
fixed frequency (4000Hz), means that pulse
rate = 4000Hz+Interference frequency. The
interference frequencies are adjustable from
80Hz to 150Hz.
The pulse rates of CH2 and CH4 are modulated
between setting value and 4080Hz in 10 seconds.
IF (Interferential) WAVEFORM
RUSS (Russian) PROGRAM
No.
MECHANISM
TECHNICAL DESCRIPTION
01
Program
Three RUSS Modes: N (Normal),
M (Modulation) and M1 (Modulation 1)
02
Normal
program (N)
Constant stimulation based on setting value.
Burst frequency is adjustable from 20Hz to
80 Hz. The duty cycle keep at 50%.
Modulation
program (M)
Duty cycle is automatically varied in a cycle
time. The duty cycle is increase from 10% to
50% in 10 seconds, and then decrease from
50% to 10% in next 10 seconds. In this
program, burst frequency is adjustable from
20Hz to 80Hz.
03
22
04
Modulation
program (M1)
Burst frequency is decreased from the setting
value to 20Hz in 10 seconds, and then
increased from 20Hz to the setting value in
next 10 seconds. In this program, the burst
frequency is adjustable from 20Hz to 80Hz.
RUSSIAN WAVEFORM
23
Chapter 7: ACCESSORIES
Twin Stim® Plus 3rd Edition Combo Stimulator comes complete with
standard accessories as below:
No
DESCRIPTION
QTY’
1
50 X 50 mm Adhesive Electrodes
8PCS
2
Lead wires
4PCS
3
AA Battery
4PCS
4
Instruction Manual
1PC
5
Carrying Case
1PC
6
AC Adapter
1PC
24
Chapter 8: OPERATING INSTRUCTIONS
8.1 Check/Replace the batteries
Over time, in order to ensure the functional safety
of device, changing the batteries is necessary.
1) Slide the battery cover and open.
2) Insert four AA batteries into the battery compartment.
3) Make sure you are installing the batteries properly.
Be sure to match the positive and negative ends of
the battery to the marking in the battery compartment
of the device.
4) Replace the battery cover and press to close.
Caution:
► Remove the batteries if the device is not in use for long periods of time.
► Do not mix old and new batteries or difference type of batteries.
► Warning: If batteries leak and come into contact with the skin or eyes,
wash immediately with copious amounts of water.
► Batteries must be handled by an adult. Keep batteries out of the reach
of children.
► Remove exhausted batteries from the unit.
► Dispose of batteries safety according to local regulation.
8.2 Connect electrodes to lead wires
Insert the lead wire connector into electrodes
connector (standard 0.08 inch female connection).
Make sure no bare metal of the pins is exposed.
Caution:
Always use the electrodes with CE mark,
or which are legally marketed in the US
under 510(K) procedure.
25
Connection Cables
8.3 Connect lead wires to device
1) Before proceeding to this step, be sure the device is completely
turned OFF.
2) Insert the lead wires into the lead connectors on top of the device.
PLUG
LEAD CONECTOR
Caution:
Do not insert the plug of the patient lead wire into any AC power
supply socket.
8.4 Electrode
8.4.1 Electrode options
The electrodes are disposable and should be routinely replaced when
they start to lose their adhesive nature. If you are unsure of your electrode
adhesive properties, order replacement electrodes. Replacement electrodes
should be re-ordered through or on the advice of your physician to ensure
proper quality. Follow application procedures outlined in electrode packing,
to maintain optimal stimulation and to prevent skin irritation.
8.4.2 Place electrodes on skin
Apply electrodes to the exact site indicated by your physician or therapist,
before applying electrodes, be sure the skin surface over which electrodes
are placed is thoroughly cleaned and dried. Make sure the electrodes are
placed firmly to the skin and make good contact between the skin and the
electrodes. Place the electrodes over the skin; attach them properly,
firmly, and evenly.
Caution:
1) Before applying the self-adhesive electrodes, it is recommended to wash
26
and degrease the skin, and then dry it.
2) Do not turns on the device when the self-adhesive electrodes are not
positioned on the body.
3) Never remove the self-adhesive electrodes from the skin while the device
is still turned on.
4) It is recommended that, at a minimum, 4cm x 4cm self-adhering based,
square electrodes are used at the treatment area.
8.4.3 Electrode placement
The placement of electrodes can be one of the most important parameters
in achieving success with therapy. Of utmost importance is the willingness
of the physician to try the various styles of electrode placement to find
which method best fits the needs of the individual patient.
Every patient responds to electrical stimulation differently and their needs
may vary from the conventional settings suggested here. If the initial results
are not positive, speak to your physician about alternative stimulation
settings and/or electrode placements. Once an acceptable placement has
been achieved, mark down the electrodes sites and the settings, so the
patient can easily continue treatment at home.
8.5 Turn on
Before using the device for the first time, you are strongly advised to take
careful note of the counter-indications and safety measures detailed at
the beginning of this manual (Safety information), as this powerful
equipment is neither a toy nor a gadget!
Press the [
] button to turn on the device.
8.6 Select the therapeutic mode and program
There are 4 therapeutic modes available –
TENS, EMS, IF and RUSS.
The therapeutic mode and program can be
selected by pressing the [MODE] button.
The LCD displays as
(TENS)→B; (TENS)→N; (TENS)→M; (TENS)→SD1; (TENS)→SD2;
(EMS)→C; (EMS)→S; (EMS)→A;
(IF)→N; (IF)→M; (IF)→M1;
(RUSS)→N; (RUSS)→M; (RUSS)→M1.
27
8.7 Adjust output intensity
There are 4 sets of intensity buttons, which correlate to each of the 4
channels. Slowly increase or decrease the intensity as directed by your
physician by pressing the up or down intensity buttons under the
respective channel.
Press the up arrow [△] button to increase intensity and press the down
arrow [▽] button to decrease intensity.
Caution:
If the stimulation levels are uncomfortable or become uncomfortable,
reduce the stimulation intensity to a comfortable level and contact
your medical practitioner if problems persist.
8.8 Turn off the device
After treatment, turn the device off by pressing the [
28
] button.
Chapter 9: PARAMETER CONTROLS
There are 4 therapeutic modes available –TENS, EMS, IF and RUSS. Each
mode’s parameters can be set by pressing [SET] button to enter setting
mode, and then adjust the parameters by pressing [▲] or [▼] button.
9.1 Steps to set a new TENS program
9.1.1 Select TENS therapeutic mode and program
Press [MODE] button until the LCD display “TENS” and expected program
(B, N, M, SD1, SD2).
9.1.2 Set pulse width
Press [SET] button to enter setting mode, the “Width” indicator displays on
LCD, press [▲] or [▼] button to adjust the parameter from 50μs to 300μs.
9.1.3 Set pulse rate
Press [SET] button again, The “Rate” indicator displays on LCD, press
[▲] or [▼] button to adjust the parameter from 2Hz to 150Hz. In Burst (B)
program, you can set the burst rate from 0.5Hz to 5Hz.
9.1.4 Set timer
There are two adjustable timers available. The left timer controlling the
treatment time of CH1 and CH2. The right timer controlling the treatment
time of CH3 and CH4. The treatment time is adjustable from 1 to 60
minutes or C (Continuous). Press [SET] button to enter this menu, then
press [▲] or [▼] button to adjust the setting. Press [▲] button when the
timer shows 60 minutes, it will be switched to continuous stimulation.
Two timers can be set in the same way.
9.2 Steps to set a new EMS program
9.2.1 Select EMS therapeutic mode and program
Press [MODE] button until the LCD display “EMS” and expected program
(C, S, A).
9.2.2 Set ramp time (A or S program)
Press [SET] button to enter setting mode, The “Ramp” indicator displays
on LCD when you select Alternate (A) or Synchronous (S) program, press
29
[▲] or [▼] button to adjust the parameter from 1s to 8s.
9.2.3 Set ON time (A or S program)
Press [SET] button again, The “On” indicator displays on LCD, press [▲]
or [▼] button to adjust the parameter from 2s to 90s.
9.2.4 Set OFF time (A or S program)
Press [SET] button again, The “Off” indicator displays on LCD, press [▲]
or [▼] button to adjust the parameter from 2s to 90s.
9.2.5 Set pulse width
Press [SET] button again, the “Width” indicator displays on LCD, press
[▲] or [▼] button to adjust the parameter from 50μs to 300μs.
9.2.6 Set pulse rate
Press [SET] button again, The “Rate” indicator displays on LCD, press
[▲] or [▼] button to adjust the parameter from 2Hz to 150Hz.
9.2.7 Set timer
There are two adjustable timers available. The left timer controlling the
treatment time of CH1 and CH2. The right timer controlling the treatment
time of CH3 and CH4. The treatment time is adjustable from 1 to 60
minutes or C (Continuous). Press [SET] button to enter this menu, then
press [▲] or [▼] button to adjust the setting. Press [▲] button when the
timer shows 60 minutes, it will be switched to continuous stimulation.
Two timers can be set in the same way.
9.3 Steps to set a new IF program
9.3.1 Select IF therapeutic mode and program
Press [MODE] button until the LCD display “IF” and expected program
(N, M, M1).
9.3.2 Set interference frequency
Press [SET] button to enter setting mode, press [▲] or [▼] button to adjust
the parameter from 1Hz to 150Hz.
9.3.3 Set timer
There are two adjustable timers available. The left timer controlling the
treatment time of CH1 and CH2. The right timer controlling the treatment
time of CH3 and CH4. The treatment time is adjustable from 1 to 60 minutes
30
or C (Continuous). Press [SET] button to enter this menu, then press [▲]
or [▼] button to adjust the setting. Press [▲] button when the timer shows
60 minutes, it will be switched to continuous stimulation. Two timers can
be set in the same way.
9.4 Steps to set a new RUSS program
9.4.1 Select RUSS therapeutic mode and program
Press [MODE] button until the LCD display “RUSS” and expected program
(N, M, M1).
9.4.2 Set burst frequency
Press [SET] button to enter setting mode, press [▲] or [▼] button to adjust
the burst frequency from 20Hz to 80Hz.
9.4.3 Set timer
There are two adjustable timers available. The left timer controlling the
treatment time of CH1 and CH2. The right timer controlling the treatment
time of CH3 and CH4. The treatment time is adjustable from 1 to 60
minutes or C (Continuous). Press [SET] button to enter this menu, then
press [▲] or [▼] button to adjust the setting. Press [▲] button when the
timer shows 60 minutes, it will be switched to continuous stimulation.
Two timers can be set in the same way.
31
Chapter 10:
PATIENT COMPLIANCE METER
This unit can store 60 sets of operation records. Total treatment time up to
999 hours can be stored.
Check & Delete Individual Record
Press [MODE] button and turn on the power simultaneously. The LCD will
show the number of records and operation time. Press the [▲] or [▼] button
to check each record.
To delete a record, press [SET] button for 3 seconds.
Check & Delete Accumulative Record
At the individual records menu, press [MODE] button to switch to
accumulative record menu. Press the [SET] button first, then press the
[MODE] button simultaneously for 3 seconds and all of the records will be
deleted followed by a beeper sound.
32
Chapter 11:
MAINTENANCE AND STORAGE
1) Non-flammable cleaning solution is suitable for cleaning the device.
Note: Do not smoke or work with open lights (for example, candles, etc.)
when working with flammable liquids.
2) Stains and spots can be removed with a cleaning agent.
3) Do not submerge the device in liquids or expose it to large amounts of
water.
4) Return the device to the carrying box to ensure that the unit is wellprotected before transportation.
5) If the device is not to be used for a long period of time, remove the
batteries from the battery compartment (acid may leak from used
batteries and damage the device). Put the device and accessories in
carrying box and keep it in cool dry place.
6) The packed TENS/ EMS device should be stored and transported under
the temperature range of -10°C~50°C, relative humidity 10%~90%,
atmosphere pressure 700 hPa~ 1060 hPa.
33
Chapter 12: TROUBLESHOOTING
Problem
Displays fail to
light up
Possible
Cause
Make sure that the
batteries are full and
were inserted with the
correct polarity
Try new batteries.
Reinsert batteries, ensure
batteries are inserted correctly.
Remove the batteries and
There is an error in the
reinsert them after approx.
electronics
3 seconds
Electrodes Dried out or
Replace
Stimulation weak contaminated
or cannot feel
Lead wires
any stimulation
Replace
Old/worn/damaged
Verify connection is secure.
Insure firmly
Intermittent
output
Turn down the intensity.
Rotate lead wires in socket 90°.
If still intermittent, replace lead
wires.
Lead wires
If still intermittent after replacing
lead wires, a component may
have failed. Call the repair
department.
Intermittent
output
Stimulation is
uncomfortable
Program option in
use
Intensity is too high
Some programs will seem
intermittent. This is expected.
Option Controls in the Operation
section for a description of the
program option.
Decrease intensity
Damaged or worn
Replace
electrodes or lead wires
34
Stimulation is
uncomfortable
Stimulation is
ineffective
Electrode active area
size is too small
Replace electrodes with
large more area
May not be operating
the device according
to the manual.
Please check the manual
before use.
Improper electrode and Reposition electrode and
applicator placement
applicator
Unknown
Contact Clinician
Re-position the electrodes. If
Use the electrodes on the
at any time you feel pain or
same site every time.
discomfort stop use immediately.
The electrodes aren't
Ensure the electrode is stuck
The skin becomes stuck onto the skin
securely on the skin.
red and/or you feel properly.
a stabbing pain
Clean the electrode pads with a
The electrodes are dirty. damp, lint free cloth or replace
new electrode pads.
The surface of the
Replace new electrode.
electrode was scratched.
Output current
stops during
therapy
The electrode pads
come off the skin.
Turn off the device and stick
the electrode pad firmly to
the skin.
The cable is
disconnected
Turn off the device and connect
the cable.
The power of the
batteries has been
exhausted.
Please replace them with
new batteries.
35
Chapter 13: NORMALIZED SYMBOLS
Applied part of type BF
Electrical devices are recyclable material and should not be
disposed of with household waste after their useful life! Help
us to protect the environment and save resources and take
this device to the appropriate collection points. Please contact
the organization which is responsible for waste disposal in
your area if you have any questions.
Refer to Instruction Manual
Equipment capable of delivering output values in excess of
10mA r.m.s. or 10V r.m.s averaged over any period of 5s.
Type of protection against electric shock: Class ll Equipment
36
Chapter 14: WARRANTY
Twin Stim® Plus 3rd Edition Combo Stimulator carries a warranty of one
year from the date of delivery. The warranty applies to the stimulator only
and covers both parts and labor relating thereto.
The warranty does not apply to damage resulting from failure to follow the
operating instructions, accidents, abuse, alteration or disassembly by
unauthorized personnel.
37
Manufacturer for Roscoe Medical, Inc.
21973 Commerce Parkway, Strongsville, Ohio 44149
www.roscoemedical.com