1
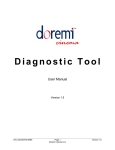
GPS Tracker User Manual 1 This Mini GPS Tracker is a next generation personal GPS tracking gadget that is compact, accurate, discreet and reliable. With Quad-Band GSM connectivity, the Mini Tracker works anywhere in the world. It is as small as a set of car keys and can be easily placed inside your pocket/handbag/ suitcase/backpack/etc. You will enjoy a piece of mind knowing exactly where your loved ones or valuable assets are. It even comes with a lanyard for securing the tracker to your pets if you want to know where they have been. Chapter 1 Before use 1.1 Product views USB port: Connect one end of charging cable to the GPS tracker and the other end to computer or 5V USB charger for charging; 2 Power/SOS button: Power on/off the GPS tracker; Initiate a SOS help call. Indicator light: Indicator light will indicate the different status of the GPS tracker, below is the details, Charging Lights on when charging; lights off automatically if charging full; Normal work Normal if lights off GSM fault Light flashing, restart every 10 minutes If SOS number is set successfully, lights on after pressing SOS helping red button for 3 seconds No power Press red button ineffectively (light off, no sound) 1.2 In the box: Item NO. Accessories Quantity 1 GPS tracker 1 2 User manual 1 3 Charging cable 1 4 Screw driver 1 Chapter 2 Start to use 2.1 Start to use the GPS tracker 1. Install the SIM card (SIM card must open the call display function): 1)Open the back cover 3 2)Pull open the battery 3)Insert the SIM card 4)Put back the battery and record the ID code 4 5)Put back the back cover and install the screw 2. Power on by pressing the Power/SOS button for 3 seconds; 3. Scan the QR code below to download and install mobile phone APP on android or apple phone, 4. The login account is ID code of the device, default password is 123456. (Please 5 check the photos below) Note: The device could be normally used after set the call device number and the SOS number. 2.2 User instruction 1. Open the box, check device model and accessories, contact your dealer if it is not right. 2. Insert 2G SIM card into device ( the device only supports Micro SIM card, the phone number in device need open GPRS and call display function). 3. Power on and rings after pressing the side red button 3 seconds. lights on under normal working when Press the side red button. Power shortage when the lights off after two drops. Please reuse after charging. 4. Record ID number on battery paper(the ID number is APP account). 6 5. The goods could not be turned off after power on and set the center number. If turned off, please send shutdown command by SMS and APP (change the SIM card after the power off, otherwise SIM card may be burned.) 6. Check GSM signal after turn on, please refer to indicator lights status in details. Chapter 3 The menus on smart phone APP 3.1 Start up the app on smart phone Open the APP in smart phone,enter ID number(10 digits),input password(default is 123456), then login. (Please refer to the photos below) 3.2 Settings 1 ) Main monitoring number 7 Enter into main menu, click“Settings”and then select“Main monitoring number”. The device will send the alarm information to this number. The alarm information includes lower power alarm, Geo-fence and other functions. 2 ) SOS number settings. The SOS number should be the number of the person who want to monitor the device. Three SOS numbers can be set at most. (Please refer to the photos below) Note: The device circularly dials SOS numbers when pressing the SOS key . It will call the second number if the first number will be not connected twice, then cycle continually. 8 3 ) Transmission interval settings It could set GPS search satellite times except for LBS. Please take care of using; it is related to the standby time of battery. ① Default standard locations: GPS starts every 10 minutes and report related location data. Standby time is 48 hours under this mode. Fast locations need 30 seconds to report data and the standby time is 8 hours. Power saving locations need one hours to report data and the standby time is 72 hours. Users could locate according to their different meets.(Please refer to the photos below) 9 4 ) Phone number of the GPS tracker. This is the phone number of the SIM card which is put inside the GPS tracker. 5 ) Other functions Remote restart and remote power off under menu please refer to APP. 3.3 Real time tracking Find the specific location, GPS and LBS location under Real time tracking menu. Click on the lower right corner “+”enlarge map, “-“shrink map. (Please refer to the photos below) 10 3.4 Historical track Historical track could find route map for nearly three months and choose begin and end time. (Please refer to the photos below) 11 3.5 GEO fence Click on the upper right corner “+”under main menu and set name for fence. The device will automatically lock device’s present position as center after click options for longitude, latitude or radius. Then automatically set position on maps. Adjust the radius distance by “+” “-” on map (default radius is 100 meters, recommended radius is 500 meters.) Save settings for clicking . The device will send message to APP beyond set fence. 12 3.6 Other functions 1)Device information It includes display device name, device number and duration of platform. 2)Device message Find all received message, such as SOS, Offline alarm, lower power alert, fence alarm. 3) Peripheral navigation Find Peripheral information:parking, food, gas station, bank, hotel, bus station, supermarket, entertainment. 4)Device list An account monitors several devices. 5)Monitoring center Find devices specific distribution and locations in an account. 6)Message center 13 Find all messages for devices. Chapter 4 Failure recovery 4.1 Device could not be connect to platform and APP is not online. Please check: 1) Is the SIM card installed correctly? Please refer to install instruction. 2) Check LED indicator light status 4.2 Device is offline on APP. Please check: 1)the SIM card is in debts 2)GPRS is canceled 3)Check IMEI, GPRS Transmission interval 3. Check center number call and call display function. 14