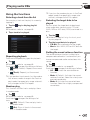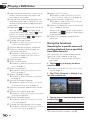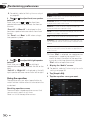
1
Operation Manual SPH-DA210 AppRadio Be sure to read Important Information for the User first! Important Information for the User includes important information that you must understand before using this product. English Contents Thank you for buying this Pioneer product. Please read through these instructions so you will know how to operate your model properly. After you have finished reading the instructions, keep this document in a safe place for future reference. 01 Introduction Manual overview.......................................... 5 ₋₋ How to use this manual..............................5 ₋₋ Conventions used in this manual...............5 ₋₋ Terms used in this manual.........................5 ₋₋ iPhone / iPod compatibility........................6 ₋₋ Android™ device compatibility...................6 To ensure safe driving................................. 7 Protecting the LCD panel and screen....... 7 Notes on internal memory.......................... 7 ₋₋ Before removing the vehicle battery..........7 02 About AppRadio Features........................................................ 8 ₋₋ Checking part names and functions..........8 ₋₋ Inserting and ejecting a disc......................9 ₋₋ Adjusting the LCD panel angle..................9 ₋₋ Connecting and disconnecting mobile devices.......................................................10 ₋₋ Available sources and conditions............13 ₋₋ Demonstration images.............................13 03 Basic operation Home screen.............................................. 14 ₋₋ Reading the screen...................................14 ₋₋ Scrolling the Home screen.......................14 ₋₋ Using the touch panel keys......................14 Touch panel keys common to each function.................................................. 16 Setting the clock........................................ 16 Audio source control................................. 16 04 Using the radio Starting procedure.................................... 18 Reading the screen................................... 18 Using the touch panel keys...................... 18 Using the functions................................... 19 ₋₋ Storing the strongest broadcast frequencies................................................19 ₋₋ Recalling broadcast frequencies.............19 ₋₋ Tuning in to strong signals.......................19 2 En 05 Playing iPod music and video Starting procedure.................................... 20 Reading the screen................................... 20 Using the touch panel keys...................... 21 Using the functions .................................. 22 ₋₋ Narrowing down song (episode) or video sources with the list........................22 ₋₋ Repeating playback...................................22 ₋₋ Random play (shuffle)...............................23 ₋₋ Changing the audiobook speed...............23 ₋₋ Selecting song (episode) or video sources from the playlist screen..............23 ₋₋ Changing the wide screen mode.............24 06 Using Pandora® internet radio Starting procedure.................................... 25 Reading the screen................................... 25 Using the touch panel keys...................... 26 Using the function .................................... 26 ₋₋ Selecting a Pandora station from the list..............................................................26 07 Viewing/operating mobile device applications Using Apps/MirrorLink source................. 27 ₋₋ AppRadio Mode.........................................27 ₋₋ MirrorLink mode........................................29 ₋₋ App Mode..................................................30 08 Registering and connecting a Bluetooth device Preparing communication devices.......... 31 Registering your Bluetooth devices......... 31 ₋₋ Searching for nearby Bluetooth devices.......................................................31 ₋₋ Pairing from your Bluetooth devices.......33 Deleting a registered device..................... 33 Connecting a registered Bluetooth device manually................... 34 Setting the Bluetooth auto connect function.................................................. 35 Disconnecting a Bluetooth device .......... 35 Switching product visibility....................... 36 Contents Changing a PIN code................................ 36 Displaying Bluetooth device address...... 37 09 Using the Bluetooth audio player Starting procedure.................................... 38 Reading the screen................................... 38 Using the touch panel keys...................... 39 10 Playing audio CDs Starting procedure.................................... 40 Reading the screen................................... 40 Using the touch panel keys...................... 40 Using the functions................................... 41 ₋₋ Selecting a track from the list..................41 ₋₋ Repeating playback...................................41 ₋₋ Random play.............................................41 ₋₋ Selecting the target data to be played.....41 ₋₋ Setting the sound retriever function........41 11 Playing music files on ROM Starting procedure.................................... 42 Reading the screen................................... 42 Using the touch panel keys...................... 42 Using the functions................................... 43 ₋₋ Selecting a file from the list.....................43 ₋₋ Repeating playback...................................43 ₋₋ Random play.............................................43 ₋₋ Selecting the target data to be played.....44 ₋₋ Setting the sound retriever function........44 12 Playing DVD-Video Starting procedure.................................... 45 Reading the screen................................... 45 Using the touch panel keys...................... 45 Using the functions................................... 46 ₋₋ Searching for a specific scene and starting playback from a specified time (Direct search)..........................................46 ₋₋ Changing the wide screen mode.............47 ₋₋ Frame-by-frame playback ........................47 ₋₋ Slow motion playback...............................47 ₋₋ Operating the disc menu..........................47 ₋₋ Selecting the DVD menu by touch panel keys..................................................48 ₋₋ Repeating playback...................................48 ₋₋ Changing the audio language (multi-audio)..............................................48 ₋₋ Changing the subtitle language...............49 ₋₋ Changing the audio output......................49 ₋₋ Changing the viewing angle (Multi-angle)..............................................49 ₋₋ Resuming playback (Bookmark)..............49 13 Using hands-free phoning Starting procedure.................................... 50 Reading the screen................................... 50 Using the touch panel keys...................... 50 Adjusting the phone volume.................... 51 Making a phone call.................................. 51 ₋₋ Direct dialing.............................................51 ₋₋ Calling a number in the phone book........51 ₋₋ Selecting a number using alphabet search mode..............................................52 ₋₋ Dialing from the history............................52 Answering an incoming call..................... 53 Using advanced functions........................ 53 ₋₋ Answering a call automatically................53 ₋₋ Switching the ring tone............................53 ₋₋ Storing a phone number...........................53 ₋₋ Using the preset dial lists.........................54 ₋₋ Inverting the names..................................54 ₋₋ Setting the private mode..........................54 ₋₋ Adjusting the other party’s listening volume.......................................................54 Using the voice recognition function (for iPhone)............................................ 55 Notes for hands-free phoning................... 55 ₋₋ General notes............................................55 ₋₋ Registration and connection....................55 ₋₋ Making and receiving calls.......................56 ₋₋ The received call history and the dialed number history..........................................56 ₋₋ Phone book transfers................................56 En 3 Contents 14 Customizing preferences Customizing the video setup settings...... 57 ₋₋ Setting the top-priority subtitle languages..................................................57 ₋₋ Setting the top-priority audio languages..................................................57 ₋₋ Setting the top-priority menu languages..................................................57 ₋₋ Setting the angle icon display..................58 ₋₋ Setting the aspect ratio............................58 ₋₋ Setting the parental lock..........................58 ₋₋ Setting the auto play.................................59 Customizing the audio settings............... 59 ₋₋ Using fader/balance adjustment..............59 ₋₋ Using the equalizer...................................60 ₋₋ Adjusting loudness...................................61 ₋₋ Using the subwoofer output.....................61 ₋₋ Enhancing bass (Bass Booster)...............62 ₋₋ Using the high pass filter.........................62 ₋₋ Adjusting source levels............................62 Customizing the system settings............. 63 ₋₋ Setting the type of the mobile device to be connected........................................63 ₋₋ Setting the rear output.............................63 ₋₋ Setting the RCA output.............................64 ₋₋ Selecting the system language................64 ₋₋ Setting the keyboard layout......................65 ₋₋ Switching the ever scroll function...........65 ₋₋ Clearing Bluetooth memory.....................65 ₋₋ Updating Bluetooth connection software.....................................................66 ₋₋ Displaying the Bluetooth system version.......................................................66 ₋₋ Setting the rear view camera...................66 ₋₋ Setting the video signal............................67 ₋₋ Adjusting the picture................................67 ₋₋ Setting the clock mode.............................68 ₋₋ Selecting the background display............68 ₋₋ Restoring the default settings..................68 ₋₋ Checking the connections of leads..........69 4 En ₋₋ Switching the App launch assist function (for iPhone).................................69 ₋₋ Displaying the firmware version...............70 ₋₋ Updating the firmware version.................70 Customizing the favorites menu.............. 70 ₋₋ Registering menu items...........................70 ₋₋ Removing menu items..............................71 Turning off the screen............................... 71 Appendix Troubleshooting......................................... 72 Positioning technology............................. 77 ₋₋ Positioning by GPS...................................77 Handling large errors................................ 77 ₋₋ When positioning by GPS is impossible.................................................77 ₋₋ Conditions likely to cause noticeable positioning errors......................................77 Handling and care of discs....................... 80 ₋₋ Built-in drive and care..............................80 ₋₋ Ambient conditions for playing a disc.....80 ₋₋ AVCHD recorded discs.............................80 ₋₋ Playing DualDisc.......................................80 Detailed information for playable media ..................................................... 81 ₋₋ Compatibility.............................................81 ₋₋ Media compatibility chart.........................82 ₋₋ Example of a hierarchy.............................83 Language code chart for DVDs................ 84 Setting list.................................................. 85 ₋₋ Video Setup settings.................................85 ₋₋ Audio settings...........................................85 ₋₋ System settings.........................................85 ₋₋ Other settings............................................85 Chapter Introduction • Before using this product, be sure to read Important Information for the User (a separate manual), which contains warnings, cautions, and other important information that you should note. • The screens shown in the examples may differ from actual screens. Actual screens may be changed without notice for performance and function improvements. How to use this manual Finding the operation procedure for what you want to do When you have decided what you want to do, you can find the page you need from the Contents. Finding customizable settings If you want to look up the settings of this product, refer to Setting list at the end of the manual. Conventions used in this manual Before moving on, take a few minutes to read the following information about the conventions used in this manual. Familiarity with these conventions will help you greatly as you learn how to use your new equipment. • Buttons on this product are described in bold lettering: e.g.) Press the Home button to display the Home screen. • Menu items, screen titles, and functional components are described in bold with double quotation marks “ ”: e.g.) Set “Dimmer” to “OFF”. • Touch panel keys that are available on the screen are described in bold in brackets [ ]: e.g.) Tap [Radio] on the Home screen. • Extra information, alternatives and other notes are presented in the following format: e.g.) ❐ If the home location has not been stored yet, set the location first. • Functions of other keys on the same screen are indicated with ❚ at the beginning of the description: e.g.) ■ If you touch [OK], the entry is deleted. • References are indicated like this: e.g.) ÜFor details, refer to Answering a call automatically on page 53. Introduction Manual overview 01 Terms used in this manual “iPhone” In this manual, iPod and iPhone are referred to as iPhone. “Android™ device” In this manual, each Android mobile device is referred to as Android device. “MirrorLink™ device” In this manual, each device that supports MirrorLink connection is referred to as MirrorLink device. “Mobile device” In this manual, all of “iPhone”, “Android device” and “MirrorLink device” are generically referred to as mobile device. En 5 Chapter 01 Introduction iPhone / iPod compatibility This product supports only the following iPhone models and iPhone software versions. Others may not work correctly. Made for • iPhone 5: iOS 6.0 • iPhone 4S: iOS 6.0 • iPhone 4: iOS 6.0 • iPhone 3GS: iOS 4.3.3 • iPod touch (5th generation): iOS 6.0 • iPod touch (4th generation): iOS 5.1.1 • iPod touch (3rd generation): iOS 5.1.1 • iPod touch (2nd generation): iOS 4.2.1 • iPod classic 160GB (2009): Ver. 2.0.4 • iPod classic 120GB: Ver. 2.0.1 • iPod classic 80GB: Ver. 1.1.2 • iPod classic 160GB (2007): Ver. 1.1.2 • iPod nano (6th generation): Ver. 1.2 • iPod nano (5th generation): Ver. 1.0.2 • iPod nano (4th generation): Ver. 1.0.4 • iPod nano (3rd generation): Ver. 1.1.3 ❐ Operation methods may vary depending on the iPhone models and the software version of iPhone. ❐ Depending on the software version of the iPhone, it may not be compatible with this equipment. For details about iPhone compatibility with this product, refer to the information on our website. This manual applies to the following iPod models. iPod with 30-pin connector • • • • • • • • • • • 6 iPod touch 4th generation iPod touch 3rd generation iPod touch 2nd generation iPod classic 160GB iPod classic 120GB iPod classic 80GB iPod nano 6th generation iPod nano 5th generation iPod nano 4th generation iPod nano 3rd generation iPhone 4S En • iPhone 4 • iPhone 3GS iPod with Lightning connector • iPod touch 5th generation • iPhone 5 Android™ device compatibility ❐ Operation methods may vary depending on the Android devices and the software version of Android OS. ❐ Depending on the version of the Android OS, it may not be compatible with this equipment. ❐ Compatibility with all Android devices is not guaranteed. For details about Android device compatibility with this product, refer to the information on our website. Chapter Introduction 01 Introduction To ensure safe driving Certain functions (such as viewing of app based visual content and certain touch panel key operations) offered by this product could be dangerous and/or unlawful if used while driving. To prevent such functions from being used while the vehicle is in motion, there is an interlock system that senses when the parking brake is set. If you attempt to use the functions described above while driving, they will become disabled until you stop the vehicle in a safe place, and apply the parking brake. Please keep the brake pedal pushed down before releasing the parking brake. Protecting the LCD panel and screen ❐ Do not allow direct sunlight to fall on the LCD screen when this product is not being used. Extended exposure to direct sunlight can result in LCD screen malfunction due to the resulting high temperatures. ❐ When using a cellular phone, keep the antenna of the cellular phone away from the LCD screen to prevent disruption of the video in the form of spots, colored stripes, etc. ❐ To protect the LCD screen from damage, be sure to tap the touch panel keys with your finger only and gently touch the screen. Notes on internal memory Before removing the vehicle battery If the battery is disconnected or discharged, all stored memory (except the registered Bluetooth device list) will be erased and must be reprogrammed. En 7 Chapter 02 About AppRadio Features Checking part names and functions Listening to the radio You can listen to the radio using this product. Playing iPod music and video You can play and operate audio sources and video sources with the iPhone connected. Viewing/operating mobile device applications With the App Mode, you can view the screen image currently displayed on the mobile device with this product’s display. ❐ When an iPhone with 30-pin connector is connected, the screen image of the application currently used is displayed with the App Mode. With the AppRadio Mode and the MirrorLink mode, you can not only view the screen image but also operate AppRadio compatible applications of the mobile device via the display with multi-touch gestures like tapping, dragging, scrolling, and flicking. Voice recognition function You can use the voice recognition function when an iPhone is connected via the Bluetooth® wireless technology. Hands-free phoning You can control the Bluetooth connection of the mobile device, and make a call using the incoming or outgoing call histories, transferred phone book, or by dialing. Using the Bluetooth audio player You can play and operate audio sources with the audio device connected via Bluetooth profile(s) (A2DP/AVRCP). Displaying the rear view camera image You can display what is behind the vehicle if a rear view camera (e.g. ND-BC6) (sold separately) is connected to the system. Mixing audio output You can mix the audio output of an application with the audio output of the other sources (radio, iPod, Bluetooth audio or disc) in the AppRadio Mode or the MirrorLink mode. 8 En 2 3 4 5 6 ❐ Available buttons will light according to the connected device. 1 Eject button • Press the Eject button to adjust the LCD panel angle. • Press and hold the Eject button to insert or eject a disc. 2 Volume (+/–) button 3 Home button • Press the Home button to display the Home screen. In the AppRadio Mode and the MirrorLink mode, when you press the Home button, the Application menu screen is displayed. To display the main Home screen, press the Home button again. • Press the Home button twice, the audio source control keys will be displayed onscreen. • Press and hold the Home button to launch the voice recognition function when an iPhone is connected via the Bluetooth wireless technology. 4 LCD screen 5 Menu button (for Android devices and MirrorLink devices) • Press the Menu button to display the menu screen. The Menu button is available while running the AppRadio app or other supported applications. • The Menu button may be disabled by some models of the connected MirrorLink device. Chapter About AppRadio 02 Adjusting the LCD panel angle Inserting and ejecting a disc Do not open or close the LCD panel by force. This may cause a malfunction. WARNING • Keep hands and fingers clear of this product when opening, closing, or adjusting the LCD panel. Be especially cautious of children’s hands and fingers. • Do not use with the LCD panel left open. If the LCD panel is left open, it may result in injury in the event of an accident. WARNING Keep hands and fingers clear of the product when opening, closing, or adjusting the LCD panel. Be especially cautious of children’s hands and fingers. CAUTION About AppRadio 6 Back button (for Android devices and MirrorLink devices) • Press the Back button to return the previous screen. The Back button is available while running the AppRadio app or other supported applications. • The Back button may be disabled by some models of the connected MirrorLink device. 1 Press the Eject button to display the flap menu screen. 2Tap or to adjust the angle. The angle can be adjusted on a level of zero to five both for the tilt down and up positions. CAUTION • Do not open or close the LCD panel by force. This may cause a malfunction. • Do not operate this product the LCD panel has completely opened or closed. If this product is operated while the LCD panel is opening or closing, the LCD panel may stop at that angle for safety. • Do not place a glass or can on the open LCD panel. Doing so may break this product. • Do not insert anything other than a disc into the disc-loading slot. 3Tap to close the flap menu screen. ❐ You can also insert and eject a disc by tapping on the flap menu screen. 1 Press and hold the Eject button to open the LCD panel and eject the disc-loading slot . 2 Insert or remove a disc. 3 Press the Eject button to retract the disc-loading slot and close the LCD panel. En 9 Chapter 02 About AppRadio Connecting and disconnecting mobile devices WARNING Certain uses of a mobile device may not be legal while driving in your jurisdiction, so you must be aware of and obey any such restrictions. If in doubt as to a particular function, only perform it while the car is parked. No feature should be used unless it is safe to do so under the driving conditions you are experiencing. CAUTION • To prevent data loss and damage to the mobile device, never remove it from this product while data is being transferred. • If data loss or corruption occurs on the mobile device for any reason, it is usually not possible to recover the data. Pioneer accepts no liability for damages, costs or expenses arising from data loss or corruption. • For safety reasons, never operate this product or mobile devices while driving. To operate this product or mobile devices, stop the vehicle in a safe place, apply the parking brake and operate them according to law. Connect your iPhone with Lightning connector Using the following cable and adapter enables you to connect your iPhone to this product. • HDMI/USB interface for iPod / iPhone (CD-IH202) (sold separately) • Lightning to USB Cable (CD-IU52) (sold separately) • Lightning Digital AV Adapter (Apple Inc. products) (sold separately) ÜFor connecting iPhone with Lightning connector, refer to Installation Manual. ❐[iPod] is disabled when an iPhone with Lightning connector is connected. Please use the CarMediaPlayer to play music or videos in the AppRadio Mode. For details about the CarMediaPlayer, refer to the information on our website. 1 Set “App Connection Settings” to “iPhone (Digital AV)” before connecting your iPhone with Lightning connector. ÜFor detailed procedures, refer to Setting the type of the mobile device to be connected on page 63. 2 Unlock your iPhone and then connect the iPhone to this product. The [Apps] icon on the Home screen changes to the active state for iPhone, and you are now ready to view the screen image of the iPhone (App Mode). ÜFor details of the App Mode, refer to Chapter 7. 3 Register your iPhone with Lightning connector and connect it to this product via the Bluetooth wireless technology. ÜFor detailed procedures, refer to Registering your Bluetooth devices on page 31. The [Apps] icon on the Home screen changes to the state for the AppRadio Mode, and you are now ready to use the AppRadio Mode. ÜFor details of AppRadio Mode, refer to Chapter 7. 10 En Chapter About AppRadio 02 Disconnecting your iPhone Disconnecting your iPhone Pull out the iPhone cable after checking that no data is being accessed, and disconnect Bluetooth connection. Using the separately sold App Connectivity Kit (CD-AH200) enables you to connect your Android device to this product. Connect your iPhone with 30-pin connector Using the separately sold USB interface cable for iPod / iPhone (CD-IU201N) enables you to connect your iPhone to this product. ❐ Connection via a USB hub is not possible. 1 Set “App Connection Settings” to “Others” before connecting your iPhone with 30-pin connector. ÜFor detailed procedures, refer to Setting the type of the mobile device to be connected on page 63. 2 Unlock your iPhone and then connect the iPhone to this product. The [Apps] and [iPod] icons on the Home screen change to active, and you are now ready to use the AppRadio Mode and to play iPod contents. ÜFor details of AppRadio Mode, refer to Chapter 7. ÜFor detailed procedure of playing iPod contents, refer to Chapter 5. ❐ When you make hands-free phoning or use your iPhone with 30-pin connector as a Bluetooth audio device, you must make the Bluetooth connection, but do not have to make the wired connection. The Bluetooth audio sound may not output sometimes when iPhone is wired. ÜFor detailed procedures, refer to Registering your Bluetooth devices on page 31. Pull out the iPhone cable after checking that no data is being accessed. Connect your Android device (HDMI connection/MHL connection) About AppRadio ❐ When you make hands-free phoning or use your iPhone with Lightning connector as a Bluetooth audio device, you must make the Bluetooth connection, but do not have to make the wired connection. The Bluetooth audio sound may not output sometimes when iPhone is wired. 1 Set “App Connection Settings” to “Others” before connecting your Android device. ÜFor detailed procedures, refer to Setting the type of the mobile device to be connected on page 63. 2 Unlock your Android device and connect the Android device to this product. The [Apps] icon on the Home screen changes to the active state for Android device, and you are now ready to view the screen image of the Android device (App Mode). ÜFor details of App Mode refer to Chapter 7. ❐ The cable connection method varies depending on your device. ÜFor details, refer to the App Connectivity Kit (CD-AH200) manual. ❐ Follow the next procedure only when you use the AppRadio Mode. 3 Register your Android device and connect it to this product via the Bluetooth wireless technology. ÜFor detailed procedures, refer to Registering your Bluetooth devices on page 31. The [Apps] icon on the Home screen changes to the state for the AppRadio Mode, and you are now ready to use the AppRadio Mode. ÜFor details of AppRadio Mode, refer to Chapter 7. En 11 Chapter 02 About AppRadio ❐ When you use the AppRadio Mode, you must make the Bluetooth connection with Serial Port Profile (SPP) from this product. ❐ When you make hands-free phoning or use your Android device as a Bluetooth audio device, you must make the Bluetooth connection, but do not have to make the wired connection. The Bluetooth audio sound may not output sometimes when Android device is wired. ❐ When an Android device is first connected to this product, touch the white dot to activate the connection. Disconnecting your Android device Pull out the cables after checking that no data is being accessed, and disconnect Bluetooth connection. Connect your MirrorLink device Using the separately sold USB interface cable for MirrorLink (CD-MU200) you to connect your MirrorLink device to this product. ÜFor connecting MirrorLink device, refer to Installation Manual. 1 Set “App Connection Settings” to “Others” before connecting your MirrorLink device. ÜFor detailed procedures, refer to Setting the type of the mobile device to be connected on page 63. 2 Unlock your MirrorLink device and then connect the device to this product. The [MirrorLink] icon on the Home screen changes to the active state for MirrorLink device, and you are now ready to use the MirrorLink mode. ÜFor details of MirrorLink, refer to Chapter 7. ❐ When you make hands-free phoning or use your MirrorLink device as a Bluetooth audio device, you must make the Bluetooth connection, but do not have to make the wired connection. The Bluetooth audio sound may not output sometimes when MirrorLink device is wired. ÜFor detailed procedures, refer to Registering your Bluetooth devices on page 31. Disconnecting your MirrorLink device Pull out the USB cable after checking that no data is being accessed. 12 En Chapter About AppRadio 02 Available sources and conditions Sources Radio iPod Apps MirrorLink Pandora® Bluetooth (Bluetooth Audio) Disc Phone About AppRadio The available sources varies according to conditions as follows. Conditions Always available. Available only when an iPod or iPhone with 30-pin connector is connected to this product. Available only when an iPhone or Android device is connected to this product. The state of the [Apps] icon varies according to the connected device and its state. Ü For details, refer to Using the touch panel keys on page 14. Available only when a MirrorLink device is connected to this product. Available only when an iPhone or Android device with the Pandora application installed is connected. Always available. When you listen to music, you must connect an audio device to this product via Bluetooth profiles (A2DP/ AVRCP). Available only when a playable disc is inserted. Available only when your mobile device is connected to this product with Bluetooth wireless technology. Demonstration images If you do not operate this product for 30 seconds while displaying the OFF screen, demonstration images are displayed. When you turn the ignition switch off (ACC OFF) and then turn it on again (ACC ON), the demonstration images will not be displayed. ❐ If you reset the system, the demonstration images will be displayed again. En 13 Chapter 03 Basic operation Home screen Using the touch panel keys The Home screen is the main screen that allows access to your entertainment sources, apps, settings and more. Page one 7 6 Reading the screen Page one Page two Day of the week indicator Current time Scroll area Current source indicator The current source indicator appears under the startup menu icon on the Home screen. When mixing sources, the indicators appear below both menu icons. Scrolling the Home screen Display the second page by flicking the scroll area on the Home screen. ❐ When you scroll the Home screen, flick the scroll area on the Home screen. 14 En Radio Displays the radio source screen. Ü For details, refer to Chapter 4. iPod Displays the iPod source screen. Ü For details, refer to Chapter 5. 3 Apps/MirrorLink Turns into the AppRadio Mode, the MirrorLink mode or the App Mode. The icon state changes as follows: Icons States Appears when your iPhone with Lightning connector is connected via the supplied cable. This icon shows to be ready to start the App Mode for iPhone. Appears when your iPhone with Lightning connector is connected via the supplied cable and processing the Bluetooth connection. This icon shows to be ready to start the AppRadio Mode for iPhone. • Appears when your iPhone with Lightning connector is connected via the supplied cable and Bluetooth wireless connection is established. • Appears when your iPhone with 30-pin connector is connected via the separately sold USB interface cable for iPod / iPhone (CD-IU201N). Appears when your Android device is connected via the separately sold App Connectivity Kit. This icon shows to be ready to start the App Mode for Android device. Chapter Basic operation Ü For details of Apps/MirrorLink, refer to Chapter 7. ❐ When two devices of iPhone, Android or MirrorLink are connected simultaneously, the preference of the connected devices is the following order: iPhone with Lightning connector or Android device, MirrorLink device, and iPhone with 30-pin connector. Pandora® internet radio Displays the Pandora application screen when an iPhone or Android device with the Pandora application installed is connected. Ü For details, refer to Chapter 6. 5 Bluetooth Displays the Bluetooth audio source screen. Ü For details, refer to Chapter 9. 6 Phone Displays the phone menu screen. ❐ When Bluetooth connection is established, a Bluetooth icon is displayed on this icon. Ü For details, refer to Chapter 13. 7 Clock adjustment Adjusts the current date and time. Ü For details, refer to Setting the clock on page 16. Page two 8 9 0 - ^ 8 Disc Displays the disc screen when a playable disc is inserted. Ü For details, refer to Chapter 10, Chapter 11 and Chapter 12. 9 OFF Turns the source off. 0 Display OFF Turns the screen off. Ü For details, refer to Turning off the screen on page 71. - Settings Displays the settings menu screen. Ü For details, refer to Chapter 14. ^ Rear View Displays the rear view camera image. Ü For details, refer to Setting the rear view camera on page 66. En Basic operation Appears when your Android device is connected via the separately sold App Connectivity Kit and processing the Bluetooth connection. Appears when your Android device is connected via the separately sold App Connectivity Kit and Bluetooth wireless connection (SPP) is established. This icon shows to be ready to start the AppRadio Mode for Android device. Appears when your MirrorLink device is connected via the supplied cable for MirrorLink. This icon shows to be ready to start the MirrorLink mode. 03 15 Chapter 03 Basic operation Touch panel keys common to each function The touch panel keys for operations common to each function are described below. E.g. “Connection” screen Audio source control When you press the Home button twice, the audio source control keys will be displayed on-screen. Using these keys, you can operate the audio source currently playing in the background without leaving the screen currently displayed. Returns to the previous screen. Returns to the previous list/category (the folder/category one level higher). Returns to the top category menu screen. Scrolls through the list and allows you to view the remaining items. ❐ The selected item is highlighted. Setting the clock 1 Touch and hold the current time or week indicator on the Home screen. 2 Tap the item to set. 3Tap or to set the current date and time. ❐ Initially, the clock is set to 12-hour format. You can change the time format. ÜFor details, refer to Setting the clock mode on page 68. 1 In AppRadio Mode/MirrorLink mode: Selects whether to mix the audio output of the application in the AppRadio Mode or the MirrorLink mode with the audio output of the tuner, iPod*, Bluetooth audio or disc. The icon state changes as follows. Icons MIX Radio MIX iPod* MIX BT Audio MIX Disc Conditions Appears when the radio audio source is mixed. Appears when the iPod audio source is mixed. Appears when the Bluetooth audio source is mixed. Appears when the disc audio source is mixed. * The iPod audio source cannot be mixed in the AppRadio Mode when an iPhone is connected. When the icon is tapped, the source list and the volume controller appear on the screen. You can select a source to be mixed, and also change the volume of audio output in the A ppRadio Mode or the MirrorLink mode by tapping or . In audio source: Selects whether to mix the audio output of the tuner, iPod* Bluetooth audio or disc with the audio output of the application in the A ppRadio Mode or the MirrorLink mode. 16 En Chapter Basic operation * In iPod source, the audio output of the application in the AppRadio Mode cannot be mixed when an iPhone is connected. The icon state changes as follows. MIX OFF Conditions Appears when the audio sources are mixed. Appears when there is no mixable source. 6 Turns the screen off. To turn it back on, tap anywhere on the screen or press the Home, Menu Back or Eject buttons. ❐ When you turn the ignition switch off (ACC OFF) and then turn it on again (ACC ON), these settings will be reset. When the icon is tapped, the switching list and the volume controller appear on the screen. You can switch the function between on and off, and also change the volume of audio output in the A ppRadio Mode or the MirrorLink mode by tapping or . Basic operation Icons MIX ON 03 2 Switches between muted and unmuted audio source. When muted, is displayed, and when unmuted, is displayed. 3 Moves to the next or previous song, file or chapter when [iPod] , [Apps], [MirrorLink], [Bluetooth] or [Disc] is selected as the source. Moves to the next or previous preset channel when [Radio] is selected as the source. Skips the current song by tapping , and disables when [Pandora] is selected as the source. When MIX is on: switches the source screen to be controlled in the Apps or MirrorLink source. When MIX is off: displays the Home screen in the Apps or the MirrorLink source. This function is disabled in the other sources. 5 Switches between playback and pause when [iPod], [Apps] , [MirrorLink], [Pandora], [Bluetooth] or [Disc] is selected as the source. Switches the frequency bands when [Radio] is selected as the source. En 17 Chapter 04 Using the radio Starting procedure Using the touch panel keys 1 Press the Home button to display the Home screen. 2 Tap [Radio] on the Home screen. Ü For details, refer to Home screen on page 14. 3 Use the touch panel keys on the screen to control the radio. Reading the screen Preset channel keys ÜFor details, refer to Storing the strongest broadcast frequencies on page 19. Current broadcast information The following information is displayed: • : Program service (PS) name • : Song title • : Artist name STEREO indicator Shows that the frequency selected is being broadcast in stereo. Signal level indicator Shows the signal strength of the selected frequency. Frequency indicator Frequency scale Current time 18 En Recalls the desired broadcast frequency. Holding down the key stores the current tuning frequency in memory. Ü For details, refer to Recalling broadcast frequencies on page 19. Switches the band between FM1, FM2 and FM3. Also switches to the FM band while receiving the AM band. Switches to the AM band while receiving the FM band. Raises frequencies in one-step increments. Holding down the key and the tuner will scan frequencies until a broadcast strong enough for good reception is found. Lowers frequencies in one-step increments. Holding down the key and the tuner will scan frequencies until a broadcast strong enough for good reception is found. Switches the reception level. Ü For details, refer to Tuning in to strong signals on page 19. Stores the strongest broadcast frequencies. Ü For details, refer to Storing the strongest broadcast frequencies on page 19. ❐ If you touch and hold the icon, pop-up text explaining the function of the icon is displayed. Chapter Using the radio 04 Using the functions Storing the strongest broadcast frequencies Tap Using the radio This function automatically assigns frequencies with good reception to the preset channels in the selected band. You can update six channels in each band. ❐ Storing broadcast frequencies may replace broadcast frequencies you have already saved. ❐ The lowest frequency is registered for channels that could not be registered automatically. . Recalling broadcast frequencies Tap any frequency on the preset channel keys. Tuning in to strong signals Local seek tuning lets you tune in to only those radio stations with sufficiently strong signals for good reception. Tap or to switch the reception level between the following levels: FM: (OFF) (LEVEL1) (LEVEL2) (LEVEL3) (LEVEL4) AM: (OFF) (LEVEL1) (LEVEL2) ❐ The highest level setting allows reception of only the strongest stations, while lower levels allow the reception of weaker stations. En 19 Chapter 05 Playing iPod music and video [iPod] source is enabled only when an iPod or iPhone with 30-pin connector is connected to this product. When an iPhone with Lightning connector is connected, [iPod] is disabled. Please use the CarMediaPlayer to play music or videos in the AppRadio Mode. Reading the screen Music For details about the CarMediaPlayer, refer to the information on our website. Starting procedure 1 Set “App Connection Settings” to “Others”. ÜFor detailed procedures, refer to Setting the type of the mobile device to be connected on page 63. 2 Connect your iPod. ÜFor details, refer to Connect your iPhone with 30-pin connector on page 11. 3 Press the Home button to display the Home screen. 4 Tap [iPod] on the Home screen. ÜFor details, refer to Home screen on page 14. 5 Select the song (episode) or video source you want to play, and switch the operation screen. ÜFor details, refer to Selecting song (episode) or video sources from the playlist screen on page 23. 6 Use the touch panel keys on the screen to control your iPod. ÜFor details, refer to Using the touch panel keys on page 21. ❐ When playing music with an application installed to an iPhone, the playback information may be displayed. You may be able to operate the playback information with the touch panel keys. 20 En Current song (episode) information • : Song title (episode) Shows the title of the current song. When a podcast is played, the episode is displayed (when available). • : Artist name (podcast title) Shows the artist name currently playing. When a podcast is played, the podcast title is displayed (when available). • : Album title (release date) Shows the title of the album for the song. When a podcast is played, the release date is displayed (when available). • : Genre indicator Shows the genre of the current song (when available). ❐ If there is no corresponding information, the following messages are displayed. • Artist name : No Name • Album title : No Title • Genre indicator : No Genre Song number Shows the song number and the total number of songs. Album artwork Album art work for the current song (episode) is displayed if it is available. Play time Shows the elapsed time, remaining time and time bar of the current song (episode). Pause indicator Appears the pause indicator while pausing playback. Current time Chapter Playing iPod music and video Video 05 • Play time Shows the elapsed time, remaining time and time bar of the current video. Pause indicator Appears the pause indicator while pausing playback. Current video title Shows the title of the current video. ❐ If there is no corresponding information, “No Name” is displayed. File number Shows the file number and the total number of files. Current time Using the touch panel keys Music Displays the playlist screen. • : Song list Displays the songs in the connected iPod in alphabetical order. En Playing iPod music and video : Artist list Displays a list of all artists saved in the connected iPod. • : Album list Displays a list of all albums saved in the connected iPod. • : Genre list Displays a list of all genres saved in the connected iPod. Ü For details, refer to Narrowing down song (episode) or video sources with the list on page 22. Displays the album playlist. Ü For details, refer to Narrowing down song (episode) or video sources with the list on page 22. Displays the playlist screen that can be used to search for song or video sources in your iPod. Ü For details, refer to Selecting song (episode) or video sources from the playlist screen on page 23. Plays songs in random order. Ü For details, refer to Random play (shuffle) on page 23. Selects the repeat range. Ü For details, refer to Repeating playback on page 22. Changes the audiobook speed. Ü For details, refer to Changing the audiobook speed on page 23. Tapping the key skips to the start of the next song or chapter. Tapping the key once skips to the start of the current song or chapter. Tapping the key twice quickly will skip to the previous song or chapter. Touching and holding the key or the key performs fast reverse or fast forward. Switches between playback and pause. Performs fast reverse or fast forward by dragging the playback point. 21 Chapter 05 Playing iPod music and video Video Switches to full-screen mode. Displays the playlist screen that can be used to search for song or video sources in your iPod. Ü For details, refer to Selecting song (episode) or video sources from the playlist screen on page 23. Hides the touch panel keys. If you want to display the touch panel keys again, tap anywhere on the screen. Plays videos in random order. Ü For details, refer to Random play (shuffle) on page 23. Selects the repeat range. Ü For details, refer to Repeating playback on page 22. Tapping the key skips to the start of the next video or chapter. Tapping once skips to the start of the current video or chapter. Tapping twice quickly will skip to the previous video or chapter. Touching and holding or performs fast reverse or fast forward. Switches between playback and pause. Changes the screen mode. Ü For details, refer to Changing the wide screen mode on page 24. Performs fast reverse or fast forward by dragging the playback point. En Narrowing down song (episode) or video sources with the list Tapping an item on a list allows you to search for song (episode) or video sources and play them in your iPod. 22 Using the functions 1 Tap the category list you want to search. ÜFor details, refer to Using the touch panel keys on page 21. ■ If you tap the key, return to the playback screen. ■ If you tap the key in the playlist, the previously selected menu screen is displayed. ■ If you tap a category list in the upper folder, the playlist screen changes to the selected category. 2 Search for the song (episode) you want to play from the playlist. ÜFor details, refer to Selecting song (episode) or video sources from the playlist screen on page 23. Repeating playback There are two repeat play types for playback. Tap Tapping . changes the setting as follows: (All): Repeats all songs or videos in the selected list. • (One): Repeats just the current song or video. • Chapter Playing iPod music and video Random play (shuffle) This function shuffles songs, albums or videos and plays them in random order. Tap Tapping . Changing the audiobook speed The playback speed can be changed while playing an audiobook. Tap Tapping . changes the setting as follows: (Normal): Playback in normal speed. • (Faster): Playback faster than normal speed. • (Slower): Playback slower than normal speed. • Selecting song (episode) or video sources from the playlist screen Category lists (for music): • Playlists • Artists • Albums • Songs • Podcasts • Genres • Composers • Audiobooks Category lists (for video): • Video Playlists • Movies • Music Videos • TV Shows • Video Podcasts • Rented Movies • Video ITunesU ❐ Category items that do not correspond to the connected iPod are not displayed. 3 Tap the key to display the alphabet search screen. ❐ The key is not displayed in the top category list or the song list. Playing iPod music and video changes the setting as follows: (Off): Does not shuffle. (Songs): Plays back songs or videos in random order within the selected list. • (Albums): Selects an album randomly, and then plays back all songs in that album in order. • • 05 You can search for the song (episode) or video you want to play from the playlist screen. 1 Tap the screen. key to display the playlist 2Tap or , then select the category you want to search for. If you tap the key in the playlist, the previously selected menu screen is displayed. ■ If you tap a category list in the upper folder, the playlist screen changes to the selected category. ■ If you tap the screen. ■ key, return to the playback En 23 Chapter 05 Playing iPod music and video 4 Tap the first letter of the title of the song/video you are looking for. While searching, touch panel key operation is not available. ■ To refine the search with a different letter, tap [Cancel]. 5 Tap the title of the list that you want to play. Repeat this operation until you find the desired song/video. 6 Start playback of the selected list. Changing the wide screen mode Tap . Tapping to change the setting as follows: • Full (full screen): A 4:3 picture is enlarged in the horizontal direction only, enabling you to enjoy a 4:3 TV picture (normal picture) without any omissions. • Zoom (zoom): A 4:3 picture is enlarged in the same proportion both vertically and horizontally; ideal for a cinema-sized picture (wide screen picture). • Normal (normal): A 4:3 picture is displayed normally, giving you no sense of disparity since its proportions are the same as that of the normal picture. ❐ You cannot operate this function while driving. ❐ When a video is viewed in a wide screen mode that does not match its original aspect ratio, it may appear different. ❐ Remember that using the wide mode feature of this system for commercial or public viewing purposes may constitute an infringement on the author’s rights protected by Copyright Law. ❐ The video image will appear coarser when viewed in “Zoom” mode. 24 En Chapter ® Using Pandora internet radio CAUTION For safety reasons, never operate this product and mobile devices while driving. To operate this product and mobile devices, stop the vehicle in a safe place and apply the parking brake and operate them according to law. Starting procedure 1 Connect your mobile device. ÜFor details, refer to Connecting and disconnecting mobile devices on page 10. 2 Press the Home button to display the Home screen. 3 Tap [Pandora] on the Home screen. Ü For details, refer to Home screen on page 14. ❐ When you use Pandora internet radio in iPhone with Lightning connector or Android device, you must make the Bluetooth connection with Serial Port Profile (SPP) from this product. 4 Start up the Pandora application installed on the mobile device. The Pandora source screen appears. ❐ Before starting up, sign-in to Pandora from your mobile device. 5 Use the touch panel keys on the screen to control Pandora. Reading the screen Current track information • : Station name indicator Shows the Pandora station name the tuner is currently tuned in to. • : Artist name Shows the artist name currently playing. • : Album title Shows the title of the album for the track. • : Track title Shows the title of the current track. ❐ “-------” is displayed if there is no corresponding information. Album artwork Album artwork for the current track is displayed if it is available. Play time Shows the elapsed time, remaining time and time bar of the current track. Pause indicator Appears the pause indicator while pausing playback. Current time En Using Pandora® internet radio You can experience Pandora by connecting an iPhone or Android device that has the Pandora application installed. ❐ Before performing operations described in this chapter, be sure to read Using app-based connected content in Important Information for the Users. ❐ Certain features of the Pandora service are not available when accessing the service through this product, including, but not limited to, creating new stations, deleting stations, emailing current stations, buying songs from iTunes or Google Play®, viewing additional text information and adjusting Cell Network Audio Quality. ❐ Pandora internet radio is a music service not affiliated with Pioneer. More information is available at http://www.pandora.com ❐ Pandora is a registered trademark of Pandora Media, Inc. 06 25 Chapter 06 Using Pandora® internet radio Using the touch panel keys Using the function Selecting a Pandora station from the list 1Tap . The station list screen appears. Gives a “Thumbs Up” to the track currently playing. Gives a “Thumbs Down” to the track currently playing and skips to the next track. Adds information for the track currently playing to bookmarks. Skips to the start of the next track. Switches between playback and pause. Displays the list of your Pandora stations to select one of them to play. Ü For details, refer to Selecting a Pandora station from the list on page 26. 2 Select the search mode. ■ If you tap [A-Z], the station list can be sorted alphabetically. ■ If you tap [DATE], the station list can be sorted in order of dates the items were created. 3 Scroll the list by tapping or to display the item you want to select. 4 Tap the item. ❐ Tapping [QuickMix] plays only one track based on particular musical characteristics at a time from several shuffled stations. 26 En Chapter Viewing/operating mobile device applications Using Apps/MirrorLink source This product provides the AppRadio Mode, the M irrorLink mode, and the App Mode for viewing and operating the mobile device applications that are installed in the mobile device connected. Available modes change according to the connected device. WARNING • Pioneer is not liable for any issues that may arise from incorrect or flawed appbased content. • The content and functionality of the supported applications are the responsibility of the App providers. • In the AppRadio Mode, functionality through the product is limited while driving, with available functions determined by the App providers. • Availability of the AppRadio Mode functionality is determined by the App provider, and not determined by Pioneer. • The AppRadio Mode allows access to applications other than those listed (subject to limitations while driving), but the extent to which content can be used is determined by the App providers. AppRadio Mode When you connect a mobile device with the AppRadio Mode compatible applications (such as AppRadio app) installed, you can control applications for the mobile device directly on this product (AppRadio Mode). You can view and operate the compatible applications via the display with multi-touch gestures like tapping, dragging, scrolling, and flicking. AppRadio Mode for iPhone You can automatically start the A ppRadio Mode when the “App launch assist” setting is set to “On” (default). The procedure changes depending on the type of your iPhone to be connected. ÜFor details of the App launch assist setting, refer to Switching the App launch assist function (for iPhone) on page 69. 1 Unlock your device and then connect your iPhone to this product. ÜFor details, refer to Connecting and disconnecting mobile devices on page 10. ❐ When an iPhone with 30-pin connector is connected, the application startup message appears and the AppRadio app launches, then the Application menu screen appears. Follow the procedure on step 4. ❐ When an iPhone with Lightning connector is connected, follow the next procedure. Viewing/operating mobile device applications Certain uses of a mobile device may not be legal while driving in your jurisdiction, so you must be aware of and obey any such restrictions. If in doubt as to a particular function, only perform it while the car is parked. No feature should be used unless it is safe to do so under the driving conditions you are experiencing. 07 2 Press the Home button to display the Home screen. En 27 Chapter 07 Viewing/operating mobile device applications 3 Tap [Apps] on the Home screen. 2 Press the Home button to display the Home screen. 3 Tap [Apps] on the Home screen. Apps in the AppRadio Mode (iPhone) The application startup message appears and the AppRadio app launches, then the Application menu screen appears. ❐ When the AppRadio app does not launch, the “App launch assist” setting may set to “Off”. In this case, you have to operate your iPhone to launch the AppRadio app. Apps in the AppRadio Mode (Android) The application startup message appears and the AppRadio app launches, then the Application menu screen appears. 4 Tap the application icon to be used. 4 Tap the application icon to be used. ❐ Some applications may not launch depending on the state of the connected device. In that case, launch the application according to the application startup message. Ü When a black screen is displayed during viewing or operating mobile device applications, refer to Problems with AppRadio Mode screen on page 74. AppRadio Mode for Android device 1 Unlock your device and then connect your device to this product. ÜFor details, refer to Connecting and disconnecting mobile devices on page 10. The [Apps] icon on the Home screen will be active. 28 En ❐ Some applications may not launch depending on the state of the connected device. In that case, launch the application according to the application startup message. Ü When a black screen is displayed during viewing or operating mobile device applications, refer to Problems with AppRadio Mode screen on page 74. Chapter Viewing/operating mobile device applications MirrorLink mode When you connect a MirrorLink device with the compatible applications installed, you can control the applications for the mobile device directly on this product (MirrorLink mode). You can view and operate the compatible applications via the display with multi-touch gestures like tapping, dragging, scrolling, and flicking. ❐ Multi-touch gestures may be disabled by some models of the MirrorLink device to be connected. 07 ❐ Some applications may not launch depending on the state of the connected device. In that case, launch the application according to the application startup message. Viewing/operating mobile device applications 1 Unlock your device and then connect your device to this product. ÜFor details, refer to Connect your MirrorLink device on page 12. The [Apps] icon on the Home screen will change to [MirrorLink]. 2 Press the Home button to display the Home screen. 3 Tap [MirrorLink] on the Home screen. MirrorLink If the launcher application is installed in the MirrorLink device, the application launches. If not, the Application menu screen appears. 4 Tap the application icon to be used. En 29 Chapter 07 Viewing/operating mobile device applications App Mode When a mobile device is wired to this product, you can view the screen image currently displayed on the mobile device (iPhone with Lightning connector, Android device) or the screen image of the application currently used (iPhone with 30-pin connector) is displayed with this product’s display. ❐ When you touch this product’s display in the App Mode, “Don’t Touch” mark appears on the upper right corner of the screen. App Mode for iPhone with Lightning connector and Android device Both the Bluetooth wireless technology and the compatible applications are not required in the App Mode. You can view any screen image of the wired device with this product’s display (mirroring function). ❐ Before using the App Mode for iPhone with Lightning connector, make sure that the “App launch assist” is set to “Off”. ÜFor details of the App launch assist setting, refer to Switching the App launch assist function (for iPhone) on page 69. 1 Unlock your device and then connect your device to this product. ÜFor details, refer to Connecting and disconnecting mobile devices on page 10. The [Apps] icon on the Home screen will be active. 2 Press the Home button to display the Home screen. 3 Tap [Apps] on the Home screen. The current screen image of the connected device appears on the display. 4 Launch an application to be used on iPhone side or Android device side. ❐ If you lock the connected device in the App Mode, the mirroring function turns off and the Home screen appears on this product’s display. 30 En App Mode for iPhone with 30-pin connector In the App Mode, you can view the screen image of the App Mode compatible applications in the connected iPhone with this product’s display. ❐ Before using the App Mode, make sure that the “App launch assist” is set to “Off”. ÜFor details of the App launch assist setting, refer to Switching the App launch assist function (for iPhone) on page 69. 1 Unlock your device and then connect your device to this product. ÜFor details, refer to Connecting and disconnecting mobile devices on page 10. The [Apps] icon on the Home screen will be active. 2 Press the Home button to display the Home screen. 3 Tap [Apps] on the Home screen. A message appears on the black screen. 4 Launch an application to be used on iPhone side. Chapter Registering and connecting a Bluetooth device If your devices feature Bluetooth technology, this product can be connected to your devices wirelessly. This section describes how to set up a Bluetooth connection. For details about connectivity with devices featuring Bluetooth wireless technology, refer to the information on our website. Preparing communication devices ❐ If you try to register more than three devices, the system will ask you to select one of the registered devices to delete. ÜFor details, refer to Deleting a registered device on page 33. Searching for nearby Bluetooth devices The system searches for available Bluetooth devices near this product, displays them in a list, and registers them for connection. 1 Activate the Bluetooth wireless technology on your devices. For some Bluetooth devices, no specific action is necessary to activate Bluetooth wireless technology. For details, refer to the instruction manual of your devices. 2Tap on the Home screen. Ü For details, refer to Home screen on page 14. The phone menu screen appears. 3Tap on the phone menu. The “Bluetooth Connection Menu” screen appears. Registering your Bluetooth devices Registering and connecting a Bluetooth device You can register and use devices that feature Bluetooth profiles with this product. ❐ When you use the AppRadio Mode to connect an Android device, the device needs to support Serial Port Profile (SPP). When connecting a device with SPP, you must perform the pairing or connection from this product. ❐ When you use audio device with the Bluetooth function, the device needs to support Advanced Audio Distribution Profile (A2DP) or A2DP with Audio/Video Remote Control Profile (AVRCP). When connecting a device with A2DP/AVRCP, you must perform the pairing or connection from this product. ❐ When this product is turn off, the Bluetooth connection is also disconnected. When this product restarts, the system automatically attempts to reconnect the previously connected device. ❐ The Bluetooth connection menu cannot be selected while driving. 08 You need to register your devices featuring Bluetooth wireless technology when you connect them for the first time. A total of three devices can be registered. Two registration methods are available: • Searching for nearby Bluetooth devices • Pairing from your Bluetooth devices En 31 Chapter 08 Registering and connecting a Bluetooth device 4 Tap [Connection] on the “Bluetooth Connection Menu”. The registered device list screen appears. 5Tap on the registered device list. The system searches for Bluetooth devices waiting for a connection and displays them in the list if a device is found. 7 Tap the Bluetooth device name you want to register. ❐ If a PIN code input is required, enter a PIN code. (The default PIN code is “0000”.) ❐ If you tap , the system starts searching for Bluetooth devices waiting for connection, and displays them in list format when any devices are detected. When the message “Paired” appears, the device is registered in the system. After the device is successfully registered, a Bluetooth connection is established from the system. The profile icons in the registered device list screen are appeared and illuminated as follows. Icons ❐ When the device is already connected, becomes inactive. ❐ Up to 30 devices will be listed in the order that the devices are found. 6 Wait until your Bluetooth device appears in the list. ■ If you want to switch between the device names and Bluetooth device addresses, tap [Device Name]. ❐ If you cannot find the Bluetooth device that you want to connect, check that the device is waiting for a Bluetooth wireless technology connection. 32 En Conditions Illuminates when your mobile device is successfully connected with the HFP (Hands-Free Profile) Illuminates when your audio device is successfully connected with the A2DP (Advanced Audio Distribution Profile)/ AVRCP (Audio/Video Remote Control Profile). Illuminates when the Bluetooth connection is established with the SPP (Serial Port Profile). ❐ After pairing, the phone book registered in the device may be automatically transmitted to this product. Chapter Registering and connecting a Bluetooth device Pairing from your Bluetooth devices You can register a Bluetooth device by setting this product to standby mode and requesting connection from the Bluetooth device. ❐ Before registration, make sure that “Visibility” in the “Bluetooth Connection Menu” is set to “On”. ÜFor details, refer to Switching product visibility on page 36. 2 Use the Bluetooth setting in the device to pair this product with device. ❐ The device name is “AppRadio SPHDA210”. ❐ If a PIN code input is required, enter a PIN code. (The default PIN code is “0000”.) When the device is successfully registered, the connection settings are made from the device. ❐ If registration fails, repeat the procedure from the beginning. Deleting a registered device When you have already registered three Bluetooth devices and you want to add another one, you must first delete one of the registered devices. ❐ If a registered phone is deleted, all the phone book entries and call history lists that correspond to the phone will be also cleared. 1Tap on the Home screen. Ü For details, refer to Home screen on page 14. The phone menu screen appears. 2Tap on the phone menu. The “Bluetooth Connection Menu” screen appears. 3 Tap [Connection] on the “Bluetooth Connection Menu”. Registering and connecting a Bluetooth device 1 Activate the Bluetooth wireless technology on your devices. For some Bluetooth devices, no specific action is necessary to activate Bluetooth wireless technology. For details, refer to the instruction manual of your devices. 08 The registered device list screen appears. En 33 Chapter 08 Registering and connecting a Bluetooth device 4Tap for the registered device you want to delete. The message “Delete OK?” appears. 5 Tap [Yes] to delete the device. The message “Deleting” appears, and the device is deleted. 3Tap on the phone menu. The “Bluetooth Connection Menu” screen appears. 4 Tap [Connection] on the “Bluetooth Connection Menu”. Connecting a registered Bluetooth device manually This product automatically connects the Bluetooth device selected as the target of connection. However, connect the Bluetooth device manually in the following cases: • Two or more Bluetooth devices are registered, and you want to manually select the device to be used. • You want to reconnect a disconnected Bluetooth device. • Connection cannot be established automatically for some reason. The registered device list screen appears. 5 Tap the Bluetooth device name you want to connect. When a connection is successfully established, is displayed on the selected device name line. If you start connection manually, carry out the following procedure. You can also connect the Bluetooth device by having this product detect it automatically. 1 Activate the Bluetooth wireless technology on your devices. For some Bluetooth devices, no specific action is necessary to activate Bluetooth wireless technology. For details, refer to the instruction manual of your devices. 2Tap on the Home screen. Ü For details, refer to Home screen on page 14. The phone menu screen appears. 34 En ❐ If a device is already connected with the same profile, that device is disconnected and the new device will be connected. Chapter Registering and connecting a Bluetooth device 08 Setting the Bluetooth auto connect function Disconnecting a Bluetooth device If this function is set on, a connection between your Bluetooth device and this product will take place automatically as soon as the two devices are less than a few meters apart. Initially, this function is set to “On”. 1Tap on the Home screen. Ü For details, refer to Home screen on page 14. The phone menu screen appears. 1Tap on the Home screen. Ü For details, refer to Home screen on page 14. The phone menu screen appears. 2Tap 2Tap on the phone menu. on the phone menu. 3 Tap [Connection] on the “Bluetooth Connection Menu”. The “Bluetooth Connection Menu” screen appears. 3 Tap [Auto Connect] to turn automatic connection on. The registered device list screen appears. If your Bluetooth device is ready for a Bluetooth wireless connection, a connection to this product will automatically be established. ■ To turn automatic connection off, tap [Auto Connect] again. 4 Tap the Bluetooth device name you want to disconnect. When the device is disconnected, is disappeared from the selected device name line. ■ To connect the device, tap the Bluetooth device name again. En Registering and connecting a Bluetooth device The “Bluetooth Connection Menu” screen appears. 35 Chapter 08 Registering and connecting a Bluetooth device Switching product visibility Changing a PIN code This function sets whether or not to make this product visible to the other device. Initially, this function is set to “On”. When connecting your Bluetooth device to this product via Bluetooth wireless technology, you may be required to enter a PIN code on your Bluetooth device. You can change the PIN code. ❐ The default PIN code is “0000”. 1Tap on the Home screen. Ü For details, refer to Home screen on page 14. The phone menu screen appears. 2Tap on the phone menu. 1Tap on the Home screen. Ü For details, refer to Home screen on page 14. The phone menu screen appears. 2Tap on the phone menu. The “Bluetooth Connection Menu” screen appears. 3 Tap [Visibility] to turn visibility off. The “Bluetooth Connection Menu” screen appears. 3 Tap [PIN Code Input] on the “Bluetooth Connection Menu”. To turn visibility on, tap [Visibility] again. ■ The “PIN Code” screen appears. 36 En Chapter Registering and connecting a Bluetooth device 4 Enter an arbitrary PIN code (up to 8 digits). 08 Displaying Bluetooth device address This product displays its Bluetooth device address. 1Tap on the Home screen. Ü For details, refer to Home screen on page 14. The phone menu screen appears. 2Tap 5Tap on the phone menu. to store the PIN code. 3 Tap [Device Information] on the “Bluetooth Connection Menu”. The “Device Information” screen appears. The “Device Name” and “BD Address” are displayed. En Registering and connecting a Bluetooth device The “Bluetooth Connection Menu” screen appears. 37 Chapter 09 Using the Bluetooth audio player You can control the Bluetooth connection of the audio device that supports Advanced Audio Distribution Profile (A2DP) or A2DP with Audio/Video Remote Control Profile (AVRCP), to operate the audio source. To connect using the Bluetooth function, you must first use the audio device to pair this product with the device. ÜFor detailed procedures, refer to Registering your Bluetooth devices on page 31. For details about connectivity with devices featuring Bluetooth wireless technology, refer to the information on our website. Starting procedure 1 Activate the Bluetooth wireless technology on your devices. For some Bluetooth devices, no specific action is necessary to activate Bluetooth wireless technology. For details, refer to the instruction manual of your devices. 2 Press the Home button to display the Home screen. 3 Tap [Bluetooth] on the Home screen. ÜF or details, refer to Home screen on page 14. 4 Use the touch panel keys on the screen to control your audio device. ❐ When a device is connected via Bluetooth profiles (A2DP and AVRCP), the playback information may be displayed. You may be able to operate the playback information with the touch panel keys. ❐ When you use your mobile device as a Bluetooth audio device, the Bluetooth audio sound may not output sometimes when the mobile device is wired. 38 En Reading the screen 1 Current song information • : Song title Shows the title of the current song (when available). • : Artist name Shows the artist name currently playing (when available). • : Album title Shows the title of the album for the song (when available). • : Genre indicator Shows the genre of the current song (when available). ❐ When a device is connected without AVRCP, “No data provided” is showing on this space. If there is no corresponding information for any item, “No data provided” is also showing. Song number Shows the song number. 3 Play time Shows the elapsed time, remaining time and time bar of the current song. 4 Pause indicator Appears the pause indicator while pausing playback. Current time Chapter Using the Bluetooth audio player 09 Using the touch panel keys 1 3 4 Using the Bluetooth audio player 1 Tapping the key skips to the start of the next song. Tapping the key once skips to the start of the current song. Tapping the key twice quickly will skip to the previous song. 2 Switches between playback and pause. 3 Tapping the key switches the range of repeat play (a song or all songs). 4 Tapping the key shuffles songs or albums and plays them in random order. En 39 Chapter 07 10 Playing audio CDs Using hands-free phoning You can play a normal music CD using the built-in drive of this product. This section describes how. Using the touch panel keys 2 1 Starting procedure 1 Insert a disc to be played. Ü For details, refer to Inserting and ejecting a disc on page 9. 2 Press the Home button to display the Home screen. Ü For details, refer to Home screen on page 14. 3 Tap [Disc] on the Home screen. The playback automatically starts. 4 Use the touch panel keys on the screen to control the disc. ÜFor details, refer to Using the touch panel keys on page 40. Reading the screen 3 4 1 Track number Shows the track number. 2 Current time 3 Play time Shows the elapsed time, remaining time and time bar of the current song. 4 Pause indicator Appears the pause indicator while pausing playback. 40 En 8 3 4 3 5 6 7 1 Performs fast reverse or fast forward by dragging the playback point. 2 Displays the playlist screen that can be used to search for tracks in a inserted disc. Ü For details, refer to Selecting a track from the list on page 41. 3 Tapping the key skips to the start of the next track. Tapping the key once skips to the start of the current track. Tapping the key twice quickly will skip to the previous track. Touching and holding the key or the key performs fast reverse or fast forward. 4 Switches between playback and pause. 5 Selects the repeat range. Ü For details, refer to Repeating playback on page 41. 6 Plays tracks in random order. Ü For details, refer to Random play on page 41. 7 Switches the target data to be played. Ü For details, refer to Selecting the target data to be played on page 41. 8 Sets the sound retriever function. Ü For details, refer to Setting the sound retriever function on page 41. Chapter Playing audio CDs Using hands-free phoning Using the functions Selecting a track from the list 07 10 ❐ If you turn the random play on in the Track repeat mode, the repeat play range automatically changes to the Disc repeat. You can play a track on the playlist screen by tapping it. Selecting the target data to be played 1 Tap the key to display playlist screen. ÜFor details, refer to on page 40. You can select the target data to be played when audio data (normal music CD) and WMA, MP3 or AAC data (ROM) are mixed in a disc. 2 Tap a track to be played. 1 Tap the . ÜFor details, refer to Using the touch panel keys on page 40. 2 Tap the target data to be played. • CD-DA: Sets audio data for the target. • Music: Sets WMA, MP3 or AAC data for the target. Setting the sound retriever function There are two repeat play types for playback. Tap . ÜFor details, refer to on page 40. Each tap of changes the setting as follows: • (Disc) (Default): Repeats the current disc. • (Track): Repeats just the current track. ❐ If you perform track search, fast forward or fast reverse, media change in the Track repeat mode, the repeat play range automatically changes to the Disc repeat. Random play The sound retriever function is effective to compressed audio data. It automatically enhances compressed audio and restores rich sound. Tap . ÜFor details, refer to on page 40. Each tap of changes the setting as follows. • Off: Deactivates the sound retriever function. • Mode 1 (Default): Activates the sound retriever function. Select for a lowly compressed sound data. • Mode 2: Activates the sound retriever function. Select for a highly compressed sound data. Playing audio CDs Repeating playback This function shuffles tracks and plays them in random order. Tap . ÜFor details, refer to on page 40. Each tap of changes the setting as follows: • (Off) (Default): Does not play tracks in random order. • (On): Plays all tracks in the current disc in random order. En 41 Chapter 07 11 Playing music files on ROM Using hands-free phoning You can play a disc that contains compressed audio files (MP3, WMA, AAC files). Starting procedure 1 Insert a disc to be played. Ü For details, refer to Inserting and ejecting a disc on page 9. 2 Press the Home button to display the Home screen. Ü For details, refer to Home screen on page 14. 3 Tap [Disc] on the Home screen. The playback automatically starts. 4 Use the touch panel keys on the screen to control the disc. ÜFor details, refer to Using the touch panel keys on page 42. • :Folder name Shows the folder name of the current song (when available). • :File name Shows the file name of the current song (when available). Folder/File number Shows the folder number and the file number. 3 Current time 4 Play time Shows the elapsed time, remaining time and time bar of the current song. 5 Pause indicator Appears the pause indicator while pausing playback. Using the touch panel keys Reading the screen 9 3 3 0 4 4 5 Current file information • : Song title Shows the title of the current song (when available). • : Artist name Shows the artist name currently playing (when available). • : Album title Shows the title of the album for the song (when available). • : Genre indicator Shows the genre of the current song (when available). 42 En 5 4 6 7 8 Switches the display between the song details (song title, artist name, album title and genre) and the directory structure (folder name and file name). 2 Displays the folder list screen that can be used to search for files in a inserted disc. Ü For details, refer to Selecting a file from the list on page 43. 3 Performs fast reverse or fast forward by dragging the playback point. 4 Tapping the key skips to the start of the next file. Tapping the key once skips to the start of the current file. Tapping the key twice quickly will skip to the previous file. Touching and holding the key or the key performs fast reverse or fast forward. Chapter Playing music files on ROM Using hands-free phoning 5 Switches between playback and pause. 6 Selects the repeat range. Ü For details, refer to Repeating playback on page 43. 7 Plays tracks in random order. Ü For details, refer to Random play on page 43. 8 Switches the target data to be played. Ü For details, refer to Selecting the target data to be played on page 44. 9 Tapping the key displays the content of the upper folder. Tapping the key displays the content of the lower folder. 0 Sets the sound retriever function. Ü For details, refer Setting the sound retriever function to on page 44 Using the functions Selecting a file from the list You can play a file on the folder list screen by tapping it. 2 Tap a folder name to be opened. Repeating playback There are two repeat play types for playback. Tap . ÜFor details, refer to Using the touch panel keys on page 42. Each tap of changes the setting as follows: • (Disc) (Default): Repeats the current disc. • (File): Repeats the current file. • (Folder): Repeats the current folder. ❐ If you perform folder (file) search, fast forward or fast reverse, folder up or folder down, media change in File repeat or Folder repeat mode, the repeat play range automatically changes to Disc. Random play This function shuffles files and plays them in random order. Tap . ÜFor details, refer to Using the touch panel keys on page 42. Each tap of changes the setting as follows: • (Off) (Default): Does not play files in random order. • (On): Plays all files in the current disc in random order. ❐ If you turn the random play on in File repeat or Folder repeat mode, the repeat play range automatically changes to Disc. Playing music files on ROM 1 Tap the key to display the folder list screen. ÜFor details, refer to Using the touch panel keys on page 42. 07 11 The contents of the selected folder are displayed. 3 Tap a file name to be played. En 43 Chapter 07 11 Playing music files on ROM Using hands-free phoning Selecting the target data to be played You can select the target data to be played when audio data (normal music CD) and WMA, MP3 or AAC data (ROM) are mixed in a disc. 1 Tap the . ÜFor details, refer to Using the touch panel keys on page 42. 2 Tap the target data to be played. • CD-DA: Sets audio data for the target. • Music: Sets WMA, MP3 or AAC data for the target. Setting the sound retriever function The sound retriever function is effective to compressed audio data. It automatically enhances compressed audio and restores rich sound. Tap . ÜFor details, refer to Using the touch panel keys on page 42. Each tap of changes the setting as follows. • Off: Deactivates the sound retriever function. • Mode 1 (Default): Activates the sound retriever function. Select for a lowly compressed sound data. • Mode 2: Activates the sound retriever function. Select for a highly compressed sound data. 44 En Chapter Playing a DVD-Video Using hands-free phoning You can play a DVD-Video using the built-in drive of this product. Starting procedure 1 Insert a disc to be played. Ü For details, refer to Inserting and ejecting a disc on page 9. 2 Press the Home button to display the Home screen. Ü For details, refer to Home screen on page 14. 3 Tap [Disc] on the Home screen. The playback automatically starts. 4 Use the touch panel keys on the screen to control the disc. ÜFor details, refer to Using the touch panel keys on page 45. 07 12 7 Status • STOP Appears while playback stops. • Disc Menu Appears while the disc menu is displayed. • Different Region Disc Appears while a different region disc is inserted. • Auto Play On/Auto Play Off Appears while auto play is turned on/off. 8 Pause indicator/Speed indicator Appears the pause indicator while pausing video or frame-by-frame playing. Also appears the speed indicator while fast-forwarding/reversing video or slow motion playing. Using the touch panel keys Page 1 1 Reading the screen 2 3 7 4 5 6 78 905 - ^ \ q 8 Page 2 1 Play time Shows the elapsed time, remaining time and time bar of the current video. 2 Current time 3 Sampling indicator 4 Digital sound format indicator Shows which digital sound format (surround sound format) has been selected. 5 Audio channel indicator Shows the current audio channel type, such as “Mch” (Multi-channel). 6 Title/Chapter number indicator Shows the title number and chapter number currently playing. w e r t y Playing a DVD-Video 3 4 5 6 u i Switches to full-screen mode. 2 Searches for a desired scene and starts playback from a specified time. Ü F or details, refer to Searching for a specific scene and starting playback from a specified time (Direct search) on page 46. En 45 Chapter 07 12 Playing a DVD-Video Using hands-free phoning Hides the touch panel keys. If you want to display the touch panel keys again, tap anywhere on the screen. 4 Searches the screen to be played by tapping the playback point. Performs fast reverse or fast forward by dragging the playback point. 5 Tapping the key skips to the start of the next title. Tapping once skips to the start of the current title. Tapping twice quickly will skip to the previous title. Touching and holding or performs fast reverse or fast forward. 6 Changes the screen mode. Ü For details, refer to Changing the wide screen mode on page 47. Switches between playback and pause. 8 Performs frame-by-frame playback or slow-motion playback. Ü For details, refer to Frame-by-frame playback on page 47 or Slow motion playback on page 47. 9 Stops playback. 0 Shows the disc menu. Ü For details, refer to Operating the disc menu on page 47. - Shows the top menu. Ü For details, refer to Operating the disc menu on page 47. ^ Selects the repeat range. Ü For details, refer to Repeating playback on page 48. \ Switches the audio language. Ü For details, refer to Changing the audio language (multi-audio) on page 48. q Switches to the next page of touch panel keys. w Switches the subtitle language. Ü For details, refer to Changing the subtitle language on page 49. e Switches the audio output. Ü For details, refer to Changing the audio output on page 49. r Changes the viewing angle (Multi-angle). Ü For details, refer to Changing the viewing angle (Multi-angle) on page 49. t Selects the DVD menu. Ü For details, refer to Selecting the DVD menu by touch panel keys on page 48. y Resumes playback (Bookmark). Ü For details, refer to Resuming playback (Bookmark) on page 49. u Performs an operation (such as resuming) that is stored on the disc. When using a disc that has a return point recorded, tap to return the playback to the recorded point. i Returns to the previous page of touch panel keys. Using the functions Searching for a specific scene and starting playback from a specified time (Direct search) You can search for a scene to be played by specifying a title, chapter or the time. ❐ Direct search is not available while playback stops. 1 Tap the key to display the direct search screen. ÜFor details, refer to Using the touch panel keys on page 45. 2 Tap [Title], [Chapter] or [10Key] to select how to search for. 2 Tap the keys to input the target number and then Tap . Search Title Chapter 10Key Required numbers The title number. The chapter number. The command numbers. ❐ To clear the input numbers, tap [C]. 46 En Chapter Playing a DVD-Video Using hands-free phoning 07 12 Changing the wide screen mode Frame-by-frame playback You can set the screen size of video. The default setting is “Full”. Frame-by-frame playback lets you move ahead one frame at a time during pause. 1 Tap the key. ÜFor details, refer to Using the touch panel keys on page 45. Tap . ÜFor details, refer to Using the touch panel keys on page 45. Each tap of moves one frame ahead. ❐ To return to normal playback, tap . ❐ With some discs, images may be unclear during frame-by-frame playback. 2 Tap [Full], [Zoom] or [Normal]. Slow motion playback Slow motion playback lets you slow down playback speed. Operating the disc menu You can operate the disc menu by directly tapping the menu item on the screen. ❐ This function can be used when the key is displayed on the lower right corner of the LCD screen. ❐ This function may not work properly with some DVD disc content. In that case, use touch panel keys to operate the DVD menu. ❐ If you tap the screen while is displayed, the touch panel keys will not be displayed. Playing a DVD-Video • Full: A 4:3 picture is enlarged in the horizontal direction only, enabling you to enjoy a 4:3 TV picture (normal picture) without any omissions. • Zoom: A 4:3 picture is enlarged in the same proportion both vertically and horizontally; ideal for a cinema-sized (wide screen) picture. • Normal: A 4:3 picture is displayed normally, giving you no sense of disparity since its proportions are the same as those of the normal picture. ❐ Images may be unclear when “Zoom” is selected. ❐ Remember that use of this system for commercial or public viewing purposes may constitute an infringement on the author’s rights protected by the Copyright Law. Touch and hold . ÜFor details, refer to Using the touch panel keys on page 45. Each tap of during slow motion playback changes the speed in four steps in the following order: 1/16 — 1/8 — 1/4 — 1/2 ❐ To return to normal playback, tap . ❐ With some discs, images may be unclear during slow motion playback. ❐ Reversed slow motion playback is not possible. 1 Tap the or key. ÜFor details, refer to Using the touch panel keys on page 45. 2 Operate by directly tapping the menu item on the screen. En 47 Chapter 07 12 Playing a DVD-Video Using hands-free phoning Repeating playback There are three repeat play types for playback. ❐ If you tap , you can use the cross key screen to assist operating the disc menu or top menu. ÜFor details of the cross key screen, refer to Selecting the DVD menu by touch panel keys on page 48. Selecting the DVD menu by touch panel keys If items on the disc menu or top menu is too small to operate, you can display the DVD menu to assist operating items on the disc menu by touch panel keys on it. 1 Tap the key. ÜFor details, refer to Using the touch panel keys on page 45. 2Tap , , or then tap [Enter]. to select an item, ❐ If you want to select the menu by tapping it directly on the screen, tap [Touch]. ❐ To show the previous screen, tap . 48 En Tap . ÜFor details, refer to Using the touch panel keys on page 45. Each tap of changes the setting as follows: • (Disc): Plays the whole of the current disc. • (Chapter): Repeats just the current chapter. • (Title): Repeats just the current title. ❐ If you perform chapter (title) search, fast forward or fast reverse in Chapter repeat or Title repeat mode, the repeat play range changes to Disc. Changing the audio language (multi-audio) You can switch the audio language while a disc with multilingual data is playing (multiaudio). Tap . ÜFor details, refer to Using the touch panel keys on page 45. Each time is tapped, the audio language changes. ❐ You can assign the top-priority language to the audio language in initial playback. ÜFor details of the top-priority language, refer to Setting the top-priority audio languages on page 57. Chapter Playing a DVD-Video Using hands-free phoning Changing the subtitle language You can switch the subtitle language while a disc with multilingual data is playing (multisubtitle). Tap . ÜFor details, refer to Using the touch panel keys on page 45. Each tap of changes the subtitle language. ❐ You can assign the top-priority language to the subtitle language in initial playback. ÜFor details of the top-priority language, refer to Setting the top-priority subtitle languages on page 57. Changing the audio output You can switch the audio output while a disc with LPCM audio is playing. Changing the viewing angle (Multiangle) You can switch the viewing angle while a disc with multi angle data is playing. Tap . ÜFor details, refer to Using the touch panel keys on page 45. Each tap of changes the viewing angle. ❐ During playback of a scene shot from multiple angles, the angle icon is displayed. You can turn the angle icon display on/off. ÜFor details of the angle icon, refer to Setting the angle icon display on page 58. Resuming playback (Bookmark) Bookmark lets you resume playback from a selected scene on the next disc loading. Tap on the desired scene. ÜFor details, refer to Using the touch panel keys on page 45. ❐ You can bookmark one point for each of up to five discs. If you try to memorize another point for the same disc, the older bookmark will be overwritten by the newer one. En Playing a DVD-Video Tap . ÜFor details, refer to Using the touch panel keys on page 45. Each tap of changes the audio output as follows. • L+R (default): Left and right • L: Left • R: Right • MIX: Mixing left and right 07 12 49 Chapter 07 13 Using hands-free phoning CAUTION For your safety, avoid talking on the phone as much as possible while driving. You can control the Bluetooth connection of the mobile device, and make a call using the incoming or outgoing call histories, transferred phone book, or by dialing. To connect using the hands-free phoning function, you must first use the mobile device to pair this product with the mobile device. ÜFor detailed procedures, refer to Registering your Bluetooth devices on page 31. For details about connectivity with devices featuring Bluetooth wireless technology, refer to the information on our website. Starting procedure 1 Press the Home button to display the Home screen. 2Tap on the Home screen. Ü For details, refer to Home screen on page 14. The phone menu screen appears. Reading the screen 1 2 3 4 1 Number of the Bluetooth connection device 2 Reception status of the mobile device 3 Battery status of the mobile device 4 Name of connected device ❐ Depending on the device, the phone menu screen may be different from the actual screen. 50 En Using the touch panel keys 23 4 5 6 9 8 7 1 Switches to the mode for entering phone numbers. ÜFor details, refer to Direct dialing on page 51. 2 Launches the voice recognition function when iPhone is connected via the Bluetooth wireless technology. Ü For details, refer to Using the voice recognition function (for iPhone) on page 55. 3 Switches to the call history list. Ü For details, refer to Dialing from the history on page 52. 4 Closes the phone menu screen and return the previous menu screen. 5 Switches to the phone book mode. Ü For details, refer to Calling a number in the phone book on page 51. Ü For details, refer to Selecting a number using alphabet search mode on page 52. 6 Displays the preset dial screen. Ü For details, refer to Using the preset dial lists on page 54. 7 Displays the “Bluetooth Connection Menu”. Ü For details, refer to Registering your Bluetooth devices on page 31. 8 Turns the ring tone for incoming calls on or off. Ü For details, refer to Switching the ring tone on page 53. 9 Turns automatic answering on or off. Ü For details, refer to Answering a call automatically on page 53. Chapter Using hands-free phoning Adjusting the phone volume During the hands-free phoning, you can adjust the phone volume using the Volume (+/–) button when you are talking. The ring tone volume also can be adjusted while the phone rings. Making a phone call You can make a phone call in many different ways. Direct dialing 1Tap . 2 Tap the number keys to enter the phone number. ■ If you tap the key, the entered number is deleted one digit at a time from the end of the number. ■ If you touch and hold the key, the entered number is cleared. 07 13 Calling a number in the phone book You can select and call a contact from the phone book entries transferred to this product. ❐ Before using this function, you need to transfer the phone book entries stored in your mobile device to this product. ÜFor details, refer to Phone book transfers on page 56. ❐ Depending on the settings of the connected mobile device, the phone book may not be automatically transferred to this product. When the phone book is not transferred, transfer the phone book from the mobile device. 1Tap . The “Phone Book” screen appears. 2 Tap the desired name on the list. 3Tap . Dialing starts. ■ To cancel the call, tap 4Tap to end the call. . 3 Tap the phone number you want to dial. The dial confirm screen appears. ■ If several phone numbers are included in an entry, select one by tapping the list. 4Tap . Dialing starts. ■ To cancel the call, tap 5Tap . Using hands-free phoning The details screen of the phone book appears. to end the call. En 51 Chapter 07 13 Using hands-free phoning Selecting a number using alphabet search mode If a lot of numbers are registered in the phone book, you can search for a phone number using alphabet search mode. 1Tap . The “Phone Book” screen appears. 2Tap to switch to the alphabet search mode. 4 Tap the list to display the phone number list of the selected entry. The details screen of the phone book appears. 5 Tap the phone number you want to dial. The dial confirm screen appears. ■ If several phone numbers are included in an entry, select one by tapping the list. 6Tap . Dialing starts. ■ To cancel the call, tap 7Tap . to end the call. Dialing from the history 3 Tap the first letter of the entry you are looking for. The screen jumps to the top of the page displaying the entries that start with the selected letter. ■ If you want to change the character to Russian, tap on the alphabet search mode. To return to English, tap again. ■ The order of the first name and last name may be different from that of the mobile device. The most recent calls made dialed, received and missed are stored in the call history list. You can browse the call history list and call numbers from it. ❐ Each call history saves 80 calls per registered mobile device. If the number of calls exceeds 80, the oldest entry will be deleted. 1Tap . The latest updated call history list appears. 2Tap (Received calls), calls) or (Missed calls). (Dialed 3 Tap an entry on the list. The dial confirm screen appears. 4Tap . Dialing starts. ■ To cancel the call, tap 5Tap 52 En to end the call. . Chapter Using hands-free phoning 07 13 Answering an incoming call Using advanced functions This product informs you that it is receiving a call by displaying a message and producing a ring sound. ❐ You can set this product to automatically answer incoming calls. If not set to automatically answer incoming calls, you will have to answer the calls manually. Ü For details, refer to Answering a call automatically on page 53. ❐ The registered name appears if the phone number of the received call is already registered in “Phone book”. Answering a call automatically 1 To answer an incoming call, tap . ■ If you tap , an incoming call is rejected. The rejected call is recorded in the missed call history list. You can enable or disable auto answer for handling incoming calls. This product automatically answers incoming calls to the mobile device, so you can answer a call while driving without taking your hands off the steering wheel. Tap . Tapping changes the setting as follows: • OFF (default): No automatic response. Respond manually. • ON: Answers incoming calls automatically. Switching the ring tone You can select whether or not to use this product’s ring tone. If this function is set to on, the ring tone for this product will sound. to end the call. Storing a phone number You can easily store up to 6 phone numbers as presets from the phone book and the call history list. Touch and hold the desired phone number in the phone book or the call history list. The phone number is registered on the “Preset Dial” list. En Using hands-free phoning 2Tap Tap . Tapping changes the setting as follows: • ON (default): The ring tone sounds. • OFF: The ring tone is muted. 53 Chapter 07 13 Using hands-free phoning Using the preset dial lists Setting the private mode 1Tap . The “Preset Dial” list appears. During a conversation, you can switch to private mode (talk directly on your mobile device). 2 Tap one of preset dial keys to select the desired phone number. The dial confirm screen appears. If you want to delete a preset phone number, touch and hold the preset phone number. ■ Tap . Tapping changes the setting as follows: • OFF (default): Hands-free phoning • ON: Talk directly on your mobile device Adjusting the other party’s listening volume 3Tap . Dialing starts. ■ To cancel the call, tap 4Tap To maintain good sound quality, this product can adjust the other party’s listening volume. If the volume is not loud enough for the other party, use this function. . to end the call. Inverting the names You can invert the order of first and last names in the phone book and the call history list. 1Tap on the phone book or the call history list. The message “Would you like to invert all names?” appears. 2 Tap [Yes] to invert the names. The order of all first and last names is inverted. 54 En Tap Tapping . switches between the three levels: — (default) — ❐ This function is not effective when the private mode is set to “ON”. Ü For details, refer to Setting the private mode on page 54. ❐ This function can be performed even while talking on the phone. ❐ Settings can be stored for each device. Chapter Using hands-free phoning 07 13 Using the voice recognition function (for iPhone) Notes for hands-free phoning You can use the voice recognition function of iPhone. ❐ When an iPhone running iOS 6.1 or later is used, Siri Eyes Free Mode is available with this product. • Connection to all mobile devices featuring Bluetooth wireless technology is not guaranteed. • The line-of-sight distance between this product and your mobile device must be 10 meters or less when sending and receiving voice and data via Bluetooth technology. However, the actual transmission distance may be shorter than the estimated distance, depending on the usage environment. • With some mobile devices, the ring sound may not be output from the speakers. • If private mode is selected on the mobile device, hands-free phoning may be disabled. 1Tap on the phone menu screen. The voice recognition function launches and the voice control screen appears. You can use the voice recognition function as the same way as using on the iPhone side. ❐ You can also launch the voice recognition function by pressing and holding the Home button. 2 Tap screen. on the voice control General notes Registration and connection En Using hands-free phoning • Mobile device operations vary depending on the type of mobile device. Refer to the instruction manual that came with your mobile device for detailed instructions. • With some mobile devices, phone book transfer may not work even though your mobile device is paired with this product. In that case, disconnect your mobile device, perform pairing again from your mobile device to this product, and then perform the phone book transfer. 55 Chapter 07 13 Using hands-free phoning Making and receiving calls • You may hear a noise in the following situations: -When you answer the phone using the button on the phone. -When the person on the other end of line hangs up the phone. • If the person on the other end of the phone call cannot hear the conversation due to an echo, decrease the volume level for handsfree phoning. This may reduce the echo. • With some mobile devices, even if you press the accept button on the mobile device when a call comes in, hands-free phoning may not be performed. • The registered name appears if the phone number of the received call is already registered in the phone book. When one phone number is registered under different names, the name that comes first in the phone book is displayed. • If the phone number of the received call is not registered in the phone book, the phone number of the received call appears. 56 En The received call history and the dialed number history • Calls made or editing performed only on your mobile device will not be applied to the dialed number history or phone book in this product. • You cannot make a call to the entry of an unknown user (no phone number) in the received call history. • If calls are made by operating your mobile device, no history data will be recorded in this product. Phone book transfers • You can register up to five numbers per entry. • If there are more than 1 000 phone book entries on your mobile device, all entries may not be downloaded completely. • With some mobile devices, it may not be possible to transfer all items in the phone book at one time. In this case, transfer items one by one from your mobile device. • Depending on the mobile device, this product may not display the phone book correctly. (Some characters may be garbled, or first and last names may be reversed.) • If the phone book in the mobile device contains image data, the phone book may not be transferred correctly. (Image data cannot be transferred from the mobile device.) • Depending on the mobile device, phone book transfer may not be available. Chapter Customizing preferences 14 Customizing the video setup settings ❐ The video setup settings can be set only when the source is set to “Disc”. 1 Press the Home button to display the Home screen. 2 Flick the scroll area on the Home screen. ÜFor details, refer to Home screen on page 14. 3 Tap [Settings] on the Home screen. The setting menu screen appears. 4Tap . The “Video Setup” screen appears. ❐ When you select “Others”, a language code input display is shown. Input the fourdigit code of the desired language then tap [OK]. ÜFor details of the language code, refer to Language code chart for DVDs on page 84. ❐ If the selected language is not recorded on the disc, the default language specified on the disc is displayed. ❐ You can also switch the subtitle language by tapping during playback. Even if you tap to switch the subtitle language, this setting will not change. Setting the top-priority audio languages You can assign the top-priority language to the top-priority audio in initial playback. If the selected audio language is recorded on the disc, the audio is output in that language. 1 Display the “Video Setup” screen. ÜFor details, refer to Customizing the video setup settings on page 57. 2 Tap [Audio Language]. 6 After changing the settings, tap return the Home screen. to Setting the top-priority subtitle languages You can assign the top-priority language to the top-priority subtitle in initial playback. If the selected subtitle language is recorded on the disc, the subtitle is displayed in that language. 1 Display the “Video Setup” screen. ÜFor details, refer to Customizing the video setup settings on page 57. 2 Tap [Subtitle Language]. 3 Tap the desired language. 3 Tap the desired language. ÜFor details of the setting, refer to Setting the top-priority subtitle languages on page 57. Setting the top-priority menu languages You can assign the top-priority language to the top-priority menu in initial playback. If the selected menu language is recorded on the disc, the menu is displayed in that language. 1 Display the “Video Setup” screen. ÜFor details, refer to Customizing the video setup settings on page 57. Customizing preferences 5 Tap the item that you want to change the settings for. 2 Tap [Menu Language]. 3 Tap the desired language. ÜFor details of the setting, refer to Setting the top-priority subtitle languages on page 57. En 57 Chapter 14 Customizing preferences Setting the angle icon display You can set the angle icon to display in scenes where the angle can be switched. 1 Display the “Video Setup” screen. ÜFor details, refer to Customizing the video setup settings on page 57. 2 Tap [Multi Angle]. Tapping [Multi Angle] changes the settings as follows: • On (default): Displays the angle icon in scenes where the angle can be switched. • Off: Hides the angle icon. Setting the aspect ratio There are two kinds of displays. A wide screen display has a width-to-height ratio (TV aspect) of 16:9, while a regular display has a TV aspect of 4:3. If you use a regular rear display with a TV aspect of 4:3, you can set the aspect ratio suitable for your rear display (We recommend use of this function only when you want to fit it to the rear display). ❐ When playing discs without a panscan system, the disc is played back with “Letter Box” even if you select “Pan Scan” setting. Confirm whether the disc package bears the mark. ❐ Some discs disable to change the TV aspect. For details, refer to the disc’s instructions. Setting the parental lock Some DVD-Video discs let you use parental lock to set restrictions so that children cannot watch violent or adult-oriented scenes. You can set the parental lock level in steps as desired. 1 Display the “Video Setup” screen. ÜFor details, refer to Customizing the video setup settings on page 57. 2 Tap [Parental]. 3 Tap [0] to [9] to input a four-digit code number, then tap . 1 Display the “Video Setup” screen. ÜFor details, refer to Customizing the video setup settings on page 57. 2 Tap [TV Aspect]. 3 Tap [16:9], [Letter Box] or [Pan Scan]. • 16:9 (default): Wide screen image (16:9) is displayed as it is. • Letter Box: The image is in the shape of a letter box with black bands at the top and bottom of the screen. • Pan Scan: The image is cut short at the right and left of the screen. ❐ When using a regular display, select either “Letter Box” or “Pan Scan”. Selecting “16:9” may result in an unnatural image. 58 En ❐ When you first set the parental lock, register any four-digit code number you want. If you do not, the parental lock will not operate. ❐ To clear the input numbers, tap [C]. 3 Touch any of [1] to [8] to select the desired level, then tap . Chapter Customizing preferences • • Level 8 (default): Playback of the entire disc is enabled. Level 7 to Level 2: Playback of discs for children and nonadult oriented discs is enabled. • Level 1: Only playback of discs for children is enabled. Setting the auto play When a disc with a disc menu is inserted, this unit will cancel the disc menu automatically and start playback from the first chapter of the first title. ❐ This function is available on DVD-Video. ❐ Some DVDs may not operate properly. If this function is not fully operable, turn this function off and start playback. 14 Customizing the audio settings ❐ The audio settings cannot be set when the source is set to “OFF”. 1 Press the Home button to display the Home screen. 2 Flick the scroll area on the Home screen. ÜFor details, refer to Home screen on page 14. 3 Tap [Settings] on the Home screen. The setting menu screen appears. 4Tap . The “Audio” screen appears. 1 Display the “Video Setup” screen. ÜFor details, refer to Customizing the video setup settings on page 57. 5 Tap the item that you want to change the settings for. 6 After changing the settings, tap return the Home screen. to Using fader/balance adjustment You can select a fader/balance setting that provides an ideal listening environment in all occupied seats. 1 Display the “Audio” screen. ÜFor details, refer to Customizing the audio settings on page 59. Customizing preferences 2 Tap [DVD Auto Play]. Tapping [DVD Auto Play] changes the settings as follows: • Off (default): Deactivates the auto play function. • On: Activates the auto play function. 2 Tap [Fader/Balance]. When “Rear Speaker” in the “System” settings is set to “Subwoofer”, “Balance” will be displayed instead of “Fader/Balance” and front/rear speaker balance cannot be adjusted. En 59 Chapter 14 Customizing preferences ÜFor details, refer to Setting the rear output on page 63. 3Tap or to adjust front/rear speaker balance. Each time you tap or , the front/rear speaker balance moves towards the front or the rear. “Front 15” to “Rear 15” is displayed as the front/rear speaker balance moves from front to rear. Set “Front” and “Rear” to “0” when using a two-speaker system. Equalizer curve S.Bass (Super Bass) is a curve in which only lowpitched sound is boosted. Powerful (default) is a curve in which low-pitched and high-pitched sounds are boosted. Natural is a curve in which low-pitched and highpitched sounds are slightly boosted. Vocal is a curve in which the midrange, which is the human vocal range, is boosted. Flat is a flat curve in which nothing is boosted. Custom1 is an adjusted equalizer curve that you create. A separate custom curve can be created for each source. Custom2 is an adjusted equalizer curve that you create. If you select this curve, the effect is applied to all audio sources. 4Tap or to adjust left/right speaker balance. Each time you tap or , the left/right speaker balance moves towards the left or the right. “Left 15” to “Right 15” is displayed as the left/ right speaker balance moves from left to right. Using the equalizer The equalizer lets you adjust equalization to match vehicle interior acoustic characteristics as desired. Recalling equalizer curves There are seven stored equalizer curves that you can easily recall at any time. Here is a list of the equalizer curves: 60 En ❐ When “Flat” is selected, no supplement or correction is made to the sound. This is useful to check the effect of the equalizer curves by switching alternatively between “Flat” and a set equalizer curve. 1 Display the “Audio” screen. ÜFor details, refer to Customizing the audio settings on page 59. 2 Tap [Graphic EQ]. 3 Tap the equalizer curve you want. Chapter Customizing preferences Adjusting the 5-band graphic equalizer You can adjust the level of each band for the equalizer curves. ❐ A separate “Custom1” curve can be created for each source. If you make adjustments when a curve other than “Custom2” is selected, the equalizer curve settings will be recorded in “Custom1”. ❐ A “Custom2” curve that is common for all sources can be created. If you make adjustments when the “Custom2” curve is selected, the “Custom2” curve will be updated. 1 Display the “Audio” screen. ÜFor details, refer to Customizing the audio settings on page 59. 2 Tap [Graphic EQ]. 3 Tap one of the keys to select a curve that you want to use as the basis of customizing. 14 Adjusting loudness Loudness compensates for deficiencies in the low- and high-sound ranges at low volume. 1 Display the “Audio” screen. ÜFor details, refer to Customizing the audio settings on page 59. 2Tap or next to “Loudness”. Each time you tap or , the level is selected in the following order: Off (default) — Low — Mid — High Using the subwoofer output This product is equipped with a subwoofer output that can be turned on or off. ❐ The cut-off frequency and output level can be adjusted when the subwoofer output is on. 1 Display the “Audio” screen. ÜFor details, refer to Customizing the audio settings on page 59. 2 Tap [Subwoofer]. The “Subwoofer” screen appears. 5 Tap the screen to adjust the level of the equalizer band. You can adjust the equalizer band level between “+12dB” and “–12dB”. 3 Tap [Subwoofer] to set to “On”. The subwoofer output is turned on. ■ If you select “Off”, the subwoofer output is turned off. Customizing preferences 4 Tap the frequency that you want to adjust the level for. You can select the following frequencies: 100Hz — 315Hz — 1.25kHz — 3.15kHz — 8kHz 4 Tap [Phase] to select “Normal” or “Reverse” to set the phase of subwoofer output. En 61 Chapter 14 Customizing preferences 5Tap or next to “Level” to adjust the output level. “+6” to “–24” is displayed as the level is increased or decreased. 6Tap or next to “Frequency” to select cut-off frequency. Each time you tap or , cut-off frequencies are selected in the following order: 50Hz — 63Hz — 80Hz (default) — 100Hz — 125Hz Only frequencies lower than those in the selected range are output from the subwoofer. Enhancing bass (Bass Booster) You can enhance bass sounds that are often muted by driving noise. 1 Display the “Audio” screen. ÜFor details, refer to Customizing the audio settings on page 59. Adjusting source levels “Source Level Adjuster” lets you adjust the volume level of each source to prevent radical changes in volume when switching between the sources. ❐ Settings are based on the FM volume level, which remains unchanged. 1 Play the source you want to adjust the volume level for. The adjustable sources are “iPod”, “Apps”, “MirrorLink”, “Pandora”, “Bluetooth”, “DVD-V”, “CD”, “ROM” and “AM” band. 2 Display the “Audio” screen. ÜFor details, refer to Customizing the audio settings on page 59. 3 Tap [Source Level Adjuster]. The “Source Level Adjuster” screen appears. 2Tap or next to “Bass Booster” to adjust the range from 0 to +6. Using the high pass filter When you cut lower sounds from the subwoofer output frequency, activate “High Pass Filter”. Only frequencies higher than those in the selected range are output from the front or rear speakers. 1 Display the “Audio” screen. ÜFor details, refer to Customizing the audio settings on page 59. 2Tap or next to “High Pass Filter”. Each time you tap or , cut-off frequencies are selected in the following order: Off (default) — 50Hz — 63Hz — 80Hz — 100Hz — 125Hz 62 En 4Tap or to adjust the source volume. “+4” to “–4” is displayed as the source volume is increased or decreased. Chapter Customizing preferences 14 Customizing the system settings 1 Press the Home button to display the Home screen. 2 Flick the scroll area on the Home screen. ÜFor details, refer to Home screen on page 14. 3 Tap [Settings] on the Home screen. The setting menu screen appears. 4Tap . The “System” screen appears. 5 Tap the item that you want to change the settings for. 6 After changing the settings, tap return the Home screen. to Before connecting your device, set the type of the device. ❐“App Connection Settings” can be set only when the source is set to “OFF” without any mobile device connection. 1 Display the “System” screen. ÜFor details, refer to Customizing the system settings on page 63. 2 Tap [App Connection Settings]. Tapping [App Connection Settings] changes the settings as follows: Setting the rear output This product’s rear output (rear speaker leads output) can be used for a full-range speaker (Full) or subwoofer (Subwoofer) connection. If you switch the rear output setting to “Subwoofer”, you can connect a rear speaker lead directly to a subwoofer without using an auxiliary amp. Initially, the product is set for a rear full-range speaker connection (Full). ❐ “Rear Speaker” can be set only when the source is set to “OFF”. 1 Display the “System” screen. ÜFor details, refer to Customizing the system settings on page 63. 2 Tap [Rear Speaker]. Tapping [Rear Speaker] changes the settings as follows: • Full (default): When no subwoofer is connected to the rear output, select “Full”. • Subwoofer: When a subwoofer is connected to the rear output, select “Subwoofer”. ❐ Even if you change this setting, there will be no output unless you turn the subwoofer output on. ÜFor details, refer to Using the subwoofer output on page 61. ❐ If you change this setting, subwoofer output in the audio menu will return to the factory settings. En Customizing preferences Setting the type of the mobile device to be connected • iPhone (Digital AV) (default): When an iPhone with Lightning connector will be connected, select “iPhone (Digital AV)”. • Others: When an iPhone with 30-pin connector, Android device or MirrorLink device will be connected, select “Others”. 63 Chapter 14 64 Customizing preferences Setting the RCA output Selecting the system language This product’s preout (RCA rear output or subwoofer output) can be used for a full-range speaker (Full) or subwoofer (Subwoofer) connection. Initially, the product is set for a subwoofer connection (Subwoofer). ❐ “Preout” can be set only when the source is set to “OFF”. The system language can be selected from three languages. ❐ If the embedded language and the selected language setting are not the same, text information may not display properly. ❐ Some characters may not be displayed properly. Text that cannot be displayed is displayed as “_” (underscore). 1 Display the “System” screen. ÜFor details, refer to Customizing the system settings on page 63. 1 Display the “System” screen. ÜFor details, refer to Customizing the system settings on page 63. 2 Tap [Preout]. Tapping [Preout] changes the settings as follows: • Subwoofer (default): When a subwoofer is connected to the RCA rear output, select “Subwoofer”. • Full: When no subwoofer is connected to the RCA rear output, select “Full”. ❐ Even if you change this setting, there will be no output unless you turn the subwoofer output on. ÜFor details, refer to Using the subwoofer output on page 61. ❐ If you change this setting, subwoofer output in the audio menu will return to the factory settings. 2 Tap [System Language]. The “System Language” screen appears. En 3 Tap the desired language. English (default), Français, Español Chapter Customizing preferences 14 Setting the keyboard layout Switching the ever scroll function You can select the keyboard layout displayed on this product for text input in the AppRadio Mode. This setting is valid only when connecting an iPhone with the AppRadio app installed. If a character string is too long for the specified frame, the string scrolls automatically to display the full text. This function is used to set whether to repeat the automatic scrolling of a string. ❐ The keyboard layout depends on the system language settings. ÜFor details, refer to Selecting the system language on page 64. ❐ When you tap on the virtual keyboard, the language setting of iPhone is changed, but the language on the virtual keyboard is not changed. If you change the language setting of the virtual keyboard, refer to the following procedure. ❐ The iPhone keyboard layouts depends on the Hardware Keyboard Layout setting of your iPhone. For details on iPhone operating procedures, refer to your iPhone User Guide. 1 Display the “System” screen. ÜFor details, refer to Customizing the system settings on page 63. 2 Tap [Keyboard]. The “Keyboard” screen appears. 1 Display the “System” screen. ÜFor details, refer to Customizing the system settings on page 63. 2 Tap [Ever Scroll]. Tapping [Ever Scroll] changes the settings as follows: • Off (default): Deactivates the ever scroll function. • On: Activates the ever scroll function. Repeats the automatic scrolling of a string. Clearing Bluetooth memory This function is used to initialize the registered devices and PIN code. ❐ “Bluetooth Memory Clear” can be set only when the source is set to “OFF”. 2 Tap [Bluetooth Memory Clear]. The “Bluetooth Memory Clear” screen appears. 3Tap or to select the desired keyboard layout. 3 Tap [Clear]. After the confirmation display appears, tap [OK] to delete the memory. ■ If you do not want to clear the memory, tap [Cancel]. En Customizing preferences 1 Display the “System” screen. ÜFor details, refer to Customizing the system settings on page 63. 65 Chapter 14 Customizing preferences Updating Bluetooth connection software This function is used to update this product with the latest software. For information on the software and updating, refer to our website. CAUTION Never turn this product off while the Bluetooth memory is being updated. ❐ “Bluetooth Software Update” can be set only when the source is set to “OFF”. 1 Display the “System” screen. ÜFor details, refer to Customizing the system settings on page 63. 2 Tap [Bluetooth Software Update]. The “Bluetooth Software Update” screen appears. 3 Tap [Start] to display the data transfer mode. ■ Follow the on-screen instructions to finish updating the software. Displaying the Bluetooth system version If this product fails to operate properly, you may need to consult your dealer for repair. In such cases, you may be asked to specify the system version. Perform the following procedure to check the version of this product. ❐ “Bluetooth Version Information” can be set only when the source is set to “OFF”. 1 Display the “System” screen. ÜFor details, refer to Customizing the system settings on page 63. 2 Tap [Bluetooth Version Information] to display to the version of the Bluetooth module of this product. 66 En Setting the rear view camera The following two functions are available. The rear view camera feature requires a separately sold rear view camera (e.g. ND-BC6). (For details, consult your dealer.) Rear view camera This product features a function that automatically switches to the full-screen image of the rear view camera installed on your vehicle. When the shift lever is in the REVERSE (R) position, the screen automatically switches to a full-screen rear view camera image. Camera for Rear view mode Rear view can be displayed at all times (e.g. when monitoring an attached trailer, etc.). Please be aware that with this setting, the camera image is not resized to fit, and a portion of what is seen by the camera is not viewable. When the “Camera Polarity” setting is set, [Rear view] icon on the Home screen becomes active and “OFF” appears on the upper right corner of the icon. To switch to the rear view mode, tap [Rear view]. ❐ In the rear view mode, “ON” appears on the upper right corner of the icon. ❐ To cancel the rear view mode, tap [Rear view] again. ❐ Tapping the screen while displaying the rear view screen returns to the current screen. ❐ In the rear view mode, if you do not touch the screen for seven seconds while displaying the following screens, the screen switches to the rear view screen automatically. • Source (Radio, iPod, Apps, MirrorLink, Pandra, Bluetooth or Disc) screens • Source off screen • AppRadio Mode screen Chapter Customizing preferences CAUTION Pioneer recommends the use of a camera which outputs mirror-reversed images. Otherwise, the screen image will appear reversed. ❐ Immediately verify whether the display changes to a rear view camera image when the shift lever is moved to REVERSE (R) from another position. ❐ When the screen changes to full-screen rear view camera image during normal driving, switch to the opposite setting in “Camera Polarity”. 1 Display the “System” screen. ÜFor details, refer to Customizing the system settings on page 63. 2 Tap [Camera Polarity]. You can select the following polarity: • Off (default): When the rear view camera is not connected to this product. • Battery: When the polarity of the connected lead is positive while the shift lever is in the REVERSE (R) position. • Ground: When the polarity of the connected lead is negative while the shift lever is in the REVERSE (R) position. You can select the suitable video signal setting for your rear view camera. ❐ As this function is initially set to “Auto”, the product will automatically adjust the video signal setting. However, the screen may turn black or images may not be displayed properly when “Auto” has been selected. Normally, select the appropriate video signal. 1 Display the “System” screen. ÜFor details, refer to Customizing the system settings on page 63. 2 Tap [Video Signal Setting]. The “Video Signal Setting” screen appears. 3Tap or to select the desired video signal. Auto (default) — PAL — NTSC — PAL-M — PAL-N — SECAM Adjusting the picture You can adjust the brightness, contrast, color, hue, dimmer and temperature for each source and rear view camera. 1 Playback the source you want to adjust the picture. 2 Display the “System” screen. ÜFor details, refer to Customizing the system settings on page 63. 3 Tap [Picture Adjustment]. The picture adjustment screen appears. 4 If you are adjusting the picture adjustment, select the source. • Rear View: Adjusts the picture for the rear view camera. • Source: Adjusts the picture for the source. The current source name is displayed on the picture adjustment screen. Customizing preferences Setting the video signal 14 5 Tap any of the following touch panel keys to select the function to be adjusted. Picture adjustment items are displayed. • Brightness: Adjusts the black intensity. • Contrast: Adjusts the contrast. En 67 Chapter 14 Customizing preferences • Color: Adjusts the color saturation. • Hue: Adjusts the tone of color (red or green is emphasized). • Dimmer: Adjusts the brightness of the display. • Temperature: Adjusts the color temperature, resulting in a better white balance. Setting the clock mode You can change the time format. 1 Display the “System” screen. ÜFor details, refer to Customizing the system settings on page 63. 2 Tap [Clock Mode]. Tapping [Clock Mode] changes the settings as follows: • 12H (default): Changes the display to 12-hour format. • 24H: Changes the display to 24-hour format. Selecting the background display ❐ You can adjust “Hue” only when “Video Signal Setting” is set to “NTSC”. ❐ With some rear view cameras, picture adjustment may not be possible. 6Tap or to adjust the selected item. Each time you tap or , the level of the selected item increases or decreases. ■ If you want to switch the adjustment item, tap or . ❐“Brightness”, “Contrast”, “Color”, “Hue” can be adjusted from “+24” to “–24”. ❐“Dimmer” can be adjusted from “+1” to “+48”. ❐“Temperature” can be adjusted from “+3” to “–3”. ❐ You cannot operate this function while driving. ❐ Different “Brightness”, “Contrast”, “Dimmer” settings can be set for when the illumination switch is on and when it is off. ❐ The same specifications are applied to all sources (Home screen, Settings screen, Radio, iPod music, Pandora) other than the video source. ❐ The “Dimmer” setting is set to a common setting in all sources. 68 En You can change the audio source screen background and Home screen background. 1 Display the “System” screen. ÜFor details, refer to Customizing the system settings on page 63. 2 Tap [Background]. The background screen appears. 3 Tap the desired background display. Restoring the default settings Resets various settings registered to this product and restores them to the default settings. ❐ “System Reset” can be set only when the source is set to “OFF”. 1 Display the “System” screen. ÜFor details, refer to Customizing the system settings on page 63. Chapter Customizing preferences 2 Tap [System Reset]. A message confirming whether to restore the settings appears. 3 Tap [OK]. ■ If you do not want to restore the settings, tap [Cancel]. Checking the connections of leads Check that leads are properly connected between this product and the vehicle. Please also check whether they are connected in the correct positions. 1 Display the “System” screen. ÜFor details, refer to Customizing the system settings on page 63. 2 Tap [Connection Status]. The “Connection Status” screen appears. GPS Antenna Indicates the connection status of the GPS antenna, the reception sensitivity, and from how many satellites the signal is received. Color Signal communication Used in positioning Orange Yellow Yes Yes Yes No ❐ When the GPS antenna is connected to this product, “OK” is displayed. When the GPS antenna is not connected to this product, “Not OK” is displayed. ❐ If reception is poor, please change the installation position of the GPS antenna. Positioning Status Indicates the current GPS positioning status. • 2D Positioning: The status when the signals from three satellites are received. • 3D Positioning: The status when the signals from four or more satellites are received. Back Signal When the shift lever is shifted to “R”, the signal switches to “High” or “Low”. (One of these is displayed depending on the vehicle.) Switching the App launch assist function (for iPhone) You can set whether to launch the AppRadio app automatically when you tap [Apps] icon on the Home screen. 1 Display the “System” screen. ÜFor details, refer to Customizing the system settings on page 63. 2 Tap [App launch assist]. Tapping [App launch assist] changes the settings as follows: • On (default): Activates the App launch assist function. • Off: Deactivates the App launch assist function. En Customizing preferences 14 69 Chapter 14 Customizing preferences Displaying the firmware version If this product fails to operate properly, you may need to consult your dealer for repair. In such cases, you may be asked to specify the system version. Perform the following procedure to check the firmware version of this product. 1 Display the “System” screen. ÜFor details, refer to Customizing the system settings on page 63. 2 Tap [Firmware Version Information] to display to the firmware version of this product. Updating the firmware version You can update the firmware version of this product by using the USB memory device connected. ❐ Before updating, check your firmware version and prepare the firmware update USB memory device by downloading the newer firmware file from the pioneer web site. ❐ “Firmware Update” can be set only when Customizing the favorites menu You can register the desired menu items on the “Favorites” screen. Registering your favorite menu items allows you to quickly jump to the registered menu screen by a simple touch on the favorites menu. ❐ Up to 12 menu items can be registered on the favorites menu list. 1 Press the Home button to display the Home screen. 2 Flick the scroll area on the Home screen. Ü For details, refer to Home screen on page 14. 3 Tap [Settings] on the Home screen. The setting menu screen appears. 4Tap . The “Favorites” screen appears. the vehicle is stopped. CAUTION Never turn this product off while updating. 1 Connect the firmware update USB memory device to the USB port on this product. 2 Display the “System” screen. ÜFor details, refer to Customizing the system settings on page 63. 3 Tap [Firmware Update]. The “Firmware Update” screen appears. 4 Tap [Continue] to display the data transfer mode. ■ Follow the on-screen instructions to finish updating the firmware. 5 Tap the item that you want to change the settings for. 6 After changing the settings, tap return the Home screen. to Registering menu items 1 Press the Home button to display the Home screen. 2 Flick the scroll area on the Home screen. Ü For details, refer to Home screen on page 14. 3 Tap [Settings] on the Home screen. The setting menu screen appears. 70 En Chapter Customizing preferences 4 Touch the tab on the left edge and/or scroll the bar on the right edge to display the desired menu item. 14 3 Tap [Display OFF] on the Home screen. The screen is turned off. ❐ Tap anywhere on the screen to turn it back on. 5 Touch and hold the menu item you want to register. ❐A icon will appear next to the menu item name. 6 The menu item is registered on the “Favorites” screen. Customizing preferences Removing menu items Touch and hold the menu item you want to remove from the “Favorites” screen. Turning off the screen You can turn off the backlight of the LCD screen. 1 Press the Home button to display the Home screen. 2 Flick the scroll area on the Home screen. Ü For details, refer to Home screen on page 14. En 71 Appendix Appendix Troubleshooting If you have problems operating this product, refer to this section. The most common problems are listed below, along with likely causes and solutions. If a solution to your problem cannot be found here, contact your dealer or the nearest authorized Pioneer service facility. Problems with this product Symptom Cause Action (Reference) The power doesn’t turn on. This product doesn’t operate. Leads and connectors are incorrectly connected. Confirm once more that all connections are correct. The fuse is blown. Rectify the reason for the fuse blowing, then replace the fuse. Be very sure to install a correct fuse with the same rating. Noise and other factors are causing the built-in microprocessor to operate incorrectly. Park your vehicle in a safe place, and turn off the engine. Turn the ignition key back to off (ACC OFF). Then start the engine again, and turn the power to this product back on. GPS signal can not be obtained. The GPS antenna is in an unsuitable location. The quality of signals from the GPS satellites is poor, causing reduced positioning accuracy. Check the GPS signal reception and the position of the GPS antenna if necessary. Obstacles are blocking signals from the satellites. The quality of signals from the GPS satellites is poor, causing reduced positioning accuracy. Check the GPS signal reception and the position of the GPS antenna if necessary, or continue driving until reception improves. Keep the antenna clean. The position of satellites relative to your vehicle is inadequate. The quality of signals from the GPS satellites is poor, causing reduced positioning accuracy. Continue driving until reception improves. Signals from the GPS satellites have been modified to reduce accuracy. (GPS satellites are operated by the US Department of Defense, and the US government reserves the right to distort positioning data for military reasons. This may lead to greater positioning errors.) The quality of signals from the GPS satellites is poor, causing reduced positioning accuracy. Wait until reception improves. If a vehicle phone or mobile device is used near the GPS antenna, GPS reception may be lost temporarily. The quality of signals from the GPS satellites is poor, causing reduced positioning accuracy. When using a mobile device, keep the antenna of the mobile device away from the GPS antenna. Something is covering the GPS antenna. Do not cover the GPS antenna with spray paint or vehicle wax, because this may block the reception of GPS signals. Snow buildup can also degrade the signals. Adjust the picture quality. (Page 67) The screen is too bright. 72 En Picture quality adjustment of the display is not correct. Appendix Appendix Symptom Cause Action (Reference) The display is very dim. Picture quality adjustment of the display is not correct. Adjust the picture quality. (Page 67) No sounds are produced from an The volume level is low. audio source. The mute is on. The volume level will not rise. A speaker lead is disconnected. Adjust the volume level. Turn the mute off. Check the connection. The person on the other end of the phone call cannot hear the conversation due to an echo. The voice from the person on the other end of the phone call is output from the speakers and then picked up by the microphone again, creating an echo. Use the following methods to reduce the echo: —Lower the volume on the receiver —Have both parties pause slightly before speaking There is no picture. The parking brake cord is not connected. Connect the parking brake cord, and apply the parking brake. The parking brake is not applied. Connect the parking brake cord, and apply the parking brake. The backlight of the LCD panel is turned off. Turn on the backlight. (Page 71) The setting for the rear view camera is incorrect. Select the appropriate setting for the rear view camera. The shift lever was placed in [R] when the rear view camera was not connected. Select the correct polarity setting for “Camera Polarity”. (Page 66) Nothing is displayed and the touch panel keys cannot be used. Problems with the audio screen Cause Action (Reference) iPod cannot be operated. The iPod is frozen. Reconnect the iPod with the suitable cable. An error has occurred. Reconnect the iPod with the suitable cable. No sounds are produced. The volume level will not rise. Cables are not connected correctly. Connect the cables correctly. Music in an iPod cannot be played. A playable music is not selected. Select music using the search function. Appendix Symptom Problems with the phone screen Symptom Cause Action (Reference) Dialing is not possible. Your mobile device is out of range for service. Retry after re-entering the range for service. The connection between the mobile device and this product cannot be established now. Perform the connection process. En 73 Appendix Appendix Problems with AppRadio Mode screen Symptom Cause A black screen is displayed. Press the Home button and display While operating an application, the application was ended on the mobile the Home screen. device side. A message prompting reconnection is displayed. The screen is displayed, but operation does not work at all. Action (Reference) The mobile device OS may be waiting for screen operation. Stop the vehicle in a safe place and check the screen on the mobile device. A mobile device with a security function was connected to this product. Unlock and reconnect the mobile device. The OS version installed in the mobile device is old. Upgrade the OS version. An incompatible mobile device was connected to this product. Connect a compatible mobile device to this product. An error has occurred. When an iPhone is connected, turn the ignition switch off (ACC OFF) and then turn it on again (ACC ON). When an Android device is connected, disconnect the Bluetooth connection from this product and then reconnect it. The radio audio is not output. The radio audio mixing is turned off. Turn on the radio audio mixing. Problems with MirrorLink mode screen Symptom Cause Action (Reference) A message prompting reconnection is displayed. A mobile device with a security function was connected to this product. Unlock and reconnect the mobile device. The OS version installed in the mobile device is old. Upgrade the OS version. An incompatible mobile device was connected to this product. Connect a compatible mobile device to this product. An error has occurred. When an iPhone is connected, turn the ignition switch off (ACC OFF) and then turn it on again (ACC ON). The screen is displayed, but operation does not work at all. When an Android device is connected, disconnect the Bluetooth connection from this product and then reconnect it. The radio audio is not output. 74 En The radio audio mixing is turned off. Turn on the radio audio mixing. Appendix Appendix Problems with the disc screen Cause Action (Reference) CD or DVD playback is not possible. The disc is inserted upside down. Insert the disc with the label upward. The disc is dirty. Clean the disc. The disc is cracked or otherwise damaged. Insert a normal, round disc. The files on the disc are in an irregular file format. Check the file format. The disc format cannot be played back. Replace the disc. The loaded disc is a type this system cannot play. Check what type of disc it is. The parking brake lead is not connected or applied. Connect the parking brake lead correctly, and apply the parking brake. The parking brake interlock is activated. Park your vehicle in a safe place and apply the parking brake. The audio or video skips. This product is not firmly secured. Secure This product firmly. No sounds are produced. The volume level will not rise. Cables are not connected correctly. Connect the cables correctly. The system is performing still, slow motion, or frame-by-frame playback with DVD-Video. There is no sound during still, slow motion, or frame-by-frame playback with DVD-Video. The system is paused or performing, fast reverse or forward during the disc playback. For the media other than music CD (CD-DA) there is no sound on fast reverse or forward. The icon 9 is displayed, and operation is impossible. The operation is not compatible with the video configuration. This operation is not possible. (For example, the DVD playing does not feature that angle, audio system, subtitle language, etc.) The picture stops (pauses) and this product cannot be operated. The reading of data is impossible during disc playback. Stop playback once, then restart. The picture is stretched, with an incorrect aspect ratio. The aspect setting is incorrect for the display. Select the appropriate setting for that image. (Page 58) The screen is covered by a caution message and the video cannot be shown. A parental lock message is displayed The parental lock is on. and DVD playback is not possible. Turn the parental lock off or change the level. (Page 58) The parental lock for DVD playback cannot be canceled. Input the correct code number. (Page 58) The code number is incorrect. Playback is not with the audio lanThe DVD playing does not feature diguage and subtitle language settings alog or subtitles in the language seselected in “Video Setup”. lected in “Video Setup”. Appendix Symptom Switching to a selected language is not possible if the language selected in “Video Setup” is not recorded on the disc. (Page 57) En 75 Appendix Appendix Symptom Cause Action (Reference) The picture is extremely unclear/ dis- The disc features a signal to prohibit Since this product is compatible cotorted and dark during playback. copying. (Some discs may have this.) py guard analog copy protect system, the picture may suffer from horizontal stripes or other imperfections when a disc with that kind of protection signal is viewed on some displays. This does not mean this product is malfunctioning. 76 En Appendix Appendix Positioning technology Positioning by GPS The Global Positioning System (GPS) uses a network of satellites orbiting the Earth. Each of the satellites, which orbit at a height of 68 900 000 feet (21 000 km), continually broadcasts radio signals giving time and position information. This ensures that signals from at least three can be picked up from any open area on the ground’s surface. The accuracy of the GPS information depends on how good the reception is. When the signals are strong and reception is good, GPS can determine latitude, longitude and altitude for accurate positioning in three dimensions. But if signal quality is poor, only two dimensions, latitude and longitude, can be obtained and positioning errors are somewhat greater. • In some driving conditions, signals from GPS satellites may not reach your vehicle. In this case, it is impossible for the system to use GPS positioning. In tunnels or enclosed parking garages When driving among high buildings Under elevated roads or similar structures When driving through a dense forest or tall trees When positioning by GPS is impossible Conditions likely to cause noticeable positioning errors Handling large errors • GPS positioning is disabled if signals cannot be received from more than two GPS satellites. Appendix Positioning errors are kept to a minimum by combining GPS, dead reckoning and map matching. However, in some situations, these functions may not work properly, and the error may become larger. • If a car phone or cellular phone is used near the GPS antenna, GPS reception may be lost temporarily. • Do not cover the GPS antenna with spray paint or car wax, because this may block the reception of GPS signals. Snow buildup can also degrade the signals, so keep the antenna clear. ❐ If a GPS signal has not been received for a long time, your vehicle’s actual position and the current position mark on the map may diverge considerably or may not be updated. In such a case, once GPS reception is restored, accuracy will recover. For various reasons, such as the state of the road you are traveling on and the reception status of the GPS signal, the actual position of your vehicle may differ from the position displayed on the map screen. En 77 Appendix Appendix • If you make a slight turn. • If the road has a series of hairpin bends. • If there is a parallel road. • If there is a loop or similar road configuration. • If there is another road very nearby, such as in the case of an elevated freeway. • If you take a ferry. • If you take a recently opened road that is not on the map. • If you drive in zigzags. 78 En • If you are driving on a long, straight road or a gently curving road. • If you are on a steep mountain road with many height changes. Appendix Appendix • If you enter or exit a multi-storey parking lot or similar structure using a spiral ramp. • If your vehicle is turned on a turntable or similar structure. • When you drive around a traffic circle. • When starting driving immediately after starting the engine. • If trees or other obstacles block the GPS signals for a considerable period. • If you drive very slowly, or in a start-andstop manner, as in a traffic congestion. Appendix • If you join the road after driving around a large parking lot. En 79 Appendix Appendix Handling and care of discs Some basic precautions are necessary when handling your discs. Built-in drive and care • Use only conventional, fully circular discs. Do not use shaped discs. • Do not use cracked, chipped, warped, or otherwise damaged discs as they may damage the built-in drive. • Use 12-cm discs. Do not use 8-cm discs or an adapter for 8-cm discs. • When using discs that can be printed on label surfaces, check the instructions and the warnings of the discs. Depending on the discs, inserting and ejecting may not be possible. Using such discs may result in damage to this equipment. • Do not touch the recorded surface of the discs. • Store discs in their cases when not in use. • Avoid leaving discs in excessively hot environments including under direct sunlight. • Do not attach labels, write on or apply chemicals to the surface of the discs. • Do not attach commercially available labels or other materials to the discs. — The discs may warp making the disc unplayable. — The labels may come off during playback and prevent ejection of the discs, which may result in damage to the equipment. • To clean a disc, wipe it with a soft cloth, moving outward from the center. • Condensation may temporarily impair the built-in drive’s performance. Leave it to adjust to the warmer temperature for about one hour. Also, wipe any damp discs with a soft cloth. • Playback of discs may not be possible because of disc characteristics, disc format, recorded application, playback environment, storage conditions and so on. • Road shocks may interrupt disc playback. • Read the precautions for discs before using them. Ambient conditions for playing a disc • At extremely high temperatures, a temperature cutout protects this product by switching it off automatically. • Despite our careful design of the product, small scratches that do not affect actual operation may appear on the disc surface as a result of mechanical wear, ambient conditions for use or handling of the disc. This is not a sign of the malfunction of this product. Consider it to be normal wear and tear. AVCHD recorded discs This product is not compatible with discs recorded in AVCHD (Advanced Video Codec High Definition) format. Do not insert AVCHD discs. If inserted, the disc may not be ejected. Playing DualDisc • DualDiscs are two-sided discs that have a recordable CD for audio on one side and a recordable DVD for video on the other. 80 En Appendix Appendix • Playback of the DVD side is possible with this product. However, since the CD side of DualDiscs is not physically compatible with the general CD standard, it may not be possible to play the CD side with this product. • Frequent loading and ejecting of a DualDisc may result in scratches to the disc. • Serious scratches can lead to playback problems on this product. In some cases, a DualDisc may become stuck in the discloading slot and will not eject. To prevent this, we recommend you refrain from using DualDisc with this product. • Please refer to the manufacturer for more detailed information about DualDiscs. Detailed information for playable media Compatibility Common notes about disc compatibility CD-R/CD-RW discs • Unfinalized discs cannot be played back. • It may not be possible to playback CD-R/ CD-RW discs recorded on a music CD recorder or a computer because of disc characteristics, scratches or dirt on the disc, or dirt, scratches or condensation on the lens of the built-in drive. • Playback of discs recorded on a computer may not be possible, depending on the recording device, writing software, their settings, and other environmental factors. • Please record with the correct format. (For details, please contact manufacturer of media, recorders, or writing software.) • Titles and other text information recorded on a CD-R/CD-RW disc may not be displayed by this product (in the case of audio data (CD-DA)). • Read the precautions with CD-R/CD-RW discs before using them. DVD-Video discs Appendix • Certain functions of this product may not be available for some discs. • Compatibility with all discs is not guaranteed. • It is not possible to playback DVD-ROM/ DVD-RAM discs. • Playback of discs may become impossible with direct exposure to sunlight, high temperatures, or depending on the storage conditions in the vehicle. • Discs which have been recorded with the Video Recording format (VR mode) cannot be played back. • DVD-R DL (Dual Layer) discs which have been recorded with Layer Jump recording cannot be played back. • For detailed information about recording mode, please contact the manufacturer of media, recorders, or writing software. • DVD-Video discs that have incompatible region numbers cannot be played on this DVD drive. The region number of the player can be found on this product’s chassis. DVD-R/DVD-RW/DVD-R SL (Single Layer)/DVD-R DL (Dual Layer) discs • Unfinalized discs which have been recorded with the Video format (video mode) cannot be played back. En 81 Appendix Appendix Media compatibility chart General Media File system CD-R/-RW • • • • ISO9660 level 1 ISO9660 level 2 Romeo, Joliet UDF 1.02/1.50/ 2.00/2.01/2.50 Maximum number of folders 700 Maximum number of files 999 Playable file types MP3, WMA, AAC DVD-R/-R SL/-R DL/DVD-RW • • • • ISO9660 level 1 ISO9660 level 2 Romeo, Joliet UDF 1.02/1.50/ 2.00/2.01/2.50 3 500 Note: Maximum playback time of audio file stored in the disc: 60 h MP3 compatibility Media CD-R/-RW File extension .mp3 DVD-R/-R SL/-R DL/DVD-RW Bit rate 8 kbps to 320 kbps (CBR), VBR Sampling frequency 8 kHz to 48 kHz (32 kHz, 44.1 kHz, 48 kHz for emphasis) ID3 tag ID3 tag Ver. 1.0, 1.1, 2.2, 2.3 Notes: • Ver. 2.x of ID3 tag is prioritized when both Ver. 1.x and Ver. 2.x exist. • This product is not compatible with the following: MP3i (MP3 interactive), mp3 PRO, m3u playlist WMA compatibility Media CD-R/-RW File extension .wma Bit rate 5 kbps to 320 kbps (CBR), VBR Sampling frequency 8 kHz to 48 kHz DVD-R/-R SL/-R DL/DVD-RW Note: This product is not compatible with the following: Windows Media™ Audio 9 Professional, Lossless, Voice AAC compatibility Media CD-R/-RW File extension .m4a Bit rate 8 kbps to 320 kbps (CBR), VBR Sampling frequency 8 kHz to 44.1 kHz Note: This product plays back AAC files encoded by iTunes. 82 En DVD-R/-R SL/-R DL/DVD-RW Appendix Appendix Common notes Example of a hierarchy • This product may not operate correctly, depending on the application used to encode WMA files. • Depending on the version of Windows Media™ Player used to encode WMA files, album names and other text information may not be correctly displayed. • There may be a slight delay when starting playback of audio files encoded with image data. • This product is not compatible with packet write data transfer. • This product can recognize up to 32 characters, beginning with the first character, including extension for the file and folder name. Depending on the display area, this product may try to display them with a reduced font size. However, the maximum number of the characters that you can display varies according to the width of each character, and of the display area. • Folder selection sequence or other operations may be altered, depending on the encoding or writing software. • Regardless of the length of blank section between the songs of original recording, compressed audio discs play with a short pause between songs. The following figure is an example of the tier structure in the disc. The numbers in the figure indicate the order in which folder numbers are assigned and the order to be played back. : Folder : File 1 2 3 4 5 6 Level 1 Level 2 Level 3 Level 4 Notes En Appendix • This product assigns folder numbers. The user cannot assign folder numbers. • If there is a folder that does not contain any playable file, the folder itself will display in the folder list but you cannot check any files in the folder. (A blank list will appear.) Also, these folders will be skipped without displaying the folder number. 83 Appendix Appendix Language code chart for DVDs 84 Two-letter code, input code Language Two-letter code, input code Language aa, 0101 ab, 0102 af, 0106 am, 0113 ar, 0118 as, 0119 ay, 0125 az, 0126 ba, 0201 be, 0205 bg, 0207 bh, 0208 bi, 0209 bn, 0214 bo, 0215 br, 0218 ca, 0301 co, 0315 cs, 0319 cy, 0325 da, 0401 de, 0405 dz, 0426 el, 0512 en, 0514 eo, 0515 es, 0519 et, 0520 eu, 0521 fa, 0601 fi, 0609 fj, 0610 fo, 0615 fr, 0618 fy, 0625 ga, 0701 gd, 0704 gl, 0712 gn, 0714 gu, 0721 ha, 0801 hi, 0809 hr, 0818 hu, 0821 hy, 0825 ia, 0901 Afar Abkhazian Afrikaans Amharic Arabic Assamese Aymara Azerbaijani Bashkir Belarusian Bulgarian Bihari Bislama Bengali Tibetan Breton Catalan Corsican Czech Welsh Danish German Dzongkha Greek English Esperanto Spanish Estonian Basque Persian Finnish Fijian Faroese French Western Frisian Irish Scot.Gaelic Galician Guarani Gujarati Hausa Hindi Croatian Hungarian Armenian Interlingua ie, 0905 ik, 0911 in, 0914 is, 0919 it, 0920 iw, 0923 ja, 1001 ji, 1009 jw, 1023 ka, 1101 kk, 1111 kl, 1112 km, 1113 kn, 1114 ko, 1115 ks, 1119 ku, 1121 ky, 1125 la, 1201 ln, 1214 lo, 1215 lt, 1220 lv, 1222 mg, 1307 mi, 1309 mk, 1311 ml, 1312 mn, 1314 mo, 1315 mr, 1318 ms, 1319 mt, 1320 my, 1325 na, 1401 ne, 1405 nl, 1412 no, 1415 oc, 1503 om, 1513 or, 1518 pa, 1601 pl, 1612 ps, 1619 pt, 1620 qu, 1721 rm, 1813 Interlingue Inupiaq Indonesian Icelandic Italian Hebrew Japanese Yiddish Javanese Georgian Kazakh Greenlandic Central Khmer Kannada Korean Kashmiri Kurdish Kirghiz Latin Lingala Lao Lithuanian Latvian Malagasy Maori Macedonian Malayalam Mongolian Moldavian Marathi Malay Maltese Burmese Nauru Nepali Dutch Norwegian Occitan Oromo Oriya Panjabi Polish Pashto Portuguese Quechua Romansh En Two-letter code, input code Language rn, 1814 ro, 1815 ru, 1821 rw, 1823 sa, 1901 sd, 1904 sg, 1907 sh, 1908 si, 1909 sk, 1911 sl, 1912 sm, 1913 sn, 1914 so, 1915 sq, 1917 sr, 1918 ss, 1919 st, 1920 su, 1921 sv, 1922 sw, 1923 ta, 2001 te, 2005 tg, 2007 th, 2008 ti, 2009 tk, 2011 tl, 2012 tn, 2014 to, 2015 tr, 2018 ts, 2019 tt, 2020 tw, 2023 uk, 2111 ur, 2118 uz, 2126 vi, 2209 vo, 2215 wo, 2315 xh, 2408 yo, 2515 zh, 2608 zu, 2621 Rundi Romanian Russian Kinyarwanda Sanskrit Sindhi Sango Serbo-Croat Sinhala Slovak Slovenian Samoan Shona Somali Albanian Serbian Swati Sotho Sundanese Swedish Swahili Tamil Telugu Tajik Thai Tigrinya Turkmen Tagalog Tswana Tonga Turkish Tsonga Tatar Twi Ukrainian Urdu Uzbek Vietnamese Volapük Wolof Xhosa Yoruba Chinese Zulu Appendix Appendix Page Setting list Bluetooth Memory Clear 65 Bluetooth Software Update 66 Bluetooth Version Information 66 Camera Polarity 66 Video Signal Setting 67 Picture Adjustment 67 57 Clock Mode 68 Audio Language 57 Background 68 Menu Language 57 System Reset 68 Multi Angle 58 Connection Status 69 TV Aspect 58 App launch assist 69 Parental 58 Firmware Version Information 70 DVD Auto Play 59 Firmware Update 70 The customizable settings of this product are listed below. For details about changing each setting, refer to the page for that item. Video Setup settings Page Subtitle Language Other settings Audio settings Page Page Favorites 70 Graphic EQ 60 Display OFF 71 Loudness 61 Subwoofer 61 Bass Booster 62 High Pass Filter 62 Source Level Adjuster 62 Appendix 59 Fader/Balance System settings Page App Connection Settings 63 Rear Speaker 63 Preout 64 System Language 64 Keyboard 65 Ever Scroll 65 En 85 PIONEER CORPORATION 1-1, Shin-ogura, Saiwai-ku, Kawasaki-shi, Kanagawa 212-0031, JAPAN PIONEER ELECTRONICS (USA) INC. P.O. Box 1540, Long Beach, California 90801-1540, U.S.A. TEL: (800) 421-1404 PIONEER ELECTRONICS OF CANADA, INC. 340 Ferrier Street, Unit 2, Markham, Ontario L3R 2Z5, Canada TEL: 1-877-283-5901 TEL: 905-479-4411 PIONEER EUROPE NV Haven 1087, Keetberglaan 1, B-9120 Melsele, Belgium/Belgique TEL: (0) 3/570.05.11 PIONEER ELECTRONICS ASIACENTRE PTE. LTD. 253 Alexandra Road, #04-01, Singapore 159936 TEL: 65-6472-7555 PIONEER ELECTRONICS AUSTRALIA PTY. LTD. 5 Arco Lane, Heatherton, Victoria, 3202, Australia TEL: (03) 9586-6300 PIONEER ELECTRONICS DE MEXICO, S.A. de C.V. Blvd.Manuel Avila Camacho 138 10 piso Col.Lomas de Chapultepec, Mexico, D.F. 11000 TEL: 55-9178-4270 先鋒股份有限公司 台北市內湖區瑞光路 407 號 8 樓 電話 :886-(0)2-2657-3588 先鋒電子(香港)有限公司 香港九龍長沙灣道 909 號 5 樓 電話 :852-2848-6488 © 2013 PIONEER CORPORATION. All rights reserved. <KMZAX> <13E00000> <CWW6491-A>UC