1
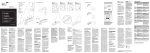
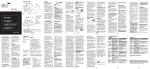
Operation Manual AM 5200 (-A) E5200EN3 v 1.0 May 2013
Aquamatic 5200 (-A)
Operation Manual
1 (36)
Operation Manual AM 5200 (-A) E5200EN3 v 1.1 May 2013
2 (36)
Operation Manual AM 5200 (-A) E5200EN3 v 1.1 May 2013
1 Safety
1.1 Warning
Ensure that the transport locks are disengaged before switching the
instrument on. Follow the instructions in Section 5.1.
To prevent operator injury or damage to the instrument, verify that the
line voltage is correct before connecting the mains power. This
information is located on the name plate of the instrument. Also, ensure
the main power cable is connected to a power outlet with protective earth
ground.
Apart from the measurement cell, accessed through removal of the top
cover, there are no user serviceable parts inside the instrument. Perten
Instruments takes no responsibility for injury or damages caused by
personnel not specially trained for AM 5200 (-A) service.
In the event of a power cable connector failure, the replacement must be
made only by qualified personnel.
1.2 Caution
The AM 5200 (-A) must only be used for analysis of unground grain,
oilseed, beans, pulses and similar product.
The Transport Locks (see section 5.1.2) are located near sharp edges.
Wear gloves and use caution when removing and setting Transport Locks.
3 (36)
Operation Manual AM 5200 (-A) E5200EN3 v 1.1 May 2013
2
General Description
Introduction
The AM 5200 (-A) is a grain analyzer, designed to determine moisture, temperature and specific
weight. The instrument measures the dielectric constant of grain at 150 MHz. The instrument
requires no sample preparation other than cleaning or the removal of large impurities.
Applications
The AM 5200 (-A) is intended for the measurement of many types of grains and oilseeds. For a
complete list of grain and seed types for which the instrument is approved for use in your location,
please consult the current Approved Uses information at www.perten.com/am5200usda. This
listing includes the range of moisture content and temperature for each type of sample to be
measured.
Method
Typically, a 700 ml sample is poured into the hopper. The instrument automatically starts
measuring the sample when a sufficient amount of sample has been received.
Features
The instrument includes a large color touch-screen for operation and presentation of results. The
internal scales are used for calculating specific weight (density) of the sample. Specific weight is
commonly referred to as Test Weight, or Hectoliter Weight.
Calibration
Through the use of the specific weight measurements and the UGMA (Unified Grain Moisture
Algorithm, developed by the United States Department of Agriculture) only one calibration is
required for all products, although with individual settings for bias, slope and other product
specific factors.
Optional Equipment (Data Entry)
A USB barcode scanner or USB keyboard may be utilized for data entry.
Optional Equipment (Flow Through Mode)
The flow through catch drawer may be purchased to allow grain to flow through and into a larger
user supplied container.
Optional Equipment (Printer)
A serial ticket printer such as the
* Citizen CD-S500A-RSU(Matrix printer) along with a FTDI chipset USB to Serial adapter cable is
supported by the AM 5200/5200-A.
* Star TSP 654 RF (Thermal printer) along with a FTDI chipset USB to Serial adapter cable is
supported by the AM 5200/5200-A.
Optional Equipment (Data transfer)
USB memory stick
Note
Pictures in this manual may change depending on UI Version. Current pictures based on UI
20130130.04.
4 (36)
Operation Manual AM 5200 (-A) E5200EN3 v 1.1 May 2013
3
1
3
4
5
6
7
8
9
Table of Contents
Safety…………………………………………………………………………………………………. 3
1.1
Warning……………………………………………………………………………………… 3
1.2
Caution………………………………………………………………………………………. 3
2 General Description…………………………………………………………………………………. 4
Table of Contents……………………………………………………………………………………. 5
Liability………………………………………………………………………………………………... 6
4.1
Declaration of Conformity (CE)…………………………………………………………… 7
Setting up the Instrument…………………………………………………………………………… 8
5.1
Unpacking and Installation………………………………………………………………… 8
5.2
Configuration and Adjustment…………………………………………………………… 10
User’s Quick Guide – Analyzing Samples………………………………………………………. 11
User’s Reference Guide………………………………………………………………………… 12
7.1
Instrument Overview……………………………………………………………………… 12
7.2
Operating the AM 5200 (-A)……………………………………………………………... 13
7.3
Analyzing Samples……………………………………………………………………….. 14
7.4
Settings and Features……………………………………………………………………. 16
7.5
Error messages…………………………………………………………………………… 29
Maintenance……………………………………………………………………………………… 33
8.1
Cleaning sample sensors………………………………………………………………... 33
8.2
Cleaning the RF cell……………………………………………………………………… 33
Technical Specification……………………………………………………………………………. 34
9.1
Technical data…………………………………………………………………………….. 34
9.2
Environmental operating conditions…………………………………………………….. 35
This operation manual has Perten Instruments’ part number E5200EN3.
5 (36)
Operation Manual AM 5200 (-A) E5200EN3 v 1.1 May 2013
4
Liability
The AM 5200 (-A) is designed to measure moisture in grains and oilseeds. The correctness of the
results provided by the instrument is influenced by factors that Perten Instruments cannot monitor
nor take responsibility for.
It is the responsibility of the operator to ensure that the results are correct, for example by using
daily check samples to monitor the instrument and to perform periodic checks on the scale as
provided in the instructions. Perten Instruments or its distributors can never be responsible for any
damages caused by incorrect results by this product.
6 (36)
Operation Manual AM 5200 (-A) E5200EN3 v 1.1 May 2013
4.1
Declaration of Conformity (CE)
7 (36)
Operation Manual AM 5200 (-A) E5200EN3 v 1.0 May 2013
5
5.1
Setting up the Instrument
Unpacking and Installation
Notice how the instrument was packed upon arrival. If the instrument is to be transported, return
in original packaging. It is important that all packing materials are saved. Be sure to remove
the transportation locks on the load cell before use. Lift the instrument from the box using the
handles located on both sides of the foam packing material. Remove all tape and protective covers.
5.1.1
Box contents
This delivery contains:
The AM 5200 (-A)
Mains Power Cable
Operation Manual for the AM 5200 (-A)
5.1.2
Removing transport locks
There are two built-in transport locks protecting the load cell. These must to be lowered to the
“operate” position before switching the instrument on. The instrument can be carried carefully
without using the transport locks. For shipping or transportation on carts or similar, return the
transport locks to the lock position
To disengage the transport locks, first put the instrument on its back and remove the catch drawer.
The red locks are indicated by the arrows in the picture on the following page.
8 (36)
Operation Manual AM 5200 (-A) E5200EN3 v 1.1 May 2013
The Transport Locks (see section 5.1.2) are located near sharp edges. Wear gloves and use
caution when removing and setting Transport Locks.
1. Transport Lock 1 is secured by a magnetic catch. To unlock, tilt the red plate to release the
locking pin and slide the red plate to the lower position. Ensure the locking pin enters the top
hole for unlocked position.
The figures below show Transport Lock 1 in the Locked and Unlocked positions.
Transport Lock 1 in Locked position. Note the
position of the locking pin in the bottom hole.
9 (36)
Transport Lock 1 in Unlocked position. Note
the position of the locking pin the top hole.
Operation Manual AM 5200 (-A) E5200EN3 v 1.1 May 2013
2. Transport Lock 2 is secured by three thumbscrews. Remove thumbscrews A and B and
loosen thumbscrew C. Then slide lock bracket to the Unlock position as displayed in the
graphic below. Reinstall thumbscrew A in its original position and B in the unlocked
position. Ensure all thumbscrews are snug.
The two images below show Transport Lock 2 in Locked and Unlocked positions.
C
A
B
A
C
Transport lock 2
Transport lock 2
B
Before moving or shipping the AM 5200 (-A), please ensure both Transportation Locks are
properly secured. To lock, simply reverse the unlocking procedure.
5.1.3
Placement of the AM 5200 (-A)
Place the AM 5200 (-A) on a vibration-free, level surface with less than 5% slope.
The AM 5200 (-A) should not be placed near radio transmitters such as mobile/cellular phones.
AM 5200 (-A) leveling procedures
For optimal performance, this procedure should be followed each time the instrument is moved.
Ensure all feet are free to rotate prior to adjustment.
Remove the top cover to gain access to the level indicator mounted on the top flat plate, located
near the front and center of the instrument. Remove the top cover with a slight pull upward or
push downward. Do not pull or push on the finger guards of the funnel assembly as damage may occur.
Adjust the feet as necessary to ensure the instrument is level and each of the feet can no longer be
turned. Check the stability by attempting to push the instrument front to back and side to side
while watching the level. The bubble should remain steady. Once the feet are in the desired
positions, lock the lock nut (located on the screw above the rubber foot) in place by using a
wrench to tighten the nut securely to the bottom of the instrument.
5.2
Configuration and Adjustment
The AM 5200 (-A) is supplied with the Unified Grain Moisture Algorithm developed by the
United States Department of Agriculture and provides unparalleled accuracy.
The instrument has been thoroughly adjusted at the factory, but local reference methods for
moisture and specific weight may differ from the methods the AM 5200 (-A) is referenced against.
Perten Instruments recommends the user verify adjustments by analyzing a few samples of each
product using both the reference method and the AM 5200 (-A), comparing the results.
It is recommended that the user select products to be displayed in the “Products list”. This is
explained in Section 7.4.3.4. To set analysis options such as the use of sample ID. Please refer to
Section 7.4.1.21 for detailed information.
To change settings for date, time, units for temperature, and specific weight please refer to Section
7.4.1.1.
10 (36)
Quick Guide
6
Operation Manual AM 5200 (-A) E5200EN3 v 1.0 May 2013
User’s Quick Guide – Analyzing Samples
See Section 7.33 for additional information.
Ste Instruction
p
1
Select product by pressing the corresponding
button. Use arrow keys to scroll down and up the list.
2
Enter Sample ID (only if an ID is desired).
Press the input field and the keyboard will be activated.
Enter sample ID and press “Enter”. The user can also
enter other sample information into the “Info” field by
pressing the input field.
3
Pour sample into top funnel.
Stop pouring when
the grain level reaches
the bottom of the
metal funnel.
The AM 5200 (-A) automatically starts the analysis.
4
The result is calculated and displayed.
5
Empty the catch drawer and replace. To analyze the
next sample of the same sample type, just pour the
sample into the funnel.
6
To analyze a different sample type, press “Cancel” from
the Analyze screen or “Products” from the Results
screen and follow instructions in step 1 above.
11 (36)
Illustration/Picture
Operation Manual AM 5200 (-A) E5200EN3 v 1.1 May 2013
7
User’s Reference Guide
7.1
Instrument Overview
Funnel
Touch screen
Catch drawer
Mains switch, USB, and Ethernet
The power switch is located on the rear side, beside the mains
power inlet.
Two USB (ψ) ports are located next to the power switch. The AM
5200 (-A) is a USB master, and can be connected to memory sticks
and printer, but not to a computer (with the exception of
recording serial or standard output). Note that only specific
printer models can be used with the AM 5200 (-A).
The Ethernet port is designed for receiving future updates to
firmware or calibrations.
12 (36)
Operation Manual AM 5200 (-A) E5200EN3 v 1.1 May 2013
7.2
Operating the AM 5200 (-A)
The AM 5200 (-A) is operated through a color touch screen. As a resistance-type touch screen, it is
intended to be operated by touch, with the user touching screen elements by hand. It is possible to
use when wearing gloves or with a stylus pen. Multi-touch is not supported. Only one key can be
pressed at a time.
The picture below shows a typical screen in the AM 5200 (-A). The grey field at the top of the
screen is the Menu name field, which is the currently selected menu. The user will also find date
and time at the top right of this field.
To select one of the blue buttons, simply touch it. The user will hear a clicking sound when
pressed. The white fields display the current setting, and the text to the left explains the setting. By
pressing the white fields, the user can change the setting. When the white field is pressed, the
content of the field will change. To save changes, simply press “Save” at the bottom right. To scroll
through the list, press the up or down arrow button.
In other screens, there may be white fields intended for text entry. When pressed, an on-screen
keyboard is displayed.
13 (36)
Operation Manual AM 5200 (-A) E5200EN3 v 1.1 May 2013
7.3
Analyzing Samples
7.3.1
Preparations
This Section describes necessary preparations required to begin analysis.
Step Action
Description
1
Switch the instrument
on.
The AM 5200 (-A)
automatically starts a self-test
when the instrument is
switched on. The instrument is
off when the bottom of the
button is pressed and on when
the top is pressed.
2
Empty and insert catch
drawer.
The catch drawer must be
emptied and inserted before
analysis can begin. A reminder
is displayed when the
instrument has completed the
self-test.
3
Prepare the sample.
Approximately 700 ml of
sample is required.
14 (36)
Illustration/Picture
Operation Manual AM 5200 (-A) E5200EN3 v 1.1 May 2013
Begin analysis
The following Section is a step-by-step instruction of how to run sample analysis.
Step
1
Action
Description
Illustration/Picture
Select
product.
Select the product by pressing the
corresponding button in the list. Use the
arrow keys to scroll up and down in the
list to display more products.
Enter sample
ID if desired
The instrument can be set to store a
sample ID to track analyzed samples. If
this feature is used, the instrument will
ask for a sample ID. Press the white field,
and an on-screen keyboard will be
displayed. Should a mistake be made
necessitating the user to return to the
Products menu, press “Cancel”. Should
the user need to empty the sample into
the catch drawer, press “Abort”.
Pour the
sample into
the funnel.
The analysis starts immediately.
Read the
result.
The result is then calculated and
displayed.
Empty the
catch drawer.
Empty the catch drawer and put it back
again. Keeping the catch drawer in place
can prevent rodents from entering the
unit and causing damage.
2
3
4
5
15 (36)
[Type a quote from the
document or the summary of
an interesting point. You can
position the text box
anywhere in the document.
Use the Text Box Tools tab
to change the formatting of
the pull quote text box.]
[Type a quote from the
document or the summary of
an interesting point. You can
position the text box
anywhere in the document.
Use the Text Box Tools tab
to change the formatting of
the pull quote text box.]
[Type a quote from the
document or the summary of
an interesting point. You can
position the text box
anywhere in the document.
Use the Text Box Tools tab
to change the formatting of
the pull quote text box.]
Operation Manual AM 5200 (-A) E5200EN3 v 1.1 May 2013
6
Run the next
sample.
7.4
The instrument now assumes that it will
analyze another sample of the same
product type. If this is the case, simply
continue from step 4 above. If a different
product is to be analyzed, press “Cancel”
to return to the Product list and proceed
from step 1.
Settings and Features
To access settings and features, press the “Menu” key. The following menu items will be seen:
Item
Description
General Settings
Local settings, analysis options and basic maintenance features.
Profiles
Contains a list of the calibrations installed in the instrument.
Products
Select which products appear in the “Products” menu and change settings for
the respective products.
Reports
Access all analysis results.
Import/Export
Import and export data, results, and settings.
Logbook
Shows all changes and warnings that have appeared in the instrument.
System info
Lists software version and other system information.
16 (36)
Operation Manual AM 5200 (-A) E5200EN3 v 1.1 May 2013
7.4.1
General settings
Item
Description
Local Settings
Language, date, time, etc….
Change Access
Right
Log in as Administrator to access configuration and adjustment features.
Analysis Options
Set preferences for analysis and how results are displayed.
Maintenance
Adjust the built-in balance, clean, and access additional maintenance
functions.
7.4.1.1
Local settings
In “Local settings”, the user can view basic instrument configuration. The settings can be changed
when logged in as an Administrator. Please read Section 7.4.1.2 for detailed information on
changing access rights. For all settings, press the white field to toggle or select options.
Setting
Description
Date Format
Select to show dates as yyyy-mm-dd or mm/dd/yyyy.
Time Format
Use 24h or 12h time display.
System Mode
Select Normal or Flow through operating modes. Normal mode requires the
drawer to be emptied after each test. Flow though mode allows samples to be
run rapidly, with the grain flowing through an optional drawer and collecting
in a larger receptacle placed underneath the instrument.
17 (36)
Operation Manual AM 5200 (-A) E5200EN3 v 1.1 May 2013
Sampling Mode
Select automatic or manual. Automatic starts a test when the cell is filled.
Manual waits for a button press to run a sample.
Language
Select the language to use when operating the instrument.
Test Weight
Unit
Select Test weight units. Test weight (also called Specific Weight or Hectoliter
Weight) can be calculated and displayed as lb/bu, kg/hl, g/0.5, g/L.
Temp Unit
Select display sample temperature in C or F.
Output Mode
Print – Compatible with Citizen CD-S500 Impact printer or equivalent.
Output is NTEP Compliant.
Perten – Output record compatible with most grain receiving software.
Control - Interfaces with special control and recording programs that can select
product type and initiate a sample reading (in flow through mode), then accept
results from the unit.
Multi - with available multi-port adapter, simultaneously provides all output
formats on four separate connections (ports): Printer, Perten, Custom, and
Control.
Volume
0 to 5 (Low to High)
Baud Rate
Baud Rate Selections for printing purposes (2400, 4800, 9600, 19200, 38400,
57600, 115,200). The printer provided by Perten Instruments requires a baud
rate of 19200.
Change Log
Print
Sends the record of changes made to settings to printer.
Show Products
Allows the user to change the mode of default products shows. Toggle
between Full and Favorite.
Diagnostic Log
Allows the user to Enable or Disable the Diagnostic Log. (Administrator only).
Date
Set the current month, day, and year. This can be done by selecting “Date” and
the correct day on the calendar. Selecting the Month and Year at the top of the
calendar allows a month to be chosen and the arrows allow scrolling to choose
the correct year.
18 (36)
Operation Manual AM 5200 (-A) E5200EN3 v 1.1 May 2013
Time
7.4.1.2
Set the current hour, minute, and am/pm. This can be done by selecting Time
and the setting to be changed and entering the number into the keypad on the
display.
Change access right
Upon initialization, the access right is set to “Default”, meaning no adjustments or configuration
changes are allowed.
To log in as “Administrator”, allowing changes, enter “Change Access Right” in the “General
Settings” menu, and then press the top field, displaying “Access Right: Default”. The user will see
the keyboard and can enter the password: 142857. Press Enter and Access Right will be changed to
“Administrator”. The user will also see a small icon of an ID Card in the middle of the field at the
top of the display.
To log out and return to a default user, access the feature again, and leave the field blank when the
keyboard appears and press “Enter”, or click “Login” at the bottom right of the screen. A Message
will confirm the Default Access Right. Any incorrect login will return the use to Default Access
Right.
19 (36)
Operation Manual AM 5200 (-A) E5200EN3 v 1.1 May 2013
7.4.1.3
Analysis Options
In “Analysis Options”, default analysis options can be changed. These settings will be used by
individual products whenever “Default” is selected. It is possible to override these default settings
on individual products.
Setting
Description
Decimals
Select whether to display moisture results with one or two decimals.
ID required
“No” means that the sample ID feature is disabled and it is not possible to enter
ID when analyzing a sample.
“Optional” means that it is possible, but sample ID is not required.
“Required” means that the instrument will not display any results unless a
sample ID is entered.
“Auto-increment” means that the instrument will automatically increment the
sample ID, from “1” to “2” and so on.
“Show last” will return the previous sample ID, and is useful if you analyze
many samples with similar IDs.
Printout text
Enter the text to be displayed at the top of each printout. Useful for displaying
the company name on the printout.
Auto print
“Yes” – results will always be printed after each analysis.
“No” – no printout will be made. It is still possible to create a printout
manually after an analysis has been performed.
What to Print
Moisture results are always printed. The user can select whether to include
specific weight and temperature. (Moisture, Moist/TW, Moist/TW/Temp,
Moist/Temp)
20 (36)
Operation Manual AM 5200 (-A) E5200EN3 v 1.1 May 2013
7.4.1.4
Maintenance
In “Maintenance” the user can access the available maintenance tasks. These features should only
be accessed in the event of technical difficulties and as directed by technical support. Detailed user
maintenance procedures are located in section 8.
Setting
Description
Check scale
This feature is to check and adjust the built-in balance used for moisture and
Test Weight/Hectoliter Weight determination. Please contact technical
support for more information and assistance.
Grain Weight
Check
Displays the weight factor, sample temperature and total weight for a sample.
Stability Check
Allows the user to access more technical information if required during
technical support. (Administrator only). Requires power cycle.
System recovery
Select [Set a restore point] to save the system configurations and data to the SD
card. (Administrator only)
Control values
Shows the values of the various measurements for the empty cell.
Clean
Allows opening of funnel for access to the inside of the cell for cleaning.
Change Pass
Code
Allows the Administrator to change the Admin Pass Code. Enter the current
Admin Pass Code (Default is 142857) in the “Current Pass” field. Enter the
new desired pass code in the “New Pass” and “Confirmation field. If the
revised Admin Pass Code is lost, the user can call Perten for an access code to
reset the Admin Pass Code to the Default setting.
Test Serial Ports
Enables diagnostics of the serial ports; Printer, Perten, and Custom.
21 (36)
Operation Manual AM 5200 (-A) E5200EN3 v 1.1 May 2013
7.4.2
Profile
In “Profile”, the user can view calibration settings for profiles stored by the instrument. Selecting
“Profile” will display a list of all available profiles. Select a profile to view by pressing its button
and the Profile name and version number will be displayed.
7.4.3
Products
The “Products” menu allows the user to change the settings for existing products, add and delete
products, and choose which products appear in the “Products list” when analyzing samples.
Menu item
Description
Product Settings
In “Product Settings”, you can change the settings for products. When you
press this button, you will see a list of existing products.
Add Product
Use this button to create a new product (only visible when logged in as
Administrator).
Delete Product
Use this button to delete one of the existing products (only visible when
logged in as Administrator).
Organize
Products
Select products to display, and in which order (only visible when logged in as
Administrator).
Set Default
Order
This sets the product list back to factory settings (only visible when logged in
as Administrator).
22 (36)
Operation Manual AM 5200 (-A) E5200EN3 v 1.1 May 2013
7.4.3.1
Product Settings
In “Product Settings”, the user can change settings for existing products. There are restrictions on
editing officially approved products. These products will display a padlock symbol on the product
button.
Setting
Description
Name
The name displayed in the Products List of the analysis start screen, and the
results database.
Profile
The profile contains the specific calibration used for the product.
Sample ID
Choose whether to use Default setting (as set in “Analysis options” under
“General settings”) or a specific setting for this product.
Abbreviation
Shows the official abbreviation for the product.
Moisture Bias
Bias is the offset used to adjust to the reference method.
Moisture Slope
Slope is the skew used to adjust to the reference method.
Moisture
Locked
Can be toggled to allow/not allow bias/slope changes for moisture.
TW Active
“Yes” means that Specific Weight (TW/HLW) is calculated when analyzing
this product. “No” means it is not. To set it to “Yes”, it is necessary to adjust
bias. Some products are bias adjusted from factory. These are the only products
with Specific Weight activated from factory.
TW Bias
Bias is the offset used to adjust to the reference method.
TW Slope
Slope is the skew used to adjust to the reference method.
TW Locked
Can be toggled to allow/not allow bias/slope changes for test weight.
Auto Print
Choose the Default setting (as set in “Analysis options” under “General
settings”) or a specific setting for this product.
23 (36)
Operation Manual AM 5200 (-A) E5200EN3 v 1.1 May 2013
What to Print
Select to print only moisture results or Specific Weight and/or temperature.
Requires a connected printer.
Average
Can be set to 1, 2 or 3 to determine whether the displayed values are the
average of 1, 2 or 3 sample measurements, respectively.
7.4.3.2
Add Product
“Add Product” allows the user to create a new product, either by copying settings from an existing
product, or by creating completely new settings. The settings to be configured are listed in the
table 7.3.3.1.
7.4.3.3
Delete Product
“Delete Product” allows the user to delete a product and its settings from the instrument. If
deleted, the product will no longer be available to the instrument. The Profile used for this product
is still available in the system.
7.4.3.4
Organize Products
In “Organize Products”, the user can select what installed products should be displayed in the
“Products” menu and in which order they appear.
Product names which appear with a white button are visible in menus, and product names that are
displayed in a grey button are not visible in menus. To switch between the modes, simply touch
the product name.
7.4.3.5
Set Favorite List
The instrument allows the user to set a list of favorite products to be displayed. To set favorites,
change access rights to “Admin” as detailed in Section 7.4.1.2. To select a product as a favorite,
touch the product name. Product names which appear with a white button are visible in the
favorites list, and product names that are displayed in a grey button are not visible in the favorites
list.
24 (36)
Operation Manual AM 5200 (-A) E5200EN3 v 1.1 May 2013
Press the “Save” key at the bottom right to save changes.
Favorites selected are displayed under the “Select Product” screen, by touching the “Favorite”
button. If the user needs to display the full list of products, touch the “Full” button.
7.4.3.6
Set Default Order
This returns the product list to the factory settings.
7.4.4
Reports
The reports feature contains a database of all analysis results. The first screen displays three fields:
“Product Name”, “From” and “To”. Pressing “Done” at this screen will produce a complete list of
all analyses, starting with the most recent at the top. The user can also choose to filter by product
and/or date of analysis, by pressing any of the three fields to make a selection.
If “From” or “To” are selected, a calendar will be displayed. Use arrow keys to select a previous
month or a later month. Press the month and year at the top to display a list of all months in the
year. In the month screen, press the year to list additional years.
By pressing “Product Name” and selecting “Wheat”, a list of all analyses of wheat samples
will be displayed.
By pressing “From” and selecting October 3rd 2012, a list of all analyses made on October
3rd 2012 and later will be displayed.
By pressing “To” and selecting November 15th 2012, a list of all analyses made until that
date will be displayed.
For example, it is possible to combine two or all three selection criteria so that only wheat
samples analyzed between October 3rd and November 15th 2012 will be displayed.
25 (36)
Operation Manual AM 5200 (-A) E5200EN3 v 1.1 May 2013
In list view, individual measurements can be displayed in full screen view by touching that row. A
result screen of only that analysis will open. Touch “Back” to return to list view.
7.4.5
Import/Export
The import and export function allows the user to import updates and product settings, as well as
export results and data. A USB memory stick is used for data transfer. Simply insert a memory
stick into the USB port at the back of the instrument before attempting to import or export data.
7.4.5.1
Import
If the user has received a file from Perten Instruments, or your local distributor, for update of the
AM 5200 (-A), place that file on a memory stick as directed and insert the memory stick into the
USB port at the back of the instrument. Then navigate to the “Import/Export” menu and select
“Import”.
7.4.5.2
Export Predictions
This feature is used to export predicted values for moisture, specific weight, and temperature to a
file which can be opened in a spreadsheet program. Insert a memory stick into one of the USB
ports at the back of the instrument before selecting export. A folder will be created on the memory
stick containing a data file. The file can be opened in MS Excel or a similar program.
7.4.5.3
Export Raw Data
In some situations, a technical support representative may ask for raw data from the instrument.
Use this feature to export raw data to a file. Before pressing the key, insert a memory stick into
one of the USB ports at the back of the instrument. Press the key and a folder named “Raw data”
will be created on the memory stick, and a file named “X.tab” will be created within the folder.
7.4.5.4
Export Perten and Custom Data
This feature exports data in spreadsheets formatted in the form of the output formats “Serial” and
“Standard data”.
26 (36)
Operation Manual AM 5200 (-A) E5200EN3 v 1.1 May 2013
7.4.5.5
Update Via Internet
This feature allows the user to update the instrument through the Ethernet port. Direct internet
or cellular router (wireless data connection) options are available. Any updates are initiated by the
user - not by remote site – preserving security of calibrations and data records. Internet connection
required.
7.4.6
Logbook
The logbook shows events/warnings and changes.
Events & Warnings
All types of error messages are listed, both hardware failures and
errors during analyses such as results outside analytical range for
example.
Change Log
All kinds of changes done to settings in the instrument are listed,
such as a bias adjustment or a software update.
7.4.7
System info
System info lists information about the instrument, current software versions etc.
Listing
Description
Manufacturer
Perten Instruments AB is the manufacturer of the AM 5200 (-A).
Serial number
Displays the serial number of your instrument.
UI software version
Displays the version of the user interface software.
Controller software
version
Displays the version of the controller software.
27 (36)
Operation Manual AM 5200 (-A) E5200EN3 v 1.1 May 2013
Language Version
Displays the version of the Language software.
Kernel Version
Displays the version of Kernel being used.
Calibration Version
Displays the version of Calibration.
Samples analyzed
This is the number of analyses performed by the instrument since it
was manufactured.
Last Service Date
This is the date when an authorized technician last serviced the
instrument.
Next Service Date
Displays the recommendation for the next service date. If reached
contact your distributor or Perten Instruments
DHCP
Allows the user to enable or disable Dynamic Host Configuration
Protocol for IP Networks.
Remote IP
Destination for UDP broadcast of results.
IP
This displays the IP address for this instrument.
Operating Parameters
Min Ambient Temperature, Max Ambient Temperature, Ambient
Temperature Difference, Ambient Temperature difference
(Visible but not changeable)
Adjust Factors
Unit Calibration Factors
(Visible but not changeable)
Test Mode
Allows Test mode to be enabled or disabled (when the screen shows
“Enable” Test mode is on). When a product is selected to run a
sample with Test mode enabled, entering a number 1-20 into the
sample ID field will generate a result based on different test sample
parameters. (Administrator only)
28 (36)
Operation Manual AM 5200 (-A) E5200EN3 v 1.1 May 2013
7.5
Error messages
Error message
Solution
Ambient Temperature out of range
The ambient temperature is either too high or too
low for the AM 5200 (-A) to work properly.
Clean sensor lenses, see instructions
The sample sensors may be dirty. Please see
instructions in Section 8.1 below. Also, make sure
that the instrument is not placed in direct sunlight.
Emergency stop, see instructions
A mechanical failure was detected. Check for
obstructions such as straws or other objects. Switch
power off and on again. Consult technical support if
the message persists.
Measuring cell not empty, see
instructions
Some sample or foreign material remained in the
test cell after the lid opened to allow the sample to
flow out. For example, this may be caused by a very
wet sample. Inspect the bottom of the cell (with
catch drawer removed) to look for residue around
the cell bottom and RF lid. If this does not resolve
the issue, it may be necessary to clean the cell as
described in Section 8.2.
Moisture out of range
The sample moisture content is outside the limits
the AM 5200 (-A) was calibrated for, and results
may not be accurate.
29 (36)
Operation Manual AM 5200 (-A) E5200EN3 v 1.1 May 2013
Name field cannot be empty
Please enter a name.
No printer found
Please connect a printer, and/or check that it is
properly connected.
Out of limit error
If this message appears after analysis it means one or
more parameters is outside of the approved range.
If this message appears before analysis it means that
a self-test on the empty measurement cell has shown
a system drift. Switch power off and on again, and
contact technical support if it persists.
Please make sure catch drawer is empty
Pull out the catch drawer and empty if necessary.
RF lid cannot open, see instructions
(RF Lid = measurement cell dump
door.)
Switch power off and on again. If the problem
persists, inspect transportation locks to make sure it
is properly disengaged according to instructions
(Section 5.1.2). If the problem still persists, contact
technical support.
RF lid cannot close, see instructions
(RF Lid = measurement cell dump
door.)
There may be residue on the RF lid at bottom of
test cell, too much sample in waste drawer, or
mechanical interference. Empty waste tray and
switch power off and on again to retry. Consult
technical support if problem persists.
Catch drawer not in place
Please insert the catch drawer. If the catch drawer is
fully inserted and the AM 5200 (-A) still gives this
message, there may be a problem with the sensor.
Please contact technical support.
Sample temperature out of range
The sample temperature exceeds the limits set for
this grain type. Allow the sample to warm (or cool)
closer to ambient temperature and re-run the
sample; or, use a different sample.
Sample to ambient temperature exceeded
The difference in temperature between the sample
and the instrument exceeds limits. Allow the sample
30 (36)
Operation Manual AM 5200 (-A) E5200EN3 v 1.1 May 2013
to warm or cool closer to ambient temperature and
re-run the sample; or, use a different sample.
Strike off failed, see instructions
Motorized sample strike-off was unable to push
excess sample off the top of test cell. Possible causes:
very wet and coarse sample, too much sample, or
mechanical interference. Retry with less sample.
Contact technical support if it persists.
Top cover not in place, see instructions
Please install the top cover and make sure it is
pressed down and locked in position. Power must
then be cycled off and on.
Unable to export
Please insert a USB memory stick into one of the
USB ports at the back. Make sure that there is
enough space on the memory stick.
Unable to export change log
Please insert a USB memory stick into one of the
USB ports at the back. Make sure that there is
enough space on the memory stick.
Unable to export events and warnings
Please insert a USB memory stick into one of the
USB ports at the back. Make sure that there is
enough space on the memory stick.
Unable to export raw data
Please insert a USB memory stick into one of the
USB ports at the back. Make sure that there is
enough space on the memory stick.
Unable To export UGMA factors
Please insert a USB memory stick into one of the
USB ports at the back. Make sure that there is
enough space on the memory stick.
Unable to export Unit Adjustment
Factors
Please insert a USB memory stick into one of the
USB ports at the back. Make sure that there is
enough space on the memory stick.
Waste tray is full
Pull out the catch drawer and empty if necessary.
Weight out of range
The sample weight is not sufficient for analysis.
31 (36)
Operation Manual AM 5200 (-A) E5200EN3 v 1.1 May 2013
This could happen if the sample you try to analyze
is of very low density. If you receive this message
for a sample of normal density, please contact
technical support.
Empty weight is not stable
The empty weight measurement is not stable for
analysis. This may be caused by instrument
instability due to unstable or vibration
environment. First insure the instrument is
properly leveled on a solid surface as per section
5.1.3 of this manual. If problem persists, please
contact technical support.
Sample weight is not stable
The sample weight measurement is not stable for
analysis. This may be caused by instrument
instability due to unstable or vibration
environment. First insure the instrument is
properly leveled on a solid surface as per section
5.1.3 of this manual. If problem persists please
contact technical support.
If any of the following error messages appear, please contact technical support and inform them of
the error message displayed.
Empty Cell control 1 out of range
Empty Cell control 2 out of range
Empty weight out of range.
Genuine Aquamatic Validation Error. Please contact customer service.
Sample magnitude is not stable
Sample phase is not stable
Unable to Initialize ACC
Unknown Error
Validation Error
32 (36)
Operation Manual AM 5200 (-A) E5200EN3 v 1.1 May 2013
8
8.1
Maintenance
Cleaning sample sensors
Switch the power off and remove the power cable. Then open the instrument by removing the top
cover.
Lift off the top cover
Inspect the four sensor lenses inside the funnel
If the sensor lenses need to be cleaned, first use gentle compressed air jet (such as “canned air” used
for PC servicing). If this is inadequate, use a damp soft cloth to remove residue build up. Snap the
top cover back on before plugging in the power cable.
8.2
Cleaning the RF cell
Prior to turning the power off, select [Menu]-[General settings]-[Maintenance]-[Clean]-[Open
Funnel]. Do not press back. Switch the power off and remove the power cable. This allows the
grain dump door to open for better access to the RF cell.
Open the instrument:
Push back the black inner funnel
Lift off the top cover
Push back the inner funnel to access the metal RF cell inside the instrument. If the cell needs to be
cleaned, first use gentle compressed air jet (such as “canned air” used for PC servicing). If this is
inadequate, use a damp soft cloth to remove residue build up.
The plastic door on the bottom of the RF cell may also be accessed for cleaning by placing the
instrument on its back and removing the catch drawer. The plastic door may be moved and
cleaned with a damp soft cloth.
Reassemble and make sure to snap the top cover back on before plugging in the power cable.
33 (36)
Operation Manual AM 5200 (-A) E5200EN3 v 1.1 May 2013
9
Technical Specification
9.1
Technical data
Power requirements
100-240V~, 50-60Hz, 60 VA
Fuses
The mains fuses are mounted inside the instrument and shall only be
replaced by qualified personnel. There are no user serviceable parts
inside the instrument.
Fuse rating: 2 x T2A L250V
Battery
CR2032 3V Li-Ion with wires and connector
Perten part number 21270
Dimensions
H x W x D (mm/inches): 415/16.3 x 424/16.7 x 353/13.9
Net weight
18.3 kg / 40.3 lb.
Analysis time
Approximately 10 seconds
Radio frequency
150 MHz
User interfaces
Color touch screen (5.7”)
Interconnection
Ethernet - through RJ 45 connector
USB (x2) – for general purpose through USB connector
34 (36)
Operation Manual AM 5200 (-A) E5200EN3 v 1.1 May 2013
9.2
Environmental operating conditions
Note
The environmental conditions only refer to the conditions in which the apparatus can be safely
used. Temperature variations may affect the analysis result.
Transport
Temperature -20 to +55 °C
Relative humidity 10% - 90%
Atmospheric pressure 500 hPa – 1060 hPa.
Operation
For indoor use
Ambient temperature maximum + 5 to + 40 °C noncondensing. Local approvals may specify different
temperature range.
Relative humidity 30% - 90%
Atmospheric pressure 700 hPa – 1050 hPa.
Position
The AM 5200 (-A) shall be placed horizontally and in vibrationfree surroundings.
Sample temperature sensitivity
Typically 0°C to 45°C. The range may be wider or more
narrow for individual grain types and local approvals may
specify different temperature limits.
35 (36)
Operation Manual AM 5200 (-A) E5200EN3 v 1.1 May 2013
Perten Instruments, Inc.
6444 S. 6th St Road
Springfield, IL 62712
Tel 217-585-9440
Fax 217-585-9441
[email protected]
http://www.perten.com
Shore Measuring Systems
A Division of CTB, Inc.
1112 Enterprise Dr.
Rantoul, IL 61866
Tel 217-892-2544
Fax 217-892-4281
[email protected]
http://www.shoremeasuring.com
GSF
506 5th Ave.
Sully, IA 50251
Sales 1-800-627-6702
Service 1-877-856-0060
Fax 1-641-594-4364
[email protected]
http://www.gsf-agstar.com
Perten Instruments AB
P.O. Box 9006
S-126 09 Hägersten
SWEDEN
Tel +46 8 505 80 900
Fax +46 8 505 80 990
E-mail: [email protected]
Web: www.perten.com
36 (36)