1
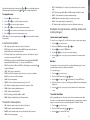
5. Press the
arrows.
or
or
arrows.
7. Press the
key three times to accept your selection and return to the main
operation screen.
Locating pipes and cables
For more detailed descriptions of using the
locator and transmitter, and for detailed
locate techniques, refer to the Operation
Manual.
In direct connection, you connect the transmitter directly to the pipe or cable you wish to
survey using the red Direct Connect lead supplied. The black lead is generally connected
to earth using the supplied ground stake.
The transmitter will then apply a discrete signal to the line, which you can trace using the
locator. This method provides the best signal on an individual line and enables the use of
lower frequencies, which can be traced for longer distances.
2. Scroll to the INFO menu using the
or
arrows.
key to enter the INFO menu.
arrows.
5. Press the
key to select YES
6. Press the
key to begin the Self-Test
key
SideStepauto™
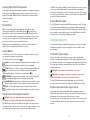
The transmitter can be used to recommend a general-purpose locate frequency for the
intended locate task by measuring the impedance of the target cable or pipe. To run
SideStepauto™, connect the transmitter to the target utility, then:
1. Press the
key to enter the menu.
2. Scroll to the OPT F menu using the
The transmitter is placed on the ground over or near the survey area. You select the
appropriate frequency. The transmitter will then induce the signal indiscriminately to
any nearby metallic conductor. In induction mode, using higher frequencies is generally
recommended as they are induced more easily onto nearby conductors.
Transmitter Clamp
7. Once the Self-Test is completed, the result (PASS or FAIL) will be displayed.
8. Restart the locator using the
WARNING! Direct connection to live conductors is POTENTIALLY LETHAL. Direct
connections to live conductors should be attempted by fully qualified personnel only
using the relevant products that allow connections to energized lines.
Induction
key to enter the menu.
or
Generally speaking, it is better to use a low frequency on larger, low impedance utilities,
and move to a higher frequency on smaller, high impedance utilities.
Direct connection
We recommend that a Self-Test is run at least weekly, or before each use. As the SelfTest tests the integrity of the locate circuity, it is important that it is carried out away from
larger metallic object such as vehicles, or strong electrical signals. To run a Self-Test:
3. Press the
Active frequencies are applied to the target pipe or cable using the transmitter, and
provide the most effective way of tracing buried pipes or cables.
The transmitter can apply a signal using three different methods:
Running a Self-Test
4. Select TEST using the
Locating with Active Frequencies
The lowest power setting required to trace the target utility should always be used to
minimize the risk of false trails.
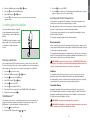
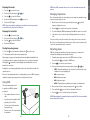
The RD8100 locator is designed to operate
with the ‘blade’ of the locator perpendicular
to the path of the cable or pipe being
located.
1. Press the
key to select ‘START.
4. Press the
key to start the test. The transmitter will automatically select a general
purpose frequency for use on the connected utility.
key to enter the ECO sub menu
6. Select ECO using the
3. Press the
or
14
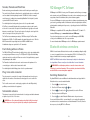
An optional signal clamp can be placed around an insulated live wire or pipe up to
8.5" / 215mm in diameter to transfer the transmitter signal to the utility. This method of
applying the transmitter signal is particularly useful on insulated live wires and removes
the need to disconnect the supply to the cable.
WARNING! Do not clamp around uninsulated live conductors.
WARNING! Before applying or removing the clamp around a power cable ensure
that the clamp is connected to the transmitter at all times.
arrows.
15
ENGLISH
4. Select the ALK Battery type using the