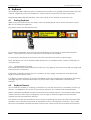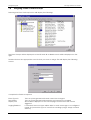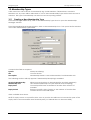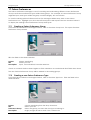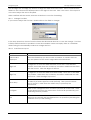
1
Wildcat 9.0
Manager Utilities
User Guide
Last Update 20.08.10
Maxgaming Qld
Manager Utilities User Guide
Table of Contents
1
2
3
4
5
6
7
8
Wildcat Membership and Player Loyalty .................................................................................................6
1.1
Wildcat Help Desk ................................................................................................................................6
1.2
Bytecraft Help Desk..............................................................................................................................6
Basic User Tools & Tips..................................................................................................................................7
2.1
Wizards ...................................................................................................................................................7
2.1.1
Run Wizard Again on Finishing ....................................................................................................7
Opening the Wildcat Program ..................................................................................................................8
EzyBreak ........................................................................................................................................................9
4.1
Starting EZYBreak ..................................................................................................................................9
4.1.1
Starting During a Feature.............................................................................................................9
4.2
EZYBreak Timeout..................................................................................................................................9
4.2.1
Floor View Notification ...............................................................................................................10
4.2.2
Paging Notification.....................................................................................................................10
4.3
Attendant Intervention......................................................................................................................10
4.4
Event Reports ......................................................................................................................................11
Promotions Map.........................................................................................................................................12
5.1
Manager Utilities Map........................................................................................................................12
Points............................................................................................................................................................13
6.1
Aging/Purging Points .........................................................................................................................13
6.2
Transferring points...............................................................................................................................13
6.3
Manually Adjusting Points .................................................................................................................13
6.4
Creating a New Point Type...............................................................................................................14
6.5
Maintaining Point Types.....................................................................................................................15
6.5.1
Editing a Point Type ....................................................................................................................15
6.6
Creating a New Equation .................................................................................................................15
6.6.1
Step 2A - Creating a Base equation........................................................................................16
6.6.2
Step 2B - Creating a Promotional Equation............................................................................17
6.6.3
Promotional Equation - Example ..............................................................................................17
6.7
Maintaining Equations .......................................................................................................................18
6.7.1
Editing an Equation ....................................................................................................................18
6.7.2
Deleting an Equation .................................................................................................................18
Paging .........................................................................................................................................................19
7.1
Event Types..........................................................................................................................................19
7.2
Paging Setup Overview.....................................................................................................................19
7.3
Creating a Zone .................................................................................................................................20
7.4
Creating a Pager................................................................................................................................21
7.5
Creating an Event Group..................................................................................................................21
7.6
Maintaining Zones/Pages/Event Groups........................................................................................22
7.6.1
Editing Zones/Pagers/Event Groups.........................................................................................22
7.6.2
Deleting Zones/Pagers/Event Groups......................................................................................22
7.7
Assigning EGMs to Zones ...................................................................................................................22
7.8
Assigning Events to Event Groups ....................................................................................................23
7.9
Assigning Event Groups to Pagers ...................................................................................................24
7.10 Assigning Pagers to Zones.................................................................................................................25
7.11 Message Escalation ...........................................................................................................................25
7.11.1 Message Acknowledgment......................................................................................................25
7.11.2 Modes of escalation...................................................................................................................26
7.11.3 Escalation Setup..........................................................................................................................26
7.12 VIP Paging Alert ..................................................................................................................................27
Redemption Items .....................................................................................................................................29
8.1
Creating a new Redemption Item ..................................................................................................29
8.2
Maintaining Redemption Items........................................................................................................30
8.2.1
Editing a Redemption Item .......................................................................................................30
8.2.2
Deleting a Redemption Type....................................................................................................30
8.3
Redemption Items Stock Control Report ........................................................................................31
1
Maxgaming Qld
Manager Utilities User Guide
9
Age Groups ................................................................................................................................................32
9.1
Viewing existing Age Groups............................................................................................................32
9.2
Creating a New Age Group.............................................................................................................32
9.2.1
Editing an Age Group ................................................................................................................32
9.2.2
Deleting an Age Group .............................................................................................................32
10 Patron Details .............................................................................................................................................34
10.1.1 Adding a Patron Detail Type.....................................................................................................34
10.1.2 Editing a Patron Detail Type ......................................................................................................35
10.1.3 Deleting a Patron Detail Type ...................................................................................................35
11 Messages ....................................................................................................................................................36
11.1 Updating/Changing a Message......................................................................................................36
12 Barrel Draw .................................................................................................................................................37
12.1 Creating a Promotion ........................................................................................................................37
12.1.1 Barrel Draw Promotion Fields.....................................................................................................38
12.2 BDS - Points Promotion .......................................................................................................................40
12.3 BDS - Kiosk Promotion.........................................................................................................................40
12.4 Ticket Format.......................................................................................................................................41
12.5 Barrel Draw Reporting........................................................................................................................41
12.6 Paper Rolls ...........................................................................................................................................41
12.7 Printer Alerts to Pagers. ......................................................................................................................41
13 Player Kiosk .................................................................................................................................................42
13.1 Creating a Prize Draw........................................................................................................................42
13.1.1 Prize Probability ...........................................................................................................................42
13.2 Birthday Prize .......................................................................................................................................44
13.3 Editing Prize Items ...............................................................................................................................45
13.4 Second Chance Draw ......................................................................................................................45
13.5 BDS - Kiosk Promotion.........................................................................................................................45
13.6 Player Kiosk Screens ...........................................................................................................................45
13.6.1 Idle Mode .....................................................................................................................................46
13.6.2 Invalid Card or Card Not Inserted Correctly ..........................................................................46
13.6.3 Card Inserted...............................................................................................................................46
13.6.4 Main Menu ...................................................................................................................................47
13.6.5 Points Balance .............................................................................................................................47
13.6.6 Points Redemption......................................................................................................................47
13.6.7 Insufficient Points for Redemption ............................................................................................48
13.6.8 Technical Difficulties ...................................................................................................................49
13.7 Prize Draw Screens .............................................................................................................................49
13.8 Player Kiosk Reports............................................................................................................................50
13.8.1 Kiosk Usage Report. ....................................................................................................................50
13.8.2 Prize Draw Redemption Reconciliation Report......................................................................50
13.9 Player Kiosk Maintenance.................................................................................................................50
13.10 Kiosk Printer – Replacing Paper Roll .............................................................................................50
13.10.1
Standard Kiosk Printer .............................................................................................................50
13.10.2
Mini Kiosk Printer.......................................................................................................................50
14 Ratings .........................................................................................................................................................51
14.1 View Existing Ratings ..........................................................................................................................51
14.2 Creating a new Rating Grade .........................................................................................................51
14.3 Maintaining Ratings ...........................................................................................................................52
14.3.1 Editing a Rating Type..................................................................................................................52
14.3.2 Deleting a Rating ........................................................................................................................52
14.4 Marketing Ratings Points ...................................................................................................................52
14.4.1 Points Rewards.............................................................................................................................52
14.4.2 Kiosk Rewards ..............................................................................................................................52
14.5 Ratings Reports ...................................................................................................................................52
2
Maxgaming Qld
Manager Utilities User Guide
15 Membership Types.....................................................................................................................................53
15.1 Creating a New Membership Type .................................................................................................53
15.2 View Existing Membership Types......................................................................................................54
15.2.1 Editing a Membership Type.......................................................................................................54
15.2.2 Deleting a Membership Type....................................................................................................54
15.3 Membership Type Reports ................................................................................................................54
16 Patron Groups ............................................................................................................................................55
16.1 Creating a New Patron Group.........................................................................................................55
16.2 Adding Patrons to a Group ..............................................................................................................56
16.3 Maintaining Patron Groups...............................................................................................................56
16.3.1 Editing a Patron Group ..............................................................................................................56
16.3.2 Deleting a Patron Group ...........................................................................................................56
16.4 Reporting on Patron Groups.............................................................................................................57
17 Patron Preferences ....................................................................................................................................58
17.1 Creating a Patron Preference Group .............................................................................................58
17.2 Creating a new Patron Preference Type .......................................................................................58
17.3 Maintaining Patron Preference Groups or Types ..........................................................................59
17.3.1 Editing a Group or Type .............................................................................................................59
17.3.2 Deleting a Patron Preference Group or Type ........................................................................59
17.4 Allocating a Preference to a Patron...............................................................................................59
17.5 Reporting on Patron Preferences ....................................................................................................60
18 Employees...................................................................................................................................................61
18.1 Creating Employee Cards (for sites with card embossers only) .................................................61
18.2 Creating Employees ..........................................................................................................................61
18.3 Assigning Cards to Employees .........................................................................................................62
19 Membership - Additional Functions ........................................................................................................64
19.1 Membership Reports ..........................................................................................................................64
19.1.1 Membership Summary by Age Group.....................................................................................64
19.1.2 Membership Summary by Member Type................................................................................64
19.1.3 Membership Summary by Post Code ......................................................................................64
19.1.4 New Members Report ................................................................................................................64
19.1.5 Random Members Draw Report...............................................................................................64
19.1.6 Receipted Fees Detail Report...................................................................................................64
19.1.7 Receipted Fees Summary Report.............................................................................................64
19.1.8 Membership Renewal by Membership Type ..........................................................................65
19.1.9 New Members by Membership Type.......................................................................................65
19.2 Random Members Draw ...................................................................................................................65
19.2.1 Print................................................................................................................................................65
19.2.2 Redraw .........................................................................................................................................65
19.2.3 Close .............................................................................................................................................65
19.3 Wide Area Draw Facility (Membership Draw) ...............................................................................65
19.4 Random Number Generator ............................................................................................................67
19.5 Kiosk Membership Setup ...................................................................................................................67
20 Reports.........................................................................................................................................................68
20.1 Report Folders .....................................................................................................................................68
20.1.1 Creating a New Folder...............................................................................................................68
20.1.2 Renaming a Folder .....................................................................................................................68
20.1.3 Deleting a Folder.........................................................................................................................68
20.1.4 Moving Reports to Folders .........................................................................................................68
20.2 Viewing and Creating Promotion Reports .....................................................................................68
20.2.1 Generating a Report ..................................................................................................................68
20.3 Report Creation Tools ........................................................................................................................69
20.3.1 Run Icon........................................................................................................................................69
20.3.2 Re Run Icon ..................................................................................................................................69
20.3.3 Auto Run Icon ..............................................................................................................................69
20.3.4 Close Icon ....................................................................................................................................69
20.4 Reports Toolbar ...................................................................................................................................69
20.4.1 Printing a Report..........................................................................................................................69
20.4.2 Print Preview.................................................................................................................................69
3
Maxgaming Qld
Manager Utilities User Guide
20.4.3 Re Run...........................................................................................................................................69
20.4.4 Paging through a Report ...........................................................................................................69
20.4.5 Stopping Report Creation .........................................................................................................69
20.4.6 Closing a Report..........................................................................................................................70
20.4.7 Page Setup ..................................................................................................................................70
20.4.8 Viewing Multiple Reports ...........................................................................................................70
20.5 Exporting Reports to Other Applications ........................................................................................70
20.6 Reports Wizards...................................................................................................................................71
20.7 Patron Select Wizard..........................................................................................................................71
20.8 Promotion Report Categories...........................................................................................................72
20.8.1 Audit..............................................................................................................................................72
20.8.2 General Reports ..........................................................................................................................72
20.8.3 Marketing Reports.......................................................................................................................72
20.8.4 Points Reports...............................................................................................................................73
20.8.5 Unallocated Reports...................................................................................................................73
20.8.6 Utilities Reports .............................................................................................................................74
21 Expiry Dates ................................................................................................................................................75
21.1.1 Patrons ..........................................................................................................................................75
21.1.2 Patron Cards................................................................................................................................75
21.1.3 Redemption Vouchers ...............................................................................................................75
21.2 Creating or Maintaining an Expiry Date .........................................................................................75
21.3 Viewing Existing Expiry Dates ............................................................................................................76
22 Documents .................................................................................................................................................77
22.1 View Documents ................................................................................................................................77
22.2 Creating a New Document Group .................................................................................................77
22.3 Creating a New Document Type ....................................................................................................77
22.4 Editing a Document Group’s Details...............................................................................................78
22.4.1 Editing a Document’s Details....................................................................................................78
22.5 Deleting a Document Group or Type .............................................................................................78
23 Card Functions ...........................................................................................................................................79
23.1 Card Types...........................................................................................................................................79
23.1.1 Creating a New Card Type .......................................................................................................79
23.2 Maintaining Card Types ....................................................................................................................80
23.2.1 View the Existing Card Types.....................................................................................................80
23.2.2 Edit the Properties of a Card Type: ..........................................................................................80
23.2.3 Deleting a Card Type .................................................................................................................80
23.3 Card Accounts ...................................................................................................................................80
23.4 Card Devices ......................................................................................................................................80
23.5 Batch Card Creator (For Sites with Cards Embossers) ..................................................................81
23.6 Format Card (For Sites with Card Embossers) ................................................................................83
23.6.1 Change Font Size ........................................................................................................................84
23.6.2 Card Format Layout ...................................................................................................................84
24 Appendix – Terms and Conditions of Membership/Loyalty ................................................................85
4
Maxgaming Qld
Manager Utilities User Guide
5
Maxgaming Qld
Manager Utilities User Guide
1 Wildcat Membership and Player Loyalty
The Wildcat Membership and Player Loyalty software is also known as Card Services. In the Card
Services System there are two separate areas that will be used regularly by the gaming venue;
Manager Utilties and Card Accounts. The Manager Utilities module is used for setting up the default
information used by the Card Accounts module. The Card Accounts module is used for the
creation and maintenance of Patron records (also known as the Membership Database).
The Card services system (CSS) can be used in conjunction with Gemini Loyalty Units (card readers)
or alone as a Membership Database.
1.1 Wildcat Help Desk
For any questions regarding your monitoring system, please do not hesitate to call:
THE MAXGAMING WILDCAT HELP DESK (24 Hours)
1800 700 116
1.2 Bytecraft Help Desk
All machine faults and issues are to be logged with the Bytecraft Help Desk:
Bytecraft Help Desk
1800 021 814
6
Maxgaming Qld
Manager Utilities User Guide
2 Basic User Tools & Tips
Where a specific selection can be made in reports etc the Wildcat system will always default to
‘ALL’ unless otherwise specified.
To move around the dialogue boxes use the mouse and cursor.
Clicking on the X box on the top right hand corner of the window will close that window.
Clicking on the X in the top right hand corner of the screen will exit the Wildcat Program.
2.1 Wizards
When requesting a particular report or completing data entry Wildcat will ask for information using
a ‘wizard’ function. When completing a wizard:
•
•
•
•
•
Read each screen carefully;
To go back to the previous dialogue box, single click on the BACK button;
To go to the next dialog box, single click on the NEXT button;
To complete the process, single click on the FINISH button;
To abort the wizard, single click on the CANCEL button.
2.1.1 Run Wizard Again on Finishing
There is a ‘RUN WIZARD AGAIN’ feature in this program. This is a time saving device when having to
input information repeatedly. If the RUN WIZARD AGAIN box is ticked, the wizard will reappear each
time you click the FINISH button. If you don’t require the wizard, click CANCEL to return to the
original screen.
To turn this function off, single click on the Run Wizard Again box; the tick will disappear.
7
Maxgaming Qld
Manager Utilities User Guide
3 Opening the Wildcat Program
To gain access to the program you must have a User ID and Password (please see the chapter on
SECURITY to create a password and user id).
On your computer screen (desktop) there will be a Wildcat icon (the pawprint). Double click on
the Wildcat icon.
The Logon screen will appear:
1.
2.
3.
4.
5.
Enter your User ID in the field indicated.
Press TAB or use the mouse to click at PASSWORD.
Enter your Password (password is NOT case sensitive).
Single click on OK or press Enter.
The Wildcat Program has now been accessed (as shown below).
To close the Wildcat program, single click on the EXIT icon at the top right of the application
toolbar or single click the X in the top right hand corner of the screen.
8
Maxgaming Qld
Manager Utilities User Guide
4 EzyBreak
The EZY Break facility allows players to securely leave credits on a gaming machine while they take
a break. EZYBreak cannot be enabled for venues without Gemini Units (Loyalty Card Units).
Maxgaming will enable EZY Break for each venue and set the default 3 minute time out.
4.1
Starting EzyBreak
While a player card is inserted, the player can start an EZY Break session when the EGM is in play,
idle or in a feature (free games).
The player presses the EZY Break button.
The machine will disable, with the Gemini Unit displaying the message ‘Game Suspended EZY
Break’. The player then removes their card and can leave the machine.
To resume play the player must re-insert the same card that was used to suspend play.
Note: EZY Break can not be initiated while the EGM is in Cancelled Credit, Jackpot Verification or
any Error states.
4.1.1 Starting During a Feature
If EZY Break has been started during the feature (i.e. free games) then the session will not begin until
the feature has completed.
If EZY Break is initiated outside of these conditions and the player card removed, EZY Break will
begin on the next button press.
If a different patron attempts to end the EZY Break session by inserting their card before the lockup
message appears, the EGM will remain in a locked state until an Attendant Card has been
inserted.
4.2
EzyBreak Timeout
As per the Rules Ancillary to Gaming, a machine can only be reserved for a maximum of three (3)
minutes. As EzyBreak is also a form of reserving a machine, the 3 minute period will still apply.
When a machine in EzyBreak mode has exceeded the 3 minute timeout, the machine will change
colour in the Floor View and, if configured, send a page to defined pagers with the machine
number that has exceeded the timeout.
The Timeout can be unsuspended by the customer re-inserting the same card that suspended the
machine or the attendant can insert an Attendant Card to unsuspend the machine. Any credits
still on the suspended machine should be paid out via cancel credit (see Attendant Intervention).
9
Maxgaming Qld
Manager Utilities User Guide
4.2.1 Floor View Notification
Machines will change colour in Floor View when in EZY Break lock up.
When EzyBreak mode is enabled on the machine, Floor View will change the colour of the machine
to a light blue. When the 3 minute time out is reached the colour will change from blue to purple.
4.2.2 Paging Notification
When a machine in EzyBreak mode has exceeded the 3 minute timeout period a page will be sent
to defined pagers with the machine number that has exceeded the timeout. This function is
configured in Promotions/Pager Messages.
4.3
Attendant Intervention
From time to time it may be necessary for staff to intervene and override the suspended state and
allow other patrons to play the machine.
Using an attendant card it is possible to unsuspend a machine and cancel credits on the machine.
Cancelling the credits is called ‘Forcing a Handpay’ and will produce a payout voucher within
cashier. The payout voucher will have the patron’s name and membership number already printed
for easy reconciliation with the owner of the funds.
The procedure to Force a Handpay is:
1. Attendant recognises a handpay is required following page or floor view alert.
2. Attendant inserts Attendant Card into the loyalty unit. A prompt appears 1 – Force
Handpay, pressing button 1 (Service) will initiate the Force Handpay.
3. After pressing button 1 the attendant is asked if they are sure they want to force the
handpay, answer Yes by pressing button 3 (Change). Pressing button 2 (Drink) will stop the
Force Handpay process.
4. After pressing button 3 (Change) an Accepted message appears alerting the attendant
the Credits are cancelled and voucher has been printed. As soon as the Attendants card is
inserted into the loyalty unit the EGM will be enabled, therefore Attendants cards should
only be used when the Attendant is forcing a handpay).
10
Maxgaming Qld
4.4
Manager Utilities User Guide
Event Reports
The usual EGM Event report will highlight the changes in EGM status throughout the EzyBreak
suspending and enabling process.
You will note that the credit meter is read and reported at the commencement of the EzyBreak
session. This should be used in the case of patron disputes/queries.
Ezy Break initiated and ended by the patron (normal use):
Ezy Break initiated by a patron and ended by an attendant:
Ezy Break initiated by patron and ended by patron after the time out has been reached:
Ezy Break initiated by patron and ended by an attendant after the time out has been reached:
11
Maxgaming Qld
Manager Utilities User Guide
5 Promotions Map
To access the Manager Utilities module, click on the Promotions icon in the WILDCAT main toolbar
to display the Promotions Map.
5.1
Manager Utilities Map
Click on the Manager Utilities icon to show the Manager Utilities Map. Each utiltity available will
have a corresponding icon.
Please note that the ‘Membership Functions’ icon is normally disabled. A small additional cost is
applicable to use this module. Please contact your regional Account Manager if you wish to have
Membership Functions access.
12
Maxgaming Qld
Manager Utilities User Guide
6 Points
Bonus points are used by the gaming venue to encourage loyalty and allow customers to earn
rewards. Within the Card Services System (CSS) there is the facility to be able to set up 3 types of
Points. Only ONE of these points is able to be seen by the patron.
Bonus Points
used to track EGM play and earn points to ‘buy’ redemption items.
Ratings Points
to track the value of a Patron to a particular site over a given period.
These points are usually not redeemable and should not be visible to
the Patron.
Complimentary Points
used primarily by Site staff to reward valuable patrons with
complimentary items such as a free drink or meal based upon their
value to the Site. These Points are usually not visible to the Patron.
The points allocated to patrons are relative to the amount of money generated in turnover or wins
by the patron. The exact number of points allocated to the patron depends on equations set in
this module.
6.1
Aging/Purging Points
Wildcat has the ability to expire bonus points after a designated period of inactivity. This is similar to
other retail loyalty programs where the user may have 12 months to ‘use’ the point before the
system deletes it from all records.
Aging or purging points is recommended as it will ensure that the liability to the gaming venue (i.e.
the dollar value of the total points) will be kept to a minimum.
Periods can be a minimum 1 month, a specific date or the system can be set at Never Age Points.
When a patron redeems points for prizes or cash, the system will automatically use the oldest points
available in the patron’s points balance.
Please Note: to purge points on a specific date, please contact your account manager for details
on this process.
6.2
Transferring points
6.3
Manually Adjusting Points
Wildcat has the ability to transfer points from one patron’s account to another active patron’s
account in the membership database. If the permissions have been set in Wildcat Security
Priveleges and it is is allowable as part of the gaming venues procedures, any staff with access will
be able to complete the Transfer of Points.
Wildcat allows the manual adjustment of a person’s current points balance at any time (providing
the permissions have been set in Wildcat Security Priveleges). A CREDIT of points is the same as
ADDING POINTS and a DEBIT is the same as REMOVING POINTS (for correcting redemption errors or
when a patron has breach the loyalty terms and conditions).
When a manual adjustment has been made, the person making the adjustment must complete a
comments fields. This comment can be viewed when generating the PROMOTIONS AUDIT REPORT.
It is recommended to keep the amount of staff able to perform manual adjustments to a minimum.
13
Maxgaming Qld
6.4
Manager Utilities User Guide
Creating a New Point Type
From the Manager Utilities Map, click on the Points icon to open the Point Manager. Click on the
New Point icon. This opens the first window of the New Point Type wizard.
Complete the fields in the wizard window.
System
Site
Point Type
Display Name
Redemption Value
Display On Gemini Unit
Select Monitoring from the drop down box.
Select your gaming venue from the drop down box.
Select a Point Type from the list
Type a description for the new point type. This will be the name of
the point that customers will see on any points displays.
This is the calculation that will be used during points redemption. Type
in the number of points that would equal one dollar in the cost of a
redemption item (i.e. 100 bonus points equals $1).
Tick the box to show the points on the LCD screen on the poker
machine’s card reader.
Check or uncheck the Run wizard again on Finish checkbox as needed and click NEXT when the
fields are completed.
The New Point Wizard will move to the next screen. Tick the check-boxes as required.
Accrual
Redemption by Patron
Redemption by Admin
Aging
Transfer
Manual Adjustment
Points will accrue from playing an EGM.
Patron may redeem points, eg for prizes.
Administrator may redeem points.
To set aging periods for points.
Points may be transferred between different patron accounts.
Points may be manually adjusted by an administrator.
14
Maxgaming Qld
Manager Utilities User Guide
If no point expiry will take place, click the Finish button.
If Aging is has been checked, click the Next button. Fill in the fields as required, completing the
aging attributes.
Period Type
Ageing Periods
First Period Date
Select the unit for measuring ageing periods in (monthly/quarterly).
Type the number of periods to age.
Type the date that the first period should start.
Click Finish when the fields are completed.
Any new point types will be added to the existing point types.
6.5
Maintaining Point Types
To view the existing point types from the Manager Utilities Map, click on the Points icon to open the
Point Manager. In the left-hand pane expand the tree structure to see the existing points.
6.5.1 Editing a Point Type
In the Point Manager window, expand the tree structure to show the existing point types. Right
click on the point type you wish to edit in the left-hand pane. Select Properties from the pop-up
and edit the required field.
The three tabs, General, Permissions and Ageing, correspond to the fields described in the previous
section. Please refer to that section for the definitions of these fields.
Click OK when done to save any changes.
6.6
Creating a New Equation
Equations are used to calculate the actual number of points a patron earns during EGM play.
Each Point type to be used requires a Base Equation to calculate the standard number of points to
be earned. The facility also exists to set up a Promotional Equation, which awards extra points when
the patron satisfies the various criteria.
To create a new equation, from the Manager Utilities Map, click on the Points icon.
From the Point Manager window, click on the New Equation icon (top left).
This opens the first window of the New Equation wizard.
15
Maxgaming Qld
Manager Utilities User Guide
Complete each field as required.
System
Site
Point Type
Description
Method Type
Select Monitoring as the system.
Select your site from the drop down box.
Select a point type from the list
Type a description to identify the new equation type (i.e. Base equation)
Select from Base or Promotional. All point types have a Base equation, defining a
basic method of calculating points. A Promotional Equation alters this equation for
special cases.
Enabled Flag Tick this check-box to activate the equation to calcuate points. If this box is left
unchecked, the equation will not be used.
Check or uncheck the Run wizard again on Finish checkbox as needed. Click Next when the fields
are completed.
If you are creating a Base equation, follow Step 2A below, if you are creating a Promotional
equation (double points, birthday points etc), follow Step 2B instead.
6.6.1 Step 2A - Creating a Base equation
Fill in the fields in the wizard window as per normal.
Award one point for every
In
For
Type in the number of dollars (turnover/wins) that will earn one point.
Select the type of dollar (turnover/wins) to which the previous field
refers to.
Select a patron category from the list.
Click on the Finish button. A base equation using your parameters will be generated.
16
Maxgaming Qld
Manager Utilities User Guide
6.6.2 Step 2B - Creating a Promotional Equation
A promotional equation is used for a special feature connected to each patron. For example, on
a birthday, you might want to reward them with double points. On less busy days you might want
to offer triple points over a set period of time to encourage patronage.
Fill in the fields as required:
Award ….. points where
Equation Section
More
Clear
Select a multiple from the list.
Select an item from the 1st field, a comparator from the 2nd field and
an item from the 3rd field.
Click on the more button to add further qualifiers to the equation.
These fields are the same as the previous row.
Click the clear button to reset the window entries.
Click on the Finish button
A Promotional equation using your parameters will be generated.
6.6.3 Promotional Equation - Example
The Followin screen shows a Promotional Equation that will run double points on Tuesdays between
10am and midday:
17
Maxgaming Qld
6.7
Manager Utilities User Guide
Maintaining Equations
6.7.1 Editing an Equation
In the Points Manager window, expand the tree structure to show the existing equations. Right click
on the Equation you wish to edit in the left-hand pane. Select Properties from the pop-up.
In the Edit Equation Wizard, edit the fields as required (these fields are identical to the fields
described under the previous section, Creating a new Equation).
Click OK when done.
6.7.2 Deleting an Equation
In the Points Manager window, expand the tree structure to show the existing Equations. Right click
on the Equation you wish to delete in the left-hand pane.
Select Delete from the pop-up.
Click Yes in the confirmation box (or no if you wish to keep the equation).
18
Maxgaming Qld
Manager Utilities User Guide
7 Paging
The set-up and configuration of pagers includes the use of ‘zones’ within a site, messages only
being sent to one pager at a time and the escalation of unanswered messages.
Previously, paging was being set-up by assigning ‘paging events’
(which included the Gemini Unit buttons such as ‘Service button
pressed’) to ‘paging event groups’. These groups were then
assigned to pagers (that have been allocated to the site).
Full Functional Paging adds EGM ‘Zones’ to this set-up. Therefore
EGMs have to be allocated to a zone and each pager will also
have to be allocated to a zone.
The relationships of these properties can be shown in the diagram
at right.
7.1
Event Types
There are three types of events:
1. Patron Events (Gemini unit button presses)
2. EGM Events (eg Hopper Empty, Main Door Open)
3. System Events (Barrel draw printer empty, Kiosk Paper empty etc)
7.2
Paging Setup Overview
The setup of Full Functional Paging requires the following steps:
1.
2.
3.
4.
5.
6.
7.
8.
Creating a new Zone
Creating a new Pager
Creating a new Event Group
Assigning EGMs to Zones
Assigning Events to Event Groups
Assigning Event Groups to Pagers
Assigning Pagers to Zones
Configuration of message escalation
The ‘creation’ steps must be performed before anything is ‘assigned’.
Setup of Full Functional Paging can be accessed via the ‘Pager Messages’ icon in the Manager
Utilities Map in Wildcat. Clicking this icon will open the Paging Configuration screen.
19
Maxgaming Qld
Manager Utilities User Guide
This screen shows a representation of the machines on the floor at the gaming venue. If a site has
EGMs on more than one floor, then selection of each floor is available by the clicking on the floor
tab at the top of the screen.
The representation shown is exactly what is displayed in the Floor View function (without the
position numbers). As well as this, each EGM will be displayed as a colour, which represents the
zone it is allocated to. If zones have not been allocated, the EGMs will be grey.
7.3
Creating a Zone
Creation of a new zone is accessed via the Paging Maintenance screen by clicking the
‘Maintenance’ icon. The Paging Maintenance screen is shown below:
To create a zone, click inside the Zone area, so that the word ‘Zones’ at the top of the window
becomes red. Then by selecting the ‘New’ button the following screen will appear.
Type in the description for the new zone (eg Bar area, Zone 2 etc) and then select a colour by
pressing the ‘select’ button. This will present the colour window.
Select the desired colour for this zone, click OK and then Finish. This will then return to the Paging
Maintenance screen and will show the new zone with the selected colour. Continue to finish all
zones.
20
Maxgaming Qld
7.4
Manager Utilities User Guide
Creating a Pager
Click inside the pager area, so that the word ‘Pagers’ at the top of the window becomes red.
Select the ‘New’ button and the following screen will appear:
Field Descriptions
Description
Capcode
Parent Pager
Enabled Box
7.5
Name of the pager (eg Pager 1, Supervisor Pager etc)
6 Digit number which identifies the pager (usually found on a yellow/white
sticker on the reverse side of the pager)
Used for message escalation (see the section on message escalation for
more information)
Needs to be checked for the pager to work (if you want to disable a pager,
simply uncheck this box).
Creating an Event Group
Click inside the Pager Event Groups area, so that the word ‘Pager Event Groups’ at the top of the
window becomes red. Then by selecting the ‘New’ button the following will appear:
Type in a description of the Pager event group and a comment for this group (optional). Then press
FINISH when complete.
21
Maxgaming Qld
7.6
Manager Utilities User Guide
Maintaining Zones/Pages/Event Groups
7.6.1 Editing Zones/Pagers/Event Groups
To edit anything you have created, simply click on the appropriate item (so that it is highlighted)
and then press the EDIT button. A window displaying all of the appropriate properties will be shown
and you will be able to edit these properties as you need.
7.6.2 Deleting Zones/Pagers/Event Groups
To delete a Zone/Pager/Event Group, click on the item (so that it is highlighted) and press the
‘Delete’ button. A confirmation box will appear, press OK and the item will be deleted. Press
cancel if you do not wish to delete.
PLEASE NOTE: You will not be able to delete an item that has been associated with something else
(ie an Event Group that has pager events assigned to it). For this item to be deleted, you must first
remove that item from everything it is associated with.
7.7
Assigning EGMs to Zones
Once a zone has been created, you must then assign a group of EGMs to that zone.
In the paging configuration window, select the EGMs that are required for that zone. You can
either select them one at a time (by holding down the CTRL key and left clicking on each EGM) or
in a group (by holding down the left mouse button and dragging a box over the relevant EGMs).
The selected EGMs will be highlighted by a black border. When all required EGMs have been
selected, click the ‘EGMÆZONE’ icon. This will present you with the following screen:
Highlight which zone you want the EGMs assigned to and
press the ‘Assign’ button. This will then return you to the
Paging Configuration screen and the selected EGMs will now
be displayed with the relevant zone colour.
If you assign EGMs to a zone that already has EGMs assigned
to it, the new information will override the old settings (ie any
EGMs that were previously assigned to this zone will no longer
be assigned to any zone). This means that you must select ALL
EGMs to be included in a zone BEFORE assigning them to that
zone.
Removing EGMs from a Zone
To remove an EGM from a zone, simply select that EGM (or
group of EGMs) and press the right mouse button. From the
sub-menu, left-click on ‘Remove EGM from zone’(as shown
at right).
This will remove the selected EGM from that zone.
22
Maxgaming Qld
7.8
Manager Utilities User Guide
Assigning Events to Event Groups
Selecting the Event ÆGroup button will display the following:
The Event Groups will be displayed on the left and all available events will be displayed on the
right.
Double-click on the appropriate event ID that you want to assign. This will display the following
screen:
Complete the fields as required:
Event Type ID
Description
Display Text
Paging Enabled
This is a system generated ID and cannot be changed
This is a system generated description and cannot be changed
What will be displayed on the actual pager screen when the event is
triggered
If checked, the event type will be able to send a message to a configured
pager (to prevent this type of event from sending a page, simply uncheck
this box)
23
Maxgaming Qld
Manager Utilities User Guide
Once these properties have been set, press the OK button.
The Pager Events can then be assigned by dragging them from the right hand side and ‘dropping’
them on the desired Event Group. The screen will refresh and display the selected event
underneath the selected Event group.
To remove an event, simply drag the event from the left side and drop it back into the event list on
the right side.
NOTE: A Pager Event group can have more than one event assigned to it, and each event can be
assigned to more than one group.
7.9
Assigning Event Groups to Pagers
To assign Event Groups to Pagers, select the ‘GroupsÆPagers’ button. This will display the window
shown below.
This displays a list of pagers on the left and Event Groups on the right. To assign a group to a pager,
simply drag the group from the right and ‘drop’ it onto the desired pager. The screen will then
refresh and display that event underneath the relevant pager.
To remove a group from a pager, simply drag the group from the left side back onto the group list
on the right side.
NOTE: A pager can have more than one group assigned to it, and the same group can be
assigned to more than one pager.
24
Maxgaming Qld
7.10
Manager Utilities User Guide
Assigning Pagers to Zones
To assign Pagers to Zones, select the ‘PagersÆZones’ button. This will display the following window:
This displays a list of zones on the left and pagers on the right. To assign a pager to a zone, simply
drag the pager from the right and drop it onto the desired zone. The screen will then refresh and
display that pager underneath the relevant zone.
To remove a pager from a zone, simply drag the pager from the left side back onto the pager list
on the right side.
NOTE: A zone can have more than one pager assigned to it, and the same pager can be assigned
to more than one zone.
7.11
Message Escalation
With message escalation the system will send the message to only one (the last recently used) of
the pages that has been configured to receive that type of message. If that message does not get
acknowledged within a specified timeframe, the system will send the messsage to another pager.
The only exception to this is for System events – these messages are sent to ALL pages that are
configured to receive them and not get escalated.
7.11.1 Message Acknowledgment
To prevent a message being escalated to another pager, that message must be acknowledged.
To acknowledge a patron initiated event:
1. Release the button (eg – if the ‘Change’ button was pressed by the patron, pressing the
‘Change’ button again will acknowledge the message and cause the light to go out).
2. Insert valid employee card into gemini unit to reset the machine.
For an EGM event, there are two ways to acknowledge the message:
1. Insert an employee card into the Gemini unit on the relevant EGM to reset
2. Return the EGM to an unsuspended state (eg if the message was initiated by a machine
fault, clearing that fault will acknowledge the message)
25
Maxgaming Qld
Manager Utilities User Guide
7.11.2 Modes of escalation
There are three types of message escalation available:
Pager
This will escalate the message to a specific pager that has already been defined (known as the
‘parent pager’)
Pager Event Group
This will escalate the message to another pager that has the relevant Event Group assigned to it
Zone and Pager Event Group
This will escalate the message to another pager that has both the relevant event group and
relevant zone assigned to it.
7.11.3 Escalation Setup
Setup of escalation is accessed via the Paging Configuration Items screen, which can be located
in the Edit menu (found in the Paging Maintenance screen)
This will display the following screen:
Paging Enabled
Escalation Enabled
Length of time
before escalation
Check this box to enable paging.
For escalation to be activated, this box must be checked.
This is the amount of time the attendant has to acknowledge the
pager message before it gets escalated to another pager (bear in mind that
on busy nights, it will take longer to acknowledge messages).
26
Maxgaming Qld
Length of time
message remains
Manager Utilities User Guide
This is the amount of time a pager message will continue to get escalated if it
is not acknowledged (eg – if this is set as 60 secs and escalation time is set to
30 secs, the message will get escalated twice before being removed from
the system).
If the escalation box is checked, this will allow access to the next screen:
Field descriptions are as shown on this screen. As mentioned previously, there are three types of
modes to select from.
NOTE: If the ‘pager’ mode is selected, then a parent pager will also have to be selected for each
pager. This is done by editing the properties of the pager (accessed in the Paging Maintenance
screen).
7.12
VIP Paging Alert
The paging system can be set to alert staff when a ‘VIP patron’ enters the venue. A VIP Patron is
also known a member with a Rating Grade (for more information please refer to the chapter on
Rating Grades).
This will then send a page to a defined pager when a VIP patron inserts their card into a Gemini
Unit for the first time on any day. The pager will display the EGM position with any additional display
text defined by the venue.
If your venue would like to use this function, it needs to be enabled from Maxgaming Help Desk.
Before you contact Maxgaming, be sure you know beforehand which rating grade you will be
using for this paging alert.
After contacting Maxgaming, you will then need to enable the paging event. Click on
PROMOTIONS/PAGER MESSAGES:
27
Maxgaming Qld
Manager Utilities User Guide
At the icons at the top of the screen click ASSIGN EVENT->GROUP.
Find the VIP PLAYER ONSITE alert and double click to display the Event:
Type the display text for the pager and ensure the PAGING ENABLED box has been ticked. Click
OK to save changes.
Select the VIP pager event and using the mouse, ‘drag and drop’ the event onto the required event group (which is, in
turn, attached to a pager).
28
Maxgaming Qld
Manager Utilities User Guide
8 Redemption Items
Redemption Items are the items a patron will ‘buy’ using the points they have earned. These items
can consist of products generally available in a venue’s prize showcase but have now
encompassed the likes of Dinners For Two, Drink vouchers, cash vouchers, Keno games and much
more.
The Redemption Item Manager is used for setting up and maintaining all the different types of
redeemable items, and fixing their values for redemption.
To view the existing Redemption Item types from the Manager Utilities Map, click on the
Redemption Items icon.
The gaming site will appear at the left. Expand the tree structure below it to see the existing
redemption items.
8.1
Creating a new Redemption Item
To create a type of Redemption Item from the Manager Utilities Map, click on the Redemption
Items icon to open the Redemption Item Manager window.
In the Redemption Item Manager window, click on the NEW ITEM icon. This opens the first window
of the New Redemption Item wizard.
Complete the fields as per normal.
29
Maxgaming Qld
Manager Utilities User Guide
New Redemption Item Fields
System
Select Monitoring from the list
Site
Select your site from the list
Description Type
A brief description for the new redemption item. This will appear on the
docket that prints when the patron requests the product from the list.
Monetary Value
The price of the item in dollars and cents (the system will automatically work
out the value required for points, based on the Bonus Point type created in
the POINTS section).
Point Type
Select the type of point that can be used to redeem the item.
Cash Flag
Tick this checkbox if this Redemption Item will be redeemed for cash (i.e. it is
not an item of merchandise).
Available
If the prize is available to redeem for points tick the box.
Quantity in Stock
This allows for stocktake purposes. Each time a prize is redeemed the
number decreases to zero which then flags the item as unavailable. For an
item that will ALWAYS be availble (i.e. gift voucher) leave this field blank. DO
NOT enter a zero value for this purpose.
Check or uncheck the Run Wizard again on Finish checkbox as needed. Click NEXT and enter any
comments required (i.e please take to cashier to redeem prize).
Click FINISH when done. If you have checked the RUN WIZARD AGAIN ON FINISH, the wizard will
reappear to repeat the steps. Click CANCEL if all redemption items are entered.
Any new redemption item will be added to the existing items.
8.2
Maintaining Redemption Items
In the Manager Utilities Map, click on the Redemption Items icon to open the Redemption
Manager window.
8.2.1 Editing a Redemption Item
In the Redemption Manager window, expand the tree structure to show the existing redemption
types.
1. In the left hand pane, right click on the redemption item you wish to edit.
2. Select Properties from the pop-up screen.
3. On the General tab page, edit the fields as required. These fields are identical to the fields
described in Creating A New Redemption Item.
4. On the Comments tab, edit any comments necessary.
5. Click OK when done.
8.2.2 Deleting a Redemption Type
In the left hand pane, right click on the redemption item you wish to delete.
Select Delete from the pop-up.
Click Yes in the confirmation box or NO if you do not wish to delete this item. If Yes is selected, the
item will be deleted from the screen.
Items can only be deleted after 90 days post redemption (ie; if the prize was redeemed less than 90
days previously, it will be ‘associated with a redemption’ and cannot be deleted).
30
Maxgaming Qld
8.3
Manager Utilities User Guide
Redemption Items Stock Control Report
This is available under Reports and can be used for stocktaking purposes. Click on REPORTS and
open the UNALLOCATED folder. Double click on the Redemption Items Stock Control Report.
Choose the column you want the report sorted by and click FINISH.
Based on your selections the report wil generate on the screen.
As with any report in Wildcat, this report can be exported using the Export Function.
31
Maxgaming Qld
Manager Utilities User Guide
9 Age Groups
The facility exists within the Card Services System Reports function to use Age Grouping as one of
the reporting criteria. This will allow sites to determine the Age demographics of their Membership
base and assist with marketing and promotional opportunities based on the Patron’s Age group.
The Age Group Manager is used for viewing and setting up of these patron age groups.
9.1
Viewing existing Age Groups
In the Manager Utilities Map, click on the Age Groups icon. Expand the tree structure below it to
see the existing Age Groups(if the age groups have been set up).
Highlighting a group in the left-hand pane will show that group's properties in the right-hand pane.
9.2
Creating a New Age Group
From the Manager Utilities Map, click on the Age Groups icon to open the Age Group Manager
window.
Click on the New Group icon. This opens the New Group wizard.
Fill in the fields in the wizard window:
System
Select ‘Monitoring’
Site
Select your site from the list.
Description
Type a description for the new age group type.
Minimum Age Range Fill in the youngest age, in years, that is included in the group.
Maximum Age Range Fill in the oldest age, in years, that is included in the group.
Check or uncheck the Run wizard again on Finish checkbox as needed. Click on finish and the
new age group will be added.
9.2.1 Editing an Age Group
In the Age Groups Manager window, expand the tree structure to show the existing Age Groups.
Right click on the Age Group you wish to edit in the left-hand pane.
Select Properties from the pop-up. On the General tab page, edit the fields as required. These
fields are identical to the fields described under the previous section, Creating a new Age Group.
Click OK when done.
9.2.2 Deleting an Age Group
In the Age Groups Manager window, expand the tree structure to show the existing Age Groups.
Right click on the Age Group you wish to delete in the left-hand pane. Select Delete from the popup.
Click Yes in the confirmation box.
32
Maxgaming Qld
Manager Utilities User Guide
Age Group Reports
The AGE GROUPS set up in this function can be used when sorting the following reports:
• Membership Grouping Detail
• Membership Grouping Summary
• Patron Average Bet – Group Summary
• Patron Mailing Report
• Patrons Preference Detail Report
• Patron Preference Detail Report
• Patron Preference Summary Report
• For more detail please refer to the Reports chapter in this manual.
The sort function is available via the Report Wizard:
The default sort function will be set to ALL. Click on the box beside ALL and you can specify which
age group on which to report.
33
Maxgaming Qld
Manager Utilities User Guide
10 Patron Details
The Patron Detail Manager is used for setting up personalised details for patrons that are required to
be kept by the venue, but don’t appear as default fields in the New Patron Wizard. This function is
useful for recording a spouse/regiment/club affiliations/locker numbers etc.
Personalised details that have been set up in this section can be selected and viewed when
editing a patron in the Card Accounts section.
Adding a New Detail Type
In the Promotions Map, click on the Manager Utilities. Click on the Patron Details icon. Expand the
tree structure to show the existing patron details.
Click on the New Detail Icon to open the New Patron Detail wizard.
Fill in the fields in the wizard window.
System
Site
Description
Select Monitoring from the list
Select your site from the list
Type in a name for the new patron detail type
Click on the Finish button to create the detail type. The new Patron Detail type will be added to
the list in the Patron Detail manager.
10.1.1 Adding a Patron Detail Type
In the patron maintainance window find the patron as per normal search process.
At the bottom right of the screen, find the PATRON DETAIL window.
34
Maxgaming Qld
Manager Utilities User Guide
Click on ADD NEW to add a new detail:
In the drop down box you will find the Detail Type entered previously. Choose the detail required
and then click in the VALUE field:
This is a free text field. Type in the required information. There is no need to save any changes. This
option will hold the value until changed by the user.
10.1.2 Editing a Patron Detail Type
• Follow the steps to find the Other Details screen in the Patron Maintenance Window.
• Highlight the value and press the DELETE button on the keyboard. Type in the new value.
10.1.3 Deleting a Patron Detail Type
• Follow the steps to find the Other Details screen in the Patron Maintenance Window.
• Highlight the value and press the DELETE button on the keyboard. The value field will be
blank from this stage onwards.
Please see the CARD ACCOUNTS manual for the process on attaching a Detail to a Patron.
The Patron by Extra Details and Patron Mailing report will print the selected details.
35
Maxgaming Qld
Manager Utilities User Guide
11 Messages
The Message Manager is used for creating messages to be displayed on the LCD display on the
Gemini Unit associated with each EGM. These messages can be displayed on all the EGMs at a
site, one floor of EGMs, one bank of EGMs, or on one individual EGM.
11.1
Updating/Changing a Message
At the Manager Utilities Map, click on the Messages icon to open the Messages Manager. On the
right of the screen you should see the list of Promotional Messages.
Right click on the message to update and choose PROPERTIES.
The only part of the message that can be edited is the Message Text Field.
Once the message text has been changed, click OK to save the changes.
If the ENABLE box is ticked, the message will start scrolling on the gemini unit immediately.
If you want to delete the message, untick the ENABLED box and the message will stop scrolling.
36
Maxgaming Qld
Manager Utilities User Guide
12 Barrel Draw
The Barrel Draw function allows the card services system to work in conjunction with the monitoring
system to recognise when a promotion is being run and to print an entry ticket into a barrel when a
patron meets the predetermined entry criteria.
The entry criteria can be based on wins, turnover, jackpot hits or point of sale. Multiple tickets can
also be produced for a patron’s birthday if desired.
The barrel draw printer is a Star Micronics TSP442 connected to the management pc via the hub. It
is for the site to provide a barrel for the tickets to drop into.
PLEASE NOTE: Only one active promotion per printer is permitted.
12.1
Creating a Promotion
Choose Barrel Draw from the Promotions Manager Map.
This will display the Barrel Draw Setup Manager where any past, current and future promotions are
visible and the status of each promotion. It also shows which printer is enabled with each
promotion.
Click on NEW (in the top left corner). This will show the New Barrel draw Promotion wizard.
Complete the fields as required
37
Maxgaming Qld
Manager Utilities User Guide
12.1.1 Barrel Draw Promotion Fields
Site
Choose the site from the drop down box.
Description
This will appear at the top of the ticket printed and will identify the promotion
in Wildcat.
State
Choose Inactive or Active for the state of the promotion.
Printer
Choose a printer from the list.
Or Points
See BDS Points Promotion
Enable Reporting
Tick this box to be able to generate a report on barrel draw activity.
Kiosk Promotion
See Kiosk Promotion Setup
Start Date/Time
The first day of the promotion.
Stop Date/Time
The last day of the promotion.
Archive Promotion
This section tells the system to delete records in the database relating to the draw after X amount of
days. The number of records that a barrel draw feature produces in the database is sizeable and
in order to keep the table to a manageable size information is deleted when no longer required.
It is suggested that the purge be set to a maximum of 14 days (the default is 14 days). All reports
pertaining to this promotion must be run within the purge time as all records will be lost once
records are purged.
Click on Next to move to the next screen.
This screen is used to configure which hours the promotion will be running. Click on the time period
for the promotion to run for each day. If the promotion is not required to run on certain days,
remove the tick from those days.
In the example shown above the promotion will run every Monday between 12pm and 2pm.
PLEASE NOTE: It is only possible to run one active promotion at a time on each printer. If you
attempt to try and run two at once, Wildcat will produce the following error message.
Click on Next to move to the following screen.
38
Maxgaming Qld
Manager Utilities User Guide
The EGMs screen allows the
site to specify which EGMs the
promotion will be run on.
A tick means the promotion is
activated on this selection.
If a site wants the promotion to run
for the whole site, do not touch this
screen as this is the default setting.
In the example shown only Bank 1
is enabled.
Click Next to proceed to the
following screen.
The Criteria screen allows the user
to choose the criteria a patron
must meet to earn an entry ticket
in the promotion.
It is also possible to have more
than one criteria selected at once
e.g. Turnover of $30.00 OR Wins of
$10.00.
The Birthday Bonus Tickets means
that if the patron satisfies the
promotion criteria on their birthday
they would get bonus tickets for
each time they qualified for a
draw.
The POS Transaction tickets mean that if your system is connected to a Point of Sale component, a
ticket can now be obtained by making a purchase at the bar (with a total points value of X).
The messages screen allows for messages to be sent to the Gemini Unit and EGM when a Barrel
Draw is active. Click OK when done.
39
Maxgaming Qld
12.2
Manager Utilities User Guide
BDS - Points Promotion
The ticket spitter function can also be used to reward patrons (who match the promotion criteria)
with points – instead of entry into a major draw.
Follow the same instructions for a normal ticket spitter promotion, however choose the POINTS
instead of PRINTER option. Choose the Point Type and amount of points to reward the patron.
Click NEXT and follow the same format as per normal ticket spitter promotions.
As this promotion format doesn’t use a printer, as many of these promotions can be setup as
required.
12.3
BDS - Kiosk Promotion
A new criteria has been added to Barrel Draw to allow the printing of tickets from the Kiosk to Barrel
simultaneously. The 1st card entry at Kiosk per day can be printed via barrel draw. The has the
same functionality as the kiosk prize draw where the ticket only prints on 1st card insertion for the
day. It would eliminate the need for a 2nd chance 1:1 draw on the kiosk.
Please note that it can only be set for one promotion at a time per site.
40
Maxgaming Qld
12.4
Manager Utilities User Guide
Ticket Format
Tickets produced by the promotion will have the following Format.
Ticket #:
Promotion:
Patron:
Member ID:
Card:
Printed:
52
Win a Car
John Smith
1011
7720
2001-06-23 10:46:21.395217
(id:1)
The last line called Printed shows the date and time (the number after the . should be disregarded
as it is in milliseconds).
The ID number is the criteria that was used to produce the ticket.
12.5
Barrel Draw Reporting
Reports can be generated detailing all the tickets that have been produced using this function.
These report can assist sites with marketing and also with disputes concerning patrons.
Click on REPORTS. Double click on the UNNALLOCATED folder.
Select one of the following reports:
1. Promotion Voucher Report by EGM
2. Promotion Voucher Report by Member Number
Complete the wizard to generate the required report and print if necessary.
PLEASE NOTE: When setting up the promotion, Wildcat will have requested a time period for when
information regarding the promotion can be purged. The time period to be selected is for the site
to decided however promotion information for these reports is only kept for a maximum of 8 weeks.
12.6
Paper Rolls
The tickets are 28mm long - from a 80m roll a site will get approximately 2800 tickets from a roll.
Please contact Maxgaming Help Desk to request an order of Barrel Draw rolls.
These rolls may have a Maxgaming watermark on the non-thermal side to distinguish which way
the roll is to be loaded into the printer.
The thermal side should be up when pulled through the front chute.
If the paper roll ends whilst printing tickets any further tickets will remain in a ‘queue’ until a new roll
is inserted. Once the new roll is in position and the printer is returned to ‘online’, the tickets will
automatically start printing.
12.7
Printer Alerts to Pagers.
When using the maxgaming CSS Paging System an alert can be sent to a designated pager when
the printer is offline or runs out of paper.
Please see the Paging System Section for details on this setup.
41
Maxgaming Qld
Manager Utilities User Guide
13 Player Kiosk
The Player Kiosk is used by patrons to assist in the retrieval of point balances or in redeeming points
for prizes from their Player Card account. In addition a patron may also participate in Prize Draws
(similar to Lucky Door prizes) by simply inserting their Player Card into the Kiosk.
The Kiosk can also be utilised by staff as an ‘Attendant Terminal’ when using Employee Cards. For
more information on Employee Cards, please see the section on Employees.
The Player Kiosk comprises of an in-built PC, with multi-media capabilities, networked to the Site
Controller via a hub. The external components consist of a touch screen, card reader, barcode
scanner (for future enhancements) and a ticket printer.
The Player Kiosk has the ability to reward frequent visitors to your venue by printing out random
prizes. This is set up via the Kiosk icon found in Promotions.
13.1
Creating a Prize Draw
Upon insertion of a Player Card into the Kiosk, the patron can automatically qualify for a Prize Draw.
Each patron can qualify only once per day. Should the patron win a prize the Kiosk will display the
respective message & print a ticket for the patron to collect their prize.
13.1.1 Prize Probability
As there is usually more than one prize potentially available to a player a system hierarchy is used.
When a player inserts a player card they are eligible for the lowest probability prize first, then the
next highest until they win a prize or have been considered for all prizes. If a player wins a prize they
are then ineligible for all of the remaining levels of probability.
ie.
prize A has a probability of 1 in 1000 card swipes
prize B has a probability of 1 in 250 card swipes
prize C has a probability of 1 in 100 card swipes
Please note that a patron CAN MATCH ALL THREE probabilities at the one time (i.e. it is possble for
the patrons to win 3 prizes at the one time).
Click on Promotions, Manager Utilities and Kiosk Setup.
42
Maxgaming Qld
Manager Utilities User Guide
Click on New Prize icon to display the first screen of the New Prize Item Wizard. Complete the fields
as required.
System
Site
Prize Description
Birthday Prize
Enabled
Probability
Win Message
Prize Type
Second Chance….
Always Monitoring
Select venue from the drop down box
A description that will be shown on the Management PC Screen
If this prize draw if for a Birthday (see Birthday Prize section)
Tick this box for the prize to be enabled.
How often, per customer, this prize is to be won (NOTE: Only one prize per
day per customer)
Text displayed on the Kiosk screen.
Choose to award a Prize or Points.
Allows a patron to win this prize more than once (after a set time).
Click on NEXT.
Prize Value
Ticket Text
Days To Expire
Prize Quantity
The value of the prize award (in dollars and cents)
This text will appear on the ticket printed from the kiosk.
How many days the ticket is valid.
Set how many of these prizes are to be awarded. Leave blank for unlimited
quantity.
Click on Next.
43
Maxgaming Qld
Manager Utilities User Guide
In this screen date & time parameters are to be set for when this particular prize becomes available
or when the prize will stop drawing:
In the final screen the prize can be restricted to particualr rating grades (the default is ALL RATING
GRADES) and/or Simplay users.
Click on FINISH and this prize item is now enabled.
13.2
Birthday Prize
The kiosk has the ability to award a patron a ‘Birthday Prize’ if they match the birthday prize criteria.
To create a birthday prize follow the steps for creating a normal kiosk prize.
44
Maxgaming Qld
Manager Utilities User Guide
In the field BIRTHDAY PRIZE choose the preferred criteria.
If Birthday This Month
If Birthday Within…
means that the patrons must swipe at least once during the month of
their birthday
means that the patrons must swipe at least once within X days either
side of the birthday. If the patron can only win this prize on the EXACT
DATE OF BIRTH choose this option but leave the days field blank.
If a patron matches the birthday criteria, a birthday cake graphic will appear and a sound will play
(clapping) to annouce to the customer they have won.
13.3
Editing Prize Items
13.4
Second Chance Draw
A prize item can be edited as required by right clicking on the item & selecting Properties. Make
the changes and click OK to save changes or CANCEL to close without saving changes.
If a ‘ Second Chance’ draw is required to be set up at a site the probability of winning the prize
must be set at 1:1 - this means that if no other prizes are won by inserting a valid card into the kiosk
a Second Chance ticket will be issued. Text similar to “Place ticket into Second Chance Barrel to
enter the weekly draw” should be set up to print on the ticket in the New Prize Item wizard.
The prize value in dollars and cents is to be set at $0.00 for Second Chance draws. This way the Prize
Draw redemption report is not showing incorrect information when totalling prizes issued in a given
period.
13.5
BDS - Kiosk Promotion
A new criteria has been added to Barrel Draw to allow the printing of tickets from the Kiosk to Barrel
simultaneously. The 1st card entry at Kiosk per day can be printed via barrel draw. The has the
same functionality as the kiosk prize draw where the ticket only prints on 1st card insertion for the
day. It would eliminate the need for a 2nd chance 1:1 draw on the kiosk.
For more information please refer to the BDS section of this manual.
13.6
Player Kiosk Screens
The kiosk display has been designed to be user friendly. The following graphics are an example of
what the kiosk will display for each option. Please note that the format may be different.
45
Maxgaming Qld
Manager Utilities User Guide
13.6.1 Idle Mode
Idle mode will show when the kiosk in not in use. In idle mode the Player Kiosk displays how to insert
your card (future developments of the Kiosk will allow for promotional movies to be played - similar
to screen savers - during idle mode).
13.6.2 Invalid Card or Card Not Inserted Correctly
In the event of an invalid card being inserted into the Kiosk or a Player Card not inserted correctly
the following error will be displayed.
Please ask the patron to re-insert the card to activate the player card screen.
13.6.3 Card Inserted
Upon insertion of a Player Card the system will attempt to validate the card.
46
Maxgaming Qld
Manager Utilities User Guide
13.6.4 Main Menu
The Main Menu currently offers two choices - a balance inquiry & the redemption screen for
accrued points.
13.6.5 Points Balance
To view available points, a simple process of inserting the player card & touching ‘Points Balance’
at the menu will complete this transaction.
13.6.6 Points Redemption
The redemption of points can be performed by the customer inserting their card into the Kiosk &
selecting ‘Show Me The Prize List’ from the main menu. The redemption screen offers a selection of
prizes from which a patron may redeem points for prizes (only one prize can be redeemed at any
one time).
47
Maxgaming Qld
Manager Utilities User Guide
In order to view the full list of prizes a patron must scroll up or down the screen by touching the
respective arrow alongside the prize list. The redemption item view defaults to the most expensive
item available that matches the current points balance. The arrow below is available to scroll
down to the next screen in the prize list.
The arrow in this screen is used to scroll back up the list of prize screens.
The patron makes the selection by touching the required prize. This will change to letters to blue.
Pressing the ‘Redeem Item’ button and then confirming their selection by touching ‘Yes’ will print a
ticket receipt.
Once the ticket has printed the points balance will be decreased by the amount of the redeemed
item.
Should a patron decide they no longer wish to progress with their chosen prize they simply select
‘No’ and the Kiosk will return to the Main menu.
13.6.7 Insufficient Points for Redemption
When insufficient points are available for the redemption of a prize the following error will be
displayed.
48
Maxgaming Qld
Manager Utilities User Guide
By following directions a patron may then reselect a prize within the available points balance from
the selection menu.
13.6.8 Technical Difficulties
Should the Kiosk lose its connection to the Site Controller the following error will be displayed.
This error is essentially due to the database being no longer available to the Kiosk.
Ensure the Cat 5 cable is secured at back of Kiosk and/or check at the Hub (near your site
controller) that the link light is illuminated. Restart the kiosk if necessary.
13.7
Prize Draw Screens
Once a player had inserted their card, the following screen may display.
Should a patron not win an instant prize a ‘Second Chance Draw’ feature can be setup to print a
ticket prompting the patron to enter a manual barrel draw.
49
Maxgaming Qld
13.8
Manager Utilities User Guide
Player Kiosk Reports
Kiosk reports are found in the Unallocated Folder in the Reports Section.
13.8.1 Kiosk Usage Report
The report lists all player card entries into the Kiosk for a defined period and summarises the results
at the bottom of the report.
13.8.2 Prize Draw Redemption Reconciliation Report
This report lists all prizes issued from the kiosk for a defined period showing the patrons who received
these prizes and the monetary amount of the prize. The report has the ability to show ONLY
BIRTHDAY PRIZES as an additional filter.
A summary of prize type and points type is included.
13.9
Player Kiosk Maintenance
The Maxgaming Kiosks should only be cleaned with mild products such as Windex, and only when it
has been switched off and the power cable removed from the unit (always test other cleaning
products on an inconspicuous area). When using a cloth, make sure it is rung out before use.
13.10 Kiosk Printer – Replacing Paper Roll
The printer is thermal based & located in the Kiosk housing. It is essentially maintenance free & the
only item that requires replacement is the paper roll.
13.10.1 Standard Kiosk Printer
To release the paper flick down the green peg to release the Printer Head and pull the paper out.
Close the printer head. Insert new roll and move paper to the start of the printer head. Insert the
paper as far as possible until the printer head grabs the paper and pulls it through (the printer must
be powered on to detect the paper).
13.10.2 Mini Kiosk Printer
To remove existing paper roll, push down on the black tab at the front right of the printer. This will
release the printer head. Pull out the old roll and snap the printer head back into place (i.e ‘close
it’s mouth’). Insert the spindle and place the paper roll into the printer mechanism as pictured
below. The printer must be powered on so it will detect the paper and feed automatically.
50
Maxgaming Qld
Manager Utilities User Guide
14 Ratings
By using the Ratings function a Site is able to grade their patrons according to the number of
Ratings Points they have accumulated over a given period of time. These Ratings Grades can be
labelled, for example Platinum, Gold, Silver, and Bronze etc. A patron is automatically allocated to
one of the grades depending on the level of ratings points they have accumulated.
This function allows a Site to quickly identify high-value patrons and allow them to specifically
reward those patrons with extra bonus points, prizes or rewards (if warranted).
The Ratings Manager is used for creating and maintaining these different patron ratings.
14.1
View Existing Ratings
14.2
Creating a new Rating Grade
From the Manager Utilities Map, click on the Ratings icon to open the Rating Manager.
Choose a site in the left-hand pane and expand the tree structure below it to see the existing
ratings.
PLEASE NOTE: a ratings point must be created before using this function. See the chapter on
POINTS for more detail.
From the Manager Utilities Map, click on the Ratings icon to open the Rating Manager. Click on
the New Rating icon. This opens the New Rating Grade wizard.
Complete the fields in the wizard window.
System
Site
Description
Point Type
Minimum Level
Maximum Level
Select Monitoring
Select your site from the list
A brief description for the new type (i.e. Gold or Platinum)
Rating Points is the default.
Type the minimum number of points a patron needs to be included in this
rating (1 point = $1 turnover).
Type the maximum number of points a patron can have before moving to
the next highest rating (1 point = $1 turnover).
Click Finish when done and the new rating will be added to any existing rating types.
**When choosing levels for points, think of how fast or how slow you would like your patrons to
move up to each level. All patrons will start at a ‘base’ level of zero points (i.e. base/bronze).
51
Maxgaming Qld
14.3
Manager Utilities User Guide
Maintaining Ratings
14.3.1 Editing a Rating Type
Right click on the rating type you wish to edit in the left-hand pane and select Properties from the
pop-up.
On the General tab page, edit the fields as required (these fields are identical to the fields
described under the previous section, Creating a new Rating).
Click OK when done.
14.3.2 Deleting a Rating
Right click on the rating type you wish to delete in the left-hand pane and select Delete from the
pop-up.
Click Yes in the confirmation box.
14.4
Marketing Ratings Points
14.4.1 Points Rewards
A promotional point equation can be created using the ratings as a filter. For example: all Platinum
rated members can accrue normal bonus points at half the criteria required – simply because they
are a ‘Platinum member’. For more details see the POINTS chapter in this manual.
14.4.2 Kiosk Rewards
Prizes can be won on the kiosk by patrons of a particular rating grade. Please refer to the section
on Kiosk for more information.
14.5
Ratings Reports
•
Inactive members
•
Members Birthday
•
Membership Grouping Detail and Summary reports
•
Patron Profit
•
Patron Rating
•
Account Statement
•
Account Transaction Detail and Summary reports (by account and transaction)
•
Patron Export Reports
•
Patron Mailing Report
•
Patron Preference Detail
•
Patron Preference Summary
The following reports can be sorted using the ratings points that have been created:
For more detail please refer to the Reports chapter in this manual.
52
Maxgaming Qld
Manager Utilities User Guide
15 Membership Types
A Site can have various levels of Membership eg. Social Members, Full Members, Associate
Members etc. A patron will be allocated to one of these Membership Types when their account is
created. This type of membership can also be used as reporting criteria.
15.1
Creating a New Membership Type
From the Manager Utilities Map, click on the Membership Types icon to open the Membership
Manager window.
From the Membership Manager window, click on the Membership icon. This opens the first window
of the New Membership Type wizard.
Compete the fields as required.
System
Always Monitoring.
Site
Choose the site.
Description
Membership Name i.e.Associate Member, Social Member etc.
The following sections will only appear if Membership Receipting is enabled:
Associate Membership
Membership Fee
Expiry Date
Expiry Period
Allows spouses/partners to be included (ie associate members)
The annual membership fee (this will assist with receipting)
Choose Specific Date or Number of Months after creation of
member.
Enter the specific date of expiry or the number of months after
creation that the card will expire.
Click on FINISH when done.
NOTE: If expiry occurs on a specific date, once a year the site will have to increase the year of the
expiry date to accommodate new financial years (i.e. 2004 will have to become 2005).
53
Maxgaming Qld
15.2
Manager Utilities User Guide
View Existing Membership Types
From the Manager Utilities Map, click on the Membership Types icon.
The gaming site will appear in the left-hand pane. Expand the tree structure below it to see the
existing membership types.
15.2.1 Editing a Membership Type
In the Membership Manager window, expand the tree structure to show the existing membership
types.
Right click on the membership type you wish to edit in the left-hand pane and select Properties
from the pop-up. On the General tab page, edit the fields as required.
Click OK when done.
15.2.2 Deleting a Membership Type
In the Membership Manager window, expand the tree structure to show the existing membership
types.
Right click on the membership type you wish to delete in the left-hand pane and select Delete from
the pop-up screen.
Click Yes in the confirmation box.
15.3
Membership Type Reports
The MEMBERSHIP TYPES set up in this function can be used when sorting the following reports:
•
Membership Grouping Detail
•
Membership Grouping Summary
•
Patron Aveneage Bet – Group Summary
•
Patron Profit
•
Patron Rating
•
Patron Mailing Report
•
Patron Preference Detail Report
•
Patron Preference Summary Report
•
Inactive Members
•
Members Birthday
•
Patron Export Report
For more detail refer to the Reports chapter in this manual.
54
Maxgaming Qld
Manager Utilities User Guide
16 Patron Groups
The Patron Group Manager is used for creating and maintaining different Patron Groups and
Patron Group Members within these groups. For example, a patron Group might be Dart Club and
members can be allocated to this group.
To view the existing Groups from the Manager Utilities Map, click on the Patron Groups icon.
Expand the tree structure below the site name to see the existing Patron Groups and Members.
16.1
Creating a New Patron Group
In the Manager Utilities Map, click on the Patron Groups icon to open the Patron Group Manager
window. From the Patron Group Manager window, click on the New Group icon. This opens the
New Patron Group wizard.
Fill in the fields in the wizard window
System
Select Monitoring from the list
Site
Select your site from the drop down box
Description
A brief description for the New Patron Group
Permanent
Tour or Permanent
Tour Start Date Time If you chose ‘Tour’ in the previous field, you need to set up the duration for
which this group will be valid. Type the start Date/Time here.
Tour Finish Date/Time Type the end date/time here.
Check or uncheck the Run wizard again on Finish checkbox as needed and click FINISH when
done.
The new Patron Group will be added to any existing groups.
55
Maxgaming Qld
16.2
Manager Utilities User Guide
Adding Patrons to a Group
In the Patron Group Manager window, open the tree structure and select the group to add
patrons.
Click on the Members icon. This opens the Edit Patron Group Members wizard.
Click on the Browse button to find patrons' details in order to add them to the group. This opens the
Account Search dialog box.
Select either the Patron or Account tab to search for
a patron by name or account details (you only need
to fill in one field to search for a patron, e.g. only the
patron's surname or their first name or their Card
number).
After clicking Find Now, select the
patrons you wish to add from the
list below the dialog box.
To select more than one name,
hold down the <Ctrl> key while
clicking with the mouse.
Click OK when done. (or Close to
cancel a search.)
The new Patrons will be added to
the chosen Group.
16.3
Maintaining Patron Groups
16.3.1 Editing a Patron Group
• In the Patron Group Manager window, expand the tree structure to show the existing
Groups.
• Right click on the Group you wish to edit in the left-hand pane.
• Select Properties from the pop-up.
• On the General tab page, edit the fields as required.
• Click OK when done.
16.3.2 Deleting a Patron Group
• In the Patron Group Manager window, expand the tree structure to show the existing
Groups.
• Right click on the Group you wish to delete in the left-hand pane.
• Select Delete from the pop-up.
• Click Yes in the confirmation box.
56
Maxgaming Qld
16.4
Manager Utilities User Guide
Reporting on Patron Groups
Using the Patrons Groups that have been created, the following reports can be sorted:
•
Inactive Members
•
Members Birthday
•
Membership Grouping Detail
•
Membership Grouping Summary
•
Patron Profit
•
Patron Rating
•
Patron Mailing
•
Patron Preference Detail
•
Patron Preference Summary
The sort option will appear in the reports wizard:
For more detail refer to the Reports chapter in this manual.
57
Maxgaming Qld
Manager Utilities User Guide
17 Patron Preferences
The Patron Preference Manager is used for creating and maintaining different Patron Preference
Groups and Patron Preference Types within these groups. For example, a Patron Preference Group
might be Sport, and types within this group could be Rugby, AFL and Cricket.
To view the existing patron Preferences from the Manager Utilities Map, click on the Patron
Preferences icon. Highlight your site in the left-hand pane and expand the tree structure below it
to display the existing Patron Preference Groups and Types.
17.1
Creating a Patron Preference Group
From the Patron Preference Manager window, click on the New Group icon. This opens the New
Preference Group wizard.
Fill in the fields in the wizard window.
System
Site
Description
Always Monitoring
Select your site
Sport, Favourite Drink, Favourite Meal etc
Check or uncheck the Run wizard again on Finish checkbox as needed and click Finish when done.
The new Patron Preference Group will be added to the existing groups.
17.2
Creating a new Patron Preference Type
From the Patron Preference Manager window, click on the New Type icon. Fill in the fields in the
wizard window
System
Site
Preference Group
Description
Choose Monitoring from the drop down box.
Select your site.
Select the group you want the new type to belong to.
Rugby League, Bourbon and Coke, Chinese etc
58
Maxgaming Qld
Manager Utilities User Guide
Check or uncheck the Run wizard Again on Finish checkbox as needed and click Finish when
done.
The new Patron Preference Type will be added to the chosen Group.
17.3
17.3.1
•
•
•
•
Maintaining Patron Preference Groups or Types
Editing a Group or Type
Right click on the Preference Group or Type you wish to edit in the left-hand pane.
Select Properties from the pop-up.
On the General tab page, edit the fields as required (these fields are identical to the fields
described under the previous section, Creating a New Patron Preference Group).
Click OK when done.
17.3.2
•
•
•
Deleting a Patron Preference Group or Type
Right click on the item you wish to delete in the left-hand pane.
Select Delete from the pop-up.
Click Yes in the confirmation box.
17.4
Allocating a Preference to a Patron
From the PROMOTIONS screen, click on CARD ACCOUNTS. This will open the Patron Maintenance
window. Search for the particular patron by entering a surname, membership number or by
swiping the card through the card swipe.
Click on PREFERENCES and the preferences that have been created will appear.
According to each patron, select the preference by clicking in each box. To remove a tick, click
on the corresponding box and the tick will disappear.
59
Maxgaming Qld
17.5
Manager Utilities User Guide
Reporting on Patron Preferences
After creating the preference groups and types, reports can be generated using the Reports
function. This can be useful when marketing new products or deciding on the type of
entertainment to be available within your establishment.
The following reports use the Patron Preference Settings:
•
Patron Preference Detail
•
Patron Preference Summary
60
Maxgaming Qld
Manager Utilities User Guide
18 Employees
Employee Cards can be created to enable gaming staff to clear EGMs from disabled states by
inserting a card rather than turning the reset key on an EGM. This is used in conjunction with the
Cashier facility for the completion of transactions such as Cancel Credits, Hopper Fills, Jackpot
payouts & Short Pays.
Employee cards can also be used through the Kiosk (available through maxgaming) to print
vouchers – cutting down on travel time between the cashier box and customer.
Privileges are assigned to cards to enable different staff the ability to perform certain tasks.
A gaming site can be set to one of three different levels of Card Functionality. This is for QCOM
EGMs only - DUCMS protocol EGMs still require the reset key to be turned to generate a voucher
and enable the EGM.
The three card levels are as follows:
NONE
OPTIONAL
REQUIRED
The employee must open and close the door to resume the EGM.
The employee may open and close the door to resume the EGM or use a valid card.
Most sites are automatically given this option.
The employee must use a card to resume the EGM. It is possible, at this level, for a
cancel credit lockup to be cleared by using a key but the EGM will not resume until
a valid employee card is used.
The level to be used at a set is set by maxgaming after conferring with management on the
specific staff requirements.
18.1
Creating Employee Cards (for sites with card embossers only)
18.2
Creating Employees
An Employee Card Type must be created before entering employees into the program. Please
contact Maxgaming Help Desk to create the Employee Card Type.
After creating Employee Card Types you can create Employees and assign the relevant Card types
to these employees (this is for sites with card printers only – otherwise please contact maxgaming to
order a set of employee cards).
From the Manager Utilities Screen, select Employees.
61
Maxgaming Qld
Manager Utilities User Guide
Enter employee details as required and assign the Employee Card Type.
1
2
3
4
If the employee has a Gaming
Employee Licence, enter this number
in the Licence Number field. It will
appear on the payout voucher if
printed via the kiosk.
Only screen 1 and 5 are compulsory
screens.
5
18.3
Assigning Cards to Employees
Select an employee by highlighting their name, then select ‘New Card’ (If no employees are
visible, press F5 to refresh the screen).
62
Maxgaming Qld
Manager Utilities User Guide
The Employee Card Wizard will appear. Assign the employee to the card required.
Follow the prompts on the screen and emboss the card as per usual.
Once the card has been issued, it is ready to be used by the staff member for the functions
assigned to that particular type of card.
63
Maxgaming Qld
Manager Utilities User Guide
19 Membership - Additional Functions
Membership Functions is part of the membership receipting component and allows sites to
maintain an up-to-date database of the site’s financial membership and provide reporting
capabilities based upon that information.
Clicking on this icon will allow the site to report on Membership receipting and also activate extra
functions available only to sites with this icon enabled.
19.1
Membership Reports
A number of reports have been added to provide marketing data to sites. Double click on the
report and complete the wizard to run the report according to the required criteria.
19.1.1 Membership Summary by Age Group
This report provides a summary of the memberships by Age Groups. It can be reviewed as
numerical data or converted into a bar graph.
19.1.2 Membership Summary by Member Type
This report provides a summary of the memberships by type. It can be reviewed as numerical data
or converted into a bar graph
19.1.3 Membership Summary by Post Code
This report provides a summary of the memberships by Post Code. It can be reviewed as numerical
data or converted into a bar graph (one of the filters includes the top postcodes).
19.1.4 New Members Report
This report provides a summary of the members that have joined between two particular dates
(specified by the site).
19.1.5 Random Members Draw Report
This report lists the result of the Random Members Draw held at the site using the Random Member
Draw function available.
19.1.6 Receipted Fees Detail Report
This report lists the members who have renewed or joined the site between a start and end date
specified by the site.
19.1.7 Receipted Fees Summary Report
This report lists a summary of all fees receipted by the site for the period selected.
64
Maxgaming Qld
Manager Utilities User Guide
19.1.8 Membership Renewal by Membership Type
This report summarises the membership renewals based on the membership types for the period
selected.
19.1.9 New Members by Membership Type
This report summarises the new memberships based on the membership types for the period
selected.
19.2
Random Members Draw
This function allows the site to run a completely random draw based on selected criteria (member
status/membership type/player/non-player/card user/non-user).
Once the site has selected the patron criteria (and specified a prize) the draw will commence. The
computer screen will change to display the draw taking place. The following information will
appear:
•
•
•
•
•
Draw number (Draw numbers increment by 1 every time the function is used)
Draw date and time
Prize description
Winning membership number (8 digits with leading zeros)
Winning Member’s Name
Once the winner is displayed the site can click Yes or No to indicate that the prize was claimed.
The site then has the option to PRINT, REDRAW or CLOSE. Each draw must be of the status
‘not claimed’ to move to the redraw function. There is no limit to the number or redraws and the
information can be printed at any time.
19.2.1 Print
If the site has not specified whether the prize was claimed or not, they have the option of printing
the screen display (not recommened for thermal printers).
19.2.2 Redraw
If the winner does not claim the prize then the site has the option of re-drawing. Clicking NO will
enable Wildcat to commence the re-draw and generate another random member number as the
winner (and increment the draw numberby 1).
19.2.3 Close
Closing the function will enable Wildcat to save all results and close the window.
19.3
Wide Area Draw Facility (Membership Draw)
Wide Area Draw facility is now available for sites belonging to a Group Host. Call the Helpdesk to
enquire if your site is belongs to a Group Host Ph 1800 700 116.
Grouped sites with Loyalty are able to conduct a draw at one venue which will include all active
patrons from members from all venues in the group. This is possible as the draw is actually
conducted on the maxgaming Central Host and the result is sent back to the venue where the
draw was originated.
Left click on Promotions, then select Manager Utilities, Membership Functions and the following will
appear.
65
Maxgaming Qld
Manager Utilities User Guide
Select Random Members Draw
Enter a Prize Description. Click NEXT.
Use the drop down arrows to select the appropriate criteria. Select Finish.
This will generate a membership draw using the criteria used in the previous screen.
66
Maxgaming Qld
19.4
Random Number Generator
19.5
Kiosk Membership Setup
Manager Utilities User Guide
This function allows the site to enter an upper and lower limit and Wildcat will then supply a
randomly generated number within thse limits each time a draw is triggered (by clikcking on
DRAW). Please note that these draws are not saved by Wildcat and that it IS POSSIBLE FOR THE
SAME NUMBER TO BE CHOSEN MORE THAN ONCE.
Patrons can renew their membership through the kiosk by redeeming points to the value of the
membership type. This icon just allows an extra message to display (specified by the site). The
default message ‘Membership Renewal Successful’ will display automatically.
67
Maxgaming Qld
Manager Utilities User Guide
20 Reports
The Reports module enables the user to create and print reports relating to Promotions and Card
Services. The information included in a report can be selected via filters in the wizards. Reports are
initially displayed on-screen and can then be printed. They can also be exported into a variety of
file formats to enable them to be used in other applications.
20.1
Report Folders
You can personalise Wildcat to hold reports in a particular folder of your choice. This may make it
easier to find reports used on a daily basis.
20.1.1 Creating a New Folder
• From the Manager Utilities Map, click on the Reports icon to open the Promotions reports
window.
• Select one of the existing categories (folders).
• Select Edit / New from the Menu at the top of the screen, or right-click anywhere in the
window and select New.
• A new folder is added.
20.1.2 Renaming a Folder
• Select the folder that you want to rename.
• Click and hold the left mouse key for 2 seconds and release. The folder name should be
highlighted and a cursor should be flashing beside the name.
• Type a unique name for the folder.
20.1.3 Deleting a Folder
• Select the folder that you want to delete.
• Select Edit/Delete from the Menu at the top of the screen, or right-click and select Delete.
Any reports contained in folders that get deleted are returned to the Unallocated folder (as
Wildcat reports cannot be deleted). This folder will appear automatically if it has been removed
previously.
20.1.4
•
•
•
•
Moving Reports to Folders
Expand the tree structure of folders to show the available reports
Left-click on the report you wish to move and hold the left mouse button down.
Drag the mouse pointer until the required new folder is highlighted and release the left
mouse button.
The Report will be moved to the new folder.
20.2
Viewing and Creating Promotion Reports
20.2.1
•
•
•
Generating a Report
From the Manager Utilities Map, click on the Reports icon.
Highlight the report that you wish to create.
Complete the report wizard by using one of the methods described in Report Creation
Tools.
Reports are generated by means of ‘wizards’. Each wizard window has list-boxes or fields to fill in to
ensure that the report required is generated. A report may contain multiple pages and the fonts
that are used depend on the report generated and cannot be changed.
68
Maxgaming Qld
20.3
Manager Utilities User Guide
Report Creation Tools
Once you have selected a report, various icons and menu selections are available that allow you
to generate reports in different ways.
20.3.1 Run Icon
The Run icon is generally used the first time you generate a report. Run can also be accessed from
the menu location View / Run, (or double click the Report Name, or highlight the report and press
<Enter>).
20.3.2 Re Run Icon
The Re Run icon is used if you want to regenerate a report, with a few changes. This icon
regenerates a report using the selections you have previously used. You rarely want to regenerate
a report verbatim, so you can alter selections in each screen. Re Run can also be accessed from
the menu location View / Re Run.
20.3.3 Auto Run Icon
The Auto Run icon is used to automatically generate a report with built in system preferences. Auto
Run can also be accessed from the menu location View / Auto Run.
20.3.4 Close Icon
The Close icon closes the Reports window.
Automatic printing
To automatically print all reports, select Edit / Auto Print from the menu.
20.4
Reports Toolbar
Once the report has been generated, there are various options available, as indicated by the
icons on the Reports Toolbar.
20.4.1 Printing a Report
To print the report, click on the Print icon. The standard Windows Print dialog box opens, from
which you can select the printout settings.
20.4.2 Print Preview
To toggle between the Print Preview and Normal view, click on the Print Preview icon. (The Print
Preview mode removes the blue border from around the page and keeps the column titles at the
top of the page while scrolling).
20.4.3 Re Run
If the report is not quite what you wanted, you can re-run it by clicking the Re Run icon which takes
you back to the first wizard window, but retains your most recent selections in each wizard window.
These selections used in the previous Run can be altered as required.
20.4.4 Paging through a Report
The First, Prior, Next and Last icons allow you to page through the report. You can also drag the
slider in the right-hand scrollbar of the Reports window up or down, or use the Page Up and Page
Down keys.
20.4.5 Stopping Report Creation
The Stop icon allows you to terminate the creation of a report before it completes. Do not use a
report that has been stopped before the completion of the generating function.
69
Maxgaming Qld
Manager Utilities User Guide
20.4.6 Closing a Report
The Close icon closes the current report.
20.4.7 Page Setup
To change the page setup for a generated report, Select File / Page Setup from the menu.
To change the size or source of the paper, click on the Size or Source field list-box to display the
drop down menu and click on a selection.
To change the page orientation, select Portrait or Landscape.
Click on the OK button.
20.4.8 Viewing Multiple Reports
To view multiple reports at a time, select Window from the menu, then select Cascade, Tile
Horizontal or Tile Vertical as required.
20.5
Exporting Reports to Other Applications
Reports can be exported in various file formats for use in other applications. To save a report in
another format
Click on the Export icon
(or select View / Export from the Reports Menu).
Select the type of file that you want to export
from the Export File Type list box, e.g. Microsoft
Excel file (.XLS), Text file (.TXT), dBase file (.DBF),
Lotus 1-2-3 file (.WK1), etc.
Type the pathname and filename in the Export
File Name field, or click on the Browse button,
select a path and then type in a filename in the
resulting filename field.
Uncheck the Include headings checkbox if you do not require headings.
Click OK when done. A confirmation dialog box will pop up if the export was successful.
If an error occurs, e.g. incorrect path typed, an error dialog box will appear. Click OK on this box to
return to the Export dialog box where the error can be corrected.
Wildcat can also create and export a file with all the patron details specified by the user. This can
be done in the Patron Table Export (found in the Unallocated folder).
Using the wizards, select the criteria needed to create a personalised report and continue the
wizards until completed. Wildcat will ask what format the file is to be saved as and where this file is
to be saved (along with the file name). The file will save in the nominated area but it is
recommended that this file be saved directly to the a:\ drive (floppy disk) ready to be used in mail
merges etc.
Maxgaming has created a manual to assist with exporting reports for the purpose of mail merging
(lables/envelopes/letters etc). Please contact the Maxgaming Help Desk to request a copy.
70
Maxgaming Qld
20.6
Manager Utilities User Guide
Reports Wizards
Most of the fields used in Reports wizards are summarised below. Some or all of these could appear
when generating any given report.
System
Site Group
Start Day or Month &
End Day or Month
Inactive Members
Before…..
Gender
Age Group List
Number of Patrons
Sort By
20.7
Select Monitoring
Select your site only.
Select the start and end times of the reporting period.
Members that have not played since this date.
Select a Gender
Select a range of Patron’s Age Groups
Type in the number of patrons to report on or use the arrow keys to
Increase or decrease an amount.
Select the options you wish to sort the report by.
Patron Select Wizard
A number of Reports allow for the selection of Individual Patrons. In these cases, the following
Search Wizard will appear.
Tick the All check-box to select all Patrons at the Site, or left click the Browse button to select a
number of individual Patrons.
The following screen will then appear.
Type in all or part of their surname into the Surname field, press Enter or Find Now, and select their
name from the resulting list.
OR
Type in all or part of their first name into the First Name field, press Enter or Find Now, and select their
name from the resulting list.
71
Maxgaming Qld
Manager Utilities User Guide
OR
Swipe the card through the card swipe, and press Enter or Find Now.
OR
Select the Account tab to search by Account Name, Account Number or Card Number.
Type their Account Name (or first letters of their Account Name) into the Account Name field,press
Enter or Find Now, and select their name from the resulting list.
Press OK to select the highlighted patron or Close to cancel the search function
Continue this process until all Patrons required are listed.
To remove a patron from the list, highlight the applicable Account Number and select Remove.
To View and Print Reports, refer to REPORTS CREATION mentioned earlier in this chapter.
FOOTNOTE: Any numberof Patrons listed in the search function can be selected at the same time
by simply left-clicking on all those required.
20.8
Promotion Report Categories
20.8.1 Audit
Promotions Audit Report
Shows details of auditable transactions such as Point Adjustments, Card and Patron suspension and
reactivation etc.
20.8.2 General Reports
Promotions Event
Shows details of events regarding the gemini units. This report will mainly be generated by
technicians and maxgaming staff.
20.8.3 Marketing Reports
Inactive Members
Identifies and gives details of patrons who have not played a session since a chosen date.
Member’s Birthday
Shows the details of patrons who birthdays fall between two specified dates.
Membership Grouping Detail
Shows full detail of patron age, gender, membership type, ratings etc of patrons (depending on
selection criteria).
Membership Grouping Summary
Shows a summary of patron details (membership number, name and address – depending on
selection criteria)
Membership Renewal
Shows the expiry date and anniversary date of the selected patrons. This is used by sites who utilise
the ‘CYCLIC RENEWAL’ method for memberships (12 months expiry from date of joining).
Patron Average Bet
Shows stroke, turnover, wins and average bet details for a selected patron’s account.
Patron Average Bet –Group Summary
Shows stroke, turnover, wins and average bet details for selected groups of sites.
Patron Profit
Shows selected amount of patrons who have produced top profits.
72
Maxgaming Qld
Manager Utilities User Guide
Patron Rating
Shows selected amount of patrons who have produced the top turnover figures.
20.8.4 Points Reports
Account Point Liability
Shows the available balance (in point and dollar value) in a selected patron’s account or overall
total liabilty.
Account Statement
An account statement for a selected patron’s account showing all transactions.
Account Transaction Detail
Lists each separate transaction in detail. Can be sorted or filtered by Transaction Types.
Account Transaction Summary – By Account
A summary of patron account details. Account names, numbers, amounts accrued, redeemed
and balance are all listed by account.
Account Transaction Summary – by Transaction
A summary of patron account details. Transaction types, point types, system, site and amount are
all listed by transaction.
Patron Session Detail
Shows details of gaming machine activity for a selected patron.
Patron Session Summary
Shows a summary of gaming and machine activity for a selected patron.
Voucher Detail
Use this report for detail on vouchers being printed when patrons redeem points. The report lists the
voucher number, detail of the voucher, patron name, number, address and phone number.
Voucher Reconciliation
Similar to voucher detail, although this report details voucher transactions while also listing the
amount of points redeemed for each voucher and the value, in dollars, of each voucher
redeemed.
20.8.5 Unallocated Reports
The following reports are used for other components of the Card Services System. Please refer to
the manual that corresponds with the hardware selected.
•
•
•
•
Kiosk Usage (Kiosk)
Prize Draw Redemption Reconciliation (Kiosk)
Promotion Voucher Report by EGM (Barrel Draw)
Promotion Voucher Report by Member Number (Barrel Draw)
Other Reports available in the Unallocated folder are as follows:
Account Point Liability – Group Host Summary
Shows the available balance (in point and dollar value) in a selected patron’s account or overall
total liabilty for a Group Host.
Cards Issue Report
Lists details of cards that have been printed – showing membership numbers, member names and
date and time of cards being printed.
Patron By Extra Details
For use when reporting on the Patron Detail function. For more information see the section Patron
Details.
73
Maxgaming Qld
Manager Utilities User Guide
Patron Comments Report
Reports on the information kept in the free text fields of a patrons membership details.
Patron Export Report
This report is to assist in a mail merge of the membership database. It is possible to export very
detailed information on all or selected members to a disk.
Patron Mailing Report
This report is similar to the Patron Export Report but not as detailed and will only include patrons
who have the ‘MAIL-OUT’ box ticked in their profile.
Patron Preference Detail Report
This report is useful for promotions/marketing to assist with future promotions targeting particular
preferences.
Patron Preference Summary Report
This is a summary of the above report.
Random Members Draw Report
Lists the members drawn during selected Members Draws. For more information refer to Members
Draw section.
Redemption Item Stock Control Report
This report will assist when stocktaking the redemption items available on site.
Turnover Comparison by Site
This report shows difference between whole site turnover and turnover involving members with
cards. Also shows points accrued in the selected period and the dollar value of the points
accrued.
Voucher Reconciliation Summary
A summary of all prizes redeemed using points sorted by status.
20.8.6 Utilities Reports
Account Transaction Status
Shows full details of a selected patron’s account, sorting by the current status of the transactions.
74
Maxgaming Qld
Manager Utilities User Guide
21 Expiry Dates
A Site is able to set specific Expiry Dates for Patrons, Cards and Vouchers.
PLEASE NOTE: Do not use this function for memberships if Membership Receipting is enabled. The
expiry dates for memberships can be found in MEMBERSHIP TYPES.
21.1.1 Patrons
This is most commonly the Club’s Membership Year end date eg. 30/6 or 31/12 etc.
21.1.2 Patron Cards
A date after which the Site has decided that the card cannot be used and must be renewed.
21.1.3 Redemption Vouchers
A date after which a voucher, if not redeemed, will become invalid.
The Expiry Dates Manager is used for creating and maintaining these expiry dates.
DO NOT use the PATRON EXPIRY Tab if you are to use the Membership Receipting Function.
21.2
Creating or Maintaining an Expiry Date
From the Manager Utilities Map, click on the Expiry Dates icon to open the Expiry Date
Maintenance window.
Click on the required tab to select the
item you wish to create or maintain
Select an option:
•
•
Never Expire
Expire
If Expire is chosen, then choose between:
On - then select the required date
The required number of months after the
creation date.
Click OK when done.
75
Maxgaming Qld
21.3
Manager Utilities User Guide
Viewing Existing Expiry Dates
From the Manager Utilities Map, click on the
Expiry Dates icon to open the Expiry Date
Maintenance window
Click on the required tab to select the Item
you wish to view.
76
Maxgaming Qld
Manager Utilities User Guide
22 Documents
The documents module is used for keeping track of documents used for the 100-point check
required for some membership types and/or Simplay. The document types are listed as groups and
viewed in a tree structure.
General documents (e.g. a scan of a driver’s licence) can also be listed here.
22.1
View Documents
22.2
Creating a New Document Group
In the Promotions Map, click on the Manager Utilities icon to open the Manager Utilities Map
window. In the Manager Utilities Map window, click on the Documents icon. Expand the tree
structure to show the existing document groups.
Click on the New Group icon to open the New Document Group wizard.
Fill in the fields in the wizard window.
Check Type
Description
Group Point Limit
Form Section
Select the type of group from the list box.
Type a name for the new group
Type in the maximum number of reference points (of the 100 points) that can
be contributed by documents in this group.
Type in the section of the 100 points Check form the this new group
corresponds to. Use a, b, c etc for subsection within a section.
Check or uncheck the Run wizard again on Finish checkbox as needed.
Click on the Finish button to create the group.
The new Group will be added to the list in the document manager.
22.3
Creating a New Document Type
Click on the New Doc icon to open the New Document wizard.
Fill in the fields in the wizard window.
Check Type
Document Group
Description
Point Value
Form Section
Select the type of check (or General Documents if the document is not
related to points checking) from the list box.
Select the group that the new document type belongs to from the list box.
Type a name for the new document type
Type in the number of points that this type of document can contribute.
Type in the section of the 100 point check form that this new document
corresponds to. Use a, b, c etc for subsections within a section.
Check or uncheck the Run wizard again on Finish box as needed.
Click on the Finish button to create the document type.
The new type will be added to the list in the document manager.
77
Maxgaming Qld
22.4
Manager Utilities User Guide
Editing a Document Group’s Details
Editing a Group’s details uses the same wizard as used in creating a new Group.
•
•
•
•
22.4.1
•
•
•
22.5
•
•
•
Right click on the group that you wish to edit.
From the pop-up screen, select Properties.
The Edit Document Group wizard opens.
Edit the wizard as required.
Editing a Document’s Details
Right click on the Document type that you wish to edit.
From the pop up screen, select properties (the Edit Document wizard opens).
Edit the document wizard as required.
Deleting a Document Group or Type
Right click on the document type or Group that you wish to delete.
From the pop-up, select Delete.
Click yes in the confirmation box.
The item will delete only if it is not in use at time of deletion.
78
Maxgaming Qld
Manager Utilities User Guide
23 Card Functions
Card Functions are used for embossing, setting up and maintaining the player cards.
To Access Card Functions, click on the Manager Utilities icon from the Promotions Map.
Click on the Cards icon from the Manager Utilities Map.
The Cards Screen will appear.
23.1
Card Types
The Card Services System provides the facility to set up both Patron and Employee cards, each
capable of specific functions. There is also the ability to be able to set up a number of each type of
card depending on your site’s specific needs eg. A site may have separate cards for Life Members
and Ordinary Members.
The Card Type Manager is used for creating and maintaining these different card types.
23.1.1 Creating a New Card Type
• From the Manager Utilities Map, click on the Cards icon to open the Card Manager Utilities
Map.
• Click on the Card Types icon.
• Choose your site in the left-hand pane and expand the tree structure below it to see the
existing card types.
• Click on the New Type icon. This opens the first window of the New Card Type wizard.
Fill in the fields in the wizard window.
System
Site
Card Holder Type
Description
Select a system from the list
Select your site from the list
Select a type from the list (employee/patron)
Type a description for the new card type.
Click NEXT to open the second wizard.
Tick the checkboxes to enable the functions that you wish this type of card to have.
Check or uncheck the Run wizard again on Finish checkbox as needed.
Click Finish when done. The new type will be added to the existing card types.
79
Maxgaming Qld
23.2
Manager Utilities User Guide
Maintaining Card Types
23.2.1 View the Existing Card Types
From the Manager Utilities Map, click on the Cards icon to open the Card Manager Utilities Map.
Click on the Card Types icon.
Choose your site in the left-hand pane and expand the tree structure below it to see the existing
card types.
23.2.2
•
•
•
•
•
•
Edit the Properties of a Card Type:
Click on the Card Types icon.
Expand the tree structure to see the existing card types.
Right click on the card type you wish to edit in the left-hand pane.
Select Properties from the pop-up.
Select the General or Permissions tab.
Edit the fields as required.
Click OK when done.
23.2.3
•
•
•
•
Deleting a Card Type
Click on the Card Types icon.
Expand the tree structure to show the existing card types.
Right click on the card type you wish to delete in the left-hand pane.
Select Delete from the pop-up.
Click Yes in the confirmation box.
23.3
Card Accounts
The Card Accounts icon on the Card Manager Utilities Map window is used for creating and
maintaining card accounts and patron accounts. It is identical to the Card Accounts icon on the
initial Promotions Map.
Please refer to the Card Accounts User Manual for more information.
23.4
Card Devices
The Card Devices icon is used to set up the card reader or card embosser. This is only required if
there is a reader or embosser attached to the Management PC.
To set up card devices from the Manager Utilities Map, click on the Cards icon to open the Cards
Map. Click on the Card Devices icon to bring up the following dialogue screen.
80
Maxgaming Qld
Manager Utilities User Guide
Complete the fields in this window.
Card Reader Tab
Not Installed
Installed On
COM Port
Type
Select this if there is no card reader installed.
Select this if a card reader is installed.
Select the COM Port to which the card reader is attached. Use the arrow
keys to scroll through the list, if necessary. There can be only one device
attached to a port.
This denotes the type of card reader attached.
Card Embosser Tab
Not Installed
Installed On
COM Port
Select this is there is no card embosser installed
Select this if there is a card embosser installed.
Select the COM Port to which the card Embosser is attached. There can be
only one device attached to a COM Port.
High/Low Coercitivity Select for the type of magnetic strip used on the player card. This will be
advised by a maxgaming representative.
PIN Pad Tab
Not Installed
Select this is there is no PIN Pad installed
Installed On
Select this if there is a PIN Pad installed.
COM Port
Select the COM Port to which the PIN Pad is attached. Note that there can
be only one device attached to a COM Port.
Click the OK button to save the details.
If the wrong COM Port has been selected, an error message such as ‘Card Reader not responding
on COM Port X’ will appear at the bottom of the Patron Maintenance window.
23.5
Batch Card Creator (For Sites with Cards Embossers)
The Batch Card Creator function is used for printing multiple cards at one time. To create the
batch file for printing, the user must go into each member that requires a card and do the following
(ensure that the printer is turned off at this point):
Click on CARD ACCOUNTS and find the member as per normal search processes.
Click on CARDS (F7) to display this screen:
Click NEW (F3) and follow the process as if you were printing a card normally.
81
Maxgaming Qld
Manager Utilities User Guide
As there is no Card Printer enabled, Wildcat will store the file for printing at a later time:
The card file will show in the patron’s card maintenance window:
Close the screen and return to the Patron Window. Repeat this process for all patron cards.
To print multiple patron cards from the Manager Utilities Map, click on the Cards icon to open the
Card Manager Utilities Map.
Click on the Batch Card Creator icon to run the Batch Card Creation Wizard.
Select the members to print their cards or tick the ALL box to print ALL CARD FILES.
82
Maxgaming Qld
Manager Utilities User Guide
Click NEXT and then FINISH to start the printing process.
PLEASE NOTE – If the embosser is switched off or not set up correctly, you will get an error message.
Cancel back to the Card Manager Utilities Map and use the Card Devices icon to set up the
embosser (see the section on Card Devices).
You will be prompted to insert the required number of blank cards into the embosser.
Insert the cards and click OK.
The cards will be embossed in sequence.
Click OK when done.
23.6
Format Card (For Sites with Card Embossers)
The Format Card function is used for laying out text on a player card. To be able to use this
function, an embosser must be connected to your site Management PC.
From the Manager Utilities Map, click on the Cards icon to open the Card Manager Utilities Map.
Click on the Format Card icon to run the Format Card wizard. Select the card type from the drop
down box and your venue from the Site list.
Click the Finish button. This opens the Card Format Layout screen. Drag the database fields from
the right side of the screen to the left to make it appear on the card.
Click and drag the required text fields into position. You can also use the arrow keys on the
keyboard.
83
Maxgaming Qld
Manager Utilities User Guide
Use the Align Left and Align Top buttons to align text fields with each other. Move unwanted text
fields into the Columns Not Displayed box to the right of the card. Print a test card – if the layout is
not correct adjust the text as required.
When satisfied with the results, click the OK button to save the formatting.
23.6.1 Change Font Size
If you need to adjust the font size, double click on the field to change:
In the drop down box choose from the three sizes listed and click OK to save this change. Font size
is field specific therefor it is possible to have the members name and expiry date as a small size
whilst having the membership number as a large size font.
23.6.2 Card Format Layout
Key / Button Name
Description
Columns Not
Displayed
Place text fields that you do not wish to emboss on cards in this box.
Any text placed off the card's edge will be relocated here.
Align Left
To align two or more text fields flush left, move the 1st text field into
position, then hold down the <Ctrl> key and select additional text fields
with the mouse. Click the Align Left button.
Align Top
To align two or more text fields level horizontally: Move the 1st text field
into position. Hold down the <Ctrl> key and select additional text with
the mouse. Click the Align Top button.
Arrow Keys
You can use the arrow keys to move text fields too. Click on a text field
to select it (a frame appears round the field). Then press the arrow
keys to move it. Hold down the <Shift> key to speed up the
movements.
Configure
Click on the Configure button to select a picture file of the card. Click
on the Browse button in the next screen to find a file provided by your
Monitoring Service provider.
Test
Embosses a card with the text fields laid out as specified. (Assuming the
embosser is set up and working.)
84
Maxgaming Qld
Manager Utilities User Guide
24 Appendix – Terms and Conditions of Membership/Loyalty
It is important to set conditions of loyalty to cover any issues that may arise from the operation of
the loyalty and membership system. The following are example conditions only:
1.
2.
3.
4.
5.
6.
7.
8.
9.
10.
11.
12.
13.
14.
15.
16.
17.
18.
19.
20.
21.
22.
23.
24.
25.
26.
Only one membership per person is permitted.
Membership of the loyalty system is free.
<Insert site name> may refuse any application for membership.
<Insert site name > may terminate a membership in the Loyalty Program without notice for
any reason including, without limitation, if the member:
•
fails to comply with these membership terms and conditions;
•
abuses any privilege accorded to the member under the loyalty program
•
supplies any misleading information or make any misrepresentations to <insert
site name>.
•
no player activity is recorded on the card for a period longer than <insert
amount> months.
The decisions of management in relation to the operation of the reward/loyalty system are
final.
Player Loyalty Cards are not credit or charge cards, are not transferable and remain the
property of <insert site name>.
Points cannot be transferred between member accounts to accumulate a required total.
Any tax, liability or duty arising from a member’s participation in the Loyalty Program is the
responsibility of the member.
Points are earned on the basis that at least one standard point is issued for every <insert
amount of turnover/wins>. From time to time, bonus points may be issued in addition to
standard points under specially advertised promotions or competitions
It is the member’s responsibility to ensure their membership card is properly inserted into the
card reader and is generating bonus points. Any play accumulated without your card
properly inserted will not generate points (bonus points are displayed on the screen of your
machine as they accrue).
Management reserves the right to adjust all points, promotional prize tickets and gift
vouchers of any member resulting from malfunction, operation error or any kind of
misrepresentation.
Members wishing to redeem bonus points must do so before 31st October each year, where
<insert site name> will adjust all balances back to a nil value.
Bonus points will expire automatically once they reach 12 months in age.
Management holds no responsibility for loss of points or prizes due to the malfunction of the
Turbo Bonus System/Player Loyalty System.
Bonus points, prizes, complimentary gifts and promotions are subject to change without
prior notice.
When issued with a card, it is the cardholder’s responsibility to create their own PIN and to
not disclose this PIN to any other party. This PIN will protect points from being redeemed in
the case of a lost card (turbo program only).
Members of the loyalty program are issued their first card free of charge. Loss of card will
be result in payment of $5 for a new card to be printed.
Card holders cannot authorise others to use or claim prizes on their card.
Management is not responsible for any loss or damages incurred by members, directly or
indirectly relating to their membership card.
Members must be over 18 years of age to participate in the loyalty program.
It is the card holder’s responsibility to notify the venue of any change of address, or if any
card is lost, stolen or damaged.
Loyalty benefits and privileges are determined by <site name> and may vary or change
without notice.
In the case of self-exclusion or barring, ALL BONUS POINTS are forfeited.
All vouchers must be used before the stated expiry date and are for the designated
member’s use only.
Points will expire automatically <time period> after the point accrual date.
In the case of the death of a member, his/her benefits and privileges (including points) will
lapse automatically.
85
Maxgaming Qld
Manager Utilities User Guide
27. This loyalty program is conducted in accordance with <insert site name>’s Privacy Policy.
This policy complies with the Privacy Act and relates to the collection, storage and use of
personal member information. A copy of the policy may be viewed upon request.
28. Use of your membership card indicates acceptance of the Rules, Terms and Conditions as
stated above.
86