1
Quick Start Guide
www.DiveRite.com
CO8000 NiTek Q Computer QS Guide__Nov 14 2011
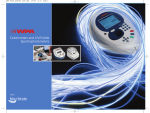
Congratulations on your Dive Rite NiTek Q purchase.
This Quick Start Guide is intended to familiarize you with the basic functions of this computer. It is not a
substitute for the user manual found in our library at www.DiveRite.com. You MUST read the NiTek Q user
manual in its entirety before diving this product.
The NiTek Q is an electronic device and electronic devices can fail. NEVER dive this computer without a back
up device or dive tables.
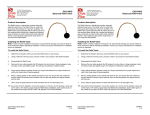
Before diving your NiTek Q the battery must be charged. The Q can be charged with either the included AC
charger or from any USB connector. To access the charging port, use a coin and turn the cap a quarter turn
counter clockwise to align the groove on the battery cap with the groove on the computer case. When this
groove is aligned the battery cap is no longer sealed. Plug the charger into an AC outlet or USB connection
and then into the port on the computer. The battery symbol is animated to indicate charging. Periodically
disconnect the charging cable and check the number of bars - a solid battery symbol indicates a full charge.
Upon full charge, reinsert the battery cap and using a coin turn the battery cap a quarter turn clockwise to
seal. Do not dive the computer unless the battery cap is sealed.
Getting Started
- The NiTek Q has an always-on OLED screen
-
-
that returns to a sleep mode (hibernation)
after 10 minutes.
either A or B button to bring it out
of hibernation.
The Home screen shows the serial number and
the software version.
The Surface screen is the default screen, which
will appear ten seconds following activation.
The Surface screen displays battery charge
status, date, time, choice of FRESH water or SEA
calibration, and the first gas mix you will use
when diving.
Navigating the menus of the Q is intuitive:
the left (A) button and right (B) button are
used in the same way across all screens.
Serial
Number
Software
Version
A
B
Home Screen
Surface Mode Screen
A to scroll
B to select
A to confirm the choice and advance
to the next option.
To return to the Surface Mode Screen:
and hold the A button for 2-3 seconds.
If no buttons are pressed within about 20 seconds, the screen will return to the surface mode.
To return the computer to hibernation:
the B button for 2-3 seconds.
Menus
Dive Option SET Mode
The dive option SET and display mode is where
all “dive” settings are programmed including
your P02 alarm for each gas (either 1.4 or 1.6),
%02, an optional maximum depth alarm, a maximum dive time alarm, conservatism/gradient
factor options, a sampling rate for the log book
(either 15 or 30 second intervals), the FRESH or
SEA water option, and brightness control.
CO8000 NiTek Quick Start Guide
SET Mode Screen
-
To get to the SET Mode Screen from the Surface Mode Screen:
the A button.
- Programming Gas Mixes
the B button. The MIX number will
be flashing “1.” To select Mix 1:
the A button, which will lock in your first
mix and then scroll to the P02 alarm option.
the B button to toggle between 1.4 and
1.6 P02 alarm.
www.diverite.com
Menus: SET Mode continued
the B button to choose your GF:
CONS 2 = 30/75 (default)
CONS 1= 40/100
CONS 0= 75/95
the A button to set your P02 alarm. The
computer will automatically advance to your %02
gas option.
NOTE: Up to 2 different gas mixes can be programmed, but if
you are only using 1 mix, you only need to set MIX 1.
the A button to select your GF. The
computer will then scroll to the flashing Imperial/Metric option.
Additional Settings
Imperial/Metric
the B button to select your %02.
- Dive Profile Sampling Rate
- Maximum Depth Alarm
- Maximum Dive Time Alarm - Fresh/Sea Water
- Conservatism/Gradient Factor - Brightness Control
- Metric/Imperial
the B button to toggle to either ft (Imperial) or m (Metric).
the A button to set your option. The
computer will then scroll to the sampling rate
option for your dive log.
Sampling Rate (for Log Book and Profile)
the B button to toggle to either 15 seconds or 30 seconds.
SET Mode Screen
the A button to set your selection. The
computer will then scroll to the calibration option
for either FRESH or SEA water.
Maximum Depth and Time Alarms
If you do not wish to set a Maximum Depth Alarm,
continue to press the A button to scroll through this
menu. If you wish to set a Depth Alarm:
FRESH or SEA
the B button until your reach your
desired maximum depth.
the B button to toggle to either FRESH
water or SEA.
the A button to select the depth, and
the A button to set your option. The
computer will then advance to additional
screens.
the B button to select “ON.” The computer will advance to the Maximum Dive Time
Alarm option.
Brightness Control
If you do not wish to set a Maximum Dive Time Alarm,
continue to press the A button to scroll through this
menu. If you wish to set a Dive Time Alarm:
Upon entering the SET screen, MIX 1 is flashing.
the A button repeatedly until the Brightness
number is flashing.
the B button until your reach your
desired dive time.
the B button to change the brightness.
When finished, press the A button to lock in your
selection.
the A button to select the time, and
the B button to select “ON.” The computer will scroll to the Conservatism/Gradient
Factor option.
Additional Screens
-
PLAN
LOG
PROFILE
-
PC
TIME/ DATE
the A button to scroll to additional screens.
PLAN displays the NDL (no decompression limit)
based on your programmed gasses for a dive.
the B button to activate the screen.
Continue pressing the B button to change depths
for your NDL.
SET Mode Screen
Conservatism/Gradient Factors
The NiTek Q uses the Buhlman ZLH16 algorithm,
a default gradient factor of 30/75, and two addit-ional pre-set GF settings to choose from that allow
for deep stops or shallow stops.
CO8000 NiTek Quick Start Guide
LOG is where your logged dives are stored.
the B button to activate the screen. Continue
pressing the B button to scroll through logged dives.
3
www.diverite.com
PROFILE is where graphic profiles of each dive are
stored.
the B button to activate the screen. Continue pressing the B button to scroll through your
logged profiles.
Second Underwater Screen
PC - Workbench dive software allows the Q diver to
perform
dive planning or gas mixes on either a PC or
.
MAC. An optional upgrade to the Workbench Logbook allows you to upload dive data and view dive
profiles. Contact Dive Rite at [email protected]
for information about the Workbench upgrade.
Second Underwater Screen: Displays current
depth, dive time, temperature and conservatism
(gradient) factor.
Changing Gas Mixes:
the A button and the MIX number will flash.
TIME - From the Surface Mode Screen scroll through
the menus using the A button to the TIME screen.
The seconds will be flashing.
the B button as needed to select mix number. O2, and P02 will change per the programmed mix.
the B button to reset to 00.
the A button to lock the mixture and return
to the primary screen. A mix cannot be locked in if it
causes you to exceed pre-programmed 1.4 or 1.6 ATM.
the A button to scroll to minutes.
WARNINGS: There are several visual warnings you
should be alert to and become familiar with. Refer to
your NiTek Q user manual at www.DiveRite.com for
additional information. These include:
the B button to set the accurate time.
Continue setting hours, year, day, and month using
the A and B buttons as directed above. To change to
24-hour time:
the B button when “PM” flashes.
Dive Mode
Dive Computer Mode: The Dive Computer Mode
is automatically entered when the computer enters
the water. It begins performing its dive calculations
once you descend below 5 feet (1.5m). While in
diving mode, the computer calculates and displays
information about your dive and prompts you with
safety stop information and warnings, if needed.
When diving, there are two screens you can toggle
between, and you can switch to different gas mixes,
when needed.
-
Ascent-Rate Warning
P02 Limit Warning
PGT Limit Warning
OLI Warning
Decompression Warning
Deco-Stop Violation Warning
FREEDOM OF CHOICE
OLI
Bar
This two-gas Nitrox dive computer gives you the
freedom to choose additional features as your skills
grow and your equipment changes. The Q diver can
upgrade to normoxic or hypoxic Trimix, CCR, digital
compass, and custom gradient factors. You only pay
for the features you will use and can upgrade to additional features at any time. Contact us at Dive Rite
at [email protected] to upgrade your NiTek Q
and then simply connect to any standard USB port
to unlock the features you have added.
PGT
Bar
Primary Underwater Screen
Primary Underwater Screen: Displays depth, remaining no-decompression time, dive time, max
depth, mix P02, and 02 percentage, mix number,
and PGT (pressure gas in tissue) and OLI (oxygen
limit indicator) bar graphs (graphic representations
of your “CNS clock”).
To get to the Second Underwater Screen:
and hold the B button. Release the B button to return to the Primary Underwater Screen.
CO8000 NiTek Quick Start Guide
SUPPORT: All Dive Rite products receive our commitment to excellence in customer service from your
fellow divers. Contact us at [email protected] or
phone at 800-495-1046, M-F 9A-4P, EST.
4
www.diverite.com
Using Your NiTek Q
The following is a checklist of general things you should pay attention to before, during, and after a dive.
Before A Dive:
Be sure the computer is charged. The Q can be charged from any USB connection or from
its included charger.
Ensure that the USB cap is secure.
Check that the proper time and date are set.
Check that the proper mixes and modes are set.
Review the dive plan for maximum depth, times, and for mixes you plan to use.
During A Dive:
Monitor your NiTek Q throughout the dive for depth and time.
Monitor the Pressure Gas In Tissue (PGT) and Oxygen Limit Indicator (OLI) bar graphs.
Heed all alarms or warnings.
Follow the no-decompression limits, or complete any displayed decompression schedule.
After A Dive:
Monitor Surface Interval Time if making another dive.
Follow desaturation and no-fly guidelines.
Review your dive using the log book and profile modes.
NOTE: The Q defaults to a sleep mode (or hibernation) after 10 minutes. The screen display is the biggest drain on the bat-
tery. You can put the computer back to sleep by pressing the B button for 3-5 seconds. To reawaken the computer press either
A or B button.
800-495-1046
www.DiveRite.com
Copyright © 2011 Lamartek, Inc. dba Dive Rite
This manual is copyrighted by Lamartek, Inc. dba Dive
Rite. You may not reproduce, translate, transcribe, or
transmit any part of this manual without express,
written permission from Lamartek, Inc. dba Dive Rite.