1
Timing Manual
Download Latest Manual at
http://www.eagleeyedv.com/ProManual_s/622.htm
Save .pdf file to C: Program Files > EagleEye > EagleEyePro > Help
Download Latest Software at
http://www.eagleeyedv.com/SoftwareUpdates_s/615.htm
Posted January 20, 2013
IN THE BAG
EQUIPMENT LIST
LICENSING & USB KEY
II. CROSS COUNTRY
3
3
I. TRACK & FIELD
A. SYSTEM OVERVIEW
1. General Overview & Suggestions
2 Operational Overview
3. Hardware Overview
4. Software Overview
4-5
6
6
7
B. OPERATION INSTRUCTIONS
1. Import Athletes
2. Time a Race
3. Read a Race
4. Assign Times
5. Save Results File
6. Wireless Trigger Unit
8
8
8
9
9
10
C. FILE SHARING
1. Using the USB Switch
11
D. CREATING FILES
1. Creating lynx.evt File (option 1)
2. Using Excel .xls File (option 2)
12
13
E. HARDWARE SET UP
1. Camera
2. Wireless Receiver & Transceiver
14
14
F. PRE-MEET SET UP
1. Recommended Order of Set Up
2. Camera Placement
3. Camera Alignment
4. Camera Adjustments
15
15
16
17
G. SET UP OPTIONS
1. Standard
2. Extended Distance
3. Multiple Camera
4. Gigibit PoE Ethernet Switch
18
18
18
18
H. PRE MEET PRECAUTIONS
1. Check Hard Drive Space
2. Turn Off Firewall
I. MISC. FEATURES
1. Change Race Clock Display
2. Print Proof of Performance/ Images)
3. Save or Export Video
4. Record & Review Simultaneously
5. Practice Mode – Virtual Grabber
19
19
20
20
20
21
21
A. SYSTEM OVERVIEW
1. Camera Options
2 Manual vs. Automatic Start
3. Entering Bib Numbers
4. Camera Alignment
22
22
22
22
B. OPERATION INSTRUCTIONS
1. Time a Race
2. Camera Alignment
3. Choose a Camera
23
24
25
C. RESULTS & FILES
1. Using an Excel .xls template
2. Suggested Hy-Tek Process
26
26
III. VIDEO ANALYSIS
1. Camera Option
2. On-Screen Overlay
3. Output to .avi
4. Export .seq to .avi
5. Play .avi File
6. Motion Analysis Software
27
27
27
28
28
28
IV. SUPPORT
A. TROUBLESHOOTING
1. Software Issues / Restore Settings
2. No Start Detection
3. No Camera Detection or Reduced Frame Rate
4. Poor Image Quality
5. Trouble Reading Hip Numbers
29
29
29
29
29
B. UPDATES
1. Software Updates
2. Manual Updates
3. Video Tutorials
4. Software installation on a Second Computer
29
29
29
29
V. SUPPLEMENTS
A. ADDITIONAL FILE SHARING OPTIONS
1. Sharing Results File via Internet Dropbox
2. Windows Ad Hoc Wireless Network
30
31
B. OPTIONAL DISPLAY
1. Set Up and Operation
2. Optional Extended Range Set-Up
32
33
C. DISCONTINUED PRODUCTS
1. GoSuite! File Sharing
2. Express Card
3. Sennheiser Trigger
4. Wireless Start System (blue trigger)
34
34
34
35
2
EQUIPMENT LIST
The standard Eagle Eye Pro 100 Timing system includes the following items shipped in an
easy to carry backpack. Please take inventory of the contents of your backpack to be sure all
items are included.
1. Computer
Includes: Lenovo Thinkpad notebook computer with power source. [Operating System: Windows 7. Software: Eagle Eye Pro
Timing Software, Pylon camera Driver, Sentinel USB Key Driver]
2. Video Camera with Lens
Included power source and protective pelican camera case.
3. USB Software Key
Stored in the protective pelican camera case.
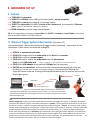
4. Wireless Trigger System
Includes: 1 x Receiver unit with power source and 2 x 15 inch attachable
antennas (one used for back-up). 1 x transmitter unit with 9-volt battery
installed, 1 x 4 inch attachable antenna and 2 x USB audio adaptor
(one use for back-up) and audio cable.
5. Data Cables
Includes: 1 x 300 foot cable & 1 x6 foot practice data cable.
6. Camera Mounting Kit (some 2014 packages).
Includes: Clamp, extension arm & geared tripod head.
7. Backpack Carrying
Includes: All listed equipment above.
LICENSING
Your Eagle Eye Pro software is licensed and controlled by
a USB key. The USB key must remain plugged into a USB port while Eagle Eye Pro is running.
If the USB Key is not in use, Eagle Eye Pro software will operate as a READ ONLY version.
Damaged keys:
A damaged USB key can be replaced at a cost of $75.00 plus shipping. The damaged key
must be returned to Eagle Eye before a replacement key can be shipped.
Lost or stolen keys:
The USB protection key acts as the actual license for the software and therefore a lost or
stolen key cannot be replaced without a fee. A replacement key is the same as providing
another copy of the software.
Lost or stolen USB keys/licenses can typically be claimed on the owner’s insurance.
3
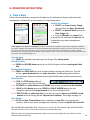
I. TRACK & FIELD
A. SYSTEM OVERVIEW
1. General Introduction & Suggestions
Your Eagle Eye Pro timing system is an easy to use combination of software and hardware. As with all
electronic equipment and computer software, it is important that you understand its many features. The
information below will help lay the foundation to begin learning your system and working with this
manual.
Training a Timing Operator
Operating your Eagle Eye Pro timing system does not require a computer expert. However, an operator’s
experience and ability depends on your expectations and the importance of the competition being timed.
It is possible to train a student in as little as fifteen minutes (10 minutes of instruction and 5 minutes on
their own) to operate the software for small time trial event, however more training is required for a
large invitational that integrates results with meet management software.
Practicing
Eagle Eye Pro software is equipped with a video simulator called a Virtual Grabber. Using the virtual
grabber allows you to practice without the need to connect the camera. Although you will not see a live
image, the Virtual Grabber allows you to trigger the race clock, record, playback, bookmark athletes,
determine results, etc. You will need to insert the USB Key before using the Virtual Grabber. Note:
Grabber is another word for camera.
Developing a Meet Schedule
We recommend using a rolling schedule for your first event, or building a time schedule with adequate
time between events so that the novice operator will not be stressed during competition. Adequate
practice and familiarity with the system will help assure a quality first meet experience for everyone. The
goal of a capable operator should be to allow the Starter to move the meet along as efficiently as
possible.
Meet Management Operator
Track and field competitions that integrate timing (Eagle Eye) with meet management software (Hy-Tek,
Race Tab, RaceberryJAM, etc.) require the use of two computers to operate efficiently; one computer
dedicated to timing and another dedicated to meet management. These two computers are typically
networked via the included USB switch. Above all, it is important not to underestimate the need for a
knowledgeable operator of your meet management software. This person dictates the flow of results
and must keep pace with the running events and enter field events in a timely manner.
Hip Numbers & Finish-Line Management
The use of hip numbers to identify athletes is common for all electronic timing systems. The ability to
successfully read hip numbers on the recorded video is a result of camera placement (distance of camera
to athlete(s)), the lens focus and aperture and the appropriate (exposure) setting for current lighting
conditions. Special attention to the above will assure that hip numbers can be identified on the recorded
race video.
4
The full frame video of Eagle Eye Pro offers a significant advantage. If a hip number of a finishing
athlete is obscured at the finish line, the video can easily advance forward or backward to reveal the
number. However, as is common with all competitions, hip numbers often fall off during a race. For
this reason it’s important to have a plan for the retrieval of hip numbers (athlete identity) immediately
upon the completion of a distance race. All timing system operators must have an accurate order of
finish to refer to while assigning times. With the camera mounted on the infield, we recommend
placing two hip numbers on each athlete, one on the left hip and a second number on the upper left
chest (often viewable on the recorded video). Secondly, we recommend that a finish line observer
physically write down a rank order of finishing athletes (hip numbers) as they cross the finish line.
Having a hip number retrieval process will save valuable time for the timing operator and assure your
event operates with the highest level of efficiency and accuracy.
Camera Alignment
Be sure to allow adequate time prior to an event to set up and align your camera to the finish line.
Create a plan in advance and practice mounting your camera off the ground (ladder, tall tripod, old
pole vault standard, volleyball pole, etc.). Our preference is multi-adjustable a frame aluminum ladder.
If possible, try and mount your camera on the inside of the track so that the camera is as close to the
finishing athletes (when not in lanes) as possible. This makes reading hip number considerably easier
and more reliable. Additionally, pay special attention to calibrating the finish line within the software
per the steps outlined in this manual.
System Set-Up
It’s recommend that you allow at least one hour for system set up. Although set up can take less time,
one hour allows for troubleshooting unforeseen issues. Above all, establishing a live-image (between
the camera and computer) should be your first priority. This assures the system is working properly.
1.
2.
3.
4.
5.
6.
7.
8.
Position camera on the finish-line.
Layout the 300 foot length of data cable from the camera to the timing computer.
Establish a live video image within Eagle Eye Pro software.
Move the timing computer to the finish line and re-establish a live-image on the computer, using
the six foot practice cable.
Within the Finish Line tab, select the Calibration tool while viewing the computer screen, adjust
the camera/clamp so that the calibration line is on the leading edge of the finish line.
Reconnect the timing computer to the main data cable.
Connect the wireless trigger and re-establish a live image. Be sure to verify detection within the
Trigger tab (be sure to properly connect the USB audio plug before opening the Pro software to
assure it detection).
Test the wireless system with the Starter while standing at the location furthest from receiver/
computer. It’s recommended to test from all start locations.
Communicate with Starter
It is important to explain to the Starter how to use the wireless transceiver. Let the Starter know how
to read the red and green lights and how the timer intends to communicate via the data lights; also if
you expect the Starter to immediately monitor for a successful start and recall the race if necessary. Be
sure to have an extra high quality 9-volt battery on hand for the wireless transceiver.
Troubleshooting
Your software settings are hard-coded and optimized for your timing application. To restore the default
settings, simply exit and reopen the software program.
5
2. Operational Overview
Start - Upon the firing of the starting pistol, the transmitter
worn by the Starter, sends a wireless signal to its receiver
(connected to the timing computer) to begin the race clock
within the Eagle Eye Pro software.
1. ➔
Capture - As the runners approach the finish line, the
Operator 'clicks' the record button to capture video directly
to the computer's hard drive. [Each frame is time-stamped to
2. ➔
1/1000th of a second, producing increments in excess of 100fps].
Bookmark - A simple press of the space-bar during the record process allows the Operator
to "mark" the video as athletes cross the finish line, making the review process extremely fast
and efficient (recommended for events 400m and longer).
3. ➔
Review – After the last runner crosses the finish line, the stop button is clicked and the
recorded race video is immediately available for review. The operator easily moves the video
(via the scrollbar, arrow keys or roller mouse) to bring the torso of each athlete to the finish line
and determine their finishing time.
4. ➔
Results – Results can either be recorded manually or integrated with meet management
software (such as Hy-Tek Meet Manager, RaceberryJAM, Race Tab, etc.) A press of the keyboard
automatically assigns the finishing time to the appropriate athlete within Eagle Eye Pro. This file
is accepted into the management software for seamless integration.
5. ➔
3. Hardware Overview
6
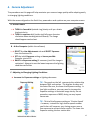
4. Software Overview
Eagle Eye Pro timing software is sophisticated yet easy to use. Its graphical interface is designed
to make operation both intuitive and efficient.
Tab structure shown below. The Race Results tab is
used for each event.
The Results and Finish Line tabs are shown below.
Eagle Eye Pro uses a convenient tab
structure (located on the right side of
the screen) that contains all the
necessary features for easy access.
Activating the Camera Icon reveals
seven tabs, each with a specific
function. Shown below are the Finish
Line and the Race Tab (most
commonly used.)
The Reel icon reveals a
directory of recorded events.
7
B. OPERATION INSTRUCTIONS
1. Import Athletes
Create an Event File (.evt) or Excel (.xls) template
Described on pages 11 and 12.
2. ➔ Import & Pre-Name the Race Video
SELECT the Results tab and CLICK Import and navigate to the
created .evt or .xls file. Once loaded within the Race Tab, SELECT
(highlight) the race from the list that is about to be run. This
will automatically name the video sequence (.seq file) by
the event name upon recording.
1. ➔
2. Time a Race
Arm the Wireless Trigger
PRESS the red button on top of the receiver to active the green ready light.
2. ➔ Arm the Software
PRESS Ctrl-F12 to ARM the system or the Arm button within the Race Trigger tab. The
word ARMED will appear when system is ready – and immediately change to TRIGGERED
upon the detection of the gun.
1. ➔
Important: If at anytime the time-code is triggered prematurely by the Starter (from bumping
the transceiver, etc.) – simply RE-ARM the software with Ctrl-F12. The time-code will keep
running however upon TRIGGERING the time code will start over at zero.
Record the Race
CLICK the red REC button to start recording prior to the athletes crossing the finish line.
Continue recording until ALL athletes have finished the race.
4. ➔ Create Event Markers “Bookmarks” (optional: Recommended for all distance events)
PRESS the SPACE BAR to mark finishing athletes just prior to crossing the finish-line. This
will create “Event Markers” on the recorded video time-line of each finishing athlete,
making it fast and easy to read distance events.
5. ➔ Stop the Race
CLICK the STOP button after the last athlete has crossed the finish line.
6. ➔ Signal the Start
PRESS the RED button (on top of the receiver) to active the ready light on the Starter’s
transceiver. This step is optional, however it serves as Red Flag to hold the Starter from
firing the gun before the timing operator is ready for the next event to begin. More info on
page 10 and 14.
3. ➔
Press RED button once to turn the Ready light RED. Press again to
turn ready light GREEN.
8
3. Read a Race
After stopping the record process, the captured video is immediately available for
review.
When NOT using Event Markers “bookmarks”
LEFT-CLICK and HOLD the timeline button with your mouse and proceed to drag the
video time-line left to right. Use arrow keys or mouse roller
wheel to make frame by frame adjustments as needed.
PAUSE to read the video as each athlete’s torso meets the
finish-line.
When using Event Markers “bookmarks”
ACTIVATE the video by CLICKING the
GREEN Event Marker Represent finishing athletes
video scroll bar (any location on the
scroll bar). PRESS Ctrl + Arrow Key (left or right arrow key) to jump to each event
marker “bookmark”. Use arrow keys or mouse to make frame by frame adjustments
as needed. PAUSE to read the video as each athlete’s torso meets the finish-line
overlay.
TIP: An athlete has crossed the finish line when the leading edge of their torso has met or exceeded
the finish line (the torso is considered the region between the neck and waist).
4. Assign Times
1. ➔
2. ➔
Be sure to first activate the time line region by clicking anywhere on the timeline bar.
TYPE the number key that corresponds to the finishing athlete’s HIP number or LANE
number. The time will automatically populate into the appropriate cell next to their
name. (as viewable in the results tab).
TIP: TIME REQUIREMENT: For double digit entries, press both numbers on the key pad within one second.
Example: For hip number 12, press the 1 and 2 keys consecutively. TIP: CORRECTING MISTAKEN ENTRY: Retype the
correct HIP or LANE number. TIP: DELETING ENTRY: Perform a RIGHT-CLICK on the cell you wish to delete the entry from.
5. Save Results File
After all times have been determined for each runner, EagleEye Pro
software generates (with the steps below) a results file that contains
the necessary information to integrate with Meet Management
software such as Hy-Tek, RaceberryJAM, Race Tab, etc.
1. ➔
2. ➔
CLICK the Save Times button.
CHOOSE the appropriate folder and SELECT Save
TIP: The folder you select to save the race file to will become the default folder for each
race to follow. Example: :C tfmeets folder is the default Hy-Tek folder.
TIP: The file name is defaulted and does not need to be manually typed.
Saved Video
Recorded sequences (race videos) do not need to be saved after each race. Each recording is
saved directly to the hard drive and labeled by event name. ACCESS recorded video with the
HISTORY REEL icon.
9
6. Wireless Trigger Units
The benefits of Sure-Start Technology begin as soon as both units are powered
on. Within moments, flashing lights turn solid red as the transceiver
and receiver synchronize with one another. Both units are
technically transceivers that make possible two-way communication
via a series of green and red lights that communicate the systems readiness,
Transmitter
effectively replacing the need for a ‘ready flag’ in the press box.
Although the LEARN pairing button is still present, it is no longer necessary to use as a pairing process (as it was
with the older blue generation 1 unit) since the wireless trigger and receiver auto-pair with one another.
Prior to each race the Starter should either:
1) HANG the transceiver from the gun hand (as shown) OR
2) HOLD the transceiver in the non-gun hand when both arms are held
outstretch and above the head (prior to and during the firing of the gun).
This option is often used when the Starter is monitoring and confirming a successful
start immediately after the gun is fired (option A below). When held in the non-gun hand,
it’s easier to tip the unit downward after firing the gun to visually confirm a green light (successful
trigger). A red light indicates a non-successful trigger and the race should immediately be recalled.
A. READY Mode Option
The READY mode allows the timing operator and Starter
to use the trigger units to communicate the same way a
flag is often used in the press box. A white flag in the press
box tells the Starter to begin the next race, while a red flag indicates the timing operator is not
ready or that a recall (upon the gun start) is needed.
Timing Operator: Presses the Ready/Reset button (on the top of the receiver) after each race to
turn the Ready light Red. The button is pressed again to turn the Ready light green once the
system is armed and ready for the next race .
Starter: The Starter monitors the transceiver and does not begin each race until the Ready light
turns green. The Starter may also choose to monitor the unit (immediately upon firing the gun) to
confirm the timing system was triggered. A red light on the unit would require an immediate recall
of the race.
B. GREEN Mode Option
The GREEN mode (or open mode) uses the Ready/Reset button ONLY when the timing
operator needs more time before the start of the next race. The timing operator DOES NOT
press the Ready/Reset button after each race but rather only when needed.
TROUBLESHOOTING: Unresponsive Date Lights: PRESS and HOLD the Ready/Reset button for three seconds if
at any time the data lights are unresponsive. This will reset the lights. You may need to turn the transceiver off
and back on to assist the reset process. A Low Battery in the transceiver may cause unresponsive data lights.
Always have a fresh high quality 9-volt battery on hand. TIP: Because of its external omni-directional antenna,
10
the black face of the transceiver does not need to be pointed in the direction of its receiver).
C. FILE SHARING
When integrating Eagle Eye Pro with meet management software (Hy-Tek, Race Tab,
RaceberryJAM, etc.) it is necessary to share the lynx.evt event file (created by the meet
management software) and the .lif results files (created by Eagle Eye Pro software).
1. Sharing Results File via USB Switch
The included USB Switch allows each computer to access the same external
drive. The shared files remain on this drive while allowing each computer
access via the following process.
Eagle Eye Computer
Timing
USB Cable
1. ➔
2. ➔
3. ➔
4. ➔
5. ➔
6. ➔
7. ➔
Hy-Tek, etc. Computer
Results
USB Switch
USB Cable
PLUG a USB storage device (such as a thumb drive) into the back of the USB Switch.
CONNECT the USB cables from the USB Switch to available USB ports on each
computer.
ACCEPT the USB storage device on computer one once it
is detected.
PRESS the RESET button on the USB Switch to connect
to computer two.
ACCEPT the USB storage device on computer two once it is
detected. You need only accept the thumb drive once on each
computer during initial set up.
Within the Eagle Eye Results Tab, SAVE a results file to the USB thumb drive
connected to the USB Switch. You need only map this drive once during set up.
Within the Meet Management software, CHOOSE to direct the .EVT file to the USB
storage device connected to the USB Switch. This should also be the location the meet
management software will receive the .lif results file generated by Eagle Eye. You need
only map to this drive once during set up.
Tip: It is recommended that the operator of the meet management software (results computer) operate
the USB Switch. This allows the timing operator to focus entirely on reading each race and preparing to
time the next event.
Additional Wireless File Sharing Options
See pages 30-31 for additional file sharing options: 1) Free Dropbox internet file sharing
process used when wifi is available and 2) a Windows Ad Hoc computer to computer
wireless network which does not require an internet connection or wifi.
* Instructions for the discontinued USB file transfer cable can be found on page 34.
11
D. CREATING FILES
1. Creating an .EVT File for Import (Option 1)
Used when using Meet Management Software
A lynx.evt file is an industry standard event file created by common meet management
software. This file contains information (heat, name, school and lane/position) for each seeded
event. In order to integrate with Eagle Eye Pro, this file must first be created by your meet
management software (Hy-Tek, Race Tab, RaceberryJaM, etc.) and imported into Eagle Eye Pro
via the Race Results tab. Follow the instructions below depending on the software you use.
Hy-Tek Meet Manager (version 4.0)
1. From the top menu go to Set-up > Photo Finish Interface > Eagle Pro Timing.*
2. Within the Run mode go to Interfaces > Photo Finish -Eagle Eye Pro > Update Start Lists.
----------If updating for the first time and or changing the file location.
3. SELECT the Activate update of start list checkbox (middle of screen) if updating for the first time.
4. SELECT the Change Data Location button and navigate to the destination folder you intend to share
between Hy-Tek and Eagle Eye.
5. CLICK the OK button. Hy-Tek will save the lynx.evt in the location chosen in step 4 .
6. Within Eagle Eye Pro >Results Tab > Choose the import button and navigate to the Lynx.evt file.
* If Eagle Eye is not an option in an earlier version, choose FinishLynx File Sharing. ** Hy-Tek requires their Photo Finish
Interface license for this feature to activate the Get Times button within the Run mode.
Race Tab (version 3.64)
1.
2.
3.
4.
5.
Within the desired seeded meet, CHOOSE RaceTab from the upper left.
CHOOSE FAT Interfaces and BROWSE to a destination folder where the lynx.evt will save to.
CHOOSE Eagle Eye as the brand of FAT and CLICK Save and Done (lower right).
CHOOSE RaceTab (upper left) > Export > Lynx. (Note - no confirmation is indicated)
Within Eagle Eye Pro > Results Tab > CHOOSE import and navigate to the saved lynx.evt file.
Race Tab can be downloaded for FREE at http://racetab.milesplit.com/page/download
RaceberryJaM
1. PULL ScoreMeetLynx file down to Create Lynx/ Flash Timing file (if Eagle Eye is not listed).
2. CHOOSE the destination folder (meet directory).
3. CHOOSE an offset to the IDs to distinguish men's and women's events.
("0" for one division, "100" for the next, etc. are good options)
4. ACCEPT the defaults for the schedule file. Say "No: to finalize schedule.
5. SWITCH to next division (Ctrl-G). Repeat for all divisions and choose to finalize the schedule.
Importing the lynx.evt file into Eagle Eye Pro Software
1. SELECT the RESULTS TAB. 2. NAVIGATE to the location of the lynx.evt file
and CHOOSE Import. SELECT OPEN. 3. EVENTS and ATHLETES will appear in
the Race Results Tab.
12
2. Integrating with an Excel .xls File (Option 2)
Used when not using Meet Management Software
Your Eagle Eye Pro system has the ability to integrate with an .xls file. This file
can be imported into Eagle Eye Pro as a blank template (without names, schools, etc.) in order
to print results or as a customized template containing athlete names, teams, heats, lanes, etc.
that you have added manually.
To use the Excel feature you must use the provided .xls template or create an .xls file with the
correct format (Row 1/ Columns A-H) as shown in the image below.
1. ➔
DOWNLOAD the Meet-Template.xls file via the address below and SAVE to the location of
your choice. It’s recommended to copy and paste the address into your web browser.
http://www.eagleeyedv.com/Meet_Template_s/704.htm
2. ➔
Within Eagle Eye Pro Software, SELECT the Results tab and CLICK Import and navigate
to the location of the file.
CHANGE the Worksheet File to .xls (lower right corner)
and SELECT the Meet-Template.xls file.
RECORD a race and ASSIGN times as usual.
CLICK the Save Times button to save times to the Meet-Template.xls document.
PRINT results by opening the .xls file at its source and choosing to print entire document
or individual sheet (event).
3. ➔
4. ➔
5. ➔
6. ➔
Customizing template
Enter names, teams, ID/Bib # and TFRRS numbers for each participant if you choose.
These cells can be left blank, however DO DOT delete unused columns. The labeled
columns are necessary for the proper file structure. If you wish to delete columns, do so
only after you are done using the .xls file within Eagle Eye Pro software. Additionally you
can delete and add heats, lanes and events to fit your needs. Please use caution not to
change the fundamental format of the file. Always keep a copy of the original .xls file
on hand.
13
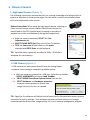
E. HARDWARE SET UP
1. Camera
TURN ON the computer.
INSERT the USB Key into a USB Port (of your choice) on the computer.
TURN ON the camera by plugging in its power supply.
INSERT the data cable into both the back of the camera and the computer’s Ethernet
port. (wait 1-2 minutes for camera to connect)
5. ➔ OPEN software and a live image should appear.
1. ➔
2. ➔
3. ➔
4. ➔
Tip: If live image does not load, go to top toolbar and SELECT > Hardware > Load Grabber and choose
your listed camera (Basler Pylon Gigi Camera).
2. Wireless Trigger System/ Gun Sensor (Generation 2)
Instructions below refer to the Generation 2 trigger system (red cover). Instructions for the
Generation 1 (blue cover) can be found on page 35.
ATTACH an antenna to both units.
PLUG IN the large end of the audio cable to the back of the receiver.
PLUG IN the receiver’s power supply.
PLUG IN the other end of the audio cable into the microphone
input on the USB audio card . * Lenovo computers only. See info below for non Lenovo computers.
5. ➔ PLUG IN the USB adaptor to an available USB port on the computer.
6. ➔ SWITCH on the transceiver. At this point both units will automatically pair with one
another (the manual ‘Learn’ process is no longer necessary ). Once paired the flashing red
lights will remain solid red. Pressing the Ready/Reset button on the receiver will turn the
Ready lights green.
1. ➔
2. ➔
3. ➔
4. ➔
Antennas
USB adaptor
USB Port
Audio Cable
Plug into microphone input
*Some non Lenovo computers do not need the USB audio card since they are equipped with
a microphone and head phone jack separate from one another. Your non-Lenovo computer
may allow for the audio cable to be plugged directly into the audio jack without the use of the
USB audio adaptor card.
TIPS
Practice Triggering: A finger tap to the outside of the transceiver will trigger the system. A data light on both the
transceiver and receiver confirm a successful transmission. Position: Do not position the transceiver on the hip of
the Starter or wear in a pocket. The body may attenuate (reduce) the signal. Elevate: Do not try to send a signal
through a crowd of people on the infield, etc. Elevate the receiver or transceiver if necessary. A longer audio cable
may be required (purchase from Eagle Eye or retailer such as Radio Shack, etc.). This would require operating in
Green mode only (see page 10). Sensitivity: The transmitter is set at 50% gain before shipment. If you believe an
increase in sensitivity is necessary for your facility, please contact Eagle Eye for details. Test: Be sure to test your
wireless start system for successful transmissions prior to each track meet. Pay special attention to the start
14
locations farthest from the receiver. Be sure to maintain a clear line of sight.
F. PRE-MEET SET
1. Recommended Order of Set Up
It is recommend that you allow at least one hour for system set-up. Although set up can take
less time, one hour or more allows for troubleshooting unforeseen issues.
Establishing a live-image (between the camera and computer) should be your first priority.
This assures the system is working properly.
1. ➔
2. ➔
3. ➔
4. ➔
5. ➔
6. ➔
7. ➔
8. ➔
POSITION camera on the finish line.
LAYOUT the long (300 foot) data cable from the camera to the timing computer.
ESTABLISH a live video image within Eagle Eye Pro software.
MOVE the timing computer to the finish line and re-establish a live-image on the
computer, using the smaller length practice cable.
OPEN the Finish Line tab and select the calibration tool. While viewing the computer
screen, adjust the camera/clamp so that the calibration line is on the leading edge of the
finish line.
RECONNECT the timing computer to the main (300‘) data cable.
CONNECT the wireless trigger and re-establish a live image. Be sure to verify detection
within the Trigger tab. Be sure to properly connect the USB audio plug before opening the
Pro software.
TEST the wireless trigger system (while standing at the location furthest from receiver/
computer) via one of the following methods: 1) firing the Starter’s pistol, 2) a strong finger
tap to the front face of the receiver unit while holding the unit above your head. A sharp
blow directly into the transmitter’s sensor port may be used, however be sure your hand or
body does not block the receiver’s line of sight.
2. Camera Placement
Position the camera so that athletes in lane one (closest to camera) are visible from the knees
up. This will allow identification of hip numbers in lane one while keeping athletes in the
outside lanes as close to the camera as possible. It’s best to have a live image on the computer
and have a helper stand in lanes 1 and 8 (during the set up process) with the camera set and
angled accordingly.
1. ➔ MOUNT the camera 7-10 feet in the air via a tripod, pole, standard, etc.
2. ➔ POSITION the camera 8-15 feet back from the finish-line.
3. ➔ PLUG the camera into the computer and position so that you can move the
camera/stand while viewing the live finish-line image.
4. ➔ MOVE the camera
stand as needed so
that the finish line on
the track is centered
within the image on
the computer with the
calibration tool.
15
3. Camera Alignment
Proper camera alignment assures finish line accuracy. The goal is to square the camera both
horizontally and vertically. This is accomplished with the help of the calibration tool within the
Finish Line tab.
1. ➔
2. ➔
3. ➔
PLACE the timing computer in a stable location near the camera aligned on the finish-line
CONNECT the camera to the computer and obtain a live image within the software.
CHOOSE the Finish Line tab and check the Calibrate box and Both from the Mode drop
down list.
Calibration
Lines appear
both
horizontally
and vertically
4. ➔
While standing on a ladder or reaching to
adjust the camera, align the camera so
that the vertical line is on the leading edge
of the finish line and the horizontal line is
perpendicular to a lane line
5. ➔
SELECT the ADD LINE button and draw a
vertical line directly on top of the
calibrated center line (positioned over the
finish line). Adjust the line width and color as
preferred and SELECT the Lock Overlay check
box and Uncheck the Calibration box
TIP: To delete the finish line: Click on the finish line and RIGHT-CLICK on the line
and select delete.
TIP: To Straighten line: With the curser on the bottom of the line, CLICK and
HOLD and move in the direction the line needs to straighten.
16
4. Camera Adjustment
The procedures on this page will help maximize your camera image quality while adapting easily
to changing lighting conditions.
With the camera aligned on the finish line, powered on and a picture on your computer screen:
A. At the Camera
TURN the focus dial (outside ring) slowly until you obtain
the best clarity.
2. ➔ TURN the aperture dial (inside ring) fully open (counter
clockwise when standing behind camera). The image
should appear washed out.
1. ➔
B . At the Computer (within the software)
SELECT the Live Adjustments tab and SELECT Exposure
from the features list.
4. ➔ SET the initial Exposure setting as low as possible.
Example: start at 50
5. ➔ RAISE the Exposure setting (if necessary) until the image is
optimized. Attempt to use the lowest exposure the lighting
conditions will allow.
3. ➔
C. Adjusting to Changing Lighting Conditions
➔
Increase the Exposure settings as lighting decreases.
TIP: The graph on the left represents the relationship
between light and motion. The brighter the day and
the faster the race, the lower the Exposure setting. In
low light conditions, you may need to increase the
Exposure settings to maintain image clarity. Do not
exceed an exposure of 8000; doing so may impact
frame rate.
TIP: Think of the Exposure setting as ‘ Shutter Speed’
– however, instead of a high shutter speed number
you find on still cameras, your timing camera uses a
low exposure to achieve similar results. The lower the
Exposure setting the less motion blur.
17
G. SET UP OPTIONS
Below are hardware set up options for you to consider based on your facility and objectives. All options
show the Eagle Eye Pro timing computer networked to share files with the meet management computer
(via your choice of included USB switch or wireless options such as Dropbox).
1. Standard
The camera is positioned up to 300 feet away with the included Ethernet data cable.
300 foot data cable
Meet Management Computer
Eagle Eye Timing Computer
2. Extended Distance
The use of an optional PoE Gigibit Ethernet switch (must support 9k jumbo frames) can double
the distance from your camera to your timing computer. * Also used when no power source is
available for the camera.
Up to 300
foot data cable
Up to 300
foot data cable
Up to 600 feet total distance with one switch, 1200 feet with two switches, etc.
Meet Management Computer
Eagle Eye Timing Computer
3. Multiple Camera
Connect two or more cameras to the Ethernet Switch and easily switch from either camera
within the Pro software. Ideal for running dash events with the wind.
Meet Management Computer
Eagle Eye Timing Computer
Up to 300 foot data cable
Up to 300 foot data cable
The Ethernet Switch to be located
in press box or on the infield. If on the infield, a third 300 foot cable would be required from the Switch to the timing computer
Gigibit Enabled PoE Ethernet Switch
The use of a Switch can significantly increase the distance from the timing
computer to the camera. Multiple cameras can be connected to the same
switch and viewable within Eagle Eye Pro software.
* No Camera Power Needed
Your Eagle Eye Pro timing camera is PoE enabled, allowing it to draw power from a powered PoE Ethernet
switch without the need for its own power source. The examples above using a PoE Ethernet Switch does not
require the camera to have its own power source.
18
H. PRE-MEET PRE-CAUTIONS
1. Check Available Record Time (hard drive)
Check to be sure you have adequate space on your hard drive.
The example at right shows 3:56.10 minutes of available
recording time.
To Check Record Time
➔ SELECT the Record Tab and Calculate size in Time.
To Increase Record Time
To increase recording time you may need to create space on
your hard drive by deleting or moving existing video
(sequences) files.
1. ➔
2. ➔
To delete Individual videos SELECT the HISTORY via the Reel icon.
RIGHT-CLICK on the file and choose delete file to delete videos (sequences) in bulk,
DELETE directly from the destination folder
located at:
C: My Documents > Sequence (folder)
To Change Storage Location (optional)
1. ➔ SELECT TOOLS and Eagle Eye Pro Settings from
the top toolbar.
2. ➔ SELECT the RECORDING Tab and
3. ➔ BROWSE to a folder of your choice.
*If recording to an external drive, must be a 7200 rpm USB 3 hard drive.
2. Turn Off Anti Virus & Fire Wall Applications
IMPORTANT!
Programs running in the background while operating Eagle Eye Pro run the risk of creating an
interruption during a recorded race. It’s very important NOT to run a fire wall or anti virus
(Norton, McAfee, etc.) software program during a track meet. Because your computer is offline there is no risk of a virus.
Your Eagle Eye computer was shipped to you with the fire wall turned off for this reason.
19
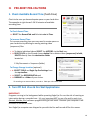
I. MISC. FEATURES
1. Change Race Clock Display
From the top toolbar, SELECT Tools > Eagle
Eye Pro Settings and CLICK the Timestamp Tab.
2. ➔ SELECT the font, size, color, & position as desired.
1. ➔
2. Print Proof of Performance / Images
Eagle Eye Pro supports printing images in several ways via the File menu.
For Proof of Performance images we recommend performing a PRINT SCREEN function
using the built in Windows print screen feature.
PRESS the PrntScr button located on the top row of
your keypad.
2. ➔ CHOOSE to Print or copy into a document of your
choice.
1. ➔
3. Save or Exporting Video
Occasionally you may want to save a small section of a race video. That section, called a
snippet can be saved while the remainder is discarded. Discarding the unnecessary portion
of video assures the resulting file is as small as possible.
If you have been recording a sequence and wish to save a snippet, click the Save button.
Remember that the whole sequence must be selected in order to save the entire sequence.
Saving can only be performed in Review or Playback mode, when the upper status bar
displays the range of frames in the current Selection. There are three ways to save a
snippet:
1. ➔ CLICK the Save button
2. ➔ SELECT File | Save As... from the main menu
3. ➔ RIGHT-CLICK on the Coarse Slider and select Save Selection As... OR Choose to
export to .avi
20
4. Record & Review Simultaneously
The word “Review” refers to examining an earlier portion of what is currently being recorded.
This feature allows you to review the finishing times of athletes before other athletes have
crossed the finish line.
There are a few ways to switch to Review mode while recording:
DRAG the Coarse Slider to the left until you reach the area
you wish to review, or
2. ➔ CLICK the Lock/Unlock pin button, or use F4 keyboard shortcut.
1. ➔
Dragging the Coarse Slider lets you select a review segment anywhere in the recorded stream.
Click the Lock pin to the right of the slider for immediate reviewing access to the frames that
were just recorded.
To return at any time to LIVE mode, use one of the methods below:
3. ➔
4. ➔
RIGHT-CLICK anywhere in a reviewed image and select Back To Camera, or
Click the Lock/Unlock pin button, or use F4 keyboard shortcut.
-------------------------------There are a few ways to navigate through a sequence while
in Review or Playback:
DRAG the slider thumb button to the desired location;
Proceed frame by frame by pressing the right or left arrow keys or using your mouse
wheel.
3. ➔ Hold down the CTRL key and press the right or left arrow keys to jump to the next
bookmark.
1. ➔
2. ➔
5. Practice Mode – Virtual Grabber
Eagle Eye Pro software incorporates several options that allow
you to practice using the software without having to set up the
entire system. The Virtual Grabber as shown at the right, will act
as a live image that can be recorded and interacted with as if it
were an image from the camera.
1. ➔
2. ➔
3. ➔
INSERT the USB KEY into the computer.
OPEN Eagle Eye Pro Software.
Within the software go to the top toolbar and SELECT > Hardware > Load Grabber
and choose Virtual Grabber.
21
II. CROSS COUNTRY
A. SYSTEM OVERVIEW
The following instructions assume the user has an adequate knowledge of the Eagle Eye
Pro system as described in the previous pages.
1. Camera Options
Cross country does not have the same frame rate
requirement as track and field. For this reason, you have
the option of using either your high speed camera (recording
at a recommended 30fps) or a USB camera (recording at 30
frames per second).
An advantage of a quality USB camera (such as a Microsoft
HD Lifecam) is that it can be powered by the computers USB
port, making the system completely portable. Additionally,
the video file created is much smaller and takes less hard
space than a video created with a high speed camera
running at 100+ fps.
2. Manual vs. Automatic Start
The race clock for cross country can also be started manually and does not require an
automatic start system. To clear the time code after a manual start (example: false start)
delete the video sequence via the History Reel. Perform a Right-click delete on the file.
3. Entering Results – Using Bib Numbers
When integrating with meet management software such as Hy-Tek, Race Tab or Excel
template, the operator will enter the bib number of the finishing athlete within the Results
tab of the Eagle Eye Pro software. To do so, the cross country option must be checked
within the Results tab. Details on page 26.
4. Camera Alignment & Order of Finish
Cross country places an emphasis on an accurate order of finish. For this reason, video
verification is an absolute must for cross country regardless of the timing system used.
Eagle Eye excels by combining both video confirmation with an accurate race clock and
resulting time for each competing athlete.
Camera placement depends on how you intend to use your system for cross country (as
described below).
Primary Timing: If you are using Eagle Eye Pro as a primary cross country timing system, it
is recommended that the camera be positioned slightly past the finish line and angled
slightly forward in order to view athlete bib numbers.
Video Back-Up: If your system is used as a video back up system only, the camera can be
aligned off to the side at your discretion.
22
B. OPERATION INSTRUCTIONS
1. Time a Race
Follow the steps below to prepare both Eagle Eye Pro software and your preferred meet
management software for a cross country or road racing event.
Prepare the Software
1. ➔ SELECT the Cross Country Timing
option within the Race Results tab.
2. ➔ SELECT the Manual Mode within the
Race Trigger tab.
3. ➔ From the Results tab, Import first
lynx.ppl file the and then the lynx.evt file
(created by your meet management
software).
.evt or .ppl? Both the lynx.evt and lynx.ppl are industry standard files created by common meet management software.
The .ppl file (“people” file) contains a list of participating athletes (assigned bib numbers, teams, etc.) and is the common
file used for cross country and road racing events. The .evt (“event” file) contains individual events and the entered
athletes for each event and is generally used for track and field or when a cross country event has been seeded like a track
meet within Hy-Tek Meet Manager, etc.
Start the Race
4. ➔ PRESS the spacebar manually upon the firing of the starter pistol.
Record the Race
5. ➔ PRESS the RECORD button prior to the first finish place athlete crossing the finish
line.
Bookmark the Finishers
6. ➔ PRESS the SPACE-BAR just prior to each athlete crossing the finish-line. This will
create a green bookmark on the video time-line. Bookmarking each athlete is
not necessary, however bookmarks can significantly speed up the review process.
Read the Race
7. ➔ CLICK the STOP button after all
athletes have crossed the finish line.
8. ➔ ACTIVATE the video timeline by CLICKING your mouse anywhere on the timeline
9. ➔ HOLD the Ctrl button down and PRESS the RIGHT ARROW button (on the
computer keyboard) to jump forward to the first finishing athlete.
10. ➔ RIGHT-CLICK the video time line (scroll tab) to reveal a pop up and ENTER the bib
number of the finishing athlete. Repeat for all athletes. See image on page 24.
Save Results
11. ➔ CLICK the Save Times button when complete and save file in the appropriate
location. Within your meet management software, choose to Import the result file.
TIP: CORRECTING MISTAKEN ENTRY: Retype the correct HIP or LANE number. TIP: DELETING ENTRY:
Perform a RIGHT-CLICK > Clear on the cell you wish to delete the entry.
TIP: To reveal a list of participating athletes (that can be selected), Right-Click the athlete list from
within the Race Results tab
23
This image shows how to enter the bib number of
each finishing athlete via step 10 on the previous
page 23.
Tip: It is possible to enter two digit bib numbers by
typing the two digit number directly on the keyboard (as
is done for track and field). Be sure the timeline has
been activated by a mouse click.
Note: This is however not possible for three digit
numbers; doing so would slow down the entering of hip
numbers for track events (making the software wait for
three seconds to determine if three digits are being
entered).
2. Camera Alignment
Below are examples of camera alignment for cross country races. Depending on the role
of your Eagle Eye Pro timing/ video system, you may choose a side view or a frontal
view to assist with reading bib numbers.
The primary role of
a cross country
timing system is to
determine an
accurate order of
finish.
Since cross country
times are only
recorded to the
1/10th of a second
(and not to the
1/100th as is the
case for track) the
alignment of your
camera and it’s
angle depends on
the operators
priorities and
preference.
24
3. Choose a Camera
1. High Speed Camera (Option 1)
The following instructions assume the user has a strong knowledge of the Eagle Eye Pro
system as described in the previous pages. For this reason, certain instructional pieces
will not be duplicated in this section.
Reduce Frame Rate: When using the high speed camera, reducing its
frame rate will create a much smaller video file and reduce the
overall load on the CPU (helpful when choosing to record and
playback race video simultaneously during the competition).
With the camera connected, SELECT the Live
Adjustments tab .
2. ➔ SELECT-FRAME RATE (fps) from the list (see Tip below).
3. ➔ TYPE the frame rate of your choice in the space
provided and PRESS Enter on the keyboard.
1. ➔
TIP: Standard video is generally recorded at 30fps. 30-60 fps is
adequate for cross country.
2. USB Camera (Option 2 )
A USB camera can draw power directly from the timing laptop
computer, thus creating a completely portable system.
With the camera connected to a USB port, from the top-toolbar,
SELECT-HARDWARE and choose Load Grabber.
2. ➔ SELECT-WDM DirectShow Capture Device from the list.
3. ➔ SELECT-Hardware and hardware properties
to adjust camera properties (frame rate,
image size, pan, tilt, etc.) as needed.
1. ➔
TIP: Eagle Eye Pro software will default to the frame rate for the particular camera you are
connected to and its settings. Your windows computer will also allow you to change
camera properties (frame rate, image quality, etc.) via its camera management program.
25
C. RESULTS & FILES
1. Using an Excel .xls template File
See instructions on page 12.
2. Suggested Hy-Tek Process
Below are instructions to integrate Hy-Tek Meet Manager software with Eagle Eye Pro for
cross country events. This method does not require the Hy-Tek cross country
module.
Preparing Hy-Tek Files
1. ➔
2. ➔
3. ➔
4. ➔
5. ➔
6. ➔
7. ➔
From the top menu, OPEN a current meet (File > Open New) or CREATE a new meet via
SET UP > Meet Set-Up. Be sure to check the Track and Field/ CC box.
CREATE an EVENT(s) via Events > Add and choose your appropriate settings.
IMPORT Roster via File > Import > Semi-Colon Delimited Rosters > Entries. Navigate to
file location and select.
ASSIGN competition numbers by going to Run > Athletes > Comp#.
SEED events via Run > Seeding. Choose no breaks and one heat. Add additional
number of competitors for each heat (you will only have one heat for each XC event).
This will make it easier to add a runner as needed. Close seeding.
CREATE the Lynx.evt file via Run > Interfaces > Photo Finish – Eagle Eye Pro > Update
Start Lists.
CHANGE data location as needed. CHECK the Activate update of start lists box.
Within Eagle Eye Pro Software
1. ➔ With the Race Results Tab, CHECK the Cross Country Timing box.
2. ➔ IMPORT the .evt file via the IMPORT button. Navigate to its location as needed.
Athletes will appear within the Event Information.
3. ➔ Record and Read the race (per instructions).
4. ➔ SAVE results file via the Save Time button in the Race Results tab.
Move .lif results file via USB switch (or other process) to the results computer as needed.
Within Hy-Tek Software
1. ➔ IMPORT results via RUN mode and CLICKING the Get Times button. Be sure to have selected
the correct event.
2. ➔
3. ➔
ENTER the letters NT for ALL athletes that do not have a time.
Score the meet by PRESSING Score. You can print from this page as well.
.
26
III. VIDEO ANALYSIS
Your Eagle Eye Pro Timing software and high speed camera have the ability serve as a
tremendous teaching tool. The ability to record and replay video in super slow motion
(100fps), bookmark key events as they happen, and review during live recording are just a few
of the many features used for motion analysis.
This section assumes the user has a working knowledge of camera and software operation as
described in previous pages of this manual.
1. Camera Options
Choose to use either your high speed timing
camera at 100fps+ or for a portable solution
choose to use a USB webcam (30 fps) that
can be powered by your laptop battery. We
recommend the Microsoft USB HD LifeCam.
2. On-Screen Overlay
The strength of Eagle Eye Pro is its high
speed capture and slow motion replay. The
on-screen overlay is limited to the finish-line
feature as shown. This tool serves as an
adequate visual reference, however for more
detailed analysis we recommend using Eagle
Eye Pro Viewer software as described on the
following page.
3. Output Video to .avi
Eagle Eye Pro software creates a .seq video
file as its default format. If using Eagle Eye
Pro software to record and review video, no
changes to this format are required.
However, to create a more common .avi file
for playback with Windows Media Player,
Pro Viewer, etc.) follow the steps below:
SELECT the Recording tab from the
Eagle Eye Pro Settings dropdown menu located on
the top toolbar.
2. ➔ CHOOSE Windows Movie File (*avi.)
from the output drop down menu. All recorded video will now be created as an .avi format.
1. ➔
27
4. Export .seq to .avi
The default video file created by Eagle Eye Pro Timing software is an .seq file. This file type will
not play in most third party software or video players. For this reason, follow the steps below
to export the .seq file to a common .avi format that will play in Windows Media Player, Eagle
Eye Pro Viewer, etc.
➔
File > Export To > Windows Movie
5. Play .avi Files
Eagle Eye Pro Timing software will play .avi files created by other cameras or software sources.
Perform the following to import and play .avi files:
➔
File > Open > Windows Movie > navigate to file
6. Motion Analysis Software
Eagle Eye Pro Viewer software is separate from Eagle Eye Pro Timing software and made
available free of charge at www.EagleEyeProViewer.com . Pro Viewer’s original sourcecode project Kinovea is also available at www.Kinovea.org
Pro Viewer offers enhanced technical features such as on-screen overlays, magnification, sideby-side comparison, angles, perspective grids, drawing tools, single or dual camera capture and
playback of standard or high speed video, and more.
Pro Viewer can operate
independently of Pro
Timing software or in
combination on the
same computer. To take
advantage of the
strengths of each, use
Pro Timing to capture at
100 fps and Pro Viewer
to playback the recorded
video for enhanced
analysis.
Within Pro Timing: Choose to Output Video to .avi as described on
the previous page.
2. ➔ Within Pro Viewer: Map the Explorer Window (left side of Pro Viewer
window) to the destination folder within Pro Timing (C: My Documents >
Sequences). If playing video recorded at over 30fps, from the top toolbar
choose Motion > High speed camera and enter the frame rate of the original
recorded video.
1. ➔
28
IV. SUPPORT
A. TROUBLESHOOTING
1. Software Issues
Closing the software and reopening will reset these settings and solve the majority of software issues. It is
however necessary to adjust the camera settings (exposure, contrast, brightness, etc.) when conditions change.
2. No Start Detection
1) Be sure the receiver antennae remains in an upright position and has a clear line of site to the transceiver
worn by the Starter. 2) Adjust the transceiver position on the hand of the Starter. Do not position the
transceiver on the hip of the Starter or wear in a pocket. The body may attenuate (reduce) the signal. 3) Do not
try to send a signal through a crowd of people on the infield. Elevate the receiver if necessary. 4) Maintain a
fresh 9-volt battery in the transmitter. 5) If the unit is false triggering, the gain should be reduced. The gain
controls the sensitivity of the gun sensor from minimum (counter clockwise) to maximum (clockwise). 6) The
audio cable (from the receiver) should be plugged into the mic jack on the USB adaptor. 7) Be sure the volume
is turned up. The USB adaptor should be selected from the Device drop down menu within the Trigger tab. If
not listed, shut down Eagle Eye Pro and reopen the software. 8) The adaptor should be automatically detected
by the computer. If the adaptor is not listed, close and reopen the software.
3. No Camera Detection or Reduced Frame Rate
1) Check ALL data cable connections from the camera to the computer. 2) Be sure cable is not kinked, damaged
or pulled too tightly around corners, etc. 3) Be sure cable is not coiled too tightly as coiled cable may reduce or
eliminate frame rate. Be sure to loosely unwind long lengths of cable to assure adequate data transmission. 4)
Check that the camera is powered on and confirm green/red data lights on the computer Ethernet port. 5)
Always use the proper length of data cable. Data cable (cat5, cat6) has an effective range of up to 100 meters
without the use of an Ethernet switch (see page 18).
4. Poor Image Quality
1) Adjust camera lens and focus and 2) software exposure settings for the current lighting conditions (see page
17). Use the lowest exposure setting possible, however increase in small increments if image appears too dark.
3) Refer too cable issues in number 3 above.
5. Trouble Reading Hip Numbers
1) Refer to topics 3 and 4 above. 2) Adjust camera position as described on page 15.
B. UPDATES & MISC. INFO.
Pro customers should routinely visit the pages below to assure both the Pro software and user manual are up
to date. Additionally , customers and timing operators are encouraged to forward their email to
[email protected] to be placed on our mailing list. All updates are communicate via email announcements.
1. Software Updates
http://www.eagleeyedv.com/SoftwareUpdates_s/615.htm
2. Manual Updates
http://www.eagleeyedv.com/ProManual_s/622.htm
3. Video Tutorials
http://www.eagleeyedv.com/Tutorials_s/624.htm
4. Software Installation on a Second Computer
It is possible to install second ‘read-only’ version of your Pro software on a second computer. You find
information on this process at the address listed in item 1. above.
29
V. SUPPLEMENTS
A. ADDITIONAL FILE SHARING OPTIONS
1. Sharing Results File via Internet Dropbox
Dropbox is a FREE online file and storage solution that will allow you to easily share the file
(created by the meet management software) and the .lif results files (created by the Eagle Eye
software) between two or more computers. Sharing these files will allow auto-population of
the track times from Eagle Eye into Hy-Tek (or other meet management software) via the GET
TIMES feature.
Eagle Eye Computer
Timing
1.
2.
3.
4.
5.
➔
➔
➔
➔
➔
Hy-Tek, etc. Computer
Results
On one computer, go to www.Dropbox.com and choose SIGN UP.
CREATE an ACCOUNT and DOWNLOAD Dropbox as instructed.
On the second computer, go to www.Dropbox.com and DOWNLOAD Dropbox again.
Use the SAME Dropbox ACCOUNT on both computers.
While both computers are CONNECTED to the INTERNET, go to My Computer
and locate your Dropbox.
(This is your shared file location for both
the Eagle Eye and Hy-Tek computers.
The image at right shows the option of
creating a results folder).
Within the Eagle Eye Results Tab, SAVE
a results file to the Dropbox folder.
You need only map to this location
once during set up.
7. ➔ Within the Meet Management (Hy-Tek, etc.) software, CHOOSE to direct the
lynx.evt file to the Dropbox FOLDER. This will be the location the Meet
Management software will receive the .lif results file generated by Eagle Eye.
You need only map this location once during set up. BOTH computers can now
share and access the same files.
6. ➔
Tip: If you do not have Internet access in your press box or timing location, consider creating your
own Internet access via an Internet Hotspot (such as a Verizon Jet Pack) or enable your iPhone
to act as a Personal Hotspot.
30
2. Windows Ad Hoc Wireless Network
Windows supports a wireless PC to PC file transfer process known as an Ad Hoc Network.
This is an ideal method for transferring files wirelessly when no wireless internet is available.
Eagle Eye Computer
Timing
Hy-Tek, etc. Computer
Results
On Computer 1
1. ➔ SELECT the Internet Access icon in your system tray (bottom right) and OPEN
Network and Sharing Center.
2. ➔ SELECT Set UP a New Connection or Network.
3. ➔ SELECT Set Up a wireless ad hoc network and CHOOSE Next
4. ➔ CHOOSE Next again.
5. ➔ ENTER a name for this Network and a password to give to those you want to
connect. Be sure to write the password down. SELECT Next again.
6. ➔ SELECT the Network and Sharing Center.
7. ➔ CONFIRM that 1) Turn on Network Discovery, 2) Turn on File and Printing and
Turn on Sharing so Anyone with a Network Access can Read and 3) Write files in the Public
Folders are selected.
8. ➔ TURN OFF password protected sharing is selected. CLICK Save changes
On Computer 2
1. ➔ SELECT the Internet Access icon in your system tray (bottom right) and SELECT the Network you
created and CLICK OK
2. ➔ ENTER the Security Key (password) you created on computer 1.
3. ➔ SELECT Open Network and Sharing Center.
4. ➔ While the computers are negotiating with each other, you will see Identifying
under View Your Active Networks. Once connected you will see Public Network.
5. ➔ CLICK the MY Computer icon on your desktop and CLICK Network to expand the
list of available networks.
6. ➔ CLICK the Users (Share) folder
7. ➔ CLICK on the Public folder
8. ➔ CLICK the results folder you have directed your meet management software to retrieve its information.
Once you have created the network connection as described above, the results file (created by the
Eagle Eye timing computer) can be saved by selecting Save Times within the Race Results tab. The
meet management computer will then retrieve the results file from this same location (for example,
when using the GET TIMES button within Hy-Tek’s Meet Manager Run mode).
31
B. OPTIONAL DISPLAY
LED Scrolling Display
A great display board for any size track meet!
The LED Scrolling Display shows running time and results as name, place and performance after
each race. Integrates seamlessly into the Eagle Eye Pro timing software and system.
Running clock begins immediately with starting gun while you control the display options. Set
the display mode for immediate or scrolling results. The immediate mode displays each
athlete's performance immediately as the Eagle Eye timing operator enters the lane/ hip
number. The scrolling mode places results in sequential order of finish to scroll at your defined
pace. Even choose to display a custom message to the board.
All controls are conveniently located within the Eagle Eye Pro software Results tab. Once the
initial driver is installed on your Eagle Eye computer, each operation is a simple plug-n-play
process. No external software required for operation.
1. Set-Up and Operation
1. ➔
2. ➔
3. ➔
4. ➔
5. ➔
6. ➔
7. ➔
INSTALL the included Software Driver for the Serial to USB Adaptor Cable
(shown below). This is a one-time installation. This adaptor cable is necessary to convert
the 9-pin serial cable to a USB connection.
Note: The 9-pin serial cable will not connect directly to your laptop.
CONNECT the Power Cord to the Display Board and PLUG into a power source.
CONNECT the Serial Cable to the back of the display and the other end of the Serial
cable to the USB Adaptor cable.
PLUG the USB Adaptor Cable into an available USB Port on the Eagle Eye computer.
OPEN Eagle Eye Pro software and SELECT the Race Results tab.
SELECT the Scoreboard Button (located at the bottom of the tab) and CHOOSE an
available Com Port * This is likely not the defaulted Com Port 3
The Scoreboard Display Setting menu will appear. CHOOSE your desired Options.
The best way to TEST your display connection is to Type a Message in the Text Space and
SELECT the SEND button. Your message should appear on the display immediately.
USB TO SERIAL CABLE ADAPTOR
9-PIN TO 9-PIN SERIAL CABLE
32
2. Optional Extended Range Set-Up
The distance from the display to the Eagle Eye computer can
be extended up to 300 feet with the use of additional data
cable and USB Extenders (pictured at right).
This additional cabling is necessary to position the timing
computer in the press box and the LED display on the finish
line.
USB EXTENDER ADAPTER OVER
NETWORK CABLE (300-FT)
INSTALL the USB to Serial Cable software driver on the Eagle Eye computer as instructed.
INSTALL the USB Extender software driver on the Eagle Eye computer as instructed.
CONNECT Power to the Display Board.
CONNECT the 9-pin to 9-pin Serial Cable to the display board and the other end to the
USB Serial Adaptor Cable.
5. ➔ CONNECT the USB to Serial Adaptor to the USB Extender (with power).
6. ➔ CONNECT the USB Extender to the USB port on the Eagle Eye computer.
7. ➔ CONNECT the long 300 foot data cable to both USB Extenders.
1. ➔
2. ➔
3. ➔
4. ➔
LED Scrolling Display
9-Pin to 9-Pin Serial Cable
USB Extender
USB to Serial
Adaptor
Eagle Eye Computer
Software drivers installed
1. USB to Serial Cable Driver and
2 USB Extender Driver
USB Extender
with Power
Up to 300 Feet of
Data Cable
33
C. DISCONTINUED PRODUCTS
1. GO Suite! FILE SHARING
The GO Suite! File sharing cable has been replaced with the USB switch or the Dropbox
method as explained on page 10, 11, 30 and 31.
1. ➔
2. ➔
3. ➔
4. ➔
5. ➔
6. ➔
7. ➔
PLUG either end of the transfer cable into a USB port on the results computer.
LAUNCH the Go!Suite program on the results computer.
PLUG the other end of the cable into a USB port on the Eagle Eye computer.
CHOOSE the Folder Sync option on both computers.
CLICK the PLUS sign (upper left) to create a new task.
Name the task and navigate to the C: tfmeets folders on both computers.
AFTER each results file has been created on the Eagle Eye computer, the results
operator CLICKS the Sync This Task button to have the Eagle Eye results files (.lif
files) copied to the results machine.
2. EXPRESS CARD
If your Eagle Eye provided computer included an Express Card, follow the instructions
below.
INSERT the ExpressCard in the
ExpressCard slot on the side of
your computer. WAIT for the
LED lights on the ExpressCard
to begin flashing RED and
GREEN.
3. SENNHEISER TRIGGER (Generation 1)
The original Sennheiser trigger system (transmitter and receiver) are no longer being used.
The units have been replaced with our second generation trigger
system. If you have yet to upgrade, please
contact Eagle Eye in time to receive a new
trigger before your next timing event.
34
4. WIRELESS START SYSTEM (Generation 1)
The Pro timing wireless start system has been upgraded to a generation
2 ‘sure-start’ devise with two-way communication. Directions for this
device are on page 13-14.
Below are instructions on wearing, synching and triggering the wireless
start system. This system has the blue protective transmitter cover
(generation 1).
Generation 1
Transmitter
Blue Case
Set Up
Connection instructions can be found on page 13. Both the blue and the red
trigger unit connect to the computer via the USB audio adaptor in the same way.
Wearing the Transmitter
➔ ATTACH the Transmitter on the arm or wrist of the Starter with the included
strap. Be sure the black face of the transmitter always maintains a
clear line of sight to its receiver. The transmitter has an internal antenna and
must point in the direction of the receiver and must not be blocked. For this
reason it should not be worn on the hip of the Starter.
Synching the Receiver and Transmitter
1. ➔ TURN On the wireless transmitter and plug in the receiver unit. Once powered, red lights
on both units confirm the system is ready to synchronize.
2. ➔ PRESS the recessed LEARN button on the front of the receiver.
While the red light is illuminate, TRIGGER the transmitter
with a gun or a sharp blow directly into the recessed port on
the transmitter. Three red flashing blinks will confirm a
successful paring.
Arming and Triggering the Race Clock
ARM the system with the Ctrl-F12 ‘hotkey’ sequence on your keyboard.
TIPS
Practice Triggering: A strong, sharp blow directly into the sensor port on the transceiver will
trigger the system. A red light on both the transmitter and receiver confirm a successful
transmission. Adjusting Sensitivity: The gain on the transmitter controls the sensitivity of the
gun sensor from minimum (counter clockwise) to maximum (clockwise). The transmitter is set
at 50% gain before shipment. If the unit does not trigger reliably, adjust the gain accordingly. If
the unit is false triggering, the gain should be reduced. Test: Be sure to test your wireless start
system prior to each track meet, adjusting gain as needed. Pay special attention to the start
locations farthest from the receiver. Position: Do not position the transceiver on the hip of the
Starter or wear in a pocket. The body may attenuate (reduce) the signal. Elevate: Do not try to
send a signal through a crowd of people on the infield, etc. Elevate the receiver if necessary. A
longer audio cable may be required (purchase from Eagle Eye or retailer such as Radio Shack,
etc.
35