1
How To Use
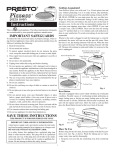
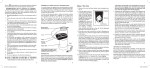
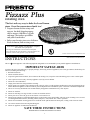
Before using for the first time, become familiar with the Pizzazz® Plus
rotating oven (Fig. A). Wash the baking pan in warm, soapy water; rinse
and dry thoroughly.
Baking Pan
1. Set the rotating oven on a flat, dry countertop away from countertop
edge.
2. Position the pan over the lower heating element at an angle so the back
Pan Hub
inside rim of the pan rests against the back of the “curls” on the lower
“Curl”
element tray (Fig. B). Slowly lower the pan until it is parallel to the
counter.
Drive Shaft
Gently drop the pan in place – it will automatically center itself so that
the drive shaft is inserted in the pan’s hub. Usually, the pan rotates
slightly as it drops into place.
“Curl”
Fig. B
Lower Element Tray
You can tell that it is properly in place by plugging the unit in. The pan
will immediately begin to rotate. If it doesn’t, reposition the pan using
the above instructions.
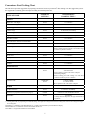
3. For making pizza, remove pizza from box or wrapper and cardboard disk. Center pizza on baking pan. When baking take-out pizza
or rising crust pizza, you may use the baking wheel or special baking tray if provided by the pizza manufacturer. Refer to the chart
on page 4 for times and settings.
For making other convenience foods, remove food from package. Do not use the crisping trays or sleeves on the rotating oven.
Distribute food evenly on baking pan. Refer to the chart on page 5 for baking instructions for the specific convenience food being
prepared.
4. Plug the unit in. The motor will turn on and the baking pan will begin to rotate. Note: If the baking pan does not rotate, the pan hub
is probably not centered over the drive shaft (Fig. B). Reposition the pan following the instructions in step 2.
5. Slide the heat element selector switch to the appropriate setting (LOWER–DUAL–UPPER).
6. Press the timer dial down and rotate it clockwise to the desired baking time. Refer to the cooking charts on pages 4 and 5, rather
than the manufacturer’s instructions. Typically, pizzas will cook faster on the Pizzazz® Plus rotating oven than in a conventional
oven. Once the timer is set, the heating elements will turn on and the food will begin to cook. Do not preheat the rotating oven.
Be sure to always rotate the timer dial beyond the “4” minute mark then back to the desired time when selecting a setting of four
minutes or less.
Note: When the heating elements are turned on, the metal surrounding the heating elements will expand. You may hear a light humming or vibrating sound, or a slight pop, as the metal expands. This is normal.
7.If timer goes off and additional baking time is needed, simply reset timer to desired time. To cook 4 minutes or less, rotate the dial
beyond “4” and then back to time desired. This will activate the heating elements and timer function. When food appears done,
press down on the timer dial and turn it to “0” if it is not at “0” already. The heating elements will turn off when the timer is at the
“0” position. Note: You will hear a clicking sound periodically whenever the unit is plugged in and the timer is at the “0” position.
This is normal.
8. Then while the pan continues to rotate, using hot pads carefully lift the baking pan off the rotating oven, being careful food does
not touch the upper heating element. Set hot baking pan on a heat resistant surface.
9. Allow rotating oven to run for 60 to 90 seconds, once baking pan is removed, before unplugging the unit. Let unit cool before
cleaning or storing.
10. Carefully place food on a serving plate or slide pizza onto cardboard circle or pizza tray. Cut and serve. Do not cut pizza on the
baking pan. For best results use nylon, plastic, wooden or rubber utensils. Do not use metal utensils as they may scratch the
nonstick surface.
3