1
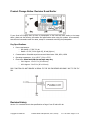
Quick-Start Circuit
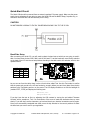
The Serial LCDs should be powered from an external regulated 5 V power supply. Make sure the power
supply has an adequate current rating to power the Serial LCD and the BASIC Stamp, Propeller chip, or
whichever microcontroller and other devices you are using.
CAUTION
DO NOT PROVIDE A SIGNAL TO THE 'RX' PIN BEFORE APPLYING 5 VDC TO THE '5V' PIN.
Baud Rate Setup
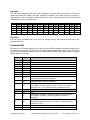
After connecting the Serial LCD, you will need to select the baud rate at which you are going to send it
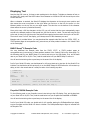
data. You have three choices: 2400, 9600, and 19,200 baud. To set the baud rate, move the dip switches
on the back of the LCD into the correct positions according to the table next to the switches, which is also
repeated below:
MODE
Test
2,400
9,600
19,200
SW1
OFF
ON
OFF
ON
SW2
OFF
OFF
ON
ON
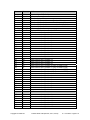
As you can see from the table, there is also a fourth choice called Test. Use this Test mode to confirm
that the power and ground to the LCD are hooked up correctly before you send it any data. Move the dip
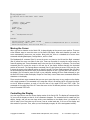
switches to the Test setting and turn on the power. The LCD display should turn on with the backlight on
(models 27977, 27979) and display the following text:
Parallax, Inc.
www.parallax.com
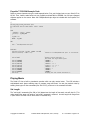
If you don’t see the text at first, try adjusting the LCD contrast by turning the pot labeled “Increase
Contrast” with a screwdriver. Turn it in the direction of the arrow to make the characters show up more
clearly. If you still don’t see the characters, go back and check your electrical connections and try again.
Once you’ve successfully completed test mode, move the dip switches to the correct positions to select
the baud rate you want to use for your application.
Copyright © Parallax Inc.
Parallax Serial LCDs (#27976, 27977, 27979)
v3.1 3/11/2013 Page 2 of 11