1
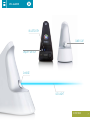
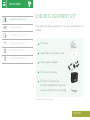
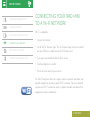
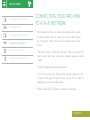
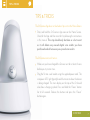
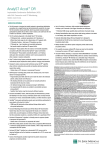
User Manual
Contents
POWER DOWN
AT A GLANCE
SET UP YOUR S3
SUPPORT
SAFETY INFORMATION
SCAN WITH S3
TIPS & TRICKS
IMPORTANT TO KNOW
SYNC YOUR S3
TECHNICAL SPEC
AT A GLANCE
bluetooth
DARK CAP
ON/Off switch
S3 nose
LED LIGHT
continue
>
SAFETY INFORMATION
Handling
Electrical warnings
General warnings
WARNING:
Failure to follow these safety instructions could result in fire,
electric shock, or other injuries, or damage to the S3, iPad mini or
other property. Before using the S3, read the entire manual and all
safety instructions to ensure safe and proper use.
Servicing
HANDLING
This Scanner is a highly sensitive scientific measurement instrument.
Always handle it with care.
continue
>
SAFETY INFORMATION
Handling
Electrical warnings
Electrical warnings
a.Water & Moisture
General warnings
Servicing
To reduce the risk of fire from electric shock, do not expose the S3 to
rain or moisture.
Do not use the S3 near water sources such as bathtubs, wash bowls,
sinks, laundry machines, in wet basements, swimming pools, or other
receptacles for liquids. If liquids are spilled on or near the S3 while it is
connected to its power cord then unplug the device from the electrical
outlet immediately and contact your local Scanner Support. If the S3 is
not plugged in but is operating on battery power then do not approach
the device, but contact your local Scanner Support.
b.Servicing
Do not remove the display cover or bottom of the S3, or attempt to
repair the device yourself. Disassembling the device may damage
it or may cause injury to you. There are no-user-serviceable parts
inside. Servicing should only be performed by a qualified technician at
Pharmanex®.
continue
>
SAFETY INFORMATION
Handling
Electrical warnings
Electrical warnings
c.Power Cords & Power Supplies
General warnings
Servicing
Do not plug any other power cord or power supply into the S3 except
the ones that are provided with this unit. Do not overload wall outlets
or extension cords. A grounding-type power plug will fit only into a
grounding type receptacle (outlet) with matching openings. If you need
an extension cord, use only the grounding type.
d.Cooling
The S3 should never be placed near or over a radiator, heat register,
or any other heat source. Avoid leaving the device in an overly hot or
cold environment for prolonged periods of time. The optimal storage
temperature range for the device is between 10° C to 40° C.
continue
>
SAFETY INFORMATION
Handling
General warnings
Electrical warnings
a.Eye safety
General warnings
Servicing
The Scanner utilises LEDs (Light Emitting Diodes) as a source of
light. LEDs are found in household lighting, electronics and common
flashlights. While they are not generally thought of as harmful to the
eye, it is strongly recommended to not stare directly into this or any
bright source at close range or for prolonged periods of time.
b.Sensitive Optical Components
The optical components of the S3 can be damaged if exposed to
excessively bright light. Do not scan shiny, mirror-like, or metallic objects
that reflect light back into the S3. Do not scan any extremely bright
objects of any kind. Do not point the S3 at bright room lights or the sun.
Cover the Scanner nose with the S3 Dark Cap when the device is going
to be located in a high-brightness area, and any time the device is not
in use. Not following these recommendations can damage the sensitive
optical components inside the S3.
continue
>
SAFETY INFORMATION
Handling
General warnings
Electrical warnings
c.Usage limitations
General warnings
Servicing
This unit must not be used or operated in any manner other than
that specified by Pharmanex®. Failure to operate the unit under these
conditions may impair the safety features provided by the unit.
d. Connected device
The S3 has been configured to work only with approved Apple devices
(currently the iPad mini). The S3 will not sync with or perform software
functions if it is connected to an unapproved device.
continue
>
SAFETY INFORMATION
Handling
Electrical warnings
General warnings
Servicing
Servicing
Servicing of the S3 is not to be performed by the user, or any
unapproved third party. The S3 should never be opened or
disassembled. If the S3 enclosure ever becomes cracked or broken, do
not attempt to access the internal components or electric circuitry. This
could cause exposure to the circuitry and risk of fire or electric shock.
To avoid any risk of shock, disconnect the unit from any power source
immediately (if applicable) and then return the S3 to Pharmanex® for
servicing.
NOTE:
The S3 warranty is void if the enclosure has been tampered with
in any way, if any part of the enclosure is deliberately removed, or
if there is evidence of attempts to remove the enclosure. Not only
will these actions void the warranty, but the Scanner Lease Holder
will be held responsible for the full cost of the S3.
continue
>
SAFETY INFORMATION
Handling
Servicing
Electrical warnings
Conditions Requiring Service:
General warnings
Servicing
If any of the following conditions occur, unplug the S3 from the wall
outlet (if applicable) and call your local Scanner Support:
•The power supply cord or plug is damaged.
•Liquid has been spilled on, or objects have fallen on (or into) the
product.
•The product is damp or wet from condensation or exposure to rain or
water.
•The product does not operate normally when following the operation
instructions.
•The product has been dropped or the cover has been damaged.
•The product exhibits a distinct change in performance, such as the
inability to perform basic functions.
•The S3 Scanner App instructs you to call technical support.
continue
>
IMPORTANT TO KNOW
POSITIONING
CALIBRATION
OPERATING TEMPERATURE
TRAVELLING WITH THE S3
POSITIONING
The Pharmanex® BioPhotonic Scanner (S3) is an instrument that
measures carotenoid levels in the skin. It is not intended to be used for
medical purposes. It is not a medical device or a medical diagnostic
tool of any kind and is not intended to diagnose, treat, mitigate, cure, or
prevent any disease or condition, or affect the structure or function of
any part of the body.
continue
>
IMPORTANT TO KNOW
POSITIONING
CALIBRATION
OPERATING TEMPERATURE
TRAVELLING WITH THE S3
CALIBRATION
All precision scientific instruments require calibration. Most are
calibrated daily and some are calibrated before each measurement. The
first time you use it, the S3 requires a Dark Cap Scan and an Operator
Scan. After this first calibration is done, you will need to do a Dark Cap
Scan once every 24 hours, and an Operator Scan once every 14 days.
continue
>
IMPORTANT TO KNOW
POSITIONING
CALIBRATION
OPERATING TEMPERATURE
TRAVELLING WITH THE S3
OPERATING TEMPERATURE
The S3 can be affected by the environmental conditions in which it
is stored and operated. The Scanner is designed to work in ambient
temperatures between 10° to 40° C. The optimal scanning
temperature is 20° to 25° C. The S3 should not be stored or
transported in temperatures greater than 40° C or lower than 10° C.
Leaving the S3 in a car on a warm day or a cold night can affect its
performance or damage the device.
If the Scanner has been stored at a temperature different than the
operating conditions described above (such as in a car overnight),
sufficient time must be given for the S3 to acclimate to the operating
environment before setup and calibration. Please allow enough
time, usually 30 minutes, for the S3 to adjust to the scanning
environment before plugging the S3 into a power outlet, or
attempting to calibrate the device.
continue
>
IMPORTANT TO KNOW
POSITIONING
CALIBRATION
OPERATING TEMPERATURE
TRAVELLING WITH THE S3
TRAVELLING WITH THE S3
Only travel with the S3 in the S3 carrying bag provided with the
instrument. When the S3 is transported by air, it should be brought
along as carry-on luggage. This minimises the potential for added
shock, jarring, and exposure to extreme temperatures associated with
checked baggage. Remember that the S3 is an extremely sensitive
scientific device and should always be treated as such.
continue
>
SET UP YOUR S3
CHECKING EQUIPMENT LIST
CHARGING DEVICES
CHECKING EQUIPMENT LIST
Please review the following equipment list to ensure all components are
included.
ACTIVATING YOUR IPAD MINI
CONNECTING YOUR IPAD
INSTALLING THE S3 APP
S3 Scanner
Apple iPad mini* placed in its cover
CONNECTING VIA BLUETOOTH
Power supplies & adapters
S3 Scanner carrying bag
S3 Scanner Dark Scan Caps
(2 in total, 1 placed on the Scanner and
one spare, placed in the carrying bag)
*May not be provided for your market
continue
>
SET UP YOUR S3
CHECKING EQUIPMENT LIST
CHARGING DEVICES
ACTIVATING YOUR IPAD MINI
The Scanner and the iPad mini should be plugged into a grounded
electrical outlet and charged using the power supplies included
for at least 8 hours before the first attempt to operate the devices.
CONNECTING YOUR IPAD
HOW TO DO IT:
CHARGING DEVICES
INSTALLING THE S3 APP
CONNECTING VIA BLUETOOTH
>Plug one end of the S3 power cord into the back of the Scanner
and plug the other end into a grounded outlet.
he power charging LED light on the back of the Scanner will
T
illuminate green, showing that the S3 is charging.
> Plug the iPad mini USB cord into the USB electrical adapter.
>Plug one end of the iPad mini power cord into the base of the
iPad mini and plug the other end into an electrical outlet.
Once both the S3 and iPad mini are charged, you can unplug them
from their power supplies.
continue
>
SET UP YOUR S3
CHECKING EQUIPMENT LIST
CHARGING DEVICES
ACTIVATING YOUR IPAD MINI
Press the “Power” button on the top right bezel of the unit. Slide the
unlock bar on the screen to the right to enter the Home Screen.
ACTIVATING YOUR IPAD MINI
CONNECTING YOUR IPAD
INSTALLING THE S3 APP
CONNECTING VIA BLUETOOTH
Power button
continue
>
SET UP YOUR S3
CHECKING EQUIPMENT LIST
CHARGING DEVICES
ACTIVATING YOUR IPAD MINI
CONNECTING YOUR IPAD
CONNECTING YOUR IPAD MINI
TO A Wi-Fi NETWORK
Wi-Fi is needed to:
•Access the Internet
INSTALLING THE S3 APP
•Install the S3 Scanner App. The S3 Scanner App must be installed
on your iPad mini in order to use the S3 Scanner unit
CONNECTING VIA BLUETOOTH
•Sync your scan records to the Nu Skin® server
•Purchase digital scan credits
•Email the scan results to your clients
Nu Skin Enterprises does not supply wireless networks and does not
provide support for private or public Wi-Fi networks. You must connect
to your own Wi-Fi network or access a public network and obtain their
appropriate security credentials.
continue
>
SET UP YOUR S3
CHECKING EQUIPMENT LIST
CHARGING DEVICES
ACTIVATING YOUR IPAD MINI
CONNECTING YOUR IPAD
INSTALLING THE S3 APP
CONNECTING VIA BLUETOOTH
CONNECTING YOUR IPAD MINI
TO A Wi-Fi NETWORK
•Activating the iPad mini will automatically display what is called
the Home Screen. You can always return to the Home Screen
by pushing the “Home” button at the bottom centre of the
device.
•The Home Screen is filled with small icons. When you tap on the
touch screen, these icons will activate computer programs called
“Apps”.
•Find the Settings App on the Home Screen.
•On the left side of the Settings App window, locate the WiFi option in the upper left of the screen. Tap on Wi-Fi in order to
configure your wireless network options.
•Make sure that the Wi-Fi option is set to the ON position.
continue
>
SET UP YOUR S3
CHECKING EQUIPMENT LIST
CHARGING DEVICES
CONNECTING YOUR IPAD MINI
TO A Wi-Fi NETWORK
ACTIVATING YOUR IPAD MINI
•A list of available Wi-Fi networks will be shown below. Tap on the
network you want to join and enter any required security credentials.
CONNECTING YOUR IPAD
Example:
INSTALLING THE S3 APP
CONNECTING VIA BLUETOOTH
continue
>
SET UP YOUR S3
CHECKING EQUIPMENT LIST
CHARGING DEVICES
ACTIVATING YOUR IPAD MINI
CONNECTING YOUR IPAD
INSTALLING THE S3 APP
CONNECTING VIA BLUETOOTH
CONNECTING YOUR IPAD MINI
TO A Wi-Fi NETWORK
•Once you have selected a Wi-Fi network, the iPad mini will
automatically access the Internet through that signal. A Wi-Fi
icon will be displayed in the upper left corner of the Apple device.
The more bars the Wi-Fi icon shows, the stronger the signal.
•The iPad mini will automatically attempt to connect with any Wi-Fi
network you have successfully used in the past as long as you are
within range of that signal. The typical range of a Wi-Fi network is
between 36 to 91 m. Interference can reduce Wi-Fi signal ranges.
continue
>
SET UP YOUR S3
CHECKING EQUIPMENT LIST
CHARGING DEVICES
ACTIVATING YOUR IPAD MINI
CONNECTING YOUR IPAD
INSTALLING THE S3 SCANNER APP
ON THE IPAD MINI
Reminder: You will not be able to install the S3 Scanner App on your iPad
mini unless your iPad mini is connected to a Wi-Fi network.
INSTALLING THE S3 APP
CONNECTING VIA BLUETOOTH
On the Home Screen, tap on the Safari App. Enter in web address:
www.s3ScannerApp.com
Press the “Download” button to
download the S3 Scanner App
After the S3 Scanner App has been
successfully installed on the iPad mini, the
App will have an icon on the Home Screen.
Tap the S3 Scanner App icon to start the program.
You can press the “Home” button at any time to exit the S3 Scanner
App.
continue
>
SET UP YOUR S3
CHECKING EQUIPMENT LIST
CHARGING DEVICES
POWERING UP YOUR SCANNER
AND CONNECTING IT TO YOUR
IPAD MINI VIA BLUETOOTH
ACTIVATING YOUR IPAD MINI
CONNECTING YOUR IPAD
INSTALLING THE S3 APP
CONNECTING VIA BLUETOOTH
Reminder: The S3 operates using a rechargeable battery. Once the battery is
charged, it can be unplugged from the power supply and used as a
stand-alone device for a maximum of 6 hours of constant use.
WARNING:
Make sure the Dark Cap is covering the S3
nose before turning on the S3. The S3 will
not fully activate unless it detects a Dark
Cap. Once the Dark Cap is secure on the
nose, press the “Power” button to activate
the S3. The S3 display screen will show that
the unit is powered and ready to link to the
iPad mini.
continue
>
SET UP YOUR S3
CHECKING EQUIPMENT LIST
CHARGING DEVICES
POWERING UP YOUR SCANNER
AND CONNECTING IT TO YOUR
IPAD MINI VIA BLUETOOTH
ACTIVATING YOUR IPAD MINI
CONNECTING YOUR IPAD
INSTALLING THE S3 APP
CONNECTING VIA BLUETOOTH
Press the “Home” button of your iPad mini to return
to the Home Screen. Tap the “Settings” App to
access the iPad settings. Bluetooth should be turned
to the “On” position. The iPad mini will now detect
Bluetooth signals. Press the “Home” button again to
return to the Home Screen.
On the back of the S3 Scanner unit to the right of
the Main Power button is the Bluetooth button. Hold
down the Bluetooth button for 2-3 seconds until it
begins to blink. The blinking blue LED light on the
back of the S3 unit indicates that the device is now
broadcasting a Bluetooth signal. The next time you
turn on the power on the Scanner; do not press the
Bluetooth button again. It is no longer necessary for
subsequent connections.
BLUETOOTH
continue
>
SET UP YOUR S3
CHECKING EQUIPMENT LIST
CHARGING DEVICES
POWERING UP YOUR SCANNER
AND CONNECTING IT TO YOUR
IPAD MINI VIA BLUETOOTH
ACTIVATING YOUR IPAD MINI
CONNECTING YOUR IPAD
HOW TO DO IT:
INSTALLING THE S3 APP
Tap now on the S3 Scanner App. Do not start the S3 Scanner App
until the Bluetooth button is blinking.
CONNECTING VIA BLUETOOTH
>In the “Status” tab, drag down the arrows under the “To search for
Scanners, pull down” button.
The App will now search for S3 Bluetooth signals. If your S3 is not
listed, pull down the arrows again. Interference may occasionally
prevent initial detection. Detected S3 devices will be listed on the left
of the Status window.
continue
>
SET UP YOUR S3
CHECKING EQUIPMENT LIST
CHARGING DEVICES
POWERING UP YOUR SCANNER
AND CONNECTING IT TO YOUR
IPAD MINI VIA BLUETOOTH
ACTIVATING YOUR IPAD MINI
CONNECTING YOUR IPAD
HOW TO DO IT:
INSTALLING THE S3 APP
CONNECTING VIA BLUETOOTH
>Tap on your S3’s CS number.
A window will ask if you would like to connect with the Scanner.
>Click “Yes”
Devices will be linked.
continue
>
SET UP YOUR S3
CHECKING EQUIPMENT LIST
CHARGING DEVICES
POWERING UP YOUR SCANNER
AND CONNECTING IT TO YOUR
IPAD MINI VIA BLUETOOTH
ACTIVATING YOUR IPAD MINI
CONNECTING YOUR IPAD
INSTALLING THE S3 APP
HOW TO DO IT:
Once a S3 and the iPad mini are linked, they will automatically try to
detect and communicate with each other when activated until you
choose to “Disconnect” them in the Status tab window.
CONNECTING VIA BLUETOOTH
IMPORTANT:
Only one S3 can be linked to an iPad mini at a time.
continue
>
SET UP YOUR S3
CHECKING EQUIPMENT LIST
CHARGING DEVICES
POWERING UP YOUR SCANNER
AND CONNECTING IT TO YOUR
IPAD MINI VIA BLUETOOTH
ACTIVATING YOUR IPAD MINI
CONNECTING YOUR IPAD
INSTALLING THE S3 APP
CONNECTING VIA BLUETOOTH
Bluetooth is different from Wi-Fi. Wi-Fi allows a device to access the
Internet. Bluetooth is a local signal between two devices. Your S3 unit
and the iPad mini can communicate even when you do not have a
Wi-Fi connection as long as Bluetooth is active.
The Bluetooth link between the devices has a maximum range of
about 160 feet (50 m). Interference from various sources can decrease
that range. The Status tab of the S3 Scanner App will tell you if you
are out of range and disconnected from your S3.
continue
>
SCAN WITH S3
The Status taB
Scan tab
Result Screen – Demographics
The Status tab
and S3 calibration
The Status tab is used to view the status of Scanners and perform the
calibration scans: the Dark Cap & Operator Scans. S3 Scanners will be
listed as:
• In range, grey S3 icon.
NOTE: If your Scanner is "Locked", pop up window appears, contact your
local Scanner Support.
continue
>
SCAN WITH S3
The Status taB
Scan tab
Result Screen – Demographics
The Status tab
and S3 calibration
Reminder: Only one S3 unit can be linked to your iPad mini at a time.
When an S3 is linked to the Scanner App, the status tab will show the
CS number.
continue
>
SCAN WITH S3
The Status taB
Scan tab
Result Screen – Demographics
The Status tab
and S3 calibration
The next step is to perform a Dark Cap Scan. Make sure that the
Dark Cap is on the S3 nose and press the Dark Scan icon. Follow the
instructions on the screen until the Dark Cap is complete. You will
need to perform a Dark Cap Scan once every 24 hours.
Then, remove the Dark Cap and perform an Operator Scan by
tapping on the Operator Scan icon. You will need to do an Operator
Scan once every 14 days.
These calibration scans are used as a quality assurance tool to track
Scanner consistency. Make sure you make them accordingly.
continue
>
SCAN WITH S3
The Status taB
Scan tab
Result Screen – Demographics
The Scan tab
WARNING: To start scanning a subject, you first need to get his express consent
that he agrees to share his personal data such as his name and
demographic information. To do this, please have your subject sign
the Schedule B of your S3 Agreement and keep the copy of it for you.
Nu Skin® will operate regular audits to make sure you collect these
forms.
To scan a person, you must either purchase digital scan credits or use
a Scan Card.
continue
>
SCAN WITH S3
The Status taB
The Scan tab
Scan tab
A. Scan with digital scan credits
Result Screen – Demographics
To purchase credits
HOW TO DO IT:
>Tap the “Purchase Scan Credits” button.
new window will open asking you to log in to your Distributor account.
A
Please have your Distributor ID, your Nu Skin® web log-in credentials
and a credit card ready. Your iPad mini needs to be connected to a Wi-Fi
network to do the purchase.
continue
>
SCAN WITH S3
The Status taB
Scan tab
Result Screen – Demographics
The Scan tab
You can purchase scan credits in units of 1, 20, or 100 by tapping on the
appropriate icons on the screen.
>Once you have chosen a final amount of credits, tap the “Check Out”
button to purchase them and add them to your S3.
Follow the on-screen instructions until your purchase is completed.
>When you are done, you can close the Buy Digital Scan Credits
window by tapping the “Back” icon in the upper right corner of the
screen.
The App will return to the Scan tab window.
continue
>
SCAN WITH S3
The Status taB
Scan tab
Result Screen – Demographics
The Scan tab
NOTE: After you have purchased scan credits, you will notice that both the
Scan tab icon and the Digital Scan icon have changed. Both icons
now have numbers that show the amount of digital scans you have
remaining. Keep an eye on this number to keep track of when to
purchase more scan credits!
To scan digital
If you have scan credits available, tapping on the “Digital Scan” button will
automatically begin to guide you through the scanning process.
continue
>
SCAN WITH S3
The Status taB
The Scan tab
Scan tab
B.Scan with a Scan Card
HOW TO DO IT:
Result Screen – Demographics
>Tapping the “Scan Card” button allows you to either scan a Scan Card
with the iPad mini’s camera, or input the Scan Card number using the
digital keyboard.
Once the Scan Card information is entered, the S3 Scanner App will begin
to guide you through the scanning process.
continue
>
SCAN WITH S3
The Status taB
The Scan tab
Scan tab
>The camera lens is located in the upper-left corner of the back plate of
the iPad mini, just beneath the main power button.
Result Screen – Demographics
Important:
Be sure that you are not obscuring the camera lens when trying to
scan a card’s barcode. When imaging, it is best to hold the iPad mini
with your hands on both the bottom left and right corners with the
Home button on the right side.
continue
>
SCAN WITH S3
The Status taB
The Scan tab
Scan tab
>Put the Scan Card on a flat surface, and hold the iPad in a parallel
Result Screen – Demographics
position above the card.
When the card is centred in the camera, the S3 Scanner App will
automatically recognise the barcode, input the data into the App, and
return to the Scan tab window ready to perform a scan.
>If for any reason the camera is not able to properly record the barcode,
then tap the “Enter Scan Card Manually” button in the upper left.
This will open an input field and the iPad mini digital keyboard.
>Type the Scan Card number into the
input field using the digital keyboard.
Tap “Return” on the digital keyboard
when you are finished typing in the
Scan Card number.
continue
>
SCAN WITH S3
The Status taB
Scan tab
Result Screen – Demographics
The Scan tab
The App will recognise the number and return to the Scan tab window
ready to perform a scan. If you input the Scan Card number incorrectly, the
S3 Scanner App will give you the message:
“INVALID CODE. PLEASE TRY AGAIN”
If you want to return to the Scan tab window without having scanned or
input a Scan Card number then tap “Cancel”.
You are now ready to start scanning subjects. You must first enter the
person’s name in the “Person Being Scanned” field.
Then the subject is requested to:
“PLEASE PLACE HAND ON SCANNER”
When his/her hand is put on the S3 nose, the scan session begins
automatically via 3 different steps:
•Sensing
•Initialising
•Scanning
continue
>
SCAN WITH S3
The Status taB
The Scan tab
Scan tab
Result Screen – Demographics
Show how the hand should be
placed for a proper scan
To cancel the scan session and
return to the Scan tab window
The scan takes around 30 seconds. The hand should remain on the probe
until the S3 Scanner App and the Scanner display screen both release the
score.
continue
>
SCAN WITH S3
The Status taB
The Scan tab
Scan tab
The scan is now finished. The scan screen will now offer you 2 options:
Result Screen – Demographics
•To email the scan results to the clients by inputting their email address.
The email is created and sent by Nu Skin Enterprises but the client will
have the possibility to answer you directly.
•To enter demographic information on the bottom bar to allow you to
better understand the person’s overall profile.
continue
>
SCAN WITH S3
The Status taB
Scan tab
Result Screen – Demographics
The Scan tab
To exit the scan session, press “Done” and you will return to the Scan tab
home page where you need to choose either Digital Scan credits or a Scan
Card.
Once you tap the “Done” button, you can no longer look back at the
customer’s score.
continue
>
SCAN WITH S3
The Status taB
Scan tab
Result Screen – Demographics
Result Screen – Demographics
Tapping on each icon will activate touch menus which allow you to
select the option that best describes a person’s profile. This information
will help Nu Skin® record the subjects’ profile and establish statistical
data.
It is not required to enter demographic data
to obtain a scan results and it is only optional.
However, we strongly encourage you to
collect as much information on each subject
as possible in every scanning session. When
entering the information, please be as careful
and accurate as possible. It is crucial to any
meaningful statistics.
continue
>
SYNC YOUR S3
SYNC YOUR S3
The S3 Scanner App will keep a digital copy of all your completed scans in
the Records tab. Tap on the Records tab to open up the Records window.
You will see a list of the scans you have completed in chronological order by
date and time (most recent scan first).
You will notice that the completed scan results may have the words
“Pending” or “Recorded”. These words tell you whether the record has
been synced with the Nu Skin® server or not. A synced record will show as
Recorded while a record with a Pending status means that the record has
not been synced yet.
In order to sync your completed scan records to the Nu Skin® server, you
will need to be connected to a Wi-Fi network.
continue
>
SYNC YOUR S3
SYNC YOUR S3
IMPORTANT: You must sync the S3 Scanner App to the Nu Skin® server at least
once a month and not later than the last day of the month. Not
doingthis,yourscanswillnotcountforyourmonthlyScannerMaintenance,
Free Programme, Personal Sales Volume (PSV) and commissions.
We recommend that you sync after each of your scan sessions.
To sync your scan records, press the button “SYNC”
The Operator tab
Use this tab to change session and select the market and language you
want.
continue
>
POWER DOWN
POWER DOWN your S3
•Disconnect first from the S3 Scanner App by going to the Status tab and
clicking on the “Disconnect” button.
•Exit the S3 Scanner App by pressing the iPad home button.
•Shut off the iPad screen by tapping the “Power” button briefly.
•Power down the S3 by pressing the “Power” button on the back. Do not
press the Bluetooth button when powering down. It is no longer necessary.
•Place the Dark Cap on the nose to prevent any damage to the electronics.
•To disconnect the S3 from the power supply, unplug the power adapter
from the rear charging plug. When the S3 is connected to the power supply,
keep the power adapter and rear charging plug easily accessible at all times.
•Place the S3 into its carrying case when it is not in use.
Important:
Do not shut down the S3 while performing a scan or at any time
while in use. If you are operating the S3 on batteries and the
display gives you a low-power warning, then either connect the
S3 to a power outlet using the power supply or shut down the
device.
continue
>
SUPPORT
SUPPORT
•CONTACT will supply you with the email address of your local
Scanner Support and website links where you can obtain support.
•ABOUT will tell you the S3 Scanner App software version, the S3
firmware version and other information about the hardware and
software.
continue
>
TIPS & TRICKS
TIPS & TRICKS
The S3 Scanner App does not load when I tap on it in the Home Screen.
>Press and hold the S3 Scanner App icon on the Home Screen.
Uninstall the App and then reinstall it by following the instructions
in this manual. This step should only be taken as a last resort
as it will delete any unused digital scan credits you have
purchased and will erase any un-synced scan results.
The S3 Scanner unit won’t turn on.
>Make sure you have charged the Scanner unit for at least 8 hours
before you try to turn it on.
>Plug the S3 into a wall socket using the supplied power cord. The
rear power LED light (green) should illuminate to show the device
is being charged. The main display on the top of the S3 should
also show a charging symbol. Press and hold the “Power” button
for 5 full seconds. Release the button and press the “Power”
button again.
continue
>
TIPS & TRICKS
TIPS & TRICKS
The S3 Scanner App won’t let me perform a scan.
>There are several reasons why this might be happening:
- The Scanner might not be linked to the iPad mini via Bluetooth.
- Make sure the iPad mini and the Scanner are in range of each
other (within 30 m).
- You may need to perform a Dark Cap Scan or an Operator
Scan. Check the status tab for this.
- Make sure you sync the Scanner at least once per month.
- Check that you have either purchased a digital scan credit or
you have input a Scan Card.
- Make sure that you type the name of the subject in the Scan tab
window.
When I try to use a Scan Card, the camera won’t read the number
properly.
>Type the Scan Card number manually into the text field using the
digital keyboard.
continue
>
TIPS & TRICKS
TIPS & TRICKS
The S3 Scanner App says that my Scan Card is invalid.
>The Scan Card has probably been used. Use a different Scan
Card or purchase a digital scan credit using the Scan tab.
Where does the S3 Scanner App keep my completed scans?
>The App stores a list of your completed scans in the Record tab
of the App.
continue
>
TIPS & TRICKS
TIPS & TRICKS
SYNC
Make sure your iPad mini is connected to a Wi-Fi network.
If an error is displayed saying that the server does not answer, please wait 10
minutes and try syncing again. If the error comes up again, contact your local
Scanner Support.
If the time has expired for sync, press the “Sync” button. This will reload scan
time.
DARK CAP
The Dark Cap is designed to be a protective cover for the S3 nose.
Whenever you are not scanning, put it on even between each scans.
CLEANING
We all have oils on our skin which after repeated scanning, can interfere with
the reading of the Scanner. Clean the nose and the front of the Scanner
periodically. To do this, first disconnect the S3 from the charging cord. Then
apply a glass cleaner or a mild soap and water solution to a microfiber cloth
and wipe down the device. Do not submerge the S3 in water or rinse water
to clean. Do not use harsh chemical solvents or abrasive cleaners. In addition,
we recommend your subjects use the Nu Skin® Epoch® Hand Purifier prior
scanning to help reduce the amount of oil being deposited on the S3 and the
potential transfer of germs from one person to another.
continue
>
TIPS & TRICKS
TIPS & TRICKS
VARIABILITY
Variability is common because the Scanner measures carotenoids, which
are found at trace levels and in a biological tissue.
Two types of factors influence the Skin Carotenoid Score
1. Personal (genetics, diet, dietary lifestyle)
2. Operational (calibration, temperature, hand placement, drafty conditions)
85% of all measurements will be +/- one colour shade from the mean.
To ensure your Scanner scans accurately:
•Place the hand of the subject at the exact same location as you did for
their previous scan.
•Check that the Scanner has been well calibrated via the Dark Cap
Scan and the Operator Scan.
•Scan your subjects in a room where there is an ambient temperature
of 20 to 25° C.
continue
>
TIPS & TRICKS
TIPS & TRICKS
BLUETOOTH
Maintaining your Bluetooth connection tips:
1. Do not shut off the Scanner while the S3 Scanner App is still running.
2. Do not press the Bluetooth button on the back of the Scanner once
you have connected. This will reset the Bluetooth connection and can
sometimes cause signal interruptions.
continue
>
TIPS & TRICKS
TIPS & TRICKS
BLUETOOTH
If you cannot establish a Bluetooth connection, then first try the Bluetooth
REFRESH FIX:
1. Press the Bluetooth button on the back of the Scanner for 5 seconds
until it is blinking.
2. Exit the App as normal.
3. Reload the S3 Scanner App, check the status tab to see if your device
has successfully reconnected to the iPad.
4. If the two devices do not connect, then exit the App and tap on the
SETTINGS icon.
5. Shut the Bluetooth switch to OFF. Wait for 2-3 seconds. Then set the
Bluetooth switch back to ON.
6. Load the S3 Scanner App again and see if the connection is
successfully re-established.
7. If this process does not work, follow the POWER refresh steps on the
next page.
continue
>
TIPS & TRICKS
TIPS & TRICKS
POWER REFRESH FIX
>Shut down the S3 App
>Shut off the S3 Scanner by holding the power button for 3 seconds
>Power down the iPad by holding the power button down for 5
seconds and swipe the red arrow when it appears)
>Power the iPad back on
>Locate the settings icon and tap it
>Tap on Bluetooth and disable it
>Wait for three seconds and activate the Bluetooth again
>Power the S3 Scanner back on
>Hold the Bluetooth button down for 5 seconds until it is blinking
>Open the S3 Scanner App
>Attempt to connect to the Scanner
continue
>
TECHNICAL SPEC
TECHNICAL SPECIFICATIONS
•Voltage or Voltage Range : only with this power supply type
DOC EMSA 200/200
– Input 100–240 V, 50–60 Hz, 1,0 A
– Output 20 V, 50–60 Hz, 2,0 A
• Statement of Range of Environmental Conditions
– Indoor use up to 2000 m
– Safe Operating Temperature: 10° to 40° C
– Optimal Operating Temperature: 20° to 25° C
– Safe Storage temperature: 10° to 40° C
– Relative Humidity: 18 – 85 %
– Mains supply voltage: +10 % to -10 %
• EMC: 61326-1:2013; EN 61000-3-3:2008; EN 61000-3-2:2006
• Safety: 61010-1:2010
• Weight: (1.46 kg)
• Height: (16.8 cm)
• Width: (23.5 cm)
• Depth: (11.6 cm)
Name and Address of the EU Representative
Nu Skin Belgium N.V.
Leonardo Da Vincilaan 9
1935 Zaventem – Belgium
To contact your local Scanner Support, please consult the S3 App, section Support>Contact
continue
>
TECHNICAL SPEC
TECHNICAL SPECIFICATIONS
CE marking on a product is a manufacturer’s declaration that the
product conforms with the requirements of the European Council
Directives 2006/95/EC, 2004/108/EC and 1999/5/EC.
This symbol designates that this unit is listed by Underwriters
Laboratories.
This symbol designates that this unit is listed by the Canadian
Standards Association.
No user-serviceable parts inside. All components are custom
made and must not be altered in any way. Removing, damaging
or altering labels voids all warranties.
This symbol indicates that the unit should not be disposed of
by the consumer. It must be sent back to Pharmanex® LCC for
disposal.
The S3 is a Class B digital device that complies with part 15 of
the FCC rules. Operation is subject to the following two
conditions: (1) this device may not cause harmful interference,
and (2) this device must accept any interference received,
including interference that may cause undesired operation.
Restriction of Use of Hazardous Substances compliant
(Directive 2011/65/EC).