Download Online Capacity Tester MK70 User and PC-Software
Transcript
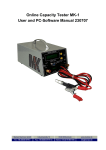
Online Capacity Tester MK70
User and PC-Software Manual
User manual Online-Battery-Tester
-2–
User manual Online-Battery-Tester
-3–
Introduction:
With this processor controlled capacity tester you can measure the the C20 capacity
of the 12V battery. The discharge current will be set automatically. For batteries
below 25Ah C20 capacity it will be the C1 rate (e.g. for 18Ah battery it will be 18A).
For batteries above 25Ah C20 capacity the discharge current will always be 25A.
The cut off voltage (The voltage limit where you want to stop the discharge) is set to
1,6V / cell. The tester calculates the C20 capacity referring to the Peukert values of
the battery.
As a further option you can also make a single cycle test of the battery. You can set
the charging in hours. In the menu of the tester you decide if you start with a charge
or discharge cycle. Starting with a charge cycle, the battery will be charged until the
programmed charging time is over. The battery then will be discharged with the
related C20 discharge current until 1,6V / cell. Finally the battery will be charged
again. If you start with a discharge cycle the battery will also be charged after
discharge.
If you set the charging time to “0 hours”, the battery will only be discharged.
The test results can either be displayed online on a PC screen or can be seen as
total results in the menu of the tester.
The standard delivery includes the battery tester MK70, a 9 pole RS 232 cable for
connection to a COM-Port on your PC, a power supply (for use of the tester if no
battery is connected) the software CD and the user manual. 24V Charge test
connection is also included.
Start up procedure
Software installation
Insert software CD into your computer and double click on CD icon.
Connecting the tester to the battery
Use the red crocodile lead to connect to the positive terminal of the battery and the
black to connect to the negative terminal. After connecting the tester to the battery
you can see the software version and the serial number of the tester for a few
seconds. After that, you will be able to see the voltage of the battery connected on
the display.
User manual Online-Battery-Tester
-4–
Menu System:
The main menu consists of 8 screens. You can change between the screens with the
Display Change button.
1. Voltage screen
Voltage
12.8 V
This shows the voltage of the battery that you have connected.
2. Battery a/h capacity screen
C20 Capacity:
000,0 Ah
This screen allows you to set the C20 a/h capacity of your battery. You do this by
pressing the yellow the Up/Down button. If the C20 a/h capacity of the battery is not
defined on the labelling of your battery please ask your battery dealer for the correct
value.
3. Discharge
The battery you wish to test needs to be fully charged before you start the test. Press
Start/Stop button if you want to start the discharge test. Remember to set the correct
a/h capacity of the battery in screen 2 before starting the discharge test.
Discharge
4. Charging time
If you wish to start a test with a charger attached you will need to select a charge
time. You can change the charging time between 1-16 hours using the yellow
Up/Down button. ATTENTION: Please make sure that this is set to 00 if you are
just using the Discharge option to test one battery.
Charging time
00h
User manual Online-Battery-Tester
-5–
5. Charging
This option has three stages; it will charge the battery, discharge the battery and then
charge the battery again. You will need to set the correct a/h capacity of the battery
in screen 2 and then set a charge time in screen 4. Attach a 12 volt charger to the
positive and negative charger plugs on the front of the tester. Press Start/Stop to
start the test. Remember to turn the charger on after you have pressed start.
Charging
6. 24V Charger test
This option will allow you to watch/record the charging curve of a 24 volt charger and
charge two 12 volt batteries. You can then see the amps and volts that the charger
produces over a set charge time. You need to connect a 24 volt charger to the
positive and negative charger plugs on the front of the tester and also connect two
batteries. To connect two batteries to the tester you need to connect the red positive
crocodile clip to the positive of one battery and the black negative crocodile clip to the
negative of the other battery. You then need to link the spare positive terminal of one
battery and spare negative terminal of the other with the link cable included in your
MK tester box. Press Start/Stop to start the test, remember to make sure that you
set a charge time in menu screen 4 and turn your charger on after you press start.
24V charger test
7. Read Test Results
The MK tester will store your last three test results. Press Start/Stop and you can
view each of the three results. You will be able to see the a/h capacity of the tested
battery, % Pass or Fail of the battery and how many minutes the test ran for. Press
the Display Change button to cycle through the three results. Test one is the last test
that you completed. To exit this menu press Start/Stop.
Read Test Result
User manual Online-Battery-Tester
-6–
8. Meas. Data -> PC
If a PC with the tester software (Akku) is connected, you can send the stored data of
the tester to the PC. IMPORTANT - Make sure that you select the software
option to download before you press Start/Stop at this menu.
Meas. Data -> PC
During the test:
During the test you can see the following on the tester screen:
Elapsed time: This is the time since the beginning of the actual process (charging or
discharging)
Voltage: The voltage of the battery (during discharging), or the actual charging
voltage (during charging)
% capacity of your battery you will see the calculated C20 capacity.
When the battery test is finished, the tester will show the as a test result the
indication “Pass” or “Fail”. Battery <60% will be indicated as “Fail”
You can stop the discharge or charge any time if you press the start/stop
button.
Technical Data:
Measured Voltage Range
Max. Input Voltage
Min Input Voltage
Discharging current
Current error
Cut off voltage
Charging time
Max Number of cycles
Dimensions
Weight
Version 12 V
6 – 18 V
16V
6V
0,3 – 25 A
(0,1 – A )
2 % 0,05 A
6 – 15 V
1 h – 99 h
1
200 x 140 x 90 mm
1,5 kg
User manual Online-Battery-Tester
-7–
PC-Software instruction:
With this software you can download the measured data of the Capacity tester, draw and
print charging / discharging curves or test documentation. The device reads the
measurement data through RS 232.
Minimum hardware requirements
Pentium I processor, 32 MByte RAM
2 MByte free capacity on the hard drive
VGA adapter, 800x600 resolution with 256 colour.
Recommended hardware requirement:
Pentium II processor, 64 MByte RAM
SVGA graphics adapter,1024x768
Pentium II processor, 64 MByte RAM
SVGA adapter,1024x768 resolution 32K color depth
Operation system::
Windows 9x / ME / 2000 / XP
Short description of file menu
-
-
Read Last Measurement :
To transfer the measured data from the unit to PC.
Send header:
Add 4 column of information’s to the test
Open file :
To open a previously downloaded and saved measurement
On Line Load: Starts the On-Line test screen
Read Last 3 Measurement : Transfer last 3 measurements to PC
Open: Open existing file
Save: Save file to directory
Export to Microsoft Excel:To create a Microsoft Excel .xls file.
Test report: Creates a complete test report, with discharge curve.
Settings: NOTE: It is absolutely necessary to select the appropriate COM port.
Otherwise it may cause abnormal operation.
Correction: To set the current and voltage correction values
Set the correction values. The software re-calculates all the values (I, U)
according to the selected correction. Voltage: It multiplies ALL voltage
values with the multiplier, or adds the offset value.
Current: It multiplies ALL current values with the multiplier, or adds the
offset value.
Rename – Here you can change the filename
Close
Exit
User manual Online-Battery-Tester
-8–
With the provided software you can either see the discharge and charge graph
whilst performing the test or you can download the graph and create a test
report for further use
Start the Akku.exe programm.
User manual Online-Battery-Tester
-9–
ON-Line Test Screen (Allows you to watch the test on a computer
as it happens)
Press the icon for the “On-Line load”, or choose in the menue file/On-Line load
On - Line load
A new window will open with a blank grey screen.
ATTENTION: To see the online graph, you have to start the software before you
press the START/STOP Button on the online tester. Otherwise you will see no
date.
User manual Online-Battery-Tester
- 10 –
You see a green and a red line that shows the area between 60% and 100%
capacity. The battery should be in between these two lines or above.
Measurements will be taken every 15 minutes and displayed.
When the test is over you press the “continue”-button and will be transferred
to the software. You now can add comments to the graph and create a TestReport.
This following application is an example graph of a discharged battery with a
measured capacity of 55%. In the test report you can add your own logo and
name.
13
12,8
12,6
12,4
12,2
12
11,8
11,6
11,4
11,2
11
10,8
10,6
10,4
10,2
10
9,8
9,6
9,4
9,2
9
8
7
6
0
2
4
6
8
10
12
14
16
18
20
Time ( minutes )
22
24
26
28
30
32
34
The following is an example of a battery test including charge – discharge –
and charge.
User manual Online-Battery-Tester
- 11 –
To comment the graph, click with the right mouse button on the voltage or
current line. Choose “Type of label” on the top left of the Test report to place
the marker on voltage or current line.
To remove a marker, click right on it and confirm the message box.
You can add Name, Place of measurement, Instruments and date with the
actual information’s.
You can add further comments in “Comment other” on the Test Report.
User manual Online-Battery-Tester
- 12 –


