1
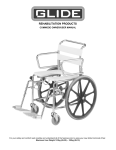
Rehabilitation Products
G2 Series Owner / User Manual
For your safety and comfort read carefully and understand all of the features prior to using
your new manual wheelchair.
Maximum recommended user weight 150kg
1
Table of Contents
Section
1
2
3
4
5
6
7
8
9
10
11
12
13
14
15
16
17
18
Description
Introduction
Getting Acquainted With Your New Chair
Backrest and Seat Upholstery
Armrest
Footplates
Forks and Castors
Castor Alignment
Wheels
Brakes
Rear Wheel Position
Folding and Opening the Wheelchair
Cross Brace
Tyres / Castor Tyres
Operation of Wheelchair
Transporting your Chair
Options
Servicing
Warranty
2
Page
3
4
4
5
5
6
6
7
8
8-9
9
9
10
11 – 12
12 – 13
14
15
15 - 17
Section 1
Introduction
Thank you for choosing the Glide G2 Manual Wheelchair.
An Australia designed and manufactured product which complies with AS 3695 and has a
manufacturers recommended user weight of 150kg.
With proper care and operation, your G2 chair will provide years of trouble free use.
Please take the time to familiarize yourself with the functions and features of your chair by
reading this owner / user manual. If you have any queries about the functions of the chair you
can call Glide Rehabilitation Products or your nearest Glide Rehabilitation Products dealer.
Glide Rehabilitation Products
+61 8 9345 3400
3
Section 2
Getting acquainted with your new chair
Section 3
Upholstery
With proper care your upholstery should give years of trouble free service. It is very important
to read the following:
• Regular (weekly) cleaning of back and seat upholstery is very important to remove
body oils which can cause hardening of the vinyl.
To clean, wipe with a clean cloth or sponge, which has been moistened in warm soapy
water, and then dry with a soft, clean cloth. The use of mild non-abrasive pure soap is
recommended. Stubborn grime may require gentle scrubbing with a soft brush.
Warning
• Never use furniture polishes, abrasive cleaners or steel wool.
Regular use of cleaners containing hydrocarbons or similar additives may cause
damage to the vinyl and harden the surface.
• Always replace broken upholstery screws immediately to avoid possible tearing.
• Stretched, torn or split upholstery must be replaced for safety reasons.
4
Section 4
Armrest
To remove:
• Push button and hold in on front arm socket.
• Using the other hand lift armrest upwards.
Note: Wheelchairs may be supplied without button
locks.
To install:
• Replace armrest into front and rear arm sockets,
push button in and armrest down
simultaneously.
• Ensure armrest is secure and button has popped
out.
Warning
• Never lift wheelchair by armrest as damage may
occur.
Section 5
Footrest
To remove:
• Push lever inwards to unlock and swing
outwards.
• Lift upwards to remove.
To install:
• Insert footrest back on the two locating pins
and swing inwards for automatic locking.
To adjust footplates:
• Remove hexagonal bolt.
• Move up or down. Line up the nearest hole for
the desired height.
• Replace hexagonal bolt and tighten.
5
Note: Your wheelchair may be fitted with
swing
away armrests. Simply lift up full arm and
swing to one side or lift up and remove
completely.
Section 6
Fork and Castors
•
•
•
•
•
•
•
•
Assembly
Press bearing housing into bottom of castor
tube.
Press castor bush into top of castor tube.
Slide castor pintle through bearing bearing
housing and castor bush.
Place circlip on castor pintle.
Slide bearing on pintle and locate in bearing
housing.
Screw hex-nut until there is 1mm of up and down
pintle movement.
Place castor fork in position and tighten locknut.
Important
Once tightened ensure 1mm of up and down movement
and castor turns freely.
Section 7
Castor Alignment
•
Incorrect castor alignment will render the
wheelchair difficult to steer and propel.
Alignment should be checked when rear
wheels have been repositioned or if castors
have had a heavy knock (e.g. hitting a kerb).
Adjustment
• To adjust, place the wheelchair on level ground
and loosen both M8 socket screws until castor
plate can swivel. Using a square, set castor
tube at 90 degrees to the ground and lock in
position.
• When both castors are set, ensure all screws
are tight before use.
6
Section 8
Wheels
The large wheels are fitted with sealed bearings and should last many years without
replacement.
Large wheels (fixed)
• To remove large wheels unscrew locknut and using a large screwdriver unscrew the
axle and remove when free.
• Installation in the reverse procedure.
Large wheels (quick release)
• To remove large wheels (quick release) push button in and slide wheel out while button
is still depressed.
• To install push button in and slide wheel in.
• Wheels should be removed weekly and axles and sockets wiped clean with a soft cloth
to avoid jamming in the socket. Smear axle with dri-lube stick before replacing.
Warning
• Do not use wheelchair, unless button is fully out when wheels are in place.
7
Section 9
Brakes
•
Brakes are designed as a locking device only and should only be applied when the
wheelchair is stationary. Do not use brakes for slowing the wheelchair. Use the
pushrims as a means of braking.
Adjusting Brakes
• Inflate tyre to correct pressure before making
adjustment to brakes.
• Loosen locking screws on brake body and adjust
brake pad so when lever is in the locked position the
wheel is firmly locked.
• Re-tighten lock nuts.
• Check that when both brakes are applied, the
wheelchair will not roll.
If rolling occurs readjust.
• When brakes are in the off position the bars should not
rub against the tyre.
Section 10
Rear Wheel Position
The rear wheels are adjustable both vertically and
horizontally.
To adjust vertically.
Remove the rear wheels and the 4 bolts holding the
axle plate. Move plate up and down to the desired
height. Replace bolts and tighten. Avoid over
tightening bolts as the frame may be damaged.
To adjust horizontally.
Remove the rear wheels and axle plate from frame.
Remove axle socket and place in the required hole. Half hole adjustments can be achieved by
reversing axle plate. Replace axle socket and tighten.
8
Caution
Increasing the seat fall and moving wheels forward will greatly affect the stability of the
wheelchair.
Section 11
Folding and opening the wheelchair
Opening
• Standing in front of the wheelchair, using two hands slowly press down on both seat
tubes keeping both hands on top of the seat at all times. As the wheelchair folds out
you will notice more pressure is required to open the chair until it reaches a point
where it will suddenly snap into position.
Caution
Never wrap hands around the seat tube when opening the wheelchair or have any part of the
hand protruding further than the seat width as injury may occur.
Folding
Before folding flip footplates to the up position.
Standing to one side of the wheelchair, grasp the seat upholstery front and rear,
approximately centre and lift upwards. You may find that a quick jerking action may be
necessary for the chair to release from the locked position.
Section 12
Cross Brace
•
The cross brace centre bolt should be kept tight. Over tightening will make wheelchair
difficult to fold.
9
Section 13
Tyres / Castor Tyres
•
Worn and under inflated tyres will render the wheelchair difficult to steer and propel.
Large wheel tyres and castor tyres should be only replaced in pairs.
Anti Tip Wheels
• When anti-tip wheels are required, please contact your nearest Glide Rehabilitation
Products dealer for correct fitting procedures.
Warning
Interference with kerbs may occur when anti tip wheels are fitted.
10
Section 14
Operation of wheelchair
If there is a need for a lap type posture restraining
belt to be fitted to the G2 wheelchair we recommend
that you contact your nearest Glide Rehabilitation
Products agent or Glide Rehabilitation Products
direct for correct fitting procedures.
On downgrades, the body should be in a straight
position and the speed and direction of the
wheelchair controlled by push rims (not brakes).
Caution
• Maximum safe slop 11 degrees.
Section 14 – 1
Operation of wheelchair
Crossing obstacles
If you are a first time user or don’t have the physical strength, it is advisable to have an
attendant assist you while crossing obstacles (e.g. sidewalk kerb). The attendant can tilt the
chair back using the hand grips and the rear tilt bar, then pushing large wheels as far as the
kerb, then lifting the wheelchair up over the kerb.
If you are an experienced user and have the physical strength, the following method may be
used. Place the wheelchair in front of the kerb. By moving the push rim quickly forward, the
castors will lift and the chair will surge forward enabling you to place the castors on the top of
the kerb. If the footplate / footplates touches the obstacle, perform same operation but lift the
front castor just before the obstacle is reached.
11
Section 14 – 2
Operation of wheelchair
Descending from obstacle
Descending from shallow obstacles can be dealt with by rolling forward and keeping the body
in an upright position.
Higher obstacles can be dealt with by reversing. Bring the two large wheels to the edge of the
obstacle and slowly easing down using the push rim as a brake and the body leaning
forwards to avoid tipping.
WARNING!
Descending stairs unattended is not recommended and
should be as a last resort and done with extreme caution.
Where possible, elevators or access ramps should be
used. If however, it is necessary to descend stairs, the
push handles are only to be used by the attendant to
stabilize the chair and occupant during the descent. Rate
of descent, should be controlled by the occupant, using
the rear wheel push rims.
Section 14 – 3
Static Stability
Reaching forward, to the side or to the back of the wheelchair will affect the stability of the
wheelchair.
Do not take risks, especially when the chair is not on level plane.
Section 15
Transporting your chair
To date there is no recognized Australian Standard that covers wheelchairs suitable for
vehicle transport while the user is in the chair.
However the G2 manual chair is suitable for transport within a vehicle provided the
appropriate tie-down brackets are fitted and a 4 point restraint system (Unwin) is used. Where
possible, wheelchair occupants should be transferred into and use the proper vehicle seat
and restraints. Your vehicle restraint system must comply with AS2942-1994.
12
CAUTION
Do not use legrests, footplates or armrests as attachment points for your tie-down system.
Unoccupied wheelchairs should be safely stored outside the passenger compartment of the
vehicle.
Posture positioning belts should not be used as vehicle restraint belts.
NOTE:
Ensure that your restraint system complies with AS2942 and you fully understand how your
tie-down system works and whether it is compatible with the Glide Rehabilitation Products G2
manual wheelchair.
13
Section 16
Options
Listed below are some of the common options available. Options can be supplied in lieu of
parts when ordering a new wheelchair or sold as a spare part at a later date.
• Elevating Leg Rests
• Anti Tip Bars
• Tray
• Oxygen Bottle Carrier
• Crutch Holder
• Brake Extension
• Quick Release Hubs
• Lambs Wool Cover
• Arm Trough
• I.V. Pole
• Desk Arms
• Headrest Extension
• Stump Support
• Adjustable Height Arms
• Seatbelt
• Heel Loops
• Contact your supplier for more options
• Pneumatic Castors
• Thorn Resistant Tubes (Large Wheel)
• Spoke Guards
14
Section 17
Servicing
Weekly
• Cleaning and care of upholstery as described in Section 3.
• Check the pressure and condition of the tyres. Do not exceed maximum pressure
advised on the side of the tyre.
• Service quick release axles if applicable (Section 8).
Every 3 Months
• Check castor play (Section 6).
• Check brakes and adjust if necessary (Section 7).
• Ensure all nuts and screws are tight.
• Check rear wheels for loose spokes. Spokes should be tightened by an experienced
wheel builder.
• Regular cleaning to restore your wheelchair to it’s original finish.
Every Year
• We advise that your wheelchair be serviced by an approved dealer at least once a
year. This will ensure that your wheelchair is in safe operating condition.
Section 18
Warranty
Lendal Pty Ltd (Trading as Glide Rehabilitation Products) warrants the following as listed:
Frame
3 Year Warranty
Frame will be replaced within the first 12 month period. Thereafter, Glide Rehabilitation
Products will extend the warrant for a further 2 years and will either replace or repair frame.
Controller – where applicable
12 Month Warranty
Controllers and associated hardware will be repaired where possible. Replacement will only
occur if repair is not practical or not possible.
15
Actuators / Motors / Gearboxes – where applicable
12 Month Warranty
Automatic replacement with six months of invoice. There afterwards, unit must be returned for
evaluation and possible repair before replacement.
Upholstery
6 Month Warranty
This will cover against defects in materials or workmanship. Warranty does not cover against
normal wear, tear or damage.
Tyres and Tubes
No Warranty
Parts
Components replaced during the warranty period will be warranted for the remainder of the
warranty period.
Spare Parts and Accessories
All spare parts and accessories sold will have a 6 month warranty period from date of
purchase.
Receipts are required to support warranty claims.
Conditions
Under normal conditions no responsibility will be taken for the repair or replacement of the
product that has not been maintained in accordance with manufacturers recommendations or
is not as a direct result of an original manufacturing defect.
Lendal Pty Ltd (Trading as Glide Rehabilitation Products) warrants all manufactured and
distributed products against defects in materials and workmanship for a period of one year or
for a period otherwise stated in this warranty from date of purchase.
Lendal Pty Ltd will repair or replace any part, as required, provided the purchase product is
delivered intact and prepaid to a location authorized by Lendal Pty Ltd within the prescribed
period of warranty.
This warranty does not extend to parts or components damaged by misuse, neglect, accident
or improper installation, nor those tampered with, altered or serviced by an agency not
authorized by Lendal Pty Ltd.
The foregoing in lieu of all other warranties expressed, implied or statutory, Lendal Pty Ltd’s
sole liability shall be repair or replace of components as specified above.
Section 18 – 1
Important
1. Lendal Pty Ltd (trading as Glide Rehabilitation Products) does not warrant either
expressly or impliedly the suitability of the wheelchair for the purchaser or any intended
user. Purchasers and intended users are advised that advice from an appropriate
16
register medial practitioner or health professional should be obtained prior to using the
wheelchair.
2. Except insofar as is prohibited by statute, Lendal Pty Ltd shall not be responsible for
damage, injury or loss of any kind to any property or person howsever caused arising
from or in connection with the Glide Rehabilitation Products wheelchair. All conditions
and warranties that (but for this provision) would be implied in favour of, and all rights
and remedies that (but for this provision) would be conferred upon the purchaser or
other persons against Lendal Pty Ltd arising under or as a result of the Trade Practices
Act 1974, any other legislation or the general law are excluded and limited to the
maximum extent possible and in cases where Lendal Pty Ltd liability cannot be
completely excluded but may be limited to one of the following (at the option of Lendal
Pty Ltd).
a. The replacement of the Glide Rehabilitation Products wheelchair or the supply
of an equivalent wheelchair.
b. The repair of the Glide Rehabilitation Products wheelchair.
c. The payment of the cost of replacing the Glide Rehabilitation Products
wheelchair or of acquiring an equivalent wheelchair.
d. The payment of the cost of having the Glide Rehabilitation Products wheelchair
repaired.
Section 18 – 2
Warranty
The following will be required when making a warranty claim. Make sure all the relevant
details are filled in at time of purchase.
Name ___________________________________________________
Address __________________________________________________________________
City ___________________________
Purchase by (e.g. hospital)
________________________________________________________
Serial No. _______________________________________
Purchase Date _______________________________________
Series / Model No. _______________________________________________
Size _____________________________
Dealer’s Name __________________________________________
17
Rehabilitation Products
Read the
operator
and
instruction
manual
Glide Rehabilitation Products are manufactured
in Australia by Lendal Pty. Ltd. (ACN 009 033 694)
25 Ledgar Road, Balcatta, Western Australia 6021
Phone: +61 8 9345 3400 Fax: +61 8 9345 1318
Email: [email protected] Web: www.glide.com.au
ABN 60 157 412 811
A Wholly Australian Owned Company
18
Apply the
brakes
when
transferring
patients