Download xtraViU Series interViU Series
Transcript
xtraViU Series
Model Number
Resolution
Input
Output
VCUA-20
1280 x 1024
USB
VGA
VCUA-60
1600 x 1200
USB
VGA
VCUD-20
1280 x 1024
USB
DVI-D
VCUD-60
1600 x 1200
USB
DVI-D
VCUB-20
1280 x 1024
USB
DVI-D + VGA
VCUB-60
1600 x 1200
USB
DVI-D + VGA
* The color depth is supported up to 32 bits at the maximum resolution.
- Related Products
interViU Series
Model Number
Resolution
Input
Output
VCDA-60
1600 x 1200
DVI-D
VGA
VCAD-60
1600 x 1200
VGA
DVI-D
* The snapshot on this user’s manual may slightly differ from version
to version without affecting the function.
YSOL
YS Solutions Co., Ltd.
YS Solutions Co.,Ltd.
TOKYO
Kouji-machi Tsuruya Hachiman Blug.6F, 2-4,Koujimachi,
Chiyoda-ku, Tokyo 102-0083 Japan
Tel:+81-3-5212-3521 Fax:+81-3-5212-3524
E-mail:[email protected]
OSAKA
Shin-Osaka Suehiro Center Blug.613, 3-11-26,Nishi-Nakajima,
Yodogawa-ku, Osaka 532-0011 Japan
Tel:+81-6-4806-7088 Fax:+81-6-6300-0122
URL:http://www.ysol.co.jp
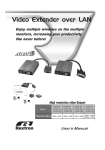
Connection Pattern
* UP TO SIX
xtraViUs through the USB 2.0 ports can be connected at a
time, enjoying multiple windows on the multiple monitors, increasing
your productivity like never before!
1
Contents
Chapter 1 Product Overview
A. Introduction
B. Package Contents
Chapter 2 Installation
A. Before the Installation
xtraViU
- Install the Hardware First
- Install the Hardware First
C. How To Un-install the xtraViU
B. How To Install the
Chapter 3 Operation
A. Monitor Settings Control
B. Set the Display into Extend Mode (Default Mode)
C. Set the Display into Clone Mode
D. Set the Display as the Primary Display
E. Media Playback
F. Use Multiple
xtraViUs
G. Standby and Hibernate, Shut down and Restart
H. The
xtraViU with Multiple Users
xtraViU
I. Disconnect the
Chapter 4 Specifications
2
Chapter 1 Product Overview
A. Introduction
Thank you for purchasing Rextron’s
xtraViU Series --- USB to VGA
converter (VCUA-20 / VCUA-60), USB to DVI converter (VCUD-20 /
VCUD-60), and USB to BOTH DVI AND VGA (VCUB-20 / VCUB-60). It allows
you to add UP TO SIX monitors through the USB 2.0 port simultaneously!
And, the installation is as easy as 2 steps--- install the driver AND plug the
xtraViU, and then you’re ready to enjoy multiple windows on the
multiple monitors, increasing your productivity like never before! The
connected monitor can configured to either clone your primary screen, or
extend the Windows desktop allowing visibility of more applications at
the same time such as while reading the email on one monitor, open the
attachment on the other monitor.
The
xtraViU
software used to control the extra monitor by just using
little computer resource and offers a vast array of screen resolutions and
color depths. This ensures that there is little difference in performance
between a directly connected monitor and a monitor connected through
the
xtraViU.
B. Package Contents
1.
xtraViU unit x 1
2. User’s Manual x 1
3. CD with the driver and user’s manual x 1
4. USB A-B Cable x 1 (for VCUB-20 / VCUB-60)
3
Chapter 2 Installation
A. Before the Installation
Before the installation, here are 3 things need your attention.
1. The xtraViU software can be installed on any desktop or laptop
system running Windows XP Home or Professional. Currently, there is no
driver support for other platform or previous Windows versions.
Windows XP service pack 2 is mandatory as it fixes instabilities on the
Windows graphics drivers.
2. UP TO SIX xtraViUs can be connected to the PC at a time.
3. Hardware requirements
PC with 1.2 GHz or higher processor clock speed required. Intel
Pentium / Celeron family, or AMD K6 / Athlon / Duron family, or
compatible processor recommended
512 Megabytes of RAM
At least one USB 2.0 port
30 Megabytes of available disk space
Super VGA (800 x 600) or higher resolution video card and monitor
CD-ROM or DVD drive.
The minimum hardware requirements for a PC capable of displaying a DVD
on the monitor with the xtraViU connected are:
PC with dual CPUs and 2.0GHz processor clock speed
512 Megabytes of RAM or more if other applications are to run at the
same time
Set the resolution of monitor with the xtraViU connected to 800 x
600 at 16 bit colors.
Note: More than one xtraViU connected at a time more computer
resource may consume.
4
B. How To Install the
xtraViU
There are two ways to install the xtraViU, the user can feel no hesitate
to choose either way to finish the installation --- Install the Hardware
First AND Install the Software First.
Install the Hardware First
Step 1. Connect the second monitor to the
xtraViU.
VGA monitor
VCUA-20
VCUA-60
DVI monitor
VCUD-20
VCUD-60
Note: for VCUB-20 / VCUB-60, the user can connect the second
AND third monitor (one is VGA and another one is DVI) at a time.
And, both monitors always act the same screen.
5
Step 2. Connect the
xtraViU to the USB port of computer.
Desktop ( or Laptop)
VGA monitor
VCUA-20
VCUA-60
Desktop ( or Laptop)
DVI monitor
VCUD-20
VCUD-60
Step 3. The window of “Found New Hardware Wizard” pops up, select “No,
not this time” and then click “Next”.
6
Step 4. Select “Install the software automatically [Recommended]
and then click “Next”.
Step 5. Processing.
7
Step 6. Click “Next”.
Step 7. Click “Browse”.
8
Step 8. Choose your CD-ROM driver from the list.
Step 9. Click “OK”
9
Step 10. Processing.
Step 11. Click “Next” to continue.
10
Step 12. Select “I accept the terms in the license Agreement” and
click “Next”.
Step 13. Click “Install”.
11
Step 14. Click “Finish” to complete the whole installation
procedure.
Step 15. Restart the computer.
Step 16. The message of “Found New Hardware” pops up on the
lower right corner of the desktop.
12
Step 17. The default value of
xtraViU is Extend mode.
Step 18. The user can open up any window and drag it to the second
monitor.
13
Install the Software First
Step 1. Insert the
xtraViU software installation CD and double click
“Setup”.
Step 2. Processing.
14
Step 3. Click “Next” to continue.
Step 4. Select “I accept the terms in the license Agreement” and
click “Next”.
15
Step 5. Click “Install”.
Step 6. Installing automatically.
16
Step 7. Click “Finish” to complete the whole installation
procedure.
Step 8. Restart the computer.
Step 9. Connect the second monitor to the
xtraViU.
VGA monitor
VCUA-20
VCUA-60
DVI monitor
VCUD-20
VCUD-60
Note: for VCUB-20 / VCUB-60, the user can connect the second
AND third monitor (one is VGA and another one is DVI) at a time.
And, both monitors always act the same screen.
17
Step 10. Connect the
xtraViU to the USB port of computer.
Desktop ( or Laptop)
VGA monitor
VCUA-20
VCUA-60
Desktop ( or Laptop)
DVI monitor
VCUD-20
VCUD-60
Step 11. The message of “Found New Hardware” pops up on the
lower right corner of the desktop.
18
Step 12. The default value of
xtraViU is Extend mode.
Step 13. The user can open up any window and drag it to the second
monitor.
19
C. How To Un-install the
xtraViU
The xtraViU driver can be removed from the “Add or Remove Programs:
utility under the Windows control panel.
Step 1. Click “Start” Æ “Control Panel”Æ “Add or Remove Programs”
Step 2. Find the
xtraViU driver and click on “Remove”.
Step 3. Click “YES” to remove the driver.
20
Step 4. Processing.
Step 5. Click “YES” to restart the computer for completing the
whole un-installation procedure.
21
Chapter 3 Operation
A. Monitor Settings Control
Once the software and hardware of
xtraViU are properly installed and
connected, should the user can easily find the icon located in the lower
right corner of desktop as following snapshot shown, click on it to bring up
the following screen.
22
From this pop-up window, allowing the user easily to achieve the
following controls.
1. Screen Resolution
The user can select the following resolutions for operation as the
following figure shown.
Note: the resolution options may vary from monitor to monitor.
2.
Color Quality
As the following figure shown, the user can select either 16 bits color
depth or 32 bits color depth for operation.
23
3.
Screen Rotation
The user may rotate the screen to the desired angel for certain
applications.
z
Normal: keeps the extra screen with the same angel as the
primary screen.
z
Rotated Left: rotates the extra screen 90 degree clockwise.
24
z
Rotated Right: rotates the extra screen 90 degree
counterclockwise.
z
Upside-Down: rotates the extra screen 180 degree.
25
4.
Extend To
Allows the user to set the extra screen extend to the above,
below, left, and right of the primary screen. Please refer to Section
B of this chapter for more details.
5.
Extend
The user can extend the primary screen to the extra
screen by selecting this option. Please refer to Section B of
this chapter for more details.
6.
Mirror
Allows the user to clone the primary screen to the extra screen.
Please refer to Section C of this chapter for more details.
7. Off
This option for turning off the extra screen.
8.
Advanced
In this option, the user can set up more settings as following shown.
z
Display selection
26
z
Resolution and Color Quality Settings
z
Refresh Rate: Click “Advance”Æ”Adapter”Æ”List all mode…”,
all valid combinations of resolution, color quality and refresh
rate are fully listed here. For CRT monitors, it’s best to use a
high refresh rate so as to avoid discomfort due to flicker. Flat
panel monitors do not flicker and a low refresh rate is
adequate.
27
B. Set the Display into Extend Mode (Default Mode)
In Extend Mode, the monitor attached to the xtraViU forms part of the
extended windows desktop. The extra desktop area is a great productivity
aid, allowing more applications or documents to be visible at a time.
Step 1. Click the icon to bring up the window as the following
shown.
Step 2. Select “Extend to” to get the extend screen as the following
figure shown.
28
Step 3. (optional) for certain applications, the user can set the
extra screen to:
z
Above the primary: select “Extend To” Æ “Above”
z
Below the primary: select “Extend To” Æ “Below”
29
z
Left of the primary: select “Extend To” Æ “Left”
z
Right of the primary: select “Extend To” Æ “Right”
30
C. Set the Display into Clone Mode
In Clone Mode, the monitor attached to the xtraViU simply copies what
is on the main (primary) display.
Step 1. Click the icon to bring up the window as the following shown.
Step 2. Select “Mirror” to get the exactly the same screen as the
primary on the extra screen.
Note: The resolution, color depth and refresh rate of the primary screen
are replicated on the monitor connected to the xtraViU. If the
monitor connected to the xtraViU supports a lower resolution
than the primary display, then a part of the screen is shown on the
cloned display. As the mouse is moved around the screen, the
xtraViU display will pan to the current area.
31
D. Set the Display as the Primary Display
To mark the xtraViU as the primary display is available as well.
Step 1. Click the icon to bring up the window as the following shown.
Step 2. Select “Advance”
32
Step 3. Choose the current primary display, for example, “1”.
Step 4. Uncheck the box marked “Use this device as the primary
monitor”.
33
Step 5. Choose the desired screen as the primary screen, for
example, “2”.
Step 6. Check the box marked “Use this device as the primary
monitor”.
34
Note: On some PCs and laptops it’s necessary to disable the main display
(i.e. uncheck the box marked “Extend my Windows display onto
this monitor” for the main display) as part of the same settings
change. The
xtraViU stays primary if the PC enters hibernate or
xtraViU is detached, the
suspend mode or is rebooted. If the
main display becomes primary again.
It’s possible to work conveniently with a laptop by setting its action
with the lid closed to “do nothing” then making the
xtraViU
screen primary while disabling the main screen. The laptop lid can
then be closed and the laptop used with the
xtraViU screen and
with external keyboard and mouse.
E. Media Playback
In Extend or Clone Mode, the
xtraViU can display media files and DVDs
using the following media player:
WinDVD (www.intervideo.com)
Power DVD (www.cyberlink.com)
VLC (http://www.videolan.org/vlc/)
Windows Media Player up to version 10
(http://www.microsoft.com/windows/windowsmedia/player/10/def
ault.aspx)
RealPlayer (www.real.com)
Mplayer and MPUI (http://mpui.sourceforge.net)
There is limited support for other video players, and for video in clone
mode.
35
F. Use Multiple xtraViUs
The driver supports UP TO SIX simultaneously attached screens.
The driver saves each screen’s display profile separately. This allows for
different physical positioning, or different resolutions, of connected
monitors in the office and the home.
G. Standby and Hibernate, Shut down and Restart
If PC that the xtraViU is connected to is placed into standby or
hibernate mode, the display goes blank. When the PC is again powered up
(and unlocked if necessary) the connected monitor returns to the same
mode as it was before stand by or hibernate.
If the PC is shut down, restarted and logged in, again the connected
display returns to the same mode as it was before shutdown.
H. The xtraViU with Multiple Users
The xtraViU works with multiple users on the PC. The mode settings are
saved for each user so each can use their own desktop configuration.
I. Disconnect the xtraViU
If the xtraViU is powered off or the USB cable is removed from the
computer, the display blanks. All windows and icons move to the primary
screen.
On reconnection or powering up of the xtraViU, the display returns to
the same mode as it was before disconnection. However, windows and
icons that were previously on the screen will not be moved back.
36
Chapter 4 Specifications
There are three components that make up the screen mode:
Resolution: In common usage, this refers to the number of pixels
displayed on screen horizontally and vertically.
Color Quality: This defines the number of different colors that can be
shown on the screen at the same time.
Refresh rate: Measures the speed that the entire screen is rescanned.
Higher frequencies reduce flicker.
Some monitors advertise the supported resolutions through the VGA or
DVI connector. If this is the case, the
xtraViU identifies the supported
resolutions from the monitor. If the monitor does not advertise the
supported resolutions, the
xtraViU
driver chooses a set of common
screen resolutions for the monitor.
The driver of xtraViU supports the maximum resolution as the following
table shown. Generally speaking, most of the common resolutions under
the maximum resolution are fully supported. It’s important for making
sure to set the proper resolution for
xtraViU since it might be damaged
with improper or unsupported resolutions.
37
Function
VCUA-20
VCUA-60
Signal Input
USB
USB
Signal Output
VGA
VGA
1280 x 1024
1600 x 1200
Max. Resolution
LED
USB Cable
Connector(Output)
Orange
Blue
35cm (detached)
35cm (detached)
HDB-15 Female
HDB-15 Female
Enclosure
ABS
ABS
Weight
75g
75g
Dimensions( HxWxD )
23.6x47.9x87(mm)
23.6x47.9x87(mm)
Function
VCUD-20
VCUD-60
USB
USB
Signal Input
Signal Output
DVI
VGA
1280 x 1024
1600 x 1200
Orange
Blue
35cm (detached)
35cm (detached)
DVI Female
DVI Female
Enclosure
ABS
ABS
Weight
75g
75g
23.6x47.9x87(mm)
23.6x47.9x87(mm)
Max. Resolution
LED
USB Cable
Connector(Output)
Dimensions( HxWxD )
38
Function
Signal Input
Signal Output
Max. Resolution
LED
VCUB-20
VCUB-60
USB
USB
DVI + VGA
DVI + VGA
1280 x 1024
1600 x 1200
Orange
Blue
Connector(Input)
USB B-Type
USB B-Type
Connector(Output)
DVI Female
DVI Female
Enclosure
Dimensions( HxWxD )
+
+
HDB-15 Female
HDB-15 Female
Metal
Metal
25x90x81(mm)
25x90x81(mm)
Note that interlaced modes are NOT supported.
Limited Warranty
IN NO EVENT SHALL THE DIRECT VENDOR'S LIABILITY FOR DIRECT OR INDIRECT, SPECIAL, INCIDENTIAL
OR CONSEQUENTIAL DAMAGES, LOSS OF PROFIT, LOSS OF BUSINESS, OR FINANCIAL LOSS WHICH MAY
BE CAUSED BY THE USE OF THE PRODUCT EXCEEDS THE PRICE PAID FOR THE PRODUCT.
The direct vendor makes no warranty or representation, expressed or implied with respect to the contents or use of this
documentation, and especially disclaims its quality, performance, merchantability, or fitness for any particular purpose.
The direct vendor also reserves the right to revise or update the product or documentation without obligation to notify any user of
such revisions or updates. For further information, please contact your direct vendor.
All the brand names and registered trademarks are the property of their respective owners.
39




![2013 Gun List internet copy[2]](http://vs1.manualzilla.com/store/data/005851443_1-16b4e1bd3fc391c408d2005c48a2e336-150x150.png)

