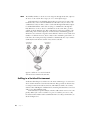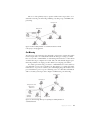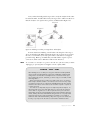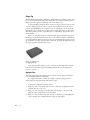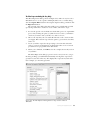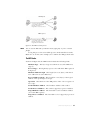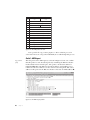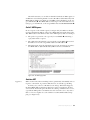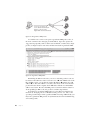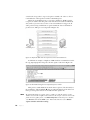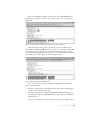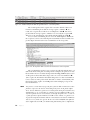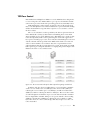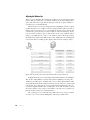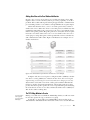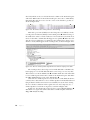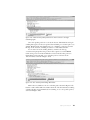
1
Learn how to: • Use packet analysis to identify and resolve common network problems like loss of connectivity, DNS issues, sluggish speeds, and malware infections • Build customized capture and display filters • Monitor your network in real-time and tap live network communications • Graph traffic patterns to visualize the data flowing across your network • Use advanced Wireshark features to understand confusing captures • Build statistics and reports to help you better explain technical network information to non-techies Practical Packet Analysis is a must for any network technician, administrator, or engineer. Stop guessing and start troubleshooting the problems on your network. ABOUT THE AUTHOR Chris Sanders is a computer security consultant, author, and researcher. A SANS Mentor who holds several industry certifications, including CISSP, GCIA, GCIH, and GREM, he writes regularly for WindowSecurity.com and his blog, ChrisSanders.org. Sanders uses Wireshark daily for packet analysis. He lives in Charleston, South Carolina, where he works as a government defense contractor. All of the author’s royalties from this book will be donated to the Rural Technology Fund (http://ruraltechfund.org). w w w.nostarch.com $49.95 ($57.95 CDN) FSC LOGO SHELVE IN: NETWORKING/SECURITY This book uses a lay-flat binding that won’t snap shut. SANDERS T H E F I N E ST I N G E E K E N T E RTA I N M E N T ™ “ I L I E F L AT .” D N N O 2 TI I D E With an expanded discussion of network protocols and 45 completely new scenarios, this extensively revised second edition of the best-selling Practical Packet Analysis will teach you how to make sense of your PCAP data. You’ll find new sections on troubleshooting slow networks and packet analysis for security to help you better understand how modern exploits and malware behave at the packet level. Add to this a thorough introduction to the TCP/IP network stack and you’re on your way to packet analysis proficiency. used in this book from http://nostarch.com/packet2.htm P R A C T I C A L P A C K E T A N A LY S I S It’s easy to capture packets with Wireshark, the world’s most popular network sniffer, whether off the wire or from the air. But how do you use those packets to understand what’s happening on your network? Download the capture files 2ND EDITION DON’T JUS T S TA R E AT CAP TURED PACKE TS. A N A LY Z E T H E M . PR AC T I C A L PAC K E T A N A LY S I S U S I N G WIRESHARK TO SOLV E RE A L-WORLD N E T W O R K P R O B L E M S CHRIS SANDERS PRAISE FOR THE FIRST EDITION OF PRACTICAL PACKET ANALYSIS “An essential book if you are responsible for network administration on any level.” —LINUX PRO MAGAZINE “A wonderful, simple to use and well laid out guide.” —ARSGEEK.COM “If you need to get the basics of packet analysis down pat, this is a very good place to start.” —STATEOFSECURITY.COM “Very informative and held up to the key word in its title, ‘Practical.’ It does a great job of giving readers what they need to know to do packet analysis and then jumps right in with vivid real life examples of what to do with Wireshark.” —LINUXSECURITY.COM “Are there unknown hosts chatting away with each other? Is my machine talking to strangers? You need a packet sniffer to really find the answers to these questions. Wireshark is one of the best tools to do this job and this book is one of the best ways to learn about that tool.” —FREE SOFTWARE MAGAZINE “Perfect for the beginner to intermediate.” —DAEMON NEWS PRACTICAL PACKET ANALYSIS 2ND EDITION Using Wireshark to Solve Real-World Network Problems by Chris Sanders San Francisco PRACTICAL PACKET ANALYSIS, 2ND EDITION. Copyright © 2011 by Chris Sanders. All rights reserved. No part of this work may be reproduced or transmitted in any form or by any means, electronic or mechanical, including photocopying, recording, or by any information storage or retrieval system, without the prior written permission of the copyright owner and the publisher. Printed in Canada 15 14 13 12 11 123456789 ISBN-10: 1-59327-266-9 ISBN-13: 978-1-59327-266-1 Publisher: William Pollock Production Editor: Alison Law Cover and Interior Design: Octopod Studios Developmental Editor: William Pollock Technical Reviewer: Tyler Reguly Copyeditor: Marilyn Smith Compositor: Susan Glinert Stevens Proofreader: Ward Webber Indexer: Nancy Guenther For information on book distributors or translations, please contact No Starch Press, Inc. directly: No Starch Press, Inc. 38 Ringold Street, San Francisco, CA 94103 phone: 415.863.9900; fax: 415.863.9950; [email protected]; www.nostarch.com The Librar y of Congress has cataloged the first edition as follows: Sanders, Chris, 1986Practical packet analysis : using Wireshark to solve real-world network problems / Chris Sanders. p. cm. ISBN-13: 978-1-59327-149-7 ISBN-10: 1-59327-149-2 1. Computer network protocols. 2. Packet switching (Data transmission) I. Title. TK5105.55.S265 2007 004.6'6--dc22 2007013453 No Starch Press and the No Starch Press logo are registered trademarks of No Starch Press, Inc. Other product and company names mentioned herein may be the trademarks of their respective owners. Rather than use a trademark symbol with every occurrence of a trademarked name, we are using the names only in an editorial fashion and to the benefit of the trademark owner, with no intention of infringement of the trademark. The information in this book is distributed on an “As Is” basis, without warranty. While every precaution has been taken in the preparation of this work, neither the author nor No Starch Press, Inc. shall have any liability to any person or entity with respect to any loss or damage caused or alleged to be caused directly or indirectly by the information contained in it. This book, my life, and everything I will ever do is a direct result of faith given and faith received. This book is dedicated to God, my parents, and everyone who has ever shown faith in me. I tell you the truth, if you have faith as small as a mustard seed, you can say to this mountain, “Move from here to there” and it will move. Nothing will be impossible for you. Matthew 17:20 BRIEF CONTENTS Acknowledgments .........................................................................................................xv Introduction ................................................................................................................xvii Chapter 1: Packet Analysis and Network Basics ................................................................1 Chapter 2: Tapping into the Wire ..................................................................................17 Chapter 3: Introduction to Wireshark ..............................................................................35 Chapter 4: Working with Captured Packets .....................................................................47 Chapter 5: Advanced Wireshark Features .......................................................................67 Chapter 6: Common Lower-Layer Protocols ......................................................................85 Chapter 7: Common Upper-Layer Protocols ...................................................................113 Chapter 8: Basic Real-World Scenarios ........................................................................133 Chapter 9: Fighting a Slow Network ............................................................................165 Chapter 10: Packet Analysis for Security .......................................................................189 Chapter 11: Wireless Packet Analysis ..........................................................................215 Appendix: Further Reading ..........................................................................................235 Index .........................................................................................................................241 CONTENTS IN DETAIL ACKNOWLEDGMENTS INTRODUCTION xv xvii Why This Book? .....................................................................................................xvii Concepts and Approach ........................................................................................xviii How to Use This Book ............................................................................................. xix About the Sample Capture Files ................................................................................ xx The Rural Technology Fund ....................................................................................... xx Contacting Me ........................................................................................................ xx 1 P A CK E T A N A L Y S IS AN D N E T W O R K B A S I CS 1 Packet Analysis and Packet Sniffers ............................................................................. 2 Evaluating a Packet Sniffer ............................................................................ 2 How Packet Sniffers Work............................................................................. 3 How Computers Communicate.................................................................................... 4 Protocols ..................................................................................................... 4 The Seven-Layer OSI Model .......................................................................... 5 Data Encapsulation ...................................................................................... 8 Network Hardware .................................................................................... 10 Traffic Classifications ............................................................................................... 14 Broadcast Traffic ........................................................................................ 14 Multicast Traffic.......................................................................................... 15 Unicast Traffic............................................................................................ 15 Final Thoughts......................................................................................................... 16 2 T AP P I N G IN TO T H E W I R E 17 Living Promiscuously ................................................................................................ 18 Sniffing Around Hubs .............................................................................................. 19 Sniffing in a Switched Environment............................................................................ 20 Port Mirroring ............................................................................................ 21 Hubbing Out ............................................................................................. 22 Using a Tap............................................................................................... 24 ARP Cache Poisoning ................................................................................. 26 Sniffing in a Routed Environment ............................................................................... 30 Sniffer Placement in Practice ..................................................................................... 31 3 INTRODUCTION TO WIRESHARK 35 A Brief History of Wireshark ..................................................................................... 35 The Benefits of Wireshark......................................................................................... 36 Installing Wireshark................................................................................................. 37 Installing on Microsoft Windows Systems ...................................................... 37 Installing on Linux Systems........................................................................... 39 Installing on Mac OS X Systems ................................................................... 40 Wireshark Fundamentals.......................................................................................... 41 Your First Packet Capture ............................................................................ 41 Wireshark’s Main Window ......................................................................... 42 Wireshark Preferences ................................................................................ 43 Packet Color Coding .................................................................................. 45 4 W O R K I N G W IT H C AP T U R E D P AC K E T S 47 Working with Capture Files ...................................................................................... 47 Saving and Exporting Capture Files.............................................................. 48 Merging Capture Files ................................................................................ 49 Working with Packets .............................................................................................. 49 Finding Packets .......................................................................................... 50 Marking Packets ........................................................................................ 51 Printing Packets.......................................................................................... 51 Setting Time Display Formats and References.............................................................. 52 Time Display Formats.................................................................................. 52 Packet Time Referencing.............................................................................. 52 Setting Capture Options........................................................................................... 53 Capture Settings......................................................................................... 53 Capture File(s) Settings................................................................................ 54 Stop Capture Settings ................................................................................. 55 Display Options ......................................................................................... 56 Name Resolution Settings ............................................................................ 56 Using Filters............................................................................................................ 56 Capture Filters ........................................................................................... 56 Display Filters ............................................................................................ 62 Saving Filters ............................................................................................. 65 5 A D V A N CE D W I RE S H A R K F E A T U R E S 67 Network Endpoints and Conversations....................................................................... 67 Viewing Endpoints ..................................................................................... 68 Viewing Network Conversations .................................................................. 69 Troubleshooting with the Endpoints and Conversations Windows ..................... 70 Protocol Hierarchy Statistics...................................................................................... 71 Name Resolution..................................................................................................... 72 Enabling Name Resolution .......................................................................... 73 Potential Drawbacks to Name Resolution....................................................... 73 Protocol Dissection .................................................................................................. 74 Changing the Dissector ............................................................................... 74 Viewing Dissector Source Code ................................................................... 76 Following TCP Streams............................................................................................. 76 Packet Lengths ........................................................................................................ 78 x Contents in D etai l Graphing ............................................................................................................... 79 Viewing IO Graphs .................................................................................... 79 Round-Trip Time Graphing........................................................................... 81 Flow Graphing .......................................................................................... 82 Expert Information ................................................................................................... 82 6 C O M M O N L O W E R - L A Y E R PR O TO CO L S 85 Address Resolution Protocol ...................................................................................... 86 The ARP Header......................................................................................... 87 Packet 1: ARP Request ................................................................................ 88 Packet 2: ARP Response.............................................................................. 89 Gratuitous ARP .......................................................................................... 89 Internet Protocol ...................................................................................................... 91 IP Addresses .............................................................................................. 91 The IPv4 Header ........................................................................................ 92 Time to Live ............................................................................................... 93 IP Fragmentation ........................................................................................ 95 Transmission Control Protocol ................................................................................... 98 The TCP Header......................................................................................... 98 TCP Ports................................................................................................... 99 The TCP Three-Way Handshake ................................................................. 101 TCP Teardown ......................................................................................... 103 TCP Resets............................................................................................... 105 User Datagram Protocol ......................................................................................... 105 The UDP Header ...................................................................................... 106 Internet Control Message Protocol ........................................................................... 107 The ICMP Header..................................................................................... 107 ICMP Types and Messages........................................................................ 107 Echo Requests and Responses .................................................................... 108 Traceroute ............................................................................................... 110 7 COMMON UPPER-LAYER PROTOCOLS 113 Dynamic Host Configuration Protocol....................................................................... 113 The DHCP Packet Structure ........................................................................ 114 The DHCP Renewal Process ....................................................................... 115 DHCP In-Lease Renewal ............................................................................ 119 DHCP Options and Message Types ............................................................ 120 Domain Name System ........................................................................................... 120 The DNS Packet Structure .......................................................................... 121 A Simple DNS Query ............................................................................... 122 DNS Question Types ................................................................................ 124 DNS Recursion ........................................................................................ 124 DNS Zone Transfers ................................................................................. 127 Hypertext Transfer Protocol..................................................................................... 129 Browsing with HTTP .................................................................................. 129 Posting Data with HTTP ............................................................................. 131 Final Thoughts....................................................................................................... 132 Contents in D etai l xi 8 B AS IC R E A L - W O R L D S C E N A R I O S 133 Social Networking at the Packet Level...................................................................... 134 Capturing Twitter Traffic............................................................................ 134 Capturing Facebook Traffic ....................................................................... 137 Comparing Twitter vs. Facebook Methods ................................................... 140 Capturing ESPN.com Traffic ................................................................................... 140 Using the Conversations Window .............................................................. 140 Using the Protocol Hierarchy Statistics Window ........................................... 141 Viewing DNS Traffic................................................................................. 142 Viewing HTTP Requests ............................................................................. 143 Real-World Problems ............................................................................................. 144 No Internet Access: Configuration Problems ................................................ 144 No Internet Access: Unwanted Redirection .................................................. 147 No Internet Access: Upstream Problems ...................................................... 150 Inconsistent Printer.................................................................................... 153 Stranded in a Branch Office ...................................................................... 155 Ticked-Off Developer ................................................................................ 159 Final Thoughts....................................................................................................... 163 9 F I G H T IN G A S L O W N E TW O R K 165 TCP Error-Recovery Features ................................................................................... 166 TCP Retransmissions ................................................................................. 166 TCP Duplicate Acknowledgments and Fast Retransmissions............................ 169 TCP Flow Control .................................................................................................. 173 Adjusting the Window Size ....................................................................... 174 Halting Data Flow with a Zero Window Notification .................................... 175 The TCP Sliding Window in Practice........................................................... 175 Learning from TCP Error-Control and Flow-Control Packets.......................................... 178 Locating the Source of High Latency ........................................................................ 179 Normal Communications........................................................................... 180 Slow Communications—Wire Latency......................................................... 180 Slow Communications—Client Latency........................................................ 181 Slow Communications—Server Latency ....................................................... 182 Latency Locating Framework ...................................................................... 182 Network Baselining ............................................................................................... 183 Site Baseline ............................................................................................ 184 Host Baseline........................................................................................... 185 Application Baseline................................................................................. 186 Additional Notes on Baselines ................................................................... 186 Final Thoughts....................................................................................................... 187 10 P A CK E T A N A L Y S IS FO R S E C U R I T Y 189 Reconnaissance .................................................................................................... 190 SYN Scan ............................................................................................... 190 Operating System Fingerprinting ................................................................ 194 xii C on t e n t s i n D e t a i l Exploitation .......................................................................................................... 197 Operation Aurora .................................................................................... 197 ARP Cache Poisoning ............................................................................... 202 Remote-Access Trojan ............................................................................... 206 Final Thoughts....................................................................................................... 213 11 W I R E L E S S PA C K E T A N A L Y S I S 215 Physical Considerations ......................................................................................... 216 Sniffing One Channel at a Time ................................................................. 216 Wireless Signal Interference ...................................................................... 217 Detecting and Analyzing Signal Interference ............................................... 217 Wireless Card Modes............................................................................................ 218 Sniffing Wirelessly in Windows .............................................................................. 219 Configuring AirPcap................................................................................. 219 Capturing Traffic with AirPcap ................................................................... 221 Sniffing Wirelessly in Linux ..................................................................................... 222 802.11 Packet Structure ........................................................................................ 223 Adding Wireless-Specific Columns to the Packet List Pane .......................................... 225 Wireless-Specific Filters.......................................................................................... 226 Filtering Traffic for a Specific BSS ID........................................................... 226 Filtering Specific Wireless Packet Types ...................................................... 227 Filtering a Specific Frequency .................................................................... 227 Wireless Security .................................................................................................. 228 Successful WEP Authentication................................................................... 229 Failed WEP Authentication ........................................................................ 230 Successful WPA Authentication .................................................................. 231 Failed WPA Authentication........................................................................ 232 Final Thoughts....................................................................................................... 233 APPENDIX FURTHER READING 235 Packet Analysis Tools............................................................................................. 235 tcpdump and Windump ............................................................................ 235 Cain & Abel ............................................................................................ 236 Scapy ..................................................................................................... 236 Netdude ................................................................................................. 236 Colasoft Packet Builder ............................................................................. 237 CloudShark ............................................................................................ 237 pcapr ..................................................................................................... 237 NetworkMiner ......................................................................................... 238 Tcpreplay................................................................................................ 238 ngrep ..................................................................................................... 238 libpcap ................................................................................................... 239 hping...................................................................................................... 239 Domain Dossier ....................................................................................... 239 Perl and Python........................................................................................ 239 Contents i n Detail xiii Packet Analysis Resources ...................................................................................... 239 Wireshark Home Page.............................................................................. 239 SANS Security Intrusion Detection In-Depth Course ....................................... 239 Chris Sanders Blog .................................................................................. 240 Packetstan Blog ....................................................................................... 240 Wireshark University ............................................................................... 240 IANA ..................................................................................................... 240 TCP/IP Illustrated (Addison-Wesley)............................................................ 240 The TCP/IP Guide (No Starch Press) ........................................................... 240 INDEX xiv Contents in D e ta i l 241 ACKNOWLEDGMENTS This book was made possible through the direct and indirect contributions of a great number of people. First and foremost, all the glory goes to God. Writing a book brings forth a great deal of positive and negative emotion. When I am stressed, He brings me comfort. When I am frustrated, He brings me peace. When I am confused, He brings me resolve. When I am tired, He brings me rest. When I am prideful, He keeps me level-headed. This book, my career, and my existence are possible only because of God and his son Jesus Christ. Dad, I draw motivation from a lot of sources, but nothing makes me happier than to hear you say that you are proud of me. I can’t thank you enough for letting me know that you are. Mom, the second edition of this book will be released right before the ten-year anniversary of your passing. I know you are watching over me and that you are proud, and I hope I can continue to make you even prouder. Aunt Debi and Uncle Randy, you guys have been my biggest supporters since day one. I don’t have a large family, but I treasure what I do have, especially you guys. Although we don’t get together nearly as much as I’d like, I can’t thank you enough for being like a second set of parents to me. Tina Nance, we don’t get to talk nearly as much as we used to, but I will always consider you my second mom. I wouldn’t be doing what I’m doing today without your support and belief in me. Jason Smith, you’ve listened to more of my frequent rants than anyone else, and just that has helped me keep sane. Thanks for being a great friend and coworker, providing input on various projects, and letting me use your garage for like six months that one time. Regarding my coworkers (past and present), I’ve always believed that if a person surrounds himself with good people, he will become a better person. I have the good fortune of working with some great people who are some of the best and brightest in the business. You guys are my family. Mike Poor, you are my packet-analysis idol without equivocation. Your work and approach to what you do are inspiring and help me do what I do. Tyler Reguly, thanks so much for tech-editing this book. I’m sure it wasn’t a fun process, but it was absolutely necessary and absolutely appreciated. Thanks also to Gerald Combs and the Wireshark development team. It’s the dedication of Gerald and the hundreds of other developers that makes Wireshark such a great analysis platform. If it weren’t for their efforts, this book wouldn’t exist . . . or if it did, it would be based on tcpdump, and that wouldn’t be fun for anyone. Bill and the No Starch Press staff took a chance on a kid from Kentucky not just once but twice. Thanks for doing it, having patience with me, and helping me make my dreams come true. xvi A c kno w l e d g m e n t s INTRODUCTION Practical Packet Analysis, 2nd Edition was written over the course of a year and a half, from late 2009 to mid 2011, approximately four years after the first edition’s release. This book contains almost all new content, with completely new capture files and scenarios. If you liked the first edition, then you will like this one. It is written in the same tone and breaks down explanations in a simple, understandable manner. If you didn’t like the first edition, you will like this one, because of the new scenarios and expanded content. Why This Book? You may find yourself wondering why you should buy this book as opposed to any other book about packet analysis. The answer lies in the title: Practical Packet Analysis. Let’s face it—nothing beats real-world experience, and the closest you can come to that experience in a book is through practical examples of packet analysis with real-world scenarios. The first half of this book gives you the prerequisite knowledge you will need to understand packet analysis and Wireshark. The second half of the book is devoted entirely to practical cases that you could easily encounter in day-to-day network management. Whether you are a network technician, a network administrator, a chief information officer, a desktop technician, or even a network security analyst, you have a lot to gain from understanding and using the packet-analysis techniques described in this book. Concepts and Approach I am generally a really laid-back guy, so when I teach a concept, I try to do so in a really laid-back way. This holds true for the language used in this book. It is very easy to get lost in technical jargon when dealing with technical concepts, but I have tried my best to keep things as casual as possible. I’ve made all the definitions clear, straightforward, and to the point, without any added fluff. After all, I’m from the great state of Kentucky, so I try to keep the big words to a minimum. (You’ll have to forgive me for some of the backwoods country verbiage you’ll find throughout the text.) If you really want to learn packet analysis, you should make it a point to master the concepts in the first several chapters, because they are integral to understanding the rest of the book. The second half of the book is purely practical. You may not see these exact scenarios in your workplace, but you should be able to apply the concepts you learn from them in the situations you do encounter. Here is a quick breakdown of the contents of the chapters in this book: Chapter 1: Packet Analysis and Network Basics What is packet analysis? How does it work? How do you do it? This chapter covers the basics of network communication and packet analysis. Chapter 2: Tapping into the Wire This chapter covers the different techniques you can use to place a packet sniffer on your network. Chapter 3: Introduction to Wireshark Here, we’ll look at the basics of Wireshark—where to get it, how to use it, what it does, why it’s great, and all of that good stuff. Chapter 4: Working with Captured Packets After you have Wireshark up and running, you will want to know how to interact with captured packets. This is where you’ll learn the basics. Chapter 5: Advanced Wireshark Features Once you have learned to crawl, it’s time to take off running. This chapter delves into the advanced Wireshark features, taking you under the hood to show you some of the less apparent operations. xviii I n tr o d u c t i o n Chapter 6: Common Lower-Layer Protocols This chapter shows you what some of the most common lower-layer network communication protocols—such as TCP, UDP, and IP—look like at the packet level. In order to understand how these protocols can malfunction, you first need to understand how they work. Chapter 7: Common Upper-Layer Protocols Continuing with protocol coverage, this chapter shows you what the three of the most common upper-layer network communication protocols— HTTP, DNS, and DHCP—look like at the packet level. Chapter 8: Basic Real-World Scenarios This chapter contains breakdowns of some common traffic and the first set of real-world scenarios. Each scenario is presented in an easy-to-follow format, where the problem, analysis, and solution are given. These basic scenarios deal with only a few computers and involve a limited amount of analysis—just enough to get your feet wet. Chapter 9: Fighting a Slow Network The most common problems network technicians hear about generally involve slow network performance. This chapter is devoted to solving these types of problems. Chapter 10: Packet Analysis for Security Network security is the biggest hot-button topic in the information technology area. Chapter 10 shows you some scenarios related to solving security-related issues with packet-analysis techniques. Chapter 11: Wireless Packet Analysis This chapter is a primer on wireless packet analysis. It discusses the differences between wireless analysis and wired analysis, and includes some examples of wireless network traffic. Appendix: Further Reading The appendix of this book suggests some other reference tools and websites that you might find useful as you continue to use the packet-analysis techniques you have learned. How to Use This Book I have intended this book to be used in two ways: As an educational text that you will read through, chapter by chapter, in order to gain an understanding of packet analysis. This means paying particular attention to the real-world scenarios in the last several chapters. As a reference resource. There are some features of Wireshark that you will not use very often, so you may forget how they work. Practical Packet Analysis is a great book to have on your bookshelf when you need a quick refresher about how to use a specific feature. I’ve also provided some unique charts, diagrams, and methodologies that may prove to be useful references when doing packet analysis for your job. I n t r o d u ct i on xix About the Sample Capture Files All of the capture files used in this book are available from the No Starch Press page for this book, http://www.nostarch.com/packet2.htm. In order to maximize the potential of this book, I highly recommend that you download these files and use them as you follow along with the examples. The Rural Technology Fund I couldn’t write an introduction without mentioning the best thing to come from Practical Packet Analysis. Shortly after the release of the first edition of this book, I founded a 501(c)(3) nonprofit organization that is the culmination of one of my biggest dreams. Rural students, even those with excellent grades, often have fewer opportunities for exposure to technology than their city or suburban counterparts. Established in 2008, the Rural Technology Fund (RTF) seeks to reduce the digital divide between rural communities and their more urban and suburban counterparts. This is done through targeted scholarship programs, community involvement, and general promotion and advocacy of technology in rural areas. Our scholarships are targeted to students living in rural communities who have a passion for computer technology and intend to pursue further education in that field. I’m pleased to announce that 100 percent of the author proceeds from this book go directly to the Rural Technology Fund in order to provide these scholarships. If you want to learn more about the Rural Technology Fund or how you can contribute, visit our website at http:// www.ruraltechfund.org/. Contacting Me I’m always thrilled to get feedback from people who read my writing. If you would like to contact me for any reason, you can send all questions, comments, threats, and marriage proposals directly to me at [email protected]. I also blog regularly at http://www.chrissanders.org/ and can be followed on Twitter at @chrissanders88. xx I n t r od u ct i on PACKET ANALYSIS AND NETWORK BASICS A million different things can go wrong with a computer network on any given day—from a simple spyware infection to a complex router configuration error—and it’s impossible to solve every problem immediately. The best we can hope for is to be fully prepared with the knowledge and tools we need to respond to these types of issues. All network problems stem from the packet level, where even the prettiest looking applications can reveal their horrible implementations, and seemingly trustworthy protocols can prove malicious. To better understand network problems, we go to the packet level. Here, nothing is hidden from us—nothing is obscured by misleading menu structures, eye-catching graphics, or untrustworthy employees. At this level, there are no true secrets (only encrypted ones). The more we can do at the packet level, the more we can control our network and solve problems. This is the world of packet analysis. This book dives into the world of packet analysis headfirst. You’ll learn how to tackle slow network communication, identify application bottlenecks, and even track hackers through some real-world scenarios. By the time you have finished reading this book, you should be able to implement advanced packet-analysis techniques that will help you solve even the most difficult problems in your own network. In this chapter, we’ll begin with the basics, focusing on network communication, so you can gain some of the basic background you’ll need to examine different scenarios. Packet Analysis and Packet Sniffers Packet analysis, often referred to as packet sniffing or protocol analysis, describes the process of capturing and interpreting live data as it flows across a network in order to better understand what is happening on that network. Packet analysis is typically performed by a packet sniffer, a tool used to capture raw network data going across the wire. Packet analysis can help with the following: Understanding network characteristics Learning who is on a network Determining who or what is utilizing available bandwidth Identifying peak network usage times Identifying possible attacks or malicious activity Finding unsecured and bloated applications There are various types of packet-sniffing programs, including both free and commercial ones. Each program is designed with different goals in mind. A few popular packet-analysis programs are tcpdump, OmniPeek, and Wireshark (which we will be using exclusively in this book). tcpdump is a command-line program. OmniPeek and Wireshark have graphical user interfaces (GUIs). Evaluating a Packet Sniffer You need to consider a number of factors when selecting a packet sniffer, including the following: Supported protocols All packet sniffers can interpret various protocols. Most can interpret common network protocols (such as IPv4 and ICMP), transport layer protocols (such as TCP and UDP), and even application layer protocols (such as DNS and HTTP). However, they may not support nontraditional or newer protocols (such as IPv6, SMBv2, and SIP). When choosing a sniffer, make sure that it supports the protocols you’re going to use. 2 Chapter 1 User-friendliness Consider the packet sniffer’s program layout, ease of installation, and general flow of standard operations. The program you choose should fit your level of expertise. If you have very little packetanalysis experience, you may want to avoid the more advanced commandline packet sniffers like tcpdump. On the other hand, if you have a wealth of experience, you may find an advanced program more appealing. As you gain experience with packet analysis, you may even find it useful to combine multiple packet-sniffing programs to fit particular scenarios. Cost The great thing about packet sniffers is that there are many free ones that rival any commercial products. The most notable difference between commercial products and their free alternatives is their reporting engines. Commercial products typically include some form of fancy report-generation module, which is usually lacking or nonexistent in free applications. Program support Even after you have mastered the basics of a sniffing program, you may occasionally need support to solve new problems as they arise. When evaluating available support, look for developer documentation, public forums, and mailing lists. Although there may be a lack of developer support for free packet-sniffing programs like Wireshark, the communities that use these applications will often fill the gap. These communities of users and contributors provide discussion boards, wikis, and blogs designed to help you to get more out of your packet sniffer. Operating system support Unfortunately, not all packet sniffers support every operating system. Choose one that will work on all the operating systems that you need to support. If you are a consultant, you may be required to capture and analyze packets on a variety of operating systems, so you will need a tool that runs on most operating systems. Also keep in mind that you will sometimes capture packets on one machine and review them on another. Variations between operating systems may force you to use a different application for each device. How Packet Sniffers Work The packet-sniffing process involves a cooperative effort between software and hardware. This process can be broken down into three steps: Collection In the first step, the packet sniffer collects raw binary data from the wire. Typically, this is done by switching the selected network interface into promiscuous mode. In this mode, the network card can listen to all traffic on a network segment, not only the traffic that is addressed to it. Conversion In this step, the captured binary data is converted into a readable form. This is where most advanced command-line packet sniffers stop. At this point, the network data is in a form that can be interpreted only on a very basic level, leaving the majority of the analysis to the end user. Packet Analysi s and Network Basi cs 3 Analysis The third and final step involves the actual analysis of the captured and converted data. The packet sniffer takes the captured network data, verifies its protocol based on the information extracted, and begins its analysis of that protocol’s specific features. How Computers Communicate In order to fully understand packet analysis, you must understand exactly how computers communicate with each other. In this section, we’ll examine the basics of network protocols, the Open Systems Interconnections (OSI) model, network data frames, and the hardware that supports it all. Protocols Modern networks are made up of a variety of systems running on many different platforms. To aid this communication, we use a set of common languages called protocols. Common protocols include Transmission Control Protocol (TCP), Internet Protocol (IP), Address Resolution Protocol (ARP), and Dynamic Host Configuration Protocol (DHCP). A protocol stack is a logical grouping of protocols that work together. One of the best ways to understand protocols is to think of them as similar to the rules that govern spoken or written human languages. Every language has rules, such as how verbs should be conjugated, how people should be greeted, and even how to properly thank someone. Protocols work in much the same fashion, allowing us to define how packets should be routed, how to initiate a connection, and how to acknowledge the receipt of data. A protocol can be extremely simple or highly complex, depending on its function. Although the various protocols are often drastically different, many protocols commonly address the following issues: Connection initiation Is it the client or server initiating the connection? What information must be exchanged prior to communication? Negotiation of connection characteristics Is the communication of the protocol encrypted? How are encryption keys transmitted between communicating hosts? Data formatting How is the data contained in the packet ordered? In what order is the data processed by the devices receiving it? Error detection and correction What happens in the event that a packet takes too long to reach its destination? How does a client recover if it cannot establish communication with a server for a short duration? Connection termination How does one host signify to the other that communication has ended? What final information must be transmitted in order to gracefully terminate communication? 4 Chapter 1 The Seven-Layer OSI Model Protocols are separated according to their functions based on the industry-standard OSI reference model. The OSI model divides the network communications process into seven distinct layers, as shown in Figure 1-1. This hierarchical model makes it much easier to understand network communication. The application layer at the top represents the actual programs used to access network resources. The bottom layer is the physical layer, through which the actual network data travels. The protocols at each layer work together to ensure data is properly handled by the protocols at layers above and below it. NOTE The OSI model was originally published in 1983 by the International Organization for Standardization (ISO) as a document called ISO 7498. The OSI model is no more than an industryrecommended standard. Protocol developers are not required to follow it exactly. And the OSI model is not the only networking model that exists; for example, some people prefer the Department of Defense (DoD) model, also known as the TCP/IP model. Application Presentation Session Transport Network Data Link Physical Figure 1-1: A hierarchical view of the seven layers of the OSI model Each OSI model layer has a specific function, as follows: Application layer (layer 7) The topmost layer of the OSI model provides a means for users to actually access network resources. This is the only layer typically seen by end users, as it provides the interface that is the base for all of their network activities. Presentation layer (layer 6) This layer transforms the data it receives into a format that can be read by the application layer. The data encoding and decoding done here depends on the application layer protocol that is sending or receiving the data. The presentation layer also handles several forms of encryption and decryption used for securing data. Session layer (layer 5) This layer manages the dialogue, or session between two computers. It establishes, manages, and terminates this connection among all communicating devices. The session layer is also responsible for establishing whether a connection is duplex or half-duplex, and for gracefully closing a connection between hosts, rather than dropping it abruptly. Packet Analysi s and Network Basi cs 5 Transport layer (layer 4) The primary purpose of the transport layer is to provide reliable data transport services to lower layers. Through flow control, segmentation/desegmentation, and error control, the transport layer makes sure data gets from point to point error-free. Because ensuring reliable data transportation can be extremely cumbersome, the OSI model devotes an entire layer to it. The transport layer utilizes both connection-oriented and connectionless protocols. Certain firewalls and proxy servers operate at this layer. Network layer (layer 3) This layer is responsible for routing data between physical networks, and it is one of the most complex of the OSI layers. It is responsible for the logical addressing of network hosts (for example, through an IP address). It also handles packet fragmentation, and in some cases, error detection. Routers operate at this layer. Data link layer (layer 2) This layer provides a means of transporting data across a physical network. Its primary purpose is to provide an addressing scheme that can be used to identify physical devices (for example, MAC addresses). Bridges and switches are physical devices that operate at the data link layer. Physical layer (layer 1) The layer at the bottom of the OSI model is the physical medium through which network data is transferred. This layer defines the physical and electrical nature of all hardware used, including voltages, hubs, network adapters, repeaters, and cabling specifications. The physical layer establishes and terminates connections, provides a means of sharing communication resources, and converts signals from digital to analog and vice versa. Table 1-1 lists some of the more common protocols used at each individual layer of the OSI model. Table 1-1: Typical Protocols Used in Each Layer of the OSI Model Layer Protocol Application HTTP, SMTP, FTP, Telnet Presentation ASCII, MPEG, JPEG, MIDI Session NetBIOS, SAP, SDP, NWLink Transport TCP, UDP, SPX Network IP, IPX Data link Ethernet, Token Ring, FDDI, AppleTalk Although the OSI model is no more than a recommended standard, you should know it by heart. As we progress through this book, you will find that the interaction of protocols on different layers will shape your approach to network problems. Router issues will soon become “layer 3 problems” and software issues will be recognized as “layer 7 problems.” 6 Chapter 1 NOTE In discussing our work, a colleague told me about a user complaining that he could not access a network resource. The issue was the result of the user entering an incorrect password. My colleague referred to this as a “layer 8 issue.” Layer 8 is the unofficial user layer. This term is commonly used among those who live at the packet level. How does data flow through the OSI model? The initial data transfer on a network begins at the application layer of the transmitting system. Data works its way down the seven layers of the OSI model until it reaches the physical layer, at which point the physical layer of the transmitting system sends the data to the receiving system. The receiving system picks up the data at its physical layer, and the data proceeds up the remaining layers of the receiving system to the application layer at the top. Services provided by various protocols at any given level of the OSI model are not redundant. For example, if a protocol at one layer provides a particular service, then no other protocol at any other layer will provide this same service. Protocols at different levels may have features with similar goals, but they will function a bit differently. Protocols at corresponding layers on the sending and receiving computers are complementary. For example, if a protocol on layer 7 of the sending computer is responsible for encrypting the data being transmitted, the corresponding protocol on layer 7 of the receiving machine is expected to be responsible for decrypting that data. Figure 1-2 shows a graphical representation of the OSI model as it relates to two communicating clients. You can see communication going from top to bottom on one client, and then reversing when it reaches the second client. Application Application Presentation Presentation Session Session Transport Transport Network Network Data Link Data Link Physical Physical Figure 1-2: Protocols working at the same layer on both the sending and receiving systems Packet Analysi s and Network Basi cs 7 Each layer in the OSI model is capable of communicating with only the layers directly above and below it. For example, layer 2 can send and receive data only from layers 1 and 3. Data Encapsulation The protocols on different layers of the OSI model communicate with the aid of data encapsulation. Each layer in the stack is responsible for adding a header or footer—extra bits of information that allow the layers to communicate—to the data being communicated. For example, when the transport layer receives data from the session layer, it adds its own header information to that data before passing it to the next layer. The encapsulation process creates a protocol data unit (PDU), which includes the data being sent and all header or footer information added to it. As data moves down the OSI model, the PDU changes and grows as header and footer information from various protocols is added to it. The PDU is in its final form once it reaches the physical layer, at which point it is sent to the destination computer. The receiving computer strips the protocol headers and footers from the PDU as the data climbs up the OSI layers. Once the PDU reaches the top layer of the OSI model, only the original data remains. NOTE The term packet refers to a complete PDU that includes header and footer information from all layers of the OSI model. Understanding how encapsulation of data works can be a bit confusing, so we’ll look at a practical example of a packet being built, transmitted, and received in relation to the OSI model. Keep in mind that as analysts, we don’t often talk about the session or presentation layers, so those will be absent in this example (and the rest of this book). In this scenario, we are on a computer that is attempting to browse to http://www.google.com/. For this process to take place, we must generate a request packet that is transmitted from our source client computer to the destination server computer. This scenario assumes that a TCP/IP communication session has already been initiated. Figure 1-3 illustrates the dataencapsulation process in this example. We begin on our client computer at the application layer. We are browsing to a website, so the application layer protocol being used is HTTP, which will issue a command to download the file index.html from google.com. Once our application layer protocol has dictated what we want to accomplish, our concern is with getting the packet to its destination. The data in our packet is passed down the stack to the transport layer. HTTP is an application layer protocol that utilizes, or sits on, TCP. Therefore, TCP serves as the transport layer protocol used to ensure reliable delivery of the packet. As a result, a TCP header is generated. This TCP header includes sequence numbers and other data that is appended to the packet, and ensures that the packet is properly delivered. 8 Chapter 1 Client HTTP Server Application HTTP Presentation Session Ethernet TCP HTTP Transport TCP IP TCP HTTP Network IP IP HTTP Data Link Ethernet TCP HTTP TCP HTTP IP TCP HTTP Physical Figure 1-3: A graphical representation of encapsulation of data between client and server NOTE We often say that one protocol “sits on” another protocol because of the top-down design of the OSI model. An application protocol such as HTTP provides a particular service and relies on TCP to ensure delivery of its service. As you will learn, DNS sits on UDP, and TCP sits on IP. Having done its job, TCP hands the packet off to IP, which is the layer 3 protocol responsible for the logical addressing of the packet. IP creates a header containing logical addressing information and passes the packet along to Ethernet on the data link layer. Physical Ethernet addresses are stored in the Ethernet header. The packet is now fully assembled and passed to the physical layer, where it is transmitted as zeros and ones across the network. The completed packet traverses the network cabling system, eventually reaching the Google web server. The web server begins by reading the packet from the bottom up, meaning that it first reads the data link layer, which contains the physical Ethernet addressing information that the network card uses to determine that the packet is intended for a particular server. Once this information is processed, the layer 2 information is stripped away, and the layer 3 information is processed. The IP addressing information is read in the same manner as the layer 2 information to ensure proper addressing and that the packet is not fragmented. This data is also stripped away so that the next layer can be processed. Layer 4 TCP information is now read to ensure that the packet has arrived in sequence. Then the layer 4 header information is stripped away, leaving only the application layer data, which can be passed to the web server application hosting the website. In response to this packet from the client, the server should transmit a TCP acknowledgment packet so the client knows its request was received followed by the index.html file. Packet Analysi s and Network Basi cs 9 All packets are built and processed as described in this example, regardless of which protocols are used. But at the same time, keep in mind that not every packet on a network is generated from an application layer protocol, so you will see packets that contain only information from layer 2, 3, or 4 protocols. Network Hardware Now it’s time to look at network hardware, where the dirty work is done. We’ll focus on just a few of the more common pieces of network hardware: hubs, switches, and routers. Hubs A hub is generally a box with multiple RJ-45 ports, like the NETGEAR hub shown in Figure 1-4. Hubs range from very small 4-port devices to larger 48-port ones designed for rack mounting in a corporate environment. Figure 1-4: A typical 4-port Ethernet hub Because hubs can generate a lot of unnecessary network traffic and are capable of operating only in half-duplex mode (they cannot send and receive data at the same time), you won’t typically see them used in most modern or high-density networks (switches are used instead). However, you should know how hubs work, since they will be very important to packet analysis when using the “hubbing out” technique discussed in Chapter 2. A hub is no more than a repeating device that operates on the physical layer of the OSI model. It takes packets sent from one port and transmits (repeats) them to every other port on the device. For example, if a computer on port 1 of a 4-port hub needs to send data to a computer on port 2, the hub sends those packets to ports 1, 2, 3, and 4. The clients connected to ports 3 and 4 examine the destination Media Access Control (MAC) address field in the Ethernet header of the packet, and they see that the packet is not for them, so they drop (discard) the packet. Figure 1-5 illustrates an example in which computer A is transmitting data to computer B. When computer A sends this data, all computers connected to the hub receive it. Only computer B actually accepts the data; the other computers discard it. As an analogy, suppose that you sent an email with the subject line “Attention all marketing staff ” to every employee in your company, rather than to only those people who work in the marketing department. The marketing department employees will know it is for them, and they will probably open 10 Chapter 1 it. The other employees will see that it is not for them, and they will probably discard it. You can see how this would result in a lot of unnecessary communication and wasted time, yet this is exactly how a hub functions. The best alternatives to hubs in production and high-density networks are switches, which are full-duplex devices that can send and receive data synchronously. Computer B Computer A Computer C Computer D Figure 1-5: The flow of traffic when computer A transmits data to computer B through a hub Switches Like a hub, a switch is designed to repeat packets. However, unlike a hub, rather than broadcasting data to every port, a switch sends data to only the computer for which the data is intended. Switches look just like hubs, as shown in Figure 1-6. Figure 1-6: A rack-mountable 24-port Ethernet switch Several larger switches on the market, such as Cisco-branded ones, are managed via specialized, vendor-specific software or web interfaces. These switches are commonly referred to as managed switches. Managed switches provide several features that can be useful in network management, including the ability to enable or disable specific ports, view port specifics, make configuration changes, and remotely reboot. P ack e t A n a l y s i s a n d N e t w o rk B a s i c s 11 Switches also offer advanced functionality when it comes to handling transmitted packets. In order to be able to communicate directly with specific devices, switches must be able to uniquely identify devices based on their MAC addresses, which means that they must operate on the data link layer of the OSI model. Switches store the layer 2 address of every connected device in a CAM table, which acts as a kind of traffic cop. When a packet is transmitted, the switch reads the layer 2 header information in the packet and, using the CAM table as reference, determines to which port(s) to send the packet. Switches send packets only to specific ports, thus greatly reducing network traffic. Figure 1-7 illustrates traffic flow through a switch. In this figure, computer A is sending data to only the intended recipient: computer B. Multiple conversations can happen on the network at the same time, but information is communicated directly between the switch and intended recipient, not between the switch and all connected computers. Computer B Computer A Computer C Computer D Figure 1-7: The flow of traffic when computer A transmits data to computer B through a switch Routers A router is an advanced network device with a much higher level of functionality than a switch or a hub. A router can take many shapes and forms, but most have several LED indicator lights on the front and a few network ports on the back, depending on the size of the network. Figure 1-8 shows an example of a router. Routers operate at layer 3 of the OSI model, where they are responsible for forwarding packets between two or more networks. The process routers use to direct the flow of traffic among networks is called routing. Several types of routing protocols dictate how different types of packets are routed to other networks. Routers commonly use layer 3 addresses (such as IP addresses) to uniquely identify devices on a network. 12 Chapter 1 Figure 1-8: A low-level Cisco router suitable for use in a small to mid-sized network One way to illustrate the concept of routing is by using the analogy of a neighborhood with several streets. Think of the houses, with their addresses, as computers, and each street as a network segment, as shown in Figure 1-9. From your house on your street, you can easily communicate with your neighbors in the other houses on the street. This is similar to the operation of a switch that allows communication among all computers on a network segment. However, communicating with a neighbor on another street is like communicating with a computer that is not on the same segment. 192.168.0.9 192.168.0.5 192.168.0.7 192.168.0.3 501 502 505 506 503 10.100.1.100 504 Vine Street 507 192.168.0.1 508 10.100.1.1 Oak Street 201 202 203 204 Dogwood Lane 192.168.0.6 192.168.0.2 192.168.0.8 192.168.0.4 192.168.0.51 192.168.0.55 192.168.0.53 192.168.0.57 10.100.1.150 192.168.0.50 205 206 207 208 192.168.0.52 192.168.0.56 192.168.0.54 192.168.0.58 Figure 1-9: Comparison of a routed network to neighborhood streets Referring to Figure 1-9, let’s say that you’re sitting at 503 Vine Street and need to get to 202 Dogwood Lane. In order to do this, you must cross onto Oak Street, and then onto Dogwood Lane. Think of this as crossing network segments. If the device at 192.168.0.3 needs to communicate with the device at 192.168.0.54, it must cross a router to get to the 10.100.1.1 network, and then cross the destination network segment’s router before it can get to the destination network segment. The size and number of routers on a network will typically depend on the network’s size and function. Personal and home-office networks may have only a small router located at the center of the network. A large corporate network might have several routers spread throughout various departments, all connecting to one large central router or layer 3 switch (an advanced type of switch that also has built-in functionality to act as a router). P ack e t A n a l y s i s a n d N e t w o rk B a s i c s 13 As you begin looking at more and more network diagrams, you will come to understand how data flows through these various points. Figure 1-10 shows the layout of a very common form of routed network. In this example, two separate networks are connected via a single router. If a computer on network A wishes to communicate with a computer on network B, the transmitted data must go through the router. Network A Network B Computer W Computer B Router Computer A Computer C Computer D Computer Y Computer X Computer Z Figure 1-10: The flow of traffic when computer A transmits data to computer X through a router Traffic Classifications Network traffic can be divided among three main classes: broadcast, multicast, and unicast. Each classification has a distinct characteristic that determines how packets in that class are handled by networking hardware. Broadcast Traffic A broadcast packet is one that is sent to all ports on a network segment, regardless of whether that port is a hub or switch. All broadcast traffic is not created equally, however. There are layer 2 and layer 3 forms of broadcast traffic. For instance, on layer 2, the MAC address FF:FF:FF:FF:FF:FF is the reserved broadcast address, and any traffic sent to this address is broadcast to the entire network segment. Layer 3 also has a specific broadcast address. The highest possible IP address in an IP network range is reserved for use as the broadcast address. For example, in a network configured with a 192.168.0.xxx IP range and a 255.255.255.0 subnet mask, the address 192.168.0.255 is the broadcast address. In larger networks with multiple hubs or switches connected via different media, broadcast packets transmitted from one switch reach all the way to the ports on the other switches on the network, as they are repeated from switch to switch. The extent to which broadcast packets travel is called the broadcast domain, which is the network segment where any computer can directly transmit to another computer without going through a router. Figure 1-11 14 Chapter 1 shows an example of two broadcast domains on a small network. Because each broadcast domain extends until it reaches the router, broadcast packets circulate only within this specified broadcast domain. Router Broadcast Domain Broadcast Domain Figure 1-11: A broadcast domain extends to everything behind the current routed segment. Our earlier example describing how routing relates to a neighborhood also provides good insight into how broadcast domains work. You can think of a broadcast domain as being like a neighborhood street. If you stand on your front porch and yell, only the people on your street will be able to hear you. If you want to talk to someone on a different street, you need to find a way to speak to that person directly, rather than broadcasting (yelling) from your front porch. Multicast Traffic Multicast is a means of transmitting a packet from a single source to multiple destinations simultaneously. The goal of multicasting is to simplify this process by using as little bandwidth as possible. The optimization of this traffic lies in the number of times a stream of data is replicated in order to get to its destination. The exact handling of multicast traffic is highly dependent on its implementation in individual protocols. The primary method of implementing multicast is via an addressing scheme that joins the packet recipients to a multicast group, which is how IP multicast works. This addressing scheme ensures that the packets cannot be transmitted to computers to which they are not destined. In fact, IP devotes an entire range of addresses to multicast. If you see an IP address in the 224.0.0.0 to 239.255.255.255 range, it is most likely multicast traffic. Unicast Traffic A unicast packet is transmitted from one computer directly to another. The details of how unicast functions depend on the protocol using it. For example, consider a device that wishes to communicate with a web server. This is a one-to-one connection, so this communication process would begin with the client device transmitting a packet to only the web server. This form of communication is an example of unicast traffic. P ack e t A n a l y s i s a n d N e t w o rk B a s i c s 15 Final Thoughts This chapter covered the absolute basics that you need as a foundation for packet analysis. You must understand what is going on at this level of network communication before you can begin troubleshooting network issues. In the next chapter, we will build on these concepts and discuss more advanced network communication principles. 16 Chapter 1 TAPPING INTO THE WIRE A key decision for effective packet analysis is where to position a packet sniffer to appropriately capture the data. This is most often referred to by packet analysts as sniffing the wire, tapping the network, or tapping into the wire. Simply put, this is the process of placing a packet sniffer on a network in the correct physical location. Unfortunately, sniffing packets is not as simple as plugging a laptop into a network port and capturing traffic. In fact, it is sometimes more difficult to place a packet sniffer on a network’s cabling system than it is to actually analyze the packets. The challenge with sniffer placement is that a large variety of networking hardware is used to connect devices. Figure 2-1 illustrates a typical situation. Because the three main devices on a modern network (hubs, switches, and routers) each handles traffic differently, you must be very aware of the physical setup of the network you are analyzing. Packet Sniffer Figure 2-1: Placing your sniffer on the network is sometimes the biggest challenge you will face. The goal of this chapter is to help you develop an understanding of packet-sniffer placement in a variety of different network topologies. But first, let’s look at how we’re actually able to see all the packets that cross the wire we’re tapping into. Living Promiscuously Before you can sniff packets on a network, you need a network interface card (NIC) that supports a promiscuous mode driver. Promiscuous mode is what allows a NIC to view all packets crossing the wire. As you learned in Chapter 1, with network broadcast traffic, it’s common for clients to receive packets that are not actually destined for them. ARP, which is used to determine which MAC address corresponds to a particular IP address, is a crucial fixture on any network, and it’s a great example of traffic sent to hosts other than the intended recipient. To find the matching MAC address, ARP sends a broadcast packet to every device on its broadcast domain in hopes that the correct client will respond. A broadcast domain (the network segment where any computer can directly transmit to another computer without going through a router) can consist of several computers, but only one client on that domain should be interested in the ARP broadcast packet that is transmitted. It would be terribly inefficient for every computer on the network to actually process the ARP broadcast packet. Instead, the NICs of the devices on the network for whom the packet is not destined recognize that the packet is of no use to them, and the packet is discarded rather than being passed to the CPU for processing. The discarding of packets not destined for the receiving host improves processing efficiency, but it’s not so great for packet analysts. As analysts, we typically want to see every packet sent across the wire so that we don’t risk missing some crucial piece of information. 18 Chapter 2 We can ensure we capture all of the traffic by using the NIC’s promiscuous mode. When operating in promiscuous mode, the NIC passes every packet it sees to the host’s processor, regardless of addressing. Once the packet makes it to the CPU, it can then be grabbed by a packet-sniffing application for analysis. Most modern NICs support promiscuous mode, and Wireshark includes the libpcap/WinPcap driver, which allows it to switch your NIC directly into promiscuous mode from the Wireshark GUI. (We’ll talk more about libpcap/ WinPcap in Chapter 3.) For the purposes of this book, you must have a NIC and an operating system that support the use of promiscuous mode. The only time you do not need to sniff in promiscuous mode is when you want to see only the traffic sent directly to the MAC address of the interface from which you are sniffing. NOTE Most operating systems (including Windows) will not let you use a NIC in promiscuous mode unless you have elevated user privileges. If you cannot legally obtain these privileges on a system, chances are that you should not be performing any type of packet sniffing on that particular network. Sniffing Around Hubs Sniffing on a network that has hubs installed is a dream for any packet analyst. As you learned in Chapter 1, traffic sent through a hub goes through every port connected to that hub. Therefore, to analyze the traffic running through a computer connected to a hub, all you need to do is connect a packet sniffer to an empty port on the hub. You will be able to see all communication to and from that computer, as well as all communication between any other devices plugged into that hub. As illustrated in Figure 2-2, your visibility window is limitless when your sniffer is connected to a hub-based network. Computer D Visibility Window Computer A Sniffer Computer E Computer B Computer F Computer C Figure 2-2: Sniffing on a hub network provides a limitless visibility window. Tappi ng i n to the Wi re 19 NOTE The visibility window, as shown in various diagrams throughout this book, represents the devices on the network whose traffic you can see with a packet sniffer. Unfortunately for us, hub-based networks are pretty rare because of the headaches they cause network administrators. Because only one device can communicate at any one time, a device connected through a hub must compete for bandwidth with the other devices trying to communicate through the hub. When two or more devices communicate at the same time, packets collide, as shown in Figure 2-3. The result may be packet loss, and the communicating devices will compensate for that loss by retransmitting packets, which increases network congestion and collisions. As the level of traffic and number of collisions increase, devices may need to transmit a packet three or four times, decreasing network performance dramatically. It’s easy to understand why most modern networks of any size use switches. Transmitting Computer Transmitting Computer Collision Hub Figure 2-3: Collisions occur on a hub network when two devices transmit at the same time. Sniffing in a Switched Environment As discussed in Chapter 1, switches are the most common type of connection device used in modern network environments. They provide an efficient way to transport data via broadcast, unicast, and multicast traffic. As a bonus, switches allow full-duplex communication, meaning that machines can send and receive data simultaneously. Unfortunately for packet analysts, switches add a whole new level of complexity. When you connect a sniffer to a port on a switch, you can see only broadcast traffic and the traffic transmitted and received by your machine, as shown in Figure 2-4. 20 Chapter 2 There are four primary ways to capture traffic from a target device on a switched network: port mirroring, hubbing out, using a tap, and ARP cache poisoning. Computer D Computer A Visibility Window Sniffer Computer E Computer B Computer F Computer C Figure 2-4: The visibility window on a switched network is limited to the port you are plugged into. Port Mirroring Port mirroring, or port spanning, is perhaps the easiest way to capture the traffic from a target device on a switched network. In this type of setup, you must have access to the command-line or web-management interface of the switch on which the target computer is located. Also, the switch must support port mirroring and have an empty port into which you can plug your sniffer. To enable port mirroring, you issue a command that forces the switch to copy all traffic on one port to another port. For instance, to capture the traffic from a device on port 3 of a switch, you could simply plug your analyzer into port 4 and mirror port 3 to port 4, allowing you to see all traffic transmitted and received by your target device. Figure 2-5 illustrates port mirroring. Computer D Computer A Computer B’s Port Mirrored to Sniffer Port Computer E Computer F Sniffer Visibility Window Computer B Computer C Figure 2-5: Port mirroring allows you to expand your visibility window on a switched network. Tappi ng i n to the Wi re 21 The way that you set up port mirroring depends on the manufacturer of your switch. For most switches, you’ll need to log in to a command-line interface and enter the port mirroring command. You’ll find a list of common port-mirroring commands in Table 2-1. NOTE Some switches provide web-based GUIs that offer port mirroring as an option, but these aren’t as common and aren’t standardized. However, if your switch provides an effective way to configure port mirroring through a GUI, by all means use it. Table 2-1: Commands Used to Enable Port Mirroring Manufacturer Command Cisco set span <source port> <destination port> Enterasys set port mirroring create <source port> <destination port> Nortel port-mirroring mode mirror-port <source port> monitor-port <destination port> When port mirroring, be aware of the throughput of the ports you are mirroring. Some switch manufacturers allow you to mirror multiple ports to one individual port, which may be very useful when analyzing the communication between two or more devices on a single switch. However, let’s consider what will happen using some basic math. If you have a 24-port switch and you mirror 23 full-duplex 100Mbps ports to one port, you could potentially have 4,600Mbps flowing to that port. This is well beyond the physical threshold of a single port, so it could cause packet loss or network slowdowns if the traffic reached a certain level. In these situations, switches have been known to completely drop excess packets or even “pause” their internal circuitry, preventing communication altogether. Be sure that this type of situation doesn’t occur when you are trying to perform your capture. Hubbing Out Another way to capture the traffic through a target device on a switched network is by hubbing out. This is a technique by which you segment the target device and your analyzer system on the same network segment by plugging them directly into a hub. Many people think of hubbing out as cheating, but it’s really a perfect solution in situations where you can’t perform port mirroring but still have physical access to the switch the target device is plugged into. To hub out, all you need is a hub and a few network cables. Once you have your hardware, connect it as follows: 22 Chapter 2 1. Go to the switch the target device resides on and unplug the target from the network. 2. Plug the target’s network cable into your hub. 3. Plug in another cable that connects your analyzer to the hub. 4. Plug in a network cable from your hub to the network switch to connect the hub to the network. Now you have basically put the target device and your analyzer in the same broadcast domain, and all traffic from your target device will be broadcast so that the analyzer can capture those packets, as illustrated in Figure 2-6. Computer D Computer A Visibility Window Sniffer Computer E Computer F Hub Computer B Computer C Figure 2-6: Hubbing out isolates your target device and analyzer. In most situations, hubbing out will reduce the duplex of the target device from full to half. While this method isn’t the cleanest way to tap into the wire, it’s sometimes your only option when a switch does not support port mirroring. But keep in mind that your hub will also require a power connection, which can be difficult to find in some instances. NOTE As a reminder, it is usually a nice gesture to alert the user of the device that you will be unplugging it, especially if that user happens to be the company CEO! FINDING “TRUE” HUBS When hubbing out, be sure that you’re using a true hub and not a falsely labeled switch. Several networking hardware vendors have a bad habit of marketing and selling a device as a hub when it actually functions as a low-level switch. If you aren’t working with a proven, tested hub, you will see only your own traffic, not that of the target device. When you find a hub, test it to make sure it really is a hub. If it is, it’s a keeper! The best way to determine whether or not a device is a true hub is to hook up a pair of computers to it and see if one computer can sniff traffic between the other computer and various other devices on the network, such as another computer or a printer. If so, that’s a true hub. Since hubs are so antiquated, they are not really mass-produced anymore. It’s almost impossible to buy a true hub off the shelf, so you’ll need to be creative in order to find one. A great source is often a surplus auction at your local school district. Public schools are required to attempt to auction surplus items before disposing of them, and they often have older hardware sitting around. I’ve seen people walk away from surplus auctions with several hubs for less than the cost of a plate of white beans and cornbread. Alternatively, eBay can be a good source of hubs, but be wary, as you may run into the same issue with switches mislabeled as hubs. Tappi ng i n to the Wi re 23 Using a Tap Everybody knows the phrase, “Why have chicken when you can have steak?” (Or if you are from the South, “Why have ham when you can have fried bologna?”) This choice also applies to hubbing out versus using a tap. A network tap is a hardware device that you can place between two points on your cabling system in order to capture the packets between those two points. As with hubbing out, you place a piece of hardware on the network that allows you to capture the packets you need. The difference is that rather than using a hub, you use a specialized piece of hardware designed for network analysis. There are two primary types of network taps: aggregated and nonaggregated. Both types of taps sit in between two devices in order to sniff the communications. The primary difference between an aggregated tap and a nonaggregated tap is that the nonaggregated tap has four ports, as shown in Figure 2-7, and the aggregated tap only has three ports. Figure 2-7: A Barracuda nonaggregated tap Taps also typically require a power connection, although some include batteries for brief stints of packet sniffing without the need to plug into a power receptacle. Aggregated Taps The aggregated tap is the simplest to use. It has only one physical monitor port for sniffing bidirectional traffic. To capture all traffic to and from a single computer plugged into a switch using an aggregated tap, follow these steps: 24 Chapter 2 1. Unplug the computer from the switch. 2. Plug one end of a network cable into the computer, and plug the other end into the tap’s “in” port. 3. Plug one end of another network cable into the tap’s “out” port, and plug the other end into the network switch. 4. Plug one end of a final cable into the tap’s “monitor” port, and plug the other end into the computer that is acting as your sniffer. The aggregated tap should be connected as shown in Figure 2-8. At this point, your sniffer should be capturing all traffic in and out of the computer you’ve plugged into the tap. Aggregated Tap Computer Switch Monitor Sniffer Figure 2-8: Using an aggregated tap to intercept network traffic Nonaggregated Taps The nonaggregated tap is slightly more complex than the aggregated type, but it allows a bit more flexibility when capturing traffic. Instead of a single monitor port that can be used to listen to bidirectional communication, the nonaggregated type has two monitor ports. One monitor port is used for sniffing traffic in one direction (from the computer connected to the tap), and the other monitor port is used for sniffing traffic in the other direction (to the computer connected to the tap). To capture all traffic to and from a single computer plugged into a switch, follow these steps: 1. Unplug the computer from the switch. 2. Plug one end of a network cable into the computer, and plug the other end into the tap’s “in” port. 3. Plug one end of another network cable into the tap’s “out” port, and plug the other end into the network switch. 4. Plug one end of a third network cable into the tap’s “monitor A” port, and plug the other end into one NIC on the computer that is acting as your sniffer. 5. Plug one end of a final cable into the tap’s “monitor B” port, and plug the other end into a second NIC on the computer that is acting as your sniffer. The nonaggregated tap should be connected as shown in Figure 2-9. Tappi ng i n to the Wi re 25 Nonaggregated Tap Computer Switch Monitor A Monitor B Sniffer Figure 2-9: Using a nonaggregated tap to intercept network traffic Choosing a Network Tap Given the difference between these two types of taps, which one is better? In most situations, aggregated taps are preferred, because they require less cabling and don’t need two NICs on your sniffer computer. However, in situations where you are capturing a high volume of traffic or care about traffic going in only one direction, nonaggregated taps are beneficial. You can purchase taps of all sizes, ranging from about US$150 for simple Ethernet taps to enterprise-grade fiber-optic taps in the five-figure range. I’ve used taps from Net Optics and Barracuda Networks, and have been very happy with them. I’m sure that there are many other great taps available. ARP Cache Poisoning One of my favorite techniques for tapping into the wire is ARP cache poisoning. We will cover the ARP protocol in detail in Chapter 6, but a brief explanation is necessary in order to understand how this technique works. The ARP Process Recall from Chapter 1 that the two main types of packet addressing are at layers 2 and 3 of the OSI model. These layer 2 addresses, or MAC addresses, are used in conjunction with whichever layer 3 addressing system you are using. In this book, in accordance with industry-standard terminology, I refer to the layer 3 addressing system as the IP addressing system. All devices on a network communicate with each other on layer 3 using IP addresses. Because switches operate on layer 2 of the OSI model, they are cognizant of only layer 2 MAC addresses, so devices must be able to include this information in packets they construct. When a MAC address is not known, it must be obtained using the known layer 3 IP addresses to be able to forward traffic to the appropriate device. This translation process is done through the layer 2 protocol ARP. The ARP process, for computers connected to Ethernet networks, begins when one computer wishes to communicate with another. The transmitting computer first checks its ARP cache to see if it already has the 26 Chapter 2 MAC address associated with the IP address of the destination computer. If it does not, it sends an ARP request to the data link layer broadcast address FF:FF:FF:FF:FF:FF, as discussed in Chapter 1. As a broadcast packet, this packet is received by every computer on that particular Ethernet segment. The packet basically asks, “Which IP address owns the XX:XX:XX:XX:XX:XX MAC address?” Devices without the destination computer’s IP address simply discard this ARP request. The destination machine replies to the packet with its MAC address via an ARP reply. At this point, the original transmitting computer now has the data link layer addressing information it needs to communicate with the remote computer, and it stores that information in its ARP cache for fast retrieval. How ARP Cache Poisoning Works ARP cache poisoning, sometimes called ARP spoofing, is the process of sending ARP messages to an Ethernet switch or router with fake MAC (layer 2) addresses in order to intercept the traffic of another computer. Figure 2-10 illustrates this setup. ARP cache poisoning is an advanced form of tapping into the wire on a switched network. It is commonly used by attackers to send falsely addressed packets to client systems in order to intercept certain traffic or cause denialof-service (DoS) attacks on a target. However, it can also be a legitimate way to capture the packets of a target machine on a switched network. Normal Traffic Pattern Target Computer Switch Sniffer Poisoned ARP Cache Router Target Computer Switch Router Sniffer Figure 2-10: ARP cache poisoning allows you to intercept the traffic of your target computer. Using Cain & Abel When attempting to poison the ARP cache, the first step is to acquire the required tools and collect some information. For our demonstration, we’ll use the popular security tool Cain & Abel from oxid.it (http://www.oxid.it/), which supports Windows systems. Download and install it now, according to the directions on the website. Before you can use Cain & Abel, you’ll need to collect certain information, including the IP address of your analyzer system, the remote system from which you wish to capture the traffic, and the router from which the remote system is downstream. Tappi ng i n to the Wi re 27 When you first open Cain & Abel, you will notice a series of tabs near the top of the window. (ARP cache poisoning is only one of Cain & Abel’s features.) For our purposes, we’ll be working in the Sniffer tab. When you click this tab, you should see an empty table, as shown in Figure 2-11. Figure 2-11: The Sniffer tab in the Cain & Abel main window To complete this table, you will need to activate the program’s built-in sniffer and scan your network for hosts. To do so, follow these steps: 1. Click the second icon from the left on the toolbar, which resembles a NIC. 2. You will be asked to select the interface you wish to sniff. This interface should be the one that is connected to the network on which you will be performing your ARP cache poisoning. Select this interface and click OK. (Ensure that this button is depressed in order to activate Cain & Abel’s built-in sniffer.) 3. To build a list of available hosts on your network, click the plus symbol (+) icon. The MAC Address Scanner dialog appears, as shown in Figure 2-12. The All hosts in my subnet radio button should be selected (or you can specify an address range if necessary). Click OK to continue. Figure 2-12: The Cain & Abel network discovery tool The grid should now be filled with a list of all the hosts on your attached network, along with their MAC addresses, IP addresses, and vendor information. This is the list you will work from when setting up ARP cache poisoning. 28 Chapter 2 At the bottom of the program window, you should see a set of tabs that will take you to other windows under the Sniffer heading. Now that you have built your host list, you will be working from the APR (for ARP Poison Routing) tab. Switch to the APR window now by clicking the tab. Once in the APR window, you are presented with two empty tables. After you’ve completed the setup steps, the upper table will show the devices involved in your ARP cache poisoning, and the lower one will show all communication between your poisoned machines. To set up your poisoning, follow these steps: 1. Click in the blank area in the upper portion of the screen, and then click the plus sign (+) icon on the program’s standard toolbar. 2. The window that appears has two selection panes. On the left side, you will see a list of all available hosts on your network. Click the IP address of the target computer whose traffic you wish to sniff, and the pane on the right will show a list of all hosts in the network, except for the target machine’s IP address. 3. In the right pane, click the IP address of the router that is directly upstream from the target machine, as shown in Figure 2-13, and then click OK. The IP addresses of both devices should now be listed in the upper table in the main application window. 4. To complete the process, click the yellow-and-black radiation symbol on the standard toolbar. This will activate Cain & Abel’s ARP cache poisoning features and allow your analyzing system to be the middleman for all communications between the target system and its upstream router. You should now be able to fire up your packet sniffer and begin the analysis process. When you are finished capturing traffic, simply click the yellow-andblack radiation symbol again to stop ARP cache poisoning. Figure 2-13: Selecting the devices for which you wish to enable ARP cache poisoning Tappi ng i n to the Wi re 29 A Word of Caution on ARP Cache Poisoning As a final note on ARP cache poisoning, you should be very aware of the roles of the systems for which you implement this process. For instance, do not use this technique when the target device is something with very high network utilization, such as a file server with a 1Gbps link to the network (especially if your analyzer system provides only a 100Mbps link). When you reroute traffic using the technique shown in this example, all traffic transmitted and received by the target system must first go through your analyzer system, therefore making your analyzer the bottleneck in the communication process. This rerouting can create a DoS-type effect on the machine you are analyzing, which will result in degraded network performance and faulty analysis data. NOTE You can avoid all the traffic going through your analyzer system by using a feature called asymmetric routing. For more information about this technique, see the oxid.it User Manual (http://www.oxid.it/ca_um/topics/apr.htm). Sniffing in a Routed Environment All of the techniques for tapping into the wire on a switched network are available on routed networks as well. The only major consideration when dealing with routed environments is the importance of sniffer placement when you are troubleshooting a problem that spans multiple network segments. As you’ve learned, a device’s broadcast domain extends until it reaches a router, at which point the traffic is handed off to the next upstream router. In situations where data must traverse multiple routers, it is important to analyze the traffic on all sides of the router. For example, consider the communications problem you might encounter in a network with several network segments connected via a variety of routers. In this network, each segment communicates with an upstream segment in order to store and retrieve data. Based on Figure 2-14, the problem we’re trying to solve is that a downstream subnet, network D, cannot communicate with any devices on network A. If you sniff the traffic of a device on network D that is having trouble communicating with devices on other networks, you may clearly see data being transmitted to another segment, but you may not see data coming back. If you rethink the positioning of your sniffer and begin sniffing the traffic in the next upstream network segment (network B), you will have a clearer picture of what is happening. At this point, you may find that traffic is dropped or routed incorrectly by the router of network B. Eventually, this leads you to a router configuration problem that, when corrected, solves your larger dilemma. Although this scenario is a bit broad, the moral of the story is that when dealing with multiple routers and network segments, you may need to move your sniffer around a bit to get the entire picture. 30 Chapter 2 This is a prime example of why it is often necessary to sniff the traffic of multiple devices on multiple segments in order to pinpoint a problem. Network A Network B Network C Network D Figure 2-14: A computer on network D can’t communicate with one on network A. N E T W O R K M A PS In our discussion of network placement, we have examined several different network maps. A network map, or network diagram, is a diagram that shows all technical resources on a network and how they are connected. There is no better way to determine the placement of your packet sniffer than to be able to visualize a network. If you have a network map available, keep it handy, as it will become a valuable asset in the troubleshooting and analysis process. You may even want to make a detailed network map of your own network. Remember that sometimes half the battle in troubleshooting is ensuring you are collecting the right data. Sniffer Placement in Practice We have looked at four different ways to capture network traffic in a switched environment. We can add one more if we consider simply installing a packetsniffing application on a single device from which we want to capture traffic (the direct install method). Given these five methods, it can be a bit confusing to determine which one is the most appropriate. Table 2-2 provides some general guidelines for each method. Tappi ng i n to the Wi re 31 Table 2-2: Guidelines for Packet Sniffing in a Switched Environment Technique Guidelines Port mirroring • Usually preferred because it leaves no network footprint and no additional packets are generated as a result of it. • Can be configured without taking the client offline, which is convenient when mirroring router or server ports. Hubbing out • Ideal when you are not concerned about taking the host temporarily offline. • Ineffective when you must capture traffic from multiple hosts, as collisions and dropped packets will be imminent. • Can result in lost packets on modern 100/1000Mbps hosts because most true hubs are only 10Mbps. Using a tap • Ideal when you are not concerned about taking the host temporarily offline. • The only option when you need to sniff traffic from a fiber-optic connection. • Since taps are made for the task at hand and are up to par with modern network speeds, this method is superior to hubbing out. • May be cost prohibitive when budgets are tight. ARP cache poisoning • Considered very sloppy, as it involves injecting packets onto the network in order to reroute traffic through your sniffer. • Can be effective when you need to grab a quick capture of traffic from a device without taking it offline and where port mirroring is not an option. Direct install • Usually not recommended because if there is an issue with a host, that issue could cause packets to be dropped or manipulated in such a way that they are not represented accurately. • The NIC of the host does not need to be in promiscuous mode. • Best for test environments, examining/baselining performance, and examining capture files created elsewhere. As analysts, we need to be as stealthy as possible. In a perfect world, we collect the data we need without leaving a footprint. Just as forensic investigators don’t want to contaminate a crime scene, we don’t want to contaminate our captured network traffic. As we step through practical scenarios in later chapters, we’ll discuss the best ways to capture the data we require on a case-by-case basis. For the time being, the flowchart in Figure 2-15 should help you to decide on the best method to use for capturing traffic. Remember that this flowchart is simply a general reference, and it does not cover every possible iteration of tapping into the wire. 32 Chapter 2 Tapping into the wire Use port mirroring Do your switches support mirrroring? Yes No Can a client be taken offline temporarily? No Use ARP cache poisoning Yes Do you have access to a tap? No Yes Hub out Use a tap Figure 2-15: A diagram to help determine which method is best for tapping into the wire Tappi ng i n to the Wi re 33 INTRODUCTION TO WIRESHARK As mentioned in Chapter 1, several packet-sniffing applications are available for performing network analysis, but we’ll use Wireshark in this book. This chapter introduces Wireshark. A Brief History of Wireshark Wireshark has a very rich history. Gerald Combs, a computer science graduate of the University of Missouri at Kansas City, originally developed it out of necessity. The first version of Combs’s application, called Ethereal, was released in 1998 under the GNU Public License (GPL). Eight years after releasing Ethereal, Combs left his job to pursue other career opportunities. Unfortunately, his employer at that time had full rights to the Ethereal trademarks, and Combs was unable to reach an agreement that would allow him to control the Ethereal “brand.” Instead, Combs and the rest of the development team rebranded the project as Wireshark in mid-2006. Wireshark has grown dramatically in popularity, and its collaborative development team now boasts more than 500 contributors. The program as it exists under the Ethereal name is no longer being developed. The Benefits of Wireshark Wireshark offers several benefits that make it appealing for everyday use. It is aimed at both the journeyman and the expert packet analyst, and offers a variety of features to entice each. Let’s examine Wireshark according to the criteria defined in Chapter 1 for selecting a packet-sniffing tool. Supported protocols Wireshark excels in the number of protocols that it supports—more than 850 as of this writing. These range from common ones like IP and DHCP to more advanced proprietary protocols like AppleTalk and BitTorrent. And because Wireshark is developed under an open source model, new protocol support is added with each update. NOTE In the unlikely case that Wireshark doesn’t support a protocol you need, you can code that support yourself and submit your code to the Wireshark developers for inclusion in the application (if your code is accepted, of course). User-friendliness The Wireshark interface is one of the easiest to understand of any packet-sniffing application. It is GUI-based, with very clearly written context menus and a straightforward layout. It also provides several features designed to enhance usability, such as protocol-based color coding and detailed graphical representations of raw data. Unlike some of the more complicated command-line-driven alternatives, like tcpdump, the Wireshark GUI is great for those who are just entering the world of packet analysis. Cost Since it is open source, Wireshark’s pricing can’t be beat: Wireshark is released as free software under the GPL. You can download and use Wireshark for any purpose, whether personal or commercial. NOTE Although Wireshark may be free, some people have made the mistake of paying for it by accident. If you search for packet sniffers on eBay, you may be surprised by how many people would love to sell you a “professional enterprise license” for Wireshark for the low, low price of $39.95. Of course, this is a farce, but if you decide you really want to buy it, give me a call, and we can talk about some oceanfront property in Kentucky I have for sale! Program support A software package’s level of support can make or break it. When dealing with freely distributed software such as Wireshark, there may not be any formal support, which is why the open source community often relies on its user base to provide support. Luckily for us, the Wireshark community is one of the most active of any open source project. 36 Chapter 3 The Wireshark web page links directly to several forms of support, including online documentation, a support and development wiki, FAQs, and a place to sign up for the Wireshark mailing list, which is monitored by most of the program’s top developers. Paid support for Wireshark is also available from CACE Technologies through its SharkNet program. Operating system support Wireshark supports all major modern operating systems, including Windows, Mac OS X, and Linux-based platforms. You can view a complete list of supported operating systems on the Wireshark home page. Installing Wireshark The Wireshark installation process is surprisingly simple. However, before you install Wireshark, make sure that your system meets the following requirements: 400 MHz processor or faster 128MB RAM At least 75MB of available storage space NIC that supports promiscuous mode WinPcap capture driver The WinPcap capture driver is the Windows implementation of the pcap packet-capturing application programming interface (API). Simply put, this driver interacts with your operating system to capture raw packet data, apply filters, and switch the NIC in and out of promiscuous mode. Although you can download WinPcap separately (from http://www .winpcap.org/), it is typically better to install WinPcap from the Wireshark installation package, because the included version of WinPcap has been tested to work with Wireshark. Installing on Microsoft Windows Systems The first step when installing Wireshark under Windows is to obtain the latest installation build from the official Wireshark web page, http://www .wireshark.org/. Navigate to the Downloads section on the website and choose a mirror. Once you’ve downloaded the package, follow these steps: 1. Double-click the .exe file to begin installation, and then click Next in the introductory window. 2. Read the licensing agreement, and then click I Agree if you agree. 3. Select the components of Wireshark you wish to install, as shown in Figure 3-1. For our purposes, you can accept the defaults by clicking Next. I n t r o d u c t i o n t o W i res h a r k 37 Figure 3-1: Choosing the Wireshark components you wish to install 4. Click Next in the Additional Tasks window. 5. Select the location where you wish to install Wireshark, and then click Next. 6. When the dialog asks whether you want to install WinPcap, make sure the Install WinPcap box is checked, as shown in Figure 3-2, and then click Install. The installation process should begin. Figure 3-2: Selecting the option to install the WinPcap driver 7. 38 Chapter 3 About halfway through the Wireshark installation, the WinPcap installation should start. When it does, click Next in the introductory window, read the licensing agreement, and then click I Agree. 8. WinPcap should install on your computer. After this installation is complete, click Finish. 9. Wireshark should complete its installation. When it’s finished, click Next. 10. In the installation confirmation window, click Finish. Installing on Linux Systems The first step when installing Wireshark on a Linux system is to download the appropriate installation package. Not every version of Linux is supported, so don’t be surprised if your specific distribution doesn’t have its own install package. Typically, for system-wide software, root access is a requirement. However, local software installations compiled from source can usually be installed without root access. RPM-based Systems For RPM-based distributions, such as Red Hat Linux, download the appropriate installation package from the Wireshark web page. Then open a console window and enter the following (substituting the filename of your downloaded package as appropriate): rpm -ivh wireshark-0.99.3.i386.rpm If any dependencies are missing, install them and repeat the Wireshark installation. DEB-based Systems On a DEB-based distribution such as Debian or Ubuntu, you can install Wireshark from the system repositories. Open a console window and type the following: apt-get install wireshark Compiling from Source If your Linux distribution doesn’t use an automated package management software, the most effective way to install Wireshark is to compile it from source. To do this, complete the following steps: 1. Download the source package from the Wireshark web page. 2. Extract the archive by typing the following (substituting the filename of your downloaded package as appropriate): tar –jxvf wireshark-1.2.2.tar.bz2 3. Change into the newly created directory where the files were extracted. I n t r o d u c t i o n t o W i res h a r k 39 4. As a root-level user, configure the source so that it will build correctly for your distribution of Linux by using the command ./configure. If you wish to deviate from the default installation options, you can specify those options at this point in the installation. If any dependencies are missing, you will most likely receive an error. If installation is successful, you should see a message noting success, as shown in Figure 3-3. Figure 3-3: Successful output from the ./configure command 5. Enter the make command to build the source into a binary. 6. Initiate the final installation with make install. Installing on Mac OS X Systems There are a few caveats for installing Wireshark on Mac OS X Snow Leopard, but installation is not a difficult task and I’ve outlined the installation steps here. The steps are: 40 Chapter 3 1. Download the DMG package from the Wireshark web page. 2. Copy Wireshark.app to the Applications folder. 3. Open the Utilities folder in Wireshark.app. 4. In Finder, click Go, and select Go To Folder. Enter /usr/local/bin/ to open that directory. 5. Copy the contents of the Command Line folder into /usr/local/bin/. You must enter your password in order to do this. 6. In the Utilties folder, copy the ChmodBPF folder into the StartupItems folder. You will need to enter your password again to perform this action and complete the installation. Wireshark Fundamentals Once you’ve successfully installed Wireshark on your system, you can begin to familiarize yourself with it. Now you finally get to open your fully functioning packet sniffer and see . . . absolutely nothing! Okay, so Wireshark isn’t very interesting when you first open it. In order for things to really get exciting, you need to get some data. Your First Packet Capture To get packet data into Wireshark, you’ll perform your first packet capture. You may be thinking, “How am I going to capture packets when nothing is wrong on the network?” First, there is always something wrong on the network. If you don’t believe me, then go ahead and send an email to all of your network users and let them know that everything is working perfectly. Secondly, there doesn’t need to be something wrong in order for you to perform packet analysis. In fact, most packet analysts spend more time analyzing problem-free traffic than traffic that they are troubleshooting. You need a baseline to compare to in order to be able to effectively troubleshoot network traffic. For example, if you ever hope to solve a problem with DHCP by analyzing its traffic, you must understand what the flow of working DHCP traffic looks like. More broadly, in order to find anomalies in daily network activity, you must know what normal daily network activity looks like. When your network is running smoothly, you can set your baseline so that you’ll know what its traffic looks like in a normal state. So, let’s capture some packets! 1. Open Wireshark. 2. From the main drop-down menu, select Capture and then Interfaces. You should see a dialog listing the various interfaces that can be used to capture packets, along with their IP addresses. 3. Choose the interface you wish to use, as shown in Figure 3-4, and click Start, or simply click the interface under the Interface List section of the welcome page. Data should begin filling the window. I n t r o d u c t i o n t o W i res h a r k 41 Figure 3-4: Selecting an interface on which to perform your packet capture 4. Wait about a minute or so, and when you are ready to stop the capture and view your data, click the Stop button from the Capture drop-down menu. Once you have completed these steps and finished the capture process, the Wireshark main window should be alive with data. As a matter of fact, you might be overwhelmed by the amount of data that appears, but it will all start to make sense very quickly as we break down the main window of Wireshark one piece at a time. Wireshark’s Main Window You’ll spend most of your time in the Wireshark main window. This is where all of the packets you capture are displayed and broken down into a more understandable format. Using the packet capture you just made, let’s take a look at Wireshark’s main window, as shown in Figure 3-5. Packet List Packet Details Packet Bytes Figure 3-5: The Wireshark main window uses a three-pane design. 42 Chapter 3 The three panes in the main window depend on one another. In order to view the details of an individual packet in the Packet Details pane, you must first select that packet by clicking it in the Packet List pane. Once you’ve selected your packet, you can see the bytes that correspond with a certain portion of the packet in the Packet Bytes pane when you click that portion of the packet in the Packet Details pane. NOTE Notice that Figure 3-5 lists a few different protocols in the Packet List pane. There is no visual separation of protocols on different layers; all packets are shown as they are received on the wire. Here’s what each pane contains: Packet List The top pane displays a table containing all packets in the current capture file. It has columns containing the packet number, the relative time the packet was captured, the source and destination of the packet, the packet’s protocol, and some general information found in the packet. NOTE When I refer to traffic, I am referring to all packets displayed in the Packet List pane. When I refer to DNS traffic specifically, I mean the DNS protocol packets in the Packet List pane. Packet Details The middle pane contains a hierarchical display of information about a single packet. This display can be collapsed and expanded to show all of the information collected about an individual packet. Packet Bytes The lower pane—perhaps the most confusing—displays a packet in its raw, unprocessed form; that is, it shows what the packet looks like as it travels across the wire. This is raw information with nothing warm or fuzzy to make it easier to follow. Wireshark Preferences Wireshark has several preferences that can be customized to meet your needs. To access Wireshark’s preferences, select Edit from the main dropdown menu and click Preferences. You’ll see the Preferences dialog, which contains several customizable options, as shown in Figure 3-6. I n t r o d u c t i o n t o W i res h a r k 43 Figure 3-6: You can customize Wireshark using the Preferences dialog options. Wireshark’s preferences are divided into six major sections: User Interface These preferences determine how Wireshark presents data. You can change most options here according to your personal preferences, including whether or not to save window positions, the layout of the three main panes, the placement of the scroll bar, the placement of the Packet List pane columns, the fonts used to display the captured data, and the background and foreground colors. Capture These preferences allow you to specify options related to the way packets are captured, including your default capture interface, whether to use promiscuous mode by default, and whether to update the Packet List pane in real time. Printing The preferences in this section allow you to specify various options related to the way Wireshark prints your data. Name Resolution Through these preferences, you can activate features of Wireshark that allow it to resolve addresses into more recognizable names (including MAC, network, and transport name resolution) and specify the maximum number of concurrent name resolution requests. Statistics This section provides a few configurable options for Wireshark’s statistical features. Protocols The preferences in this section allow you to manipulate options related to the capture and display of the various packets Wireshark is capable of decoding. Not every protocol has configurable preferences, but some have several options that can be changed. These options are best left at their defaults unless you have a specific reason to change them. 44 Chapter 3 Packet Color Coding If you are anything like me, you may enjoy shiny objects and pretty colors. If that is the case, you probably got excited when you saw all those different colors in the Packet List pane, as in the example in Figure 3-7 (well, the figure is in black and white, but you get the idea). It may seem as if these colors are randomly assigned to each individual packet, but this is not the case. Figure 3-7: Wireshark’s color coding allows for quick protocol identification. Each packet is displayed as a certain color for a reason. These colors reflect the packet’s protocol. For example, all DNS traffic is blue, and all HTTP traffic is green. The color coding allows you to quickly differentiate between various protocols so that you don’t need to read the protocol field in the Packet List pane for each individual packet. You will find that this greatly speeds up the time it takes to browse through large capture files. Wireshark makes it easy to see which colors are assigned to each protocol through the Coloring Rules window, shown in Figure 3-8. To open this window, select View from the main drop-down menu and click Coloring Rules. Figure 3-8: The Coloring Rules window allows you to view and modify the coloring of packets. I n t r o d u c t i o n t o W i res h a r k 45 You can define your own coloring rules and modify existing ones. For example, to change the color used as the background for HTTP traffic from the default green to lavender, follow these steps: 1. Open Wireshark and access the Coloring Rules window (ViewColoring Rules). 2. Find the HTTP coloring rule in the coloring rules list and select it by clicking it once. 3. Click the Edit button. You’ll see the Edit Color Filter dialog, as shown in Figure 3-9. Figure 3-9: When editing a color filter, you can modify both the foreground and background colors. 4. Click the Background Color button. 5. Select the color you wish to use on the color wheel, and then click OK. 6. Click OK twice more to accept the changes and return to the main window. The main window should then reload itself to reflect the updated color scheme. As you work with Wireshark on your network, you will begin to notice that you deal with certain protocols more than others. Here’s where colorcoded packets can make your life a lot easier. For example, if you think that there is a rogue DHCP server on your network handing out IP leases, you could simply modify the coloring rule for the DHCP protocol so that it shows up in bright yellow (or some other easily identifiable color). This would allow you to pick out all DHCP traffic much more quickly, and make your packet analysis more efficient. These coloring rules can also be further extended by creating them based on your own custom filters. Now that you have Wireshark up and running, you’re ready to do some packet analysis. The next chapter describes how you can work with the packets you’ve captured. 46 Chapter 3 WORKING WITH CAPTURED PACKETS Now that you’ve been introduced to Wireshark, you’re ready to start capturing and analyzing packets. In this chapter, you’ll learn how to work with capture files, packets, and time-display formats. We’ll also cover more advanced options for capturing packets and dive into the world of filters. Working with Capture Files As you perform packet analysis, you will find that a good portion of the analysis you do will happen after your capture. Usually, you will perform several captures at various times, save them, and analyze them all at once. Therefore, Wireshark allows you to save your capture files to be analyzed later. You can also merge multiple capture files. Saving and Exporting Capture Files To save a packet capture, select FileSave As. You should see the Save File As dialog, as shown in Figure 4-1. You’re asked for a location to save your packet capture and for the file format you wish to use. If you do not specify a file format, Wireshark will use the default .pcap file format. Figure 4-1: The Save File As dialog allows you to save your packet captures. One of the more powerful features of the Save File As dialog is the ability to save a specific packet range. This is a great way to thin bloated packet capture files. You can choose to save only packets in a specific number range, marked packets, or packets visible as the result of a display filter (marked packets and filters are discussed later in this chapter). You can export your Wireshark capture data into several different formats for viewing in other media or for importing into other packet-analysis tools. Formats include plaintext, PostScript, comma-separated values (CSV), and XML. To export your packet capture, choose FileExport, and then select the format for the exported file. You will see a Save As dialog containing options related to that specific format. 48 Chapter 4 Merging Capture Files Certain types of analysis require the ability to merge multiple capture files. This is a common practice when comparing two data streams or combining streams of the same traffic that were captured separately. To merge capture files, open one of the capture files you want to merge and choose FileMerge to bring up the Merge with Capture File dialog, shown in Figure 4-2. Select the new file you wish to merge into the already open file, and then select the method to use for merging the files. You can prepend the selected file to the currently open one, append it, or merge the files chronologically based on their timestamps. Figure 4-2: The Merge with Capture File dialog allows you to merge two capture files. Working with Packets You will eventually encounter situations involving a very large number of packets. As the number of these packets grows into the thousands and even millions, you will need to be able to navigate through packets more efficiently. For this purpose, Wireshark allows you to find and mark packets that match certain criteria. You can also print packets for easy reference. W or k i n g w i t h C a p t u r e d P a ck e t s 49 Finding Packets To find packets that match particular criteria, open the Find Packet dialog, shown in Figure 4-3, by pressing CTRL-F. Figure 4-3: Finding packets in Wireshark based on specified criteria This dialog offers three options for finding packets: The Display filter option allows you to enter an expression-based filter that will find only those packets that satisfy that expression. The Hex value option searches for packets with a hexadecimal (with bytes separated by colons) value you specify. The String option searches for packets with a text string you specify. Table 4-1 shows examples of these search types. Table 4-1: Search Types for Finding Packets Search Type Examples Display filter not ip ip addr==192.168.0.1 arp Hex value 00:ff ff:ff 00:AB:B1:f0 String Workstation1 UserB domain Other options include the ability to select the window in which you want to search, the character set to use, and the search direction. You can extend the capability of your string searches by specifying the pane the search is performed in, setting the character set used, and making the search case sensitive. Once you’ve made your selections, enter your search criteria in the text box, and click Find to find the first packet that meets your criteria. To find the next matching packet, press CTRL-N; find the previous matching packet by pressing CTRL-B. 50 Chapter 4 Marking Packets After you have found the packets that match your criteria, you can mark those of particular interest. For example, you may want to mark packets to be able to save those packets separately or to find them quickly based on the coloration. Marked packets stand out with a black background and white text, as shown in Figure 4-4. (You can also sort out only marked packets when saving packet captures.) To mark a packet, right-click it in the Packet List pane and choose Mark Packet from the pop-up or click a packet in the Packet List pane and press CTRL-M. To unmark a packet, toggle this setting off using CTRL-M again. You can mark as many packets as you wish in a capture. To jump forward and backward between marked packets, press SHIFT-CTRL-N and SHIFT-CTRL-B, respectively. Figure 4-4: A marked packet is highlighted on your screen. In this example, packet 1 is marked and appears darker. Printing Packets Although most analysis will take place on the computer screen, you may need to print captured data. I often print out packets and tape them to my desk so that I can quickly reference their contents while doing other analysis. Being able to print packets to a PDF file is also very convenient, especially when preparing reports. To print captured packets, open the Print dialog by choosing FilePrint from the main menu. You will see the Print dialog, as shown in Figure 4-5. Figure 4-5: The Print dialog allows you to print the packets you specify. W or k i n g w i t h C a p t u r e d P a ck e t s 51 You can print the selected data as plaintext or PostScript, or to an output file. As with the Save File As dialog, you can print a specific packet range, marked packets only, or packets displayed as the result of a filter. You can also select which of Wireshark’s three main panes to print for each packet. Once you have selected the options, click Print. Setting Time Display Formats and References Time is of the essence—especially in packet analysis. Everything that happens on a network is time sensitive, and you will need to examine trends and network latency in nearly every capture file. Wireshark recognizes the importance of time and supplies several configurable options relating to it. In this section, we’ll look at time display formats and references. Time Display Formats Each packet that Wireshark captures is given a timestamp, which is applied to the packet by the operating system. Wireshark can show the absolute timestamp indicating the exact moment when the packet was captured, as well as the time in relation to the last captured packet and the beginning and end of the capture. The options related to the time display are found under the View heading on the main menu. The Time Display Format section, shown in Figure 4-6, lets you configure the presentation format as well as the precision of the time display. The presentation format option lets you choose various options for time display. The precision options allow you to set the time display precision to automatic or to a manual setting, such as seconds, milliseconds, microseconds, and so on. We will be changing these options later in the book, so you should familiarize yourself with them now. Packet Time Referencing Packet time referencing allows you to configure a certain packet so that all subsequent time calculations are done in relation to that specific packet. This feature is particularly handy when you are examining a series of sequential events that are triggered somewhere other than the start of the capture file. To set a time reference to a certain packet, select the reference packet in the Packet List pane, and then choose EditSet Time Reference from the main menu. To remove a time reference from a certain packet, select the packet and toggle off the EditSet Time Reference setting. When you enable a time reference on a particular packet, the Time column in the Packet List pane will display *REF*, as shown in Figure 4-7. Setting a packet time reference is useful only when the time display format of a capture is set to display the time in relation to the beginning of the capture. Any other setting will produce no usable results and will create a set of times that can be very confusing. 52 Chapter 4 Figure 4-6: Several time display formats are available. Figure 4-7: A packet with the packet time reference toggle enabled Setting Capture Options We walked through a very basic packet capture in Chapter 3. Wireshark offers quite a few more capture options in the Capture Options dialog, shown in Figure 4-8. To open this dialog, choose CaptureInterfaces and click the Options button next to the interface on which you want to capture packets. The Capture Options dialog has more bells and whistles than you can shake a stick at, all designed to give you more flexibility while capturing packets. It’s divided into Capture, Capture Files, Stop Capture, Display Options, and Name Resolution sections, which we’ll examine separately. Capture Settings The Interface drop-down list in the Capture section is where you can select the network interface to configure. The left drop-down list allows you to specify whether the interface is local or remote, and the right drop-down list shows all available capture interfaces. The IP address of the interface you have selected is displayed directly below this drop-down list. W or k i n g w i t h C a p t u r e d P a ck e t s 53 Figure 4-8: The Capture Options dialog The three checkboxes on the left side of the dialog box allow you to enable or disable promiscuous mode (always enabled by default), capture packets in the currently experimental pcap-ng format, and limit the size of each capture packet by bytes. The buttons on the right side of the Capture section let you access wireless and remote settings (as applicable). Beneath those is the buffer size option, which is available only on systems running Microsoft Windows. You can specify the amount of capture packet data that is stored in the kernel buffer before it is written to disk. (This is a value you won’t normally modify unless you begin noticing that you are dropping a lot of packets.) The Capture Filter option lets you specify a capture filter. Capture File(s) Settings The Capture File(s) section allows you to automatically store capture packets in a file, rather than capturing them first and then saving the file. Doing so offers you a great deal more flexibility in managing how packets are saved. You can choose to save them as a single file or a file set, or even use a ring buffer to manage the number of files created. To enable this option, enter a complete file path and name in the File text box. When capturing a large amount of traffic or performing long-term captures, file sets can prove particularly useful. A file set is a grouping of multiple 54 Chapter 4 files separated by a particular condition. To save to a file set, check the Use Multiple Files option here. Wireshark uses various triggers to manage saving to file sets based upon a file size or time condition. To enable these options, place a check mark next to the Next File Every option (the top one for file-size triggers and the one beneath that for time-based triggers), and then specify the value and unit on which to trigger. For instance, you can create a trigger that creates a new file after every 1MB of traffic captured, or after every minute of traffic captured, as shown in Figure 4-9. Figure 4-9: A file set created by Wireshark at one-minute intervals These options can also be used in combination. For example, if you specify both triggers, a new file will be created when 1MB of data is captured or when a minute has elapsed—whichever comes first. The Ring Buffer With option lets you use a ring buffer when creating a file set. This is used by Wireshark as a first in, first out (FIFO) method of writing multiple files. Although the term ring buffer has multiple meanings throughout information technology, for our purposes here, it is essentially a file set that specifies that upon completion of writing the last file, the first file is overwritten when more data must be saved to disk. You can check this option and specify the maximum number of files you wish to cycle through. For example, say you choose to use multiple files for your capture with a new file created every hour, and you set your ring buffer to 6. Once the sixth file has been created, the ring buffer will cycle back around and overwrite the first file rather than create a seventh file. This ensures that no more than six files (or in this case, hours) of data will remain on your hard drive, while still allowing new data to be written. The Stop Capture After option allows you to stop the current capture once a certain number of files have been created. Stop Capture Settings The Stop Capture section lets you stop the running capture after certain triggers are met. As with multiple file sets, you can trigger based on file size and time interval, as well as number of packets. These options can be used with the multiple file options previously discussed. W or k i n g w i t h C a p t u r e d P a ck e t s 55 Display Options The Display Options section controls how packets are shown as they are being captured. The Update List of Packets in Real Time option is self-explanatory and can be paired with the Automatic Scrolling in Live Capture option. When both of these options are enabled, all captured packets are displayed on the screen, with the most recently captured ones shown instantly. WARNING When paired, the Update List of Packets in Real Time and Automatic Scrolling in Live Capture options can be quite processor intensive, even when capturing a reasonable amount of data. Unless you have a specific need to see the packets in real time, it’s best to deselect both options. The Hide Capture Info Dialog option lets you suppress the display of a small window that shows the number and percentage of packets that have been captured, by protocol. Name Resolution Settings The Name Resolution section options allow you to enable automatic MAC (layer 2), network (layer 3), and transport (layer 4) name resolution for your capture. We’ll discuss name resolution in Wireshark more in depth, including its drawbacks, in Chapter 5. Using Filters Filters allow you to specify exactly which packets you have available for analysis. Simply stated, a filter is an expression that defines criteria for the inclusion or exclusion of packets. If there are packets you don’t want to see, you can write a filter that gets rid of them. If there are packets you want to see exclusively, you can write a filter that shows only those packets. Wireshark offers two main types of filters: Capture filters are specified when packets are being captured and will capture only those packets that are specified for inclusion/exclusion in the given expression. Display filters are applied to an existing set of captured packets in order to hide unwanted packets or show desired packets based on the specified expression. Let’s look at capture filters first. Capture Filters Capture filters are used during the actual packet-capturing process. One primary reason for using a capture filter is performance. If you know that you do not need to analyze a particular form of traffic, you can simply filter it out with a capture filter and save the processing power that would typically be used in capturing those packets. 56 Chapter 4 The ability to create custom capture filters comes in handy when dealing with large amounts of data. The analysis process can be sped up by ensuring that you are looking at only the packet relevant to the issue at hand. A simple example of when you might use a capture filter is when capturing traffic on a server with multiple roles. Suppose you are troubleshooting an issue with a service running on port 262. If the server you are analyzing runs several different services on a variety of ports, finding and analyzing only the traffic on port 262 can be quite a job in itself. To capture only the port 262 traffic, you can use a capture filter. To do so, you can use the Capture Options dialog, discussed earlier in this chapter, as follows: 1. 2. 3. 4. Choose CaptureInterfaces and click the Options button next to the interface on which you want to capture packets to open the Capture Options dialog. Select the interface you wish to capture packets on, and choose a capture filter. You can apply the capture filter by entering an expression next to the Capture Filter button. We want our filter to show only traffic inbound and outbound to port 262, so we enter port 262, as shown in Figure 4-10. (We’ll discuss expressions in more detail in the next section.) Once you have set your filter, click Start to begin the capture. Figure 4-10: Creating a capture filter in the Capture Options dialog After collecting an adequate sample, you should now see only the port 262 traffic and be able to more efficiently analyze this particular data. W or k i n g w i t h C a p t u r e d P a ck e t s 57 Capture/BPF Syntax Capture filters are applied by WinPcap and use the Berkeley Packet Filter (BPF) syntax. This syntax is common in several packet-sniffing applications, mostly because most packet-sniffing applications rely on the libpcap/WinPcap libraries, which allow for the use of BPFs. A knowledge of BPF syntax is crucial as you dig deeper into networks at the packet level. A filter created using the BPF syntax is called an expression, and each expression consists of one or more primitives. Primitives consist of one or more qualifiers (as listed in Table 4-2) followed by an ID name or number, as shown in Figure 4-11. Table 4-2: The BPF Qualifiers Qualifier Description Examples Type Identifies what the ID name or number refers to host, net, port Dir Specifies a transfer direction to or from the ID name or number src, dst Proto Restricts the match to a particular protocol ether, ip, tcp, udp, http, ftp Primitive Operator Primitive r lif ie r ie ua lif ID Q ua Q r ie ua lif ID Q Q ua lif ie r dst host 192.168.0.10 && tcp port 80 Figure 4-11: A sample capture filter Given the components of an expression, a qualifier of src and an ID of 192.168.0.10 would combine to form a primitive. This primitive alone is an expression that would capture traffic only with a source IP address of 192.168.0.10. You can use logical operators to combine primitives to create more advanced expressions. Three logical operators are available: Concatenation operator AND (&&) Alternation operator OR (||) Negation operator NOT (!) For example, the following expression will capture only traffic with a source IP address of 192.168.0.10 and a source or destination port of 80: src 192.168.0.10 && port 80 58 Chapter 4 Hostname and Addressing Filters Most filters you create will center on a particular network device or grouping of devices. Depending on the circumstances, filtering can be based on a device’s MAC address, IPv4 address, IPv6 address, or its DNS hostname. For example, say you’re curious about the traffic of a particular host that is interacting with a server on your network. From the server, you can create a filter using the host qualifier that captures all traffic associated with that host’s IPv4 address: host 172.16.16.149 If you are on an IPv6 network, you would filter based on an IPv6 address using the host qualifier as shown here: host 2001:db8:85a3::8a2e:370:7334 You can also filter based on a device’s hostname with the host qualifier, like so: host testserver2 Or, if you’re concerned that the IP address for a host might change, you can filter based on its MAC address as well by adding the ether protocol qualifier: ether host 00-1a-a0-52-e2-a0 The transfer direction qualifiers are often used in conjunction with filters like the ones in the previous examples to capture traffic based on whether it’s going to or coming from a host. For example, to capture only traffic coming from a particular host, add the src qualifier src host 172.16.16.149 To capture only data leaving server 172.16.16.149 that is destined for a questionable host, use the dst qualifier: dst host 172.16.16.149 When you don’t use a type qualifier (host, net, or port) with a primitive, the host qualifier is assumed. Therefore, the equivalent of the preceding example could exclude that qualifier: dst 172.16.16.149 W or k i n g w i t h C a p t u r e d P a ck e t s 59 Port and Protocol Filters In addition to filtering on hosts, you can filter based on the ports used in each packet. Port filtering can be used to filter based on services and applications that use known service ports. For example, here’s a simple filter to capture traffic only on port 8080: port 8080 To capture all traffic except that on port 8080, this will work: !port 8080 The port filters can be combined with transfer direction qualifiers. For example, to capture only traffic going to the web server listening on the standard HTTP port 80, use the dst qualifier: dst port 80 Protocol Filters Protocol filters let you filter packets based on certain protocols. They are used to match non-application-layer protocols that can’t simply be defined by the use of a certain port. Thus, if you want to see only ICMP traffic, you could use this filter: icmp To see everything but IPv6 traffic, this will do the trick: !ip6 Protocol Field Filters One of the real powers of the BPF syntax is the ability that it gives us to examine every byte of a protocol header in order to create very specific filters based on that data. The advanced filters that we’ll discuss in this section will allow you to retrieve a specific number of bytes from a packet beginning at a particular location. For example, suppose that we want to filter based on the type field of an ICMP header. The type field is located at the very beginning of a packet, which puts it at offset 0. To identify the location to examine within a packet, specify the byte offset in square brackets next to the protocol qualifier— icmp[0] in this example. This specification will return a 1-byte integer value that we can compare against. For instance, to get only ICMP packets that 60 Chapter 4 represent destination unreachable (type 3) messages, we use the equal to operator in our filter expression, as follows: icmp[0] == 3 To examine only ICMP packets that represent an echo request (type 8) or echo reply (type 0), use two primitives with the OR operator: icmp[0] == 8 || icmp[0] == 0 These filters work great, but they filter based on only 1 byte of information within a packet header. Luckily, you can also specify the length of the data to be returned in your filter expression by appending the byte length after the offset number within the square brackets, separated by a colon. For example, say we want to create a filter that captures all ICMP destination-unreachable, host-unreachable packets, identified by type 3, code 1. These are 1-byte fields, located next to each other at offset 0 of the packet header. To do this, we create a filter that checks 2 bytes of data beginning at offset 0 of the packet header, and compare that against the hex value 0301 (type 3, code 1), like this: icmp[0:2] == 0x0301 A common scenario is to capture only TCP packets with the RST flag set. We will cover TCP extensively in Chapter 6. For now, you just need to know that the flags of a TCP packet are located at offset 13. This is an interesting field because it is collectively 1 byte in size as the flags field, but each particular flag is identified by a single bit within this byte. Multiple flags can be set simultaneously in a TCP packet, so we can’t efficiently filter by a single tcp[13] value because several may represent the RST bit being set. Therefore, we must specify the location within the byte that we wish to examine by appending that location to the current primitive with a single ampersand (&). The RST flag is at the bit representing the number 4 within this byte, and the fact that this bit is set to 4 tells us that the flag is set. The filter looks like this: tcp[13] & 4 == 4 To see all packets with the PSH flag set, which is identified by the bit location representing the number 8, our filter would use that location instead: tcp[13] & 8 == 8 Sample Capture Filter Expressions You will often find that the success or failure of your analysis depends on your ability to create filters appropriate for your current situation. Table 4-3 shows a few of the capture filters that I use most frequently. W or k i n g w i t h C a p t u r e d P a ck e t s 61 Table 4-3: Commonly Used Capture Filters Filter Description tcp[13] & 32 == 32 TCP packets with the URG flag set tcp[13] & 16 == 16 TCP packets with the ACK flag set tcp[13] & 8 == 8 TCP packets with the PSH flag set tcp[13] & 4 == 4 TCP packets with the RST flag set tcp[13] & 2 == 2 TCP packets with the SYN flag set tcp[13] & 1 == 1 TCP packets with the FIN flag set tcp[13] == 18 TCP SYN-ACK packets ether host 00:00:00:00:00:00 (replace with your MAC) Traffic to or from your MAC address !ether host 00:00:00:00:00:00 (replace with your MAC) Traffic not to or from your MAC address broadcast Broadcast traffic only icmp ICMP traffic icmp[0:2] == 0x0301 ICMP destination unreachable, host unreachable ip IPv4 traffic only ip6 IPv6 traffic only udp UDP traffic only Display Filters A display filter is one that, when applied to a capture file, tells Wireshark to display only packets that match that filter. You can enter a display filter in the Filter text box above the Packet List pane. Display filters are used more often than capture filters because they allow you to filter packet data without actually omitting the rest of the data in the capture file. That way, if you need to revert back to the original capture, you can simply clear the filter expression. You might use a display filter to clear irrelevant broadcast traffic from a capture file; for instance, to clear ARP broadcasts from the Packet List pane when these packets don’t relate to the current problem being analyzed. However, because those ARP broadcast packets may be useful later, it’s better to filter them temporarily than it is to delete them. To filter out all ARP packets in the capture window, simply place your cursor in the Filter text box at the top of the Packet List pane and enter !arp to remove all ARP packets from the Packet List pane, as shown in Figure 4-12. To remove the filter, click the Clear button. Figure 4-12: Creating a display filter using the Filter text box above the Packet List pane 62 Chapter 4 The Filter Expression Dialog (the Easy Way) The Filter Expression dialog, shown in Figure 4-13, makes it easy for novice Wireshark users to create capture and display filters. To access this dialog, click the Capture Filter button in the Capture Options dialog, and then click the Expression button. The left side of the dialog lists all possible protocol fields. These fields specify all possible filter criteria. To create a filter, follow these steps: 1. To view the specific criteria fields associated with a protocol, expand that protocol by clicking the plus (+) symbol next to it. Once you find the criterion you want to base your filter on, click to select it. 2. Choose the way that your selected field will relate to the criterion value you supply. This relation is specified as equal to, greater than, less than, and so on. 3. Create your filter expression by specifying a criterion value that will relate to your selected field. You can define this value or select it from predefined ones programmed into Wireshark. 4. When you’ve finished, click OK to view the completed text-only version of your filter. The Filter Expression dialog is great for novice users, but once you get the hang of things, you will find that manually entering filter expressions greatly increases their efficiency. The display filter expression syntax structure is simple, yet extremely powerful. Figure 4-13: The Filter Expression dialog allows for easy creation of filters in Wireshark. W or k i n g w i t h C a p t u r e d P a ck e t s 63 The Filter Expression Syntax Structure (the Hard Way) You will most often use a capture or display filter to filter based on a specific protocol. For example, say you are troubleshooting a TCP problem and you want to see only TCP traffic in a capture file. If so, a simple tcp filter will do the job. Now let’s look at things from the other side of the fence. Imagine that in the course of troubleshooting your TCP problem, you have used the ping utility quite a bit, thereby generating a lot of ICMP traffic. You could remove this ICMP traffic from your capture file with the filter expression !icmp. Comparison operators allow you to compare values. For example, when troubleshooting TCP/IP networks, you will often need to view all packets that reference a particular IP address. The equal-to comparison operator (==) will allow you to create a filter showing all packets with an IP address of 192.168.0.1: ip.addr==192.168.0.1 Now suppose that you need to view only packets that are less than 128 bytes in length. You can use the “less than or equal to” operator (<=) to accomplish this goal in a filter expression like this: frame.len <= 128 Table 4-4 shows Wireshark’s comparison operators. Table 4-4: Wireshark Filter Expression Comparison Operators Operator Description == Equal to != Not equal to > Greater than < Less than >= Greater than or equal to <= Less than or equal to Logical operators allow you to combine multiple filter expressions into one statement, dramatically increasing the effectiveness of our filters. For example, say that we’re interested in displaying only packets to two IP addresses. We can use the or operator to create one expression that will display packets containing either IP address, like this: ip.addr==192.168.0.1 or ip.addr==192.168.0.2 Table 4-5 lists Wireshark’s logical operators. 64 Chapter 4 Table 4-5: Wireshark Filter Expression Logical Operators Operator Description and Both conditions must be true. or Either one of the conditions must be true. xor One and only one condition must be true. not Neither one of the conditions is true. Sample Display Filter Expressions Although the concepts related to creating filter expressions are fairly simple, you will need to use several specific keywords and operators when creating new filters for various problems. Table 4-6 shows some of the display filters that I use most often. For a complete list, see the Wireshark display filter reference at http://www.wireshark.org/docs/dfref/. Table 4-6: Commonly Used Display Filters Filter Description !tcp.port==3389 Clear RDP traffic tcp.flags.syn==1 TCP packets with the SYN flag set tcp.flags.rst==1 TCP packets with the RST flag set !arp Clear ARP traffic http All HTTP traffic tcp.port==23 || tcp.port 21 Cleartext admin traffic (Telnet or FTP) smtp || pop || imap Cleartext email traffic (SMTP, POP, or IMAP) Saving Filters Once you begin creating a lot of capture and display filters, you will find that you use certain ones frequently. Fortunately, you don’t need to type these in each time you want to use them, because Wireshark lets you save your filters for later use. To save a custom capture filter, follow these steps: 1. Select CaptureCapture Filters to open the Capture Filter dialog. 2. Create a new filter by clicking the New button on the left side of the dialog. 3. Enter a name for your filter in the Filter Name box. 4. Enter the actual filter expression in the Filter String box. 5. Click the Save button to save your filter expression in the list. To save a custom display filter, follow these steps: 1. Select AnalyzeDisplay Filters, or click the Filter button above the Packet List pane to open the Display Filter dialog, shown in Figure 4-14. W or k i n g w i t h C a p t u r e d P a ck e t s 65 Figure 4-14: The Display Filter dialog allows you to save filter expressions. 2. Create a new filter by clicking the New button on the left side of the dialog. 3. Enter a name for your filter in the Filter Name box. 4. Enter the actual filter expression in the Filter String box. 5. Click the Save button to save your filter expression in the list. Wireshark includes several built-in filters that are great examples of what a filter should look like. You will want to use them (together with the Wireshark help pages) when creating your own filters. We will use filters in examples throughout this book. 66 Chapter 4 ADVANCED WIRESHARK FEATURES Once you master the basics of Wireshark, the next step is to delve into its analysis and graphing capabilities. In this chapter, we’ll look at some of these powerful features, including the Endpoints and Conversations windows, the finer points of name resolution, protocol dissection, stream following, IO graphing, and more. Network Endpoints and Conversations In order for network communication to take place, you must have data flowing between at least two devices. An endpoint is a device that sends or receives data on the network. For instance, there are two endpoints in TCP/IP communication: the IP addresses of the systems sending and receiving data, such as 192.168.1.25 and 192.168.1.30. For example, on layer 2, the communication takes place between two physical NICs and their MAC addresses. If the NICs sending and receiving data have addresses of 00:ff:ac:ce:0b:de and 00:ff:ac:e0:dc:0f, those addresses are the endpoints of communication, as you can see in Figure 5-1. Conversation A Endpoint A Endpoint B 00:ff:ac:ce:0b:de 00:ff:ac:e0:dc:0f Conversation B Endpoint A 192.168.1.25 Endpoint B 192.168.1.30 Figure 5-1: Endpoints on a network A conversation on a network, like a conversation between two people, describes the communication that takes place between two hosts (endpoints). For example, Jim and Sally’s conversation might consist of, “Hey, how are you?” “I’m great! Yourself?” and “Couldn’t be better!” A conversation between 192.168.1.5 and 192.168.0.8 might look like “SYN,” “SYN/ACK,” and “ACK.” (We’ll look at the TCP/IP communication process in more detail in Chapter 6.) Viewing Endpoints When analyzing traffic, you may find that you can pinpoint a problem to a specific endpoint on a network. Wireshark’s Endpoints window (StatisticsEndpoints) shows several helpful statistics for each endpoint (see Figure 5-2), including the addresses and the number of packets and bytes transmitted and received by each. The tabs at the top of the window show all supported and recognized endpoints in the current capture file. To narrow the list of endpoints to specific protocols, click a tab. Check the Name resolution checkbox to use name resolution within the Endpoints window. You can use the Endpoints window to filter out specific packets for display in the Packet List pane. Right-click a specific endpoint to see several options, including the ability to create a filter to display only traffic related to this endpoint or all traffic excluding the selected endpoint. You can also export the endpoint directly into a colorization rule (coloring rules are discussed in Chapter 3). 68 Chapter 5 Figure 5-2: The Endpoints window lets you view each of the endpoints in a capture file. Viewing Network Conversations The Wireshark Conversations window (StatisticsConversations), shown in Figure 5-3, displays the addresses of the endpoints involved in the conversation listed as Address A and Address B, and the packets and bytes transmitted to and from each device. The conversations listed in this window are divided by the protocol they use, which can be selected via the tabs at the top of the window. Rightclicking a specific conversation allows you to create filters that may be useful, such as displaying all traffic transmitted from device A, all traffic received by device B, or all traffic communicated between devices A and B. Figure 5-3: The Conversations window lets you interact with each conversation in a capture file. Advanced Wireshark Features 69 Troubleshooting with the Endpoints and Conversations Windows lotsofweb.pcap NOTE The Endpoints and Conversations windows are crucial in network troubleshooting, especially when you’re trying to locate the source of a significant amount of traffic on the network or determine which one of your servers is talking the most. For example, when you open the file lotsofweb.pcap, you will see a lot of HTTP traffic representing multiple clients browsing the Internet. If you start by viewing the Endpoints window, you can immediately draw some conclusions about the traffic you are viewing. Looking at the IPv4 tab (see Figure 5-4), you see that your first address when sorting by bytes is the local 172.16.16.128 address, meaning this device on your network is the top talker (host responsible for the most communication) among your data set. The second address of 74.125.103.163 is a nonlocal address, so at this point, you can assume that you have one client talking to this IP address a lot, or that multiple clients are talking to it a moderate amount. A quick WHOIS (http://whois.arin.net/ui/) tells you that this IP address belongs to Google, and perusing the packets will identify this as YouTube traffic. IP address assignments are managed by different entities, depending on their geographic location. In our example here, we used the American Registry for Internet Numbers (ARIN), which is responsible for the IP address assignments of the United States (and some surrounding areas). Generally, you would perform a WHOIS for an IP at the website of the organization responsible for that IP. If you don’t know the geographic region and perform the search at the wrong registry site, you will be pointed toward the right location. Some other such address registries include AfriNIC (Africa), RIPE (Europe), and APNIC (Asia/Pacific). Figure 5-4: The Endpoints window shows which hosts are talking the most. 70 Chapter 5 Given this information, would it be safe to assume that your top communicating endpoints comprise your largest conversation? If you now open the Conversations window and go to the IPv4 tab, you can indeed verify this by sorting the list by bytes. In this view, you can see that the traffic is consistent with a video download, because the number of bytes transmitted from Address A (74.125.103.163) greatly outnumbers the number of bytes transmitted from Address B (172.16.16.128) (see Figure 5-5). Figure 5-5: The Conversations window confirms that the two top talkers are communicating with each other. You will see how to use the Endpoints and Conversations windows in practical scenarios later in this book. Protocol Hierarchy Statistics lotsofweb.pcap When dealing with extremely large capture files, you sometimes need to determine the distribution of protocols in the file—that is, what percentage of a capture is TCP, IP, DHCP, and so on. Rather than counting each packet and totaling the results, you can use Wireshark’s Protocol Hierarchy Statistics window, which is a great way to benchmark your network. For instance, if you know that 10 percent of your network traffic is usually made up of ARP traffic, and one day you take a capture that is 50 percent ARP traffic, then you know something might be wrong. With the lotsofweb.pcap file still open, open the Protocol Hierarchy Statistics window (shown in Figure 5-6) by choosing StatisticsProtocol Hierarchy. Notice that not all totals add up to exactly 100 percent. Because many of the packets contain multiple protocols from various layers, the count of each protocol as compared to each packet may be off. Nevertheless, you will still get an accurate view of the distribution of protocols in the capture file. Advanced Wireshark Features 71 Figure 5-6: The Protocol Hierarchy Statistics window shows the distribution of various protocols. The Protocol Hierarchy Statistics window is often one of the first windows you look at when examining traffic. It really gives you a good snapshot of the type of activity occurring on a network. As you begin to look at more traffic, you will eventually be able to profile the users and devices on a network just by looking at the distribution of protocols in use. I’ve found that simply by looking at traffic from a network segment, I can often immediately identify the network segment as belonging to the IT department due to the presence of administrative protocols such as ICMP or SNMP, or to the orderfulfillment department due to the high volume of SMTP traffic, or even to that pesky new intern in the corner with his World of Warcraft traffic! Name Resolution Network data is transported via various alphanumeric addressing systems that are often too long or complicated to remember, such as the physical hardware address 00:16:CE:6E:8B:24. Name resolution (also called name lookup) is the process a protocol uses to convert one identifying address into another. For example, while a computer might have the physical MAC address 00:16:CE:6E:8B:24, the DNS and ARP protocols allow us to see its name as Marketing-2.domain.com. By associating easy-to-read names with these cryptic addresses, we make them easier to remember and identify. 72 Chapter 5 Enabling Name Resolution To enable name resolution, open the Capture Options dialog by choosing CaptureOptions. As shown in Figure 5-7, three types of name resolution are available in Wireshark: MAC name resolution This type of name resolution uses the ARP protocol to attempt to convert layer 2 MAC addresses, such as 00:09:5B:01:02:03, into layer 3 addresses, such as 10.100.12.1. If attempts at these conversions fail, Wireshark will use the ethers file in its program directory to attempt conversion. Wireshark’s last resort is to convert the first 3 bytes of the MAC address into the device’s IEEEspecified manufacturer name, such as Netgear_01:02:03. Network name resolution This type of name resolution attempts to convert a layer 3 address, such as the IP address 192.168.1.50, into an easy-to-read DNS name such as MarketingPC1.domain.com. Transport name resolution This type of name resolution attempts to convert a port number into a name associated with it. An example of this would be to display port 80 as http. Figure 5-7: Enabling name resolution in the Capture Options dialog You can leverage the various name resolution tools to make your capture files more readable and to save a lot of time in certain situations. For example, you can use DNS name resolution to help readily identify the name of a computer you are trying to pinpoint as the source of a particular packet. Potential Drawbacks to Name Resolution Given its benefits, using name resolution may seem like a no-brainer, but there are some potential drawbacks, including the following: Name resolution can fail, typically because the name is unknown by the name server the query was sent to. Name resolution must take place every time you open a specific capture file because this information is not saved in the file. This means that if the servers that a file’s name resolution depends on are not available, name resolution will fail. The dependence on DNS may cause additional packets to be generated. The resulting traffic to resolve all DNS-based addresses will cloud your capture file. It’s typically a rule of thumb that you don’t want to see your own traffic on the wire when analyzing another issue. Advanced Wireshark Features 73 Name resolution requires additional processing overhead. If you are dealing with a very large capture file and are running low on memory, you may want to forgo the name resolution feature in order to conserve system resources. Protocol Dissection A protocol dissector allows Wireshark to break down a protocol into various sections so that it can be analyzed. For example, the ICMP protocol dissector allows Wireshark to take the raw data off the wire and format it as an ICMP packet. You can think of a dissector as the translator between the raw data flowing across the wire and the Wireshark program. In order for a protocol to be supported by Wireshark, it must have a dissector built into it (or you can write your own in C or Python). Wireshark uses several dissectors in unison to interpret each packet. It determines which dissectors to use by using its programmed logic and making a well-educated guess. Changing the Dissector wrongdissector .pcap 74 Chapter 5 Unfortunately, Wireshark does not always make the right choices when selecting the dissector to use on a packet. This is especially true when it is using a protocol on the network in a nonstandard configuration, such as a nondefault port (which is often configured by network administrators as a security precaution or by employees trying to circumvent access controls). Luckily, we can change the way Wireshark implements certain dissectors. For example, open the trace file wrongdissector.pcap. Notice that this file contains a bunch of SSL communication between two computers. SSL is the Secure Socket Layer protocol, which is used for secure encrypted communication between hosts. Under most normal circumstances, viewing SSL traffic in Wireshark won’t yield much usable information due to its encrypted nature. However, there is something definitely wrong here. If you peruse the contents of several of these packets by clicking them and examining the Packet Bytes pane, you will quickly find plaintext traffic. In fact, if you look at packet 4, you will find mention of the FileZilla FTP server application. The next few packets clearly display a request and response for both a username and a password. If this were actually SSL traffic, you wouldn’t be able to read any of the data contained in the packets, and you certainly wouldn’t see all usernames and passwords transmitted in the clear (see Figure 5-8). Given the information that is shown here, it is safe to assume that this is probably FTP traffic, rather than SSL traffic. This is most likely because this FTP traffic is using port 443, which is the standard port used for HTTPS (HTTP over SSL). Figure 5-8: Plaintext usernames and passwords? This looks more like FTP than SSL! To fix this problem, you can force Wireshark to use the FTP protocol dissector on these packets, a process referred to as a forced decode. To perform this process: 1. Right-click one of the SSL packets and select Decode As. This will bring up a dialog in which you can select the dissector you wish to use. 2. Tell Wireshark to decode all TCP source port 443 traffic using the FTP dissector by selecting destination (443) from the drop-down menu, and then selecting FTP under the Transport tab (see Figure 5-9). Figure 5-9: The Decode As dialog allows you to create forced decodes. 3. Once you have made your selections, click OK to see the changes immediately applied to the capture file. You should see the data nicely decoded so that you can analyze it from the Packet List pane without needing to dig deep into its individual bytes. WARNING The changes you make when creating a forced decode are not saved when you save the capture file and close Wireshark. You must re-create your forced decodes every time you open the capture file. Advanced Wireshark Features 75 You can use the forced decode feature multiple times within the same capture file. Because it can be hard to keep track of the forced decodes you have applied when you use more than one in a capture file, Wireshark does this for you. From the Decode As dialog, you can click the Show Current button to display all of the forced decodes you have created so far (see Figure 5-10). You can also clear them by clicking the Clear button. Viewing Dissector Source Code The beauty of working with an open Figure 5-10: Clicking the Show source application is that if you are conCurrent button shows all of the forced fused as to why something is occurring, decodes you have created for a capture file. you can look at the source code and find out the exact reason. This really comes in handy when trying to determine why a particular protocol has been interpreted incorrectly. Examining the source code of protocol dissectors can be done directly from the Wireshark website by hovering over the Develop link and clicking Browse the Code. This link will send you to the Wireshark subversion repository, where you can view the current release code for Wireshark as well as the code for previous releases. Clicking the releases folder will present you with all of the official Wireshark (and even Ethereal) releases, with the newest at the bottom of the list. Once you select the release you want to examine, the protocol dissectors can be found in the epan/dissectors folder. Each dissector is labeled with packets-protocolname.c. These files can be rather complex, but you will find they all follow a standard template and tend to be commented very well. You don’t need to be an expert C programmer to understand the basic function of each dissector. If you want to get a truly deep understanding of what you are seeing in Wireshark, I recommend at least taking a look at dissectors for some of the simpler protocols. Following TCP Streams http_google.pcap 76 Chapter 5 One of Wireshark’s most satisfying analysis features is its ability to reassemble TCP streams into an easily readable format. Rather than viewing data being sent from client to server in a bunch of small chunks, the Follow TCP Stream feature sorts the data to make it easier to view. This comes in handy when viewing plaintext application layer protocols such as HTTP, FTP, and so on. (We’ll take a closer look at how these common protocols work in the next chapter.) For example, let’s consider a simple HTTP transaction. Open the file http_google.pcap. Click any of the TCP or HTTP packets in the file, right-click the file, and choose Follow TCP Stream. This will bring up the TCP stream in a separate window (see Figure 5-11). Figure 5-11: The Follow TCP Stream window reassembles the communication in an easily readable format. Notice that the text displayed in this window is in two colors. The red text is used to signify traffic from the source to the destination, and the blue text is used to identify traffic in the opposite direction, from the destination to the source. The color relates to which side initiated the communication. For instance, in our example, the client initiated the connection to the web server, so it is displayed in red. Given this TCP stream, you can clearly see a great majority of the communication between these two hosts. This communication begins with an initial GET request for the web root director (/) and a response from the server that the request was successful in the form of an HTTP/1.1 200 OK. A similar pattern is repeated throughout the stream as individual files are requested by the client and the server responds with them. You are seeing a user browsing to the Google home page. You’re actually seeing what the end user is seeing, but from the inside out. In addition to viewing the raw data in this window, you can also search within the text, save it as a file, print it, or choose to view the data in ASCII, EBCDIC, hex, or C array format. These options can be found at the bottom of the Follow TCP Stream window. Following TCP streams will become your best friend when dealing with certain protocols. Advanced Wireshark Features 77 Packet Lengths download-slow .pcap The size of a single packet or group of packets can tell you a lot about a situation. Under normal circumstances, the maximum size of a frame on an Ethernet network is 1,518 bytes. When you subtract the Ethernet, IP, and TCP headers from this number, that leaves you with 1,460 bytes that can be used for the transmission of a layer 7 protocol header or data. With that knowledge, you can begin to use the distribution of packet lengths in a capture to make some educated guesses about the traffic. Opening the file download-slow.pcap will provide a great example of this. Once the file is opened, select StatisticsPacket Lengths and click Create Stat. The result is the window shown in Figure 5-12. Figure 5-12: The Packet Lengths window helps you make educated guesses about the traffic in the capture file. I’ve highlighted the section showing statistics for packets ranging from 1,280 to 2,559 bytes in size. Larger packets such as these typically indicate the transfer of data, whereas smaller packets indicate protocol control sequences. In this case, we have a fairly large percentage of large packets (66.43 percent). Without even seeing the packets in the file, we can conclude that the capture file contains one or multiple transfers of data. This could be in the form of an HTTP download, an FTP upload, or any other type of network communication where data is transferred between hosts. Most of the remaining packets (33.44 percent) are in the 40 to 79 bytes range. Packets in this range are usually TCP control packets that don’t carry data. Let’s consider the typical size of protocol headers. The Ethernet header is 14 bytes (plus a 4-byte CRC), the IP header is a minimum of 20 bytes, and a TCP packet with no data or options is also 20 bytes. This means that standard TCP control packets—such as SYN, ACK, RST, and FIN packets—will be around 54 bytes in size and fall in this range. Of course, the addition of IP or TCP options will increase this size. 78 Chapter 5 Examining packet lengths is a great way to get a bird’s-eye view of a capture. If there are a lot of large packets, it may be safe to assume that data is being transferred. If the majority of packets are small, you may assume that the capture consists of protocol control commands, without a great deal of data being passed. These are not hard-and-fast rules, but making such assumptions is sometimes safe before taking on deeper analysis. Graphing Graphs are the bread and butter of analysis, and one of the best ways to get an overview of a data set. Wireshark includes a few different graphing features to assist in understanding capture data, the first of which is its IO graphing capabilities. Viewing IO Graphs download-fast .pcap download-slow .pcap Wireshark’s IO Graphs window allows you to graph the throughput of data on a network. You can use such graphs to find spikes and lulls in data throughput, discover performance lags in individual protocols, and to compare simultaneous data streams. To view an example of the IO graph of a computer as it downloads a file from the Internet, open download-fast.pcap. Click any TCP packet to highlight it, and then select StatisticsIO Graphs. The IO Graphs window shows a graphical view of the flow of data over the course of the capture file. In the example in Figure 5-13, you can see that the download that this graph represents averages around 500 packets per tick and stays somewhat consistent throughout its course, tapering off at the end. Figure 5-13: The IO graph of the fast download is mostly consistent. Advanced Wireshark Features 79 Let’s compare this to an example of a slower download. Leave the current file open, open another instance of Wireshark, and open download-slow.pcap. Bring up the IO graph of this download, and you will see a much different story, as shown in Figure 5-14. Figure 5-14: The IO graph of the slow download is not consistent at all. This download has a transfer rate of between 0 and 100 packets per second, and is far from consistent, sometimes even momentarily nearing 0 packets per second. You can see these inconsistencies more clearly if you place the IO graphs of the two files next to each other (see Figure 5-15). Figure 5-15: Viewing multiple IO graphs side by side can be helpful in spotting variance. Notice the configurable options at the bottom of this window. You can create up to five unique filters (using the same syntax as a display or capture filter, as discussed in Chapters 6 and 7) and specify display colors for those filters. For instance, you could create filters to show ARP and DHCP traffic, and display the lines on the graph in red and blue so that you can more easily differentiate the throughput trends between these two protocol types. 80 Chapter 5 Round-Trip Time Graphing download-fast .pcap Another graphing feature of Wireshark is the ability to view a plot of roundtrip times for a given capture file. The round-trip time (RTT) is the time it takes for an acknowledgment to be received for a packet. Effectively, this is the time it took your packet to get to its destination and for the acknowledgment of that packet to be sent back to you. Analysis of RTTs is often done to find slow points or bottlenecks in communication and to determine if there is any latency. Let’s try out this feature. Open the file download-fast. View the RTT graph of this file by selecting a TCP packet, and then choosing StatisticsTCP Stream GraphRound Trip Time Graph. The RTT graph for download-fast.pcap is shown in Figure 5-16. Figure 5-16: The RTT graph of this download appears mostly consistent, with only a few stray values. Each point in the graph represents the RTT of a packet. The default view shows these values sorted by sequence number. You can click a plotted point within the graph to be taken directly to that packet in the Packet List pane. It appears as though the RTT graph for the fast download has RTT values mostly under 0.05 seconds, with a few slower points between 0.10 and 0.25 seconds. Although there are quite a few values above acceptable limits, the majority of the RTT values are okay, so this would be considered an acceptable RTT for a file download. Advanced Wireshark Features 81 Flow Graphing http_google.pcap The flow graphing feature is very useful for visualizing connections and showing the flow of data over time. Basically, a flow graph contains a columnbased view of a connection between hosts and organizes the traffic so you can interpret it visually. To create a flow graph, open the file http_google.pcap and select Statistics Flow Graph. You’ll see a small dialog that gives a few simple options regarding the packets to process and the flow type. Just accepting the default values will be fine for this example, so click OK to generate the flow graph (see Figure 5-17). Figure 5-17: The TCP flow graph allows us to visualize the connection much better. Expert Information download-slow .pcap The dissectors for each protocol in Wireshark define expert info that can be used to alert you about particular states within a packet using that protocol. These states are separated into four categories: Chat Basic information about the communication Note Unusual packets that may be part of normal communication Warning Unusual packets that are most likely not a part of normal communication Error 82 Chapter 5 An error in a packet or the dissector interpreting it For example, open the file download-slow.pcap. Then click Analyze, and select Expert Info Composite to bring up the Expert Infos window for this capture file (see Figure 5-18). Figure 5-18: The Expert Infos window shows information from the expert system programmed within the protocol dissectors. Notice that the window has tabs for each classification of information, and that there are no errors, 3 warnings, 18 notes, and 3 chats. On the tabs, the number not inside parentheses indicates the amount of unique messages, and the number inside parentheses is the total of occurrences for that category. All of the messages within this capture file are TCP-related, simply because the expert information system hasn’t really been implemented for any other protocols as of this writing. At this time, there are 14 expert info messages configured for TCP, and they are quite useful when troubleshooting capture files. These messages will flag an individual packet when it meets certain criteria, as listed here: Chat messages Window Update Sent by a receiver to notify a sender that the size of the TCP receive window has changed. Note messages TCP Retransmission Result of packet loss. Occurs when a duplicate ACK is received or the retransmission timer of a packet expires. Duplicate ACK When a host doesn’t receive the next sequence number it is expecting, it generates a duplicate ACK of the last data it received. Zero Window Probe Used to monitor the status of the TCP receive window after a zero window packet has been transmitted (covered in Chapter 9). Keep Alive ACK Sent in response to keep-alive packets. Advanced Wireshark Features 83 Zero Window Probe ACK packets. Sent in response to zero-window-probe Window is Full Used to notify a transmitting host that the receiver’s TCP receive window is full. Warning messages Previous Segment Lost Indicates packet loss. Occurs when an expected sequence number in a data stream is skipped. ACKed Lost Packet Occurs when an ACK packet is seen but the packet it is acknowledging is not. Keep Alive Triggered when a connection keep-alive packet is seen. Zero Window Seen when the size of the TCP receive window is reached and a zero window notice is sent out, requesting the sender to stop sending data. Out-of-Order Utilizes sequence numbers to detect when packets are received out of sequence. Fast Retransmission A retransmission that occurs within 20 milliseconds of a duplicate ACK. Error messages No Error Messages The meaning of these messages will become clearer as we study TCP in Chapter 6 and troubleshooting slow networks in Chapter 9. Although some of the features discussed in this chapter may seem as if they would be used in only obscure situations, you will probably find yourself using them more than you might expect. It is important that you familiarize yourself with these windows and options; I will be referencing them a lot in the next few chapters. 84 Chapter 5 COMMON LOWER-LAYER PROTOCOLS Whether troubleshooting latency issues, identifying malfunctioning applications, or zeroing in on security threats in order to be able to spot abnormal traffic, you must first understand normal traffic. In the next couple of chapters, you’ll learn how normal network traffic works at the packet level. We’ll look at the most common protocols, including the workhorses TCP, UDP, and IP, and more commonly used application-layer protocols such as HTTP, DHCP, and DNS. Each protocol section has at least one associated capture file, which you can download and work with directly. This chapter will specifically focus on the lower-layer protocols found in reference to layers 1 through 4 of the OSI model. These are arguably the most important chapters in this book. Skipping the discussion would be like cooking Sunday supper without cornbread. Even if you already have a good grasp of how each protocol functions, give these chapters at least a quick read in order to review the packet structure of each. Address Resolution Protocol Both logical and physical addresses are used for communication on a network. The use of logical addresses allows for communication between multiple networks and indirectly connected devices. The use of physical addresses facilitates communication on a single network segment for devices that are directly connected to each other with a switch. In most cases, these two types of addressing must work together in order for communication to occur. Consider a scenario where you wish to communicate with a device on your network. This device may be a server of some sort or just another workstation you need to share files with. The application you are using to initiate the communication is already aware of the IP address of the remote host (via DNS, covered in Chapter 7), meaning the system should have all it needs to build the layer 3 through 7 information of the packet it wants to transmit. The only piece of information it needs at this point is the layer 2 data link data containing the MAC address of the target host. MAC addresses are needed because a switch that interconnects devices on a network uses a Content Addressable Memory (CAM) table, which lists the MAC addresses of all devices plugged into each of its ports. When the switch receives traffic destined for a particular MAC address, it uses this table to know through which port to send the traffic. If the destination MAC address is unknown, the transmitting device will first check for the address in its cache; if it is not there, then it must be resolved through additional communication on the network. The resolution process that TCP/IP networking (with IPv4) uses to resolve an IP address to a MAC address is called the Address Resolution Protocol (ARP), which is defined in RFC 826. The ARP resolution process uses only two packets: an ARP request and an ARP response (see Figure 6-1). NOTE An RFC, or Request for Comments, is the official document that defines the implementation standards for protocols. You can search for RFC documentation at the RFC Editor home page, http://www.rfc-editor.org/. The transmitting computer sends out an ARP request that basically asks, “Howdy everybody, my IP address is XX.XX.XX.XX, and my MAC address is XX:XX:XX:XX:XX:XX. I need to send something to whoever has the IP address XX.XX.XX.XX, but I don’t know its hardware address. Will whoever has this IP address please respond back with your MAC address?” This packet is broadcast to every device on the network segment. Any device that does not have this IP address simply discards the packet. The device that does have this IP address sends an ARP reply with an answer like, “Hey, transmitting device, I’m who you are looking for with the IP address of XX.XX.XX.XX. My MAC address is XX:XX:XX:XX:XX:XX.” Once this resolution process is completed, the transmitting device updates its cache with the MAC-to-IP address association of this device, and it can begin sending data. 86 Chapter 6 ARP Request Source IP: 192.168.0.101 Source: MAC: f2:f2:f2:f2:f2:f2 Target IP: 192.168.0.1 Target MAC: 00:00:00:00:00:00 ARP Response Source IP: 192.168.0.1 Source: MAC: 02:f2:02:f2:02:f2 Target IP: 192.168.0.101 Target MAC: f2:f2:f2:f2:f2:f2 Figure 6-1: The ARP resolution process NOTE You can view the ARP table of a Windows host by typing arp –a from a command prompt. Seeing this process in action will help you to understand how it works. But before we look at some examples, let’s examine the ARP packet header. The ARP Header As shown in Figure 6-2, the ARP header includes the following fields: Hardware Type (type 1). The layer 2 type used. In most cases, this is Ethernet Protocol Type being used. The higher-layer protocol for which the ARP request is Hardware Address Length The length (in octets/bytes) of the hardware address in use (6 for Ethernet). Protocol Address Length The length (in octets/bytes) of the logical address of the specified protocol type. Operation The function of the ARP packet: either 1 for a request or 2 for a reply. Sender Hardware Address Sender Protocol Address The hardware address of the sender. The sender’s upper-layer protocol address. Target Hardware Address The intended receiver’s hardware address (zeroed in ARP requests). Target Protocol Address address. The intended receiver’s upper-layer protocol C om m o n L ow e r - L a y e r P ro t o co l s 87 Address Resolution Protocol Bit Offset 0 16 32 0–7 8–15 Hardware Type Protocol Type Hardware Address Length Protocol Address Length 48 Operation 64 Sender Hardware Address (1st 16 Bits) 80 Sender Hardware Address (2nd 16 Bits) 96 Sender Hardware Address (3rd 16 Bits) 112 Sender Protocol Address (1st 16 Bits) 128 Sender Protocol Address (2nd 16 Bits) 144 Target Hardware Address (1st 16 Bits) 160 Target Hardware Address (2nd 16 Bits) 176 Target Hardware Address (3rd 16 Bits) 192 Target Protocol Address (1st 16 Bits) 208 Target Protocol Address (2nd 16 Bits) Figure 6-2: The ARP packet structure Now open the file arp_resolution.pcap to see this resolution process in action. We’ll focus on each packet individually as we walk through this process. Packet 1: ARP Request arp_resolution .pcap The first packet is the ARP request, as shown in Figure 6-3. We can confirm that this packet is a true broadcast packet by examining the Ethernet header in Wireshark’s Packet Details pane. The packet’s destination address is ff:ff:ff:ff:ff:ff . This is the Ethernet broadcast address, and anything sent to it will be broadcast to all devices on the current network segment. The source address of this packet in the Ethernet header is listed as our MAC address . Figure 6-3: An ARP request packet 88 Chapter 6 Given this structure, we can discern that this is indeed an ARP request on an Ethernet network using IP. The sender’s IP address (192.168.0.114) and MAC address (00:16:ce:6e:8b:24) are listed , as is the IP address of the target (192.168.0.1) . The MAC address of the target—the information we are trying to get—is unknown, so the target MAC is listed as 00:00:00:00:00:00 . Packet 2: ARP Response In our response to the initial request (see Figure 6-4), the Ethernet header now has a destination address of the source MAC address from the first packet. The ARP header looks similar to that of the ARP request, with a few changes: The packet’s operation code (opcode) is now 0x0002 , indicating a reply rather than a request. The addressing information is reversed—the sender MAC address and IP address are now the target MAC address and IP address . Most important, all of the information is present, meaning we now have the MAC address (00:13:46:0b:22:ba) of our host at 192.168.0.1. Figure 6-4: An ARP reply packet Gratuitous ARP arp_gratuitous Where I come from, when something is done “gratuitously,” that usually carries a negative connotation. A gratuitous ARP, however, is actually a good thing. In many cases, a device’s IP address can change. When this happens, the IP-to-MAC address mappings that hosts on the network have in their caches will be invalid. To prevent this from causing communication errors, a gratuitous ARP packet is transmitted on the network to force any device that receives it to update its cache with the new IP-to-MAC address mapping (see Figure 6-5). C om m o n L ow e r - L a y e r P ro t o co l s 89 Source IP: 192.168.0.101 Source: MAC: f2:f2:f2:f2:f2:f2 Target IP: 192.168.0.101 Target MAC: 00:00:00:00:00:00: Figure 6-5: The gratuitous ARP process A few different scenarios can spawn a gratuitous ARP packet. One of the most common is the changing of an IP address. Open the capture file arp_gratuitous.pcap, and you’ll see this in action. This file contains only a single packet (see Figure 6-6) because that’s all that’s involved in gratuitous ARP. Figure 6-6: A gratuitous ARP packet Examining the Ethernet header, you can see that this packet is sent as a broadcast so that all hosts on the network receive it . The ARP header looks like an ARP request, except that the sender IP address and the target IP address are the same. When received by other hosts on the network, this packet will cause them to update their ARP tables with the new IP-to-MAC address association. Because this ARP packet is unsolicited but results in a client updating its ARP cache, the packet is considered gratuitous. You will notice gratuitous ARP packets in a few different situations. As mentioned, changing a device’s IP address will generate one. Also, some operating systems will perform a gratuitous ARP on startup. Additionally, you may notice gratuitous ARP packets on systems that use them for load-balancing of incoming traffic. 90 Chapter 6 Internet Protocol The primary purpose of protocols at layer 3 of the OSI model is to allow for communication between networks. As you just saw, MAC addresses are used for communication on a single network at layer 2. In much the same fashion, layer 3 is responsible for addresses for internetwork communication. A few protocols can do this, but the most common is the Internet Protocol (IP). Here, we’ll examine IP version 4 (IPv4), which is defined in RFC 791. In order to understand the functionality of IPv4, you need to know how traffic flows between networks. IPv4 is the workhorse of the communication process and is ultimately responsible for carrying data between devices, regardless of where the communication endpoints are located. A simple network in which all devices are connected via hubs or switches is called a local area network (LAN). When you want to connect two LANs together, you can do so with a router. Complex networks can consist of thousands of LANs connected through thousands of routers worldwide. The Internet itself is a collection of millions of LANs and routers. IP Addresses IP addresses are 32-bit addresses used to uniquely identify devices connected to a network. It is a bit much to expect someone to remember a sequence of ones and zeros that is 32 characters long, so IP addresses are written in dottedquad notation. In dotted-quad notation, each of the four sets of ones and zeros that make up an IP address is converted to base 10 and represented as a number between 0 and 255 in the format A.B.C.D (see Figure 6-7). For example, consider the IP address 11000000 10101000 00000000 00000001. This value is obviously a bit much to remember or notate. Fortunately, using dottedquad notation, we can represent it as 192.168.0.1. IP addresses are divided into four distinct parts for a reason. An IP address consists of two parts: a network address and a host address. The network address identifies the LAN the device is connected to, and the host address identifies the device itself on that network. The determination of which part of the IP address belongs to the network or host address is not always the same. This is actually determined by another set of addressing information called the network mask (netmask), sometimes also referred to as a subnet mask. 11000000 10101000 00000000 00000001 192 168 0 1 192.168.0.1 Figure 6-7: Dotted-quad IPv4 address notation C om m o n L ow e r - L a y e r P ro t o co l s 91 The netmask identifies which portion of the IP address belongs to the network address and which part belongs to the host address. The netmask number is also 32 bits long, and every bit that is set to a 1 identifies the portion of the IP address that is reserved for the network address. The remaining bits set to 0 identify the host address. For example, consider the IP address 10.10.1.22, represented in binary as 00001010 00001010 00000001 00010110. In order to determine the allocation of each section of the IP address, we can apply our netmask. In this case, our netmask is 11111111 11111111 00000000 00000000. This means that the first half of the IP address is reserved for the network address (10.10 or 00001010 00001010) and the last half of the IP address identifies the individual host on this network (.1.22 or 00000001 00010110), as shown in Figure 6-8. 10.10.1.22 00001010 00001010 00000001 00010110 255.255.0.0 11111111 11111111 00000000 00000000 10.10.1.22 Network Network Host Host Figure 6-8: The netmask determines the allocation of the bits in an IP address. Netmasks can also be written in dotted-quad notation. For example, the netmask 11111111 11111111 00000000 00000000 is written as 255.255.0.0. IP addresses and netmasks are commonly written in Classless Inter-Domain Routing (CIDR) notation for shorthand. In this form, an IP address is written in full, followed by a forward slash (/) and the number of bits that represent the network portion of the IP address. For example, an IP address of 10.10.1.22 and a netmask of 255.255.0.0 would be written in CIDR notation as 10.10.1.22/16. The IPv4 Header The source and destination IP addresses are the crucial components of the IPv4 packet header, but that’s not all of the IP information you will find within a packet. The IP header is actually quite complex compared with the ARP packet we just examined. It includes a lot of extra functionality that helps IP do its job. As shown in Figure 6-9, the IPv4 header has the following fields: Version The version of IP being used Header Length The length of the IP header Type of Service A precedence flag and type of service flag, which are used by routers to prioritize traffic Total Length packet The length of the IP header and the data included in the Identification A unique identification number used to identify a packet or sequence of fragmented packets 92 Chapter 6 Flags Used to identify whether or not a packet is part of a sequence of fragmented packets Fragment Offset If a packet is a fragment, the value of this field is used to reassemble the packets in the correct order. Time to Live Defines the lifetime of the packet, measured in hops/seconds through routers Protocol Used to identify the type of packet coming next in the sequence of packets Header Checksum An error-detection mechanism used to verify the contents of the IP header are not damaged or corrupted Source IP Address The IP address of the host that sent the packet The IP address of the packet’s destination Destination IP Address Options Reserved for additional IP options. It includes options for source routing and timestamps. Data The actual data being transmitted with IP Internet Protocol Bit Offset 0–3 4–7 8–15 0 Version HDR Length Type of Service 32 64 16–18 Identification Time to Live 19–31 Total Length Flags Protocol Fragment Offset Header Checksum 96 Source IP Address 128 Destination IP Address 160 Options 160 or 192+ Data Figure 6-9: The IPv4 packet structure Time to Live ip_ttl_source.pcap ip_ttl_dest.pcap The Time to Live (TTL) value defines a period of time that can be elapsed or a maximum number of routers a packet can traverse before the packet is discarded. A TTL is defined when a packet is created, and generally is decremented by 1 every time the packet is forwarded by a router. For example, if a packet has a TTL of 2, the first router it reaches will decrement the TTL to 1 and forward it to the second router. This router will then decrement the TTL to 0, and if the final destination of the packet is not on that network, the packet will be discarded (see Figure 6-10). Since the TTL value is technically time-based, a very busy router could decrement the TTL value by more than 1, but generally, it’s safe to assume that one routing device will decrement a TTL by only 1 most of the time. C om m o n L ow e r - L a y e r P ro t o co l s 93 TTL 1 TTL 2 TTL 1 TTL 3 TTL 2 TTL 1 Figure 6-10: The TTL of a packet decreases every time it traverses a router. Why is the TTL value important? Typically, we are concerned about the lifetime of a packet only in terms of the time that it takes to travel from its source to its destination. However, consider a packet that must travel to a host across the Internet while traversing dozens of routers. At some point in that packet’s path, it could encounter a misconfigured router and lose the path to its final destination. In such a case, the router could do a number of things, one of which could result in the packet being forwarded around a network in a never-ending loop. If you have any programming background at all, you know that a loop that never ends can cause all sorts of issues, typically resulting in a program or an entire operating system crashing. Theoretically, the same thing could occur with packets on a network. The packets would keep looping between routers. As the number of looping packets increased, the available bandwidth on the network would deplete until a DoS condition occurred. To prevent this potential problem, the TTL field of the IP header was created. Let’s look at an example of this in Wireshark. The file ip_ttl_source.pcap contains two ICMP packets. ICMP (discussed later in this chapter) utilizes IP to deliver packets, as we can see by expanding the IP header section in the Packet Details pane (see Figure 6-11). Figure 6-11: The IP header of the source packet 94 Chapter 6 You can see that the version of IP being used is version 4 , the IP header length is 20 bytes , the total length of the header and payload is 60 bytes , and the value of the TTL field is 128 . The primary purpose of an ICMP ping is to test communication between devices. Data is sent from one host to another as a request, and the receiving host should send that data back as a reply. In this file, we have one device with the address of 10.10.0.3 sending an ICMP request to a device with the address 192.168.0.128 . This initial capture file was created at the source host, 10.10.0.3. Now open the file ip_ttl_dest.pcap. In this file, the data was captured at the destination host, 192.168.0.128. Expand the IP header of the first packet in this capture to examine its TTL value (see Figure 6-12). Figure 6-12: The IP header tells us that the TTL has been lowered by 1. You should immediately notice that the TTL value is 127 , one less than the original TTL of 128. Without even knowing the architecture of the network, we can conclude that these two devices are separated by one router and that the passage through that router reduced the TTL value by one. IP Fragmentation ip_frag_source .pcap NOTE Packet fragmentation is a feature of IP that permits reliable delivery of data across varying types of networks by splitting a data stream into smaller fragments. The fragmentation of a packet is based on the maximum transmission unit (MTU) size of the layer 2 data link protocol in use and the configuration of the devices using these layer 2 protocols. In most cases, the layer 2 data link protocol in use is Ethernet. Ethernet has a default MTU of 1500, which means that the maximum packet size that can be transmitted over an Ethernet network is 1,500 bytes (not including the 14-byte Ethernet header itself). Although there are standard MTU settings, the MTU of a device can be reconfigured manually in most cases. An MTU setting is assigned on a per-interface basis and can be modified on Windows and Linux systems, as well as on the interfaces of managed routers. C om m o n L ow e r - L a y e r P ro t o co l s 95 When a device prepares to transmit an IP packet, it determines whether it must fragment the packets by comparing the packet’s data size to the MTU of the network interface from which the packet will be transmitted. If the data size is greater than the MTU, the packet will be fragmented. Fragmenting a packet involves the following steps: 1. The device splits the data into the number of packets required for successful data transmission. 2. The Total Length field of each IP header is set to the segment size of each fragment. 3. The More Fragments flag is set to 1 on all packets in the data stream, except for the last one. 4. The Fragment Offset field is set in the IP header of the fragments. 5. The packets are transmitted. The file ip_frag_source.pcap was taken from a computer with the address 10.10.0.3, transmitting a ping request to a device with address 192.168.0.128. Notice that the Info column of the Packet List pane lists two fragmented IP packets, followed by the ICMP (ping) request. Begin by examining the IP header of packet 1 (see Figure 6-13). You can see that this packet is part of a fragment based on the More Fragments and Fragment Offset fields. Packets that are fragments either will have a positive Fragment Offset value or will have the More Fragments flag set. In the first packet, the More Fragments flag is set , indicating that the receiving device should expect to receive another packet in this sequence. The Fragment Offset is set to 0 , indicating this packet is the first in a series of fragments. Figure 6-13: More fragments and fragment offset values can indicate a fragmented packet. 96 Chapter 6 The IP header of the second packet (see Figure 6-14) also has the More Fragments flag set , but in this case, the fragment offset value is 1480 . This is indicative of the 1,500-byte MTU, minus 20 bytes for the IP header. Figure 6-14: The Fragment Offset value increases based on the size of the packets. The third packet (see Figure 6-15) does not have the More Fragments flag set , which marks it as the last fragment in the data stream, and the Fragment Offset is set to 2960 , the result of 1480 + (1500 – 20). These fragments can all be identified as part of the same series of data because they have the same values in the Identification field of the IP header . Figure 6-15: More Fragments is not set, indicating the last fragment. C om m o n L ow e r - L a y e r P ro t o co l s 97 Transmission Control Protocol The ultimate goal of the Transmission Control Protocol (TCP) is to provide endto-end reliability for the delivery of data. TCP, which is defined in RFC 793, operates at layer 4 of the OSI model. It handles data sequencing and error recovery, and ultimately ensures that data gets where it is supposed to go. A lot of commonly used application-layer protocols rely on TCP and IP to deliver packets to their final destination. The TCP Header TCP provides a great deal of functionality, as reflected in the complexity of its header. As shown in Figure 6-16, the following are the TCP header fields: Source Port The port used to transmit the packet. The port to which the packet will be transmitted. Destination Port Sequence Number The number used to identify a TCP segment. This field is used to ensure that parts of a data stream are not missing. Acknowledgment Number The sequence number that is to be expected in the next packet from the other device taking part in the communication. Flags The URG, ACK, PSH, RST, SYN, and FIN flags for identifying the type of TCP packet being transmitted. Window Size The size of the TCP receiver buffer in bytes. Checksum Used to ensure the contents of the TCP header and data are intact upon arrival. Urgent Pointer If the URG flag is set, this field is examined for additional instructions for where the CPU should begin reading the data within the packet. Options Various optional fields that can be specified in a TCP packet. Transmission Control Protocol Bit Offset 0–3 0 4–7 Source Port Destination Port Sequence Number 64 Acknowledgment Number 128 Data Offset Reserved Flags Window Size Checksum 160 Figure 6-16: The TCP header Chapter 6 16–31 32 96 98 8–15 Urgent Pointer Options TCP Ports tcp_ports.pcap All TCP communication takes place using source and destination ports, which can be found in every TCP header. A port is like the jack on an old telephone switchboard. A switchboard operator would monitor a board of lights and plugs. When a light lit up, he would connect with the caller, ask who she wanted to talk to, and then connect her to her destination by plugging in a cable. Every call needed to have a source port (the caller) and a destination port (the recipient). TCP ports work in much the same fashion. In order to transmit data to a particular application on a remote server or device, a TCP packet must know the port the remote service is listening on. If you try to access an application on a port other than the one configured for use, the communication will fail. The source port in this sequence is not incredibly important and can be selected randomly. The remote server will simply determine the port to communicate with from the original packet it is sent (see Figure 6-17). Source Port 1024/Dest Port 80 Source Port 80/Dest Port 1024 Web Server Listening on Port 80 Client Source Port 3221/Dest Port 25 Source Port 25/Dest Port 3221 Client Email Server Listening on Port 25 Figure 6-17: TCP uses ports to transmit data. There are 65,535 ports available for use when communicating with TCP. We typically divide these into two groups: The standard port group is from 1 through 1023 (ignoring 0 because it is reserved). Particular services use standard ports, which generally lie within the standard port grouping. The ephemeral port group is from 1024 through 65535 (although some operating systems have different definitions for this). Only one service can communicate on a port at any given time, so modern operating systems select source ports randomly in an effort to make communications unique. These source ports are typically located in the ephemeral range. Let’s examine a couple of different TCP packets and identify the port numbers they are using by opening the file tcp_ports.pcap. In this file, we have the HTTP communication of a client browsing to two websites. As mentioned previously, HTTP uses TCP for communication, which makes it a great example of standard TCP traffic. In the first packet in this file (see Figure 6-18), the first two values represent the packet’s source port and destination port. This packet is being sent from 172.16.16.128 to 212.58.226.142. The source port is 2826 , an ephemeral C om m o n L ow e r - L a y e r P ro t o co l s 99 port. (Remember that source ports are chosen at random by the operating system, although they can increment from that random selection.) The destination port is a standard port, port 80 , the standard port used for web servers using HTTP. Figure 6-18: The source and destination ports can be found in the TCP header. Notice that Wireshark labels these ports as slc-systemlog (2826) and http (80). Wireshark maintains a list of ports and their most common uses. Although these are primarily standard ports, many ephemeral ports have commonly used services associated with them. The labeling of these ports can be quite confusing, so it’s typically best to disable it by turning off transport name resolution. To do so, choose EditPreferencesName Resolution, and then remove the check mark next to Enable Transport Name Resolution. If you wish to leave this functionality enabled but want to change how Wireshark identifies a certain port, you can do so by modifying the Services file located in the Wireshark program directory, which is based on the Internet Assigned Numbers Authority (IANA) common ports listing. The second packet is being sent back from 212.58.226.142 to 172.16.16.128 (see Figure 6-19). As with the IP addresses, the source and destination ports are now also switched . Figure 6-19: The source and destination port numbers are switched for reverse communication. 100 Chapter 6 All TCP-based communication works the same way: a random source port is chosen to communicate to a known destination port. Once this initial packet is sent, the remote device communicates with the source device using the established ports. There is one more communication stream included in this sample capture file. See if you can locate the port numbers it uses for communication. NOTE As we progress through this book, you will learn more about the ports associated with common protocols and services. Eventually, you will be able to profile services and devices by the ports they use. For a thorough list of common ports, see http://www .iana.org/assignments/port-numbers/. The TCP Three-Way Handshake tcp_handshake .pcap All TCP-based communication must begin with a handshake between two hosts. This handshake process serves a few different purposes: It allows the transmitting host to ensure that the destination host is up and able to communicate. It lets the transmitting host check that it is listening on the port on which the source is attempting to communicate. It allows the transmitting host to send its starting sequence number to the recipient so that both hosts can keep the stream of packets in proper sequence. The TCP handshake occurs in three separate steps, as shown in Figure 6-20. In the first step, the device that wants to communicate (host A) sends a TCP packet to its target (host B). This initial packet contains no data other than the lower-layer protocol headers. The TCP header in this packet has the SYN flag set and includes the initial sequence number and maximum segment size (MSS) that will be used for the communication process. Host B responds to this packet by sending a similar packet with the SYN and ACK flags set, along with its initial sequence number. Finally, host A sends one last packet to host B with only the ACK flag set. Once this process is completed, both devices should have all of the information they need to begin communicating properly. SYN SYN/ACK Host A ACK Host B Figure 6-20: The TCP three-way handshake Co m m o n Lo w e r - La y e r P r o t oc o ls 101 NOTE TCP packets are often referred to by the flags they have set. For example, rather than refer to a packet as a TCP packet with the SYN flag set, we call that packet a SYN packet. As such, the packets used in the TCP handshake process are referred to as SYN, SYN/ACK, and ACK. To see this process in action, open tcp_handshake.pcap. Wireshark includes a feature that replaces the sequence numbers of TCP packets with relative numbers for easier analysis. For our purposes, we’ll disable this feature in order to see the actual sequence numbers. To disable it, choose Edit Preferences, expand the Protocols heading, and choose TCP. In the window, uncheck the box next to Relative Sequence Numbers and Window Scaling, and then click OK. The first packet in this capture represents our initial SYN packet (see Figure 6-21). The packet is transmitted from 172.16.16.128 on port 2826 to 212.58.226.142 on port 80. We can see here that the sequence number transmitted is 3691127924 . Figure 6-21: The initial SYN packet The second packet in the handshake is the SYN/ACK response from 212.58.226.142 (see Figure 6-22). This packet also contains this host’s initial sequence number (233779340) and an acknowledgment number (3691127925) . The acknowledgment number shown here is one more than the sequence number included in the previous packet, because this field is used to specify the next sequence number the host expects to receive. 102 Chapter 6 Figure 6-22: The SYN/ACK response The final packet is the ACK packet sent from 172.16.16.128 (see Figure 6-23). This packet, as expected, contains the sequence number 3691127925 as defined in the previous packet’s Acknowledgment Number field. Figure 6-23: The final ACK A handshake occurs before every TCP communication sequence. When sorting through a busy capture file in search of the beginning of a communication sequence, the sequence of SYN-SYN/ACK-ACK is a great marker. TCP Teardown tcp_teardown .pcap Most greetings eventually have a good-bye, and in the case of TCP, every handshake has a teardown. The TCP teardown is used to gracefully end a connection between two devices after they have finished communicating. This process involves four packets, and it utilizes the FIN flag to signify the end of a connection. Co m m o n Lo w e r - La y e r P r o t oc o ls 103 In a teardown sequence, host A tells host B that it is finished communicating by sending a TCP packet with the FIN and ACK flags set. Host B responds with an ACK packet, and transmits its own FIN/ACK packet. Host A responds with an ACK packet, ending the communication process. This process is illustrated in Figure 6-24. FIN/ACK ACK FIN/ACK Host A Host B ACK Figure 6-24: The TCP teardown process To view this process in Wireshark, open the file tcp_teardown.pcap. Beginning with the first packet in the sequence, (see Figure 6-25), you can see that the device at 67.228.110.120 initiates the teardown sequence by sending a packet with the FIN and ACK flags set . Figure 6-25: The FIN/ACK initiates the teardown process. Once this packet is sent, 172.16.16.128 responds with an ACK packet to acknowledge receipt of the first packet, and it sends a FIN/ACK packet. The process is complete when 67.228.110.120 sends a final ACK. At this point, the communication between the two devices ends, and they must complete a new TCP handshake in order to begin communicating again. 104 Chapter 6 TCP Resets tcp_ refuseconnection .pcap In an ideal world, every connection would end gracefully with a TCP teardown. In reality, connections often end abruptly. For example, this may occur due to a potential attacker performing a port scan or simply a misconfigured host. In these cases, a TCP packet with the RST flag set is used. The RST flag is used to indicate a connection was closed abruptly or to refuse a connection attempt. The file tcp_refuseconnection.pcap displays an example of network traffic that includes a RST packet. The first packet in this file is from the host at 192.168.100.138, which is attempting to communicate with 192.168.100.1 on port 80. What this host doesn’t know is that 192.168.100.1 isn’t listening on port 80 because it is a Cisco router, with no web interface configured, meaning that no service is listening for connections on port 80. In response to this attempted communication, 192.168.100.1 sends a packet to 192.168.100.138, telling it that communication won’t be possible over port 80. Figure 6-26 shows the abrupt end to this attempted communication in the TCP header of the second packet. The RST packet contains nothing other than RST and ACK flags , and no further communication follows. An RST packet ends communication whether it arrives at the beginning of an attempted communication sequence, as in this example, or is sent in the middle of the communication between hosts. Figure 6-26: The RST and ACK flags signify the end of communication. User Datagram Protocol The User Datagram Protocol (UDP) is the other layer 4 protocol commonly used on modern networks. While TCP is designed for reliable data delivery with built-in error checking, UDP aims to provide speedy transmission. For this reason, UDP is a best-effort service, commonly referred to as a connectionless Co m m o n Lo w e r - La y e r P r o t oc o ls 105 protocol. A connectionless protocol does not formally establish and terminate a connection between hosts, unlike TCP with its handshake and teardown processes. With a connectionless protocol, which doesn’t provide reliable services, it would seem that UDP traffic would be flaky at best. That would be true, except that the protocols that rely on UDP typically have their own built-in reliability services, or use certain features of ICMP to make the connection somewhat more reliable. For example, the application-layer protocols DNS and DHCP, which are highly dependent on the speed of packet transmission across a network, use UDP as their transport layer protocol, but they handle error checking and retransmission timers themselves. The UDP Header udp_dnsrequest .pcap The UDP header is much smaller and simpler than the TCP header. As shown in Figure 6-27, the following are the UDP header fields: Source Port The port used to transmit the packet Destination Port Packet Length The port to which the packet will be transmitted The length of the packet in bytes Checksum Used to ensure that the contents of the UDP header and data are intact upon arrival User Datagram Protocol Bit Offset 0–15 16–31 0 Source Port Destination Port 32 Packet Length Checksum Figure 6-27: The UDP header The file udp_dnsrequest.pcap contains one packet. This packet represents a DNS request, which uses UDP. When you expand the packet’s UDP header, you’ll see four fields (see Figure 6-28). Figure 6-28: The contents of a UDP packet are very simple. 106 Chapter 6 The key point to remember is that UDP does not care about reliable delivery. Therefore, any application that uses UDP must take special steps to ensure reliable delivery, if it is necessary. Internet Control Message Protocol Internet Control Message Protocol (ICMP) is the utility protocol of TCP/IP, responsible for providing information regarding the availability of devices, services, or routes on a TCP/IP network. Most network troubleshooting techniques and tools center around common ICMP message types. ICMP is defined in RFC 792. The ICMP Header ICMP is part of IP, and it relies on IP to transmit its messages. ICMP contains a relatively small header that changes depending on its purpose. As shown in Figure 6-29, the ICMP header contains the following fields: Type The type or classification of the ICMP message, based on the RFC specification Code The subclassification of the ICMP message, based on the RFC specification Checksum Used to ensure that the contents of the ICMP header and data are intact upon arrival Variable A portion that depends on the Type and Code fields Internet Control Message Protocol Bit Offset 0 0–15 Type 16–31 Code 32 Checksum Variable Figure 6-29: The ICMP header ICMP Types and Messages As noted, the structure of an ICMP packet depends on its purpose, as defined by the values in the Type and Code fields. You might consider the ICMP Type field as the packet’s classification and the Code field as its subclass. For example, a Type field value of 3 indicates “Destination Unreachable.” While this information alone might not be enough to troubleshoot a problem, if that packet were to also specify a Code field value of 3, indicating “Port Unreachable,” you could conclude that there is an issue with the port with which you are attempting to communicate. NOTE For a full list of available ICMP types and codes, see http://www.iana.org/ assignments/icmp-parameters. Co m m o n Lo w e r - La y e r P r o t oc o ls 107 Echo Requests and Responses icmp_echo.pcap ICMP’s biggest claim to fame is thanks to the ping utility. Ping is used to test for connectivity to a device. Most information technology (IT) professionals are familiar with ping. To use ping, enter ping <ip address> at the command prompt, replacing <ip address> with the actual IP address of a device on your network. If the target device is turned on, your computer has a communication route to it, and there is no firewall blocking that communication, you should see replies to your ping command. The example in Figure 6-30 shows four successful replies that display their size, RTT, and TTL used. The Windows utility also provides a summary detailing how many packets were sent, received, and lost. If communication fails, you should see a message telling you why. Figure 6-30: The ping command being used to test connectivity Basically, the ping command sends one packet at a time to a device and listens for a reply to determine if there is connectivity to that device, as shown in Figure 6-31. Echo/Ping Request Echo/Ping Response Figure 6-31: The ping command involves only two steps. NOTE Although ping has long been the bread and butter of IT, its results can be a bit deceiving as host-based firewalls are deployed. Many of today’s firewalls limit the ability of a device to respond to ICMP packets. This is great for security, because potential attackers using ping to determine if a host is accessible might be deterred, but troubleshooting is also made more difficult—it can be frustrating to ping a device to test for connectivity and not receive a reply when you know you can communicate with that device. The ping utility in action is a great example of simple ICMP communication. The packets in the file icmp_echo.pcap demonstrate what happens when you run ping. 108 Chapter 6 The first packet (see Figure 6-32) shows that host 192.168.100.138 is sending a packet to 192.168.100.1 . When you expand the ICMP portion of this packet, you can determine the ICMP packet type by looking at the Type and Code fields. In this case, the packet is type 8 , code 0 , indicating an echo request. (Wireshark should tell you what the type/code being displayed actually is.) This echo (ping) request is the first half of the equation. It is a simple ICMP packet, sent using IP, that contains a small amount of data. Along with the type and code designations and the checksum, we also have a sequence number that is used to pair requests with replies, and a random text string in the variable portion of the ICMP packet. NOTE The terms echo and ping are often used interchangeably, but just remember that ping is actually the name of a tool. The ping tool is used to send ICMP echo request packets. Figure 6-32: The ICMP echo request packet The second packet in this sequence is the reply to our request (see Figure 6-33). The ICMP portion of the packet is type 0 , code 0 , indicating that this is an echo reply. Because the sequence number in the second packet matches that of the first , we know that this echo reply matches the echo request in the previous packet. This reply packet also contains the same 32-byte string of data that was transmitted with the initial request . Once this second packet has been received by 192.168.100.138, ping will report success (see Figure 6-30, shown earlier). Figure 6-33: The ICMP echo reply packet Co m m o n Lo w e r - La y e r P r o t oc o ls 109 Note that you can use variations of ping to increase the size of the data padding, which forces packets to be fragmented for various types of network troubleshooting. This may be required when you’re troubleshooting networks that require a smaller fragment size. NOTE The random text used in an ICMP echo request can be of great interest to a potential attacker. Attackers can use the information in this padding to profile the operating system used on a device. Additionally, attackers can place small bits of data in this field as a method of covert communication. Traceroute icmp_traceroute .pcap The traceroute utility is used to identify the path from one device to another. On a simple network, a path may go through only a single router or no router at all. On a complex network, however, a packet may need to go through dozens of routers to reach its final destination, which is why it’s crucial to be able to trace the exact path a packet takes from one destination to another in order to troubleshoot communication. By using ICMP (with a little help from IP), traceroute can map the path packets take. For example, the first packet in the file icmp_traceroute.pcap is pretty similar to the echo request we looked at in the previous section (see Figure 6-34). Figure 6-34: An ICMP echo request packet with a TLL value of 1 At first glance, this packet appears to be a simple echo request from 192.168.100.138 to 4.2.2.1 , and everything in the ICMP portion of the packet is identical to the formatting of an echo request packet. However, when you expand the IP header of this packet, you’ll notice one odd value: The packet’s TTL value is set to 1 , which means that the packet will be dropped at the first router that it hits. Because the destination 4.2.2.1 110 Chapter 6 address is an Internet address, we know that there must be at least one router between our source and destination devices, so there is no way this packet will reach its destination. That’s good for us, because traceroute relies on the fact that this packet will make it to only the first router it traverses. The second packet is, as expected, a reply from the first router we reached along the path to our destination (see Figure 6-35). This packet reached this device at 192.168.100.1, its TTL was decremented to 0, and the packet could not be transmitted further, so the router replied with an ICMP response. This packet’s type 11 , code 0 tells us that the destination was unreachable because the packet’s TTL was exceeded during transit. Figure 6-35: An ICMP response from the first router along the path This ICMP packet is sometimes called a double-headed packet, because the tail end of its ICMP portion contains a copy of the IP header and ICMP data that was sent in the original echo request. This information can prove to be very useful for troubleshooting. This process of sending packets with incremented TTL values occurs two more times before we get to packet 7. Here, you see the same thing you saw in the first packet, except that this time, the TTL value in the IP header is set to 2, which ensures the packet will make it to the second hop router before it is dropped. As expected, we receive a reply from the next hop router, 12.180.241.1, with the same ICMP destination unreachable and TTL exceeded messages. This process continues with the TTL value increasing by one until the destination 4.2.2.1 is reached. To sum up, this traceroute process has communicated with each router along the path, building a map of the route to the destination. This map is shown in Figure 6-36. Co m m o n Lo w e r - La y e r P r o t oc o ls 111 NOTE The discussion here on traceroute is generally Windows-focused because it uses ICMP exclusively. The traceroute utility on Linux is a bit more versatile and can utilize other protocols in order to perform route path tracing. Figure 6-36: A sample output from the traceroute utility As you’ll see throughout this book, ICMP has many different functions. We’ll use ICMP frequently as we analyze more scenarios. This chapter has introduced you to a few of the most important protocols you will examine in the process of packet analysis. IP, TCP, UDP, and ICMP are at the foundation of all network communications, and they are critical to just about every daily task you perform. In the next chapter, we will look at a grouping of common application-layer protocols. 112 Chapter 6 COMMON UPPER-LAYER PROTOCOLS In this chapter, we’ll continue to examine the functions of individual protocols, as well as what they look like when viewed with Wireshark. We’ll discuss three of the most common upper-layer (layer 7) protocols: DHCP, DNS, and HTTP. Dynamic Host Configuration Protocol In the early days of networking, when a device wanted to communicate over a network, it needed to be assigned an address by hand. As networks grew, this manual process quickly became cumbersome. To solve this problem, Bootstrap Protocol (BOOTP) was created to automatically assign addresses to network-connected devices. BOOTP was later replaced with the more sophisticated Dynamic Host Configuration Protocol (DHCP). DHCP is an application layer protocol responsible for allowing a device to automatically obtain an IP address (and addresses of other important network assets, such as DNS servers and routers). Most DHCP servers today also provide other parameters to clients, such as the addresses of the default gateway and DNS servers in use on the network. The DHCP Packet Structure DHCP packets can carry quite a lot of information to a client. As shown in Figure 7-1, the following fields are present within a DHCP packet: OpCode reply Indicates whether the packet is a DHCP request or a DHCP Hardware Type The type of hardware address (10MB Ethernet, IEEE 802, ATM, and so on) Hardware Length Hops The length of the hardware address Used by relay agents to assist in finding a DHCP server Transaction ID A random number used to pair requests with responses Seconds Elapsed Seconds since the client first requested an address from the DHCP server Flags The types of traffic the DHCP client can accept (unicast, broadcast, and so on) Client IP Address Address field) The client’s IP address (derived from the Your IP Your IP Address The IP address offered by the DHCP server (ultimately becomes the Client IP Address field value) Server IP Address The DHCP server’s IP address Gateway IP Address The IP address of the network’s default gateway Client Hardware Address Server Host Name Boot File The client’s MAC address The server’s host name (optional) A boot file for use by DHCP (optional) Options Used to expand the structure of the DHCP packet to give it more features 114 Chapter 7 Dynamic Host Configuration Protocol Bit Offset 0 0–15 OpCode 16–31 Hardware Type 32 64 Hardware Length Hops Transaction ID Seconds Elapsed 96 Flags Client IP Address 128 Your IP Address 160 Server IP Address 196 Gateway IP Address 228+ Client Hardware Address (16 bytes) Server Host Name (64 bytes) Boot File (128 bytes) Options Figure 7-1: The DHCP packet structure The DHCP Renewal Process dhcp_nolease_ renewal.pcap The primary goal of DHCP is to assign addresses to clients during the renewal process. The renewal process takes place between a single client and a DHCP server, as shown in the file dhcp_nolease_renewal.pcap. The DHCP renewal process is often referred to as the DORA process because it uses four types of DHCP packets: discover, offer, request, and acknowledgment, as shown in Figure 7-2. Here, we’ll take a look at each type of DORA packet. Discover Offer Request DCHP Client DCHP Server Acknowlegment Figure 7-2: The DHCP DORA process C o m m on U p p e r - La y e r P r o t oc o ls 115 The Discover Packet As you can see in the referenced capture file, the first packet is sent from 0.0.0.0 on port 68 to 255.255.255.255 on port 67. The client uses 0.0.0.0 because it does not yet have an IP address. The packet is sent to 255.255.255.255 because this is the network-independent broadcast address, thus ensuring that this packet will be sent out to every device on the network. Because the device doesn’t know the address of a DHCP server, this first packet is sent in an attempt to find a DHCP server that will listen. Examining the Packet Details pane, the first thing we notice is that DHCP relies on UDP as its transport layer protocol. DHCP is very concerned with the speed at which a client receives the information it’s requesting. DHCP has its own built-in reliability measures, which means UDP is a perfect fit. You can see the details of the discovery process by examining the first packet’s DHCP portion in the Packet Details pane, as shown Figure 7-3. NOTE Because Wireshark still references BOOTP when dealing with DHCP, you’ll see a Bootstrap Protocol section in the Packets Detail pane, rather than a DHCP section. Nevertheless, I’ll refer to this as the packet’s DHCP portion throughout this book. Figure 7-3: The DHCP discover packet This packet is a request, identified by the (1) in the Message Type field . Most of the fields in this discovery packet are either blank (as you can see in the IP Address fields ) or pretty self-explanatory, based on the listing of DHCP fields in the previous section. The meat of this packet is in its four option fields: DHCP Message Type This is option type 53 (t=53), with length 1 and a value of 1 . These values indicate that this is a DHCP discover packet. 116 Chapter 7 Client Identifier This provides additional information about the client requesting an IP address. Requested IP Address This supplies the IP address the client would like to receive (typically its previously used IP address). Parameter Request List This lists the different configuration items (IP addresses of other important network devices) the client would like to receive from the DHCP server. The Offer Packet The second packet in this file lists valid IP addresses in its IP header, showing a packet traveling from 192.168.0.1 to 192.168.0.10, as shown in Figure 7-4. The client does not actually have the 192.168.0.10 address yet, so the server will first attempt to communicate with the client using its hardware address, as provided by ARP. If communication is not possible, it will simply broadcast the offer to communicate. Figure 7-4: The DHCP offer packet The DHCP portion of this second packet, called the offer packet, indicates that the message type is a reply . This packet contains the same transaction ID as the previous packet , which tells us that this reply is indeed to respond to our original request. The offer packet is sent by the DHCP server in order to offer its services to the client. It does so by supplying information about itself and the addressing it wants to provide the client. In Figure 7-4, the IP address 192.168.0.10 in C o m m on U p p e r - La y e r P r o t oc o ls 117 the Your (Client) IP Address field is being offered to the client . The value 192.168.0.1 in the Next Server IP Address field indicates that our DHCP server and default gateway share the same IP address. The first option listed identifies the packet as a DHCP Offer . The options that follow are supplied by the server and indicate the additional information it can offer, along with the client’s IP address. You can see that it offers the following: A subnet mask of 255.255.255.0 A renewal time of 30 minutes A rebinding time value of 52 minutes and 30 seconds An IP address lease time of 1 hour A DHCP server identifier of 192.168.0.1 The Request Packet Once the client receives an offer from the DHCP server, it should accept it with a DHCP request packet, as shown in Figure 7-5. Figure 7-5: The DHCP request packet The third packet in this capture still comes from IP address 0.0.0.0, because we have not yet completed the process of obtaining an IP address . The packet now knows the DHCP server it is communicating with. The Message Type field shows that this packet is a request . Although every packet in this capture file is part of the same renewal process, it has a new transaction ID, since this is a new request/reply transaction . This packet is similar to the discover packet, in that all of its IP addressing information is blank. 118 Chapter 7 Finally, in the options fields , we see that this is a DHCP Request. Notice that the requested IP address is no longer blank, and that the DHCP Server Identifier field also contains an address. The Acknowledgment Packet In the final step in this process, the DHCP server sends the requested IP addresses to the client in an acknowledgment packet and records that information in its database, as shown in Figure 7-6. Figure 7-6: The DCHP acknowledgment packet The client now has an IP address and can use it to begin communicating on the network. DHCP In-Lease Renewal dhcp_inlease_ renewal.pcap When a DHCP server assigns an IP address to a device, it leases it to the client. This means that the client is allowed to use the IP address for only a limited amount of time before it must renew the lease. The DORA process just discussed occurs the first time a client gets an IP address or when its lease time has expired. In either case, the device is considered to be out of lease. When a client with an IP address in-lease reboots, it must perform a truncated version of the DORA process in order to reclaim its IP address. This process is called an in-lease renewal. C o m m on U p p e r - La y e r P r o t oc o ls 119 In the case of a lease renewal, the Discovery and Offer packets are unnecessary. Think of it as the same DORA process used in an out-of-lease renewal, but the in-lease renewal doesn’t need to do as much, leaving only the request and acknowledgment steps. You’ll find a sample capture of an in-lease renewal in the file dhcp_inlease_renewal.pcap. DHCP Options and Message Types DHCP’s real flexibility lies in its available options. As you’ve seen, the packet’s DHCP options can vary in size and content. The packet’s overall size depends on the combination of options used. You can view a full list of the many DHCP options at http://www.iana.org/assignments/bootp-dhcp-parameters/. The only option required in all DHCP packets is the Message Type option (option 53). This option identifies how the DHCP client or server will process the information contained within the packet. There are eight message types, as defined in Table 7-1. Table 7-1: DHCP Message Types Type Number Message Type Description 1 Discover Used by the client to locate available DHCP servers 2 Offer Sent by the server to the client in response to a discover packet 3 Request Sent by the client to request the offered parameters from the server 4 Decline Sent by the client to the server to indicate invalid parameters within a packet 5 ACK Sent by the server to the client with the configuration parameters requested 6 NAK Sent by the client to the server to refuse a request for configuration parameters 7 Release Sent by the client to the server to cancel a lease by releasing its configuration parameters 8 Inform Sent by the client to the server to ask for configuration parameters when the client already has an IP address Domain Name System The Domain Name System (DNS) is one of the most crucial Internet protocols because it is the proverbial molasses that holds the bread together. DNS ties names, such as www.google.com, to IP addresses, such as 74.125.159.99. When we want to communicate with a networked device and we don’t know its IP address, we access that device via its DNS name. DNS servers store a database of resource records of IP address-to-DNS name mappings, which they share with clients and other DNS servers. 120 Chapter 7 NOTE Because the architecture of DNS servers is complicated, we will just look at some common types of DNS traffic. You can review the various DNS-related RFCs at http:// www.isc.org/community/reference/RFCs/DNS. The DNS Packet Structure As you can see in Figure 7-7, the DNS packet structure is somewhat different from the packet types we’ve discussed previously. The following fields can be present within a DNS packet: DNS ID Number Used to associate DNS queries with DNS responses. Query/Response (QR) or response. OpCode Denotes whether the packet is a DNS query Defines the type of query contained in the message. Authoritative Answers (AA) If this value is set in a response packet, it indicates that the response is from a name server with authority over the domain. Truncation (TC) Indicates that the response was truncated because it was too large to fit within the packet. Recursion Desired (RD) When set in a query, this value indicates that the DNS client requests a recursive query if the target name server does not contain the information requested. Recursion Available (RA) If this value is set in a response, it indicates that the name server supports recursive queries. Reserved (Z) Defined by RFC 1035 to be set as all zeros; however, sometimes it’s used as an extension of the RCode field. Response Code (RCode) ence of any errors. Question Count Answer Count Used in DNS responses to indicate the pres- The number of entries in the Questions section. The number of entries in the Answers section. Name Server Count The number of name server resource records in the Authority section. Additional Records Count The number of other resource records in the Additional Information section. Questions section Variable-sized section that contains one or more queries for information to be sent to the DNS server. Answers section Variable-sized section that carries one or more resource records that answer queries. Authority section Variable-sized section that contains resource records that point to authoritative name servers that can be used to continue the resolution process. C o m m on U p p e r - La y e r P r o t oc o ls 121 Additional Information section Variable-sized section that contains resource records that hold additional information related to the query that is not absolutely necessary to answer the query. Domain Name System Bit Offset 0–15 0 DNS ID Number 32 Question Count Answer Count 64 Name Server Count Additional Records Count 96 Questions Section Answers Section 128 Authority Section Additional Information Section 16–31 Q R OpCode A T R R A C D A Z RCode Figure 7-7: The DNS packet structure A Simple DNS Query dns_query_ response.pcap DNS functions in a query/response format. A client wishing to resolve a DNS name to an IP address sends a query to a DNS server, and the server sends the requested information in its response. In its simplest form, this process takes two packets, as can be seen in the capture file dns_query_response.pcap. The first packet, shown in Figure 7-8, is a DNS query sent from the client 192.168.0.114 to the server 205.152.37.23 on port 53, which is the standard port used by DNS. Figure 7-8: The DNS query packet 122 Chapter 7 When you begin examining the headers in this packet, you will see that DNS also relies on UDP . In the DNS portion of the packet, you can see that smaller fields near the beginning of the packet are condensed by Wireshark into a single Flags section. Expand this section, and you’ll see that the message is indeed a standard query , that it is not truncated, and that recursion is desired (we will cover recursion shortly). Only a single question is identified, which can be found by expanding the Queries section. There, you can see the query is for the name wireshark.org for a host (type A) Internet (IN) address . This packet is basically asking, “Which IP address is associated with the wireshark.org domain?” The response to this request is in packet 2, as shown in Figure 7-9. Because this packet has an identical identification number , we know that it contains the correct response to the original query. Figure 7-9: The DNS response packet The Flags section confirms that this is a response and that recursion is available if necessary . This packet contains only one question and one resource record , because it includes the original question in conjunction with its answer. Expanding the Answers section gives us the response to the query: the IP address of wireshark.org is 128.121.50.122 . With this information, the client can now construct IP packets and begin communicating with wireshark.org. C o m m on U p p e r - La y e r P r o t oc o ls 123 DNS Question Types The Type fields used in DNS queries and responses indicate the resource record type that the query or response is for. Some of the more common message/resource record types are listed in Table 7-2. You will be seeing these types throughout normal traffic and this book. Table 7-2: Common DNS Resource Record Types Value Type Description 1 A IPv4 host address 2 NS Authoritative name server CNAME Canonical name for an alias 15 5 MX Mail exchange 16 TXT Text string 28 AAAA IPv6 host address 251 IXFR Incremental zone transfer 252 AXFR Full zone transfer The list in Table 7-2 is brief and by no means exhaustive. To review all DNS resource record types, visit http://www.iana.org/assignments/dns -parameters/. DNS Recursion dns_ recursivequery_ client.pcap, dns_ recursivequery_ server.pcap 124 Chapter 7 Due to the hierarchical nature of the Internet’s DNS structure, DNS servers must be able to communicate with each other in order to answer the queries submitted by clients. While we expect our internal DNS server to know the name-to-IP address mapping of our local intranet server, we can’t expect it to know the IP address associated with Google or Dell. When a DNS server needs to find an IP address, it queries another DNS server on behalf of the client making the request. In effect, the DNS server acts like a client, and this process is called recursion. To view the recursion process from both the DNS client and server perspectives, open the file dns_recursivequery_client.pcap. This file contains a capture of a client’s DNS traffic file in two packets. The first packet is the initial query sent from the DNS client 172.16.0.8 to its DNS server 172.16.0.102, as shown in Figure 7-10. When you expand the DNS portion of this packet, you’ll see that this is a standard query for an A type record for the DNS name www.nostarch.com . To learn more about this packet, expand the Flags section, and you’ll see that recursion is desired . The second packet is what we would expect to see in response to the initial query, as shown in Figure 7-11. This packet’s transaction ID matches that of our query , no errors are listed, and we receive the A type resource record associated with www.nostarch.com . Figure 7-10: The DNS query with the recursion desired bit set Figure 7-11: The DNS query response The only way that we can see that this query was answered by recursion is by listening to the DNS server’s traffic when the recursion is taking place, as demonstrated in the file dns_recursivequery_server.pcap. This file shows a capture of the traffic on the local DNS server when the query was initiated. The first packet is the same initial query we saw in the previous capture file. At this point, the DNS server has received the query, checked its local database, and realized it does not know the answer to the question of which IP address goes with the C o m m on U p p e r - La y e r P r o t oc o ls 125 DNS name (nostarch.com). Because the packet was sent with the recursion desired bit set, the DNS server can ask another DNS server this question in an attempt to locate the answer, as you can see in the second packet. In the second packet, the DNS server at 172.16.0.102 transmits a new query to 4.2.2.1, which is the server to which it is configured to forward upstream requests, as shown in Figure 7-12. This query mirrors the original one, effectively turning the DNS server into a client. Figure 7-12: The recursive DNS query We can tell that this is a new query because the transaction ID number differs from the transaction ID number in the previous capture file. Once this packet is received by server 4.2.2.1, the local DNS server receives the response shown in Figure 7-13. Figure 7-13: Response to the recursive DNS query 126 Chapter 7 Having received this response, the local DNS server can transmit the fourth and final packet to the DNS client with the information requested. Although this example showed only one layer of recursion, recursion can occur many times for a single DNS request. Here, we received an answer from the DNS server at 4.2.2.1, but that server could have retransmitted the query recursively to another server in order to find the answer. A simple query can travel all over the world before it finally gets a correct response. Figure 7-14 illustrates the recursive DNS query process. Recursive Query Recursive Query Query Response DNS Client Query Response Local DNS Server External DNS Server Figure 7-14: A recursive DNS query DNS Zone Transfers dns_axfr.pcap A DNS zone is the namespace (or group of DNS names) that a DNS server has been delegated to manage. For instance, Emma’s Diner might have one DNS server responsible for emmasdiner.com. In that case, devices both inside and outside Emma’s Diner wishing to resolve emmasdiner.com to an IP address would need to contact that DNS server as the authority for that zone. If Emma’s Diner were to grow, it could add a second DNS server to handle the email portion of its DNS namespace only, say mail.emmasdiner.com, and that server would be the authority for that mail subdomain. Additional DNS servers might be added for subdomains as necessary, as shown in Figure 7-15. A zone transfer occurs when zone data is transferred between two devices, typically out of desire for redundancy. For example, in organizations with multiple DNS servers, administrators commonly configure a secondary DNS server to maintain a copy of the primary server’s DNS zone information in case the primary DNS server becomes unavailable. There are two types of zone transfers: Full zone transfer (AXFR) These types of transfers send an entire zone between devices. Incremental zone transfer (IXFR) portion of the zone information. These types of transfers send only a The file dns_axfr.pcap contains an example of a full zone transfer between the hosts 172.16.16.164 and 172.16.16.139. When you first look at this file, you may wonder whether you’ve opened the right file, because rather than UDP packets, you see TCP packets. Although DNS relies on UDP, it uses TCP for certain tasks, such as zone transfers, because TCP is more reliable for the amount of data being transferred. The first three packets in this capture file are the TCP three-way handshake. C o m m on U p p e r - La y e r P r o t oc o ls 127 emmasdiner.com web.emmasdiner.com db.web.emmasdiner.com cart.web.emmasdiner.com mail.emmasdiner.com Figure 7-15: DNS zones divide responsibility for namespaces. The fourth packet begins the actual zone transfer request between 172.16.16.164 and 172.16.16.139. This packet doesn’t contain any DNS information. It is marked as a “TCP segment of a reassembled PDU” because the data sent in the zone transfer request packet was sent in multiple packets. Packets 4 and 6 contain the packet’s data. Packet 5 is the acknowledgment that packet 4 was received. These packet are displayed in this manner because of the way in which Wireshark parses and displays TCP packets for easier readability. For our purposes, we can reference packet 6 as the complete DNS zone transfer request, as shown in Figure 7-16. The zone transfer request is a standard query , but instead of requesting a single record type, it requests the AXFR type , meaning that it wishes to receive the entire DNS zone from the server. The server responds with the zone records in packet 7, as shown in Figure 7-17. As you can see, the zone transfer contains quite a bit of data, and this is one of the simpler examples! With the zone transfer complete, the capture file ends with the TCP connection teardown process. Figure 7-16: DNS full zone transfer request 128 Chapter 7 Figure 7-17: The DNS full zone transfer occurring WARNING The data contained in a zone transfer can be very dangerous in the wrong hands. For example, by enumerating a single DNS server, you can map a network’s entire infrastructure. Hypertext Transfer Protocol The Hypertext Transfer Protocol (HTTP) is the delivery mechanism of the World Wide Web, allowing web browsers to connect to web servers to view web pages. In most organizations, HTTP represents, by far, the highest percentage of traffic seen going across the wire. Every time you do a Google search, connect to Twitter to send a tweet, or check University of Kentucky basketball scores on ESPN.com, you’re using HTTP. We won’t look at the packet structures for an HTTP transfer. Because the contents of those packets vary widely depending on their purpose, that exercise is left to you. Here, we’ll look at some practical applications of HTTP. Browsing with HTTP http_google.pcap HTTP is most commonly used to browse web pages on a web server using a web browser. The capture file http_google.pcap shows such an HTTP transfer, using TCP as the transport layer protocol. Communication begins with a three-way handshake between the client 172.16.16.128 and the Google web server 74.125.95.104. Once communication is established, the first packet is marked as an HTTP packet from the client to the server, as shown in Figure 7-18. C o m m on U p p e r - La y e r P r o t oc o ls 129 Figure 7-18: The initial HTTP GET request packet The HTTP packet is delivered over TCP to the server’s port 80 , the standard port for HTTP communication (8080 is also commonly used). HTTP packets are identified by one of eight different request methods (defined in HTTP specification version 1.1), which indicate the action the packet’s transmitter will perform on the receiver. As shown in Figure 7-18, this packet identifies its method as GET, its request Uniform Resource Indicator (URI) as /, and the request version as HTTP/1.1 . This information tells us that the client is sending a request to download (GET) the root web directory (/) of the web server using version 1.1 of HTTP. Next, the host sends information about itself to the web server. This information includes things such as the user agent (browser) being used, languages accepted by the browser (Accept-Languages), and cookie information (at the bottom of the capture). The server can use this information to determine which data to return to the client in order to ensure compatibility. When the server receives the HTTP GET request in packet 4, it responds with a TCP ACK, acknowledging the packet, and begins transmitting the requested data from packets 6 to 11. HTTP is used only to issue application layer commands between the client and server. When it’s time to transfer data, application layer control is not seen, except for at the beginning and end of the data stream. Data is sent from the server in packets 6 and 7, an acknowledgment from the client in packet 8, two more data packets in packets 9 and 10, and another acknowledgment in packet 11, as shown in Figure 7-19. All of these packets are shown in Wireshark as TCP segments, rather than HTTP packets, although HTTP is still responsible for their transmission. Figure 7-19: TCP transmitting data between the client browser and web server 130 Chapter 7 Once the data is transferred, a reassembled stream of the data is sent, as shown in Figure 7-20. Figure 7-20: Final HTTP packet with response code 200 HTTP uses a number of predefined response codes to indicate the results of a request method. In this example, we see a packet with response code 200 , which indicates a successful request method. The packet also includes a timestamp and some additional information about the encoding of the content and configuration parameters of the web server. When the client receives this packet, the transaction is complete. Posting Data with HTTP http_post.pcap Now that we have looked at the process of downloading data from a web server, let’s turn our attention to uploading data. The file http_post.pcap contains a very simple example of an upload: a user posting a comment to a website. After the initial three-way handshake, the client (172.16.16.128) sends an HTTP packet to the web server (69.163.176.56), as shown in Figure 7-21. Figure 7-21: The HTTP POST packet C o m m on U p p e r - La y e r P r o t oc o ls 131 This packet uses the POST method to upload data to a web server for processing. The POST method used here specifies the URI /wp-comments-post.php , and the HTTP 1.1 Request version. To see the contents of the data posted, expand the Line-based Text Data portion of the packet . Once the data is transmitted in this POST, an ACK packet is sent. As shown in Figure 7-22, the server responds with packet 6, transmitting the response code 302 , which means “found.” Figure 7-22: HTTP response 302 is used to redirect. The 302 response code is a common means of redirection in the HTTP world. The Location field in this packet specifies where the client is to be directed . In this case, that’s to the place on the originating web page where the comment was posted. Finally, the server transmits status code 200, and the page’s content is sent over the next several packets to complete the transmission. Final Thoughts The chapter has introduced the most common protocols you will encounter when examining traffic at the application layer. In the following chapters, we’ll examine new protocols and additional features of the protocols we’ve covered here, as we explore a wide range of real scenarios. To learn more about individual protocols, read their associated RFC or have a look at The TCP/IP Guide by Charles Kozeriok (No Starch Press, 2005). Also, see the list of resources in the appendix. 132 Chapter 7 BASIC REAL-WORLD SCENARIOS Beginning with this chapter, we’ll dig into the meat of packet analysis, as we use Wireshark to analyze real-world network problems. In the first part, we’ll analyze scenarios that you might encounter day to day as a network engineer, help desk technician, or application developer—all derived from my real-world experiences and those of my colleagues. We’ll use Wireshark to examine traffic from Twitter, Facebook, and ESPN.com to see how these common services work. The second part of this chapter introduces a series of real-world problems. For each, I describe the situation surrounding each problem and offer the information that was available to the analyst at the time. Having laid the groundwork, we’ll turn to analysis, as I describe the method used to capture the appropriate packets and step you through the analysis process. Once analysis is complete, I offer a full solution to the problem or point you to potential solutions, along with an overview of lessons learned. Throughout, remember that analysis is a very dynamic process, and the methods I use to analyze each scenario may not be the same ones that you might use. Everyone analyzes in different ways. The most important thing is that the end result of the analysis solves a problem or provides a learning experience. In addition, most problems discussed in this chapter can probably be solved without a packet sniffer. When I was first learning how to analyze packets I found it helpful to examine typical problems in atypical ways by using packet analysis techniques, which is why I present these scenarios to you. Social Networking at the Packet Level First, we’ll look at the traffic of two popular social networking websites: Twitter and Facebook. We’ll examine the authentication process associated with each service and see how the two very similar functions use different methods to perform the same task. We’ll also look at how some of the primary functions of each service work in order to gain a better understanding of the traffic we generate in our normal daily activities. Capturing Twitter Traffic twitter_login.pcap NOTE Whether you use Twitter to stay up-to-date on news in the tech community or just to complain about your girlfriend, it’s one of the more commonly used services on the Internet. For this scenario, you’ll find a capture of Twitter traffic in the file twitter_login.pcap. Websites change their code frequently. As a result, if you try to re-create the captures in the next few sections you may find that your results differ from what is shown here. The Twitter Login Process When I teach packet analysis, one of the first things I have my students do is log in to a website they normally use and capture the traffic from the login process. This serves a dual purpose: It exposes the students to more packets in general, and it allows them to discover insecurities in their daily activities by looking for plaintext passwords traversing the wire. Fortunately, the Twitter authentication process is not completely insecure. As you can see in Figure 8-1, these first three packets constitute the TCP handshake between our local device (172.16.16.128) and a remote server (168.143.162.68) . The remote server is listening for our connection on port 443 , which is typically associated with SSL over HTTP, commonly referred to as HTTPS, a secure form of data transfer. Based on these alone, we can assume that this is SSL traffic. Figure 8-1: Handshake connecting to port 443 134 Chapter 8 The packets that follow the handshake are part of the SSL encrypted handshake. SSL relies on keys—strings of characters used to encrypt and decrypt communication between two parties. The handshake process is the formal transmission of these keys between hosts, as well as the negotiation of various connection and encryption characteristics. Once this handshake is completed, secure data transfer begins. In order to find the encrypted packets that handle the exchange of data, look for the packets that are identified as Application Data in the Info column of the Packet Details pane. Expanding the SSL portion of any of these packets will display the Encrypted Application Data field, containing the unreadable encrypted data , as shown in Figure 8-2. This shows the transfer of the username and password during login. Figure 8-2: Encrypted credentials being transmitted The authentication continues briefly until the connection begins its teardown process with a FIN/ACK at packet 16. Following authentication, we would expect our browser to be redirected to our Twitter home page, which is exactly what happens. As you can see in Figure 8-3, packets 19, 21, and 22 are part of the handshake process that sets up a new connection to the same remote server (168.143.162.68) but on port 80 instead of 443 . Following the completed handshake, we see the HTTP GET request in packet 23 for the root directory of the web server (/) . The server acknowledges the request in packet 24 and begins transmitting data over the next several packets. The contents of packet 41 marks the completion of the data transmission related to the GET request. Figure 8-3: The GET request for the root directory of our Twitter home page (/) once authentication has completed Several more GET requests are made in the remainder of the capture file in order to retrieve the images and other files linked to the home page. Basi c Real-World Scenari os 135 twitter_tweet.pcap Sending Data with a Tweet Once logged in, the next step is to tell the world what’s on your mind. Because I’m in the middle of writing a book, I’ll tweet, “This is a tweet for Practical Packet Analysis, second edition” and capture the traffic from posting that tweet in the file twitter_tweet.pcap. This capture file starts as soon as the tweet is submitted. It begins with a handshake between our local workstation 172.16.16.134 and the remote address 168.143.162.100. The fourth and fifth packets in the capture comprise an HTTP packet sent from the client to the server. Wireshark has combined the data in these two packets, and placed it in the Packet Details pane of packet 5 for ease of viewing. To examine this HTTP header, expand the HTTP section in the Packet Details pane of the fifth packet, as shown in Figure 8-4. You will see that the POST method is used with the URL /status/update . We know that this is indeed a packet from the tweet, because the Host field contains the value twitter.com . Figure 8-4: The HTTP POST for a Twitter update Notice the information contained in the packet’s Line-based Text Data field in Figure 8-5. When you analyze this data, you will see a field named Authenticity Token, followed by a status field in a URL containing this value: This+is+a+tweet+for+practical+packet+analysis%2c+second+edition The value of the status field is the tweet I’ve submitted in unencrypted plaintext. There is a slight security concern here, because some people protect their tweets and don’t intend for them to be seen by just anyone. This doesn’t mean that just anybody could read the tweet, but a user on the same network could intercept this traffic and see the contents of the tweet clearly. 136 Chapter 8 Figure 8-5: The tweet in plaintext twitter_dm.pcap Twitter Direct Messaging Now we’ll consider a scenario with some security implications: Twitter direct messaging, which allows users to share presumably private messages. The file twitter_dm.pcap is a packet capture of a Twitter direct message. As you can see in Figure 8-6, direct messages aren’t exactly private. Figure 8-6: A direct message in the clear The display of packet 7 in Figure 8-6 shows that content is still sent in plaintext. This is evident in the same Line-based Text Data field that we viewed in the previous capture. The knowledge that we gain here about Twitter isn’t necessarily earthshattering, but it may make you reconsider sending sensitive data via private Twitter messages over untrusted networks. Capturing Facebook Traffic Once I’ve finished reading my tweets, I like to log in to Facebook to see what my friends are up to, so that I can live vicariously through them. Now let’s use Wireshark to capture and analyze Facebook traffic. Basi c Real-World Scenari os 137 facebook_login .pcap The Facebook Login Process We’ll begin with the login process captured in facebook_login.pcap. The capture begins as soon as credentials are submitted, as shown in Figure 8-7. Similar to the Twitter login process, we see a TCP handshake over port 443 . Our workstation at 172.16.0.122 is initiating communication with 69.63.180.173 , the server handling the Facebook authentication process. Once the handshake completes, the SSL handshake occurs , and login credentials are submitted. Figure 8-7: Login credentials are transmitted securely with HTTPS. One difference between the Facebook authentication process and the Twitter one is that we don’t immediately see the authentication connection teardown following the transmission of login credentials. Instead, we see a GET request for /home.php in the HTTP header of packet 12 , as highlighted in Figure 8-8. Figure 8-8: After authentication, the GET request for /home.php takes place. The connection used for authentication is torn down after the contents of home.php is delivered, as seen in packet 64 at the end of the capture file in Figure 8-9. First, the HTTP connection over port 80 is torn down (packet 62) , and then the HTTPS connection over port 443 is torn down. Figure 8-9: The HTTP connection is torn down and is followed by the HTTPS connection. 138 Chapter 8 facebook_ message.pcap Private Messaging with Facebook Now that we’ve examined Facebook’s login authentication process, let’s see how it handles private messaging. The file facebook_message.pcap contains the packets captured while sending a message from my account to another Facebook account. When you open this file, you may be surprised by the few packets it contains. The first two packets comprise the HTTP traffic responsible for sending the message itself. When you expand the HTTP header of packet 2, as shown in Figure 8-10, you will see the POST method is used with a rather long URL string . As you can see, the string includes a reference to AJAX. Figure 8-10: This HTTP POST references AJAX Asynchronous JavaScript and XML (AJAX) is a client-side approach to creating interactive web applications that retrieve information from a server in the background. While you might expect that after the private message is sent to the client’s browser, the session would be redirected to another page (as with the Twitter direct message), that doesn’t happen. In this case, the use of AJAX probably means that the message is sent from some type of interactive pop-up, rather than from an individual page, which means that no redirection or reloading of content is necessary. This is one of the benefits of some AJAX implementations. You can examine the content of this private message by expanding the Line-based Text Data portion of packet 2, as shown in Figure 8-11. As with Twitter, it appears as though Facebook’s private messages are sent unencrypted. Figure 8-11: The content of this Facebook message is seen in plaintext. Basi c Real-World Scenari os 139 Comparing Twitter vs. Facebook Methods You’ve now seen the authentication and messaging methods of two web services: Twitter and Facebook. Each takes a different approach. Programmers might argue that the Twitter method of authentication is better than Facebook’s because it can be faster and more efficient. Security researchers might argue the Facebook method is better because it ensures that all content has been delivered. Also, no additional authentication is required before the authentication connection closes, which may in turn make man-in-the-middle attacks more difficult to achieve. (Man-in-the-middle attacks are attacks where malicious users intercept traffic between two communicating parties.) In reality, the differences between the authentication methods of the two websites are minimal, but they do demonstrate that differences can occur when two programmers set out to develop a routine that performs the same task. Although it’s interesting, the point of this analysis was not to find out exactly how Twitter and Facebook work but simply to expose you to traffic that you can compare and contrast. This baseline should provide a good framework if you need to examine why similar services aren’t operating as they should or are just operating slowly. Capturing ESPN.com Traffic http_espn.pcap Having completed my social network stalking for the morning, my next task is to check up on the latest news headlines and sports scores. Certain sites always make for interesting analysis, and http://www.espn.com/ is one of those. I’ve captured the traffic of a computer browsing to the ESPN website in the file http_espn.pcap. This capture file contains many packets—956 to be exact. This is simply too much data for us to manually scroll through the entire file in an attempt to discern individual connections and anomalies, so we’ll use some of Wireshark’s analysis features to make the process easier. Using the Conversations Window The ESPN home page includes a lot of bells and whistles, so it’s easy to understand why it would take nearly a thousand packets to transfer that data to us. Whenever you have a large data transfer, it’s useful to know the source of that data, and more important, whether it’s from one or multiple sources. We can find out by using Wireshark’s Conversations window (Statistics Conversations). Figure 8-12 shows an example with 14 unique IP conversations, 25 unique TCP connections, and 14 unique UDP conversations—all displayed in detail in the main Conversations window. There’s a lot going on here, especially for just one site. 140 Chapter 8 Figure 8-12: The Conversations window shows several unique connections. Using the Protocol Hierarchy Statistics Window For a better view of the situation, we can see the application layer protocols used with these TCP and UDP connections. Open the Protocol Hierarchy Statistics window (StatisticsProtocol Hierarchy), as shown in Figure 8-13. Figure 8-13: The Protocol Hierarchy Statistics window shows the distribution of protocols in this capture. Basi c Real-World Scenari os 141 As you can see, TCP accounts for 97.07 percent of the packets in the capture , and UDP accounts for the remaining 2.93 percent . As expected, the TCP traffic is all HTTP , which is broken down even further into the file types transferred over HTTP. It may seem confusing when I say that all of the TCP traffic is HTTP when Wireshark shows only 12.66 percent as being HTTP, but that’s because the other 84.41 percent is pure TCP traffic (data transfer and control packets). All of the UDP traffic shown is DNS, based on the entry under the UDP heading . Based on this information alone, we can draw a few conclusions. For one, we know from previous examples that DNS transactions are quite small, so the fact there are 28 DNS packets (as listed in the Packets column next to the Domain Name Service entry in Figure 8-13) means that we could have as many as 14 DNS transactions. We derive this number by dividing the total number of packets by two, which represents pairs of requests and responses. If you look under the UDP heading of the Conversations window it will show that there are indeed 14 conversations, which accounts for each DNS transaction and confirms our assumption. DNS queries don’t happen on their own though, and the only other traffic in the capture is HTTP traffic. This tells us that it’s likely that the HTML code within the ESPN website references other domains or subdomains by DNS name, thus forcing multiple queries to be executed. Let’s see if we can find some evidence to substantiate our theories. Viewing DNS Traffic One simple way to view DNS traffic is to create a filter. Entering dns into the filter section of the Wireshark window shows all of the DNS traffic, as shown in Figure 8-14. Figure 8-14: The DNS traffic appears to be standard queries and responses. This DNS traffic shown in Figure 8-14 appears to all be queries and responses. For a better view of the DNS names being queried, create a filter that displays only the queries. To create this filter, select a query in the Packet List pane and expand the packet’s DNS header in the Packet Details pane. Then right-click the Flags: 0x0100 (Standard query) field, hover over Apply as Filter, and choose Selected. 142 Chapter 8 This should activate the filter dns.flags == 0x0100, which shows only the queries and makes it much easier to read the records we’re analyzing. And, as you can see in Figure 8-14, there are indeed 14 individual queries (each packet represents a query), and all of the domain names seem to be associated with ESPN or the content displayed on its home page. Viewing HTTP Requests Finally, we can verify the source of these queries by examining the HTTP requests. To do so, select StatisticsHTTP, select Requests, and click Create Stat. (Make sure the filter you just created is cleared before doing this.) Figure 8-15 shows the HTTP Requests window. The 14 connections shown here (each line represents a connection to a particular domain) account for all of the domains represented by the DNS queries. Figure 8-15: All HTTP requests are summarized in this window, which shows the domains accessed. With this many connections occurring, it may be in our best interest to check whether this highly involved process is taking place in a timely manner. The easiest way to do this is to view a summary of the traffic. To do so, choose StatisticsSummary. The Summary window, shown in Figure 8-16, shows that the entire process occurs in about 2 seconds , which is perfectly acceptable. It’s odd to think that our simple request to view a web page broke into requests for 14 separate domains and subdomains, touching a variety of different servers, and that this whole process took place in only 2 seconds. Capturing traffic while visiting your favorite websites and breaking it down as we have here is an interesting exercise. You never know quite where your data is coming from until you start looking at packets. Basi c Real-World Scenari os 143 Figure 8-16: The Summary window for the file shows that this entire process occurs in two seconds. Real-World Problems We’ll now shift to some examples of problematic traffic. Let’s look at various Internet access problems, as well as typical problems like an unreliable printer and a connectivity issue from a branch office. No Internet Access: Configuration Problems The first problem scenario is rather simple: A user cannot access the Internet. We have verified that the user can access all of the internal resources of the network, including shares on other workstations and applications hosted on local servers. The network architecture is fairly straightforward, as all clients and servers connect to a series of simple switches. Internet access is handled through a single router serving as the default gateway, and IP addressing information is provided by DHCP. This is a very common scenario in small offices. nowebaccess1 .pcap 144 Chapter 8 Tapping into the Wire In order to determine the cause of the issue, we can have the user attempt to browse the Internet while our sniffer is listening on the wire. We use the information from “Sniffer Placement in Practice” on page 31 (see Figure 2-15) to determine the most appropriate method for placing our sniffer. The switches on our network do not support port mirroring. We already have to interrupt the user in order to conduct our test, so we can assume that it is okay to take him offline once again. (That said, using a tap would be the most appropriate way to tap into the wire.) The resulting file is nowebaccess1.pcap. Analysis The traffic capture begins with an ARP request and reply, as shown in Figure 8-17. In packet 1, the user’s computer, with MAC address 00:25:b3:bf:91:ee and IP address 172.16.0.8, sends an ARP broadcast packet to all computers on the network segment in an attempt to find the MAC address associated with the IP address of its default gateway, 172.16.0.10. Figure 8-17: ARP request and reply for the computer’s default gateway A response is received in packet 2, and the user’s computer learns that 172.16.0.10 is at 00:24:81:a1:f6:79. Once this reply is received, the computer now has a route to a gateway that should be able to direct it to the Internet. Following the ARP reply, the computer must attempt to resolve the DNS name of the website to an IP address using DNS in packet 3. As shown in Figure 8-18, the computer does this by sending a DNS query packet to its primary DNS server, 4.2.2.2 . Figure 8-18: A DNS query sent to 4.2.2.2 Under normal circumstances, a DNS server would respond to a DNS query very quickly, but that’s not the case here. Rather than a response, we see the same DNS query sent a second time to a different destination address. As shown in Figure 8-19, in packet 4, the second DNS query is sent to the secondary DNS server configured on the computer, which is 4.2.2.1 . Basi c Real-World Scenari os 145 Figure 8-19: A second DNS query sent to 4.2.2.1 Again, no reply is received from the DNS server, and the query is sent again one second later to 4.2.2.2. This process repeats itself, alternating the destination packets between the primary and secondary configured DNS servers over the next several seconds, as shown in Figure 8-20. The entire process takes around 8 seconds , which is how long it takes before the user’s Internet browser reports that a website is inaccessible. Figure 8-20: DNS queries repeated until communication stops Based on the packets we’ve seen, we can begin pinpointing the source of the problem. First, we see a successful ARP request to what we believe is the default gateway router for the network, so we know that device is online and communicating. We also know that the user’s computer is actually transmitting packets on the network, so we can assume there isn’t an issue with the protocol stack on the computer itself. The problem clearly begins to occur when the DNS request is made. In the case of this network, DNS queries are resolved by an external server on the Internet (4.2.2.2 or 4.2.2.1). This means that in order for resolution to take place correctly, the router responsible for routing packets to the Internet must successfully forward the DNS queries to the server, and the server must respond. This all must happen before HTTP can be used to request the web page itself. We know that no other users are having issues connecting to the Internet, which tells us that the network router and remote DNS server are probably not the source of the problem. The only thing remaining as the potential source of the problem is the user’s computer itself. 146 Chapter 8 Upon deeper examination of the affected computer, we find that rather than receiving a DHCP-assigned address, the computer has manually assigned addressing information, and the default gateway address is actually set incorrectly. The address set as the default gateway is not a router and cannot forward the DNS query packets outside the network. Lessons Learned The problem in this scenario resulted from a misconfigured client. While the problem itself turned out to be quite simple, it significantly impacted the user. Troubleshooting a simple misconfiguration like this one could take quite some time for someone lacking knowledge of the network or the ability to perform a quick packet analysis as we’ve done here. As you can see, packet analysis is not limited to large and complex problems. Notice that because we didn’t enter the scenario knowing the IP address of the network’s gateway router, Wireshark didn’t identify the problem exactly, but it did tell us where to look, saving valuable time. Rather than examining the gateway router, contacting our ISP, or trying to find the resources to troubleshoot the remote DNS server, we were able to focus our troubleshooting efforts on the computer itself, which was, in fact, the source of the problem. NOTE Had we been more familiar with this particular network’s IP addressing scheme, analysis could have been even faster. The problem could have been identified immediately once we noticed that the ARP request was sent to an IP address different from that of the gateway router. These simple misconfigurations are often the source of network problems and can typically be resolved quickly with a bit of packet analysis. No Internet Access: Unwanted Redirection In this scenario, we once again have a user who is unable to access the Internet from her workstation. However, unlike the user in the previous scenario, this user can access the Internet, but she cannot access her home page, http:// www.google.com/. When the user attempts to reach any domain hosted by Google, she is directed to a browser page that says “Internet Explorer cannot display the web page.” This issue is affecting only this particular user. As with the previous scenario, this is a small network with a few simple switches and a single router serving as the default gateway. nowebaccess2 .pcap Tapping into the Wire To begin our analysis, we have the user attempt to browse to http:// www.google.com/ while we listen to the traffic that is generated using a tap. The resulting file is nowebaccess2.pcap. Basi c Real-World Scenari os 147 Analysis The capture begins with an ARP request and reply, as shown in Figure 8-21. In packet 1, the user’s computer, with MAC address 00:25:b3:bf:91:ee and IP address of 172.16.0.8, sends an ARP broadcast packet to all computers on the network segment in an attempt to find the MAC address associated with the host’s IP address 172.16.0.102. We don’t immediately recognize this address. Figure 8-21: ARP request and reply for another device on the network In packet 2, the user’s computer learns that the IP address 172.16.0.102 is at 00:21:70:c0:56:f0. Based on the previous scenario, we might assume that this is the gateway router’s address, and that address is used so that packets can once again be forwarded to the external DNS server. However, as shown in Figure 8-22, the next packet is not a DNS request, but a TCP packet from 172.16.0.8 to 172.16.0.102. It has the SYN flag set, indicating that this is the first packet in the handshake for a new TCP-based connection between the two hosts . Figure 8-22: TCP SYN packet sent from one internal host to another Notably, the TCP connection attempt is to port 80 on 172.16.0.102 , which is typically associated with HTTP traffic. As shown in Figure 8-23, this connection attempt is abruptly halted when the host 172.16.0.102 sends a TCP packet in response (packet 4) with the RST and ACK flags set . Recall from Chapter 6 that a packet with the RST flag set is used to terminate a TCP connection. However, in this scenario, the host at 172.16.0.8 attempted to establish a TCP connection to the host at 172.16.0.102 on port 80. Unfortunately, because that host has no services configured to listen to requests on port 80, the TCP RST packet is sent to terminate the connection. This process repeats twice. A SYN is sent from the user’s computer and replied to with a RST, before communication finally ends, as shown in Figure 8-24. At this point, the user receives a message in her browser saying that the page cannot be displayed. 148 Chapter 8 Figure 8-23: TCP RST packet sent in response to the TCP SYN Figure 8-24: The TCP SYN and RST packets are seen three times in total. After examining the configuration of another network device that is working correctly, the ARP request and reply in packets 1 and 2 concern us because the ARP request is not for the gateway router’s actual MAC address, but some unknown device. Following the ARP request and reply, we would expect to see a DNS query sent to our configured DNS server in order to find the IP address associated with www.google.com, but we don’t. There are two conditions that could prevent a DNS query from being made: The device initiating the connection already has the DNS name-to-IP address mapping in its DNS cache. The device connecting to the DNS name already has the DNS name-to-IP address mapping specified in its hosts file. Upon further examination of the client computer, we find that the computer’s hosts file has an entry for www.google.com associated with the internal IP address 172.16.0.102. This erroneous entry is the source of our user’s problems. A computer will typically use its hosts file as the authoritative source for DNS name-to-IP address mappings, and will check that file before querying an outside source. In this scenario, the user’s computer checked its hosts file, found the entry for www.google.com, and decided that www.google.com was actually on its own local network segment. Next, it sent an ARP request to the host, received a response, and attempted to initiate a TCP connection to 172.16.0.102 on port 80. However, because the remote system was not configured as a web server, it would not accept the connection attempts. Once the hosts file entry was removed, the user’s computer began communicating correctly and was able to access www.google.com. Basi c Real-World Scenari os 149 NOTE To examine your hosts file on a Windows system, open C:\Windows\System32\ drivers\etc\hosts. On Linux, view /etc/hosts. This scenario is actually very common. It’s one that malware has been using for years to redirect users to websites hosting malicious code. Imagine if an attacker were to modify your hosts file so that every time you went to do your online banking, it actually redirected you to a fake site designed to steal your account credentials! Lessons Learned As you continue to analyze traffic, you will learn both how the various protocols work and how to break them. In this scenario, the DNS query was not sent because the client was misconfigured, not because of any external limitations or misconfigurations. By examining this problem at the packet level, we were able to quickly spot an IP address that was unknown and also to determine that DNS, a key component of this communication process, was missing. Using this information, we were able to identify the client as the source of the problem. No Internet Access: Upstream Problems As with the previous two scenarios, in this scenario, a user complains of no Internet access from his workstation. This user has narrowed the issue down to a single website, http://www.google.com/. Upon further investigation, we find that this issue is affecting everyone in the organization—no one can access Google domains. The network is configured as in the two prior scenarios, with a few simple switches and a single router connecting the network to the Internet. Tapping into the Wire In order to troubleshoot this issue, we first browse to http://www.google.com/ to generate traffic. Because this issue is network wide—meaning it’s also affecting your computer, and it could be the result of a massive malware infection—you shouldn’t sniff directly from your device. When you find yourself in a situation like this, a tap is the best solution, because it allows you to be completely passive after a brief interruption of service. The file resulting from the capture via a tap is nowebaccess3.pcap. Analysis This packet capture begins with DNS traffic instead of the ARP traffic we are used to seeing. Because the first packet in the capture is to an external address, and packet 2 contains a reply from that address, we can assume that the ARP process has already happened and the MAC-to-IP address mapping for our gateway router already exists in the host’s ARP cache at 172.16.0.8. As shown in Figure 8-25, the first packet in the capture is from the host 172.16.0.8 to address 4.2.2.1 , and it’s a DNS packet . Examining the contents of the packet, we see that it is a query for the A record for www.google.com . 150 Chapter 8 Figure 8-25: DNS query for www.google.com A record The response to the query from 4.2.2.1 is the second packet in the capture file, as shown in Figure 8-26. Examining the Packet Details pane, we see that the name server that responded to this request provided multiple answers to the query . At this point, all looks well, and communication is occurring as it should. Figure 8-26: DNS reply with multiple A records Now that the user’s computer has determined the web server’s IP address, it can attempt to communicate with the server. As shown in Figure 8-27, this process is initiated in packet 3, with a TCP packet sent from 172.16.0.8 to 74.125.95.105 . This destination address comes from the first A record provided in the DNS query response seen in packet 2. The TCP packet has the SYN flag set , and it’s attempting to communicate with the remote server on port 80 . Basi c Real-World Scenari os 151 Figure 8-27: SYN packet attempting to initiate a connection on port 80 Because this is a TCP handshake process, we know that we should see a TCP SYN/ACK packet sent in response, but instead, after a short time, another SYN packet is sent from the source to the destination. This process occurs once more after approximately a second, as shown in Figure 8-28, at which point communication stops and the browser reports that the website could not be found. Figure 8-28: The TCP SYN packet is attempted three times with no response received. As we troubleshoot this scenario, we consider that we know that the workstation within our network can connect to the outside world because the DNS query to our external DNS server at 4.2.2.1 is successful. The DNS server responds with what appears to be a valid address, and our hosts attempt to connect to one of those addresses. Also, the local workstation we are attempting to connect from appears to be functioning. The problem is that the remote server simply isn’t responding to our connection requests; a TCP RST packet is not sent. This might occur for several reasons: a misconfigured web server, a corrupted protocol stack on the web server, or a packet-filtering device on the remote network (such as a firewall). Assuming there is no local packet filtering device in place, all of the other potential solutions are on the remote network and beyond our control. In this case, the web server was not functioning correctly, and no attempt to access it succeeded. Once the problem was corrected on Google’s end, communication was able to proceed. Lessons Learned In this scenario, the problem was not one that we could correct. Our analysis determined that the issue was not with the hosts on our network, our router, or the external DNS server providing us with name resolution services. The issue lay outside our network infrastructure. Sometimes discovering that a problem isn’t really ours can not only relieve stress, but also save face when management comes knocking. I have fought 152 Chapter 8 with many ISPs, vendors, and software companies who claim that an issue is not their fault, but as you’ve just seen, packets don’t lie. Inconsistent Printer Our IT help desk administrator is having trouble resolving a printing issue. Users in the sales department are reporting that the high-volume sales printer is malfunctioning. When a user sends a large print job to the printer, it will print several pages and then stop printing before the job is done. Multiple driver configuration changes have been attempted but have been unsuccessful. The help desk staff would like you to ensure that this isn’t a network problem. inconsistent_ printer.pcap Tapping into the Wire The common thread in relation to this problem is the printer, so we want to begin by placing our sniffer as close to the printer as we can. While we can’t install Wireshark on the printer itself, the switches used in this network are advanced layer 3 switches, so we can use port mirroring. We’ll mirror the port to which the printer is connected to an empty port, and connect a laptop with Wireshark installed into this port. Once this setup is complete, we’ll have a user send a large print job to the printer, and we’ll monitor the output. The resulting capture file is inconsistent_printer.pcap. Analysis As shown in Figure 8-29, a TCP handshake between the network workstation sending the print job (172.16.0.8) and the printer (172.16.0.253) initiates the connection at the start of the capture file. Following the handshake, a TCP data packet 1,460 bytes in size is sent to the printer . The amount of data can be seen in the far right side of the Info column in the Packet List pane or at the bottom of the TCP header information in the Packet Details pane. Figure 8-29: Data being transmitted to the printer over TCP Following packet 4, another data packet is sent containing 1,460 bytes of data , as you can see in Figure 8-30. This data is acknowledged by the printer . Basi c Real-World Scenari os 153 Figure 8-30: Normal data transmission and TCP acknowledgments The flow of data continues until the last two packets in the capture. Packet 121 is a TCP retransmission packet, and our first sign of trouble, as shown in Figure 8-31. Figure 8-31: These TCP retransmission packets are a sign of a potential problem. A TCP retransmission packet is sent when one device sends a TCP packet to a remote device, and the remote device doesn’t acknowledge the transmission. Once a retransmission threshold is reached, the sending device assumes that the remote device did not receive the data, and it retransmits the packet. This process is repeated a few times before communication effectively stops. In this scenario, the retransmission is sent from the client workstation to the printer because the printer failed to acknowledge the transmitted data. If you expand the SEQ/ACK analysis portion of the TCP header along with the additional information beneath it, as shown in Figure 8-31, you can view the details of why this is a retransmission. According to the details processed by Wireshark, packet 121 is a retransmission of packet 120 . Additionally, the retransmission timeout (RTO) for the retransmitted packet was around 5.5 seconds . When analyzing the delay between packets, you can change the time display format to suit your situation. In this case, because we want to see how long the retransmissions occurred after the previous packet was sent, change this option by selecting ViewTime Display Format and select Seconds Since 154 Chapter 8 Previous Captured Packet. Then, as shown in Figure 8-32, you can clearly see that the retransmission in packet 121 occurs 5.5 seconds after the original packet (packet 120) is sent . Figure 8-32: Viewing the time between packets is useful for troubleshooting. The next packet is another retransmission of packet 120. The RTO of this packet is 11.10 seconds, which includes the 5.5 seconds from the RTO of the previous packet. A look at the Time column of the Packet List pane tells us that this retransmission was sent 5.6 seconds after the previous retransmission. This appears to be the last packet in the capture file and, coincidentally, the printer stops printing at approximately this time. In this analysis scenario, we have the benefit of dealing with only two devices inside our own network, so we just need to determine whether the client workstation or the printer is to blame. We can see that data is flowing correctly for quite some time, and then at some point, the printer simply stops responding to the workstation. The workstation gives its best effort to get the data to its destination, as evidenced by the retransmissions, but the printer simply stops responding. This issue is reproducible and happens regardless of which computer sends a print job, so we assume the printer is the source of the problem. After further analysis, we find that the printer’s RAM is malfunctioning. When large print jobs are sent to the printer, it prints only a certain number of pages, likely until certain regions of memory are accessed. At that point, the memory issue causes the printer to be unable to accept any new data, and it ceases communication with the host transmitting the print job. Lessons Learned Although this printer problem was not the result of a network issue, we were able to use Wireshark to pinpoint the problem. Unlike previous scenarios, this one centered solely on TCP traffic. Luckily, TCP often leaves us with useful information when two devices simply stop communicating. In this case, when communication abruptly stopped, we were able to pinpoint the exact location of the problem based on nothing more than TCP’s built-in retransmission functionality. As we continue through our scenarios, we will often rely on functionality like this to troubleshoot more complex issues. Stranded in a Branch Office In this scenario, we have a company with a central headquarters and newly deployed remote branch offices. The company’s IT infrastructure is mostly contained within the central office using a Windows server-based domain and a secondary domain controller. The domain controller is responsible for handling DNS and authentication requests for users at the branch office. Basi c Real-World Scenari os 155 The domain controller is a secondary DNS server that should receive its resource record information from the upstream DNS servers at the corporate headquarters. The deployment team is rolling out the new infrastructure to the branch office when it finds that no one can access the intranet web application servers on the network. These servers are located at the main office and are accessed through the wide area network (WAN). This issue affects all users at the branch office, and is limited to just these internal servers. All users can access the Internet and other resources within the branch. Figure 8-33 shows the components to consider in this scenario, which involves multiple sites. Workstation 172.16.16.101 HQ App Server 172.16.16.200 WAN Link Branch Router Branch Slave DNS Server 172.16.16.251 Branch Office HQ Router HQ Master DNS Server 172.16.16.250 Central (HQ) Office Figure 8-33: The relevant components for the stranded branch office issue stranded_ clientside.pcap stranded_ branchdns.pcap 156 Chapter 8 Tapping into the Wire Because the problem lies in communication between the main and branch offices, there are a couple of places we could collect data to start tracking down the problem. The problem could be with the clients inside the branch office, so we’ll start by port mirroring one of those computers to check what it sees on the wire. Once we’ve collected that information, we can use it to point toward other collection locations that might help solve the problem. The initial capture file obtained from one of the clients is stranded_clientside.pcap. Analysis As shown in Figure 8-34, our first capture file begins when the user at the workstation address 172.16.16.101 attempts to access an application hosted on the headquarters app server, 172.16.16.200. This capture contains only two packets. It appears as though a DNS request is sent to 172.16.16.251 for the A record for appserver in the first packet. This is the DNS name for the server at 172.16.16.200 in the central office. As you can see in Figure 8-35, the response to this packet is a server failure , which indicates that something is preventing the DNS query from completing successfully. Notice that this packet does not answer the query since it is an error (server failure). We now know that the communication problem is related to some DNS issue. Because the DNS queries at the branch office are resolved by the DNS server at 172.16.16.251, that’s our next stop. Figure 8-34: Communication begins with a DNS query for the appserver A record. Figure 8-35: The query response indicates a problem upstream. In order to capture the appropriate traffic from the branch DNS server, we’ll leave our sniffer in place and simply change the port-mirroring assignment so that the server’s traffic, rather than the workstation’s traffic, is now mirrored to our sniffer. The result is the file stranded_branchdns.pcap. As shown in Figure 8-36, this capture begins with the query and response we saw earlier, along with one additional packet. This additional packet looks a bit odd because it is attempting to communicate with the primary DNS server at the central office (172.16.16.250) on the standard DNS server port 53 , but it is not the UDP we’re used to seeing. In order to figure out the purpose of this packet, recall our discussion of DNS in Chapter 7. DNS usually uses UDP, but it uses TCP when the response to a query exceeds a certain size. In that case, we’ll see some initial UDP traffic that triggers the TCP traffic. TCP is also used for DNS during a zone transfer, when resource records are transferred between DNS servers, which is likely the case here. Basi c Real-World Scenari os 157 Figure 8-36: This SYN packet uses port 53 but is not UDP. The DNS server at the branch office location is a slave to the DNS server at the central office, meaning that it relies on it in order to receive resource records. The application server that users in the branch office are trying to access is located inside the central office, which means that the central office DNS server is authoritative for that server. In order for the branch office server to be able to resolve a DNS request for the application server, the DNS resource record for that server must be transferred from the central office DNS server to the branch office DNS server. This is likely the source of the SYN packet in this capture file. The lack of response to this SYN packet tells us that the DNS problem here is the result of a failed zone transfer between the branch and central office DNS servers. Now we can go one step further by figuring out why the zone transfer is failing. The possible culprits for the issue can be narrowed down to the routers between the offices or the central office DNS server itself. In order to figure this out, we can sniff the traffic of the central office DNS server to see if the SYN packet is making it to the server. I have not included a capture file for the central office DNS server traffic because there was none. The SYN packet never reached the server. Upon dispatching technicians to review the configuration of the routers connecting the two offices, it was found that the central office router was configured to allow UDP traffic inbound only on port 53 and block TCP traffic inbound on port 53. This simple misconfiguration prevented zone transfers from occurring between servers, which prevented clients within the branch office from resolving queries for devices in the central office. Lessons Learned You can learn a lot about investigating network communications issues by watching crime dramas. When a crime occurs, the detectives begin by interviewing those most affected. Leads that result from that examination are pursued, and the process continues until a culprit is found. In this scenario, we began by examining the victim (the workstation) and established leads by finding the DNS communication issue. Our leads led us to the branch DNS server, then to the central DNS server, and finally to the router, which was the source of the problem. 158 Chapter 8 When performing analysis, try thinking of packets as clues. The clues don’t always tell you who committed the crime, but they often take you to the culprit eventually. Ticked-Off Developer Some of the most frequent arguments in IT are between developers and system administrators. Developers always blame shoddy network setup and malfunctioning equipment for program malfunctions. System administrators tend to blame bad code for network errors and slow communication. In this scenario, a programmer has developed an application for tracking the sales at multiple stores and reporting back to a central database. In an effort to save bandwidth during normal business hours, this is not a real-time application. Reporting data is accumulated throughout the day and is transmitted at night as a comma-separated value (CSV) file to be inserted into the central database. This newly developed application is not functioning correctly. The files sent from the stores are being received by the server, but the data being inserted into the database is not correct. Sections are missing, data is in the wrong place, and some portions of the data are missing. Much to the dismay of the system administrator, the programmer blames the network for the issue. He is convinced that the files are becoming corrupted while in transit from the stores to the central data repository. Our goal is to prove him wrong. tickedoffdeveloper .pcap Tapping into the Wire In order to collect the data we need, we can capture packets at one of the stores or at the central office. Because the issue is affecting all of the stores, it would seem that if the issue is network-related, it would occur at the central office—that is the only common thread among all stores. The network switches support port mirroring, so we’ll mirror the port the server is plugged into and sniff its traffic. The traffic capture will be isolated to a single instance of a store uploading its CSV file to the collection server. This result is the capture file tickedoffdeveloper.pcap. Analysis We know nothing about the application the programmer has developed, other than the basic flow of information on the network. The capture file appears to start with some FTP traffic, so we’ll investigate that to see if it is indeed the mechanism that is transporting this file. This is a good place to examine the communication flow graph for a nice, clean summary of the communication that is occurring. To do so, select StatisticsFlow Graph, and then click OK. Figure 8-37 shows the resulting graph. Basi c Real-World Scenari os 159 Figure 8-37: The flow graph gives a quick view of the FTP communication. Based on this flow graph, we see that a basic FTP connection is set up between 172.16.16.128 and 172.16.16.121 . Since 172.16.16.128 is initiating the connection , we can assume that it is the client, and that 172.16.16.121 is the server that compiles and processes the data. The flow graph confirms that this traffic is exclusively using the FTP protocol. We know that some transfer of data should be happening here, so we can use our knowledge of FTP to locate the packet where this transfer begins. The FTP connection and data transfer are initiated by the client, so we should be looking for the FTP STOR command, which is used to upload data to an FTP server. The easiest way to find this is to build a filter. Because this capture file is littered with FTP request commands, rather than sorting through the hundreds of protocols and options in the expression builder, we can build the filter we need directly from the Packet List pane. In order to do this, we first need to select a packet with an FTP request command present. We will choose packet 5, since it’s near the top of our list. Then expand the FTP section in the Packet Details pane and expand the USER section. Right-click the Request Command: USER field and select Prepare a Filter. Finally, choose Selected. 160 Chapter 8 This will prepare a filter for all packets that contain the FTP USER request command and put it in the filter dialog. Next, as shown in Figure 8-38, edit the filter by replacing the word USER with the word STOR . Figure 8-38: This filter helps identify where data transfer begins. Now apply this filter by pressing ENTER, and you’ll see that only one instance of the STOR command exists in the capture file, at packet 64 . Now that we know where data transfer begins, clear the filter by clicking the Clear button above the Packet List pane. Examining the capture file beginning with packet 64, we see that this packet specifies the transfer of the file store4829-03222010.csv , as shown in Figure 8-39. Figure 8-39: The CSV file is being transferred using FTP. The packets following the STOR command use a different port, but are identified as part of an FTP-DATA transmission. We’ve verified that data is being transferred, but we have yet to prove the programmer wrong. In order to do that, we need to show that the contents of the file are sound after traversing the network by extracting the transferred file from the captured packets. When a file is transferred across a network in an unencrypted format, it is broken down into segments and reassembled at its destination. In this scenario, we captured packets as they reached their destination but before they were reassembled. The data is all there, we simply need to reassemble it by extracting the file as a data stream. To perform the reassembly, select any of the packets in the FTP-DATA stream (such as packet 66) and click Follow TCP Stream. The results are displayed in the TCP stream, as shown in Figure 8-40. The data appears because it is being transferred in plaintext over FTP, but we can’t be sure that the file is intact based on the stream alone. In order to reassemble the data so that we can extract it in its original format, click the Save As button and specify the name of the file as displayed in packet 64, as shown in Figure 8-41. Then click Save. Basi c Real-World Scenari os 161 Figure 8-40: The TCP stream shows what appears to be the data being transferred. Figure 8-41: Saving the stream as the original filename The result of this save operation should be a CSV file that is an exact bytelevel copy of the file originally transferred from the store system. The file can be verified by comparing the MD5 hash of the original file with that of the extracted file. The MD5 hashes should be the same, as shown in Figure 8-42. Once the files are compared, we can prove that the network is not to blame for the database corruption occurring within the application. The file transferred from the store to the collection server is intact when it reaches the server, so any corruption must be occurring when the file is processed by the application. 162 Chapter 8 Figure 8-42: The MD5 hashes of the original file and the extracted file are equivalent. Lessons Learned One great thing about packet-level analysis is that you don’t need to deal with the clutter of applications. Poorly coded applications greatly outnumber the good ones, but at the packet level, none of that matters. In this case, the programmer was concerned about all of the mysterious components his application was dependent upon, but at the end of the day, his complicated data transfer that took hundreds of lines of code is still no more than FTP, TCP, and IP. Using what we know about these basic protocols, we were able to ensure the communication process flowed correctly and even extract files to prove the soundness of the network. It’s crucial to remember that no matter how complex the issue at hand, it’s still just packets. Final Thoughts In this chapter, we’ve covered several basic scenarios where packet analysis allowed us to gain a better understanding of problematic communication. Using basic analysis of common protocols, we were able to track down and solve network problems in a timely manner. While you may not encounter exactly the same scenarios on your network, the analysis techniques presented here should prove useful to you as you analyze your own unique problems. Basi c Real-World Scenari os 163 FIGHTING A SLOW NETWORK As a network administrator, much of your time will be spent fixing computers and services that are running slower than they should be. But just because someone says that the network is running slowly does not mean that the network is to blame. Before you begin to tackle a slow network problem, you first need to determine whether the network is in fact running slowly. You’ll learn how to do that in this chapter. We will begin by discussing the error-recovery and flow-control features of TCP. Then we will explore how to detect the source of slowness on a network. Finally, we will look at approaches for baselining networks and the devices and services that run on them. Once you have completed this chapter, you should be much better equipped to identify, diagnose, and troubleshoot slow networks. NOTE Multiple techniques can be used to troubleshoot slow networks. I’ve chosen to focus this chapter primarily on TCP because most of the time it is all that you will have to work with. TCP allows you to perform passive retrospective analysis rather than generate additional traffic (as with ICMP). TCP Error-Recovery Features TCP’s error-recovery features are our best tools for locating, diagnosing, and eventually repairing high latency on a network. In terms of computer networking, latency is a measure of delay between a packet’s transmission and its receipt. Latency can be measured as one-way (from a single source to a destination) or as round-trip (from a source to a destination and back to the original source). When communication between devices is fast, and the amount of time it takes for a packet to get from one point to another is low, the communication is said to have low latency. Conversely, when packets take a significant amount of time to travel between a source and destination, the communication is said to have high latency. High latency is the number one enemy of all network administrators who value their sanity (and their job). In Chapter 6, we discussed how TCP uses sequence and acknowledgment numbers to ensure the reliable delivery of packets. In this chapter, we’ll look at sequence and acknowledgment numbers again to see how TCP responds when high latency causes these numbers to be received out of sequence (or not received at all). TCP Retransmissions tcp_retransmissions .pcap 166 Chapter 9 The ability of a host to retransmit packets is one of TCP’s most fundamental error-recovery features. It is designed to combat packet loss. There are many possible causes for packet loss, including malfunctioning applications, routers under a heavy traffic load, or a temporary service outage. Things move fast at the packet level, and often the packet loss is temporary, so it’s crucial for TCP to be able to detect and recover from packet loss. The primary mechanism for determining whether the retransmission of a packet is necessary is called the retransmission timer. This timer is responsible for maintaining a value called the retransmission timeout (RTO). Whenever a packet is transmitted using TCP, the retransmission timer starts. This timer stops when an ACK for that packet is received. The time between the packet transmission and receipt of the ACK packet is called the round-trip time (RTT). Several of these times are averaged, and that average is used to determine the final RTO value. Until an RTO value is actually determined, the transmitting operating system relies on its default configured RTT setting. This setting is issued for the initial communication between hosts and is adjusted based on the RTT from received packets in order to form the actual RTO. Once the RTO value has been determined, the retransmission timer is used on every transmitted packet to determine whether packet loss has occurred. Figure 9-1 illustrates the TCP retransmission process. Data Retransmission 1 (RTO) Retransmission 2 (RTO × 2) Retransmission 3 (RTO × 4) Transmitting Host Retransmission 4 (RTO × 8) Recipient Host Retransmission 5 (RTO × 16) No Response = Connection Terminated Figure 9-1: Conceptual view of the TCP retransmission process When a packet is sent, but the recipient has not sent a TCP ACK packet, the transmitting host assumes that the original packet was lost and retransmits the original packet. When the retransmission is sent, the RTO value is doubled; if no ACK packet is received before that value is reached, another retransmission will occur. The RTO value will be doubled for the next retransmission should an ACK not be received. This process will continue, with the RTO value being doubled for each retransmission, until an ACK packet is received or until the sender reaches the maximum number of retransmission attempts it is configured to send. The maximum number of retransmission attempts depends on the value configured in the transmitting operating system. By default, Windows hosts default to a maximum of five retransmission attempts. Most Linux hosts default to a maximum of 15 attempts. This option is configurable in either operating system category. To see an example of TCP retransmission, open the file tcp_ retransmissions.pcap, which contains six packets. The first packet is shown in Figure 9-2. Figure 9-2: A simple TCP packet containing data F ighting a Slow Networ k 167 This packet is a TCP PSH/ACK packet containing 648 bytes of data that is sent from 10.3.30.1 to 10.3.71.7 . This is a typical data packet. Under normal circumstances, you would expect to see a TCP ACK packet in response fairly soon after the first packet is sent. In this case, however, the next packet is a retransmission. You can tell this by looking at the packet in the Packet List pane. The Info column clearly says [TCP Retransmission], and the packet will appear with red text on a black background. Figure 9-3 shows examples of retransmissions listed in the Packet List pane. Figure 9-3: Retransmissions in the Packet List pane You can also determine if a packet is a retransmission by examining it in the Packet Details and Packet Bytes panes, as shown in Figure 9-4. Figure 9-4: An individual retransmission packet Note that this packet is the same as the original packet (other than the IP identification and Checksum fields). To verify this, compare the Packet Bytes pane of this retransmitted packet with the original one . In the Packet Details pane, notice that the retransmission packet has some additional information included under the SEQ/ACK Analysis heading . This useful information is provided by Wireshark and is not actually contained in the packet itself. The SEQ/ACK analysis tells us that this is indeed a retransmission , that the RTO value is 0.206 seconds , and that the RTO is based on the delta time from packet 1 . Examination of the remaining packets should yield similar results, with the only differences between the packets found in the IP identification and Checksum fields, and the RTO value. To visualize the time lapse between each packet, look at the Time column in the Packet List pane, as shown in Figure 9-5. Here, you see exponential growth in time as the RTO value is doubled after each retransmission. 168 Chapter 9 The TCP retransmission feature is used by the transmitting device to detect and recover from packet loss. Next, we’ll examine TCP duplicate acknowledgments, a feature that the data recipient uses to detect and recover from packet loss. TCP Duplicate Acknowledgments and Fast Retransmissions tcp_dupack.pcap NOTE A duplicate ACK is a TCP packet sent from a recipient when that recipient receives packets that are out of order. TCP uses the sequence and acknowledgment number fields within its header to reliably ensure that data is received and reassembled in the same order in which it was sent. Figure 9-5: The Time column shows the increase in RTO value. The proper term for a TCP packet is actually a TCP segment, but most people tend to refer to them as packets. When a new TCP connection is established, one of the most important pieces of information exchanged during the handshake process is an initial sequence number (ISN). Once the ISN is set for each side of the connection, each subsequently transmitted packet increments the sequence number by the size of its data payload. Consider a host that has an ISN of 5000 and sends a 500-byte packet to a recipient. Once this packet has been received, the recipient host will respond with a TCP ACK packet with an acknowledgment number of 5500, based on the following formula: Sequence Number In + Bytes of Data Received = Acknowledgment Number Out As a result of this calculation, the acknowledgment number returned to the transmitting host is actually the next sequence number that the recipient expects to receive. An example of this can be seen in Figure 9-6. SEQ #: 5000 Data Size: 500 ACK #: 5500 SEQ #: 5500 Data Size: 500 ACK #: 6000 Transmitting Host SEQ #: 6000 Data Size: 500 Recipient Host ACK #: 6500 Figure 9-6: TCP sequence and acknowledgment numbers The detection of packet loss by the data recipient is made possible through the sequence numbers. As the recipient tracks the sequence numbers it is receiving, it can determine when it receives sequence numbers that are out of order. When the recipient receives an unexpected sequence number, it assumes that a packet has been lost in transit. In order to reassemble data properly, the recipient must have the missing packet, so it resends the ACK packet that F ighting a Slow Networ k 169 contains the lost packet’s expected sequence number in order to elicit a retransmission of that packet from the transmitting host. When the transmitting host receives three duplicate ACKs from the recipient, it assumes that the packet was indeed lost in transit and immediately sends a fast retransmission. Once a fast retransmission is triggered, all other packets being transmitted are queued until the fast retransmission packet is sent. This process is depicted in Figure 9-7. SEQ #: 5000 Data Size: 500 ACK #: 5500 SEQ #: 6000 Data Size: 500 Duplicate ACK(1)#: 5500 Duplicate ACK(2)#: 5500 Transmitting Host Duplicate ACK(3)#: 5500 Recipient Host Fast Retransmission SEQ #: 5500 Data Size: 500 ACK #: 6000 Figure 9-7: Duplicate ACKs from the recipient result in a fast retransmission. You’ll find an example of duplicate ACKs and fast retransmissions in the file tcp_dupack.pcap. The first packet in this capture is shown in Figure 9-8. Figure 9-8: The ACK showing the next expected sequence number This packet, a TCP ACK sent from the data recipient (172.31.136.85) to the transmitter (195.81.202.68) , has an acknowledgment of the data sent in the previous packet that is not included in this capture file. NOTE 170 Chapter 9 By default, Wireshark uses relative sequence numbers to make the analysis of these numbers easier, but the examples and screenshots in the next few sections do not use this feature. To turn off this feature, select EditPreferences. In the Preferences window, select Protocols and then the TCP section. Then uncheck the box next to Relative sequence numbers and window scaling. The acknowledgment number in this packet is 1310973186 , which should be the sequence number of the next packet received, as shown in Figure 9-9. Figure 9-9: The sequence number of this packet is not what is expected. Unfortunately for us and our recipient, the sequence number of the next packet is 1310984130 , which is not what we are expecting. This indicates that the expected packet was somehow lost in transit. The recipient host notices that this packet is out of sequence and sends a duplicate ACK in the third packet of this capture, as shown in Figure 9-10. Figure 9-10: The first duplicate ACK packet You can determine that this is a duplicate ACK packet by examining either of the following: The Info column in the Packet Details pane. The packet should appear as red text on a black background. The Packet Details pane under the SEQ/ACK Analysis heading. If you expand this heading, you will find that the packet is listed as a duplicate ACK of packet 1. The next several packets continue this process, as shown in Figure 9-11. F ighting a Slow Networ k 171 Figure 9-11: Additional duplicate ACKs are generated due to out-of-order packets. The fourth packet in the capture file is another chunk of data sent from the transmitting host with the wrong sequence number . As a result, the recipient host sends its second duplicate ACK . One more packet with the wrong sequence number is received by the recipient . That forces the transmission of the third and final duplicate ACK . As soon as the transmitting host receives the third duplicate ACK from the recipient, it is forced to halt all packet transmission and resend the lost packet. Figure 9-12 shows the fast retransmission of the lost packet. Figure 9-12: The duplicate ACKs cause this fast retransmission of the lost packet. The retransmission packet is once again noticeable through the Info column in the Packet List pane. As with previous examples, the packet is clearly labeled with red text on a black background. The SEQ/ACK Analysis section of this packet tells us that this is suspected to be a fast retransmission . (Once again, the information that labels this packet as a fast retransmission is not a value set in the packet itself, but rather a feature of Wireshark.) The final packet in the capture is an ACK packet acknowledging receipt of the fast retransmission. NOTE 172 Chapter 9 One feature to consider that may affect the flow of data in TCP communications where packet loss is present is the Selective Acknowledgement feature. In the packet capture above, Selective ACK was negotiated as an enabled feature during the initial three-way handshake process. As a result, whenever a packet is lost and a duplicate ACK received, only the lost packet has to be retransmitted, even though other packets were received successfully after the lost packet. Had Selective ACK not been enabled, every packet occurring after the lost packet would have had to be retransmitted as well. Selective ACK makes data loss recovery much more efficient. Because most modern TCP/IP stack implementations support Selective ACK, you should usually find that this feature is implemented. TCP Flow Control Retransmissions and duplicate ACKs are reactive TCP functions designed to recover from packet loss. TCP would be a poor protocol if it didn’t include some form of proactive method for preventing packet loss, but luckily it does. TCP implements a sliding-window mechanism to detect when packet loss may occur and adjust the rate of data transmission to prevent this. The slidingwindow mechanism leverages the data recipient’s receive window to control the flow of data. The receive window is a value specified by the data recipient and stored in the TCP header (in bytes) that tells the transmitting device how much data it is willing to store in its TCP buffer space. This buffer space is where data is stored temporarily until it can be passed up the stack to the application layer protocol waiting to process it. As a result, the transmitting host can send only the amount of data specified in the Window Size field at one time. In order for the transmitter to send more data, the recipient must send an acknowledgment that the previous data was received. It also must clear TCP buffer space by processing the data that is occupying that position. Figure 9-13 illustrates how the receive window works. Client Server Buffer Space Available Window Size 2500 Bytes 2500 Bytes 5000 Bytes 2000 Bytes 500 Bytes 5000 Bytes ACK 5000 Bytes 3000 Bytes 2000 Bytes 1000 Bytes 1000 Bytes ACK 5000 Bytes 5000 Bytes 5000 Bytes 5000 Bytes 5000 Bytes Figure 9-13: The receive window keeps the data recipient from getting overwhelmed. In Figure 9-13, the client is sending data to a server that has communicated a receive window size of 5,000 bytes. The client sends 2,500 bytes, reducing the server’s buffer space to 2,500 bytes, and then sends another 2,000 bytes, further reducing the buffer to 500 bytes. The server then sends an acknowledgment of this data. It processes the data in its buffer and then has an empty buffer available. This process repeats, with the client sending 3,000 bytes and another 1,000 bytes, reducing the server’s buffer to 1,000 bytes. The client once more acknowledges this data and processes the contents of its buffer. F ighting a Slow Networ k 173 Adjusting the Window Size This process of adjusting the window size is fairly clear-cut, but it isn’t always perfect. Whenever data is received by the TCP stack, an acknowledgment is generated and sent in reply, but the data placed in the recipient’s buffer is not always processed immediately. When a busy server is processing packets from multiple clients, it’s quite possible that the server could be slow in clearing its buffer and not be able to make room for new data to be received. With no means of flow control, this could lead to packets being lost and corruption of data. Fortunately, when a server becomes too busy to process data at the rate its receive window is advertising, it can adjust the size of the receive window. It does this by decreasing the window size value in the TCP header of the ACK packet it is sending back to the hosts that are sending it data. Figure 9-14 shows an example of this. Client Server Buffer Space Available Window Size 2000 Bytes 3000 Bytes 5000 Bytes 2000 Bytes 1000 Bytes 5000 Bytes ACK − Window Update: 1000 Bytes 5000 Bytes 1000 Bytes 800 Bytes 200 Bytes 1000 Bytes 150 Bytes 50 Bytes 1000 Bytes ACK 1000 Bytes 1000 Bytes Figure 9-14: The window size can be adjusted when the server becomes busy. In Figure 9-14, the server starts with an advertised window size of 5,000 bytes. The client sends 2,000 bytes, followed by another 2,000 bytes, leaving only 1,000 bytes of buffer space available. The server realizes that its buffer is filling up quickly. It knows that if data transfer keeps up at this rate, packets will soon be lost. To rectify this, the server sends an acknowledgment to the client with an updated window size of 1,000 bytes. As a result, less data is sent by the client, and the server can process its buffer contents at an acceptable rate that allows data to flow in a constant manner. The resizing process works both ways. When the server can process data at a faster rate, it can send an ACK packet with a larger window size. 174 Chapter 9 Halting Data Flow with a Zero Window Notification In some cases, a server can no longer process data sent from a client. This might be due to a lack of memory, lack of processing capability, or another problem. This could result in packets being dropped and the communication process halting, but the receive window can help minimize the negative impact. When this situation arises, a server can send a packet that contains a window size of zero. When the client receives this packet, it will halt any data transmission but will keep the connection to the server open with the transmission of keep-alive packets. Keep-alive packets are sent by the client at regular intervals to check the status of the server’s receive window. Once the server can begin processing data again, it will respond with a nonzero window size, and communication will resume. Figure 9-15 illustrates an example of zero window notification. Client Server Buffer Space Available Window Size 2000 Bytes 3000 Bytes 5000 Bytes 2000 Bytes 1000 Bytes 5000 Bytes ACK − Window Update: 0 Bytes 0 Bytes 0 Bytes Keep Alive 0 Bytes 0 Bytes ACK − Window Update: 1000 Bytes 1000 Bytes 1000 Bytes 900 Bytes 100 Bytes 1000 Bytes Figure 9-15: Data transfer stops when the window size is set to 0 bytes. In Figure 9-15, the server begins receiving data with a 5,000-byte window size. After receiving 4,000 bytes of data from the client, the server begins experiencing a very heavy processor load, and can no longer process any data from the client. The server then sends a packet with the Window Size field set to 0. The client halts transmission of data and sends a keep-alive packet. After the keep-alive packet, the server responds with a packet notifying the client that it can now receive data, and that its window size is 1,000 bytes. The client resumes sending data. The TCP Sliding Window in Practice tcp_zerowindowrecovery.pcap tcp_zerowindowdead.pcap Having covered the theory behind the TCP sliding window, we will now examine it in the capture file tcp_zerowindowrecovery.pcap. In this file, we begin with several TCP ACK packets traveling from 192.168.0.20 to 192.168.0.30. The main value of interest to us is the Window F ighting a Slow Networ k 175 Size field, which can be seen in both the Info column of the Packet List pane and in the TCP header in the Packet Details pane. You can see immediately that this field’s value decreases over the course of the first three packets, as shown in Figure 9-16. Figure 9-16: The window size of these packets is decrementing. This value goes from 8,760 bytes in the first packet to 5,840 bytes in the second packet and then 2,920 bytes in the third packet . This lowering of the window size value is a classic indicator of increased latency from the host. Notice in the Time column that this happens very quickly . When the window size is lowered this fast, it’s common for the window size to drop to zero, which is exactly what happens in the fourth packet, as shown in Figure 9-17. Figure 9-17: This zero window packet says that the host cannot accept any more data. The fourth packet is also being sent from 192.168.0.20 to 192.168.0.30, but its purpose is to tell 192.168.0.30 that it can no longer receive any data. The 0 value is seen in the TCP header , and Wireshark also tells us that this is a zero window packet in the Info column of the Packet List pane and under the SEQ/ACK Analysis section of the TCP header . Once this zero window packet is sent, the device at 192.168.0.30 will not send any more data until it receives a window update from 192.168.0.20 notifying it that the window size has increased. Luckily for us, the issue causing the zero window condition in this capture file was only temporary. So, a window update is sent in the next packet, as shown in Figure 9-18. In this case, the window size is increased to a very healthy 64,240 bytes . Wireshark once again lets us know that this is a window update under the SEQ/ACK Analysis heading. 176 Chapter 9 Figure 9-18: A TCP window update packet lets the other host know it can begin transmitting again. Once the update packet is received, the host at 192.168.0.30 can begin sending data again, as it does in packets 6 and 7. This process takes place very quickly. Had it lasted only slightly longer, it could have caused a potential hiccup on the network, resulting in a slower or failed data transfer. As one last look at the sliding window, examine the file tcp_ zerowindowdead.pcap. The first packet in this capture is normal HTTP traffic being sent from 195.81.202.68 to 172.31.136.85. The packet is immediately followed with a zero window packet sent back from 172.31.136.85, as shown in Figure 9-19. Figure 9-19: Zero window packet halting data transfer This looks very similar to the zero window packet shown in Figure 9-17, but the result is much different. Rather than the 172.31.136.85 host sending a window update and communication resuming, we see a keep-alive packet, as shown in Figure 9-20. F ighting a Slow Networ k 177 Figure 9-20: This keep-alive packet ensures the zero window host is still alive. This packet is marked as a keep-alive by Wireshark under the SEQ/ACK Analysis section of the TCP header in the Packet Details pane . The Time column tells us that this packet occurred 3.4 seconds after the last received packet. This process continues several more times, with one host sending a zero window packet and the other sending a keep-alive packet, as shown in Figure 9-21. Figure 9-21: The zero window and keep-alive packets keep occurring over time. These keep-alive packets occur at intervals of 3.4, 6.8, and 13.5 seconds . This process can go on for quite a long time, depending on the operating systems of the communicating devices. In this case, as you can see by adding up the values in the Time column, the connection is halted for nearly 25 seconds. Imagine attempting to authenticate with a domain controller or download a file from the Internet while experiencing a 25-second delay—unacceptable! Learning from TCP Error-Control and Flow-Control Packets Let’s put retransmission, duplicate ACKs, and the sliding-window mechanism into some context. Here are a few notes to keep in mind when troubleshooting latency issues: Retransmission packets Retransmissions occur because the client has detected that the server is not receiving the data it’s sending. Therefore, depending on the side of the communication you are analyzing, you may never see retransmissions. If you are capturing data from the server, and it is truly not receiving the packets being sent and retransmitted from the client, you may be left in the dark because you won’t see the retransmission packets. If you suspect 178 Chapter 9 that you are the victim of packet loss on the server side, consider attempting to capture traffic from the client (if possible) so that you can actually see if retransmission packets are present. Duplicate ACK packets I tend to think of a duplicate ACK as the pseudo-opposite of a retransmission, because it is sent when the server detects that a packet from the client it is communicating with was lost in transit. In most cases, you can see duplicate ACKs when capturing traffic on both sides of the communication. Remember that duplicate ACKs are triggered when packets are received out of sequence. For example, if the server received just the first and third of three packets sent, that would cause a duplicate ACK to be sent to elicit a fast retransmission of the second packet from the client. Since you have received the first and third packets, it’s likely that whatever condition caused the second packet to be dropped was only temporary, so the duplicate ACK would be sent and received successfully in most cases. Of course, this scenario isn’t true all the time, so when you suspect packet loss on the server side and don’t see any duplicate ACKs, consider capturing packets from the client side of the communication. Zero window and keep-alive packets The sliding window directly relates to the server’s inability to receive and process data. Any decrease in the window size or zero window states are a direct result of some issue with the server, so if you see either occurring on the wire, you should focus your investigation there. You should typically always see window update packets on both sides of network communications. Locating the Source of High Latency In some cases, packet loss may not be the cause of latency. You may find that even though communications between two hosts are slow, that slowness doesn’t show the common symptoms of TCP retransmissions or duplicate ACKs. In cases such as these, you need another technique to locate the source of the high latency. One of the most effective ways to find the source of high latency is to examine the initial connection handshake and the first couple of packets that follow it. For example, consider a simple connection between a client and a web server as the client attempts to browse a site hosted on the web server. The portion of this communication sequence we are concerned with is the first six packets, consisting of the TCP handshake, the initial HTTP GET request, the acknowledgment to that GET request, and the first data packet sent from the server to the client. NOTE In order to follow along with this section, ensure that you have the proper time display format set in Wireshark by selecting ViewTime Display FormatSeconds Since Previous Displayed Packet. F ighting a Slow Networ k 179 Normal Communications latency1.pcap We’ll discuss network baselines in detail a little later in the chapter. For now, just know that you need a baseline of normal communications to compare with the conditions of high latency. For these examples, we will use the file latency1.pcap. We have already covered the details of the TCP handshake and HTTP communication, so we won’t review those topics again. In fact, we won’t look at the Packet Details pane at all. All we are really concerned about is the Time column, as shown in Figure 9-22. Figure 9-22: This traffic happens very quickly and can be considered normal. This communication sequence is quite quick. The entire process takes less than 0.1 seconds. The next few capture files we’ll examine will consist of this same traffic pattern with a few differences in the timing of the packets. Slow Communications—Wire Latency latency2.pcap Now let’s turn to the capture file latency2.pcap. Notice that all of the packets are the same except for the time values in two of them, as shown in Figure 9-23. Figure 9-23: Packets 2 and 5 depict high latency As we begin stepping through these six packets, we encounter our first sign of latency immediately. The initial SYN packet is sent by the client (172.16.16.128) to begin the TCP handshake, and a delay of 0.87 seconds is seen before the return SYN/ACK is received from the server (74.125.95.104). This is our first indicator that we are experiencing wire latency, which is caused by a device between the client and server. We can make the determination that this is wire latency because of the nature of the types of packets being transmitted. When the server receives a SYN packet, a very minimal amount of processing is required to send a reply, because the workload doesn’t involve any processing above the transport layer. Even when a server is experiencing a very heavy traffic load, it will typically respond to a SYN packet with a SYN/ACK rather quickly. This eliminates the server as the potential cause of the high latency. The client is also eliminated because, at this point, it is not doing any processing beyond the actual receipt of the SYN/ACK packet. Elimination of both the client and server points us to potential sources of slow communication within the first two packets of this capture. 180 Chapter 9 Continuing on, we see that the transmission of the ACK packet that completes the three-way handshake occurs quickly, as does the HTTP GET request sent by the client. All of the processing that generates these two packets occurs locally on the client following receipt of the SYN/ACK, so these two packets are expected to be transmitted quickly, as long as the client is not under a heavy processing load. At packet 5, we see another packet with an incredibly high time value. It appears that after our initial HTTP GET request was sent, the ACK packet returned from the server took 1.15 seconds to be received. Upon receipt of the HTTP GET request, the server first sent a TCP ACK before it began sending data, which once again requires very little processing by the server. This is another sign of wire latency. Whenever you experience true wire latency, you will almost always see it exhibited in both the SYN/ACK during the initial handshake and in other ACK packets throughout the communication. Although this information doesn’t tell you the exact source of the high latency on this network, it does tell you that neither client nor server is the source, so you know that the latency is due to some device in between. At this point, you could begin examining the various firewalls, routers, and proxies between the affected host to locate the culprit. Slow Communications—Client Latency latency3.pcap The next latency scenario we’ll examine is contained in the file latency3.pcap, as shown in Figure 9-24. Figure 9-24: The slow packet in this capture is the initial HTTP GET This capture begins normally, with the TCP handshake occurring very quickly and without any signs of latency. Everything appears to be fine until packet 4, an HTTP GET request after the handshake has completed. This packet shows a 1.34-second delay from the previously received packet. We need to examine what is occurring between packets 3 and 4 in order to determine the source of this delay. Packet 3 is the final ACK in the TCP handshake sent from the client to the server, and packet 4 is the GET request sent from the client to the server. The common thread here is that these are both packets sent by the client and are independent of the server. The GET request should occur quickly after the ACK is sent, since all of these actions are centered on the client. Unfortunately for the end user, the transition from ACK to GET doesn’t happen quickly. The creation and transmission of the GET packet does require processing up to the application layer, and the delay in this processing indicates that the client was unable to perform the action in a timely manner. This means that the client is ultimately responsible for the high latency in the communication. F ighting a Slow Networ k 181 Slow Communications—Server Latency latency4.pcap The last latency scenario we’ll examine uses the file latency4.pcap, as shown in Figure 9-25. This is an example of server latency. Figure 9-25: High latency isn’t exhibited until the last packet of this capture. In this capture, the TCP handshake process between these two hosts completes flawlessly and quickly, so things begin well. The next couple of packets bring more good news, as the initial GET request and response ACK packets are delivered quickly as well. It is not until the last packet in this file that we see a packet exhibiting signs of high latency. This sixth packet is the first HTTP data packet sent from the server in response to the GET request sent by the client, but with a rather slow arrival time of 0.98 seconds after the server sends its TCP ACK for the GET request. The transition between packets 5 and 6 is very similar to the transition we saw in the previous scenario between the handshake ACK and GET request. However, in this case, the server is the focus of our concern. Packet 5 is the ACK that the server sends in response to the GET request it received from the client. As soon as that packet has been sent, the server should begin sending data almost immediately. The accessing, packaging, and transmitting of the data in this packet is done by the HTTP protocol, and because this is an application layer protocol, a bit of processing is required by the server. The delay in receipt of this packet indicates that the server was unable to process this data in a reasonable amount of time, ultimately pointing to it as the source of latency in this capture file. Latency Locating Framework Using six packets, we’ve managed to locate the source of high network latency from the client and the server. These scenarios may seem a bit complex, but the diagram shown in Figure 9-26 should make the process a bit quicker when troubleshooting your own latency issues. These principles can be applied to almost any TCP-based communication. NOTE 182 Chapter 9 Notice that we have not talked a lot about UDP latency. Because UDP is designed to be quick but unreliable, it doesn’t have any built-in features to detect and recover from latency. Instead, it relies on the application layer protocols (and ICMP) that it’s paired with to handle data delivery reliability. Client Server SYN SYN/ACK 1 ACK 2 Layer 7 Protocol Request 1 ACK 3 Layer 7 Protocol Data 1 Wire Latency 2 Client Latency 3 Server Latency Figure 9-26: This diagram can be used to troubleshoot your own latency issues. Network Baselining When all else fails, your network baseline can be one of the most crucial pieces of data you have when troubleshooting slowness on the network. For our purposes, a network baseline consists of a sample of traffic from various points on the network that includes a large chunk of what we would consider “normal” network traffic. The goal of the network baseline is to serve as a basis of comparison when the network or devices on it are not acting correctly. For example, consider a scenario in which several clients on the network complain of slowness when logging in to a local web application server. If you were to capture this traffic and compare it to a network baseline, you might find that the web server is responding normally but that the external DNS requests resulting from external content embedded into the web application are running twice as slowly as normal. You might have noticed the slow external DNS server without the aid of a network baseline, but when you are dealing with subtle changes, that may not be the case. Ten DNS queries taking 0.1 seconds longer than normal to process is just as bad as one DNS query taking 1 full second longer than normal, but the former is much harder to detect without a network baseline. F ighting a Slow Networ k 183 Because no two networks are alike, the components of a network baseline can vary drastically. The following sections provide examples of the components of a network baseline. You may find that all of these items apply to your network infrastructure or that very few of them do. Regardless, you should be able to place each component of your baseline inside one of three basic baseline categories: site, host, and application. Site Baseline The purpose of the site baseline is to gain an overall snapshot of the traffic at each physical site on your network. Ideally, this would be every segment of the WAN. Components of this baseline might include the following: Protocols in use Use the Protocol Hierarchy Statistics window (StatisticsProtocol Hierarchy) while capturing traffic from all of the devices on the network segment at the network edge (router/firewall), so that you can see traffic from all devices. Later, you can compare against this to find out if normally present protocols are missing or if new protocols have introduced themselves on the network. You can also use this to find above ordinary amounts of certain types of traffic based on protocol. Broadcast traffic This includes all broadcast traffic on the network segment. Sniffing at any point within the site should let you capture all of the broadcast traffic, allowing you to know who or what normally sends a lot of broadcast traffic out on the network, so you can quickly determine whether you have too much (or not enough) broadcasting going on. Authentication sequences These include traffic from authentication processes on random clients to all services, such as Active Directory, web applications, and organizationspecific software. Authentication is one area where services are commonly slow. The baseline allows you to determine if authentication is to blame for slow communications. Data-transfer rate This usually consists of a measure of a large data transfer from the site to various other sites in the network. You can use the capture summary and graphing features of Wireshark to determine the transfer rate and consistency of the connection. This is probably the most important site baseline you can have. Whenever any connection entering or leaving the network segment seems slow, you can perform the same data transfer as in your baseline and compare the results. This will tell you if the connection is actually slow and possibly even help you find the area in which the slowness begins. 184 Chapter 9 Host Baseline Having a host baseline doesn’t mean that you must baseline every single host within your network. The host baseline should be performed on only hightraffic or mission-critical servers. Basically, if a slow server will result in angry phone calls from management, you should have a baseline of that host. Components of the host baseline include the following: Protocols in use This baseline provides a good opportunity to use the Protocol Hierarchy Statistics window while capturing traffic from the host. Later, you can compare against this to find out if normally present protocols are missing or if new protocols have introduced themselves on the host. You can also use this to find above ordinary amounts of certain types of traffic based on protocol. Idle/busy traffic This baseline simply consists of general captures of normal operating traffic during peak and off-peak times. Knowing the number of connections and amount of bandwidth used by those connections at different points of the day will allow you to determine if slowness is a result of user load or another issue. Startup/shutdown In order to obtain this baseline, you will need to create a capture of the traffic generated during the startup and shutdown sequences of the host. If the computer refuses to boot, refuses to shut down, or is abnormally slow during either sequence, you can use this to determine if the cause is network-related. Authentication sequences This baseline requires capturing traffic from authentication processes to all services on the host. Authentication is one area where services are commonly slow. The baseline allows you to determine if authentication is to blame for slow communications. Associations/dependencies This baseline consists of a longer duration capture to determine what other hosts this host is dependent upon (and are dependent upon this host). You can use the Conversations window (StatisticsConversations) to see these associations and dependencies. An example of this is a SQL Server host on which a web server depends. We are not always aware of the underlying dependencies between hosts, so the host baseline can be used to determine these. From there, you can determine if a host is not functioning properly due to a malfunctioning or high-latency dependency. F ighting a Slow Networ k 185 Application Baseline The final network baseline category is the application baseline. This baseline should be performed on all business-critical network-based applications. The following are the components on the application baseline: Protocols in use Again, for this baseline, use the Protocol Hierarchy Statistics window in Wireshark, this time while capturing traffic from the host running the application. Later, you can compare against this list to find out if protocols that the application depends on are functioning incorrectly or not at all. Startup/shutdown This baseline includes a capture of the traffic generated during the startup and shutdown sequences of the application. If the application refuses to start or is abnormally slow during either sequence, you can use this to determine the cause. Associations/dependencies This baseline requires a longer duration capture in which the Conversations window can be used to determine the other hosts and applications on which this application depends. We are not always aware of the underlying dependencies between applications, so this baseline can be used to determine those. From there, you can determine if an application is not functioning properly due to a malfunctioning or high-latency dependency. Data-transfer rate You can use the capture summary and graphing features of Wireshark to determine the transfer rate and consistency of the connections to the application server during its normal operation to create this baseline. Whenever the application is reported as being slow, you can use this baseline to determine if the issues being experienced are a result of high utilization or a high user load. Additional Notes on Baselines Here are a few more points to keep in mind when creating your network baseline: 186 Chapter 9 When creating your baselines, do each one at least three times: once during a low-traffic time (early morning), once during a high-traffic time (mid-afternoon), and once during a no traffic time (late night). When possible, avoid capturing directly from the hosts you are baselining. During periods of high traffic, this may put an increased load on the device, hurt its performance, and cause your baseline to be invalid due to dropped packets. Your baseline will contain some very intimate information about your network, so be sure to secure it. Store it in a safe place where only the appropriate individuals have access. But at the same time, keep it close so that it remains functional for you. Consider keeping it on a USB flash drive or on an encrypted partition. Keep all .pcap files associated with your baseline and create a “cheat sheet” of the more commonly referenced values, such as associations or average data-transfer rates. Final Thoughts This chapter has focused on troubleshooting slow networks. We’ve covered some of the more useful reliability detection and recovery features of TCP, demonstrated how to locate the source of high latency in network communications, and discussed the importance of a network baseline and some of its components. Using the techniques discussed here, along with some of Wireshark’s graphing and analysis features (as discussed in Chapter 5), you should be well equipped to troubleshoot when you get that call complaining that the network is slow. F ighting a Slow Networ k 187 PACKET ANALYSIS FOR SECURITY Although most of this book focuses on using packet analysis for network troubleshooting, a considerable amount of real-world packet analysis is done for security purposes. This could be the job of an intrusion analyst reviewing network traffic from potential intruders, or of a forensic investigator attempting to ascertain the extent of a malware infection on a compromised host. Packet analysis for security is a big topic, suitable for an entire book. This chapter provides a taste of analyzing packets with a security focus. In this chapter, we’ll take the viewpoint of a security practitioner, as we examine different aspects of a system compromise at the network level. We’ll cover network reconnaissance, malicious traffic redirection, and system exploitation. Next, we’ll take on the role of an intrusion analyst, as we dissect traffic based on alerts from an intrusion-detection system (IDS). Reading this chapter will provide you with critical insight into network security, even if you are not in a security-focused role. Reconnaissance The first step that an attacker takes is to perform in-depth research on the target system. This step, commonly referred to as footprinting, is often accomplished using various publicly available resources, such as the target company’s website or Google. Once this research is completed, the attacker will typically begin scanning the IP address (or DNS name) of its target for open ports or running services. This scanning allows the attacker to determine whether the target is alive and reachable. For example, consider a scenario in which a bank robber is planning to steal from the largest bank in the city, located at 123 Main Street. He spends weeks planning an elaborate heist, only to find out upon arrival at the address that the bank has moved to 555 Vine Street. Worse yet, imagine a scenario in which the robber plans on walking into the bank during normal business hours, intending to steal from the vault, only to get to the bank and discover it is closed that day. Ensuring the target is alive and accessible is the first hurdle that must be crossed. Another important result of scanning is that it tells the attacker on which ports the target is listening. Returning to our bank robber analogy, consider what would happen if the robber showed up at the bank with absolutely no knowledge of the building’s physical layout. He would have no idea of how to gain access to the building, because he wouldn’t know the weak points in its physical security. In this section, we’ll discuss a few of the more common scanning techniques used to identify hosts, their open ports, and vulnerabilities on a network. NOTE So far, this book has referred to the sides of a connection as the transmitter and receiver or as the client and server. This chapter refers to each side of the communication as either the attacker or the victim. SYN Scan synscan.pcap The type of scanning often done first against a system is a TCP SYN scan, also known as a stealth scan or a half-open scan. A SYN scan is the most common type for several reasons: It is very fast and reliable. It is accurate on all platforms, regardless of TCP stack implementation. It is less noisy than other scanning techniques. The TCP SYN scan relies on the three-way handshake process to determine which ports are open on a target host. The attacker sends a TCP SYN packet to a range of ports on the victim, as if trying to establish a channel for normal communication on the ports. Once this packet is received by the victim, one of a few things may happen, as shown in Figure 10-1. 190 Chapter 10 SYN SYN/ACK SYN/ACK SYN/ACK Attacker Victim with Open Port 80 SYN RST Attacker Victim with Closed Port 80 SYN Attacker Victim with Filtered Port 80 Figure 10-1: Possible results of a TCP SYN scan If a service on the victim’s machine is listening on a port that receives the SYN packet, it will reply to the attacker with a TCP SYN/ACK packet, the second part of the TCP handshake. Then the attacker knows that port is open and a service is listening on it. Under normal circumstances, a final TCP ACK would be sent in order to complete the connection handshake, but in this case, the attacker doesn’t want that to happen, since he will not be communicating with the host further at this point. So, the attacker doesn’t attempt to complete the TCP handshake. If no service is listening on a scanned port, the attacker will not receive a SYN/ACK. Depending on the configuration of the victim’s operating system the attacker could receive an RST packet in return, indicating that the port is closed. Alternatively, the attacker may receive no response at all. That could mean that the port is filtered by an intermediate device, such as a firewall or the host itself. On the other hand, it could just be that the response was lost in transit. This result typically indicates that the port is closed, but it’s ultimately inconclusive. The file synscan.pcap provides a great example of a SYN scan performed with the NMAP tool. NMAP is a robust network-scanning application developed by Fyodor. It can perform just about any kind of scan you can imagine. You can download NMAP for free from http://www.nmap.com/download.html. Our sample capture contains roughly 2,000 packets, which tells us that this scan is reasonably sized. One of the best ways to ascertain the scope of a scan of this nature is to view the Conversations window, as shown in Figure 10-2. There, you should see only one IPv4 conversation between the attacker (172.16.0.8) and the victim (63.13.134.52). You will also see that there are 1,994 TCP conversations between these two hosts —basically a new conversation for every port pairing involved in the communications. P a c ke t A n a l y s i s f o r S e c u r i t y 191 Figure 10-2: The Conversations window shows the variety of TCP communications taking place. The scanning is occurring very quickly, so scrolling through the capture file is not the best way to find the response associated with each initial SYN packet. Several more packets might be sent before a response to the original packet is received. Fortunately, we can create filters to help us find the right traffic. Using Filters with SYN Scans As an example of filtering, let’s consider the first packet, which is a SYN packet sent to the victim on port 443 (HTTPS). To see if there was a response to this packet, we can create a filter to show all traffic to and from port 443. Here’s how to do this quickly: 1. Select the first packet in the capture file. 2. Expand the TCP header in the Packet Details pane. 3. Right-click the Destination Port field, select Prepare as Filter, and click Selected. 4. This will place a filter in the filter dialog for all packets with the destination port of 443. Now, because we also want all packets from the source port 443, click in the filter dialog at the top of the screen and erase the dst portion of the filter. The resulting filter will yield two packets, which are both TCP SYN packets sent from attacker to victim, as shown in Figure 10-3. Figure 10-3: Two attempts to establish a connection with SYN packets Since there is no response to either of these packets, it’s possible that the response is being filtered by the victim host or an intermediary device, or that the port is closed. Ultimately, the result of the scan against port 443 is inconclusive. 192 Chapter 10 We can attempt this same technique on another packet to see if we get different results. To do so, first clear the previously created filter by clicking the Clear button next to the filter area. Then select the ninth packet in the list. This is a SYN packet to port 53, commonly associated with DNS. Using the method outlined in the previous steps, create a filter based on the destination port and erase the dst portion of the filter so that it applies to all TCP port 53 traffic. When you apply this filter, you should see five packets, as shown in Figure 10-4. Figure 10-4: Five packets indicating a port is open The first of these packets is the SYN we selected at the beginning of the capture. The second is an actual response from the victim. It’s a TCP SYN/ACK—the response expected when setting up the three-way handshake. Under normal circumstances, the next packet would be an ACK from the host that sent the initial SYN. However, in this case, our attacker doesn’t want to complete the connection and doesn’t send a response. As a result, the victim retransmits the SYN/ACK three more times before giving up. Since a SYN/ACK response is received when attempting to communicate with the host on port 53, it’s safe to assume that a service is listening on that port. Let’s rinse and repeat this process one more time for packet 13. This is a SYN packet sent to port 113, which is commonly associated with the Ident protocol, often used for IRC identification and authentication services. If you apply the same type of filter to the port listed in this packet, you will see four packets, as shown in Figure 10-5. Figure 10-5: A SYN followed by a RST, indicating the port is closed The first packet is the initial SYN, which is followed immediately by a RST from the victim. This is an indication that the victim is not accepting connections on the targeted port, and that a service is most likely not running on it. Identifying Open and Closed Ports After understanding the different types of response a SYN scan can elicit, the next logical thought is to find a fast method of identifying which ports are open or closed. The answer lies within the Conversations window once again. In this window, you can sort the TCP conversations by packet number, with the highest values at the top by clicking the Packets column twice, as shown in Figure 10-6. P a c ke t A n a l y s i s f o r S e c u r i t y 193 Figure 10-6: Finding open ports with the Conversations window Three scanned ports include five packets in each of their conversations . We know that ports 53, 80, and 22 are open, because these five packets represent the initial SYN, the corresponding SYN/ACK, and the retransmitted SYN/ACKs from the victim. For five ports, only two packets were involved in the communication . The first is the initial SYN, and the second is the RST from the victim. This indicates that ports 113, 25, 31337, 113, and 70 are closed. The remaining entries in the Conversations window include only one packet, meaning that the victim host never responded to the initial SYN. These remaining ports are most likely closed, but we’re not sure. Operating System Fingerprinting An attacker puts a great deal of value on knowing his target’s operating system. Knowledge of the operating system in use ensures that all of the attack methods employed by the attacker are configured correctly for that system. This also allows the attacker to know the location of certain critical files and directories within the target file system, should he actually succeed in accessing the system. Operating system fingerprinting is the name given to a group of techniques used to determine the operating system running on a system without actually having physical access to that system. There are two types of operating system fingerprinting: passive and active. passiveosfingerprinting.pcap 194 Chapter 10 Passive Fingerprinting Using passive fingerprinting, you examine certain fields within packets sent from the target in order to determine the operating system in use. The technique is considered passive because you only listen to the packets the target host is sending and don’t actively send any packets to the host yourself. This is the most ideal type of operating system fingerprinting for attackers, because it allows them to be stealthy. That being said, how can we determine which operating system a host is running based on nothing but the packets it sends? Well, this is actually pretty easy and is made possible by the lack of specificity in the specifications defined by protocol RFCs. Although the various fields contained in TCP, UDP, and IP headers are very specific, typically, no default values are defined for these fields. This means that the TCP/IP stack implementation in each operating system must define its own default values for these fields. Table 10-1 lists some of the more common fields and the default values that can be used to link them to various operating systems. Table 10-1: Common Passive Fingerprinting Values Protocol Header Field IP Initial Time to Live IP TCP TCP TCP Don’t Fragment Flag Max Segment Size Window Size SackOK Default Value Operating System 64 NMap, BSD, Mac OS 10, Linux 128 Novell, Windows 255 Cisco IOS, Palm OS, Solaris Set BSD, Mac OS 10, Linux, Novell, Windows, Palm OS, Solaris Not set Nmap, Cisco IOS 0 Nmap 1440 Windows, Novell 1460 BSD, Mac OS 10, Linux, Solaris 1024–4096 Nmap 65535 BSD, Mac OS 10 2920–5840 Linux 16384 Novell 4128 Cisco IOS 24820 Solaris Variable Windows Set Linux, Windows, OpenBSD Not set Nmap, FreeBSD, Mac OS 10, Novell, Cisco IOS, Solaris The packets contained in the file passiveosfingerprinting.pcap are great examples of this technique. There are two packets in this file. Both are TCP SYN packets sent to port 80, but they come from different hosts. Using only the values contained in these packets and referring to Table 10-1, we should be able to determine the operating system architecture in use on each host. The details of each packet are shown in Figure 10-7. P a c ke t A n a l y s i s f o r S e c u r i t y 195 Figure 10-7: These packets can tell us which operating system they were sent from. Using Table 10-1 as a reference, we can create Table 10-2, which is a breakdown of the relevant fields in these packets. Table 10-2: Breakdown of the Operating System Fingerprinting Packets Protocol Header Field Packet 1 Value Packet 2 Value IP Initial Time to Live 128 64 IP Don’t Fragment Flag Set Set TCP Max Segment Size 1440 Bytes 1460 Bytes TCP Window Size 64240 Bytes 2920 Bytes TCP SackOK Set Set Based on these values, we can conclude that packet 1 was most likely sent by a device running Windows, and packet 2 was most likely sent by a device running Linux. Keep in mind that the list of common passive fingerprinting identifying fields in Table 10-1 is by no means exhaustive. There are many quirks that may result in deviations from these expected values. Therefore, you cannot fully rely on the results gained from passive operating system fingerprinting. NOTE activeosfingerprinting.pcap 196 Chapter 10 One tool that uses operating system fingerprinting techniques is p0f. This tool analyzes relevant fields in a packet capture and outputs the suspected operating system. Using tools like p0f, you can not only get the operating system architecture, but sometimes even the appropriate version or patch level. You can download p0f from http:// lcamtuf.coredump.cx/p0f.shtml. Active Fingerprinting When passively monitoring traffic doesn’t yield the desired results, a more direct approach may be required. This approach is called active fingerprinting. It involves the attacker actively sending specially crafted packets to the victim in order to elicit replies that will reveal the operating system in use on the victim’s machine. Of course, since this approach involves communicating directly with the victim, it is not the least bit stealthy, but it can be highly effective. The file activeosfingerprinting.pcap contains an example of an active operating system fingerprinting scan initiated with the Nmap scanning utility. Several packets in this file are the result of Nmap sending different probes designed to elicit responses that will allow for operating system identification. Nmap records the responses to these probes and builds a fingerprint, which it compares to a database of values in order to make a determination. NOTE The techniques used by Nmap to actively fingerprint an operating system are quite complex. To learn more about how Nmap performs active operating system fingerprinting, read the definitive guide to Nmap, Nmap Network Scanning, by the tool’s author Gordon “Fyodor” Lyon. Exploitation Every attacker lives for the exploitation phase. The attacker has done his research, performed reconnaissance on the target, and found a vulnerability that he is prepared to exploit in order to gain access to the target system. In the remainder of this chapter, we’ll look at packet captures of various exploitation techniques, including an exploit for a semi-recent Microsoft vulnerability, traffic redirection via ARP cache poisoning, and a remoteaccess Trojan performing data exfiltration. Operation Aurora aurora.pcap In January 2010, Operation Aurora exploited an as yet unknown vulnerability in Internet Explorer. This vulnerability allowed attackers to gain remote root-level control of targeted machines at Google, among other companies. In order to execute this malicious code, a user simply needed to visit a website using a vulnerable version of Internet Explorer. The attackers then had immediate access to the user’s machine with administrative privileges. Spear phishing, in which the attackers send an email message to victims designed to get them to click a link leading to a malicious site, was used to lure the victims. Since spear phishing messages appear to come from trusted sources, they are often successful. In the case of Aurora, we pick up this story as soon as the targeted user clicks the link in the spear phishing email message. The resulting packets are contained in the file aurora.pcap. This capture begins with a three-way handshake between the victim (192.168.100.206) and the attacker (192.168.100.202). The initial connection is to port 80, which would lead us to believe this is HTTP traffic. That assumption is confirmed in the fourth packet, an HTTP GET request for /info , as shown in Figure 10-8. P a c ke t A n a l y s i s f o r S e c u r i t y 197 Figure 10-8: The victim makes a GET request for /info. The attacker’s machine acknowledges receipt of the GET request and reports a response code of 302 (Moved Temporarily) in packet 6, the status code commonly used to redirect a browser to another page, which is the case here. Along with the 302 response code , a Location field specifies the location /info?rFfWELUjLJHpP , as shown in Figure 10-9. Figure 10-9: The client browser is redirected with this packet. After receiving the HTTP 302 packet, the client initiates another GET request to the /info?rFfWELUjLJHpP URL in packet 7, for which an ACK is received in packet 8. Following the ACK, the next several packets represent data being transferred from the attacker to the victim. To take a closer look at that data, right-click one of the packets in the stream, such as packet 9, and select Follow TCP Stream. In this stream output, we see the initial GET request, the 302 redirection, and the second GET request, as shown in Figure 10-10. After this, things start getting really strange. The attacker responds to the GET request with some very odd-looking content, the first section of which is shown in Figure 10-11. This content appears to be a series of random numbers and letters inside a <script> tag . The <script> tag is used within HTML to denote the use of a higher-level scripting language. Within this tag, you normally see various scripting statements. But this gibberish indicates that the content may be encoded to hide it from detection. Since we know this is exploit traffic, we might assume that this obfuscated section of text contains the hexadecimal padding and shellcode used to actually exploit the vulnerable service. 198 Chapter 10 Figure 10-10: The data stream being transmitted to the client Figure 10-11: This scrambled content within a <script> tag appears to be encoded. The second portion of the content sent from the attacker is shown in Figure 10-12. After the encoded text, we finally see some text that is readable. Even without extensive programming knowledge, we can see that this text appears to do some string parsing based on a few variables. This is the last bit of text before the closing </script> tag. P a c ke t A n a l y s i s f o r S e c u r i t y 199 Figure 10-12: This portion of the content sent from the server contains readable text and a suspicious iframe. The last section of data sent from attacker to client has two parts. The first is a <span id="vhQYFCtoDnOzUOuxAflDSzVMIHYhjJojAOCHNZtQdlxSPFUeEthCGdRtiIY"> section . The second is contained within the <span></span> tags and is <iframe src="/infowTVeeGDYJWNfsrdrvXiYApnuPoCMjRrSZuKtbVgwuZCXwxKjtEclbPuJPPctcflhsttMRrSyxl.gif" onload="WisgEgTNEfaONekEqaMyAUALLMYW(event)" /> . Once again, this content may be a sign of malicious activity, due to the suspicious long, random strings of unreadable and potentially obfuscated text. The portion of the code contained within the <span> tag is an iframe, which is a common method used by attackers to embed additional unexpected content into an HTML page. The <iframe> tag creates an inline frame that can go undetected by the user. In this case, the <iframe> tag references an oddly named GIF file. As shown in Figure 10-13, when the victim’s browser sees the reference to this file, it makes a GET request for it in packet 21 , and the GIF is sent immediately following that . This GIF is probably used to somehow trigger the exploit code that has already been downloaded to the victim’s machine. Figure 10-13: The GIF specified in the iframe is requested and downloaded by the victim. The most peculiar part of this capture occurs at packet 25, when the victim initiates a connection back to the attacker on port 4321. Viewing this second stream of communication from the Packet Details pane doesn’t yield much information, so we will once again view the TCP stream of the communication to get a clearer picture of the data being communicated. Figure 10-14 shows the Follow TCP Stream window output. 200 Chapter 10 Figure 10-14: The attacker is interacting with a command shell through this connection. In this display, we see something that should set off immediate alarms: a Windows command shell . This shell is sent from the victim to the server, indicating that the attacker’s exploit attempt succeeded and the payload was dropped: The client transmitted a command shell back to the attacker once the exploit was launched. In this capture, we can even see the attacker interacting with the victim by entering the dir command to view a directory listing on the victim’s machine . An attacker with access to this command shell has unrestricted administrative access to the victim’s machine and can do virtually anything he wishes to it. With just a single click, in a matter of a few seconds, the victim has just given complete control of his computer to an attacker. Exploits like this are typically encoded to be unrecognizable when going across the wire in order to prevent them from being picked up by the network IDS. As such, without prior knowledge of this exploit or even a sample of the exploit code, it might be difficult to tell exactly what it is happening on the victim’s system without further analysis. Luckily, we were able to pick out some telltale signs of malicious code in this packet capture. This includes the obfuscated text in the <script> tags, the peculiar iframe, and the command shell seen in plaintext. Here is a summary of how the Aurora exploit works: The victim receives a targeted email from the attacker that appears to be legitimate, clicks a link within it, and sends a GET request to the attacker’s malicious site. The attacker’s web server issues a 302 redirection to the victim, and the victim’s browser automatically issues a GET request to the redirected URL. The attacker’s web server transmits a web page containing obfuscated JavaScript code to the client that includes a vulnerability exploit and an iframe containing a link to a malicious GIF image. P a c ke t A n a l y s i s f o r S e c u r i t y 201 The victim issues a GET request for the malicious image and downloads it from the server. The JavaScript code transmitted earlier is deobfuscated using the malicious GIF, and the code executes on the victim’s machine, exploiting a vulnerability in Internet Explorer. Once the vulnerability is exploited, the payload hidden within the obfuscated code is executed, opening a new session from the victim to the attacker on port 4321. A command shell is spawned from the payload and shoveled back to the attacker, so that he may interact with it. From a defender’s point of view, we can use this capture file to create a signature for our IDS that might help capture further occurrences of this attack. For example, we might filter on a nonobfuscated part of the capture, such as the plaintext code at the end of the obfuscated text in the <script> tag. Another train of thought might be to write a signature for all HTTP traffic with a 302 redirection to a site with info in the URL. This signature would need some additional tuning in order to be viable in a production environment, but it’s a good start. NOTE The ability to create traffic signatures based on malicious traffic samples is a crucial step for someone attempting to defend a network against unknown threats. Captures such as the one described here are a great way to develop skills in writing those signatures. To learn more about intrusion detection and attack signatures, visit the Snort project at http://www.snort.org/. ARP Cache Poisoning arppoison.pcap 202 Chapter 10 In Chapter 2, we discussed ARP cache poisoning as a way to tap into the wire and intercept traffic from hosts whose packets you need to analyze. ARP cache poisoning can be an effective and useful tool for a network engineer. However, when used with malicious intent, it’s also a very lethal form of man-inthe-middle (MITM) attack. In an MITM attack, an attacker redirects traffic between two hosts in order to intercept or modify it in transit. There are many forms of MITM attacks, including session hijacking, DNS spoofing, and SSL hijacking. ARP cache poisoning works because specially crafted ARP packets trick two hosts into thinking they are communicating with each other, when, in fact, they are communicating with a third party who is relaying packets as an intermediary. The file arppoison.pcap contains an example of ARP cache poisoning. When you open it, you’ll see at first glance that this traffic appears normal. However, if you follow the packets, you will see our victim, 172.16.0.107, browsing to Google and performing a search. As a result of this search, there is quite a bit of HTTP traffic with some DNS queries mixed in. We know that ARP cache poisoning is a technique that occurs at layer 2, so if we just casually peruse the packets in the Packet List pane, it may be hard to see any foul play. In order to give us a leg up, we will add a couple of columns to the Packet List pane, as follows: 1. Select EditPreferences. 2. Click Columns on the left side of the Preferences window. 3. Click Add. 4. Type Source MAC and press Enter. 5. In the Field type drop-down list, select Hw src addr (resolved). 6. Click the newly added entry, and drag it so that it is directly after the Source column. 7. Click Add. 8. Type Dest MAC and press Enter. 9. In the Field type drop-down list, select Hw dest addr (resolved). 10. Click the newly added entry and drag it so that it is directly after the Destination column. 11. Click OK to apply the changes. When you have completed these steps, your screen should look like Figure 10-15. You should now have two additional columns showing the source and destination MAC addresses of the packets. Figure 10-15: The column configuration screen with newly added columns for source and destination hardware addresses P a c ke t A n a l y s i s f o r S e c u r i t y 203 If you still have MAC name resolution turned on, you should see that the communicating devices have MAC addresses that indicate Dell and Cisco hardware. This is very important to remember, because as we scroll through the capture, this changes at packet 54, when we see some peculiar ARP traffic occurring between the Dell host (our victim) and a newly introduced HP host (the attacker), as shown in Figure 10-16. Figure 10-16: Strange ARP traffic between the Dell device and an HP device Before proceeding further, note the endpoints involved in this communication, which are listed in Table 10-3. Table 10-3: Endpoints Being Monitored Role Device Type IP Address MAC Address Victim Dell 172.16.0.107 00:21:70:c0:56:f0 Router Cisco 172.16.0.1 00:26:0b:21:07:33 Attacker HP Unknown 00:25:b3:bf:91:ee But what makes this traffic strange? Recall from our discussion of ARP in Chapter 6 that there are two primary types of ARP packets: a request and a response. The request packet is sent as a broadcast to all hosts on the network in order to find the machine that has the MAC address associated with a particular IP address. The response is then sent as a unicast packet from the machine that replies to the device that transmitted the request. Given this background, we can identify a few peculiar things in this communication sequence, referring to Figure 10-16. First, packet 54 is an ARP request sent from the attacker, with MAC address 00:25:b3:bf:91:ee, as a unicast packet directly to the victim with MAC 00:21:70:c0:56:f0 . This type of request should be broadcast to all hosts on the network, but it targets the victim directly. Also, notice that although this packet is sent from the attacker and includes the attacker’s MAC address in the ARP header, it lists the router’s IP address rather than its own. This packet is followed by a response from the victim to the attacker containing its MAC address information . The real voodoo here occurs in packet 56, when the attacker sends a packet to the victim with an unsolicited ARP reply telling it that 172.16.0.1 is located at its MAC address, 00:25:b3:bf:91:ee . The problem is that the MAC address 172.16.0.1 isn’t 00:25:b3:bf:91:ee but 00:26:0b:31:07:33. We know this because we saw the router at 172.16.0.1 communicating with the victim earlier in the packet capture. Since the ARP protocol is inherently insecure (it accepts unsolicited updates to its ARP table), the victim will now be sending traffic that should be going to the router to the attacker instead. 204 Chapter 10 NOTE Because this packet capture was taken from the victim’s machine, you don’t actually see the entire picture. For this attack to work, the attacker must send the same sequence of packets to the router in order to trick it into thinking the attacker is actually the victim, but we would need to take another packet capture from the router (or the attacker) in order to see those packets. Once both parties have been duped, the communication between the victim and the router flows through the attacker, as illustrated in Figure 10-17. ARP Spoofing Setup (Victim’s Perspective) Who has 172.16.0.107? Tell 172.16.0.1 SRC MAC: 00:25:b3:bf:91:ee DST MAC: 00:21:70:c0:56:f0 Router (Cisco) 172.16.0.1 00:26:0b:21:07:33 Attacker (HP) 00:25:b3:bf:91:ee 172.16.0.107 is at 00:21:70:c0:56:f0 SRC MAC: 00:21:70:c0:56:f0 DST MAC: 00:25:b3:bf:91:ee 172.16.0.1 is at 00:25:b3:bf:91:ee SRC MAC: 00:25:b3:bf:91:ee DST MAC: 00:21:70:c0:56:f0 Victim (Dell) 172.16.0.107 00:21:70:c0:56:f0 ARP Spoofing Result (Attacker Intercepts Traffic) Router Attacker Victim Figure 10-17: ARP cache poisoning as an MITM attack Packet 57 confirms the success of this attack. When you compare this packet with one sent before the mysterious ARP traffic, such as packet 40 (see Figure 10-18), you will see that the IP address of the remote server (Google) remains the same , but the target MAC address has changed . This change in MAC address tells us that the traffic is now being routed through the attacker before it gets to the router. Because this attack is so subtle, it’s very difficult to detect. To find it, you typically need the aid of an IDS configured specifically to address it or software running on devices designed to detect sudden changes in ARP table entries. Since you will most likely use ARP cache poisoning to capture packets on networks you are analyzing, it’s important to know how this technique can be used against you as well. P a c ke t A n a l y s i s f o r S e c u r i t y 205 Figure 10-18: The change in target MAC address shows this attack was a success. Remote-Access Trojan ratinfected.pcap So far, we’ve examined security events with some knowledge of what we have before we begin examining the capture. This is a great way to learn what attacks look like, but it’s not very real world. In most real-world scenarios, people tasked with defending a network won’t examine every packet that goes across the network. Instead, they will use some form of IDS to alert them to anomalies in network traffic that warrant further examination based on a predefined attack signature. In the next example, we’ll begin with a simple alert, as if we’re the realworld analyst. In this case, our IDS generates this alert: [**] [1:132456789:2] CyberEYE RAT Session Establishment [**] [Classification: A Network Trojan was detected] [Priority: 1] 07/18-12:45:04.656854 172.16.0.111:4433 -> 172.16.0.114:6641 TCP TTL:128 TOS:0x0 ID:6526 IpLen:20 DgmLen:54 DF ***AP*** Seq: 0x53BAEB5E Ack: 0x18874922 Win: 0xFAF0 TcpLen: 20 206 Chapter 10 Our next step would be to view the signature rule that triggered this alert: alert tcp any any -> $HOME_NET any (msg:"CyberEYE RAT Session Establishment"; content:"|41 4E 41 42 49 4C 47 49 7C|"; classtype:trojan-activity; sid:132456789; rev:2;) This rule is set to alert whenever it sees a packet from any network entering the internal network with the hexadecimal content 41 4E 41 42 49 4C 47 49 7C. This content converts to ANA BILGI in human-readable ASCII. When detected, an alert fires, signifying the possible presence of the CyberEYE remote-access Trojan (RAT). RATs are malicious programs that run silently on a victim’s computer and connect back to an attacker, so that the attacker can remotely administer the victim’s machine. NOTE CyberEYE is a popular Turkish-born tool used to create RAT executables and administer compromised hosts. Ironically, the Snort rule seen here fires on the string ANA BILGI, which is Turkish for BASIC INFORMATION. Now we’ll look at some traffic associated with the alert in the file ratinfected.pcap. This Snort alert would typically capture only the single packet that triggered the alert, but fortunately, we have the entire communication sequence between the hosts involved. To skip to the punch line, search for the hexadecimal string mentioned in the Snort rule, as follows: 1. Select EditFind Packet. 2. Select the Hex Value radio button. 3. Enter the value 41 4E 41 42 49 4C 47 49 7C into the text area. 4. Click Find. As shown in Figure 10-19, you should now see the first occurrence of the above string in the data portion of packet 4 . Figure 10-19: The content string in the Snort alert is first seen here in packet 4. If you select Edit Find Next a few more times, you will see that this string also occurs in packets 5, 10, 32, 156, 280, 405, 531, and 652. Although all of the communication in this capture file is between the attacker (172.16.0.111) and victim (172.16.0.114), it appears as though some instances of the string occur in different conversations. While packets 4 and 5 are communicating using ports 4433 and 6641, most of the other instances occur between port 4433 P a c ke t A n a l y s i s f o r S e c u r i t y 207 and other randomly selected ephemeral ports. We can confirm that multiple conversations exist by looking at the TCP tab of the Conversations window, as shown in Figure 10-20. Figure 10-20: Three individual conversations exist between the attacker and victim. We can visually separate the different conversations in this capture file by colorizing them, as follows: 1. In the filter dialog above the Packet List pane, type the filter (tcp.flags.syn == 1) && (tcp.flags.ack == 0). Then click Apply. This will select the initial SYN packet for each conversation in the traffic. 2. Right-click the first packet and select Colorize Conversation. 3. Select TCP, and then select a color. 4. Repeat this process for the remaining SYN packets, choosing a different color for each. 5. When finished, click Clear to remove the filter. Having colorized the conversations, we can see how they relate to each other, which will help us to better track the communication process between the two hosts. The first conversation (ports 6641/4433) is where the communication between the two hosts begins, so it’s a good place to start. Right-click any packet within the conversation and select Follow TCP Stream to see the data that was transferred, as shown in Figure 10-21. Immediately, we see that the text string ANABILGI|556 is sent from the attacker to the victim . As a result, the victim responds with some basic system information, including the computer name (CSANDERS-6F7F77) and the operating system in use (Windows XP Service Pack 3) , and begins transmitting the same string of BAGLIMI? back to the attacker . The only communication back from the attacker is the string CAPSCREEN60 , which appears six times. This CAPSCREEN60 string returned by the attacker is interesting, so let’s see where it leads. To do so, we search for the text string within the packets using the search dialog again, specifying the String option. 208 Chapter 10 Figure 10-21: The first conversation yields interesting results. Upon performing this search, we find the first instance of the string in packet 27. The intriguing thing about this bit of information is that as soon as the string is sent from the attacker to the client, the client acknowledges receipt of the packet, and a new conversation is started in packet 29. Now, if we follow the TCP stream output of this new conversation (shown in Figure 10-22), we see the familiar string ANABILGI|12, followed by the string SH|556, and finally, the string CAPSCREEN|C:\WINDOWS\jpgevhook.dat|84972 . Notice the file path specified after the CAPSCREEN string, which is followed by unreadable text. The most intriguing thing here is that the unreadable text is prepended by the string JFIF , which a quick Google search will tell you is commonly found at the beginning of JPG files. At this point, it’s safe to conclude that the attacker initiated this conversation to transfer this JPG image. But even more importantly, we are beginning to see a command structure evolve from the traffic. It appears that CAPSCREEN is a command sent by the attacker to initiate the transfer of this JPG image. In fact, whenever the CAPSCREEN command is sent, the result is the same. To verify this, view the stream of each conversation, or try Wireshark’s IO graphing feature as follows: 1. Select StatisticsIO Graphs. 2. Insert the filters tcp.stream eq 2, tcp.stream eq 3, tcp.stream eq 4, tcp.stream eq 5, and tcp.stream eq 6, respectively, into the five filter dialogs. 3. Click the Graph 1, Graph 2, Graph 3, Graph 4, and Graph 5 buttons to enable the data points for the filters specified. 4. Change the y-axis scale to Bytes/Tick. Figure 10-23 shows the resulting graph. P a c ke t A n a l y s i s f o r S e c u r i t y 209 Figure 10-22: The attacker appears to be initiating a request for a JPG file. Figure 10-23: This graph shows that the same activity appears to repeat. Based on this graph, it appears as though each conversation contains the same amount of data and occurs for the same amount of time. We can now conclude that this activity repeats several times. 210 Chapter 10 You may already have some ideas regarding the content of the JPG image being transferred, so let’s see if we can actually view one of these JPG files. In order to extract the JPG data from Wireshark, perform the following steps: 1. First, follow the TCP stream of the appropriate packets as described in the text preceding Figure 10-22. 2. The communication must then be isolated so that we only see the stream data sent from the victim to the attacker. Do this by selecting the arrow next to the drop-down that says Entire Conversation (85033 bytes). Be sure to select the appropriate directional traffic, which is 172.16.0.114:6643 --> 172.16.0.111:4433 (85020 bytes). 3. Save the data by selecting the Save As button, ensuring that you save the file with a .jpg file extension. If you try to open the image now you may be surprised to find that it won’t open. That’s because we have one more step to perform. Unlike the scenario in Chapter 8 where we extracted a file cleanly from FTP traffic, the traffic here added some additional content to the actual data. In this case, the first two lines seen in the TCP stream are actually part of the trojan’s command sequence, not part of the data that makes up the JPG (see Figure 10-24). When we saved the stream, this extraneous data was also saved. As a result, the file viewer that is looking for a JPG file header is seeing content that doesn’t match what it is expecting, and therefore it can’t open the image. Figure 10-24: The extraneous data added by the trojan prevents the file from being opened correctly. P a c ke t A n a l y s i s f o r S e c u r i t y 211 Fixing this issue is a painless process, requiring a bit of manipulation with a hex editor. This process is called file carving. In Figure 10-25, I’ve used WinHex to highlight the first several bytes of the JPG file. You will need to delete these bytes and save the image file using any hex editor. Figure 10-25: Removing the extraneous bytes from the JPG file With the unneeded bytes of data removed, the file should open. It should be clear now that the trojan is taking screen captures of the victim’s desktop and transmitting them back to the attacker (Figure 10-26). Figure 10-26: The JPG being transferred is a screen capture of the victim’s computer. 212 Chapter 10 After these communication sequences have completed, the communication ends with a normal TCP teardown sequence. This scenario is a prime example of the thought process an intrusion analyst would follow when analyzing traffic based on an IDS alert: Examine the alert and the signature that fired it. Confirm that the signature was actually in the traffic in the proper context. Examine traffic to find out what the attacker did with the compromised machine. Begin containment of the issues before any more sensitive information leaks from the compromised victim. Final Thoughts Entire books could be written on breaking down packet captures in securityrelated scenarios, analyzing common attacks, and responding to IDS alerts. In this chapter we’ve examined some common scanning and enumeration types, a common MITM attack, and two examples of how a system might be exploited and what might happen once it is has been owned. P a c ke t A n a l y s i s f o r S e c u r i t y 213 WIRELESS PACKET ANALYSIS The world of wireless networking is a bit different than traditional wired networking. Although we are still dealing with common communication protocols such as TCP and IP, the game changes a bit when moving to the lowest levels of the OSI model. Here, the data link layer is of special importance due to the nature of wireless networking and the physical layer. This puts new restrictions on the data we access and how we capture it. Given these extra considerations, it should come as no surprise that an entire chapter of this book is dedicated to packet capture and analysis on wireless networks. In this chapter, we will discuss exactly why wireless networks are unique when it comes to packet analysis and how to overcome the challenges. Of course, we will be doing this by looking at actual practical examples of wireless network captures. Physical Considerations The first thing to consider about capturing and analyzing data transmitted across a wireless network is the physical transmission medium. Until now, we have not considered the physical layer, because we’ve been communicating over physical cabling. Now we are communicating through invisible airwaves, with packets flying right by us. Sniffing One Channel at a Time The most unique consideration when capturing traffic from a wireless local area network (WLAN) is that the wireless spectrum is a shared medium. Unlike wired networks, where each client has its own network cable connected to a switch, the wireless communication medium is the airspace client’s share, which is limited in size. A single WLAN will occupy only a portion of the 802.11 spectrum. This allows multiple systems to operate in the same physical area on different portions of the spectrum. NOTE Wireless networking is based on the 802.11 standard, developed by the Institute of Electrical and Electronics Engineers (IEEE). Throughout this chapter, the terms wireless network and WLAN refer to networks that adhere to the 802.11 standard. This separation of space is made possible by dividing the spectrum into operation channels. A channel is simply a portion of the 802.11 wireless spectrum. In the United States, 11 channels are available (more are allowed in some other countries). This is relevant because, just as a WLAN can operate on only one channel at a time, we can sniff packets on only one channel at a time, as illustrated in Figure 11-1. Therefore, if you are troubleshooting a WLAN operating on channel 6, you must configure your system to capture traffic seen on channel 6. Wireless Client 1 2 3 4 5 6 7 8 9 10 11 Wireless Access Point Wireless Spectrum (11 Channels) Figure 11-1: Sniffing wirelessly can be tedious, since it can be done on only one channel at a time. NOTE 216 Chapter 11 Traditional wireless sniffing can only be done one channel at a time, with one exception: Certain wireless scanning applications utilize a technique called channel hopping to change channels rapidly in order to collect data. One of the most popular tools of this type, Kismet (http://www.kismetwireless.net/), can hop up to 10 channels per second, which makes it very effective at sniffing multiple channels at once. Wireless Signal Interference With wireless communications, we sometimes can’t rely on the integrity of the data being transmitted over the air. It’s possible that something will interfere with the signal. Wireless networks include some features to handle interference, but those features don’t always work. Therefore, when capturing packets over a wireless network, you must pay close attention to your environment to ensure that there are no large sources of interference, such as big reflective surfaces, large rigid objects, microwaves, 2.4 GHz phones, thick walls, and high-density surfaces. These can cause packet loss, duplicated packets, and malformed packets. Interference between channels is also a concern. Although you can sniff only one channel at a time, this comes with a small caveat: Several different transmission channels are available in the wireless networking spectrum, but because space is limited, there is a slight overlap between channels, as illustrated in Figure 11-2. This means that if there is traffic present on channel 4 and channel 5, and you are sniffing on one of these channels, you will likely capture packets from the other channel. Typically, networks that coexist in the same area are designed to use nonoverlapping channels of 1, 6, and 11, so you will probably not encounter this problem, but just in case, you should understand why it happens. Figure 11-2: There is overlap between channels due to limited spectrum space. Detecting and Analyzing Signal Interference Troubleshooting wireless signal interference isn’t something that can be done by looking at packets in Wireshark. If you are going to make a habit or a career out of troubleshooting WLANs, you will surely need to check for signal interference regularly. This task is done with a spectrum analyzer, which is a tool that displays data or interference across the spectrum. Commercial spectrum analyzers can cost upward of thousands of dollars, but there is a great solution for common everyday use. MetaGeek makes a product called the Wi-Spy, which is a USB hardware device that monitors the entire 802.11 spectrum for interference. When paired with MetaGeek’s Chanalyzer software, this hardware outputs the spectrum graphically to aid in the troubleshooting process. Sample output from Chanalyzer is shown in Figure 11-3. Wireless P a ck et Analysis 217 Figure 11-3: This Chanalyzer output shows several WLANs operating in the same area. Wireless Card Modes Before we start sniffing wireless packets, we need to look at the different modes in which a wireless card can operate as it pertains to packet capture. Four wireless NIC modes are available: Managed mode This mode is used when your wireless client connects directly to a wireless access point (WAP). In these cases, the driver associated with the wireless NIC relies on the WAP to manage the entire communication process. Ad hoc mode This mode is used when you have a wireless network setup in which devices connect directly to each other. In this mode, two wireless clients that want to communicate with each other share the responsibilities that a WAP would normally handle. Master mode Some higher-end wireless NICs also support master mode. This mode allows the wireless NIC to work in conjunction with specialized driver software in order to allow the computer to act as a WAP for other devices. Monitor mode This is the most important mode for our purposes. Monitor mode is used when you want your wireless client to stop transmitting and receiving data, and listen only to the packets flying through the air. In order for Wireshark to capture wireless packets, your wireless NIC and accompanying driver must support monitor mode (also known as RFMON mode). 218 Chapter 11 Most users use wireless cards in only managed mode or ad hoc mode. A graphical representation of the way each mode operates is shown in Figure 11-4. Managed Mode Wireless Client Wireless Access Point Wireless Client Ad-Hoc Mode Wireless Client Wireless Client Master Mode Wireless Client Wireless Client (Master) Wireless Client Monitor Mode Wireless Client Wireless Client Wireless Client (Monitoring) Figure 11-4: The different wireless card modes NOTE I’m often asked which wireless card I recommend for wireless packet analysis. I use and highly recommend the ALFA 1000mW USB wireless adapter. It’s highly regarded as one of the best on the market for ensuring you are capturing every possible packet. It is available through most online computer hardware retailers. Sniffing Wirelessly in Windows Even if you have a wireless NIC that supports monitor mode, most Windowsbased wireless NIC drivers won’t allow you to change into this mode (WinPcap doesn’t support this either). You’ll need a little extra hardware to get the job done. Configuring AirPcap AirPcap (from CACE Technologies, now a part of Riverbed, http://www .cacetech.com/) is designed to overcome the limitations that Windows places on wireless packet analysis. AirPcap is a small USB device that resembles a flash drive, as shown in Figure 11-5. It is designed to capture wireless traffic. Wireless P a ck et Analysis 219 AirPcap uses the WinPcap driver discussed in Chapter 3 and a special client configuration utility. Figure 11-5: The AirPcap device is very compact, making it easy to tote along with a laptop. The AirPcap configuration program is simple to use, with only a few configurable options. The AirPcap Control Panel, shown in Figure 11-6, offers the following options: Interface You can select the device you are using for your capture here. Some advanced analysis scenarios may require you to use more than one AirPcap device to sniff simultaneously on multiple channels. Blink Led Clicking this button will make the LED lights on the AirPcap device blink. This is primarily used to identify the specific adapter you are using if you have multiple AirPcap devices. Channel In this field, you select the channel you want AirPcap to listen on. Include 802.11 FCS in Frames By default, some systems strip the last four checksum bits from wireless packets. This checksum, known as a frame check sequence (FCS), is used to ensure that packets have not been corrupted during transmission. Unless you have a specific reason to do otherwise, check this box to include the FCS checksums. Capture Type The two options here are 802.11 Only and 802.11 + Radio. This 802.11 Only option includes the standard 802.11 packet header on all captured packets. The 802.11+ Radio option includes this header and also prepends it with a radiotap header, which contains additional information about the packet, such as data rate, frequency, signal level, and noise level. Choose 802.11 + Radio in order to see all available packet information. FCS Filter Even if you uncheck the Include 802.11 FCS in Frames box, this option lets you filter out packets that FCS determines are corrupted. Use the Valid Frames option to show only those packets that FCS thinks can be received successfully. WEP Configuration This area (accessible on the Keys tab of the AirPcap Control Panel) allows you to enter WEP decryption keys for the networks you will be sniffing. In order to be able to interpret data encrypted by WEP, you will need to enter the correct WEP keys into this field. WEP keys are discussed in “Wireless Security” on page 228. 220 Chapter 11 Figure 11-6: The AirPcap configuration program Capturing Traffic with AirPcap Once you have AirPcap installed and configured, the capture process should be familiar to you. Just start up Wireshark and select CaptureOptions. Next, select your AirPcap device in the Interface selection box , as shown in Figure 11-7. Figure 11-7: Choosing the AirPcap device as your capture interface Everything on this screen should look familiar except for the Wireless Settings button. Clicking this button will give you the same options that the AirPcap utility gave you, as shown in Figure 11-8. Because Wireshark is completely integrated with AirPcap, anything configured in the client utility can also be configured from within Wireshark. Wireless P a ck et Analysis 221 Figure 11-8: The Advanced Wireless Settings dialog allows you to configure AirPcap from within Wireshark. Once you have everything configured to your liking, begin capturing packets by clicking the Start button. Sniffing Wirelessly in Linux Sniffing in Linux is simply a matter of enabling monitor mode on the wireless NIC and firing up Wireshark. Unfortunately, the procedure for enabling monitor mode differs with each model of wireless NIC, so I can’t offer a definitive guide for that here. In fact, some wireless NICs don’t require you to enable monitor mode. Your best bet is to do a quick Google search for your NIC model to determine how to enable it and if you need to do so. One of the more common ways to enable monitor mode in Linux is through its built-in wireless extensions. You can access these wireless extensions with the iwconfig command. If you type iwconfig from the console, you should see results like this: $ iwconfig Eth0 no wireless extensions Lo0 no wireless extensions Eth1 IEEE 802.11gESSID: "Tesla Wireless Network" Mode: Managed Frequency: 2.462 GHz Access Point: 00:02:2D:8B:70:2E Bit Rate: 54 Mb/s Tx-Power-20 dBm Sensitivity=8/0 Retry Limit: 7 RTS thr: off Fragment thr: off Power Management: off Link Quality=75/100 Signal level=-71 dBm Noise level=-86 dBm Rx invalid nwid: 0 Rx invalid crypt: 0 Rx invalid frag: 0 Tx excessive retries: 0 Invalid misc: 0 Missed beacon: 2 The output from the iwconfig command shows that the Eth1 interface can be configured wirelessly. This is apparent because it shows data for the 802.11g protocol, whereas the interfaces Eth0 and Lo0 return the phrase no wireless extensions. 222 Chapter 11 Along with all of the wireless information this command provides, such as the wireless extended service set ID (ESSID) and frequency, notice that the second line under Eth1 shows that the mode is currently set to managed. This is what we want to change. In order to change the Eth1 interface to monitor mode, you must be logged in as the root user, either directly or via the switch user (su) command, as shown here. $ su Password: <enter root password here> Once you’re root, you can type commands to configure the wireless interface options. To configure Eth1 to operate in monitor mode, type this: # iwconfig eth1 mode monitor Once the NIC is in monitor mode, running the iwconfig command again should reflect your changes. Now ensure that the Eth1 interface is operational by typing the following: # iwconfig eth1 up We’ll also use the iwconfig command to change the channel we are listening on. Change the channel of the Eth1 interface to channel 3 by typing this: # iwconfig eth1 channel 3 NOTE You can change channels on the fly as you are capturing packets, so don’t hesitate to do this at will. This iwconfig command can also be scripted to make the process easier. When you have completed these configurations, start Wireshark and begin your packet capture. 802.11 Packet Structure 80211beacon .pcap The primary difference between wireless and wired packets is the addition of the 802.11 header. This is a layer 2 header that contains extra information about the packet and the medium on which it is transmitted. There are three types of 802.11 packets: Management These packets are used to establish connectivity between hosts at layer 2. Some important subtypes of management packets include authentication, association, and beacon packets. Control Control packets allow for delivery of management and data packets and are concerned with congestion management. Common subtypes include request-to-send and clear-to-send packets. Wireless P a ck et Analysis 223 Data These packets contain actual data and are the only packet type that can be forwarded from the wireless network to the wired network. The type and subtype of a wireless packet determines its structure, so there are a large number of possible structures. We will examine one such structure by looking at a single packet in the file 80211beacon.pcap. This file contains an example of a management packet called a beacon, as shown in Figure 11-9. Figure 11-9: This is an 802.11 beacon packet. A beacon is one of the most informative wireless packets you can find. It is sent as a broadcast packet from a WAP across a wireless channel to notify any listening wireless clients that the WAP is available and to define the parameters that must be set in order to connect to it. In our example file, you can see that this packet is defined as a beacon in the Type/Subtype field in the 802.11 header . A great deal of additional information is found in the 802.11 management frame header, including the following: Timestamp The time the packet was transmitted. Beacon Interval The interval at which the beacon packet is retransmitted. Capability Information the WAP. SSID Parameter Set 224 Chapter 11 Information about the hardware capabilities of The SSID (network name) broadcast by the WAP. Supported Rates DS Parameter The data transfer rates supported by the WAP. The channel on which the WAP is broadcasting. The header also includes the source and destination addresses and vendor-specific information. Based on this knowledge, we can determine quite a few things about the WAP transmitting the beacon in the example file. It is apparent that it is a D-Link device using the 802.11b standard (B) on channel 11 . Although the exact contents and purpose of 802.11 management packets will change, the general structure remains similar to this example. Adding Wireless-Specific Columns to the Packet List Pane As you’ve seen, Wireshark typically shows six individual columns in the Packet List pane. Before we proceed with any additional wireless analysis, it will be helpful to add three new columns to the Packet List pane: The RSSI (for Received Signal Strength Indication) column, to show the radio frequency (RF) signal strength of a captured packet TX Rate (for Transmission Rate) column, to show the data rate of a captured packet The Frequency/Channel column, to show the frequency and channel on which the packet was collected These indicators can be of great help when troubleshooting wireless connections. For instance, even if your wireless client software says you have excellent signal strength, doing a capture and checking these columns may show you a number that does not support this claim. To add these columns to the Packet List pane, follow these steps: 1. Choose EditPreferences. 2. Navigate to the Columns section and click New. 3. Type RSSI in the Title field and select IEEE 802.11 RSSI in the Field type drop-down list. 4. Repeat this process for the TX Rate and Frequency/Channel columns, titling them appropriately and selecting IEEE 802.11 TX Rate and Channel/Frequency in the Field type drop-down list. Figure 11-10 shows what the Preferences window should look like after you have added all three columns. Wireless P a ck et Analysis 225 Figure 11-10: Adding the IEEE wireless-specific columns in the Packet List pane 5. Click OK to save your changes. 6. Restart Wireshark to display the new columns. Wireless-Specific Filters We discussed the benefits of capture and display filters in Chapter 4. Filtering traffic in a wired infrastructure is a lot easier, since each device has its own dedicated cable. In a wireless network, however, all traffic generated by wireless clients coexists on shared channels, which means that a capture of any one channel may contain traffic from dozens of clients. This section is devoted to some packet filters that can be used to help you find specific traffic. Filtering Traffic for a Specific BSS ID Each WAP in a network has a unique identifying name called its basic service set identifier (BSS ID). This name is sent in every wireless management packet and data packet the access point transmits. Once you know the name of the BSS ID you want to examine, all you really need to do is find a packet that has been sent from that particular WAP. Wireshark shows the transmitting WAP in the Info column of the Packet List pane, so finding this information is typically pretty easy. Once you have a packet from the WAP of interest, find its BSS ID field in the 802.11 header. This is the address on which you will base your filter. After you have found the BSS ID MAC address, you can use this filter: wlan.bssid.eq 00:11:22:33:44:55:66 And you will see only the traffic flowing through the specified WAP. 226 Chapter 11 Filtering Specific Wireless Packet Types Earlier in this chapter, we discussed the different types of wireless packets you might see on a network. You will often need to filter based on these types and subtypes. This can be done with the filters wlan.fc.type for specific types, and wc.fc.type_subtype for specific type or subtype combinations. For instance, to filter for a NULL data packet (a Type 2 Subtype 4 packet in hex), you could use the filter wlan.fc.type_subtype eq 0x24. Table 11-1 provides a quick reference to some common filters you might need when filtering on 802.11 packet types and subtypes. Table 11-1: Wireless Types/Subtypes and Associated Filter Syntax Frame Type/Subtype Filter Syntax Management frame wlan.fc.type eq 0 Control frame wlan.fc.type eq 1 Data frame wlan.fc.type eq 2 Association request wlan.fc.type_subtype eq 0x00 Association response wlan.fc.type_subtype eq 0x01 Reassociation request wlan.fc.type_subtype eq 0x02 Reassociation response wlan.fc.type_subtype eq 0x03 Probe request wlan.fc.type_subtype eq 0x04 Probe response wlan.fc.type_subtype eq 0x05 Beacon wlan.fc.type_subtype eq 0x08 Disassociate wlan.fc.type_subtype eq 0x0A Authentication wlan.fc.type_subtype eq 0x0B Deauthentication wlan.fc.type_subtype eq 0x0C Action frame wlan.fc.type_subtype eq 0x0D Block ACK requests wlan.fc.type_subtype eq 0x18 Block ACK wlan.fc.type_subtype eq 0x19 Power save poll wlan.fc.type_subtype eq 0x1A Request to send wlan.fc.type_subtype eq 0x1B Clear to send wlan.fc.type_subtype eq 0x1C ACK wlan.fc.type_subtype eq 0x1D Contention free period end wlan.fc.type_subtype eq 0x1E NULL data wlan.fc.type_subtype eq 0x24 QoS data wlan.fc.type_subtype eq 0x28 Null QoS data wlan.fc.type_subtype eq 0x2C Filtering a Specific Frequency If you are examining a compilation of traffic that includes packets from multiple channels, it can be very useful to filter based on each individual channel. For instance, if you are expecting to have traffic present on only channels 1 and 6, you can input a filter to show all channel 11 traffic. If you Wireless P a ck et Analysis 227 find any traffic, then you will know that something is wrong—perhaps a misconfiguration or a rogue device. In order to filter on a specific frequency, use this filter syntax: radiotap.channel.freq == 2412 This will show all traffic on channel 1. You can replace the 2412 value with the appropriate frequency for the channel you wish to filter. Table 11-2 lists the frequencies associated with each channel. Table 11-2: 802.11 Wireless Channels and Frequencies Channel Frequency 1 2412 2 2417 3 2422 4 2427 5 2432 6 2437 7 2442 8 2447 9 2452 10 2457 11 2462 There are hundreds of additional useful filters that you can use for wireless network traffic. You can view additional wireless capture filters on the Wireshark wiki at http://wiki.wireshark.org/. Wireless Security The biggest concern when deploying and administering a wireless network is the security of the data transmitted across it. With data flying through the air, free for the taking by anyone who knows how, it’s crucial that data be encrypted. Otherwise, anyone with Wireshark and an AirPcap card can see it. NOTE When another layer of encryption, such as SSL or SSH, is used, traffic will still be encrypted at that layer, and the user’s communication will still be unreadable by a person with a packet sniffer. The original preferred method for securing data transmitted over wireless networks was in accordance with the Wired Equivalent Privacy (WEP) standard. WEP was mildly successful for years until several weaknesses were uncovered in its encryption key management. To improve security, new standards were created. These include the Wi-Fi Protected Access (WPA) and WPA2 standards. Although WPA and its more secure revision WPA2 are still fallible, they are considered more secure than WEP. 228 Chapter 11 In this section, we will look at some WEP and WPA traffic, along with examples of failed authentication attempts. Successful WEP Authentication 80211-WEPauth .pcap The file 80211-WEPauth.pcap contains an example of a successful connection to a WEP-enabled wireless network. The security on this network is set up using a WEP key. This is a key you must provide to the WAP in order to authenticate to it and decrypt data sent from it. You can think of this WEP key as a wireless network password. As shown in Figure 11-11, the capture file begins with a challenge from the WAP (00:11:88:6b:68:30) to the wireless client (00:14:a5:30:b0:af) in packet 4 . The purpose of this challenge is to determine if the wireless client has the correct WEP key. You can see this challenge by expanding the 802.11 header and its tagged parameters. Figure 11-11: The WAP issues challenge text to the wireless client. The challenge is acknowledged with packet 5. The wireless client then responds by decrypting the challenge text with the WEP key and returning it to the WAP , as shown in Figure 11-12. Figure 11-12: The wireless client sends the unencrypted challenge text back to the WAP. The packet is once again acknowledged in packet 7, and the WAP responds to the wireless client in packet 8, as shown in Figure 11-13. The response contains notification that the authentication process was successful . Wireless P a ck et Analysis 229 Figure 11-13: The WAP alerts the client that authentication was successful. Finally, after successful authentication, the client can transmit an association request, receive an acknowledgment, and complete the connection process, as shown in Figure 11-14. Figure 11-14: The authentication process is followed by a simple two-packet association request and response. Failed WEP Authentication 80211WEPauthfail.pcap In our next example, a user enters his WEP key to connect to a WAP, and after several seconds, the wireless client utility reports that it was unable to connect to the wireless network but fails to tell why. The resulting file is 80211-WEPauthfail.pcap. As with the successful attempt, this communication begins with the WAP sending challenge text to the wireless client in packet 3. This is acknowledged, and in packet 5, the wireless client sends its response using the WEP key provided by the user. At this point, we would expect to see notification that the authentication was successful, but we see something different in packet 7, as shown in Figure 11-15 . Figure 11-15: This message tells us the authentication was unsuccessful. This message tells us that the wireless client’s response to the challenge text was incorrect. This suggests that the WEP key the client used to decrypt the challenge text must have been incorrect. As a result, the connection process has failed. It must be reattempted with the proper WEP key. 230 Chapter 11 Successful WPA Authentication 80211-WPAauth .pcap WPA uses a very different authentication mechanism than WEP, but it still relies on the user to enter a key into the wireless client in order to connect to the network. An example of a successful WPA authentication is found in the file 80211-WPAauth.pcap. The first packet in this file is a beacon broadcast from the WAP. Let’s expand the 802.11 header of this packet, look under tagged parameters, and expand the Vendor Specific heading, as shown in Figure 11-16. You should see a section devoted to the WPA attributes of the WAP . This lets us know that the WAP supports WPA and the version and implementation it supports. Figure 11-16: This beacon lets us know that the WAP supports WPA authentication. Once the beacon is received, the wireless client (00:14:6c:7e:40:80) sends a probe request for the WAP (00:0f:b5:88:ac:82), and the WAP responds. Authentication and association requests and responses are generated between the wireless client and WAP in packets 4 through 7. Things really start to pick up in packet 8. This is where the WPA handshake begins, continuing through packet 11. This handshake process is where the WPA challenge response takes place, as shown in Figure 11-17. Figure 11-17: These packets are a part of the WPA handshake. Wireless P a ck et Analysis 231 There are two challenges and responses. Each can be matched with the other based on the Replay Counter field under the 802.1x Authentication header, as shown in Figure 11-18. Notice that the Replay Counter value for the first two handshake packets is 1 , and for the second two handshake packets, it’s 2 . Figure 11-18: The Replay Counter field helps us pair challenges and responses. After the WPA handshake is completed and authentication is successful, data begins transferring between the wireless client and the WAP. Failed WPA Authentication 80211WPAauthfail .pcap As with WEP, we’ll look at what happens when a user enters his WPA key and the wireless client utility reports that it was unable to connect to the wireless network, without indicating the problem. The resulting file is 80211-WPAauthfail.pcap. Once again, the capture file begins in a manner identical to the successful WPA authentication we just examined. This includes probe, authentication, and association requests. The WPA handshake begins in packet 8, but in this case, we can see that there are eight handshake packets instead of the four we saw in the successful authentication attempt. Packets 8 and 9 represent the first two packets seen in the WPA handshake. In this case, however, the challenge text that is sent back to the WAP from the client is incorrect. As a result, the sequence is repeated in packets 10 and 11, 12 and 13, and 14 and 15, as shown in Figure 11-19. Each request and response can be paired using the Replay Counter value. Figure 11-19: The additional EAPOL packets here indicate the failed WPA authentication. 232 Chapter 11 Once the handshake process has been attempted four times, the communication is aborted. As shown in Figure 11-20, the wireless client deauthenticates from the WAP in packet 16 . Figure 11-20: After failing the WPA handshake, the client deauthenticates. Final Thoughts Although wireless networks are still considered widely insecure, that hasn’t slowed their deployment in various organizational environments. As the focus shifts to communication without wires, it is critical to be able to capture and analyze data on wireless networks, as well as wired ones. The skills and concepts taught in this chapter are by no means exhaustive, but they should provide a jump start in helping you understand the intricacies of troubleshooting wireless networks with packet analysis. Wireless P a ck et Analysis 233 FURTHER READING Although the tool used primarily in this book is Wireshark, a great deal of additional tools will come in handy when you’re performing packet analysis—whether it be for general troubleshooting, slow networks, security issues, or wireless networks. This chapter lists some useful packet analysis tools and other packet analysis learning resources. Packet Analysis Tools There are several tools that are useful for packet analysis in addition to Wireshark. Here, we’ll look at a few of the ones I have found most useful. tcpdump and Windump Although Wireshark is very popular, it is probably less widely used than tcpdump. Considered the de facto packet capture and analysis utility by several crowds, tcpdump is entirely text based. Although tcpdump lacks graphical features, it is great for sifting through large amounts of data, as you can pipe its output to other commands, such as sed and awk in Linux. As you delve further into packet analysis, you will find use for both Wireshark and tcpdump. You can download tcpdump from http://www.tcpdump.org/. Windump is simply a distribution of tcpdump that has been remade for Windows. You can download it from http://www.winpcap.org/windump/. Cain & Abel Discussed in Chapter 2, Cain & Abel is one of the better Windows tools for ARP cache poisoning. Cain & Abel is actually a very robust suite of tools, and you will surely be able to find other uses for it as well. It is available from http://www.oxid.it/cain.html. Scapy Scapy is a very powerful Python library that allows for the creation and manipulation of packets based on command-line scripts within its environment. Simply put, Scapy is the most powerful and flexible packet-crafting application available. You can read more about Scapy, download it, and view sample Scapy scripts at http://www.secdev.org/projects/scapy/. Netdude If you don’t need something as advanced as Scapy, then Netdude is a great Linux alternative. Although Netdude is limited in its ability, it provides a GUI that is very easy to use for creating and modifying packets for research purposes. Figure A-1 shows an example of using Netdude. You can download Netdude from http://netdude.sourceforge.net/. Figure A-1: Modifying packets within Netdude 236 Appendix Colasoft Packet Builder If you are a Windows user and want a GUI similar to Netdude, then consider using Colasoft Packet Builder, an excellent free tool. Colasoft also provides an easy-to-use GUI for packet creation and modification. You can download it from http://www.colasoft.com/packet_builder/. CloudShark CloudShark (developed by QA Café) is one of my favorite online resources for sharing packet captures with others. CloudShark is a website that displays network capture files inside your browser in a Wireshark-esque manner, as shown in Figure A-2. You can upload capture files and send the links to colleagues for shared analysis. Figure A-2: A sample capture file viewed with CloudShark My favorite thing about CloudShark is that it doesn’t require registration and accepts direct linking via URL. This means that when I post a link to a PCAP file on my blog, someone can just click it and see the packets, without needing to download the file and open it in Wireshark. CloudShark is accessible at http://www.cloudshark.org/. pcapr pcapr is a very robust Web 2.0 platform for sharing PCAP files created by the folks at Mu Dynamics. As of this writing, pcapr contains nearly 3,000 PCAP files, with examples of more than 400 different protocols. Figure A-3 shows an example of a DHCP traffic capture on pcapr. F ur t h e r R e a d i n g 237 Figure A-3: Viewing a DHCP traffic capture on pcapr When I’m looking for an example of a certain type of communication, I start by searching on pcapr. If you find yourself creating a lot of different capture files in your own experimentation, don’t hesitate to share them with the community by uploading them to pcapr, at http://www.pcapr.net/. NetworkMiner NetworkMiner is a tool primarily used for network forensics, but I’ve found it useful in a variety of other situations as well. Although it can be used to capture packets, its real strength is how it parses PCAP files. NetworkMiner will take a PCAP file and break it down into the operating systems detected and the sessions between hosts. It even allows you to extract transferred files directly from the capture. NetworkMiner is free to download from http:// networkminer.sourceforge.net/. Tcpreplay Whenever I have a set of packets that I need to retransmit over the wire to see how a device reacts to them, I use Tcpreplay to perform that. Tcpreplay is designed specifically to take a PCAP file and retransmit the packets contained within it. Download it from http://tcpreplay.synfin.net/. ngrep If you are familiar with Linux, you’ve no doubt used grep to search through data. ngrep is very similar and allows you to perform very specific searches through PCAP data. I mostly use ngrep when capture and display filters won’t do the job or get too wildly complex. You can read more about ngrep at http:// ngrep.sourceforge.net/. 238 Appendix libpcap If you plan to do any really advanced packet parsing or create applications that deal with packets, you become very familiar with libpcap. Simply put, libpcap is a portable C/C++ library for network traffic capture. Wireshark, tcpdump, and most other packet analysis applications rely on the libpcap library at some level. You can read more about libpcap at http://www.tcpdump.org/. hping hping is one of the more versatile tools to have in your arsenal. hping is a command-line packet crafting and transmission tool. It supports a variety of protocols and is very quick and intuitive to use. You can download hping from http://www.hping.org/. Domain Dossier If you need to look up the registration information for a domain or IP address, then Domain Dossier is the place to do that. It’s fast, it’s simple, and it works. You can access Domain Dossier at http://www.centralops.net/co/ DomainDossier.aspx. Perl and Python Perl and Python aren’t tools but rather scripting languages that are well worth mentioning. As you become proficient in packet analysis, you will encounter cases where no automated tool exists to meet your needs. In those cases, Perl and Python are the languages of choice for making tools that can do interesting things with packets. I typically use Python for most applications, but it’s often just a matter of personal preference. Packet Analysis Resources From Wireshark’s home page to courses and blogs, many resources for packet analysis are available. I’ll list a few of my favorites here. Wireshark Home Page The foremost resource for everything related to Wireshark is its home page, at http://www.wireshark.org/. The home page includes the software documentation, a very helpful wiki that contains sample capture files, and sign-up information for the Wireshark mailing list. SANS Security Intrusion Detection In-Depth Course As a SANS mentor, I’m slightly biased, but I don’t think there is a better packet analysis course on the planet than SANS SEC 503, Intrusion Detection In-Depth. This class focuses on the security aspects of packet analysis. Even if you aren’t focused on security, the first two days of the course provide the best introduction to packet analysis and tcpdump that I’ve ever experienced. F ur t h e r R e a d i n g 239 The course is taught by two of my packet analysis heroes, Mike Poor and Judy Novak. It is offered at live events several times throughout the year. If your travel budget is limited, the course is also taught through an online and web-based on-demand format. You can read more about SEC 503 and other SANS courses at http:// www.sans.org/. Chris Sanders Blog I don’t get around to posting nearly enough, but I do occasionally write articles related to packet analysis and post them on my blog, at http://www .chrissanders.org/. If nothing else, my blog serves as a portal that links to other articles and books I have written, and it provides information about how to get in touch with me. Packetstan Blog The blog of Mike Poor and Judy Novak is my favorite packet-related blog out there at the moment. Their site http://www.packetstan.com/ contains some great breakdowns of interesting traffic, and every single piece of content on it is A+ material. Mike and Judy are two of the best at what they do, and they are a large inspiration to me. Wireshark University Laura Chappell is one of the most prolific Wireshark evangelists you will find. Her site contains loads of Wireshark tips, as well as information about her book, Wireshark Network Analysis, and the courses she teaches. Find out more at http://www.wiresharktraining.com/. IANA The Internet Assigned Numbers Authority (IANA), available at http:// www.iana.org/, oversees the allocation of IP addresses and protocol number assignments for North America. Its website offers some valuable reference tools, such as the ability to look up port numbers, view information related to top-level domain names, and browse companion sites to find and view RFCs. TCP/IP Illustrated (Addison-Wesley) Considered the TCP/IP bible by most, this series of books by Dr. Richard Stevens is a staple on the bookshelves of most who live at the packet level. It is my favorite TCP/IP book and something I referenced quite a bit when writing this book. The TCP/IP Guide (No Starch Press) One more favorite of mine in the TCP/IP realm is this book by Charles Kozierok. Weighing in at over 1,000 pages, it’s very detailed and contains a lot of great diagrams for the visual learner. 240 Appendix INDEX Symbols & Numbers && (AND) operator, in BPF syntax, 58 <iframe> tag (HTML), 200 <script> tag (HTML), 198–199 <span> tag (HTML), 200 == (equal-to) comparison operator, 64 ! (NOT) operator, in BPF syntax, 58 .pcap file format, 48. See also capture file examples || (OR) operator, in BPF syntax, 58, 61 802.11 standard, 216 packet structure, 223–225 A ACKed Lost Packet message, 84 ACK packet, 102, 132, 167, 168 duplicate, 171–172, 179 acknowledgment number, in ACK packet, 169–170 acknowledgment packet in DHCP, 119 active fingerprinting, 196–197 address registries, 70 Address Resolution Protocol (ARP), 18, 86–90 gratuitous ARP, 89–90 header, 87–88 packet structure, 88 packets, 204 reply, 86, 87, 89, 148 request, 86, 87, 88–89, 145, 148 spoofing, 27, 205 unsolicited updates to table, 204 addressing filters, 59 ad hoc mode, for wireless NIC, 218, 219 Advanced Wireless Settings dialog, 221–222 AfriNIC (Africa), 70 aggregated network tap, 24–25 AirPcap capturing traffic, 221–222 configuring, 219–220 Control Panel, 220–221 AJAX (Asynchronous JavaScript and XML), 139 alerts from IDS, 206 ALFA 1000mW USB wireless adapter, 219 American Registry for Internet Numbers (ARIN), 70 analysis step, in sniffer process, 4 Analyze menu Display Filters, 65 Expert Info Composite, 83 AND (&&) operator, in BPF syntax, 58 and filter expression logical operator, 65 APNIC (Asia/Pacific), 70 application baseline, 185 Application layer (OSI), 5 archive file, extracting, 39 ARIN (American Registry for Internet Numbers), 70 ARP. See Address Resolution Protocol (ARP) ARP cache poisoning, 26–30, 32 attacker use, 202–205 caution on, 30 associations/dependencies in application baseline, 186 in host baseline, 185 asymmetric routing, 30 Asynchronous JavaScript and XML (AJAX), 139 attackers exploitation, 197–213 ping use to determine host accessibility, 108 and random text in ICMP echo request, 110 reconnaissance by potential, 190–197 Windows command shell use, 201 Aurora exploit, 197–202 authentication in host baseline, 185 in site baseline, 184 Twitter vs. Facebook, 140 WEP failed, 230 successful, 229–230 WPA failed, 232–233 successful, 231–232 Automatic Scrolling in Live Capture option, 56 AXFR (full zone transfer), 127 B baseline for network, 41, 183–187 application baseline, 186 host baseline, 185 site baseline, 184 basic service set identifier (BSS ID), 226 beacon packet, 224–225 broadcast from WAP, 231 benchmarking, Protocol Hierarchy Statistics for, 71–72 242 INDEX Berkeley Packet Filter (BPF) syntax, 58–61 Bootstrap Protocol (BOOTP), 113, 116 bottleneck, analyzer as, 30 BPF (Berkeley Packet Filter) syntax, 58–61 branch office, troubleshooting connections, 155–159 broadcast address, 116 broadcast domain, 14–15, 18 broadcast packet, 14–15 broadcast traffic, in site baseline, 184 BSS ID (basic service set identifier), 226 buffer space in TCP, 173 byte offset, for protocol field filters, 60 C CACE Technologies, 219 Cain & Abel, 27–29, 236 CAM (Content Addressable Memory) table, 12, 86 CAPSCREEN command, 208–209 capture file examples 80211beacon.pcap, 224 80211-WEPauthfail.pcap, 230 80211-WEPauth.pcap, 229 80211-WPAauthfail.pcap, 232 80211-WPAauth.pcap, 231 activeosfingerprinting.pcap, 197 arp_gratuitous.pcap, 90 arppoison.pcap, 202 arp_resolution.pcap, 88 aurora.pcap, 197 dhcp_inlease_renewal.pcap, 120 dhcp_nolease_renewal.pcap, 115 dns_axfr.pcap, 127 dns_query_response.pcap, 122 dns_recursivequery_client.pcap, 124 dns_recursivequery_server.pcap, 125 download-fast.pcap, 79, 81 download-slow.pcap, 78, 80, 83 facebook_login.pcap, 138 facebook_message.pcap, 139 http_espn.pcap, 140 http_google.pcap, 77, 82, 129 http_post.pcap, 131 icmp_echo.pcap, 108 inconsistent_printer.pcap, 153 ip_frag_source.pcap, 95, 96 ip_ttl_dest.pcap, 95 ip_ttl_source.pcap, 94 latency1.pcap, 180 latency2.pcap, 180 latency3.pcap, 181 latency4.pcap, 182 lotsofweb.pcap, 70, 71 nowebaccess1.pcap, 145 nowebaccess2.pcap, 147 nowebaccess3.pap, 150 passiveosfingerprinting.pcap, 195 ratinfected.pcap, 207 stranded_branchdns.pcap, 157 stranded_clientside.pcap, 156 synscan.pcap, 191 tcp_dupack.pcap, 170 tcp_handshake.pcap, 102 tcp_ports.pcap, 99 tcp_refuseconnection.pcap, 105 tcp_retransmissions.pcap, 167 tcp_teardown.pcap, 104 tcp_zerowindowdead.pcap, 177 tcp_zerowindowrecovery.pcap, 175–177 tickedoffdeveloper.pcap, 159 twitter_login.pcap, 134 twitter_tweet.pcap, 136 udp_dnsrequest.pcap, 106 wrongdissector.pcap, 74 capture files, 47–49 automatically storing packets in, 54–55 conversations in, colorizing, 208 merging, 49 saving and exporting, 48 capture filters, 56 BPF syntax, 58–61 sample expressions, 61–62 Capture menu, Interfaces, 53 Capture Options dialog, 53–54 Display options, 56 enabling name resolution, 73 for filtering, 57 Name Resolution section, 56 Capture section, for Wireshark preferences, 44 capture type, for AirPcap, 220 Chanalyzer software, 217–218 channel hopping, 216 channels, 216 changing when monitoring, 223 overlapping, 217 Chappell, Laura, 240 Chat category of expert information, 82, 83 CIDR (Classless Inter-Domain Routing), 92 Cisco, set span command, 22 Cisco router, 13 Classless Inter-Domain Routing (CIDR), 92 clearing filters, 193 Client Identifier DHCP option field, 117 clients in branch office, access to WAN, 155–159 latency, 181 misconfigured, 147 closed ports, identifying, 193–194 CloudShark, 237 Colasoft Packet Builder, 237 collection step, in sniffer process, 3 collisions, on hub network, 20 color coding for packets, 45–46 in Follow TCP Stream window, 77 Coloring Rules window (Wireshark), 45–46 colorization rule, exporting endpoints to, 68 colorizing conversations, 208 Combs, Gerald, 35 comma-separated values (CSV) files saving capture file as, 48 transmission to central database, 159–163 comparison operators, 64 compiling Wireshark from source, 39–40 INDEX 243 computers communication process, 4–14 data encapsulation, 8–10 OSI model, 5–8 protocols, 4 screen capture by attacker, 212 connectionless protocol, 105–106 Content Addressable Memory (CAM) table, 12, 86 control packets (802.11), 223 conversations, 68 in capture file, colorizing, 208 viewing, 69 Conversations window ESPN.com traffic in, 140–141 with TCP communications, 191–192 troubleshooting with, 70–71 conversion step, in sniffer process, 3 costs, of packet sniffers, 3 CSV (comma-separated values) files saving capture file as, 48 transmission to central database, 159–163 CyberEYE remote-access Trojan (RAT), 207 D data encapsulation, 8–10 data flow, halting with zero window notification, 175 Data link layer (OSI), 6, 9 data packets (802.11), 224 data set, graph for overview, 79 data-transfer rate in application baseline, 186 in site baseline, 184 data transmission, testing for corruption, 159–163 DEB-based Linux distributions, installing Wireshark on, 39 Decode As dialog, 74 default gateway, 147 attempt to find MAC address for, 145–146 denial-of-service (DoS) attacks, 27 244 INDEX Department of Defense (DoD) model, 5 destination port, for TCP, 98–100 DHCP. See Dynamic Host Configuration Protocol (DHCP) direct install method, for sniffer placement, 31, 32 direct messaging, in Twitter, 137 discover packet for DHCP, 116–117 Display Filter dialog, 65–66 display filters, 56–65 sample expressions, 65 saving, 65–66 dissection expert information from, 82–84 viewing source code, 76 DNS. See Domain Name System (DNS) DoD (Department of Defense) model, 5 domain controller, and branch office, 155–159 Domain Dossier, 239 Domain Name System (DNS), 120–129 communication problems, 157 filter for traffic, 142–143 name-to-IP address mapping, 149 packet structure, 121–122 queries, 122–123, 142 conditions preventing, 149 question types, 124 recursion, 124–127 resource record types, 124 zone transfers, 127–129 DORA process, 115 DoS (denial-of-service) attacks, 27 dotted-quad notation, 91 double-headed packet, 111 downloading NMAP tool, 191 pages from web server, 129–131 pOf tool, 196 WinPcap capture driver, 37 dropping packets, 10 dst qualifier, filter based on, 59 duplicate ACK packet, 83, 171–172, 179 Dynamic Host Configuration Protocol (DHCP), 113–120 acknowledgment packet, 119 discover packet, 116–117 in-lease renewal, 119–120 offer packet, 117–118 options and message types, 120 packet structure, 114–115 renewal process, 115–118 request packet, 118–119 E echo, vs. ping, 109 Edit menu Preferences, 44, 170 Name Resolution, 100 Set Time Reference, 53 email message, with link to malicious site, 197 encryption, 228 endpoints, 67–68 exporting, to colorization rule, 68 monitoring, 204 viewing, 68–69 Endpoints window, 68–69 troubleshooting with, 70–71 Enterasys, set port mirroring create command, 22 ephemeral port group, 99 equal-to comparison operator (==), 64 Error category of expert information, 82, 84 ESPN.com traffic, 140–144 Ethereal, 35 Ethernet, 9 broadcast address, 88 hub, 10 networks ARP process for computers on, 26–27 default MTU, 95 maximum frame size, 78 switch, rack-mountable, 11 expert information, from dissection, 82–84 exporting capture files, 48 endpoint to colorization rule, 68 expression, in BPF syntax, 58 extracting archive, 39 JPG data from Wireshark, 211–212 F Facebook capturing traffic, 137–139 login process, 138 private messaging with, 139 vs. Twitter, 140 fast retransmission, 84, 170, 172 FCS filter, for AirPcap, 220 file carving, 212 Filter Expression dialog, 63 Filter Expression Syntax Structure, 64–65 filters, 56–66 addressing, 59 BPF syntax, 58–61 clearing, 193 display, 62–65 Filter Expression dialog, 63 Filter Expression Syntax Structure, 64–65 sample expressions, 65 for DNS traffic, 142–143 hostname and addressing, 59 port and protocol, 60 protocol field, 60–61 for STOR command, 160 with SYN scans, 192–193 wireless-specific, 226–228 FIN flag, 103 finding packets, 50 Find Packet dialog, 50 fingerprinting operating systems, 194–197 flow graphing, 82 for data transmission testing, 159–160 INDEX 245 Follow TCP Stream feature, 76–77, 161–162 footer, in packet, 8 footprinting, 190 forced decode, 74–76 Fragment Offset field, for packets, 96, 97 frames, maximum size on Ethernet network, 78 frequency, filter for specific, 227–228 Frequency/Channel data, for wireless, 225 full-duplex devices, 11 switches as, 20 full zone transfer (AXFR), 127 Fyodor, 191 G gateway. See default gateway GET request packet (HTTP), 130, 135, 181 for Facebook, 138 GIF file, to trigger exploit code, 200 GNU Public License (GPL), 35 graphing, 79–82 flow, 82 IO graphs, 79–80 round-trip time, 81 gratuitous ARP, 89–90 H half-duplex mode, 10 half-open scan, 190 handshake for TCP, 101–103 initial sequence number, 169 and latency, 179 in Twitter authentication process, 134 hardware, Wireshark requirements, 37. See also network hardware header in packet, 8 for ARP, 87–88 for ICMP, 107 for IPv4 header, 92–93 246 INDEX for TCP, 98 for UDP, 106–107 help. See program support hexadecimal, searching for packets with specified value, 50 hex editor, 212 Hide Capture Info Dialog option, 56 high latency, 166, 179–183 high-traffic servers, host baseline for, 185 host address, in IP address, 91 host baseline, 185 hostname, filters, 59 host qualifier, for filter, 59 hosts file, 149–150 hping, 239 HTTP. See Hypertext Transfer Protocol (HTTP) HTTPS, 134 hubbing out, 22–23, 32 hub network, collisions on, 20 hubs, 10–11 finding “true,” 23 sniffing on network with, 19–20 Hypertext Transfer Protocol (HTTP), 8–9, 129–132 browsing with, 129–131 posting data with, 131–132 viewing requests, 143–144 I IANA (Internet Assigned Numbers Authority), 240 ICMP. See Internet Control Message Protocol (ICMP) Ident protocol, 193 idle/busy traffic, in host baseline, 185 IDS (intrusion detection system), 206 IEEE (Institute of Electrical and Electronics Engineers), 216 <iframe> tag (HTML), 200 in-lease renewal for DHCP, 119–120 incremental zone transfer (IXFR), 127 installing Wireshark, 37–41 on Linux, 39–40 on Mac OS X, 40–41 on Microsoft Windows, 37–39 Institute of Electrical and Electronics Engineers (IEEE), 216 interference, between wireless channels, 217 International Organization for Standardization (ISO), 5 Internet access, troubleshooting configuration problems, 144–147 unwanted redirection, 147–150 Internet Assigned Numbers Authority (IANA), 240 Internet Control Message Protocol (ICMP), 107–112 echo requests and responses, 108–110 header, 107 ping, 95 types and messages, 107 Internet Explorer, vulnerability in, 197 Internet Protocol (IP), 9, 91–97 addresses, 26, 91–92 assignments, 70 dynamic assignment, 113–120 filtering packets with specific address, 64 finding. See Domain Name System (DNS) fragmentation, 95–97 Time to Live (TTL), 93–95 v4 header, 92–93 intrusion detection system (IDS), 206 IO graphs, 79–80, 209–210 IP. See Internet Protocol (IP) IP-to-MAC address mapping, updating cache with, 89–90 IPv6 address, filter based on, 59 ISO (International Organization for Standardization), 5 iwconfig command, 222–223 IXFR (incremental zone transfer), 127 J JFIF string, 209 JPG file extracting data from Wireshark, 211–212 to initiate attack communication, 209–211 K Keep Alive message, 84 keep-alive packets, 175, 177–178, 179 keys, for SSL, 135 Kismet, 216 Kozierok, Charles, The TCP/IP Guide, 240 L LAN (local area networks), 91 latency, 166 locating framework, 182–183 locating source of high, 179–183 client latency, 181 normal communications, 180 server latency, 182 wire latency, 180–181 layer 2 addresses, 26 layer 8 issue, 7 leases, from DHCP, 119–120 LED lights on AirPcap, blinking, 220 libpcap/WinPcap driver, 19, 239 Linux default number of retransmission attempts, 167 hosts file examination, 150 installing Wireshark on, 39–40 sniffing wirelessly, 222–223 traceroute utility, 112 local area networks (LAN), 91 location, for packet sniffer, 17–18, 31–32 logical addresses, 9, 86 logical operators in BPF syntax, 58 for combining filter expressions, 64–65 INDEX 247 login process for Facebook, 138 for Twitter, 134–135 low latency, 166 M MAC address, 26, 86 ARP and, 18 attempt to find for default gateway, 145–146 filter based on, 59 name resolution, 73 MAC Address Scanner dialog (Cain & Abel), 28 Mac OS X, installing Wireshark on, 40–41 mailing lists, for program support, 3 make command, 40 malware redirecting users to websites with malicious code, 150 risk of infection, 150 man-in-the-middle attacks, 140, 202 managed mode, for wireless NIC, 218, 219 managed switches, 11 management packets (802.11), 223 mapping path, 110–112 marking packets, 51 master mode, for wireless NIC, 218, 219 maximum transmission unit (MTU), and packet fragmentation, 95 MD5 hashes, 162–163 merging capture files, 49 Message Type DHCP option field, 116 message types, for DHCP, 120 messaging methods, Twitter vs. Facebook, 140 MetaGeek, 217 Microsoft Windows command shell, attacker use, 201 default number of retransmission attempts, 167 hosts file examination, 150 248 INDEX installing Wireshark on, 37–39 sniffing wirelessly, 219–222 mission-critical servers, host baseline for, 185 monitor mode for wireless NIC, 218, 219 enabling in Linux, 222–223 monitor port, for nonaggregated taps, 25 More Fragments field, for packets, 96, 97 MTU (maximum transmission unit), and packet fragmentation, 95 multicast traffic, 15 N name resolution, 72–74 Name Resolution section, for Wireshark preferences, 44 namespace, for DNS server management, 127 Netdude, 236 netmask (network mask), 91–92 network address, in IP address, 91 network baselining, 183–187 network diagrams, 31 network endpoints, 67–68. See also endpoints network hardware, 10–14 hubs, 10–11 routers, 12–14 switches, 11–12 taps, 24–26 network interface card promiscuous mode support, 18–19 wireless card modes, 218–219 Network layer (OSI), 6 network maps, 31 network mask (netmask), 91–92 NetworkMiner, 238 network name resolution, 73 networks packet level as source of problems, 1 traffic classifications, 14–15 traffic flow, 14 understanding normal traffic, 85 network tap, 24–26, 32 ngrep, 238 NMAP tool, 191, 197 No Error Messages message, 84 nonaggregated network tap, 24, 25–26 Nortel, port-mirroring mode mirror-port command, 22 NOT (!) operator, in BPF syntax, 58 Note category of expert information, 82, 83 not filter expression logical operator, 65 Novak, Judy, 240 O Offer packet in DHCP, 117–118 OmniPeek, 2 one-way latency, 166 open ports, identifying, 193–194 operating systems. See also Linux; Mac OS X; Microsoft Windows fingerprinting, 194–197 sniffer support, 3 Wireshark support, 37 Operation Aurora, 197–202 OR (||) operator, in BPF syntax, 58, 61 or filter expression logical operator, 65 OSI model, 5–8 out of lease, 119 Out-of-Order message, 84 oxid.it, 27 P packet analysis, 2 tools, 235–239 web resources, 239–240 Packet Bytes pane (Wireshark), 43 packet capture, 41–42. See also capture file examples Packet Details pane (Wireshark), 43, 153 Application Data in Info column, 135 retransmission packet information, 168 Packet List pane (Wireshark), 43, 74, 153 adding columns to, 203, 225–226 for filter, 160 retransmissions in, 168 packets color coding, 45–46 dropping, 10 finding, 50 fragmentation, 95–97 length, 78–79 mapping path, 110–112 marking, 51 printing, 51–52 SYN flag, 148–149 term defined, 8 wireless types, filtering specific, 227 packet sniffers evaluating, 2–3 guidelines, 32 how they work, 3–4 positioning for data capture, 17–18, 31–32 packet sniffing, 2. See also packet analysis Packetstan blog, 240 packet time referencing, 52, 53 Parameter Request List DHCP option field, 117 passive fingerprinting, 194–196 .pcap file format, 48. See also capture file examples pcapr, 237–238 PDF file, printing packets to, 51 PDU (protocol data unit), 8 performance, 165–187. See also latency network baselining, 183–187 Selective ACK and, 172 INDEX 249 Perl, 239 physical addresses, 86 Physical layer (OSI), 5, 6, 9 ping utility, 108 plaintext, saving capture file as, 48 pOf tool, 196 Poor, Mike, 240 port mirroring, 21–22, 32 for checking for data corruption, 159 for troubleshooting printer, 153 port-mirroring mode mirror-port command (Nortel), 22 ports attacker research on, 190 attackers’ efforts to determine open, 190 blocking traffic, 158 filter based on, 60 filter to show all traffic using specific, 192 filtering packet capture by, 57 filters to exclude, 60 for HTTP, 130 identifying open and closed, 193–194 list of common, 101 for TCP, 99–101 port spanning, 21. See also port mirroring posting data with HTTP, 131–132 POST method, 132 for Facebook, 139 for tweet, 136 POST packet (HTTP), 131 PostScript, saving capture file as, 48 Preferences dialog (Wireshark), 44 Name Resolution section, 100 Protocols section, 170 Presentation layer (OSI), 5 Previous Segment Lost message, 84 primitives, in BPF syntax, 58 Print dialog, 51 printing packets, 51–52 Printing section, for Wireshark preferences, 44 250 INDEX privacy, of Twitter direct messages, 137 private messaging, with Facebook, 139 problems. See troubleshooting program support evaluating, 3 for Wireshark, 37 promiscuous mode, 3 network interface card support for, 18–19 protocol analysis, 2. See also packet analysis protocol data unit (PDU), 8 protocol field filters, 60–61 Protocol Hierarchy Statistics, 71–72, 141–142, 184 protocols, 4 in application baseline, 186 color coding in Wireshark, 45–46 dissection, 74–76 filter based on, 60 in host baseline, 185 lower-layer, 85–112 Address Resolution Protocol (ARP), 86–90 Internet Control Message Protocol (ICMP), 107–112 Internet Protocol (IP), 91–97 Transmission Control Protocol (TCP), 98–105 User Datagram Protocol (UDP), 105–107 and OSI model, 6 packet sniffer evaluation and, 2 in site baseline, 184 support by Wireshark, 37 upper-layer, 113–132 Domain Name System (DNS), 120–129 Dynamic Host Configuration Protocol (DHCP), 113–120 Hypertext Transfer Protocol (HTTP), 129–132 Protocols section, for Wireshark preferences, 44 protocol stack, 4 public forums, for program support, 3 Python, 239 Q qualifiers, in BPF syntax, 58 queries in DNS, 122–123, 142 conditions preventing, 149 R rack-mountable Ethernet switch, 11 RAT (remote-access Trojan), 206–213 reassembly, for packets in FTPDATA stream, 160–161 receive window, 173 adjusting size, 174, 176 halting data flow, 175 Received Signal Strength Indication (RSSI), 225 reconnaissance by potential attacker, 190–197 redirection, troubleshooting unwanted, 147–150 remote-access Trojan (RAT), 206–213 remote server, lack of response, 152 repeating device, hub as, 10 Replay Counter field, 232 report-generation module, free vs. commercial sniffers, 3 Request for Comments (RFC) 791, on Internet Protocol v4, 91 792, on ICMP, 107 793, on TCP, 98 826, on ARP, 86 DNS-related, 120 request packet, 8 in DHCP, 118–119 Requested IP Address DHCP option field, 117 resource records in DNS servers, 120 retransmission packets, 154, 166–169, 178–179 retransmission timeout (RTO), 154, 166, 168 retransmission timer, 166 RFC. See Request for Comments (RFC) Ring Buffer With option, 55 RIPE (Europe), 70 Riverbed, 219 RJ-45 ports, 10 round-trip time (RTT), 166 graphing, 81 routed environment, sniffing on, 30–31 routers, 12–14 for connecting LANs, 91 RPM-based Linux distributions, installing Wireshark on, 39 RSSI (Received Signal Strength Indication), 225 RST flag, 148–149 RTO (retransmission timeout), 154, 166, 168 RTT (round-trip time), 166 graphing, 81 S Sanders, Chris, blog, 240 SANS Security Intrusion Detection In-Depth course, 239–240 saving capture files, 48 display filters, 65–66 file set, 55 Scapy, 236 screen capture, of victim computer, 212 <script> tag (HTML), 198–199 secondary DNS server, 127 Secure Socket Layer (SSL), 74 over HTTP, 134–135 security for wireless, 189–213, 228–233 for baseline, 187 exploitation, 197–213 INDEX 251 security for wireless (continued) reconnaissance, 190–197 remote-access Trojan, 206–213 screen capture by attacker, 212 Twitter and, 136–137 WEP authentication failed, 230 successful, 229–230 WPA authentication failed, 232–233 successful, 231–232 Selective Acknowledgment feature, 172 sequence numbers, in TCP packet, 169 server latency, 182 Session layer (OSI), 5 set port mirroring create command (Enterasys), 22 set span command (Cisco), 22 site baseline, 184 sliding window mechanism (TCP), 173, 175–178 slow network. See performance Sniffer tab (Cain & Abel), 28 sniffing the wire, 17 Snort project, 202 social networking, packets for, 134–140 source code for dissector, viewing, 76 source port, for TCP, 99, 100 <span> tag (HTML), 200 spear phishing, 197 spectrum analyzer, 217 src qualifier, filter based on, 59 SSL (Secure Socket Layer), 74 over HTTP, 134–135 standard port group, 99 startup/shutdown in application baseline, 186 in host baseline, 185 Statistics menu Conversations, 69, 140–141 Flow Graph, 82, 159 HTTP, 143 IO Graphs, 79 Packet Lengths, 78 252 INDEX Protocol Hierarchy, 71, 141–142 Summary, 143 TCP Stream Graph, Round Trip Time Graph, 81 Statistics section, for Wireshark preferences, 44 stealth scan, 190 Stevens, Richard, TCP/IP Illustrated, 240 Stop Capture settings, 55 STOR command (FTP), 160 subnet mask, 91–92 Summary window, 143–144 switches, 11–12 sniffing on network with, 20–30 ARP cache poisoning, 26–30 hubbing out, 22–23 port mirroring, 21–22 using tap, 24–26 SYN/ACK packet, 102 SYN packet, 102, 148–149, 151–152 lack of response, 158 response, 180 SYN scans, 190–194 filters with, 192–193 T tar command, 39 TCP. See Transmission Control Protocol (TCP) tcpdump, 2, 235–236 TCP/IP, address resolution process, 86 TCP/IP Guide (Kozierok), 240 TCP/IP Illustrated (Stevens), 240 Tcpreplay, 238 terminating TCP connection, 148–149 three-way handshake for TCP, 101–103 initial sequence number, 169 and latency, 179 in Twitter authentication process, 134 throughput graphing, 79 of ports being mirrored, 22 Time Display Formats, 52 Time to Live (TTL), 93–95 Traceroute, 110–112 traffic signatures, 202 Transmission Control Protocol (TCP), 8–9, 98–105 buffer space, 173 capturing only packets with RST flag set, 61 DNS and, 127, 157–158 duplicate acknowledgments, 169–172 error-recovery features, 166–172 retransmission, 166–169 expert info messages configured for, 83–84 flow control, 173–178 following streams, 76–77 header, 98 HTTP and, 129–130 learning from error- and flowcontrol packets, 178–179 resets, 104 retransmission packets, 83, 154 sliding window mechanism, 173, 175–178 SYN scan, 190–194 teardown, 103–104 terminating connection, 148–149 three-way handshake, 101–103 initial sequence number, 169 and latency, 179 in Twitter authentication process, 134 Transmission Rate (TX Rate), for wireless, 225 Transport layer (OSI), 6, 8–9 transport name resolution, 73 trigger for exploit code, GIF file for, 200 troubleshooting branch office connections, 155–159 developer tensions, 159–163 with Endpoints and Conversations windows, 70–71 latency, 178–179 no Internet access from configuration problems, 144–147 from unwanted redirection, 147–150 from upstream problems, 150–153 printer inconsistency, 153–155 slow networks, 166 wireless signal interference, 217 TTL (Time to Live), 93–95 Twitter capturing traffic, 134–137 direct messaging, 137 vs. Facebook, 140 login process, 134–135 sending data, 136–137 TX Rate (Transmission Rate), for wireless, 225 U Ubuntu, installing Wireshark on, 39 UDP. See User Datagram Protocol (UDP) unicast packet, 15 unmarking packets, 51 Update List of Packets in Real Time option, 56 uploading data to web server, 131–132 upstream problems, troubleshooting lack of Internet access from, 150–153 User Datagram Protocol (UDP), 105–107, 157 DHCP and, 116 DNS and, 123 header, 106–107 and latency, 182 user-friendliness of packet sniffers, 3 of Wireshark interface, 37 User Interface section, for Wireshark preferences, 44 user privileges, for promiscuous mode, 19 USER request command (FTP), filter for traffic, 160–161 INDEX 253 V viewing conversations, 69 endpoints, 68–69 View menu Time Display Format, 52, 53, 154–155 Seconds Since Previous Displayed Packet, 179 visibility window, 20, 21 W WAN (wide area network), branch office access, 156 WAP (Wireless Access Protocol) beacon packet, 231 broadcast packet from, 224 Warning category of expert information, 82, 84 web resources on DHCP options, 120 DNS-related RFCs, 120 on DNS resource record types, 124 on intrusion detection and attack signatures, 202 on packet analysis, 239–240 on packet analysis tools, 236–239 on wireless capture filters, 228 web server downloading pages from, 129–131 uploading data to, 131–132 websites, capturing traffic, 140–144 WEP. See Wired Equivalent Privacy (WEP) WHOIS utility, 70 wide area network (WAN), branch office access, 156 Wi-Fi Protected Access (WPA), 228 authentication failed, 232–233 successful, 231–232 Window is Full message, 84 Windows. See Microsoft Windows Windows command shell, attacker use, 201 254 INDEX Windows Size field, 175–176 Window Update message, 83 Windump, 235–236 WinHex, 212 WinPcap capture driver, 37 Wired Equivalent Privacy (WEP), 228 authentication failed, 230 successful, 229–230 configuration with AirPcap, 220 wire latency, 180–181 Wireless Access Protocol (WAP) beacon packet, 231 broadcast packet from, 224 wireless packet analysis, 215–233 802.11 packet structure, 223–225 adding columns to Packet List pane, 225–226 filters specific to, 226–228 NIC modes, 218–219 physical considerations, 216–217 signal interference, 217 sniffing channel at a time, 216 security, 228–233 failed WEP authentication, 230 failed WPA authentication, 232–233 successful WEP authentication, 229–230 successful WPA authentication, 231–232 sniffing in Linux, 222–223 in Windows, 219–222 Wireshark University, 240 Wireshark and AirPcap, 221 benefits, 36–37 fundamentals, 41–46 first packet capture, 41–42 main window, 42–43 preferences, 43–44 hardware requirements, 37 history, 35–36 home page, 239 installing, 37–41 on Linux, 39–40 on Mac OS X, 40–41 on Microsoft Windows, 37–39 libpcap/WinPcap driver, 19, 239 relative sequence numbers, 170 Wi-Spy, 217 WPA (Wi-Fi Protected Access), 228 authentication failed, 232–233 successful, 231–232 Z Zero Window message, 84 zero window notification, 175, 176, 179 Zero Window Probe message, 83, 84 zone transfers for DNS, 127 risk from allowing access to data, 128 failed, 158 X XML, saving capture file as, 48 xor filter expression logical operator, 65 INDEX 255 Practical Packet Analysis, 2nd Edition is set in New Baskerville. The book was printed and bound by Transcontinental Inc. at Transcontinental Gagné in Louiseville, Quebec, Canada. The paper is Domtar Husky 70# Smooth, which is certified by the Forest Stewardship Council (FSC). The book has an Otabind binding, which allows it to lie flat when open. The Electronic Frontier Foundation (EFF) is the leading organization defending civil liberties in the digital world. We defend free speech on the Internet, fight illegal surveillance, promote the rights of innovators to develop new digital technologies, and work to ensure that the rights and freedoms we enjoy are enhanced — rather than eroded — as our use of technology grows. PRIVACY FREE SPEECH INNOVATION EFF has sued telecom giant AT&T for giving the NSA unfettered access to the private communications of millions of their customers. eff.org/nsa EFF’s Coders’ Rights Project is defending the rights of programmers and security researchers to publish their findings without fear of legal challenges. eff.org/freespeech EFF's Patent Busting Project challenges overbroad patents that threaten technological innovation. eff.org/patent FAIR USE EFF is fighting prohibitive standards that would take away your right to receive and use over-the-air television broadcasts any way you choose. eff.org/IP/fairuse TRANSPARENCY EFF has developed the Switzerland Network Testing Tool to give individuals the tools to test for covert traffic filtering. eff.org/transparency INTERNATIONAL EFF is working to ensure that international treaties do not restrict our free speech, privacy or digital consumer rights. eff.org/global EFF is a member-supported organization. Join Now! www.eff.org/support UPDATES Visit http://nostarch.com/packet2.htm for updates, errata, and other information. More no-nonsense books from METASPLOIT A Penetration Tester’s Guide by DAVID KENNEDY, JIM O’GORMAN, DEVON KEARNS, AND MATI AHARONI JULY 2011, 344 PP., $49.95 ISBN 978-1-59327-288-3 NO STARCH PRESS THE IDA PRO BOOK, 2ND EDITION The Unofficial Guide to the World’s Most Popular Disassembler by CHRIS EAGLE JUNE 2011, 672 PP., $69.95 ISBN 978-1-59327-289-0 HACKING, 2ND EDITION GRAY HAT PYTHON The Art of Exploitation Python Programming for Hackers and Reverse Engineers by JON ERICKSON FEBRUARY 2008, 488 PP. W/CD, $49.95 ISBN 978-1-59327-144-2 by JUSTIN SEITZ APRIL 2009, 216 PP., $39.95 ISBN 978-1-59327-192-3 PHONE: 800.420.7240 OR 415.863.9900 THE TANGLED WEB Securing Modern Web Applications by MICHAL ZALEWSKI SEPTEMBER 2011, 400 PP., $39.95 ISBN 978-1-59327-388-0 NAGIOS, 2ND EDITION System and Network Monitoring by WOLFGANG BARTH OCTOBER 2008, 720 PP., $59.95 ISBN 978-1-59327-179-4 EMAIL: [email protected] MONDAY THROUGH FRIDAY, WEB: 9 A.M. TO 5 P.M. (PST) WWW.NOSTARCH.COM Learn how to: • Use packet analysis to identify and resolve common network problems like loss of connectivity, DNS issues, sluggish speeds, and malware infections • Build customized capture and display filters • Monitor your network in real-time and tap live network communications • Graph traffic patterns to visualize the data flowing across your network • Use advanced Wireshark features to understand confusing captures • Build statistics and reports to help you better explain technical network information to non-techies Practical Packet Analysis is a must for any network technician, administrator, or engineer. Stop guessing and start troubleshooting the problems on your network. ABOUT THE AUTHOR Chris Sanders is a computer security consultant, author, and researcher. A SANS Mentor who holds several industry certifications, including CISSP, GCIA, GCIH, and GREM, he writes regularly for WindowSecurity.com and his blog, ChrisSanders.org. Sanders uses Wireshark daily for packet analysis. He lives in Charleston, South Carolina, where he works as a government defense contractor. All of the author’s royalties from this book will be donated to the Rural Technology Fund (http://ruraltechfund.org). w w w.nostarch.com $49.95 ($57.95 CDN) SHELVE IN: NETWORKING/SECURITY This book uses a lay-flat binding that won’t snap shut. SANDERS T H E F I N E ST I N G E E K E N T E RTA I N M E N T ™ “ I L I E F L AT .” D N N O 2 TI I D E With an expanded discussion of network protocols and 45 completely new scenarios, this extensively revised second edition of the best-selling Practical Packet Analysis will teach you how to make sense of your PCAP data. You’ll find new sections on troubleshooting slow networks and packet analysis for security to help you better understand how modern exploits and malware behave at the packet level. Add to this a thorough introduction to the TCP/IP network stack and you’re on your way to packet analysis proficiency. used in this book from http://nostarch.com/packet2.htm P R A C T I C A L P A C K E T A N A LY S I S It’s easy to capture packets with Wireshark, the world’s most popular network sniffer, whether off the wire or from the air. But how do you use those packets to understand what’s happening on your network? Download the capture files 2ND EDITION DON’T JUS T S TA R E AT CAP TURED PACKE TS. A N A LY Z E T H E M . PR AC T I C A L PAC K E T A N A LY S I S U S I N G WIRESHARK TO SOLV E RE A L-WORLD N E T W O R K P R O B L E M S CHRIS SANDERS