1
Setup and installation
Aligning the device
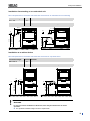
Bring the device into a level position by extending or retracting the front device feet with a spanner (SW24)
and then screwing the nut tight with a spanner (SW13). Adjust the central device foot from inside using an
Allen key (4 mm), see Removal from the packaging on page 4).
Aligning the device with floor unit
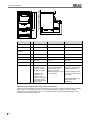
If the device is installed with a floor unit, the top-frame device can be moved and set up as follows:
1.
Remove the drawer of the floor unit to its fullest extent in order to obtain free access to the Allen
screws of the rollers and the unit feet.
5x
2.
Extend the third fore roller somewhat and retract the two forward feet of the floor unit a little.
The top-frame device can now be pushed into its final position.
3.
Now extend the two forward feet of the floor unit and retract the middle roller (Allen 5 mm).
4.
The rear rollers are also adjusted by extension or retraction.
5.
Now fix the position of the Allen screws by countering the nuts.
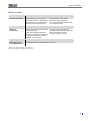
To alter the support rollers on the floor unit drawer proceed as follows:
8
6.
Extend the drawer to its fullest extent.
7.
Remove the insert mat.
8.
Remove the two Allen screw cover caps in the drawer base.
9.
The support rollers can be adjusted for height by screwing the Allen screws inwards or outwards
(Allen 5 mm).