1
ACT
ACT
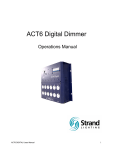
Acts+ and Act3+ Portable Dimmer Packs
User's Manual
•
3
•
<
•
C)
§ill
2
•
I
Document No.: 85051 (A67/7)
Issue: 2.0
.,
S!.tio'E
3
•"
•,,
•' • •, •
2
!F.ST
1• ,_o
0
i..
1!111
.
fill
0
.:s
CJ
~
"'-''
CJ.
~~
ii
s~
•
,,,,o
~
0
Strand Lighting
Offices and Service Centres
Asia:
7th Floor Corporation Sq., 8 Lam Lok St, Kowloon Bay, Kowloon, Hong Kong.
Tel: (852) 2757 3033
Fax: (852) 2757 1767
Belgiwn:
Chaussee de Haecht 1801, 1130 Bruxelles, Belgium. (sales office only)
Fax: (32) 02 245 2235
Tel: (32) 02 245 8686
Canada:
2430 Lucknow Drive, Unit15, Mississauga, Ontario L5S 1V3, Canada.
Fax: (1) 905 677 6859
Tel: (1) 905 677 7130
Germany:
Salzbergstrasse 2, 38302 Wolfenbuttel-Salzdahlum, Germany.
Fax: (49) 5331 78883
Tel: (49) 5331 30080
Italy:
Via delle Gardenie 33 (Pontina Vecchia Km 33,400), 00040 Pomezia Roma, Italy.
Tel: (39) 6914 7123
Fax: (39) 6914 7136
Sweden:
Box 20105, Tappvligen 24, 161 02 Bromma, Sweden. (sales office only)
Fax: (46) 08 799 69 54
Tel: (46) 08 799 695011/2/3
United Kingdom:
Grant Way, Isleworth, Middlesex TW7 5QD, UK.
Tel: (44) 01815603171
Fax: (44) 0181568 2103
USA:
PO Box 9004,18111 South Santa Fe Avenue, Rancho Dominguez, CA90221, USA.
Tel: (1) 310 637 7500
Fax: (1) 310 632 5519
The material in this document is for information purposes only and is subject to change without notice. Strand
Lighting assumes no responsibility for any errors or omissions which may appear in this manual. For comments
and suggestions regarding corrections and/or updates to this manual, please contact your nearest Strand Lighting
office.
El contenido de este manual es solamente para informaci6n y esta sujeto a cambios sin previo aviso. Strand
Lighting no asume responsabilidad par errores o omisiones que puedan aparecer. Cualquier comentario,
sugerencia o correcci6n con respecto a este manual, favor de dirijirlo a la oficina de Strand Lighting mas cercana.
Der Inhalt dieses Handbuches ist nur fiir Informationszwecke gedacht, Aenderungen sind vorbehalten. Strand
Lighting uebernimmt keine Verantwortung fiir Pehler oder lrrtuemer, die in diesem Handbuch auftreten. Ftir
Bemerkungen und Verbesserungsvorschlaege oder Vorschlaege in Bezug auf Korrekturen und/oder
Aktualisierungen in diesem Handbuch, moechten wir Sie bitten, Kontakt mit der naechsten Strand LightingNiederlassung aufzunehmen.
Le materiel decrit dans ce manuel est pour information seulement et est sujet achangements sans preavis. La
compagnie Strand Lighting n'assume aucune responsibilite sur toute erreur ou ommission inscrite dans ce manuel.
Pour tous commentaires ou suggestions concernant des corrections et/ou les mises ajour de ce manuel, veuillez
s'll vous plait contacter le bureau de Strand Lighting le plus proche.
Information contained in this document may not be duplicated in full or in part by any person without prior
written approval of Strand Lighting. Its sole purpose is to provide the user with detailed operational information
for the equipment supplied. The use of this document for all other purposes is specifically prohibited. Certain
features of the equipment described in this document may form the subject of patents or patent applications.
Document Copyright ©1994, 1995, Strand Lighting Limited. All rights reserved.
Introduction
Strand Lighting Act6+ and Act3+ dimmer packs are compact, portable dimming units,
designed for use in conjunction with lighting control consoles.
The basic Act6+ and Act3+ dimmer packs accept analogue (wire-per-dimmer) control
inputs. The Multirnux versions also accept DMX512 multiplexed digital, and D54
multiplexed analogue, control signals.
A basic dimmer pack may be upgraded to the Multimux version by adding a Multimux
Module (catalogue number 76030).
Specifications
Power Requirements
Voltage
Frequency
194 - 264 Volts AC.
48 - 62 Hz.
Three phase + Neutral + Earth, or single phase + Neutral + Earth when phase link bar
fitted.
Dimming Capacity
Act6+
Each pack contains six dimmers with two socket outlets per dimmer.
Maximum load lOA per dimmer - total 60A per dimmer pack.
[Resistive (tungsten) lamps loads only]
Minimum load 60W per dimmer.
Act3+
Each pack contains three dimmers with one socket outlet per dimmer.
Maximum load 20A per dimmer - total 60A per dimmer pack.
Loads may be resistive, or inductive - to a power factor of +0.5
Minimum load 250W per dimmer.
Control Inputs
Analogue OV to -lOV, or OV to +lOV, via 8 pin locking DIN connector.
USITT DMX512(1990) multiplexed digital control, via 5 pin XLR connector.
Strand Lighting D54 multiplexed analogue control, via 3 pin XLR connector.
(Multiplexed control inputs are only available when the optional Multimux Module is
fitted).
Dimmer Test switches - switch any dimmer to a preset level.
Dimmer Output
Connections
Act6+
Act6+ packs are available with a variety of socket outlets to suit different operating
conditions and national standards. A version without sockets is also available. This
version includes a removable panel which may be used for mounting outlets of any
suitable type.
Act3+
Act3+ packs are fitted with a single phase 32A CEEl 7 socket outlet per dimmer.
Introduction
3
Slave Output
(Act3+ only)
Analogue OV to+ lOV, with series diode and lKQ resistor, via 8 pin locking DIN
connector.
(The Slave Output corresponds to control input circuits 4 to 6).
Power Supply Output
-14.SV DC via analogue control input connector.
[Intended for providing power to Strand Lighting LX control systems, or similar
lighting control systems]
Maximum current - lOOmA.
Physical Dimensions
(unpacked)
Height
Width
Depth
Weight
Environment
(Operating)
188mm.
483mm.
280mm. (on Act3+ the output sockets protrude by 12mm).
lOKg (approximately)
Temperature
Relative humidity
Condensation level
Act6+ and Act3+ packs
0°C - 35°C
0%-90%
Zero
are suitable only for use in a dry, internal environment.
Protection ClassificationIP30 (IEC529)
4
Act6+ & Act3+ User's Manual Issue 2.0
Installation
Warning
Hazardous voltages are used in Act6+ and Act3+ dimmer packs. Ensure that the
mains supply is disconnected before opening the equipment for installation or
servicing.
Dimmer packs should be installed and serviced only by suitably qualified
personnel.
Act6+ and Act3+ dimmers may be installed in three manners:
As free standing units (for temporary installations),
Mounted on a wall (for permanent installations) - refer also to pages 6 and 12,
Several packs mounted together in a rack (for hire or touring purposes).
Installation Notes
In order to enhance the reliability of the dimmers, it is recommended that they are
operated within the following environmental limits:
Temperature
Relative Humidity
Condensation level
15°C - 25°C
60%- 80%
Zero
For absolute environmental limits, please refer to the Specifications section.
Act6+ and Act3+ dimmers are designed such that Earth leakage currents are
minimised, allowing their use on mains power supplies protected by 30mA Residual
Current Devices.
However, it should be noted that utilising RCD protection in dimming installations
may present problems. Further information is available, as Marketing Fact Sheet
number 2, from Strand Lighting if required.
The dimmers may emit a slight buzzing noise when in operation. They should be
installed away from areas where such noise would be undesirable.
The physical dimensions of an Act6+ dimmer pack are shown in Figure 1. The
dimensions of an Act3+ dimmer pack are identical (except for the overall depth as
detailed).
I
"'I
1610ee QQQ(jQQ
. . . . . . !~ 10+-+
. . . . . .
465 483
...
~ r-i--,
~~~~~-------=~-------------.i
~
rlr -----.
.~
~
·~
~
o ~ QQQQQ(;) ;Q I ~
e . . . . . . ... ... . "
~•----•
~
Overall depth : Act6+ - 280, Act3+ - 292
Fixing holes will accept No 14 screws
Dimensions in millimetres
Figure 1. - Physical Dimensions
Installation
5
Mains Power Input
Connections
Act6+ and Act3+ dimmer packs require a nominal mains input at 220/240V 50Hz AC.
This supply may be either single or three phase (star only), depending on the method of
connection. In either case separate Neutral and Earth conductors are required.
Act6+ and Act3+ dimmer packs must be Earthed for safety in operation.
Warning
In all cases, the Neutral conductor must have the same (or greater) rating, and
cross-sectional area, as the Phase conductor(s).
(Triac and thyristor dimmers operate using 'phase control', which renders the
'bala.ncing' of loads across phases - and thus a reduction in Neutral currents impossible).
Act6+ and Act3+ dimmer packs should be connected to their mains supplies via
adequately rated plugs and sockets. Power input connectors must be rated at 60A
(or more) for single phase operation, or 20A (or more) for three phase operation.
These ratings may only be reduced if the devices protecting the mains supply are
selected to limit the current drawn to the rating of the connectors.
A recommended connector type is CEE17 I BS4343.
It is strongly recommended that the mains supply to the dimmers is taken via a local
isolating switch, so that the supply may be easily disconnected for plugging and
unplugging of load connectors, the replacement offuses, and for service or
maintenance.
All cables and protection equipment must be selected and installed in accordance
with locally prevailing electrical regulations.
Cable Access
The mains input cable will enter the pack either via a Rear Connection Panel, or via
one of the Side Plates - depending on the manner in which the pack is to be mounted:
For wall mounting, side cable entry must be used,
For rack mounting, rear cable entry must be used,
For free standing, either side or rear cable entry may be used, although the rear cable
entry is recommended.
Rear Cable Entry
Remove the Rear Connection Panel. The lower edge of this is secured to the base by
three screws, as shown in Figure 2.
.--
,-----,
I
0
0
Heatsink
Rear Connection Panel
0
t
\
j_
..
Fixing Screws
•
..·---..
.···-.
(_:i
1-·
0
ZJ
=
y
Cable Entry Knockouts
Figure 2. - Rear Connection Panel
6
Act6+ & Act3+ User's Manual
Issue 2.0
Knockouts of 25rnm and 32rnm diameter are provided in the Panel to permit the mains
cable to pass through. One of these should be removed and the hole fitted with a cable
gland of the correct size.
Cable Entry
Side Cable Entry
Side Plate
The use of the right hand cable entry hole (as viewed from the front of the pack) is
not recommended, and when the Multimux Module is fitted, is not possible.
{;J(
Remove the selected Side Plate (secured to the pack chassis by two 'short' machine
• ~ screws and to the heatsink by three Taptite screws as indicated in Figure 3).
{;J : A 32rnm diameter cable entry hole is provided in each Side Plate. Remove the blanking
0
.•• '
Machine
screws
plug from its hole, and fit a cable gland of the correct size .
Also remove the Rear Connection Panel, to allow access to the mains connection
points.
The mains input is connected via a set of screw terminals, situated inside the pack, at
the rear, towards the right hand side (looking from the rear of the pack). The terminals
will accept cables of up to 16 rnm2 in size. If it is required to connect an Act6+ dimmer
pack to a single phase supply, the link bar supplied with the pack should be used to
join the three phase terminals together, as shown in Figure 4.
Taptite
screws
Figure 3. - Left Side Plate
Do NOT fit the link bar when the pack is connected to a three phase supply.
Warning
PH1 = Phase1
PH2 = Phase2
PH3 =Phase 3
0
PH3
PH2
PH1
N
E
Three Phase Connections
G
0
0
0
PH3
PH2
PH1
N
E
Single Phase Connections
N =Neutral
E =Earth
Figure 4. - Mains Connections
15mm Max
10mm Min
Prepare the cable for connection, by stripping back the insulation as shown in Figure
5, and pass it through the cable gland.
~~
:
)
• • •1
I.
·I
200mm Max
140mm Min
Figure 5. - Mains Cable
Preparation
Protection
Connect the cable ends to the appropriate terminals, ensuring that the retaining screws
0 are sufficiently tight.
Replace the Rear Connection Panel, and/or Side Plate and tighten the cable gland to
secure the cable. (The Rear Connection Panel engages in a slot in the extruded
heatsink).
Refit the fixing screws, ensuring that they are replaced in their correct positions.
The mains supply to each dimmer pack must be protected against overload, external to
the pack.
Appropriate fuse or circuit breaker ratings are 63A for a single phase supply, and 20A
for a three phase supply.
If the available mains supply is not capable of providing the full rated currents, the
protection device rating must be reduced accordingly. It must then be noted that it will
not be possible to use the dimmers with their maximum rated loads.
Protection systems on the supply to each dimmer pack should limit the potential fault
current level to 1500A, or less.
Installation
7
Power Distribution
Earthing
In order to achieve correct Earthing, and mains power distribution, it is recommended
that all dimmers and lighting control equipment within the installation should draw
their mains power from one central distribution point. Preferably, this point should be
as close as possible to the mains power intake for the site or building. The wiring from
the distribution point to the lighting equipment should ideally only be used for
supplying power to that lighting equipment alone, and should not carry power to other
appliances or equipment.
Act6+ and Act3+ dimmer packs must be properly Earthed for safety, and also to
ensure correct operation.
It is essential that all Earth connections, within the overall installation, are at the same
potential. If this is not the case, circulating currents may be generated in signal Earth
connections, possibly leading to fluctuating light levels, and in extreme cases, to
damage to wiring or equipment.
In a situation where the Earth is provided via the supply Neutral, it is very important
that the control console and dimmers are powered from one central point. This should
be the point at which the equipment Earths are connected to the supply Neutral, and to
Earth itself.
If in doubt, please consult a Strand Lighting office, or an approved Service Provider.
Installation Rack mounting
Act6+ and Act3+ dimmer packs may be mounted in a standard 'nineteen inch' rack.
For rack mounted dimmer packs, the mains input cable must pass via the Rear
Connection Panel, not via a Side Plate.
To prevent overheating of rack mounted dimmers when in use, a fan, or set offans,
should be fitted to the top of the rack, and there should be a gap of about 1Omm
between adjacent packs to allow the flow of cooling air.
To ensure adequate cooling, thefan(s) should provide an airflow of about 16 litres
per second across the top of each dimmer pack.
Screws
Taptite screws
Pack configured for rack mounting
Before a dimmer pack may be rack mounted, the Side Plates must be removed and
refitted with the mounting holes at the front.
This is achieved by removing one (either) of the two Side Plates, reversing it, and
refitting it. (refer Figure 6.)
The other Side Plate should then be similarly reversed.
Do not remove both Side Plates at once, and take care not to trap any internal
wiring as the Side Plates are re-fitted.
If required for a correct fit in the rack, the four feet may be unscrewed from the base of
the pack.
When fixing the packs into the rack, leave a lOmm gap between adjacent packs to
allow ventilation. (Mounting the packs on 178mm centres will give the correct
spacing).
Screws
Taptite screws
Pack configured for wall mounting,
or free standing operation
Figure 6. - Mounting Options
8
Act6+ & Act3+ User's Manual
Issue 2.0
Installation Wall mounting
Wall mounted Act6+ and Act3+ dimmer packs may be located one above the other,
provided that a space of at least 150mm is left between each pack.
For wall mounted dimmer packs, the mains input cable must pass via one of the Side
Plates (only the left hand end may be used in a pack with a Multimux Module).
The wall onto which the packs are to be mounted must be flat. If it is not, mounting
rails or a sub-panel must be used between the wall and the dimmer packs.
If mounting directly onto a wall, this should be drilled and plugged to accept No. 14
screws.
The horizontal pitch of the fixing holes is 465mm, and the vertical pitch is 102mm.
The packs should be supported whilst they are fixed in position.
After fixing, the packs should be checked to ensure that they are firmly and safely
mounted.
As with all electrical installations, Act6+ and Act3+ dimmer packs should be
mounted on an incombustible surface away from jla.mmable items.
Warning
Installation Free Standing
Free standing Act6+ and Act3+ dimmer packs may be stacked one on top of each other
to save floor space. However, to ensure adequate cooling airflow, they should not be
stacked more than two high.
Warning
Installing the
Multimux Module
When placing the dimmer packs, care must be taken that they are placed away
from jla.mmable material, and that neither they, nor their associated cables,
obstruct access or escape routes.
A basic Act6+ or Act3+ pack may be upgraded to provide Multimux input facilities by
the addition of a Multimux Module.
Before fitting the Multimux Module, disconnect the dimmer pack from its source
of mains power.
Warning
The module fits into a space at the right hand end of the pack. In basic packs this space
is covered by a blanking plate.
The blanking plate is retained by two screws, as shown in Figure 7. Remove these
screws to allow removal of the plate .
•
0
Withdraw the blanking panel. Note that a cable is attached to the retainlng bracket for
the blanking panel by an adhesive pad. Gently pull this cable away from the pad.
Plug the cable onto the 10 pin connector at the rear of the circuit board in the
Multimux Module, noting that the connector only fits in one orientation.
Taking care not to damage any wiring, slide the Multimux Module into the pack.
Fit the front top fixing screw, and 2 screws to retain the bottom of the module.
Fixing screws
Figure 7. - Blank Panel
Installation
9
Connections
Control Connections
Analogue Input
Dimmer2
Figure 13 in the Operation section shows the front panel layouts and the location of the
control connectors.
The analogue control (wire-per-dimmer) input will accept either positive or negative
control signals without the need for adjustment. The control signals must be within the
ranges OV (off) to +lOV (full on), or OV (off) to -lOV (full on), with the control
voltages being fed via a diode and a resistor (usually lOK.Q for -lOV, and lK.Q for
+ lOV). These additional components are normally included in control systems and
demultiplex units supplied by Strand Lighting.
The control input is via an eight pin 'DIN' socket on the front of the pack. Connector
pin connections are shown in Figure 8.
-15V Power
Dimmer 6
Dimmer Common
Plug viewed from
'pin' side
The connector is of the 'locking ring' type; cables with the appropriate mating plugs
may be obtained from Strand Lighting.
Other styles of 'DIN' plugs will mate with the connectors on Act6+ and Act3+, but the
locking mechanisms may not function.
Figure 8. - Analogue Input
Connections
Slave Output
(Act3+ only)
The Slave Output connection allows the control signals for dimmers 4, 5, and 6 from a
Multimux Module (or the analogue control input) to be connected to a second Act3+
dimmer pack. This allows one Multimux Module (or analogue control cable) to be
'shared' between two Act3+ dimmer packs. The connections are as shown in Figure 8,
with the exception that pins 4, 5, 6, and 7 are not connected.
The Slave Output from the 'master' dimmer pack should be connected to the Analogue
Input of the 'slave' dimmer pack, via a short control cable. This control cable should
be wired '1 to 1'. Suitable cables may be obtained from Strand Lighting.
Multiplexed Inputs
054
054 Control
l
The D54 input will accept a multiplexed analogue control signal which conforms to the
Strand Lighting specification for D54. Details of this specification are available from
Strand Lighting on request.
)
The control input is via a three pin male XLR type connector. Pin connections are
shown in Figure 9. A three pin female XLR connector is also fitted to allow a series of
Act6+ and/or Act3+ packs to be connected together in 'daisy chain' fashion.
Connector
viewed from
'pin' side
Figure 9. - 054 Input
Connections
10
Act6+ & Act3+ User's Manual Issue 2.0
DMX512 Control
Connector
viewed from
'pin' side
The DMX512 input will accept a multiplexed digital control signal which conforms to
USITT specification DMX512 (1990). Details of this specification are available from
USITT on request.
Not used
The control input is via a five pin male XLR type connector. Pin connections are
shown in Figure 10. A five pin female XLR connector is also fitted to allow a series of
Act6+ and/or Act3+ packs to be connected together in 'daisy chain' fashion.
OMX-
Figure 10. - DMX512 Input
Connections
It is recommended that Control connections are not plugged or unplugged when
power is applied to the dimmer pack as this may cause any connected loads to flash
up momentarily.
Termination
For correct operation of a dimming installation using DMX512, it is important to
terminate the end of the DMX control line. A termination facility is included on the
Multimux Module. The TERM. switch on the 'last' rack on the control line should be
switched to the down position to apply the termination.
The TERM switch on all packs other than the last one on the control line must be
set in the up (off) position - if more than one pack applies termination, the
installation may not operate correctly.
An LED indicator under the TERM. switch indicates, when illuminated, that the pack
is applying DMX512 line termination.
Dimmer Outputs
Act6+
Dimmer output connections, on all styles of Act6+ dimmer packs (except the 'blank'
version) are by means of two socket outlets, connected in parallel, per dimmer.
When operating from a three phase supply, dimmers 1and2 are connected to phase 1,
dimmers 3 and 4 to phase 2, and dimmers 5 and 6 to phase 3.
Plug tops used for dimmer output connections must be of the correct type to match the
socket outlets.
It is important that plugs are wired correctly. Figure 11 shows the various types of
socket outlets fitted to Act6+ dimmer packs.
e
Sockets viewed from
outside the pack
E
L =Live
N =Neutral
E =Earth
UK15A
CEE17
French
Schuko
Swiss
Figure 11. - Outlet Socket Connections
Act3+
Dimmer output connections on Act3+ dimmer packs are by means of a single CEEl 7
socket outlet per dimmer. Connections are as shown for CEEl 7 in Figure 11.
When operating from a three phase supply, dimmer 1 is connected to phase 1, dimmer
2 to phase 2, and dimmer 3 to phase 3.
Connections
11
Dimmer Outlets Blank Packs
The 'blank' Act6+ pack allows the fitting of any suitable dimmer outlet connector(s).
This may be appropriate for certain uses, eg. equipment for use 'on tour', where
multi-pin connectors are often desirable.
The 'blank' Act6+ pack is not intended for use as a 'hardwired' dimmer.
ie. it should not be connected directly to power inlet and load circuit wiring without
the use of plug and socket connectors.
The fitting of outlet connectors to a blank Act6+ pack must be carried out by a
suitably qualified electrician or electrical engineer.
Warning
Connectors for use with Act6+ dimmer packs must be rated to carry at least JOA
at 240V AC. (415V AC for 3 phase).
The use of 'common' Neutral pins within multi-pin connectors is not
recommended, and if common Earth pins are used, all the Earth pins in every
connector must be joined together.
Remove the three screws on each side (Refer Figure 12) which retain the heatsink
assembly in place.
Lift off the heatsink assembly and place it on its back behind the pack, taking care not
to damage or disconnect any of the internal wiring.
Remove the screws which retain the blank plate into the pack front panel, and gently
withdraw the blank panel. Remove the nut which holds the panel Earth connection and
release the connection. Take care not to lose the nut, or the two shake-proof washers.
Remove these fixing screws only
(on each end)
End Plates will be
reversed if pack is
configured for rack
mounting
Figure 12. - Heatsink Fixing
Screws
Drill or punch appropriate holes into the blank panel to allow the chosen connector(s)
to be fitted. Fit the connector(s) into the panel.
Connect the dimmers to the connector(s), using stranded cable of at least 1.5mm2 in
size.
The six dimmer output 'Live' connections are wired to a terminal block, positioned
inside the pack, on the left side of the front panel. The terminal block is numbered to
correspond to the dimmer numbers.
Connect Neutral and Earth wires from the outlet connector(s) to the mains input
terminal bars. (Connections to the Neutral bar are made using crimp 6.3mm 'push-on'
terminals, and connections to the Earth bar are made using M4 'ring crimp' terminals
screw fixed to the bar).
The pack is supplied with a set of terminals attached to the terminal bars. These
terminals are suitable for wire sized between 1.5mm2 and 2.5mm2 . The correct type of
crimp tool must be used to affix the terminals to the wires.
Wiring added inside the dimmer pack must be suitable for sustained operation at an
ambient temperature of up to 70°C.
The cabling should be organised such that it does not compromise the separation of
mains voltage circuits, and low voltage control circuits - even under fault
conditions.
Connect a mains input cable into the pack as appropriate to the chosen mounting
method.
Re-connect the Earth wire to the blank panel, before re-assembling the pack.
12
Act6+ & Act3+ User's Manual
Issue 2.0
Operation
Act 6+
0
Fuses
0
0
0
0
0
Fuse OK LEDs
••• •••
Test Switches
Test LED
Analogue Input
Act3+
0
Circuit Breakers
•••
0
Circuit On LEDs
0
Test Switches
Test LED
Slave Output
Analogue Input
Multimux Module
Terminate Switch
Terminate LED
DMX512 Loop Through
OMX OK LED
DMX512 Input
First Dimmer Number
Switches
D54 Loop Through
D54 OK LED
D54 Input
Figure 13. - Front Panel Layout
Operation
13
Dimmer Control
Basic Dimmer Packs
On a basic Act6+ or Act3+ dimmer pack there are two possible control sources: the
analogue input (positive or negative - auto-sensing) from a control console, and the
dimmer test switches. These two control sources interact on a highest-takes-precedence
basis. ie. whichever of the two possible levels is the higher will control the dimmer.
Multimux Dimmer Packs
When a Multimux Module is fitted, the multiplexed control inputs are arranged such
that the DMX512 input takes priority over the D54 input. ie. if a DMX512 control
signal is present, a D54 signal will be ignored. The control from a multiplexed signal
then interacts with the analogue inputs and the test switches on a highest-takesprecedence basis.
If a DMX512 input fails, is disconnected, or is switched off, any dimmers which were
on will hold their levels for 10 seconds, and then fade out over 5 seconds.
If a D54 input, or analogue input, fails, is disconnected, or is switched off, any
dimmers which were on will turn off instantaneously.
Dimmer Load Test
Facility
To test the basic operation of a dimmer, or of a connected load, press the appropriate
numbered test button. This will switch the dimmer to a pre-set level. (see Adjustments
section) The buttons operate in a push-on, push-off manner. Whenever any one of the
switches is on, the TEST LED indicator illuminates.
First Dimmer
Number (Multimux only)
The first dimmer number to which the pack is to respond must be set on the three
miniature rotary switches on the Multimux Module.
The switches set, as labelled, the hundreds, tens, and units of the required 'first dimmer
number'. The other five dimmers then respond to the next higher five dimmer numbers,
in ascending order. (On Act3+ dimmer packs, dimmers 4 - 6 correspond to the Slave
outlet).
As the switches are small, some care is required to ensure that the correct numbers are
set. Figure 14. shows the switch positions.
Figure 14. - Switch Positions
Multiplex OK
Indicators
(Multimux only)
14
If desired, to reduce the risk of 'tampering' , the switch knobs may be removed by
grasping them carefully with a pair of pliers and pulling gently. This will allow the
numbers to be more readily seen, but will then require the use of a small screwdriver in
order to change the settings.
The D54 OK and DMX OK LEDs will show, respectively, that a valid D54 or
DMX512 multiplexed control signal is being received. The indicators will only
illuminate if the First Dimmer Number switches are set within the range 1 to 384 for
D54, or 1to512 for DMX512.
Act6+ & Act3+ User's Manual Issue 2.0
Auto Sequence
Mode (Multimux only)
If the First Dimmer Number switches are set to numbers in the 600 - 999 range, the
Multimux Module will automatically switch or fade the dimmers up and down in a
cyclic manner. This feature allows the Act6+ or Act3+ to be used without a control
console for exhibition or display purposes. It also provides a comprehensive
operational test of the majority of the dimmer pack electronic circuits.
The Multiplex OK LEDs will flash alternately whilst Auto Sequence mode is active.
The hundreds switch sets the test pattern:
Hundreds switch
Test mode
6
Chase (dimmers step) - 1; 2; 3; 4; 5; 6; 1; 2; 3; etc.
7
Chase with bounce - 1; 2; 3; 4; 5; 6; 5; 4; 3; etc.
8
Chase with build - 1 ; 1+2; 1+2+3: etc. then unbuild
9
Cycle (dimmers fade) - 1; 2; 3; 4; 5; 6; 1; 2; 3; etc.
(On Act3+ dimmer packs, dimmers 4 - 6 correspond to the Slave outlet).
The tens switch sets the step time in seconds:
0
1
2
3
4
5
6
7
8
9
Step time (chases)
0.2
0.4
0.6
1
1.5
2
3
4
5
6
Step time (cycle)
0.5
1
1.5
2
3
4
5
6
8
10
Tens switch
The units switch sets the number of dimmers in the sequence:
Units switch
0
1
2
3
4
5
6
7
8
9
No of dimmers
1
1
2
3
4
5
6
6
6
6
A slight discontinuity in pattern may be observed when changing the switch settings.
Adjustments
Maximum Dimmer
Level
0
TEST LEVEL o
o TOP SET
0
The maximum dimmer output level is factory set to give maximum light levels for a
control input level of 100%. If required, however, the 'full' setting of all the dimmers
within the pack may be adjusted by means of a single preset potentiometer, accessible
through a hole in the base plate (refer Figure 15). This may be necessary if the pack is
to be controlled by an analogue control system not manufactured by Strand Lighting,
or if it is required to limit the maximum dimmer outputs to extend lamp life.
Position the pack so that the Top Set adjustment potentiometer is easily accessible.
() .................._ ........
Ensure that at least one load is connected and is visible from the pack position, connect
0
.____ _ _ _ _ _ _ _ _ ____. the control system, and apply power to the pack.
Base of Dimmer Pack
viewed from below
Figure 15. - Adjustment
Potentiometer Access Hole
Positions
Adjustments
Ensure that no dimmer Test Switches are on, and use the control system to set a
dimmer (with a load) to full level.
Using a small, insulated preset adjustment tool, tum the Top Set potentiometer
clockwise until the light output begins to fall.
15
Tum the potentiometer anti-clockwise until the light output just reaches full, or the
desired maximum level.
Return the pack to its normal location and operational state.
Test Level
'I
The level to which dimmers are driven by the Test Switches is factory set to
approximately 70% of full level. If required this level may be altered (between
approximately 40% and 85%) by means of a single preset potentiometer, accessible
through a hole in the base plate. (refer Figure 15).
Position the pack so that the Test Level adjustment potentiometer is easily accessible.
Ensure that at least one load is connected and is visible from the pack position, and
apply power to the pack.
Press the Test Switch on a dimmer (with a load) so that it is on.
Using a small, insulated preset adjustment tool, tum the Test Level potentiometer until
the required test level is observed at the load. (The potentiometer must be turned anticlockwise to increase the level).
Return the pack to its normal location and operational state.
16
Act6+ & Act3+ User's Manual
Issue 2.0
Accessories and Spare Parts
For information regarding accessories and spare parts for use with Act6+ and Act3+
dimmer packs, please contact a Strand Lighting office or an approved Dealer or
Service Provider.
A list of dealers and Service Providers is available, on request, from Strand Lighting
offices.
Service and Maintenance
Act6+ and Act3+ dimmer packs do not require routine maintenance other than external
cleaning. However, in common with all electrical equipment, they should be
periodically checked to ensure that they remain in good condition. Any repairs or
maintenance to the internal electronics, or other circuitry, should only be carried out by
authorised Strand Lighting Service personnel, or approved Service Providers.
Safety Tests
Act6+ and Act3+ dimmer packs are subjected to safety inspections and tests prior to
despatch from the Strand Lighting factory.
If, as part of routine checks, the packs are to be subjected to electrical safety tests,
applied using a 'standard' Portable Appliance Tester, the following points should be
observed:
The nature of the electronic dimmer circuits means that an 'insulation test' using a
voltage in the order of 500V will give a result of approximately l.7MQ. Although this
may appear as a test failure, the apparently low resistance is normal for an Act6+ or
Act3+ dimmer pack, and is not due to failing insulation. User safety is not at risk.
(Any reading below 1.5MQ indicates a problem which must be investigated).
A high voltage 'Flash' test must not be applied to an Act6+ or Act3+ dimmer
pack.
Caution
Self Tests
A high current Earth continuity test must not be applied to the signal ground pins
of the control input connector(s).
When power is applied to a Multimux Act6+ or Act3+ pack, the Processor in the
Multimux Module (if fitted) runs a short series of tests. Whilst the tests are running,
the DMX OK and D54 OK LEDs will both illuminate. In the unlikely event that one of
the tests discovers an error, the DMX OK and D54 OK LEDs will flash together for a
number of times, and then pause before repeating the flash sequence.
The number of flashes indicates the nature of the problem, and should be noted so that
a Service Provider is more readily able to provide assistance in curing the problem.
After repeating the flash pattern, the processor will attempt to operate normally.
Accessories and Spare Parts
17
r
111
Circuit Protection
Act6+
Act6+ outputs are protected individually by fuses. These fuses also serve to protect the
dimmer electronics from overload.
On all versions of Act6+ dimmer packs the fuse type is lOA 32x6.3mm, HRC Quick
acting (F), 250V.
&
If a fuse fails, investigate and correct the cause of the failure before replacing the
fuse.
Warning
IAlways switch off the supply to the pack before replacing fuses.
IDo NOT use fuses of types other than that specified.
Act3+
Act3+ outputs and dimmer electronics are protected by resettable circuit breakers.
If a circuit breaker trips, investigate and correct the cause of the problem before
resetting the circuit breaker.
Warning
The internal dimmer control circuits of Act6+ and Act3+ are protected by a self
resetting thermal fuse.
18
Act6+ & Act3+ User's Manual Issue 2.0