1
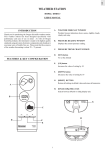
E3 SERIES USER MANUAL Table of Contents 1 OVERVIEW ...................................................................................................................... 4 1.1 1.2 1.3 1.3.1 1.3.2 1.3.3 1.3.4 2 OPERATION MODES ..................................................................................................... 14 2.1 2.2 2.3 2.4 3 SAFETY ...................................................................................................................... 5 WARNINGS ................................................................................................................. 5 INSTALLATION ............................................................................................................. 6 Choosing the right location .................................................................................... 6 Device transportation ............................................................................................ 7 Unpacking and placing the UPS ............................................................................ 7 Providing electrical connections............................................................................. 9 ONLINE (NORMAL) OPERATION MODE ............................................................................. 14 BATTERY OPERATION MODE ......................................................................................... 14 BYPASS OPERATION MODE .......................................................................................... 15 SYSTEM OFF MODE .................................................................................................... 15 TOUCH PANEL AND MENU STRUCTURE ..................................................................... 17 3.1 3.2 3.2.1 3.2.2 3.3 3.4 3.4.1 3.4.2 3.4.3 3.5 3.5.1 3.5.2 3.5.3 3.5.4 3.5.5 3.5.6 3.5.7 3.5.8 3.5.9 3.5.10 3.5.11 CARE AND CLEANING ................................................................................................. 17 TOUCH PANEL STRUCTURE .......................................................................................... 17 Mimic diagram (Upper Screen) ............................................................................ 17 Data monitoring Touch screen (lower screen) ...................................................... 19 MENU STRUCTURE ..................................................................................................... 19 MAIN MENUS ............................................................................................................. 22 Displays ............................................................................................................. 22 Warnings ............................................................................................................ 23 Settings .............................................................................................................. 28 OPERATING PROCEDURES ........................................................................................... 31 Switching the UPS on ......................................................................................... 31 Starting the UPS ................................................................................................. 34 Stopping the UPS ............................................................................................... 36 Switching the UPS off ......................................................................................... 36 Manual bypass operation .................................................................................... 37 Economic operation mode (ECO-MOD) ............................................................... 38 Emergency stop procedure (EPO) ....................................................................... 39 Operation during mains fail.................................................................................. 40 Remote start and stop of the UPS ....................................................................... 40 Testing batteries ................................................................................................. 41 Operation on generator ....................................................................................... 42 E3 Series 160-300kVA Rev 1.0.1 Page | 1 E3 SERIES 3.5.12 3.5.13 4 USER MANUAL Operation during an overload .............................................................................. 42 Parallel operation ................................................................................................ 43 COMMUNICATION ......................................................................................................... 50 4.1 4.2 4.3 4.4 4.5 4.6 RS–232 AND RS–485 COMMUNICATION OPTIONS .......................................................... 50 MOD-BUS COMMUNICATION OPTION............................................................................... 51 SNMP COMMUNICATION ............................................................................................. 52 REMOTE MONITORING PANEL ....................................................................................... 53 PROGRAMMABLE RELAY UNIT ....................................................................................... 54 SETTING/USER I/O .................................................................................................... 56 5 TROUBLESHOOTING .................................................................................................... 57 6 MAINTENANCE.............................................................................................................. 59 7 TECHNICAL SPECIFICATIONS...................................................................................... 60 E3 Series 160-300kVA Rev 1.0.1 Page | 2 E3 SERIES USER MANUAL Introduction Thank you for choosing our high technology E3 Series™ uninterruptible power supply. Product you purchased was manufactured as per ISO9001 quality assurance system using most advanced technology. In order to get highest efficiency from your product and to ensure a safe use, we recommend that you strictly read and retain this user manual for later reference. In addition, do not hesitate to contact your nearest authorized vendor or technical support center for more detailed information and/or assistance E3 Series 160-300kVA Rev 1.0.1 Page | 3 E3 SERIES USER MANUAL 1 Overview E3 Series Uninterruptible Power Supply (UPS) is a high technology product that was manufactured to provide uninterruptible energy to fields including but not limited to industrial facilities, hospital, schools, banks, business centers, and computer and communication systems. You can use your device, which is equipped with static bypass system, all necessary protection systems and an online structure with all loads safely. Because this device was designed double conversion online system basis, it supplies all connected loads with continuous voltage with stable frequency and stable amplitude. Therefore, no transition period is necessary when electric power is interrupted or recovered. With deployment of a DSP (Digital Signal Processor) based microprocessor in its design, UPS output voltage is accurately controlled, thereby ensuring stable operation of devices that are sensitive to voltage fluctuations. Static bypass unit of the system ensures that the mains voltage is constantly kept at backup. In case of an overload, this system takes over the load uninterruptedly. Once overload is recovered, load is transferred back to inverter. In addition, static bypass unit acts in similar way in cases of UPS failure and prevents power shortage at the system.UPS will supply loads from the battery in cases of mains voltage outage or beyond the tolerance limits. Loads are supplied from the battery for a backup time that varies depending on the capacity of batteries used. If mains voltage is recovered to a value within the tolerance limits during the backup time, UPS will return to online mode automatically and continue supplying power to loads. Meanwhile, batteries are charged as well. When UPS is connected to a computer system using any of a several communication options, all functions of the device can be monitored by means of designated software. Connecting to a remote device via modern is possible to transfer information on device related functions and problems. System used in E3 series uninterruptible power supply is shown in the following simple block diagram. Figure–1 UPS block structure E3 Series 160-300kVA Rev 1.0.1 Page | 4 E3 SERIES 1.1 USER MANUAL Safety This user manual includes all information pertaining to transportation, installation, and operation of E3 Series uninterruptible power supply with 160-300 KVA power range. 1.2 Warnings Be sure to read this user manual prior to your use of UPS system. Heed all warnings included in this user manual. Please apply all instructions in respective order. UPS must be operated in upright position in all cases. Protect the UPS against contact with liquids. UPS must be installed and commissioned by an authorized service personel. Please do not remove the UPS covers. There are parts in this UPS which are not to be serviced by the user. Contact authorized technical service in case of any failure. Do not operate the UPS out of temperature and humidity limits described in technical specifications section hereof. Contact with batteries of the UPS is highly dangerous. Even all the switches are turned off; there will be high voltage on battery contacts. Do not attempt to open batteries. Electrolytic liquid used in batteries is highly hazardous to skin and eyes. Batteries must be connected by authorized personnel only and replacement batteries should be of compatible type. Explosion Hazard: Do not litter batteries in fire. If you encounter any problems while implementing instructions given in this manual, please contact our center at telephone numbers and e-mail addresses given on the back cover of this manual. E3 Series 160-300kVA Rev 1.0.1 Page | 5 E3 SERIES 1.3 USER MANUAL Installation 1.3.1 Choosing the right location Uninterruptible power supplies are devices that consist of highly delicate electronic circuits. Therefore, the environment to install and run UPS must be carefully analyzed and chosen. Uninterruptible power supply operates at temperatures between 0–40 C. However, environment temperature must be maintained in the range of 15–25 C so that the inner heat of the UPS can be adequately cooled down. Cooling devices that provide ample ventilation to keep environment temperature within the range given above must be utilized in installation environment. Power of the air conditioner required in installation environment is given below. UPS Power (KVA) 160 200 250 300 Air Conditioner Power (BTUx1000) 22 29 36 43 Table–1 Air conditioner power for different UPS power UPS must be positioned so that the ventilation inlets/outlets shown on the figure are not blocked 100cm 100cm Ventilation 100cm Location Figure-2 choosing the right location Distance that must be observed around the UPS should be as indicated in the figure-3. Place the UPS so that it will not be exposed to direct sunlight or radiated heat. E3 Series 160-300kVA Rev 1.0.1 Page | 6 E3 SERIES USER MANUAL Environment to operate the UPS should be carefully chosen to ensure that it will not be any influence by dust, iron filings, oil, and miscellaneous manufacturing wastes. Operating environment should be free of flammable and caustic gasses such as hydrogen sulfur, sulfuric acid, chloride, ammonia, nitric acid, ozone, and hydrochloric acid and alike. 1.3.2 Device transportation Carry the UPS to installation location along with the palette it was shipped on using a forklift or pallet jack. Figure–3 Transporting the UPS Strictly, do not carry the UPS in horizontal position. UPS must be carried in upright (vertical) position only. 1.3.3 Unpacking and placing the UPS If UPS shall be kept at the depot for a prolonged period of time, do not remove packaging until the installation. E3 Series 160-300kVA Rev 1.0.1 Page | 7 E3 SERIES USER MANUAL Cut the black protection band shown in Figure and remove the nylon protective material inside the card box. Figure–4 Removing packaging Lift the card box upwards to remove. Remove Styrofoam protective materials fit on upper corners of the UPS. Once unpacked, examine the UPS carefully. UPS may have been damaged during the transportation. Check to ensure that all standard (user manual, communication cable, parallel cable and warranty certificate) and optional products ordered were shipped with the UPS without omissions. UPS is mounted on the palette from front and back sides using fixation elements. Figure–5 Unloading UPS from the palette Remove front and back fixation elements shown in Figure-6(A). Unload the UPS carefully from the palette. Roll the UPS on rollers shown in Figure-6 (B) to the place where UPS will be operated. E3 Series 160-300kVA Rev 1.0.1 Page | 8 E3 SERIES 1.3.4 USER MANUAL Providing electrical connections 1.3.4.1 Input feedback protection This UPS includes no internal circuit for protection against feedback currents. Therefore, it is essential that users or those who installed the UPS put warning labels on all circuit interrupt switches deployed on the line where uninterruptible power supply is used. Warning labels should remind that a UPS device is operating on this line to technical personnel to service these circuits. Warning labels should be as follows. BE SURE TO ISOLATE THE UPS PRIOR TO SERVICING THIS CIRCUIT 1.3.4.2 Cross-sections of cables to use Cross-sections of cables to be used are given in the following table. Be sure to adhere to following cable cross-section specifications for a safe operation. UPS Power (KVA) Input Cable Cross-section 2 (mm ) Output Cable Cross-section 2 (mm ) Ground Cable Cross-section 2 (mm ) Battery Cable Cross-section 2 (mm ) 160 4x95 4x95 35 3 x 70 200 4x120 4x120 70 3 x 95 250 4x150 4x150 95 3x120 300 4x185 4x185 120 3x150 Table–2 Cable cross-sections Battery cable cross-sections given in the table above is for cables to be connected between external battery cabin and UPS. E3 Series 160-300kVA Rev 1.0.1 Page | 9 E3 SERIES USER MANUAL 1.3.4.3 Providing cable connections UPS’s frontside view is as shown in this figure. Make sure that all breakers on power unit, shown on the figure on the right,are turned off. Remove connection terminal protection cover in the figure on the right. a)Single Input b) Dual Input Figure–6 UPS front view Detailed view of terminals in 160KVA UPS is shown in the figure below. E3 Series 160-300kVA Rev 1.0.1 Page | 10 E3 SERIES USER MANUAL Figure–7 Connection terminals layout Detailed view of terminals in 200-300KVA UPS is shown in the figure below. Figure–8 Connection terminals layout Make sure to connect ground connection before proceeding with all other connections of the UPS. Connect ground cable to terminal labeled “E”. Connect input cables to terminals labeled “INPUT” (L1), (L2), (L3) ve (N1). E3 Series 160-300kVA Rev 1.0.1 Page | 11 E3 SERIES USER MANUAL Observe phase sequence while connection input cables. In case of any mistakes in phase sequence, UPS will not operate. Connect output cables to terminals labeled “OUTPUT” (L1), (L2), (L3) sequentially and (N2). 1.3.4.4 Providing battery cabin connections E3 Series uninterruptible power supplies have batteries that must be kept in external cabin(s). Following steps must be performed when making external battery cabin connections. If the distance between battery cabins and the UPS is longer than three (3) meters, wrap battery cables together. Make sure to heed following warnings while working with batteries. Batteries have electric shock hazard Remove wristwatch, rings, and all other metal accessories. Be sure to use tools with isolated handles only. Wear isolating gloves and boots. Do not leave tools or other metal objects on batteries. great Be sure to adhere to polarity while connecting battery cables as shown in the following drawing. Polarity faults will be damage the UPS. Figure–9 Battery cabin connection (for single battery cabin) If the UPS has only one battery cabin with 64 batteries, connect the cable from the cabin to UPS terminal labeled “BATTERY” N3, cabin’s (+) cable to terminal labeled “BATTERY” (+), and cabin’s (-) cable to terminal labeled “BATTERY” (-) . E3 Series 160-300kVA Rev 1.0.1 Page | 12 E3 SERIES USER MANUAL Figure–10 Battery cabin connections (for two battery cabins) If the UPS has two battery cabins with 64 batteries, connect first cabin’s (+) cable to terminal labeled “BATTERY” (+), second cabin’s (-) cable to terminal labeled “BATTERY” (-) and combine first cabin’s (-) cable and second cabin’s (+) and connect them to terminal labeled “BATTERY” N3 together. If the UPS has two battery cabins with 128 batteries, combine (+) cables of both cabins and connect them to terminal labeled “BATTERY” (+),connect (-) cables and connect them to terminal labeled “BATTERY” (-), and combine neutral cables together and connect them to terminal labeled “BATTERY” N3. If batteries are located in two separate cabins, make sure that quantities and capacities of batteries on both cabins are identical. Equal quantity of batteries should be used for plus (+) and minus (-) busbars in external battery cabins. Batteries should be stored no longer than (3) three months at approximately 25 C prior to recharging. Too high or too low a temperature will damage batteries. Exceeding the recommended ambient storage temperature will reduce back-up time and may adversely affect life. E3 Series 160-300kVA Rev 1.0.1 Page | 13 E3 SERIES USER MANUAL 2 Operation modes 2.1 Online (normal) operation mode E3 Series UPSs supply all connected loads with continuous voltage with stable frequency and stable amplitude during online operation. Rectifier and inverter units run continuously. Load is supplied with a stable sinusoidal voltage generated by the inverter. Inverter and bypass voltages are synchronized. Batteries are constantly kept at a buffer charge voltage. Mimic diagram displayed on the Touch screen is as shown below. Figure–11 online (normal) operation mode UPS will switch back from this operation mode when any of the following occurs: 2.2 Mains voltage or mains frequency is out of limits Overheat or overload Battery test procedure A failure Battery operation mode Rectifier unit does not run, inverter unit runs. Inverter unit is supplied from the battery. Load is supplied a stable sinusoidal voltage generated by the inverter. Batteries are in discharge position. Mimic diagram is as shown in the following drawing. Figure–12 Battery operation mode E3 Series 160-300kVA Rev 1.0.1 Page | 14 E3 SERIES USER MANUAL When any of the following conditions occurs, UPS will switch to this operation mode. Mains voltage or mains frequency is out of limits Mains phase sequence fault Battery test procedure 2.3 Bypass operation mode Inverter and rectifier units do not run. Load is supplied by bypass source over static bypass unit. Mimic diagram is as shown in the following drawing. Figure–13 Bypass operation mode When any of the following conditions occurs, UPS will switch to this operation mode. 2.4 As soon as UPS is turned on Cases of overheat shutdown, overload shutdown or overcurrent inverter Stopping the UPS by remote bypass switch Any failures in rectifier or inverter stages System off mode Rectifier, inverter and static bypass units do not run. Figure–14 System off mode E3 Series 160-300kVA Rev 1.0.1 Page | 15 E3 SERIES USER MANUAL UPS will switch to this operation mode if any of the following conditions occurs. Stopping the UPS by ‘EPO’ switch Stopping the UPS through a computer (shutdown). Bypass voltage and frequency is out of limits during bypass operation mode Static bypass switch (SCR) malfunction during bypass operation mode Shutdown due to overheat or overload during stop mode E3 Series 160-300kVA Rev 1.0.1 Page | 16 E3 SERIES USER MANUAL 3 Touch panel and menu structure 3.1 Care and Cleaning Handle the touchscreen with care prior and during installation. Do not pull or stress cables/flexibletails and ensure not to damage the touchscreen prior to installation. Clean the touchscreen surfaceswith an alcohol free glass cleaner and soft cloth. Ensure that the surfaces are clean and dry beforeintegration of the touchscreen. Industry standard Anti Static procedures for electronic equipment must be followed when handling the touchscreen sensor and controller PCB during allstages of unpacking and installation of the product to prevent damage to the product due to high levels of ESD. 3.2 Touch panel structure Figure–15 Touch panel 3.2.1 Mimic diagram (Upper Screen) This window consists of a mimic diagram, ups series, power and internal temperature information, serial number, an alarm information section and a section where date/time information is displayed. This is a graphical diagram. Diagram features symbols denoting input, output, battery, rectifier and inverter units and paths that indicate the current operating mode of the UPS. E3 Series 160-300kVA Rev 1.0.1 Page | 17 E3 SERIES USER MANUAL Moreover, UPS power breakers (input, output and manual bypass) are shown here so that users will be able to tell the current condition of the UPS at a glance. Figure-16 Sub-Menus Figure–17 Mimic diagram window E3 Series 160-300kVA Rev 1.0.1 Page | 18 E3 SERIES 3.2.2 USER MANUAL Data monitoring Touch screen (lower screen) Data monitoring section You can monitor data and status information about the UPS and make changes to parameters and settings using this menu structure. Figure–18 Data monitoring section 3.3 Menu structure There is a menu structure in data monitoring window to ensure easy access to UPS data and make changes to settings as necessary. Menu structure consists of three levels, namely: Main Menu, Intermediate Menu, and Sub Menu. You can browse through menu options and make changes using the keypad. Users are allowed to use displays, UPS status, warnings and custom settings main menus only. Calibration, set values and test settings main menus are for use by authorized technical service personnel only. E3 Series 160-300kVA Rev 1.0.1 Page | 19 E3 SERIES USER MANUAL MENU COMMANDS MEASUREME NTS UPS START BATTERY TEST START BATTERT EQUALIZATION CHARGE START RESET BATTERY CAPACITY INPUT PRINT SETTINGS BYPASS PRINT EVENTS LOG INVERTER CLEAR EVENTS LOG DEVICE PRINT DATA LOGS CLEAR DATA LOGS RESET OPERATING TIME RETURN FACTORY SETTINGS OUTPUT BATTERY RECTIFIER DATA LOGS INPUT VOLTAGE L1 INPUT VOLTAGE L2 INPUT VOLTAGE L3 OUTPUT VOLTAGE L1 OUTPUT VOLTAGE L2 OUTPUT VOLTAGE L3 OUTPUT LOAD L1 OUTPUT LOAD L2 OUTPUT LOAD L3 BATTERY VOLTAGE TEMPERATURE OUTPUT CURRENT L1 OUTPUT CURRENT L2 OUTPUT CURRENT L3 EVEN T LOGS CALIBRATI ONS SETTINGS PASSWOR INPUT DS OUTPUT DISPLAY BATTERY USER I/O RECTIFIER TIME EVENT SCHEDUL BYPASS ER GUARANT INVERTER Y DATA LOGS INPUT OUTPUT BATTERY BYPASS RECTIFIE R INVERTER PARALLEL COMMUNI CATION GENERAL HARDWAR E Table-3 Menu structure E3 Series 160-300kVA Rev 1.0.1 Page | 20 E3 SERIES USER MANUAL Alarm Select Ethernet Battery Unselect Events Log Bypass Setup Output Buzzer Usb Input Calibration Parallel SD Card Datalog Help Thyrstor E3 Series 160-300kVA Rev 1.0.1 Page | 21 E3 SERIES USER MANUAL Rectifier Data Commands Inverter Delete Menu Diagram Arrow Down Arrow Right Escape Delete Enter Table-4 Used Symbols 3.4 Main menus 3.4.1 Displays This is the menu where information pertaining to mains (input), output, battery, bypass, inverter and UPS can be monitored. Use selection keys to browse through menu options. Following information can be monitored using sub menus. Figure–19 Displays main menu and input sub menu E3 Series 160-300kVA Rev 1.0.1 Page | 22 E3 SERIES USER MANUAL Input The mains supply voltages (phase-neutral), currents drawn by mains, apparent and active power drawn by mains,power factor, crest factors of load currents and mains frequency can be monitored. Output UPS output voltages (phase-neutral), load currents, load percentages, load apparent and active power, output power factor, crest factor of load currents and output frequency information can be monitored. Battery Battery voltage, battery current, remaining battery capacity (percentage), elapsed time (resets at every battery operation), remain battery life can be monitored during discharge. At the same time, manual battery test procedures are also initiated from this menu (See: Testing Batteries). Bypass Mains (phase-neutral) and frequencies can be monitored. Inverter Voltages generated by UPS inverter unit (phase-neutral) can be monitored. Device Information on device model, serial number, power, program name, program date, total uptime (in days, hours, minutes and seconds respectively) and warranty status of the UPS can be monitored using this menu. One of the following three is displayed in “Warranty Status” line: “not entered” if device warranty term was not set; or warranty expiry date if warranty term was set; or “warranty expired” if warranty term is expired. On the second page of this menu, you can monitor input and output total active power, apparent power. 3.4.2 Warnings Previous warning, malfunction and information messages are monitored in this menu. 1024 different warnings may be displayed along with date and time when warning condition occurred. You can browse through warning messages and obtain information about past malfunctions of the UPS. Warnings are displayed in a page structure.You can easily find the warning location in list by touching the desired one. E3 Series 160-300kVA Rev 1.0.1 Page | 23 E3 SERIES USER MANUAL Figure–20 Warnings menu List of possible warnings and failures that may be displayed in warnings menu is given in the table below. Warnings Description Power On This indicates that UPS is switched on by turning on the input circuit breaker. Stop Mode This indicates that UPS stopped/is stopped. Rectifier Start This indicates that rectifier unit started. Inverter Start This indicates that inverter unit started. Normal Mode This indicates that UPS is running in online mode. Battery On This indicates that UPS is running on battery power. Battery Low In battery on mode, battery voltage drops under the limit of minimum battery voltage. Battery Depleted This indicates that battery voltage has depleted. Battery Test The manual or periodical battery test mode of the UPS. E3 Series 160-300kVA Rev 1.0.1 Page | 24 E3 SERIES USER MANUAL Synchron Control This indicates an ongoing synchronization procedure between inverter and bypass voltages. Eco Mode This indicates that UPS is in economic operation mode. Awaiting Shutdown This indicates that UPS is being shutdown via a control program running on computer. Awaiting Restore This indicates that UPS is being restarted via a control program running on computer. Mains Low This indicates that mains voltage is below the designated limit and that UPS has begun operating on battery power. Mains High This indicates that mains voltage is above the designated limit and that UPS has begun operating on battery power. Bypass Low This indicates that bypass voltage is below the designated limit. Static bypass unit will not supply bypass voltage to output. Bypass High This indicates that bypass voltage is above the designated limit. Static bypass unit will not supply bypass voltage to output. Dc Low This indicates that busbar voltage at the output of rectifier unit is below the designated limit. Dc High This indicates that busbar voltage at the output of rectifier unit is above the designated limit. Battery High This indicates that the voltage at battery group contacts is above the designated limit. Battery Fault Battery faulty detected during a periodic or manual battery testing procedure. Rectifier Fault During the operation of rectifier unit, this indicates that the designated voltage cannot be ensured at the output of this unit and that rectifier unit may be a problem in rectifier. Inverter Fault This indicates that the voltage at the output of inverter unit is out of designated limits. Load is transferred to static bypass unit. E3 Series 160-300kVA Rev 1.0.1 Page | 25 E3 SERIES USER MANUAL Synchron Fault This indicates that synchronization between inverter and bypass voltages has failed. There is a synchronization problem. Fan Failure This indicates that any of the fans connected to cooling unit is malfunctioned. Fuse Failure This indicates that one of the fast fuses of the UPS is malfunctions. Emergency Off This indicates that UPS is being switched off via emergency stop switch (EPO). Generator Active In generator applications, this indicates that generator is online and that UPS is supplied by the generator. Maintenance Breaker ON This indicates that UPS was switched to manual bypass mode. Maintenance Breaker OFF This indicates that UPS was switched back from manual bypass mode. Overheat Shutdown This indicates that cooler temperature has exceeded auto shutdown level (80°C). Load is transferred to static bypass unit. Overload Load supplied by UPS has exceeded designated limits. UPS will continue operating in online operation mode. We recommend that load is reduced to prevent device from overheat. Overload Shutdown Limit time for operation under overload has exceeded. Load is transferred to static bypass unit. We recommend that load is reduced. Overcurrent Rectifier There is a problem at rectifier unit. UPS will switch to battery operation mode. In this case, UPS will attempt to start rectifier unit a few times. Overcurrent Inverter Either there is short-circuit on UPS output, or excessive current is drawn from the output momentarily, or there is a malfunction at inverter unit. Load is transferred to static bypass unit temporarily. In this case, UPS will attempt to start inverter unit a few times. E3 Series 160-300kVA Rev 1.0.1 Page | 26 E3 SERIES USER MANUAL Overcurrent Fault UPS is switched to failure mode due to repetitive overcurrent problems that occurred at rectifier or inverter units. Load is transferred to static bypass unit permanently. Bypass SCR Fault Bypass thyristors are malfunctioned. Inverter SCR Fault Inverter thyristors are malfunctioned Inverter CPU Fault There is a problem between inverter CPU and panel CPU. Rectifier CPU Fault There is a problem between rectifier CPU and panel CPU. Short Circuit Shutdown There is a shortcircuit on any of output loads. Input Breaker ON This indicates that UPS’ input breaker is on. Input Breaker OFF This indicates that UPS’ input breaker is off. Battery Breaker ON This indicates that UPS’ battery breaker is on. Battery Breaker OFF This indicates that UPS’ battery breaker is off. Output Breaker ON This indicates that UPS’ output breaker is on. Output Breaker OFF This indicates that UPS’ output breaker is off. Table–5 Warnings list E3 Series 160-300kVA Rev 1.0.1 Page | 27 E3 SERIES 3.4.3 USER MANUAL Settings This is a menu where users can make parameter changes as per their desire and purpose. You can make changes using selection keys. Follow these steps to make changes. Figure–21 selecting a parameter to change Parameters included in Settings main menu and their respective functions are given in the following table. E3 Series 160-300kVA Rev 1.0.1 Page | 28 E3 SERIES Main Menu USER MANUAL Sub Menu Password–1 Passwords Password–2 Password–3 Test Time Test Period Function These are the passwords required to access “CALIBRATION”, and ‘’SETTINGS” main menus. Entering all three passwords correctly is necessary to enter these menus. Otherwise these menus will not be visible. Passwords are changed on weekly basis. These are the parameters used for test procedure On: Following full depletion of batteries, UPS restarted when mains voltage is recovered. Battery Automatic Start Language Off: Following full depletion of batteries, UPS is not restarted when mains voltage is recovered. UPS waits for a manual start up. This determines the language used on LCD screen. There are nine languages, namely Turkish, English, French, German, Polish, Hungarian, Italian, Spanish, and Russian. “xxx”: During start-up of the UPS,a logo is seen. Startup Image Off: No logo is displayed If front panel is not used for a prolonged period of time, Touch screen is dimmed to save energy and to prolong the life of Touch screen. Display Illumination Off: Screen will not switch to standby mode and will stay bright all the time. “1–30 min”: Touch screen will be dimmed if keypad is not used for a period determined here.Touch screen will be automatically lit as soon as keypad is used again. E3 Series 160-300kVA Rev 1.0.1 Page | 29 E3 SERIES USER MANUAL RL1 RL2 RL3 Relays There are seven user relays (See: Programmable Relay Unit). RL4 RL5 RL6 RL7 Settings Hour System time can be changed here. This features hour and minute in respective order (this is activated once password is entered in correctly) Date System date can be changed here. This features day, month, year, and day of the week in respective order (this is activated once password is entered in correctly). Alarm This is used to set the alarm. This features day, hour, and minute information in respective order. This will be activated only while the status information is On (this is activated once password is entered in correctly). Guarantee UPS’ warranty term is entered, changed or cancelled here (this can be changed by authorized personnel only). Serial Number UPS’ serial number is entered here. This can be entered by authorized personnel only and only during the testing stage (this is activated once password is entered in correctly). Table-6 Custom Settings Table E3 Series 160-300kVA Rev 1.0.1 Page | 30 E3 SERIES 3.5 USER MANUAL Operating procedures 3.5.1 Switching the UPS on All breakers must be in OFF position before switching UPS on. Check to make sure that all electrical connections are correct. Perform following steps in given order to switch on the UPS with 160 KVA. Soft start is necessary to start up a device of this power range. For this purpose, push soft start button (SW6) until hear beep as shown in the figure. Figure–22 Pushing soft start button Strictly do not throw input breaker on without performing a soft start. Do not keep soft start button on for a period longer than indicated above. Once soft start procedure is completed, turn input (SW2) breaker in the directions shown below to bring it to on position. (If the device is dual input, turn on static bypass (SW1) and input (SW2) breakers) E3 Series 160-300kVA Rev 1.0.1 Page | 31 E3 SERIES USER MANUAL Figure–23 Turning on input breaker(Single Input) Figure–24 Turning on static bypass breaker Figure–25 Turning on input breaker (Dual Input) If the mains voltage is within the designated limits the UPS will switch to bypass mode, otherwise UPS will switch to system off mode. At this stage, strictly do not throw battery breaker (SW4) to ON position. E3 Series 160-300kVA Rev 1.0.1 Page | 32 E3 SERIES USER MANUAL Perform following steps in given order to switch on the UPS with 200–300. Soft start is necessary to start up a device of this power range. For this purpose, push soft start button (SW6) until hear beep as shown in the figure. Figure–26 Pushing soft start button Strictly do not throw input switch on without performing a soft start. Do not keep soft start button for a period longer than indicated above. Once soft start procedure is completed, turn on input (SW2) breaker in the directions shown below to bring it to on position. (If the device is dual input, turn on static bypass (SW1) and input (SW2) breakers) Figure–27 Turning on input breaker(Single Input) E3 Series 160-300kVA Rev 1.0.1 Page | 33 E3 SERIES USER MANUAL Figure–28 Turning on static bypass breaker Figure–29 Turning on input breaker (Dual Input) If the mains voltage is within the designated limits the UPS will switch to bypass mode, otherwise UPS will switch to system off mode. At this stage, strictly do not throw battery breaker (SW4) to ON position. 3.5.2 Starting the UPS Follow MENU/COMMADS/UPS START as shown in the figure below. Figure–30 Starting the UPS E3 Series 160-300kVA Rev 1.0.1 Page | 34 E3 SERIES USER MANUAL Mimic diagram window will be displayed on Touch screen and rectifier unit will begin to run. Once rectifier unit has begun running, inverter unit will begin to run automatically. Once inverter unit is ready, UPS will switch to online mode. Figure–31 Online mimic diagram Once the UPS switched to online mode, throw the battery breaker to ON position by turning in the direction shown in the figure below. Figure–32 Turning on battery breaker Figure-33 Turning on battery breaker on 160 KVA UPSs on 200-300 KVA UPSs (Single Input) E3 Series 160-300kVA Rev 1.0.1 Page | 35 E3 SERIES USER MANUAL Figure–34 Turning On battery breaker Figure-35 Turning On battery breaker on 160 KVA UPSs on 200-300 KVA UPSs (Dual Input) Once battery breaker is turned on, mimic diagram indicates that battery breaker is off. Bring output breaker to on position. Observe that output breaker position changes in mimic diagram. Now you can turn on the loads connected to UPS. If you encounter anything unexpected during the startup, please contact authorized technical service. 3.5.3 Stopping the UPS Follow MENU/COMMADS/UPS START .If mains voltage is within the designated limits, UPS will switch to bypass mode, otherwise UPS will switch to system off mode. Mimic diagram window will show the information of this mode. 3.5.4 Switching the UPS off Stop the UPS as explained in “Stopping the UPS” section. Turn off all loads connected to UPS. Throw output breaker to OFF position. Throw battery breaker to OFF position. E3 Series 160-300kVA Rev 1.0.1 Page | 36 E3 SERIES USER MANUAL Throw input breaker to OFF position. (If the device is dual input, turn input and static bypass breaker to OFF position). There is dangerous voltage in UPS even after the UPS is switched off. Never service or intervene inner parts of the UPS. 3.5.5 Manual bypass operation 3.5.5.1 Switching the UPS to manual bypass mode Follow the steps below for a safe manual bypass operation that will not cause any energy interruption at the UPS output. Follow MENU/COMMADS/UPS STOP.Load is transferred to static bypass unit uninterruptedly and device switches to bypass operation mode. Throw the manual bypass breaker to ON position. Along with a periodical siren, “Maintenance Breaker On” warning is displayed on alarm information window and “WARNINGS” main menu. “Service” warning is displayed on the output option of “UPS STATUS” main menu. Bypass mode is indicated as follows on mimic diagram. Figure–36 Manuel bypass mode Throw output, battery and input breakers to OFF position in respective order. Shortly after UPS will switch off. (If device is dual input after turn input breaker to OFF position, turn static bypass breaker to OFF position). E3 Series 160-300kVA Rev 1.0.1 Page | 37 E3 SERIES USER MANUAL There are dangerous voltages on input, battery and output contacts while the UPS is in manual bypass position. Do not remove terminal protective cover. 3.5.5.2 Switching the UPS back from manual bypass mode While UPS is in manual bypass position and switched off, do not bring output breaker to “UPS” or “OFF” positions. Follow the steps below in order for a safe manual bypass operation that will not cause energy interruption at UPS output. Switch the UPS on as explained above in section titled switching the UPS on. UPS will switch to bypass operation mode. Bring output breaker to on position. Bring manual bypass breaker to off position. Start the UPS by following MENU/COMMADS/UPS START. Once UPS switched to online mode bring battery breaker to ON position. 3.5.6 Economic operation mode (ECO-MOD) This is an operation mode during which the load is supplied by mains instead of the power generated by uninterruptible power supply. Contrary to bypass operation mode, in this mode rectifier and inverter units keep running. Voltage, frequency and waveform of the mains are constiniously observed. Inverter voltage is kept ready and synchronized with bypass source. As soon as voltage and/or frequency of the mains go out of designated limits, load is transferred to inverter unit that is kept readily at backup. When mains returns to normal limits, load is automatically transferred to static bypass unit again. Batteries are kept charged continuously in this operation mode. When mains voltage is interrupted, rectifier unit is switched off, inverter unit is supplied on battery power, and batteries begin discharging. When the mains voltage is recovered, rectifier activates again and batteries begin recharging. 3.5.6.1 Activating economic operating mode Stop the UPS and switch to bypass operation mode. Select “Eco Mod” option via “SETTINGS/ General/ Operation Mode” menu. Switch on the UPS Wait until rectifier and inverter units begin running. Once “Eco Mode” warning is visible in “WARNINGS” menu, displayed mimic diagram will be as following drawing. E3 Series 160-300kVA Rev 1.0.1 Page | 38 E3 SERIES USER MANUAL Figure–37 Economic operation mode If the UPS is stopped during Eco-Mode, Eco-Mode will be temporarily deactivated. If bypass voltage is interrupted in this state, your loads will not be supplied power. Perform steps given above to reactivate Eco-Mode feature. 3.5.6.2 Deactivating economic operation mode Switch to bypass operation mode the UPS by following MENU/COMMADS/UPS START. Select “Normal” menu option using “SETTINGS/ General/ Operation Mode” menu. Select MENU/COMMADS/UPS START Once rectifier and inverter units begin running, UPS will switch to online (normal) operation mode. 3.5.7 Emergency stop procedure (EPO) The UPS may be halted using emergency stop switch in extraordinary cases including but not limited to fire, earthquake, flood or alike. When emergency stop switch is used, rectifier and inverter units switch off, static bypass unit will not activate, and the UPS will switch to system off mode. When emergency stop switch is used “Emergency Off ” will be visible in “WARNINGS” main menu. There are dangerous voltages on input and battery terminals even after emergency stop procedure is completed. Do not remove protective covers of switch and terminal sections. Emergency stop is performed by means of red “EPO” key located on the front panel of the UPS. To this feature, set “SETTINGS/Hardware Info/Emergency Shutdown” menu option to “local”. Emergency stop may also be performed by means of an external switch. Contacts of external emergency stop switch are taken from “USER CONTACTS” socket located on the UPS panel unit.If external emergency stop switch is brought to ON position while the UPS is running, emergency stop procedure will be initiated. To activate emergency stop feature, set “SETTINGS/ E3 Series 160-300kVA Rev 1.0.1 Page | 39 E3 SERIES USER MANUAL Hardware Info/ Emergency Shutdown” menu option to “ON”. If you do not wish to use emergency stop feature, set this menu option to “OFF”. You will have to switch off the UPS and switch back on again if you want to start the UPS after an emergency stop. 3.5.8 Operation during mains fail In case of a power outage, load is uninterruptedly supplied battery power and UPS goes under the following changes. UPS will switch to battery operation mode and mimic diagram will indicate battery operation mode accordingly. Alarm information window will display “Mains Out of Limit” and WARNINGS menu will display “Mains Fault” warnings. Data monitoring window will display “Measurements/ Battery” menu. Periodical siren will activate. Battery capacity, and accordingly battery voltage, diminishes throughout the mains voltage outage. Capacity increase rate is dependent on battery voltage and amount of load connected to output. Battery voltage is constantly compared with reference voltage set using “SETTINGS/ Battery” menu option. Periodical siren will emit more frequently depending on the result of this comparison. If mains voltage is recovered before batteries are fully depleted, UPS will switch to online (normal) operation mode uninterruptedly. The UPS will give “Batteries Depleted” warning once batteries are fully depleted and will switch off inverter units. In this case, load will no longer be supplied with power. Once batteries were fully depleted, the UPS continues to observe mains voltage for approximately 4 minutes. If mains voltage is recovered during this period of time, UPS will start up automatically and switch to online (normal) operation mode. If mains voltage is not recovered during this period of time, UPS will be switched off completely to prevent damage to batteries. Once UPS is fully switched off, do not bring the switch to OFF position to ensure that UPS can automatically startup as soon as mains voltage becomes available again. Otherwise you will have to startup the UPS manually. 3.5.9 Remote start and stop of the UPS Starting and stopping Uninterruptible Power Supply remotely using an external switch is possible. Contacts of external switch will be taken from the “CUSTOM CONTACTS” socket located on the communication unit of the UPS (See: Custom Contacts). If this switch is brought to E3 Series 160-300kVA Rev 1.0.1 Page | 40 E3 SERIES USER MANUAL OFF position while the UPS is running, UPS will switch to bypass operation mode. Rectifier and inverter units will be switched off and load will be supplied via static bypass. Once the switch is brought back to ON position, the UPS will switch to online mode again. To enable remote start/stop feature, set ‘’SETTINGS/ Hardware/Remote Shutdown” menu option to ON. 3.5.10 Testing batteries Batteries are tested in two different ways, namely manual and periodical battery testing. Battery testing can only be performed while the UPS is in online operation mode. 3.5.10.1 Manuel test Follow the steps below to initiate manual battery testing. Go to “SETTINGS/ Battery/ Test Time” menu and set battery test time in minutes. Battery test time is 1 minute by factory default. When “COMMANDS/BatteryTest Start’’ is pressed, UPS switches to battery operation mode and begins testing the batteries for a designated period of time. During testing, mimic diagram will indicate battery testing procedure as shown on the following figure. Figure–38 Battery Test Operation Page (during an ongoing test procedure) This page features information on previous tests while there isn’t any ongoing battery test. Test Time: This displays the date and time of previous battery test. If there hasn’t been any previous testing, this will not be shown. Test Result: This displays the result of previous battery test. If there hasn’t been any previous testing, “no tests” will be displayed here. If there has been a test where any problem was detected with the batteries, you will see “failure”; if no problems were detected in previous test you will see “OK” here. If previous test was cancelled, “Cancel” will be displayed. Test Monitoring: Reference battery voltage and remaining test time will be displayed. If battery voltage drops below the reference voltage during testing, this will be E3 Series 160-300kVA Rev 1.0.1 Page | 41 E3 SERIES USER MANUAL interpreted as battery failure. Battery test will be completed once test time elapsed and UPS will switch back to online mode. If you cancel during an ongoing test, battery test procedure will be terminated and UPS will switch back to online (normal) operation mode. UPS will also terminate test procedure and switch back to online (normal) operation mode if any battery failure is detected. Battery failure is notified by a periodical siren. “Test Result” field of battery test monitoring page will show “failure”. Periodical Test Batteries can be tested automatically at intervals defined using “SETTINGS/ Battery/ Test Period” menu option. Factory default setting for this menu option is 7 days. If you see “SETTINGS/ Battery/ Test Period” menu option to OFF, periodical battery test procedure will not run. 3.5.11 Operation on generator Battery charge feature of the UPS may be disabled to ensure more efficient and problemfree operation of the generator at times when UPS is supplied by the generator instead of the mains voltage. For this purpose, contact information must be supplied from the generator to UPS. These contact ends must be connected to the contacts of “CUSTOM CONTACTS” socket (See: Custom contacts). When generator is activated while the UPS is in battery operation mode, UPS will switch to online (normal) operation mode but batteries will not be charged. Moreover, UPS will transfer the load to generator gradually while UPS switches from the battery to generator thereby preventing unbalanced loading on generator. When mains voltage is recovered and generator is deactivated, batteries will begin charging again. Set the menu option “SETTINGS/ Hardware/ Generator Active” to ON for activating this feature. 3.5.12 Operation during an overload When an overload occurs, UPS will go under the following changes; “Overload” warning will be displayed in alarm information window and warnings main menu. Periodical siren system will be activated. Siren will go off once three times in every 5 seconds. Period of time UPS operates under overload changes depending on the load amount. Factory default settings are given in the following table. E3 Series 160-300kVA Rev 1.0.1 Page | 42 E3 SERIES USER MANUAL Load Amount (Percentage) Up to 110% load Overload Time Constant 110% load 30 minutes 130% load 5 minutes 150% load 30 seconds Table-7 Overload withstand periods Once overload withstand period elapsed, UPS will transfer the load to static bypass unit automatically. Rectifier and inverter units will be switched off. “Overload Shutdown” will be shown in Warnings main menu. UPS will wait 4 minutes for cooling block to cool down. If load is reduced by the end of this waiting period, UPS will start up again and switch to online mode. If overload is continued after the end of waiting period, UPS will not start up. If overload is recovered before overload withstands period elapses, periodical siren system will silence. Overload counter begins to decrease. “Overload” warning at alarm information window will be removed. We do not recommend you to run UPS on overload to prolong the life of the UPS. In case of an overload, loads must be reduced. 3.5.13 Parallel operation A parallel system may be designed by connecting outputs of multiple uninterruptible power supplies to a common load switch. A parallel system will safely supply loads that are overly sensitive against electric power outages. In a parallel system, when any of UPSs malfunction and become offline, other UPSs continue to supply the load, thereby preventing any interruption with supply to load. UPSs operating in parallel system share the load equally. This way, UPS life will be prolonged as each UPS operates under maximum capacity and UPS failures are reduced. This minimizes loss of time and money. In case where all UPSs in a parallel system malfunction, UPSs will transfer the load automatically to static bypass lines and UPSs will activate again as soon as recovered from malfunction. 3.5.13.1 Installation All electrical connections of all UPSs constituting parallel system must be provided as explained in “Installation” section of this user manual. Note following warnings while installing a parallel system. E3 Series 160-300kVA Rev 1.0.1 Page | 43 E3 SERIES USER MANUAL Installing and commissioning a parallel system should be carried out by authorized technical service personnel only. Parallel cables should be maximum 20meters in length. Nevertheless, shorter cables ensure safer operation. Use a separate designated grounding cable for each UPS in parallel system. Use a separate designated battery group for each UPS. All UPSs in parallel system must be of same model and power capacity. Air conditioning for the room where UPSs will be located must be installed as appropriate for total power of the parallel system. Provide separate input and output cables and mains and load panel connections for UPSs and build a common output busbar here. We also recommend you to place a load interrupt switch between common output busbar located on load distribution panel and load system. Signal cables must be used to ensure data transmission between the UPSs that constitute a parallel system. These signal cables are connected to sockets of parallel cards located on UPS’ communication units. Figure–39 Parallel connection sockets Safety of data communication is increased by means of ring connection method used in E3 Series UPS. Connect parallel signal cables to parallel port located on communication port as shown in the following Figure. Figure–40 Connecting signal cable E3 Series 160-300kVA Rev 1.0.1 Page | 44 E3 SERIES USER MANUAL Due to this connection manner of signal cables, layout of UPSs constituting the parallel system is highly important. Therefore we recommend you to place the UPSs as shown in the following drawing. Figure–41 Recommended UPS layout for a parallel system Figure–42 Recommended UPS layout for a parallel system Make sure that phase sequence is correct when connecting output cables of UPSs to common busbar. E3 Series 160-300kVA Rev 1.0.1 Page | 45 E3 SERIES USER MANUAL 3.5.13.2 Settings Once electrical connections of all UPSs in the parallel system were provided, make the following adjustments for each UPS constituting the parallel system. Switch on all the UPSs in the parallel system. Mimic diagram will display bypass operation mode image. Following settings are made while UPSs are in bypass operation mode. Figure–43 Bypass image Set “Settings/ Parallel/ Parallel Operation” menu option to ON. Enter quantity of devices in the parallel system to “Settings/ Parallel/ Device ID” menu option. Enter an order number for each device in “Settings/ Parallel/ Number of Devices” menu option. Order numbers assigned to devices must be unique and consecutive. Set “Settings/ Parallel/Parallel Link” menu option to ON. Figure–44 Adjusting parallel settings using test settings menu E3 Series 160-300kVA Rev 1.0.1 Page | 46 E3 SERIES USER MANUAL Once parallel system settings were completed, circle-shaped boxes that denote each UPS are displayed in mimic diagram, window alarm information section. These boxes provide information regarding data transmission between UPSs. If a box is filled, that means UPS corresponding to that box is on and communicating with the system. If a box is empty, that means UPS corresponding to that box is off or is not communicating with the system. Operating statuses of UPSs constituting parallel system may be monitored from any UPS. 3.5.13.3 Starting the parallel system Before running parallel system, check and make sure that load interrupt switch on distribution panel is in OFF position. The UPSs in parallel system can be run individually using their screens or entire system can be run together using any UPS in the system. Nevertheless, we recommend you to run each UPS individually when commissioning the system for the first time. Starting from any UPS, Follow MENU/COMMADS/UPS START. Soon later the UPS will switch to online mode. Right at that moment, all other UPSs will switch to system off mode. Startup all UPSs by repeating this step for all other devices in the parallel system. Once all the UPSs are in online operation mode, throw battery breaker to ON position. Throw output breakers of UPSs in parallel system to “UPS” position one by one. Throw main interrupt breaker on load panel to ON position. Once all UPSs in parallel system were started, you can monitor operating statuses and load sharing of all UPSs in Touch screen of any UPS in “Parallel” menu Load sharing among the UPSs must be equal to the extent possible. In case of a significant unbalance between individual loads taken by the UPSs, contact authorized technical service. 3.5.13.4 Stopping the parallel system Stopping any UPS in the system When you wish to deactivate any UPS in parallel system manually or otherwise following a malfunction, follow these steps to prevent any interruption with power supplied to load. Stopping from any UPS, Follow MENU/COMMADS/UPS START At this moment, UPS will switch to system off mode. Throw output switch to OFF position. Throw battery switch to OFF position. E3 Series 160-300kVA Rev 1.0.1 Page | 47 E3 SERIES USER MANUAL Throw input switch to OFF position. (If the device is dual input, turn input and static bypass breaker to OFF position). Once the UPS is deactivated, check to make sure that remaining UPSs share the load equally, using “Displays/Parallel” menu option. Stopping all UPSs in the system All UPSs in parallel system can be stopped using any UPS. Follow these steps to ensure that system can be stopped safely. Stopping from any UPS, Follow MENU/COMMADS/UPS START.Following will be displayed on mimic diagram screen. Select “System”. All UPSs on the system will switch to bypass operation mode at the same time. Figure–45 Stopping the parallel system Turn off loads connected to system. Throw output breaker to OFF position. Throw battery breaker to OFF position. Throw input breaker to OFF position. (If the device is dual input, turn input and static bypass breaker to OFF position). E3 Series 160-300kVA Rev 1.0.1 Page | 48 E3 SERIES USER MANUAL Figure–46 Electrical parallel connection diagram E3 Series 160-300kVA Rev 1.0.1 Page | 49 E3 SERIES USER MANUAL 4 Communication 4.1 RS–232 and RS–485 communication options RS–232 This is used to enable uninterruptible power supply communicate with a nearby computer (within 20 meters range maximum) over RS–232 protocol.Communication speed can be changed using “SETTINGS/ Communication/ Baudrate” menu option. By use of assisting software, RS–232 protocol provides the following features. Compatible with Windows, UNIX, Macintosh operating systems. Status changes that occur on UPS can be monitored. UPS status can be sent to desired addresses via e-mail. It can be used to turn off the computer, server and running programs as desired by using suitable software. Pin Signal Signal Description 2 B 3 A Signals sent and received 5 GND Table–8 RS–232 Socket structure Ground RS–485 RS-485 option is used to make use of advantages of RS–232 in longer ranges. Because RS–485 communication is kind of a signal transformation, an adaptor (RS-485 adaptor) is necessary for connection to computer end. E3 Series 160-300kVA Rev 1.0.1 Page | 50 E3 SERIES USER MANUAL Pin Signal 1 B 2 A 3 Z 4 Y 5 GND Signal Description Signals received Signals sent Ground Table–9 RS–485 Socket structure Communication speed can be changed using “SETTINGS/ Communication/ Baudrate” menu option. Figure-47 RS-232 and RS-485 ports on panel board 4.2 Mod-bus communication option This is a standard communication protocol that enables data transmission between uninterruptible power supply and PLC or other industrial systems. To enable mod-bus feature, set “SETTINGS/ Communication/ Software Protocol” menu option to “modbus (rtu)” and “SETTINGS/ Communication/ Software Protocol” to “modbus (rtu)”. Communication speed can be changed using “SETTINGS/ Communication/ Baudrate” menu option. E3 Series 160-300kVA Rev 1.0.1 Page | 51 E3 SERIES USER MANUAL Pin Signal Signal Description 1-3 B 2-4 A Signals sent and received 5 GND Ground Table–11 RS–485 Socket structure for mod-bus communication Please consult your mod-bus manual for more details. 4.3 SNMP communication This is a communication protocol that was designed and developed to enable monitoring and controlling of multiple UPSs from a single center simultaneously. Each UPS that will be used in network environment is connected to network over an SNMP adaptor. Figure–48 Connecting UPS to network over an SNMP adaptor You can connect to UPSs and check all information regarding their latest status by assigning them individual IP addresses over SNMP. You can monitor operating status of the UPS on a computer screen. Input, output and battery information of the UPS can be monitored on computer screen Latest condition of the battery can be monitored while the UPS is operating in battery mode. You can see failure statuses of the UPS and ensure timely intervention by the technical unit. E3 Series 160-300kVA Rev 1.0.1 Page | 52 E3 SERIES USER MANUAL Multiple devices connected to network environment can be monitored using a single computer. For greater detail, please consult you SNMP manual. 4.4 Remote monitoring panel This is a panel designed to enable remote monitoring of the uninterruptible power supply. Typically, this shows UPS’s operation mode, voltage, current, load and frequency information. This works over RS–485 communication protocol. Multiple panels can be connected in parallel (maximum 32 panels). Panel can be moved up to 100 meters away from the UPS. This only for monitoring purpose and does not provide controlling capability. To enable use of remote monitoring panel, please select remote in the “ SETTINGS/ Communication/ Software Protocol” menu. Figure–49 Remote monitoring panel view “REMOTE MONITORING” ports located on panel unit are as follows. Figure–50 Remote monitoring port Communication signal layout in the port is as follows. E3 Series 160-300kVA Rev 1.0.1 Page | 53 E3 SERIES USER MANUAL Pin Signal 1 B 2 A 3 Z 4 Y Signal Description Signals sent and received Table- 12 Remote monitoring socket structure 4.5 Programmable relay unit This is a unit that consists of 7 relays that transmit the status signals of the uninterruptible power supply to user. Each relay can be individually programmed by the user. A status that will activate the relay can be designated from the front panel for each relay. When designated condition occurs, relay will be activated and contact position will change. Maximum 220V/1A AC or 30V/3A DC can be applied to the contacts of the relays. Relay contacts can be accessed via “SETTINGS/RELAY” (DSUB-25F-9F) female socket located on the communication unit. Relay contact layout in relay port is given in the following table. Option-1(DB-9F) Contact \ Relay RL1 RL2 RL3 NO (normally on) 4 7 1 NC (normally close) 9 3 6 COM (common) 5 8 2 Option-2 (DB-25F) Contact \ Relay RL1 RL2 RL3 RL4 RL5 RL6 RL7 NO (normally on) 1 15 4 18 7 21 10 NC (normally close) 14 3 17 6 20 9 23 COM (common) 2 16 5 19 8 22 11 Table–13 Relay contacts layout on relay port E3 Series 160-300kVA Rev 1.0.1 Page | 54 E3 SERIES USER MANUAL Figure–51 Relay Outputs on panel card Programming relay unit Go to “SETTINGS/ Relay” menu. There are seven sub menus for seven relays in this menu, respectively RL1, RL2, RL3, RL4, RL5, RL6, and RL7. Select the relay that you wish to program in accordance with the status information given in the following table. Status Default Relay Explanation normal operation RL1 UPS is in online operation mode. bypass operation - UPS is in bypass operation mode. battery operation RL2 UPS is in battery operation mode. stand-by operation - Currently not in active use. mains out of limits - Mains voltage is out of limits. bypass out of limit - Bypass voltage is out of limits. output out of limit - Output voltage is out of limits. battery low RL3 Batteries are about to deplete. battery fault - Battery fault detected. overload RL4 There is an overload case. high temperature RL5 There is an overheat case. fan fault - One or more cooling fan(s) malfunctioned. fuse failure RL6 One of fast fuses blown. general failure RL7 There is a general failure in the system. generator active E3 Series 160-300kVA Rev 1.0.1 - Generator is running. Page | 55 E3 SERIES USER MANUAL battery breaker off - Battery breaker is off. maintenance switch on - Manual bypass breaker is on. emergency off - Ongoing emergency stop. remote shutdown - UPS was shutdown via remote access. rectifier fault - Rectifier unit malfunctioned. general alarm - There is a general alarm with the UPS. Table–14 Status lis 4.6 Setting/User I/O Status information can be received from the pins located on custom contacts of the uninterruptible power supply to control the UPS. (DB9-F) Status Information Pin Input1 2-3 Input2 4-5 Input3 1-6 Input4 8-9 Table–15 Status information of socket output pins Figure–52 User contacts E3 Series 160-300kVA Rev 1.0.1 Page | 56 E3 SERIES USER MANUAL 5 Troubleshooting If any problem is encountered with operation of uninterruptible power supply, please perform following checks before contacting authorized technical service. Necessary checks on UPS must be performed by authorized technical service personnel only. Check to make sure that input, output, and battery connections of the UPS were provided correctly Check to make sure that protection grounding of the UPS was provided as appropriate. Electrical and installation infrastructure is of utmost importance for efficient UPS system operation. Basic issues associated with UPS devices that you may encounter with and things you must do in those cases are given in the following. Overload The power required by the loads is higher than the power available. Check that the load is well balanced on three phases by checking the measurements on the display. If needed, disconnect any loads that do not need UPS. Mains out of limit Check to make sure that mains voltage and frequency are in line with the limits set forth in technical specifications section of this user manual. Overheat Check to make sure that UPS’ operation environment temperature is within the recommended temperature limits. Check air conditioning system in the environment where UPS is located. Failure to run with a generator Check and make sure that the generator used with uninterruptible power supply is of adequate power. Battery operation time too short Charge batteries for at least 10 hours and try again. Review recommended environment specifications for batteries. temperature is one of the factors that affect battery life. E3 Series 160-300kVA Rev 1.0.1 Operating environment Page | 57 E3 SERIES USER MANUAL In systems that are subject to frequent power outages where batteries activated and deactivated very frequently, battery life will be shorter inevitably. Do not service inside the UPS in cases of malfunction. E3 Series 160-300kVA Rev 1.0.1 Page | 58 E3 SERIES 6 USER MANUAL Maintenance Customer must pay utmost attention during commissioning, use and maintenance of UPS devices. Modern UPS devices consist of delicate electronic circuits and are very sensitive to temperature and sanitary conditions. UPS devices and battery banks must be operated in a cool place (air conditioning room) in clean environment that does not have humidity, and their maintenance must be performed at regular intervals. Otherwise UPS’ useful life will shorten and failures and malfunctions will occur more frequently. We recommend you to have periodical maintenance (twice a year) performed to ensure maximum efficiency from E3 Series uninterruptible power supplies. All maintenance on the UPS must be performed by authorized technical service personnel only. Fans in uninterruptible power supply must be checked and cleaned once in every three (3) months. Air inlets and outlets must be checked and cleaned. Front panel must be cleaned periodically (once in every three months). We recommend you to change condensers in rectifier and inverter sections once in every five (5) years. Batteries used in the system must be checked periodically Environment where batteries are used must be clean and at appropriate temperature. E3 Series 160-300kVA Rev 1.0.1 Page | 59 E3 SERIES 7 USER MANUAL Technical specifications General specifications Power – KVA UPS topology Efficiency (AC AC) 160 200 250 300 Online, Double-Cycle, SPWM Controlled, 3L Inverter Up to 95% in online mode, 98% eco mode Temperature Operating (0) - (+40) °C 40 °C Max. (8 hours) UPS storing temperature (-10) - (+55) °C Relative humidity 85% Cooling type Forced air conditioning 65 dB Noise level (EN 50091 ) 70 dB Protection class IP 20 Standard box color RAL 7012 Dimensions (mm) without palette (Width x Depth x Height) 160-200KVA=780 x 960 x 1850 250KVA=780 x 960 x 1850 300KVA=780 x 1260 x 1850 Weight (Kg) 600 640 700 750 Custom contacts Seven programmable relays Communication RS232 / RS485 / SNMP / MODEM / MODBUS / Remote Monitoring E3 Series 160-300kVA Rev 1.0.1 Page | 60 E3 SERIES USER MANUAL Up to 6 units Parallel Connection Feature Rectifier Power – KVA Topology Nominal input voltage 160 200 250 300 SPWM Controlled IGBT technology 220/380 Vac, 230/400 Vac, 240/415 Vac Input voltage range 15% Nominal input frequency 50 / 60 Hz Input frequency range 10% 260A 327A 410A 490A Maximum input current Input current distortion (THDi) 4% Input power factor 0.99 DC output voltage accuracy 1% DC output voltage ripple (rms) Maximum charge current (at nominal load) E3 Series 160-300kVA Rev 1.0.1 1% 16 A 20 A 24 A 29 A Page | 61 E3 SERIES USER MANUAL Input protection Fast acting fuse Inverter Power – KVA Topology Nominal output voltage Output voltage stability 160 200 250 300 SPWM Controlled IGBT technology 220/380 Vac, 230/400 Vac, 240/415 Vac Static balanced load %50 unbalanced load %100 unbalanced load Dynamic %50 load trans. %100 load trans. Recovery time Output voltage distortion 1% 2% 2% 2% 3% 2 ms 1% Complies with IEC/EN 62040-3 At linear load At non-linear load Phase angle 120° 1% 120° 2% 50 / 60 Hz At balanced load At 100% unbalanced load Output frequency Output frequency change 1% 0.1% Mains synchronized Original synchronized Nominal output power Appearing power (KVA) Active power (KW) Output nominal power factor Overload capacity 160 144 At 110% load At 130% load At 150% load Short-circuit protection 60 minutes 10 minutes 60 seconds Electronic protection against short-circuit E3 Series 160-300kVA Rev 1.0.1 200 180 250 225 300 270 0,9 Page | 62 E3 SERIES USER MANUAL Crest factor 3:1 Battery Power – KVA 160 200 Standard battery type Battery operating environment temperature Battery storing environment temperature Battery storage life (at +25°C temperature) Standard battery cell quantity 250 Dry, maintenance free (0) - (+25) °C (-10) - (+60) °C 3 months 384 Buffer charge voltage (at +25°C) 855 Vdc Minimum discharge voltage 655 Vdc Battery protection Battery test feature 300 Fast acting fuse Manual or periodical (adjustable) Bypass Power – KVA Nominal voltage Voltage range Nominal frequency Frequency range Overload capacity At 150% load At 200% load Static and Manual bypass E3 Series 160-300kVA Rev 1.0.1 160 200 250 300 220/380 Vac, 230/400 Vac, 240/415 Vac 15% 50 / 60 Hz 10% Continuous 1 minute Standard Page | 63 E3 SERIES USER MANUAL Before contacting us … Please fill in following information and call technical service in cases of malfunction or whenever you need assistance in relation to your device. Model E3 Series Power (KVA) ............................................................................................................................... Serial Number ............................................................................................................................. Purchase Date............................................................................................................................. Commissioning Date.................................................................................................................... Battery Backup Time.................................................................................................................... Company Name........................................................................................................................... AUTHORIZED TECHNICAL SERVICE E3 Series 160-300kVA Rev 1.0.1 Page | 64