1
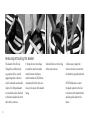
User Manual English 21 User Manual Dear user, Thank you for choosing our product! We truly hope you will experience many pleasant moments and enjoy your Trionic Veloped both off-road and in the city. Please read the User Manual carefully before use and follow all the guidelines, especially the Safety Instructions. The Veloped is primarily made for outdoor use. By choosing a Trionic Veloped you will enjoy a whole range of benefits, that will improve your access to different outdoor environments and hopefully increase your quality of life. 2 Trionic Veloped The Veloped has a unique 3-wheel design, but as you can see it has in fact four wheels. It’s aimed to be used as a walking aid, especially for people with the desire to be physically active outdoors. Developed with a focus on walking and facilitating access for the user, the Veloped is one of a kind. Its main characteristic is a dual front wheel with the capacity to overcome obstacles up to 13 cm high. The force required to overcome a smaller obstacle is also greatly reduced, when compared to a traditional wheel. The 3-wheel design, coupled with the front wheel’s suspension and the air-filled tires, increases both comfort and accessibility on all uneven surfaces. The Veloped is tested and approved according to the international standard ISO-11199-2:2005, for a maximum user weight of 150 kg. 3 The Product 4 T e c h n i c a l I n formation Safety Min. height: Max. height: Width: Length: Seat height: Seat width: Wheel dimension: Weight: Weight without wheels: Max. user weight: • 750 mm 940 mm 765 mm 1 030 mm 580 mm 445 mm 310 x 55 mm 12,3-14,9 kg 7,7 kg 150 kg • • • • • Do not stand on the Veloped or use it for transporting people. Both brakes should be locked in parking mode before you use the seat. Before walking with the Veloped, make sure it’s completely unfolded. Be extra careful on slanting surfaces. The basket is tested for a 5 kg load, evenly distributed. Items should only be transported in the basket or on the seat. NOTE! Do not use the Trionic Veloped as a wheel chair or for transporting people. C o m p l e t e D e livery Complete Delivery The following should be included in the package you have received: • 1 Veloped frame complete with gripbar, brakes, seat and basket • 1 front wheel suspension with Trionic’s patented Climbing Wheel • 2 rear wheels with Quick Release Axle and brake hub. • 1 User Manual • 1 Product Registration Card The following should be included in the package you have received: Seat cover The seat cover is made of resistant 600D polyester fabric. It is easily mounted on the seat by the use of push-buttons. Handwash 30 ºC. Basket The basket has a zippered compartment, ideal for keeping valuables such as a wallet, keys or a small handbag. The basket is made of resistant 600D polyester fabric, and it is attached through three velcro sections. Hand-wash 30 ºC. 5 F i r s t T i m e U se 1. Attach the rear wheels to the frame’s rear axle holes by pressing the black button in the centre of the wheel and then pushing the axle all the way into the axle hole. Release the push button. 6 2. Check that the wheels are properly attached by pulling/ pushing them sideways. axle and press the axle into the axel hole from underneath. Release the push button. 3. Attach the front wheel suspension to the front bottom end of the frame in the same manner, i.e. press the black button at the bottom of the 4. Check that the front wheel is securely fastened by lifting the frame from the surface and pulling the front wheel downwards. 5. Adjust the height of the handlebar as described in Chapter «Handlebar Adjustment». W a l k i n g M o de 1. Unfold the Veloped by pulling the gripbar handles sideways, away from each other. 2. Check that the Veloped locks in walking mode; when unfolding it make sure you hear a click from the telescopic stay locking into position. 3. The seat can be slid forward and rearward. Push it forward to obtain maximum walking space. Before using the seat, reaching the basket or folding the Veloped, pull the seat rearwards. 7 F o l d i n g t h e Rollator 1. Pull the seat to the rear. 2. Press the button on the right of the telescopic stay. 8 3. Simultaneously lift and fold one frame half against the other. 4. Press the other button on the left of the telescopic stay. 5. Simultaneously lift and fold one frame half against the other in order to fully fold the Veloped together. Motion Brake Parking Brake To operate the motion brake, pull the brake lever upwards. Brake with both levers at the same time. 1. Push the locking button, at the front of the lever, forward by using your index finger. Keep the button pushed forward while at the same time pulling the brake lever upwards. 2. Release the locking button, then the brake lever. Make sure the locking mechanism is fixed in position. Make sure the Veloped does not move. Us e t h e P a r k i n g B ra k e s Always lock both parking brakes before sitting down on the seat. 3. To release the parking brake, brake in the same manner as for using the motion brake. 9 R e m o v i n g / A ttaching the Basket The basket of the Trionic Veloped has a 22-litre loading capacity. It has a small zippered pocket at the rear end for valuables and smaller objects. The Veloped basket is removable, and is attached to the frame basket rails with three velcro sections. 10 1. Wrap the rear velcro flaps around the rails from underneath, between the frame and the basket rail. Fold them inwards and fix the velcro sections on the inner of the basket lining. 2. Attach the front velcro flap in the same manner. 3. If necessary, adjust the velcro sections to ensure that the basket is properly fastened. NOTE! Make sure to insert the plastic plate into the bottom sleeve of the basket before attaching the basket to the frame. B r ak e A d j u s tment 1. If the brakes function poorly, loosen the adjustment screw on each brake lever (counterclockwise) and lock it in position by screwing the lock-nut towards the handle (clockwise). Gripbar Adjustment Contact your retailer, or the person responsible for servicing your Trionic Veloped, if the brakes still function poorly. 1. Release both quick-release levers by folding them outwards. 2. Adjust the gripbar to required height, the most adequate being the distance from the wrist to the ground when standing with the arms hang- ing freely. Use help to measure! NOTE: The easiest way to adjust the gripbar is when sitting on the seat; this way you can see the height indication marks clearly, thus simplifying height adjustment. 11 Removing/Installing the R e a r W h e e l s 3. Lock both quick-release levers by folding them inwards. 12 NOTE! Do not operate the quick-release levers like wing nuts or screws. The quickrelease levers can be replaced with screws and nuts if there is a risk that the user accidentally releases the levers while using the Veloped. The rear wheels are removable to simplify transportation of the Veloped. 1. To remove the wheel, press the black button at the centre of the wheel and pull the wheel off. 2. To attach the wheel, press the black button at the centre of the wheel and push the wheel axle into the axle hole. Release the button when the wheel is in its end position. 3. Hold the tire and push/pull the wheel back and forth laterally to check if the wheel is properly secured. R e m o v i n g / I nstalling the Front Wheel The front wheel suspension is removable to simplify transportation of the Veloped. 1. Press the black button under the front hinge to release the front wheel suspension. 2. To remove the entire wheel suspension, lift the frames front end from the surface while pulling the wheel suspension downwards. 3. To install the front wheel suspension, lift the front end of the frame, press the black button and push the wheel axle Tir e A i r P r e s s u r e into the axle hole placed under the frame. Release the black push button. Check that the front wheel suspension is secured by lifting the front end of the frame from the ground and then pulling the wheel suspension downwards. Check the tire air pressure regularly. Trionic recommends a 1.5 – 2.0 bar tire pressure. Maximum tire air pressure is 2.5 bar/35 psi. 13 C h a n g e F r o n t Wheel Setting The Trionic Veloped has a front wheel suspension with the capacity to climb obstacles up to 13 cm high. The wheel has two different settings: one for off-road/irregular terrain and one for city streets. There is an adjustment handle on the front wheel, placed in the 14 between the wheels, that can be shifted between these two settings adjustor to the desired position, either upwards or downwards to its end position. 1. Turn the front wheel for easier access to the adjustment handle. Grab the front (left) wheel and lift the Veloped front end. Pull the adjustment handle outwards and slide the 2. Release the adjustment handle when you have obtained the desired setting. Irregular terrain/Upper position: Increased climbing capacity, suspension on uneven surfaces and a higher directional stability. The Veloped is a bit more difficult to steer, but it performs better off-road. City Environment/Lower position: For Easy turning with retained climbing capacity. R e m o v i n g / I nstalling the Seat The Veloped’s sliding seat is comprised of a seat base and a removable cover fixed with nine push buttons. 1. Hold the seat cover with the text Trionic to the right. Wrap the long flap between the telescopic stay and the seat base. 2. Attach the three front push buttons of the long flap to the seat base. 3. Press the three push buttons on the short flap onto the seat base. 4. Finally, press the three last push buttons of the long flap onto the short flap. 15 16 S a f e t y I n s t r uctions Service Instructions Before use, check that your Trionic Veloped functions properly: • Check the function of the motion and parking brakes. • Make sure that the frame is locked in unfolded walking mode. • Check that the gripbar is properly secured at the correct height. • Avoid contact with the front end when unfolding the frame as there is a risk of pinching. • The user’s weight may not exceed 150 kg. • Do not use the Trionic Veloped as a wheel chair or for transporting people. • The Veloped is aimed to be used as a walking aid, mainly for outdoor use. • An annual control of the product is recommended to ensure its function, either by your dealer or service representative authorized by Trionic. • Do not use a defect Veloped. In order to maintain function and safety, make sure the following is carried out regularly: • Clean the Veloped with normal dish washing liquid, water and a dishcloth. Make sure it’s properly dried. • Keep the wheels clean with dish washing liquid, water and a plastic brush. • Check that screws and levers are tightened properly. • If your Veloped is not in perfect condition: please immediately contact your retailer/dealer or service representative authorized to service your Trionic Veloped. Trionic does not take responsibility for any alterations (adjustments or inadequate repairs) done to the product without prior authorization. Guarantee Label Trionic Walker has a 2-year guarantee valid from the acquisition date. The guarantee is only valid for Trionic’s original parts (parts not cause for wear) The Walker is tested and approved according to the provisions in the international standard for walking aid products: ISO 11199-2:2005 «Walking aids manipulated with both arms». ___________________________________________________________ Serial Number ___________________________________________________________ Date/Stamp/Signature CE - Trionic Sverige AB ensures that the above mentioned product meets the relevant legislation requirements (1993:584) concerning medical products as well as the specifications contained in the provisions for medical products (LVFS 2003:11). The product meets the specifications in EC’s directive regarding medical technical products 93/42/EEC. The user’s weight may not exceed 150kg. Manufacturer Max. User Weight Width Length Max. and Min. Height Manufacturing Date Serial Number Read the manual before use Stora Wäsby, G:a Stallet, SE-194 37 Uppl. Väsby SWEDEN www.trionic.se, [email protected] Tel.: +46 8 522 100 50, Fax.: 08-522 100 59 MAX Max Weight: 150 kg Width: 76 cm Length: 102 cm Height: 75-94 cm 2010-02 SN: 201002-000138 Primarily for outdoor use ISO 11199.2:2005 According to ISO standard it is primarily for outdoor use. Product Code: EAN 13 Article Number Aid approved according to 93/42/EEC ART no: 11-00-011 S 17 18 E n v i r o n m e n t ally Friendly Troubleshooting The Trionic Veloped is manufactured in the way to have as little negative impact on the environment as possible during its lifecycle. When the product has served its purpose it can be scrapped and the parts can be recycled. • The product’s aluminium components are separated from the remaining parts when sorted for recycling. The parts are sorted into metal, plastic and mixed materials. • The greater part of the product is made of aluminium, steel and plastic. • Examples of components made of mixed materials are the brake levers, wheels and gripbar. • If you are uncertain of how to handle the recyclable material, please contact your local authorities, as different municipalities/recycling companies follow different recycling methods. Trionic Sverige AB is a member of REPA, PRO Europe (Die Grüne punkt) and fully implements the European Directive on Packaging and Packaging Waste dated December 20, 1994. If your Trionic Veloped does not work satisfactory, you can check it by following the troubleshooting guide below. If the guide does not help you solve the problem, please contact your retailer, service provider, distributor or Trionic Sverige AB. Problem: The seat is sagging/too low. Possible cause: The rear velcro band under the seat base needs to be tightened, or the Veloped is not correctly unfolded. Action: Remove the seat cover and tighten the rear velcro band of the seat base, with the Veloped fully unfolded. Do not tighten the Velcro band too much since it may turn the sliding of the seat back and forth more difficult. Problem: Difficult steering. Possible cause: The front wheel is adjusted for irregular terrain/upper position. Action: Change the setting of the front wheel suspension to the easy turning mode/ lower position, as described in the chapter «Change the Front Wheel Setting». Problem: Poor brake function. Possible cause: The brake hub or brake band is worn out, or the cable is not tight enough. Action: Adjust the brake cable tension as described in the chapter «Brake Adjustment». Problem: The rear or front wheels are not secured. Possible cause: The wheel has not been correctly attached. Action: Check that the push button of the axle locks correctly. Please contact your service provider if the wheel does not lock correctly in position. 19 Trionic Sverige AB Stora Wäsby, G:a Stallet SWEDEN www.trionic.biz [email protected] Telephone: 08 522 100 50 Fax: 08 522 100 59 Corp.ID: 556698-1527. VAT Reg. No SE556698152701 20 Foto: John van Leer SE-194 37 Upplands Väsby