1
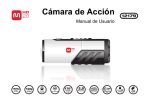
User manual HD100W A c t i o n Ca m e r a kitvision.co.uk JB. 2776 © Kitvision™ 2013 Christchurch, Dorset. BH23 4FL 1 1 With a wide range of cameras and accessories, Kitvision is here to help you record your memories. We’re committed to developing the very latest technologies so you can capture, re-live and share your experiences in the best way possible. By remembering the past and embracing the future, our vision is for every single precious moment to be treasured forever. 2 3 Contents Main features6 Box contents7 Functions8 Using the camera10 Using Wi-Fi15 Connecting your camera18 Before mounting your camera20 Mounting your camera22 Troubleshooting36 Specifications37 4 5 Main features Box contents • Records 1080p Full HD video using one easy slide switch Carefully unpack the box and ensure that you have the following accessories: • Takes 5 MP digital photographs 1. Body Piece with 2 Screw and Nut Sets • Supports up to 32 GB Micro SD cards and takes FHD videos up to 4 hours 2. Tilting Head Adaptor • Built-in 1200mAh Li-Polymer battery for up to 2.5 hours of continuous use 3. Helmet Strap with Clip (15") x 2 • Waterproof up to 10 metres without using extra casing 4. Curved Base with 3M Adhesive • Transfer files to your PC or mobile device wirelessly. Also turns your smart phone to a viewfinder and a remote control 5. Mini USB Cable 1 2 3 4 6. Strap Wings with Flat Eva Pad x 2 7. Grip Wings with Curved Rubber Pad x 2 8. Flat Wings with 3M adhesive x 2 5 9.90° Adaptor 6 7 8 12 13 10.Secure Piece for Board (surf/skate) 11. Quick Release Adaptor key 12.Grip Tie x 2 13.Quick Release Adaptor with Socket 9 10 11 14.Secure String User manual 15.Neoprene Case HD100W A c t i o n c A m e r A 16.Carabiner 17. User Manual 6 1 14 15 16 17 7 Functions 1 1. Power/Shutter button • Turns the camera on or off • Takes a single photograph 2. LED indicator Shows the camera status 3. Recording slide switch Slide to start or stop video recording 4. Lens High quality lens 5. Micro SD card slot Micro SD card storage location 6. Mini HDMI port Connects the camera to a TV via the HDMI cable 7. USB port • Connect to a computer for data transfer or camera setup • Charges your camera 8. Video resolution switch Selects video resolution: FHD (Full HD) or HD 9. Reset button Resets the camera 10. Wi-Fi LED indicator 11. 8 Wi-Fi power button (located on the camera body) Shows the Wi-Fi status Turns the Wi-Fi on or off 12. Back cover Rotates to seal the camera 13. Wi-Fi power button (located on the back cover) Turns the Wi-Fi on or off 2 3 4 5 6 8 10 7 9 11 12 13 9 Using the camera Setting date and time Charging You can set the camera’s clock with the software to ensure that your video and photo files are saved with the correct date/time information. Charge your camera with the USB cable via a PC or USB adaptor (not included). The red LED lights up to indicate that the camera is charging and it will turn off as soon as the camera has been fully charged. It takes about 3 hours to fully charge the camera. Inserting a memory card Insert a micro SD card (not included) before using the camera. Ensure that the camera power is turned OFF before inserting the card into the slot. To set up the camera clock 1. Connect your camera to a computer with the USB cable. Run actionplus.exe in your micro SD card folder (PC only). 2. Find the ‘Date and Time’ and click ‘SET’. 3. Adjust the date and time or click ‘Sync with PC’ to set with your PC clock. 4. Click ‘OK’ to save the settings. 5.After completing the setting, disconnect the camera from the PC immediately to ensure that the date and time are set correctly. Note: There is only one correct direction to insert the micro SD card into the slot. Do not force the card into the card slot as it may damage both the camera and the micro SD card. Note: A new micro SD card should be formatted before use. For more information, please see ‘Connecting your camera’, page 18 10 11 Sealing your camera Record videos The waterproof housing allows the camera to be used up to 10 metres under water. You must seal the camera with the back cover in order to protect the camera when using it in wet or damp conditions. Before you start recording, select the video resolution by switching the ‘Video Resolution Switch’ There are two methods available for starting the video record function: from ‘STOP’ to ‘REC’ • Whether the camera power is ON or OFF, simply slide the ‘Recording Slide Switch’ to start recording • When your camera is OFF and the ‘Recording Slide Switch’ is in the ‘REC’ position, press and hold the ‘Power’ button to turn the camera ON and it will start recording To secure the back cover • Attach the back cover to the back of the camera and rotate clockwise until the two black dots are aligned • Slide the latch on the back cover to lock it • To open, slide the latch on the back cover to loosen it. Rotate the cover anticlockwise until the white and black dots are aligned Note: Failure to properly seal your camera can result in leaks that damage or destroy your camera. Note: The rubber seal on the back cover forms the waterproof barrier to protect the camera in wet and underwater conditions. You must keep this seal clean, as a single strand of hair or grain of sand can cause a leak. Note: A fter each use in salt water, you will need to rinse the outside of the product and the seal with clean, salt-free water, and dry. Not doing this can cause corrosion of the product or failure in the seal which in turn could damage the product. When starting a video recording, a short vibration will indicate that recording has started. The LED indicator will illuminate RED throughout the recording. Locked Turning the power on and off To power ON the camera: Press and hold the ‘Power’ button To power OFF the camera: Press and hold the ‘Power’ button will turn off. 12 . The camera will vibrate and the green LED will turn on. . The camera will vibrate for two seconds and the green LED Unlocked There are two methods available for stopping the video record function: • Move the ‘Recording Slide Switch’ from ‘REC’ to ‘STOP’ to stop recording. The camera will vibrate and the LED indicator will illuminate GREEN to indicate the recording has stopped. The camera will then enter standby mode to stop the recording and turn the camera off. The camera will vibrate for two seconds • Hold the ‘Power’ button and the red LED light will turn off Note: An additional low-res video file with the file name ACTPXXXX_thm.mov (XXXX is 4 numeric digit) will be created simultaneously with the recording of an HD/FHD video file. The smaller video file size allows for more efficient uploading of content to social media sites and email. The resolutions of the additional videos are 432x240 when recording 1080p/720p and 320x240 when recording 960p. Note: Changing the video resolution is disabled during video recording. Note: There will be about a 1-2 second delay before the camera starts recording. Note: The various video resolution options for HD and FHD can be changed under the ‘Settings’ option in the software. Note: Ensure that there is sufficient memory available on the micro SD card. If the card is full, the camera will vibrate for five seconds and the green LED will flash continuously. 13 Taking photos Using Wi-Fi 1. Turn on the camera by pressing the ‘Power’ button . 2. Once the camera is on, press the ‘Power’ button to take a photo. The LED will flash green and there will be a short vibration to indicate that the action was successful. Note: The still photo function is disabled during video recording. Note: T he default photo mode is ‘Single Photo’. ‘Burst-Shot’ mode gives you 10 continuous photo shots to capture that unmissable moment. ‘Time Lapse’ mode can be utilized to take a series of photos at 5, 10, 30 or 60-second intervals. To change the mode, please refer to ‘Running the software’, page 19. Note: If the card is full, the camera will vibrate for five seconds and the green LED will flash continuously. Turn on Wi-Fi Auto rotation The camera has a built-in G-sensor that detects the camera orientation. By rotating your camera to 90°, 180° or 270° from the default position (refer to the picture), the recorded view will be rotated to the same angle. This allows you to mount the camera in different orientation without recording a rotated or inverted view. The video resolution will be adjusted for 90° and 270°. Video resolution 1080p 960p 720p 0° or 180° 1920 x 1080 1280 x 960 1280 x 720 90° or 270° 608 x 1080 720 x 960 416 x 720 Note: T his feature is available for capturing videos only, not still photos. Note: A djust your camera orientation before you start the video recording. The rotation feature will not be activated during the recording. Note: Y ou can disable the auto rotation function under the ‘General Settings’ option in the software. 14 1. Press and hold the ‘Power’ button to turn on your camera. 2.Press the ‘Wi-Fi Power Button’ either on the camera body or on the back cover to turn on Wi-Fi. After a short vibration, the blue LED lights up to indicate that Wi-Fi is preparing. It will take around 15-20 seconds for the Wi-Fi to become ready and connectable. The LED will flash when the Wi-Fi function is active or connected. 3.To turn off Wi-Fi, press the Wi-Fi power button either on the camera body or on the back cover. The camera will vibrate and Wi-Fi will turn off. Note: Wi-Fi will drain the camera battery more rapidly when activated. Turn Wi-Fi off if you are not using it to change settings or upload content. Connecting the camera to your computer 1. Turn on Wi-Fi. 2. Go to your PC’s or Mac’s network settings and choose Wi-Fi. Search the network and find and click ‘ACTIONPLUS’. 3. Enter the password ‘123456789’ to connect to your camera. 4. Open your Internet browser and input ‘192.168.1.2’ or ‘action.plus’. You can then view the files stored on your camera. Connect the camera to your smart device (browser) 1. Turn on Wi-Fi. 2. Go to your mobile device’s network settings and choose Wi-Fi. Search the network and find and click ‘ACTIONPLUS’. 3. Enter the password ‘123456789’ to connect to your camera. 4. Open your Internet browser and input ‘192.168.1.2’ or ‘action.plus’. You can then view the files stored on your camera. 15 Viewing files from Internet browsers via Wi-Fi Connecting the camera to your smart device (App) 1. Follow steps 1-4 in the section ‘Connecting the camera to your computer’, on page 15 of this user manual. • In the navigation page, click the Setting icon • Key in your new SSID and key in each blank accordingly • Click the Submit icon to submit your setting • Click the Reboot icon for the changes to take effect • After resetting the SSID and key, you should reconnect Wi-Fi 2. In the navigation page, click the Live Streaming icon to conduct real-time monitoring. 3. In the navigation page, click the Update icon to upgrade the firmware to a new version (if available). 4. Before completing a firmware update, make sure you have inserted a micro SD card with the updated firmware file on it into the camera. • In the navigation page, click the Update icon • ’Please click here’ will show on the webpage. Click the word ‘here’ to start updating. The Wi-Fi LED indicator will stay on for about one minute and will turn off once the update is complete 1. Search for the Action+ app in your device’s relevant App store. 2. Download and install the app to your smart device. 3. Turn on Wi-Fi. 4. Go to your mobile device’s network settings and choose Wi-Fi. Search the network and find and click ‘ACTIONPLUS’. 5. Enter the password ‘123456789’ to connect to your camera. 6. Open your app and follow App-specific instructions. Brief introduction of our App: The Action+ App (File) allows you to browse the files saved in your camera and view the photos and videos on your iOS or Android mobile device. You can download the photos and videos to your smart device, select the file(s) you would like to share on social media sites or upload files to the Cloud. The Action+ App (Remote) offers you full control of the camera wirelessly using your iOS or Andriod mobile device. You can use all camera settings, start and stop video recording, take photos via your smart device or use the smart device as a viewfinder to preview during recording (live steaming). Note: When the camera starts video recording, the live streaming, file play back and transfer functions will be temporarily disabled. Functions will resume when your camera is in standby status. 16 17 Connecting your camera Running the software Connecting your camera to a PC via USB 1. Insert a micro SD card with at least 2 MB of free space into your camera. 2. Connect your camera to a PC via the USB cable included. 3. Press the ‘Power’ button to turn the camera on. 4. Open the micro SD card folder inside file manager and you will find the file “actionplus.exe”. Click on the file to open it (PC only). The unit can be connected to a computer as a mass storage device to transfer photo/video files for storage. 1. Connect your camera to a PC via the USB cable included 2. Press the ‘Power’ button to turn the camera on. When the camera is connected to the computer as a mass storage device, you can: • Open the micro SD folder and browse the files saved in the camera • Format the micro SD card Note: If you cannot find the device, unplug the cable from the PC, turn the camera on and off once and reconnect to the PC. If you cannot find actionplus.exe in your micro SD folder, unplug the cable from the PC, turn the camera on and off once and reconnect to the PC. Using the software, you can: • Change the photo setting – photo resolution and mode • Change the video setting – FHD and HD resolution • Change the camera’s general settings – TV type, language, auto power off, auto rotation, date and time Connecting your camera to a TV/HDTV You can connect your camera to a TV or HDTV via the HDMI cable (not included). Once you are connected you can: • Take photos or videos by using your TV as a viewfinder • Playback all photo and video files saved in the camera • Delete files saved in the camera • Format the micro SD Card 18 19 Before mounting your camera Attaching the Tilting Head Adaptor to your camera Securing the strap 1. Fit the screw of the Tilting Head Adaptor to the tripod socket of the camera. 2. Screw the Tilting Head Adaptor until it is tight. The secure strap can provide additional security for your mount once you have installed the camera onto the mount. • Loop one end of the secure strap through the strap hole of the camera and out the back, using a pin to help thread it through the hole if needed • Attach the other half to the Secure Piece or hole in the Flat Wings, Strap Wings or Grip Wings • Once the camera has been secured to the Flat Mount, Strap Mount or Grip Mount, clip both ends together Attaching the Quick Release Adaptor with socket to your camera 3. Fit the screw of the Quick Release Adaptor to the tripod socket of the camera. 4. Screw the Quick Release Adaptor until it is tight. 5. Insert the Quick Release Adaptor into the Quick Release Adaptor socket. 1 2 20 3 4 21 Mounting your camera Mounting onto your board Assembling the Flat Mount • Attach the Flat Wings to the left and right side of the Body Piece accordingly Note: Please make sure you install the Flat Wings with the 3M adhesive facing downward and fit the gears of the Flat Wings and the Body Piece correctly on both sides. • Insert the bolts through the holes and tighten the nut Note: The angle of the Flat Wings can be adjusted: simply loosen the nut, adjust the Flat Wings and re-tighten the nut. Mounting onto your board 1. Peel off the 3M adhesive’s protective film on the left and right Flat Wings and attach the Flat Mount onto the board. 2.There are three ways to mount the camera onto the Body Piece: Either use the Tilting Head Adaptor or Quick Release Adaptor socket to mount your camera onto the Body Piece or attach your camera directly onto the Body Piece. Please note that the Tilting Head Adaptor provides a wider angle to allow for greater adjustment 22 • A ttaching the camera to the Body Piece via the Tilting Head Adaptor (for details on how to attach the Tilting Head Adaptor to your camera, please refer to ‘Attaching the Tilting Head Adaptor to your camera’, page 21). Note: The camera position can be adjusted horizontally, plus the camera angle can be rotated upwards or downwards by loosening or tightening the nut on the Tilting Head Adaptor. Rotate the nut • Attaching the camera to the Body Piece via the Quick Release Adaptor and Quick Release Adaptor socket (for details on how to attach the Quick Release Adaptor with socket to your camera, please refer to ‘Attaching the Quick Release Adaptor with socket to your camera’, page 21). Note: The camera position can be adjusted horizontally when using this method. • Attaching the camera directly to the Body Piece. Note: The horizontal and vertical position of the camera will be fixed when using this method. [continued...] 23 [...continued] Mounting onto your board 3.Rotate the wheel on the Body Piece anticlockwise to tighten the Tilting Head Adaptor, Quick Release Adaptor socket or the camera itself onto the Body Piece. Rotate the wheel 4.Use the secure strap to link up the camera and secure piece of Flat Mount. To fasten the mount, please refer to ‘Securing the strap’, page 20. 5.Peel off the protective film which covers the double-sided adhesive on the secure piece and attach the secure piece to a suitable location on the board. Note: When mounting your camera with the Tilting Head Adaptor or Quick Release Adaptor socket, please make sure you push the orientation column on the Body Piece down. When mounting your camera directly onto the Body Piece, please pull the orientation column on the Body Piece up. Note: If you want to make changes to the horizontal position of the camera, you can rotate the wheel on the Body Piece clockwise, adjust the camera position, and rotate anticlockwise to re-tighten the mount. 24 Mounting onto your bike helmet/backpack Assembling the Strap Mount 1.Attach the Strap Wings to the left and right side of the Body Piece accordingly. Note: Please make sure you install the Strap Wings with the flat eva pad facing downwards and fit the gears of the Strap Wings and the Body Piece correctly on both sides. 2. Insert the bolt into the slide rail from the hole and tighten the nut. Note: The angle of the Strap Wings can be adjusted: simply loosen the nut, adjust the Strap Wings and re-tighten the nut. Mounting onto your bike helmet/backpack 1. Loop the strap of the Strap Mount through one vent of the Strap Wing from the top. Next, follow either of the below steps according to your mounting object: • If you want to mount onto your bike helmet, loop the strap through the vent of the bike helmet and pull it out from the opposite helmet vent • If you want to mount onto your backpack, loop the strap through one side of the backpack shoulder belt and back through the other side 2. Loop the strap through the opposite vent of the Strap Wing from the bottom. 3. Loop the strap through the vent of the clip from the bottom. [continued...] 25 [...continued] Mounting onto your bike helmet/backpack 4. Fasten the strap and tighten the strap clip. 5.Repeat the above steps on the opposite end of the strap until the Strap Mount is firmly attached to the helmet. 6.There are three ways to mount the camera onto the Body Piece: Either use the Tilting Head Adaptor or Quick Release Adaptor socket to mount your camera onto the Body Piece, or attach your camera directly onto the Body Piece. 7.Rotate the wheel on the Body Piece anticlockwise to tighten the Tilting Head Adaptor, the Quick Release Adaptor socket or the camera itself onto the Body Piece. • Attaching your camera to the Body Piece via the Tilting Head Adaptor (for details on how to attach the Tilting Head Adaptor to your camera, please refer to ‘Attaching the Tilting Head Adaptor to your camera’, page 21) Note: The camera position can be adjusted horizontally, plus the camera angle can be rotated upwards or downwards by loosening or tightening the nut on the Tilting Head Adaptor. • Attaching your camera to the Body Piece via the Quick Release Adaptor and Quick Release Adaptor socket (for details on how to attach the Quick Release Adaptor with socket to your camera, please refer to ‘Attaching the Quick Release Adaptor with socket to your camera’, page 21) Note: The camera position can be adjusted horizontally when using this method. Notes: When mounting your camera with the Tilting Head Adaptor or the Quick Release Adaptor socket, please make sure you push down the orientation column on the Body Piece. When mounting your camera directly onto the Body Piece, please pull the orientation column up. • Attaching the camera directly onto the Body Piece Note: The horizontal and vertical position of the camera will be fixed when using this method. Notes: If you want to make changes to the horizontal position of the camera, you can rotate the wheel on the Body Piece clockwise, adjust the camera position, and rotate anticlockwise to re-tighten the mount. Notes: You may want to use the secure strap to link up the camera with the hole in the Strap Wings to fasten the mount. Please refer to ‘Securing the strap’, page 20. 26 27 Mounting onto your handlebars Assembling the Grip Mount 1. Attach the Grip Wings to the left and right side of the Body Piece accordingly. Note: Please make sure you install the Grip Wings with the curved rubber pad facing downwards and fit the gears of the Grip Wings and the Body Piece correctly on both sides. 2. Insert the bolts through the holes and tighten the nut. Mounting onto your handlebars 1.Attach and clip the Grip Mount onto the handlebars by adjusting the nuts. Note: The angle of the Grip Wings can be adjusted: simply loosen the nut, adjust the Grip Wings and re-tighten the nut. 2.Loop the Grip Tie through the vents of the Grip Wings, loop back through the vent of the tie clip, and tighten the Grip Tie. Note: By pressing the latch on the Grip Tie, you can loosen it. 3.There are three ways to mount the camera onto the Body Piece: Either use the Tilting Head Adaptor or Quick Release Adaptor socket to mount your camera onto the Body Piece, or attach your camera directly onto the Body Piece. • Attaching your camera to the Body Piece via the Tilting Head Adaptor (for details on how to attach the Tilting Head Adaptor to the camera, please refer to ‘Attaching the Tilting Head Adaptor to your camera’, page 21) Note: The camera position can be adjusted horizontally, plus the camera angle can be rotated upwards or downwards by loosening or tightening the nut on the Tilting Head Adaptor. 28 • Attaching your camera to the Body Piece via the Quick Release Adaptor and Quick Release Adaptor socket (for details on how to attach the Quick Release Adaptor with socket to your camera, please refer to ‘Attaching the Quick Release Adaptor with socket to your camera’, page 21) Note: The camera position can be adjusted horizontally when using this method. • Attaching the camera directly onto the Body Piece Note: The horizontal and vertical position of the camera will be fixed when using this method. 4.Rotate the wheel on the Body Piece anticlockwise to tighten the Tilting Head Adaptor, the Quick Release Adaptor socket or the camera itself onto the Body Piece. Note: W hen mounting the camera with the Tilting Head Adaptor or the Quick Release Adaptor socket, please make sure you push the orientation column on the Body Piece down. When mounting your camera directly onto the Body Piece, please pull the orientation column up. Note: If you want to make changes to the horizontal position of the camera, you can rotate the wheel on the Body Piece clockwise, adjust the camera position, and rotate anticlockwise to re-tighten the mount. Note: You may want to use the secure strap to link up the camera with the hole in the Grip Wings to fasten the mount. Please refer to ‘Securing the strap’, page 20. 29 Mounting onto your motorcycle helmet 30 Assembling the Curved Mount 1. Install the Body Piece into the Curved Base. Note: Please make sure you fit the gears of the Curved Base and the Body Piece correctly on both sides. Mounting without the 90º Adaptor There are three ways to mount the camera onto the Body Piece: Either use the Tilting Head Adaptor or Quick Release Adaptor socket to mount your camera onto the Body Piece, or attach your camera directly onto the Body Piece. Please note that the Tilting Head Adaptor provides a wider angle to allow for greater adjustment. a. A ttaching the camera to the Body Piece via the Tilting Head Adaptor (for details on how to attach the Tilting Head Adaptor to your camera, please refer to ‘Attaching the Tilting Head Adaptor to your camera’, page 21) 2. Insert the bolts through the holes and tighten the nut. You can also mount your camera onto the side of your motorcycle helmet by using a 90° Adaptor. Note: The camera position can be adjusted horizontally, plus the camera angle can be rotated upwards or downwards by loosening or tightening the nut on the Tilting Head Adaptor. [continued...] 31 [...continued] Mounting without the 90º Adaptor b. Attaching the camera to the Body Piece via the Quick Release Adaptor and Quick Release Adaptor socket (for details on how to attach the Quick Release Adaptor with socket to your camera, please refer to ‘Attaching the Quick Release Adaptor with socket to your camera’, page 21). Note: The camera position can be adjusted horizontally when using this method. Mounting with a 90º Adaptor You can also mount the camera onto the side of a motorcycle helmet with the 90º Adaptor: 1. Fit the screw of the 90º Adaptor to the tripod socket of the camera. 2. Screw the nut of the 90º Adaptor until it is tight. 1 2 c. Attaching the camera directly to the Body Piece. Note: The horizontal and vertical position of the camera will be fixed when using this method. 2.Rotate the wheel on the Body Piece anticlockwise to tighten the Tilting Head Adaptor, the Quick Release Adaptor socket, or the camera itself onto the Body Piece. 3.Peel off the protective film which covers the 3M adhesive under the Curved Mount, and attach the Curved Mount onto the Helmet. Attaching the Tilting Head Adaptor to the Camera with the 90º Adaptor 3. Fit the screw of the Tilting head Adaptor to the tripod socket of the 90º Adaptor. 4. Screw the Tilting Head Adaptor until it is tight. 4 3 Attaching the Quick Release Adaptor with socket to the camera with the 90º Adaptor 5. Fit the screw of the Quick Release Adaptor to the tripod socket of the 90º Adaptor. 6. Screw the Quick Release Adaptor until it is tight. 7. Insert the Quick Release Adaptor into the Quick Release Adaptor socket. 5 32 6 33 Mounting onto your motorcycle helmet There are three ways to mount the camera with the 90º Adaptor onto the Body Piece: Either use the Tilting Head Adaptor or the Quick Release Adaptor socket to mount your camera with the 90º Adaptor onto the Body Piece, or attach your camera with the 90º Adaptor directly onto the Body Piece. Please note that the Tilting Head Adaptor provides a wider angle to allow for greater adjustment. a. Attaching the camera to the Body Piece via the Tilting Head Adaptor (for details, please refer to the section ‘Attaching the Tilting Head Adaptor to the camera with the 90º Adaptor’, page 33) Note: The camera position can be adjusted horizontally, plus the camera angle can be rotated upwards or downwards by loosening or tightening the nut on the Tilting Head Adaptor. Rotate the wheel b.Attaching the camera with the 90º Adaptor to the Body Piece via the Quick Release Adaptor and Quick Release Adaptor socket (for details, please refer to the section ‘Attaching the Quick Release Adaptor with socket to the camera with the 90º Adaptor’, page 33). Note: The camera position can be adjusted horizontally when using this method. 34 c.Attaching the camera with the 90º Adaptor directly to the Body Piece. Note: The horizontal and vertical position of the camera will be fixed when using this method. Note: Before mounting, make sure the surface of the helmet on which the 3M adhesive will be adhered is clean so that the Curved Mount can be fixed onto the helmet securely. Note: When mounting your camera with the Tilting Head Adaptor or the Quick Release Adaptor socket, please make sure you push the orientation column on the Body Piece down. When mounting your camera directly onto the Body Piece, please pull the orientation column up. Note: If you want to make changes to the horizontal position of the camera, you can rotate the wheel on the Body Piece clockwise, adjust the camera position and rotate anticlockwise to re-tighten the mount. 35 Troubleshooting Specifications Sensor Lens Focus range Problem Cause Solution LED flashes and camera turns off Battery is flat Recharge the battery Camera cannot be turned on Battery is flat Recharge the battery Red LED flashes during recording Low battery Recharge the battery Cannot take photos or video (green LED flashes) Memory full Replace with an empty memory card Micro SD card is not inserted Insert micro SD card Micro SD card has not been formatted properly Format the micro SD card using a PC Photo Make sure all cable connections are secured and restart the computer if necessary Audio Try a different USB port Storage Cannot take photos or video (green and red LED flashes alternatively) Cannot find removable disk after connecting the camera to the computer Connection failure Video Connection Power Housing Unit size Weight 36 5 megapixel CMOS sensor 170º ultra wide angle field of view 0.5 m – ∞ 1080p: 1920 x 1080 pixels (16:9), 30 FPS 960p*: 1280 x 960 pixels (4:3), 30 FPS 720p: 1280 x 720 pixels (16:9), 60 FPS 720p*: 1280 x 720 pixels (16:9), 30 FPS Format: H.264 compression, saved as MPEG4 (.mov) file** Dual video files for easy sharing Resolution: 5 megapixel in JPEG format Capture modes: Single Photo, Burst-Shot*, Time Lapse* Built-in high quality microphone ADPCM Compression, Automatic Gain Control Micro SD/micro SD HC with minimum class 6 up to 32 GB (not included) Average recording times: about 4 hours (using 32 GB mSD card in 1080p30/720p60) USB 2.0 (for data connection and battery charging) HDMI Wi-Fi (802.11 b/g/n) Built-in 1200 mAH rechargeable Li-Polymer battery Battery life: Approx. 2.5 hrs (w/o Wi-Fi) or 1 hr (w/ Wi-Fi) High quality finish Waterproof up to a depth of 10 metres 108.1 x 39.3 x 40.7 (mm) 134.4 g *Settings can be changed through software settings. **If you cannot play the file format on your existing media player, please download QuickTime Player and try again. 37 System requirements Operating system Windows 7/XP SP3 /Vista and Mac 10.5 or above Interface USB port Important • Keep the lens clean. Dirt and fingerprints will affect the quality of the picture • Close the back cover properly to ensure best water sealing. Do not open it under water • Rinse the camera with clean water after use and keep it dry during storage • You can refer to the detailed operating instructions in this user manual Trademark information Microsoft® and Windows® are U.S. registered trademarks of Microsoft Corporation. • Pentium® is a registered trademark of Intel Corporation • iPhone, iPad, Macintosh is a trademark of Apple Inc • SD, SDHC, micro SD HC logos are trademarks of SD-3C, LLC • Other names and products may be trademarks or registered trademarks of their respective owners FCC Statement Caution Statement “Modifications not approved by the party responsible for compliance could void the user’s authority to operate the equipment.” Instruction Statement NOTE: This equipment has been tested and found to comply with the limits for a Class B digital device, pursuant to Part 15 of the FCC Rules. These limits are designed to provide reasonable protection against harmful interference in a residential installation. This equipment generates, uses and can radiate radio frequency energy and, if not installed and used in accordance with the instructions, may cause harmful interference to radio or television reception, which can be determined by turning the equipment off and on, the user is encouraged to try to correct the interference by one or more of the following measures: • Reorient or relocate the receiving antenna • Increase the separation between the equipment and receiver • Connect the equipment into an outlet on a circuit different from that to which the receiver is connected • Consult the dealer or an experienced radio/ TV technician for help WARNING: THE MANUFACTURER IS NOT RESPONSIBLE FOR ANY RADIO OR TV INTERFERENCE CAUSED BY UNAUTHORIZED MODIFICATIONS TO THE DEVICE. ANY SUCH MODIFICATIONS COULD VOID THE USER’S AUTHORITY TO OPERATE THE EQUIPMENT. 38 39