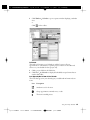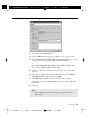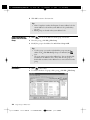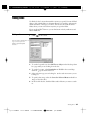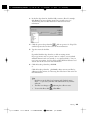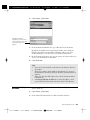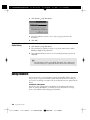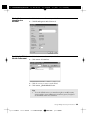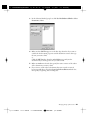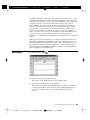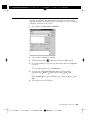
1
V E R S I O N
TM
USER'S GUIDE
FOR WINDOWS 32-BIT
File: T:\TYPE\859\W\02\A_FRONT.859
Page: 1 (1 of 4)
Plate: Composite
Spec: jama1
Galley: Final Galley
Novell, Inc. makes no representations or warranties with respect to the contents or use of this manual, and
specifically disclaims any express or implied warranties of merchantability or fitness for any particular
purpose. Further, Novell, Inc. reserves the right to revise this publication and to make changes to its content,
at any time, without obligation to notify any person or entity of such revisions or changes.
Further, Novell, Inc. makes no representations or warranties with respect to any Novell software, and
specifically disclaims any express or implied warranties of merchantability or fitness for any particular
purpose. Further, Novell, Inc. reserves the right to make changes to any and all parts of Novell software, at
any time, without any obligation to notify any person or entity of such changes.
Novell and GroupWise are registered trademarks of Novell, Inc. in the United States and other countries.
C3P0, Client 32, and Envoy are trademarks of Novell, Inc.
Quattro Pro, WordPerfect and WordPerfect Office are registered trademarks, and Presentations and
QuickMenu are trademarks of Corel Corporation Limited. Franklin Day Planner is a registered trademark of
Franklin Covey Co. Word Pro is a trademark of Lotus Development Corporation. PowerPoint and Windows
are registered trademarks, and Excel and Windows are trademarks of Microsoft Corporation. Xerox is a
registered trademark of Xerox Corporation.
©1998 Novell, Inc.
All Rights Reserved.
Printed in U.S.A.
Novell hereby grants to you the rights to use the above documentation and to freely distribute it for noncommercial purposes provided that (a) the documentation is distributed in full with no alterations, (b) that
no fees are charged for distribution, and (c) that this copyright notice is included in each distribution.
Novell, Inc.
1555 N. Technology Way • Orem, Utah 84097 U.S.A.
Page time: 00:00:01
File time: 00:00:01
Date: 05-26-98 4:39pm
User: RBALLARD
Queue: Q:PRNT
File: T:\TYPE\859\W\02\A_FRONT.859
Page: 2 (2 of 4)
Plate: Composite
Spec: jama1
Galley: Final Galley
Contents
Getting Started
Welcome to GroupWise . . . . . . . . . . . . . . . . . . . . . . . . . . . . . . . . . . . . . . . . . 2
A Brief Tour of GroupWise . . . . . . . . . . . . . . . . . . . . . . . . . . . . . . . . . . . . . . . 7
Logging into
GroupWise
Logging into GroupWise . . . . . . . . . . . . . . . . . . . . . . . . . . . . . . . . . . . . . . . . 17
Working with Items in
Your Mailbox
Sending and Receiving Items . . . . . . . . . . . . . . . . . . . . . . . . . . . . . . . . . . . .
Attaching Files . . . . . . . . . . . . . . . . . . . . . . . . . . . . . . . . . . . . . . . . . . . . . . .
Managing Sent Items . . . . . . . . . . . . . . . . . . . . . . . . . . . . . . . . . . . . . . . . . .
Managing Received Items . . . . . . . . . . . . . . . . . . . . . . . . . . . . . . . . . . . . . . .
Scheduling Group and
Posted Items
Scheduling Appointments, Tasks, and Reminder Notes . . . . . . . . . . . . . . . . 42
Scheduling Recurring Appointments . . . . . . . . . . . . . . . . . . . . . . . . . . . . . . . 54
Using Your Calendar
Using Your Daily Calendar . . . . . . . . . . . . . . . . . . . . . . . . . . . . . . . . . . . . . . 63
Setting Alarms for Calendar Items . . . . . . . . . . . . . . . . . . . . . . . . . . . . . . . . 75
Managing Your
Mailbox
Using the Folder List . . . . . . . . . . . . . . . . . . . . . . . . . . . . . . . . . . . . . . . . . . . 78
Using Shared Folders . . . . . . . . . . . . . . . . . . . . . . . . . . . . . . . . . . . . . . . . . . . 81
Running Notify . . . . . . . . . . . . . . . . . . . . . . . . . . . . . . . . . . . . . . . . . . . . . . 83
Archiving the Items in Your Mailbox . . . . . . . . . . . . . . . . . . . . . . . . . . . . . . . 86
Printing Items in Your Mailbox . . . . . . . . . . . . . . . . . . . . . . . . . . . . . . . . . . . 88
Creating Rules . . . . . . . . . . . . . . . . . . . . . . . . . . . . . . . . . . . . . . . . . . . . . . . 90
Giving Other People Access to Your Mailbox . . . . . . . . . . . . . . . . . . . . . . . . 96
Saving Items in Your Mailbox . . . . . . . . . . . . . . . . . . . . . . . . . . . . . . . . . . . 100
Owning Resources . . . . . . . . . . . . . . . . . . . . . . . . . . . . . . . . . . . . . . . . . . . 102
Opening and Emptying the Trash . . . . . . . . . . . . . . . . . . . . . . . . . . . . . . . . 104
Deleting Items from Your Mailbox . . . . . . . . . . . . . . . . . . . . . . . . . . . . . . . 106
Using the Address
Book
Using the Address Book: An Overview . . . . . . . . . . . . . . . . . . . . . . . . . . . .
Searching for Users and Resources . . . . . . . . . . . . . . . . . . . . . . . . . . . . . . .
Using LDAP in the Address Book . . . . . . . . . . . . . . . . . . . . . . . . . . . . . . . .
Using Groups to Address Items . . . . . . . . . . . . . . . . . . . . . . . . . . . . . . . . . .
Moving Addresses from One Address Book to Another . . . . . . . . . . . . . . . .
Displaying Different Information in the Address Book . . . . . . . . . . . . . . . .
Using the Address Book to Send Messages . . . . . . . . . . . . . . . . . . . . . . . . .
Using Frequent Contacts . . . . . . . . . . . . . . . . . . . . . . . . . . . . . . . . . . . . . .
Creating Personal Address Books . . . . . . . . . . . . . . . . . . . . . . . . . . . . . . . . .
Setting Personal Address Book Properties . . . . . . . . . . . . . . . . . . . . . . . . . .
Viewing Groups, Organizations, or Resources in the Address Book . . . . . . .
Finding Items in Your
Mailbox
Finding Items . . . . . . . . . . . . . . . . . . . . . . . . . . . . . . . . . . . . . . . . . . . . . . . 137
Finding Text in Items . . . . . . . . . . . . . . . . . . . . . . . . . . . . . . . . . . . . . . . . . 144
Filtering . . . . . . . . . . . . . . . . . . . . . . . . . . . . . . . . . . . . . . . . . . . . . . . . . . . 144
Creating and Working
with Documents
Managing Your Documents in GroupWise . . . . . . . . . . . . . . . . . . . . . . . . .
Creating Documents . . . . . . . . . . . . . . . . . . . . . . . . . . . . . . . . . . . . . . . . . .
Organizing Your Documents (Folder) . . . . . . . . . . . . . . . . . . . . . . . . . . . . .
Importing Documents into a GroupWise Library . . . . . . . . . . . . . . . . . . . .
Sharing Documents . . . . . . . . . . . . . . . . . . . . . . . . . . . . . . . . . . . . . . . . . .
Viewing the History of a Document . . . . . . . . . . . . . . . . . . . . . . . . . . . . . .
Page time: 00:00:01
File time: 00:00:03
Date: 05-26-98 4:39pm
User: RBALLARD
Queue: Q:PRNT
22
26
29
32
108
108
111
112
115
118
122
124
127
132
134
159
162
166
169
174
179
File: T:\TYPE\859\W\02\A_FRONT.859
Page: 3 (3 of 4)
Plate: Composite
Spec: jama1
Galley: Final Galley
Checking Out Documents . . . . . . . . . . . . . . . . . . . . . . . . . . . . . . . . . . . . .
Checking In Documents . . . . . . . . . . . . . . . . . . . . . . . . . . . . . . . . . . . . . . .
Deleting Documents . . . . . . . . . . . . . . . . . . . . . . . . . . . . . . . . . . . . . . . . . .
Copying Documents . . . . . . . . . . . . . . . . . . . . . . . . . . . . . . . . . . . . . . . . . .
Saving Documents . . . . . . . . . . . . . . . . . . . . . . . . . . . . . . . . . . . . . . . . . . .
Opening Documents . . . . . . . . . . . . . . . . . . . . . . . . . . . . . . . . . . . . . . . . .
Storing Multiple Versions of a Document . . . . . . . . . . . . . . . . . . . . . . . . . .
Managing Groups of Documents . . . . . . . . . . . . . . . . . . . . . . . . . . . . . . . .
Viewing Documents When Your Network Is Unavailable . . . . . . . . . . . . . .
Integrating GroupWise with Your Applications . . . . . . . . . . . . . . . . . . . . . .
Returning Documents to the Library . . . . . . . . . . . . . . . . . . . . . . . . . . . . .
Replacing a Document with a File from Backup . . . . . . . . . . . . . . . . . . . . .
180
183
187
189
190
192
194
196
218
220
224
227
Using GroupWise Away
from the Office
Using GroupWise Remote: An Overview . . . . . . . . . . . . . . . . . . . . . . . . . .
Preparing to Use Remote . . . . . . . . . . . . . . . . . . . . . . . . . . . . . . . . . . . . . . .
Sending and Retrieving Items in Remote . . . . . . . . . . . . . . . . . . . . . . . . . .
Configuring Your Remote Connections . . . . . . . . . . . . . . . . . . . . . . . . . . .
230
232
238
252
Using Your Phone with
GroupWise
Using Dial Sender . . . . . . . . . . . . . . . . . . . . . . . . . . . . . . . . . . . . . . . . . . . . 260
Using Conversation Place . . . . . . . . . . . . . . . . . . . . . . . . . . . . . . . . . . . . . . 260
Customizing GroupWise
Setting Options for GroupWise . . . . . . . . . . . . . . . . . . . . . . . . . . . . . . . . .
Assigning Passwords to Your Mailbox . . . . . . . . . . . . . . . . . . . . . . . . . . . . .
Customizing Your Toolbar . . . . . . . . . . . . . . . . . . . . . . . . . . . . . . . . . . . . .
Customizing Your Library Settings . . . . . . . . . . . . . . . . . . . . . . . . . . . . . . .
Using Startup Options . . . . . . . . . . . . . . . . . . . . . . . . . . . . . . . . . . . . . . . .
266
272
274
275
277
Using GroupWise
Desktop
Using GorupWise Desktop . . . . . . . . . . . . . . . . . . . . . . . . . . . . . . . . . . . . .
Actions You Can Complete from GroupWise Desktop . . . . . . . . . . . . . . . .
Using Date Navigator . . . . . . . . . . . . . . . . . . . . . . . . . . . . . . . . . . . . . . . . .
Viewing Your GroupWise Desktop Calendar . . . . . . . . . . . . . . . . . . . . . . .
Using GroupWise Marquee . . . . . . . . . . . . . . . . . . . . . . . . . . . . . . . . . . . . .
283
283
287
288
290
Using GroupWise
Imaging
Using Imaging: An Overview . . . . . . . . . . . . . . . . . . . . . . . . . . . . . . . . . . .
Using Annotations . . . . . . . . . . . . . . . . . . . . . . . . . . . . . . . . . . . . . . . . . . .
Scanning . . . . . . . . . . . . . . . . . . . . . . . . . . . . . . . . . . . . . . . . . . . . . . . . . . .
Opening an Existing Image . . . . . . . . . . . . . . . . . . . . . . . . . . . . . . . . . . . . .
E-mailing an Image . . . . . . . . . . . . . . . . . . . . . . . . . . . . . . . . . . . . . . . . . . .
295
296
298
299
300
Sending and Receiving
Workflow Items
Using Workflow: An Overview . . . . . . . . . . . . . . . . . . . . . . . . . . . . . . . . . . 302
Index
Index . . . . . . . . . . . . . . . . . . . . . . . . . . . . . . . . . . . . . . . . . . . . . . . . . . . . . 309
Page time: 00:00:01
File time: 00:00:04
Date: 05-26-98 4:39pm
User: RBALLARD
Queue: Q:PRNT
File: T:\TYPE\859\W\02\A_FRONT.859
Page time: 00:00:00
File time: 00:00:04
Page: 4 (4 of 4)
Plate: Composite
Date: 05-26-98 4:39pm
Spec: jama1
User: RBALLARD
Galley: Final Galley
Queue: Q:PRNT
File: T:\TYPE\859\W\02\G_GETSTR.859
Page: 1 (1 of 15)
Plate: Composite
Spec: jama1
Galley: Final Galley
•
Page time: 00:00:01
File time: 00:00:01
•
•
Date: 05-12-98 8:30am
•
•
•
•
•
•
User: RBALLARD
•
•
•
•
•
•
Queue: Q:PRNT
•
•
•
•
•
•
•
•
•
Getting Started
Getting Started
File: T:\TYPE\859\W\02\G_GETSTR.859
Page: 2 (2 of 15)
Plate: Composite
Spec: jama1
Galley: Final Galley
Welcome to GroupWise
GroupWise® is software that works to meet all your messaging, scheduling,
calendaring, and document management needs.
Starting GroupWise
Before you can begin using GroupWise, you must run the GroupWise Setup
program. The Setup program wizard will take you step-by-step through the setup
process.
Running the Setup Program
1
Contact your system administrator for the location of the GroupWise Setup
program, SETUP.EXE. You need to know the location of the program
before continuing.
2
Make sure you are logged in as yourself on your computer.
3
Click Start
4
Type the path to the GroupWise SETUP.EXE program
5
Follow the instructions in the Setup program.
Run.
click OK.
Starting GroupWise
1
Double-click
on your desktop.
The GroupWise Main Window appears. See A Brief Tour of GroupWise
under Getting Started for more information about the Main Window.
Getting Help
If you have trouble using GroupWise, you can get help from several sources.
Online Help is available from wherever you are in GroupWise. In addition to
online Help, you can find answers to your questions at the Cool Solutions Web
Community which is available on the Web at www.gwmag.com.
Using Online Help
Much of the GroupWise Client documentation is available online. A variety of
access methods into online Help are provided so you can pick which method
suits your needs.
How Do I • Lists help topics organized by related tasks.
2 Welcome to GroupWise
Page time: 00:00:02
File time: 00:00:03
Date: 05-12-98 8:30am
User: RBALLARD
Queue: Q:PRNT
File: T:\TYPE\859\W\02\G_GETSTR.859
Page: 3 (3 of 15)
1
Plate: Composite
Click Help
I.
Help Topics
Spec: jama1
Galley: Final Galley
the Contents tab
double-click How Do
Index • Displays key words to help you find information, much like an
index in a book.
1
Click Help
Help Topics
the Index tab.
Guides • Walk you through a task or series of tasks to help you learn
GroupWise features. You may simply read the instructions in the guides if
you’d rather not perform the steps.
Welcome to GroupWise
Page time: 00:00:02
File time: 00:00:05
Date: 05-12-98 8:30am
User: RBALLARD
Queue: Q:PRNT
3
File: T:\TYPE\859\W\02\G_GETSTR.859
Page: 4 (4 of 15)
1
Plate: Composite
Click Help
Spec: jama1
Galley: Final Galley
Guides.
Context-Sensitive Help • Displays a brief explanation about any option in a
dialog box.
1
In a dialog box, click
click an option.
Find • Lets you type specific words or phrases and displays help topics
containing those words or phrases.
4 Welcome to GroupWise
Page time: 00:00:02
File time: 00:00:07
Date: 05-12-98 8:30am
User: RBALLARD
Queue: Q:PRNT
File: T:\TYPE\859\W\02\G_GETSTR.859
Page: 5 (5 of 15)
1
Plate: Composite
Click Help
Help Topics
Spec: jama1
Galley: Final Galley
the Find tab.
Using Cool Solutions
Cool Solutions is a web site devoted to helping you learn all about GroupWise.
In Cool Solutions you’ll find helpful tips and regular feature articles that give
you all the details about using GroupWise. In addition, you’ll find resources
such as downloadable Quick Start Cards and demos that will help you get
started. The following are samples of what you’ll find.
Opening Cool Solutions •
In your web browser, type www.gwmag.com.
1
Click Basics to learn the
fundamentals of GroupWise.
Click Talk to Us and send
your feedback about
GroupWise.
Click The Vault to read
archived content.
Click FAQ to see if your
question is a frequently asked
one.
Sending Your Questions to the GroupWise Experts • Ask the Experts is
your forum to ask questions about GroupWise. If you’re wondering how to
do something in GroupWise, such as share folders, print a calendar, and so
on, and you can’t find instructions in the documentation or the Vault, send
your question to the experts.
Welcome to GroupWise
Page time: 00:00:04
File time: 00:00:11
Date: 05-12-98 8:30am
User: RBALLARD
Queue: Q:PRNT
5
File: T:\TYPE\859\W\02\G_GETSTR.859
Page: 6 (6 of 15)
Plate: Composite
Spec: jama1
Galley: Final Galley
1
In your web browser, type www.gwmag.com.
2
Click Ask the Experts
3
Click Ask the Cool Solutions Experts.
Ask Us.
Depending on the size of your monitor, you may need to scroll to find
the Ask the Cool Solutions Experts link.
4
Type your information and your question.
5
Click Send.
Downloading Resources from Cool Solutions • On the Downloadables
page, you’ll find lots of resources that you can download and use in your
organization. There are demos that show you how to use GroupWise, feature
articles from the web site, User’s Guides, Quick Start Cards, and more.
1
In your web browser, type www.gwmag.com.
2
Click Downloadables.
3
Click the item you want to download, then follow the instructions.
6 Welcome to GroupWise
Page time: 00:00:01
File time: 00:00:12
Date: 05-12-98 8:30am
User: RBALLARD
Queue: Q:PRNT
File: T:\TYPE\859\W\02\G_GETSTR.859
Page: 7 (7 of 15)
Plate: Composite
Spec: jama1
Galley: Final Galley
A Brief Tour of GroupWise
GroupWise integrates all your messaging, scheduling, calendaring, and
document management needs into one place.
The Main Window
The Main Window is your “home base” for GroupWise. From the Main
Window you can read your messages, schedule appointments, view your
Calendar, open documents, and much more.
Display settings drop-down list
on the toolbar
Folder List
Item List
The QuickViewer lets you read
messages and their attachments in
your Mailbox without opening
them in a separate window.
You can open more than one Main Window in GroupWise. This is useful if you
proxy for another user. You can look at your own Main Window and the Main
Window belonging to the person you are proxying for. You might also want to
open a certain folder in one window and look at your Calendar in another. You
can open as many Main Windows as your computer’s memory will allow.
The basic components of the Main Window are explained below.
Toolbar
The toolbar lets you quickly accomplish common GroupWise tasks, such as
opening the Address Book, sending mail messages, and displaying your
Calendar. Point your mouse over any toolbar button and a tool tip displays the
name of the feature. The display settings drop-down list lets you quickly change
the display of your Item List.
A Brief Tour of GroupWise
Page time: 00:00:02
File time: 00:00:15
Date: 05-12-98 8:30am
User: RBALLARD
Queue: Q:PRNT
7
File: T:\TYPE\859\W\02\G_GETSTR.859
Page: 8 (8 of 15)
Plate: Composite
Spec: jama1
Galley: Final Galley
Folder List
The Folder List at the left of the Main Window lets you organize the items you
send, receive, post, and share. You can also create new folders to store your items
in. Here is what you’ll find in each of the default folders:
Your user folder (indicated by your name) represents your GroupWise
database. Your user folder contains other folders as well as items.
Your Mailbox includes all items you’ve sent and received. Use the
display settings drop-down list to view only sent items or received
items.
Your Cabinet is a container for all your personal folders and shared
folders.
Your Documents folder contains references to documents that you
have created or opened. If you so specify, any documents you view or
import will also be added to this folder. See Organizing Your
Documents under Creating and Working with Documents for more
information.
Work In Progress contains unfinished messages. You can work on a
message, then send it later.
The Trash contains all the items and documents you’ve deleted.
Item List
The Item List at the right of the Main Window displays your mail and phone
messages, appointments, reminder notes, tasks, and document references. Use
the display settings drop-down list on the toolbar to display incoming items,
outgoing items, and posted items.
QuickViewer
The QuickViewer opens below the Item List box. You can quickly scan items
and their attachments in the QuickViewer rather than opening each item in
another window.
Understanding Your
Mailbox
All of your items, whether you send or receive them, are stored in your
GroupWise Mailbox on the network. You can quickly display only incoming
items, outgoing items, posted items, or draft items by clicking a setting on the
display settings drop-down list. You can further restrict which items display in
your Mailbox by using Filter. See Filtering under Finding Items in Your Mailbox
for more information.
You can organize your messages by moving them into folders within your
Cabinet.
8 A Brief Tour of GroupWise
Page time: 00:00:01
File time: 00:00:16
Date: 05-12-98 8:30am
User: RBALLARD
Queue: Q:PRNT
File: T:\TYPE\859\W\02\G_GETSTR.859
Page: 9 (9 of 15)
Plate: Composite
Spec: jama1
Galley: Final Galley
Unread Items in Your Mailbox
All unopened items in your Mailbox are bolded to help you easily identify which
items and documents you have not yet read.
Collapsed discussion threads are also marked with bold text to show that there
are items in the thread that are unread. This saves you the time of expanding
each thread to check if there are newly posted items.
Icons Appearing Next to Items in Your Mailbox
Next to each item you receive is an icon that helps you understand a little about
the item before you even read it. For example, you can determine the type of
item (mail, appointment, and so forth) and its priority. You can also see whether
the item has a file attached, whether an item you sent could not be delivered to
some recipients, and more.
Icon
Description
Appears next to an item you have sent. It indicates
that GroupWise could not deliver the item to one
or more recipients.
Appears next to a task or an appointment you have
sent. Next to a task, it indicates that at least one
recipient deleted the task without marking it
Completed. Next to an appointment, it indicates
that at least one recipient deleted or declined the
appointment without accepting it.
Appears next to an item you have sent. Next to an
appointment, it indicates that not every recipient
has accepted the appointment. Next to a task, it
indicates that not every recipient has completed the
task. Next to other item types, it indicates that not
all recipients have opened the item or that not all
recipients have deleted the item.
One or more attachments are included with the
item.
One or more sound annotations are included with
the item, or the item is a voice mail message.
Draft item.
Appears next to an item you have sent. It indicates
that GroupWise successfully delivered or transferred
the item to all the recipients.
A Brief Tour of GroupWise
Page time: 00:00:01
File time: 00:00:17
Date: 05-12-98 8:30am
User: RBALLARD
Queue: Q:PRNT
9
File: T:\TYPE\859\W\02\G_GETSTR.859
Page: 10 (10 of 15)
Icon
Plate: Composite
Spec: jama1
Galley: Final Galley
Description
Posted item.
Specific version of a document.
Official version of a document.
Unopened discussion topic posted in a shared
folder.
Opened discussion topic posted in a shared folder.
Unopened workflow item.
Opened workflow item.
Unopened mail message with a low, standard, or
high priority.
Opened mail message with a low, standard, or high
priority.
Unopened appointment with a low, standard, or
high priority.
Opened appointment with a low, standard, or high
priority.
Unopened task with a low, standard, or high
priority.
Opened task with a low, standard, or high priority.
Unopened reminder note with a low, standard, or
high priority.
Opened reminder note with a low, standard, or
high priority.
Unopened phone message with a low, standard, or
high priority.
Opened phone message with a low, standard, or
high priority.
10 A Brief Tour of GroupWise
Page time: 00:00:01
File time: 00:00:18
Date: 05-12-98 8:30am
User: RBALLARD
Queue: Q:PRNT
File: T:\TYPE\859\W\02\G_GETSTR.859
Page: 11 (11 of 15)
Plate: Composite
Icon
Spec: jama1
Galley: Final Galley
Description
The sender has requested that you reply to this
item. The item can be a low, standard, or high
priority.
Viewing Options in Your Mailbox
You can view the items in your Mailbox three different ways, depending on how
you want the information organized. Details, Discussion Threads, and As
Calendar are all found on the View menu.
Details • Details displays a list of your items and information about them in
columns, including Subject, Date, CC, Priority, Document Type, Due Date,
Size, Version#, and many other categories. Details is the default Mailbox
view if you have not changed your Mailbox properties.
1
Click
on the toolbar to view by Details.
Discussion Threads • Discussion Threads shows the e-mail discussion of an
original item and all its replies grouped in hierarchical order.
A Brief Tour of GroupWise
Page time: 00:00:02
File time: 00:00:20
Date: 05-12-98 8:30am
User: RBALLARD
Queue: Q:PRNT
11
File: T:\TYPE\859\W\02\G_GETSTR.859
Page: 12 (12 of 15)
1
Click
Plate: Composite
Spec: jama1
Galley: Final Galley
on the toolbar to view by Discussion Threads.
As Calendar • As Calendar displays all scheduled items saved in a particular
folder. This is useful if you organize all your appointments and other items
for a specific project in one folder either manually or with rules.
1
Using the Columns in
Your Mailbox
Click
on the toolbar to view As Calendar.
The Item List in the Main Window is divided into columns. Each column
displays information about the items in the list. For example, different columns
display the subject of items, the date they were sent, and so forth. You can
customize the column display for each folder in your Main Window by changing
12 A Brief Tour of GroupWise
Page time: 00:00:02
File time: 00:00:22
Date: 05-12-98 8:30am
User: RBALLARD
Queue: Q:PRNT
File: T:\TYPE\859\W\02\G_GETSTR.859
Page: 13 (13 of 15)
Plate: Composite
Spec: jama1
Galley: Final Galley
column widths, by adding or deleting columns, and by changing the order of
columns. You can even define a different column display setting for each
personal folder in your Folder List.
Adding Columns to Your Mailbox
1
In the Main Window, open the folder you want to add columns to.
2
Right-click a column heading
click a column title.
or
Right-click a column heading click More Columns
Available Columns list box Add.
a column in the
Tips
•
You can select multiple columns to add by pressing Ctrl while you
click columns.
Changing the Order of Columns
1
In the Main Window, open the folder you want to change columns settings
for.
2
Right-click a column heading
3
Click a column name in the Selected Columns box.
4
Click Down or Up.
5
Click OK.
click More Columns.
Tips
•
You can also drag columns to new positions in the Main Window.
•
You can define different column settings for each folder in your
Mailbox in Properties.
Resizing the Columns in Your Mailbox
1
In the Main Window, click the folder you want to resize columns in.
2
Position the mouse pointer over the edge of a column heading until a twoheaded arrow appears drag to resize the column.
Sorting Column Items in Your Mailbox
1
Click the folder containing the items you want to sort.
A Brief Tour of GroupWise
Page time: 00:00:01
File time: 00:00:24
Date: 05-12-98 8:30am
User: RBALLARD
Queue: Q:PRNT
13
File: T:\TYPE\859\W\02\G_GETSTR.859
Page: 14 (14 of 15)
Plate: Composite
Spec: jama1
Display Settings
Galley: Final Galley
2
Click View
Sort.
3
Click the category you want to sort by in the list box.
4
Click Ascending to sort from A to Z.
or
Click Descending to sort from Z to A.
5
Click OK.
Removing Columns from Your Mailbox
Using the Toolbar
1
In the Main Window, open the folder you want to remove columns from.
2
Drag the column heading off the column bar.
Use the toolbar to access many of the features and options found in GroupWise.
When you use certain features (for example, when you are in your Calendar), the
toolbar for that feature appears.
To find out about a toolbar button, move the mouse pointer over the button
and read the tool tip that appears.
You can customize each toolbar by adding and deleting buttons, choosing button
order, and placing separators between buttons. See Customizing Your Toolbar
under Customizing GroupWise.
Changing the Toolbar Display
1
If the toolbar is not displayed, click View
2
Right-click the toolbar
Toolbar.
click Properties.
14 A Brief Tour of GroupWise
Page time: 00:00:01
File time: 00:00:25
Date: 05-12-98 8:30am
User: RBALLARD
Queue: Q:PRNT
File: T:\TYPE\859\W\02\G_GETSTR.859
Page: 15 (15 of 15)
Plate: Composite
Spec: jama1
3
Click the Show tab.
4
Choose how you want the toolbar to display
Galley: Final Galley
click OK.
A Brief Tour of GroupWise
Page time: 00:00:01
File time: 00:00:26
Date: 05-12-98 8:30am
User: RBALLARD
Queue: Q:PRNT
15
File: T:\TYPE\859\W\02\R_02LOGI.859
Page: 16 (1 of 5)
Plate: Composite
Spec: jama1
Galley: Final Galley
•
Page time: 00:00:00
File time: 00:00:00
•
•
•
Date: 05-29-98 10:58am
•
•
•
•
•
•
User: RBALLARD
•
•
•
•
•
•
Queue: Q:PRNT
•
•
•
•
•
•
•
•
Logging into GroupWise
Logging into GroupWise
File: T:\TYPE\859\W\02\R_02LOGI.859
Page: 17 (2 of 5)
Plate: Composite
Spec: jama1
Galley: Final Galley
Logging into GroupWise
When you start GroupWise®, a dialog box gives you the opportunity to log in to
GroupWise. The Startup dialog box changes, depending on the information
GroupWise needs in order to open your Mailbox. For example, if you have a
password on your Mailbox and log into the network and start GroupWise from
your own machine, you may get a dialog box that asks for your password.
However, if GroupWise can’t find the post office (for example, if the location of
the post office changed or if the server containing the post office is currently out
of service), you may get a dialog box that lets you specify the path to the post
office or the TCP/IP address of the post office agent, your username, and your
password.
You can use a startup option to force the Startup dialog box to be displayed
when you start GroupWise.
Logging into Your
Mailbox
1
Make sure you are logged into your network.
2
Start GroupWise.
If you have not specified a password for your Mailbox and GroupWise needs
no additional information, you will bypass the Startup dialog box and
GroupWise will be displayed.
3
If you are prompted for a password or other information, type the password
or required information in the appropriate box click OK.
Tips
•
Other information GroupWise might require includes the TCP/IP
address and port of the post office agent, the path to the network
post office or the path to the remote database. If you do not know
the required information, contact your system administrator.
Logging into Your
Mailbox from Another
User’s Workstation
1
Log into the network with your own user ID.
or
To force the GroupWise Startup dialog box to be displayed, right-click the
GroupWise icon on the desktop click Properties click the Shortcut tab
in the Target box, after the GroupWise executable, type a space type
/@u-? click OK.
Logging into GroupWise
Page time: 00:00:01
File time: 00:00:02
Date: 05-29-98 10:58am
User: RBALLARD
Queue: Q:PRNT
17
File: T:\TYPE\859\W\02\R_02LOGI.859
Page: 18 (3 of 5)
Plate: Composite
Spec: jama1
Galley: Final Galley
2
Start GroupWise.
3
Type your user ID if it is not already displayed in the User ID box.
4
Click the Password box
type your password
click OK.
Tips
•
You must be on the same post office as the other user to log into
your own Mailbox from his or her workstation.
Making Your Password
Apply to Others Only
1
Start GroupWise.
2
Click the Password box
3
Select the Remember My Password check box
type your password.
click OK.
Tips
•
Your system administrator can choose to disable Remember My
Password for users on your system.
•
This option is machine-specific, meaning that if you tell GroupWise
to remember your password on one workstation, then log into
another machine, you may be prompted for your password again. If
you select the Remember My Password check box on the new
workstation, GroupWise will remember your password on it also.
•
You can also select Remember My Password in Security Options.
•
If you change your mind and want to be prompted for your
password, click Tools
Options
double-click Security
click
the Password tab
deselect Remember My Password.
•
You can have NDS remember your password using Security in
Options. Click No Password Required with NDS. Once you have
selected this option, you will not be prompted for your GroupWise
password on any machine, as long as you have logged into NDS as
yourself first. You will still be prompted for a password when using
Remote.
18 Logging into GroupWise
Page time: 00:00:01
File time: 00:00:03
Date: 05-29-98 10:58am
User: RBALLARD
Queue: Q:PRNT
File: T:\TYPE\859\W\02\R_02LOGI.859
Specifying the Path to
the Remote Database
Page: 19 (4 of 5)
Plate: Composite
Spec: jama1
Galley: Final Galley
1
Start GroupWise remotely.
2
In the Startup dialog box, type your password.
3
Click the Path to Remote Mailbox box type or browse to the path to the
remote database. For example, you might type C:\REMOTE.
or
If you do not have a remote database, type a path to where you want to have
a remote database. When you click OK, you are prompted to create the
remote database.
4
Click OK.
Tips
•
GroupWise starts remotely if you have no network connection, if
GroupWise fails after several attempts to connect to the Master
Mailbox (for example, if the server that contains the post office is
currently out of service), or if you use the /ps-<PATH> startup
option.
Specifying the TCP/IP
Address of the Post
Office Agent
1
Start GroupWise.
2
In the Startup dialog box, click TCP/IP.
3
Type the TCP/IP address of the Post Office Agent.
If you do not know the TCP/IP address or port for the post office agent,
contact your system administrator.
4
Specify the Post Office Agent port.
Logging into GroupWise
Page time: 00:00:02
File time: 00:00:05
Date: 05-29-98 10:58am
User: RBALLARD
Queue: Q:PRNT
19
File: T:\TYPE\859\W\02\R_02LOGI.859
Page: 20 (5 of 5)
5
Plate: Composite
Spec: jama1
Galley: Final Galley
Click OK.
Tips
•
You can specify either the path to the network post office or the
TCP/IP address of the Post Office Agent.
Changing the Path to
the Network Post
Office
1
Start GroupWise.
2
In the Startup dialog box, click Path to Main Mailbox.
3
Type or browse to the path to the network post office. For example, you
might type X:\PO.
If you do not know the path to the network post office, contact your system
administrator.
4
Click OK.
Tips
•
You can specify either the path to the network post office or the
TCP/IP address of the post office agent.
•
You can also use the /ph- startup option to specify the path to the
post office.
20 Logging into GroupWise
Page time: 00:00:01
File time: 00:00:06
Date: 05-29-98 10:58am
User: RBALLARD
Queue: Q:PRNT
File: T:\TYPE\859\W\02\R_03ATTA.859
Page: 21 (1 of 20)
Plate: Composite
Spec: jama1
Galley: Final Galley
•
Page time: 00:00:00
File time: 00:00:01
•
•
Date: 05-29-98 11:27am
•
•
•
•
•
•
•
User: RBALLARD
•
•
•
•
•
•
Queue: Q:PRNT
•
•
•
•
•
•
•
•
Working with Items in Your Mailbox
Working with Items in
Your Mailbox
File: T:\TYPE\859\W\02\R_03ATTA.859
Page: 22 (2 of 20)
Plate: Composite
Spec: jama1
Galley: Final Galley
Sending and Receiving Items
Every day you communicate in a variety of ways. To accommodate these needs,
GroupWise® delivers your items using a variety of item types. Each item type is
explained below.
Mail
A mail message is for basic correspondence. You can use it for anything
resembling a memorandum or letter.
Phone Message
A phone message helps you inform someone of a phone call or visitor. You can
include such information as caller, phone number, company, urgency of the call,
and so forth.
Appointment
An appointment lets you invite people to and schedule resources for meetings or
events. You can schedule the date, time, and location for the meeting. You can
use posted appointments to schedule personal events such as a doctor’s
appointment, a reminder to make a phone call at a certain time, and so forth. See
Scheduling Appointments, Tasks, and Reminder Notes under Scheduling Group and
Posted Items.
Task
A task lets you place a to-do item on your own or on another person’s Tasks
List. You can schedule a due date for the task and include a priority (such as A1).
Uncompleted tasks are carried forward to the next day. See Scheduling
Appointments, Tasks, and Reminder Notes under Scheduling Group and Posted
Items.
Reminder Note
A reminder note is posted on a specific date on your own or another person’s
Calendar. You can use reminder notes to remind yourself or others of deadlines,
holidays, days off, and so forth. Posted reminder notes are useful as reminders for
birthdays, vacations, pay days, and so forth. See Scheduling Appointments, Tasks,
and Reminder Notes under Scheduling Group and Posted Items.
Sending Mail
Messages
A mail message is like an internal memorandum; it has a primary recipient,
subject line, date, and can be carbon copied and blind copied to other users. You
can also attach files, document references, sounds, movies, and OLE objects to
your mail messages.
CC (Carbon Copy)
Sends copies of an item to users who would benefit from the information, but
who are not directly responsible for the information or directions in it. All
recipients can see that a carbon copy was sent.
BC (Blind Copy)
Sends a copy of your item to a recipient without the knowledge of any of the
other recipients. Only the sender and the blind copy recipient know that a blind
22 Sending and Receiving Items
Page time: 00:00:01
File time: 00:00:02
Date: 05-29-98 11:27am
User: RBALLARD
Queue: Q:PRNT
File: T:\TYPE\859\W\02\R_TEST.859
Page: 23 (3 of 4)
Plate: Composite
Spec: jama1
Galley: Final Galley
copy was sent. When a recipient replies and chooses Reply to All, the blind copy
recipient will not receive the reply.
1
Click
on the toolbar.
2
In the To box, type a username
press Enter. Repeat for additional users.
To select usernames from a list, click Address
click OK.
3
Type a subject.
4
Type a message.
5
Click Send.
double-click each user
Tips
•
You can specify a different default mail view in Default Views
Options. See Setting Options for GroupWise under Customizing
GroupWise.
•
You can specify many options, such as making a message a high
priority, requesting a reply from the recipients, and more. See Setting
Options for GroupWise under Customizing GroupWise.
Sending Phone
Messages
A phone message is a note you can send to notify other GroupWise users of calls
they received while they were out of the office or unavailable. Phone messages are
stored in the recipient’s Mailbox.
Sending and Receiving Items
Page time: 00:00:02
File time: 00:00:06
Date: 06-18-98 2:11pm
User: RBALLARD
Queue: Q:PRNT859Wµ
23
File: T:\TYPE\859\W\02\R_03ATTA.859
Page: 24 (4 of 20)
Plate: Composite
Spec: jama1
Galley: Final Galley
Phone Message is simply a view, like a task or mail view. You cannot answer
your phone from a phone message. Use Conversation Place to manage your
telephone directly from the GroupWise desktop. See Using Conversation Place
under Using Your Phone with GroupWise.
You can change the phone messages you receive into tasks, reminder notes, or
other posted item views. This way, you can leave a record of the conversation on
the date it was held (reminder note) or create a to-do item to complete at a later
date (task). See Changing Item Types under Working with Items in Your mailbox.
1
Click File
New
Phone Message.
2
In the To box, type the user’s name
3
Type the name, company, and phone number of the caller.
4
Select the check boxes that apply to this phone message.
5
Type the message in the Message box.
6
Click Send.
press Enter.
Tips
•
You can place a New Phone Message button on the toolbar. See
Customizing Your Toolbar under Customizing GroupWise.
Spell-Checking Items
You Send
Use Spell Checker to check the text for misspelled words, duplicate words, and
certain capitalization errors. You can spell-check selected words or the entire
message. While spell-checking, you can choose from the following options:
24 Sending and Receiving Items
Page time: 00:00:02
File time: 00:00:06
Date: 05-29-98 11:27am
User: RBALLARD
Queue: Q:PRNT
File: T:\TYPE\859\W\02\R_03ATTA.859
Page: 25 (5 of 20)
Plate: Composite
Spec: jama1
Galley: Final Galley
Replace
Replaces a misspelled word with a word Spell Checker suggests. To replace a
misspelled word, double-click the word or click the word Replace. To make
your own corrections, edit the word in the Replace With box click Replace.
Skip Once
Skips the word one time. Spell Checker will stop the next time it encounters the
word.
Skip Always
Skips every occurrence of the word throughout the document. Spell Checker
ignores the word until the next time you spell-check.
Add
Adds the word to the current user dictionary, which stores supplemental words
so that Spell Checker can recognize the word in future spell-checks.
QuickCorrect
Defines an automatic replacement for a word or phrase. When Spell Checker
stops on a word, click QuickCorrect to replace the word with the text in the
Replace With box and add the replacement to the user word list QuickCorrect
uses. Next time you type the word, QuickCorrect automatically replaces it.
Suggest
Displays additional words or phrases in the Replacements list box.
Spell-Checking an Item
1
•
Click the Subject or Message box.
or
Select the text to spell-check.
Spell-Checking Items
Automatically
2
Click Tools
Spell Check.
3
Click Yes when spell-checking is complete.
You can spell-check items automatically every time you click Send.
1
Click Tools
Options
double-click Environment.
2
Click Check Spelling Before Send
OK.
Sending and Receiving Items
Page time: 00:00:02
File time: 00:00:08
Date: 05-29-98 11:27am
User: RBALLARD
Queue: Q:PRNT
25
File: T:\TYPE\859\W\02\R_03ATTA.859
Page: 26 (6 of 20)
Plate: Composite
Spec: jama1
Galley: Final Galley
Attaching Files
You can attach files and document references to mail messages, appointments,
reminder notes, tasks, and phone messages. You can use Attach to send one or
more files or document references to other users. For example, you may want to
send an expense report to another user. You can attach a file that exists on your
hard disk, diskette, or network drive. The recipients can open the attached file,
save it, view it, or print it. If you change the attached file after you have sent it,
the recipients will not see the changes.
If the file you want to attach is a document stored in GroupWise Library, you
can attach a document reference. When a recipient opens the attachment, the
document in the library will open if the recipient has rights to open or view the
document and if the library is available. If any recipients do not have sufficient
document rights, or if they are not using an e-mail product that supports
GroupWise Library, or if the library is unavailable, only a copy of the document
will open. If the recipient edits the copy, the changes will not affect the actual
document in the library. For more information about document rights, see
Sharing Documents under Creating and Working with Documents.
If you attempt to open or view an attached file that is password-protected, you
must type the file’s password. If you do not know the password, you cannot
open or view the attached file.
Attaching a File to an
Item
1
Click
on the toolbar.
2
Fill in the To, Subject, and Message boxes.
3
Click Attach.
4
Click the file you want to send
OK.
To attach several files, Ctrl+click other files before clicking OK.
26 Attaching Files
Page time: 00:00:01
File time: 00:00:09
Date: 05-29-98 11:27am
User: RBALLARD
Queue: Q:PRNT
File: T:\TYPE\859\W\02\R_03ATTA.859
Page: 27 (7 of 20)
5
Plate: Composite
Spec: jama1
Galley: Final Galley
Click Send.
Tips
•
The recipients will see a small paper clip icon
next to the
item in their Mailboxes, indicating that the item has an attachment.
•
Moving or deleting a file on a disk or network drive does not affect a
file you’ve attached to an item and sent.
Attaching a Document
Reference to an Item
Deleting an Attached
File from an Item
1
Click
on the toolbar.
2
Fill in the To, Subject, and Message boxes.
3
Click Attach
4
Click the library where the document is stored.
5
In the Document # box, type the document number. If you don’t know the
number of the document, click Find to locate the document in the library.
6
In the Version drop-down list, click which version (current, official, or
specific) you want to attach. If you select Specific Version, type the version
number in the Version # box.
7
Click OK
1
Right-click the attachment you want to delete
Document Reference.
Send.
click Delete.
Tips
•
If you delete an attached file, it is not erased from disk or network
drive; it is simply removed from the attachment list.
•
You can delete an attached file if you are the sender, but not if you
are the recipient.
Attaching Files
Page time: 00:00:02
File time: 00:00:11
Date: 05-29-98 11:27am
User: RBALLARD
Queue: Q:PRNT
27
File: T:\TYPE\859\W\02\R_03ATTA.859
Viewing Attached Files
Page: 28 (8 of 20)
Plate: Composite
Spec: jama1
Galley: Final Galley
If you just want to quickly scan an attachment, you can view it instead of
opening it. When you view an attachment, it is not opened in a separate
application. Instead, it is displayed in a viewer. This is usually faster than
opening the attachment; however, the attachment may not be formatted
properly.
1
Right-click the attachment
click View Attachment.
Tips
•
If you cannot see an icon representing the attachment in your view,
click File Attachments View.
•
If the item you’re reading contains several attachments, they appear
as icons at the top of the Attachment Window. You can view the
other attachments by clicking them.
Opening Attached Files
When you open an attached file, GroupWise determines the correct application
to open the file in. You can accept the suggested application, or you can type the
path and filename to another application. If you just want to scan the contents of
the attachment, you can view it rather than open it. See Viewing Attached Files.
1
Open the item containing the attachment.
2
Right-click the attachment
3
If you want to open the attachment in a different application, type the path
and executable filename.
click Open.
This step may not be necessary if the correct application is already listed.
4
Click OK.
Tips
•
If you cannot see an icon representing the attachment in your view,
click File Attachments Open.
Attaching Sound Files
to an Item
You can add voice or digitally recorded sound files to an item. For example, you
might dictate a letter and have the recipient listen to the dictation and type the
letter. However, to annotate an item with sound, you must have the appropriate
hardware and software drivers installed.
1
In an item view, drag
outside of the boxes.
from the status bar onto any area of the view
28 Attaching Files
Page time: 00:00:01
File time: 00:00:12
Date: 05-29-98 11:27am
User: RBALLARD
Queue: Q:PRNT
File: T:\TYPE\859\W\02\R_03ATTA.859
Page: 29 (9 of 20)
Plate: Composite
Spec: jama1
Galley: Final Galley
2
Click the circle to begin recording the sound.
3
Click the square to stop the recording.
4
Click File
Exit & Return to GroupWise.
Managing Sent Items
You can display items in your Mailbox that you have previously sent. A few
reasons you may want to display items you’ve sent are listed below:
Read
You can read a message you sent to make sure you included correct information
or to remind yourself of what you wrote.
Resend
You can resend an item a second time, perhaps with corrections or to other users
who didn’t originally receive the item.
Track the Status (Properties)
You can see who received the item, who opened it, who deleted it, and more.
Retract
If you realize you made a mistake, and you already sent the item, you may be
able to retract it before the recipients read it.
Displaying Items
You’ve Sent
1
If your toolbar is not already displayed, click View
Toolbar.
2
Click Sent Items on the display settings drop-down list.
Tips
•
To display both received and sent items, click All Items on the
display settings drop-down list.
Confirming Delivery of
Items You’ve Sent
GroupWise provides several ways for you to confirm that your item was
delivered.
Track an Item You Sent
You can check the status in the Properties window of any item you’ve sent.
Right-click the item click Properties. The Properties window shows you when
the item was delivered and opened, in addition to other information.
Receive Notification When the Item is Opened or Deleted
You can receive notification when the recipient opens or deletes a message,
declines an appointment, or completes a task. While composing a message, click
File Properties the Status Tracking tab the When Opened or When
Managing Sent Items
Page time: 00:00:01
File time: 00:00:13
Date: 05-29-98 11:27am
User: RBALLARD
Queue: Q:PRNT
29
File: T:\TYPE\859\W\02\R_03ATTA.859
Page: 30 (10 of 20)
Plate: Composite
Spec: jama1
Deleted Return Notification pop-up list
notification.
Galley: Final Galley
select how you want to receive
Request a Reply
You can inform the recipient of an item that you need a reply. GroupWise adds
a sentence to the item stating that a reply is requested and changes the icon in
the recipient’s Mailbox to a double arrow. While composing an item, click File
Properties Reply Requested select how soon you want the reply in the
Reply Requested box.
Resending Items
Use Resend to send an item a second time, perhaps with corrections. Resend lets
you send an item without re-typing all the information.
When you resend an item, you can retract the original item. Mail and phone
messages cannot be retracted if they’ve already been opened. Appointments,
reminder notes, and tasks can be retracted at any time.
1
Click Sent Items on the display settings drop-down list on the toolbar.
2
Right-click the item you wish to resend
3
Make any changes to the item, if necessary
4
Click Yes to retract the original item.
click Resend.
click Send.
or
Click No to leave the original item.
Tips
•
You can check the Properties of the original item to see if
GroupWise was able to retract it. If Properties does not list
Retracted, the item has already been opened.
Retracting Items
You’ve Sent
Use Delete to retract an item you sent. For example, if you realize you made a
mistake after you sent an item, you may want to delete it before the recipients
read the item.
1
To display sent items in your Mailbox, click Sent Items on the display
settings drop-down list on the toolbar.
2
Click the item in your Mailbox that you want to retract.
3
Click Edit
4
Click the appropriate option.
Delete.
30 Managing Sent Items
Page time: 00:00:02
File time: 00:00:15
Date: 05-29-98 11:27am
User: RBALLARD
Queue: Q:PRNT
File: T:\TYPE\859\W\02\R_03ATTA.859
Page: 31 (11 of 20)
5
Plate: Composite
Spec: jama1
Galley: Final Galley
Click OK.
Tips
•
You can retract a mail or phone message from those recipients who
haven’t yet opened the item. You can retract an appointment,
reminder note, or task even if it has been opened. Internet messages
cannot be retracted.
•
To see which recipients have opened your message, right-click the
item in the Mailbox click Properties.
Checking the Status of
Your Items
Properties lets you check the status of any item you’ve sent. For example, you
can see when an item was delivered and when the recipient opened or deleted the
item. If a recipient accepted or declined an appointment and included a
comment, you’ll see the comment in the Properties window. You’ll also see if a
recipient marked a task Completed.
Properties also shows information about items you receive. You can see who else
received the item (except for blind copy recipients), the size and creation date of
attached files, and more. For information about a document, use the Activity
Log in Properties. See Viewing the History of a Document under Creating and
Working with Documents.
1
Click or open the item for which you want to check the status.
2
Click File
Properties.
Tips
•
You can also right-click an item in your Mailbox, then click
Properties to see the status information.
•
The icons next to an item can give you helpful status information
too. See A Brief Tour of GroupWise under Getting Started.
Managing Sent Items
Page time: 00:00:01
File time: 00:00:16
Date: 05-29-98 11:27am
User: RBALLARD
Queue: Q:PRNT
31
File: T:\TYPE\859\W\02\R_03ATTA.859
Page: 32 (12 of 20)
Plate: Composite
Spec: jama1
Galley: Final Galley
Managing Received Items
GroupWise stores all the items, mail messages, appointments, and so on, you
receive in your Mailbox.
Click Received Items on the
display settings drop-down list.
From your Mailbox, you can read items, reply to items, and forward items
you’ve received. In addition, you can delegate tasks and appointments to other
users. You can even change an item, such as a mail message, to another type of
item, such as an appointment.
Reading Items You
Receive
You can read incoming items in your Mailbox or Calendar. Your Mailbox
displays a list of all of the items you have received from other users. Posted
appointments, reminder notes, and tasks appear in your Calendar, not in your
Mailbox.
You can open and read all types of new items in your Mailbox. However, you
may want to read appointments, tasks, and reminder notes in your Calendar so
you can view new messages while looking at your schedule. Phone and mail
messages stay in your Mailbox until you delete them. Appointments, reminder
notes, and tasks stay in your Mailbox until you accept, decline, or delete them.
When you accept an appointment, reminder note, or task, it no longer appears
in your Mailbox; it appears only in your Calendar.
All Mailbox items are marked with an icon. The following table includes each
icon that displays in your Mailbox. The icons change depending on whether or
not the item has been opened.
Item Type
Unopened
Opened
Mail Message
Phone Message
32 Managing Received Items
Page time: 00:00:02
File time: 00:00:18
Date: 05-29-98 11:27am
User: RBALLARD
Queue: Q:PRNT
File: T:\TYPE\859\W\02\R_03ATTA.859
Page: 33 (13 of 20)
Plate: Composite
Item Type
Unopened
Spec: jama1
Galley: Final Galley
Opened
Task
Appointment
Reminder Note
In addition, all unopened items in your Mailbox are bolded to help you easily
identify which items and documents you have not yet read. This is especially
useful for collapsed discussion threads because it saves you the time of expanding
each thread to check if there are newly posted items.
Reading Items in Your Mailbox
1
Double-click the item you want to read.
Tips
•
If your Mailbox is not displayed, click
in your Folder List.
Reading Items in the QuickViewer
Use the QuickViewer to scan the contents of your items. The QuickViewer saves
time because you don’t need to open each item; you simply click an item or
press the Down-arrow to read your items. If you click a document reference, the
document will display in the QuickViewer. You can display an item’s
attachment by clicking the attachment in the drop-down list on the
QuickViewer toolbar. OLE attachments do not display in the QuickViewer.
When you read an item in the QuickViewer, the icon changes to the opened
status. For example, the closed envelope representing a mail message changes to
an opened envelope.
Managing Received Items
Page time: 00:00:01
File time: 00:00:19
Date: 05-29-98 11:27am
User: RBALLARD
Queue: Q:PRNT
33
File: T:\TYPE\859\W\02\R_03ATTA.859
Page: 34 (14 of 20)
Plate: Composite
Spec: jama1
Galley: Final Galley
1
Click
on the toolbar.
2
Size the QuickViewer by dragging a corner of the window or by dragging the
horizontal dividing line up or down.
If you size and close the QuickViewer, it will be the same size when you
open it again. Size it by dragging a corner of the window, not by clicking the
maximize button.
3
In the Mailbox, click each item that you want to read.
Tips
•
To close the QuickViewer, repeat Step 1 above.
•
Right-click in the QuickViewer window to choose other options
such as Print.
•
Open the QuickViewer and maximize GroupWise to increase the
size of an item.
Marking an Item Unread
If you open an item to read it, but decide you want to read the item later, you
can mark the item unread. Marking the item unread changes the item to bold
and changes the item’s icon to unopened so you will know you still need to read
the item.
1
In the Main Window, click the item in the Item List.
34 Managing Received Items
Page time: 00:00:02
File time: 00:00:21
Date: 05-29-98 11:27am
User: RBALLARD
Queue: Q:PRNT
File: T:\TYPE\859\W\02\R_03ATTA.859
Page: 35 (15 of 20)
2
Click Actions
Plate: Composite
Spec: jama1
Galley: Final Galley
Read Later.
Tips
•
Marking an item you have opened unread does not change the status
of the item in Properties. For example, if you have opened an item,
then marked the item unread, the sender of the item still sees the
item status as opened in the Properties window.
Replying to Items You
Receive
Use Reply to respond to an item. You can reply to everyone who received the
original item or to the sender only, without having to create and address a new
message. You can also include a copy of the original message in your reply. Your
reply will include Re: preceding the original subject text. You can modify the
subject text if you want.
Replying to an Item
1
Open or click the item you want to reply to.
2
Click Actions
3
Click Reply to Sender.
Reply.
or
Click Reply to All (Sender and Recipients).
4
Click OK.
5
Type your message
click Send.
Tips
•
If you reply to all recipients of an item and the original message
included BC or CC recipients, your reply will include the CC
recipients, but not the BC recipients.
Managing Received Items
Page time: 00:00:01
File time: 00:00:22
Date: 05-29-98 11:27am
User: RBALLARD
Queue: Q:PRNT
35
File: T:\TYPE\859\W\02\R_03ATTA.859
Page: 36 (16 of 20)
Plate: Composite
Spec: jama1
Galley: Final Galley
Including the Message Text in a Reply
1
Open the item you want to reply to.
2
Click Reply.
3
Click Include Message Received from Sender
4
Type your message
OK.
click Send.
Tips
•
Sometimes you may like to mix your comments with the included
text to maintain a conversational flow. In this case, you may want to
bold, underline, or italicize your text to differentiate it from the
original text. Select your text click Edit Font an option.
Replying to an Item in a Shared Folder
When you reply to an item in a shared folder, you have two additional reply
options. If you are reading someone else’s reply, you can choose to reply to the
original discussion topic, rather than to the item you are reading. Or, you can
reply to any item you are reading, whether it’s an original discussion topic or
someone else’s reply. In either case, these replies are posted in the shared folder
rather than sent to individuals.
1
Open or select an item in the shared folder.
2
Click Actions
3
Click a reply option
Reply.
OK.
For a description of each reply option, click
4
Type your reply
the option.
OK.
Tips
•
Unless you choose a Reply Privately option, your reply is posted in
the shared folder rather than sent to individuals.
36 Managing Received Items
Page time: 00:00:02
File time: 00:00:24
Date: 05-29-98 11:27am
User: RBALLARD
Queue: Q:PRNT
File: T:\TYPE\859\W\02\R_03ATTA.859
Forwarding Items to
Other Users
Page: 37 (17 of 20)
Plate: Composite
Spec: jama1
Galley: Final Galley
When you receive a message, appointment, or task, you can forward it to other
users. You can also forward a document reference. For example, if you are no
longer the chairperson of a committee but you are still receiving mail messages
related to the committee’s business, you can forward the items you receive to the
new chairperson.
When you forward an item, it is sent as an attachment to a mail message. The
mail message includes your name and any additional comments you have made.
If you receive an appointment, reminder note, or task that you want to assign to
another user, use Delegate. When you delegate an item, the sender of the item
receives notification that responsibility for the item has been assigned to another
user.
1
Click the item you want to forward in your Mailbox.
2
Click Actions
3
Type a username in the To box
Forward.
press Enter.
Click Address if you want to search for a username in the Address Book.
Double-click the username click OK.
4
Click in the Message box, then type a message (optional).
5
Click Send.
Tips
•
If you can’t accept an appointment, task, or reminder note, you can
delegate the item instead of forwarding it. Delegating places a
delegated status in the sender’s Properties window, letting the sender
know you have transferred responsibility for the item to another
person.
Changing Item Types
You can use Change To to convert an item in your Mailbox to another type of
item. For example you can change a mail message in your Mailbox to an
appointment in your Calendar. The new appointment contains all the
information from the mail message (such as To, CC, and BC lists, subject, and
message text) that is applicable in the appointment. By default, all new items
created using Change To are posted items; however, you can change a posted
item to a group item in the Change To dialog box.
When you change a mail or phone message to another type of item (such as an
appointment or task), the original item is removed from your Mailbox and the
new item is added in the appropriate location, such as the Calendar.
Managing Received Items
Page time: 00:00:01
File time: 00:00:25
Date: 05-29-98 11:27am
User: RBALLARD
Queue: Q:PRNT
37
File: T:\TYPE\859\W\02\R_03ATTA.859
Page: 38 (18 of 20)
Plate: Composite
Spec: jama1
Galley: Final Galley
When you change an item, GroupWise displays the default item view selected in
Environment Options.
Changing an Item in Your Mailbox to Another Type of Item
1
In your Mailbox, click the item you want to change.
2
Click Edit
3
Click an item type.
4
Type the necessary information.
5
Click Post.
Change To.
Tips
•
You can right-click the item click Change To to change the
selected item from a posted item to a group item or vice versa.
Changing an Item in Your Calendar to Another Type of Item
1
Click Window
Calendar to open your Calendar.
2
Click the item you want to change in the Appointments, Tasks, or Reminder
Notes List.
3
Drag the item to the list that corresponds to the type of item you want to
change it to.
For example, drag a task to the Appointments List to change it to an
appointment.
38 Managing Received Items
Page time: 00:00:02
File time: 00:00:27
Date: 05-29-98 11:27am
User: RBALLARD
Queue: Q:PRNT
File: T:\TYPE\859\W\02\R_03ATTA.859
Page: 39 (19 of 20)
4
Plate: Composite
Spec: jama1
Galley: Final Galley
Specify any additional information in the item view
click Post.
Tips
•
You can also press Ctrl while you drag the item to copy it.
Changing a Posted Item to a Group Item
Delegating Items
1
In your Calendar, click a posted item.
2
Click Edit
3
Click Group
4
Type any additional information
Change To
More.
OK.
click Send.
Use Delegate if you receive appointments, tasks, and so forth that you can’t
accept. For example, you may receive an appointment for a meeting about
something you no longer have responsibility for. Instead of declining the
appointment, you can delegate it. You can delegate appointments, tasks, or
reminder notes. The sender can find out who you delegated the item to in the
item’s Properties window.
1
In the Main Window or your Calendar, click a task, reminder note, or
appointment.
2
Click Actions
3
Type a username press Enter click Address if you want to search for a
username in the Address Book double-click the username click OK.
4
Type any additional comments to the recipient.
5
Click Send.
6
Click Yes if you want this item to remain in your Calendar.
Delegate.
or
Click No if you want this item deleted from your Calendar.
Managing Received Items
Page time: 00:00:01
File time: 00:00:28
Date: 05-29-98 11:27am
User: RBALLARD
Queue: Q:PRNT
39
File: T:\TYPE\859\W\02\R_03ATTA.859
Receiving Items That
Are Written in HTML
Page: 40 (20 of 20)
Plate: Composite
Spec: jama1
Galley: Final Galley
If you open an item that has been composed in HTML, you are opening a live
browser. While you cannot perform an independent web search, you can click on
any links that are included in the message and jump to the linked web sites.
Moving within an HTML Message
1
To move back to the previously displayed page, click HTML
Back.
or
To move forward to the next previously displayed page, click HTML
Forward.
or
To move to the first page of the message, click HTML
Message Home.
Opening Your Browser from an HTML Message
1
Click HTML
Browse This Page.
Tips
•
If you are viewing a message or attachment that is a page on the
Web, your default browser will open to the same page that you are
currently viewing in GroupWise. Once you have opened the page in
your browser, you can bookmark it or add it to your list of favorite
web sites. If the page is not on the Web, this option is not available.
Running a Script
An HTML message may contain a script, such as one composed in JavaScript or
VBScript. You will be prompted before the script is run to see if you really want
it to be run. You should never run a script from someone you don’t know or
don’t trust. A malicious script could damage your messages or impersonate you
and send messages in your name.
Each time you run a script, you can add the username to a Trusted List of
known users. If you receive a script from a user who is on the Trusted List, you
will not be prompted before the script is run.
To view who you have selected to run scripts from,
1
In an HTML message, click HTML
Security.
Turning Off HTML Support in an HTML Message
1
Click HTML
View as Text Message.
40 Managing Received Items
Page time: 00:00:01
File time: 00:00:29
Date: 05-29-98 11:27am
User: RBALLARD
Queue: Q:PRNT
File: T:\TYPE\859\W\02\R_05SCHE.859
Page: 41 (1 of 21)
Plate: Composite
Spec: jama1
Galley: Final Galley
•
Page time: 00:00:01
File time: 00:00:01
•
•
Date: 05-12-98 8:48am
•
•
•
•
•
•
User: RBALLARD
•
•
•
•
•
•
Queue: Q:PRNT
•
•
•
•
•
•
•
•
•
Scheduling Group and Posted Items
Scheduling Group and
Posted Items
File: T:\TYPE\859\W\02\R_05SCHE.859
Page: 42 (2 of 21)
Plate: Composite
Spec: jama1
Galley: Final Galley
Scheduling Appointments, Tasks, and Reminder Notes
Scheduling appointments, tasks, and reminder notes with GroupWise® is
convenient. You can use Busy Search to check for a time when all the people and
resources you want for a meeting are available. You can use Auto-Date to
schedule recurring appointments, tasks, or reminder notes quickly and easily. See
Scheduling Recurring Appointments under Scheduling Group and Posted Items for
Auto-Date information. You can also reserve a block of time with a posted
appointment. If you want to find out whether someone accepted a task or is
coming to your meeting, you can check for an accepted or declined status.
Scheduling an
Appointment
1
Click
on the toolbar.
2
In the To, CC, and BC boxes, type the names of the people to invite. In
addition, include any resource IDs in the To box. If you do not know a
resource ID, click Address
double-click the resource
click OK.
3
Type the place description in the Place box.
4
Specify the start date, start time, and duration.
5
Type a subject and message.
6
Click Send.
Tips
•
If you select a location resource in the Address Book, its description
is displayed in the Place box and its ID in the To box.
•
If you want to make sure the people and resources for the meeting
are available, you can do a Busy Search. See Checking When Everyone
Is Available later in this section.
42 Scheduling Appointments, Tasks, and Reminder Notes
Page time: 00:00:01
File time: 00:00:02
Date: 05-12-98 8:48am
User: RBALLARD
Queue: Q:PRNT
File: T:\TYPE\859\W\02\R_05SCHE.859
Rescheduling an
Appointment
Page: 43 (3 of 21)
Plate: Composite
Spec: jama1
Galley: Final Galley
1
Click Sent Items on the display settings drop-down list if your Mailbox is
not displaying outgoing items.
2
Click the appointment to reschedule.
3
Click Actions
4
Make your changes
5
Click Yes to retract the original item.
Resend.
click Send.
Tips
•
You can reschedule an appointment if you scheduled the original
appointment or if you have the necessary Proxy rights to the
scheduler’s Mailbox.
•
To reschedule an appointment for a new time on the same day, open
your Calendar and drag the appointment to the new time.
•
If the original appointment was an auto-date appointment, after you
click Actions
Resend you are prompted to click This Instance or
All Instances. Click This Instance to reschedule only the
appointment you selected, or click All Instances to reschedule all the
appointments included in the auto-date.
Canceling an
Appointment
1
Click Sent Items on the display settings drop-down list if your Mailbox is
not displaying outgoing items.
2
Click the appointment you want to cancel.
3
Click Edit
4
Click All Mailboxes
Delete.
OK.
Tips
•
You can cancel an appointment if you scheduled it or if you have the
necessary Proxy rights to the scheduler’s Mailbox.
•
If the original appointment was an auto-date appointment, after you
click Actions
Resend you are prompted to click This Instance or
All Instances. Click This Instance to reschedule only the
appointment you selected, or click All Instances to reschedule all the
appointments included in the auto-date.
•
For help on a dialog box option, click
the option.
Scheduling Appointments, Tasks, and Reminder Notes
Page time: 00:00:01
File time: 00:00:04
Date: 05-12-98 8:48am
User: RBALLARD
Queue: Q:PRNT
43
File: T:\TYPE\859\W\02\R_05SCHE.859
Scheduling a Posted
Appointment
Page: 44 (4 of 21)
Plate: Composite
Spec: jama1
Galley: Final Galley
1
On the toolbar, click the arrow on the right of
Appointment.
click Posted
2
Type a subject, a place (optional), and a message (optional).
3
Specify the start date, start time, and duration.
4
Click Post.
Tips
•
If you are working toward a deadline, are on vacation, or are
otherwise not available for meetings, schedule a posted appointment
for those times. When another user includes you in an appointment
and does a Busy Search, the user can see you are not available at
those times.
•
You can specify a Show Appointment As type for your appointment
that will display availability information in Busy Search and in your
Calendar. Right-click the appointment
click Show Appointment
As
Free, Tentative, Busy, or Out of Office. Free means the
appointment will appear on your Calendar, but will not be marked
as Busy in Busy Search.
•
A posted appointment view has no To, CC, or BC boxes. The
posted appointment is automatically placed in your Calendar.
•
Duration can be in minutes, hours, or days. If you are going on a
two-week vacation, you can schedule one posted appointment with a
duration of 14 days to cover the entire period.
•
For both group and posted appointments, being scheduled for a
certain period does not prevent you from being scheduled for
another appointment at the same time; it simply creates a scheduling
conflict. Users who do a busy search will want to avoid doublebooking you, but they can if they choose to.
44 Scheduling Appointments, Tasks, and Reminder Notes
Page time: 00:00:02
File time: 00:00:06
Date: 05-12-98 8:48am
User: RBALLARD
Queue: Q:PRNT
File: T:\TYPE\859\W\02\R_05SCHE.859
Scheduling a Posted
Appointment from the
Calendar
Page: 45 (5 of 21)
Plate: Composite
Spec: jama1
Galley: Final Galley
1
Click Window
Calendar.
2
Click the date you want
3
Type a subject, a place (optional), and a message (optional).
4
Specify the duration
double-click the time in the Appointments List.
click Post.
Tips
•
A posted appointment view has no To, CC, or BC boxes. The
appointment is automatically placed in your Calendar.
Checking When
Everyone Is Available
Use Busy Search to find a time when all the people and resources you want to
schedule for a meeting are available. You can use Busy Search in GroupWise
Remote.
1
In an appointment you are creating, specify usernames and resource IDs in
the To box. If you don’t know the usernames or resource IDs, click Address.
2
Specify the first possible day for the meeting in the Start Date box.
3
Specify the meeting’s duration.
Scheduling Appointments, Tasks, and Reminder Notes
Page time: 00:00:02
File time: 00:00:08
Date: 05-12-98 8:48am
User: RBALLARD
Queue: Q:PRNT
45
File: T:\TYPE\859\W\02\R_05SCHE.859
Page: 46 (6 of 21)
4
Plate: Composite
Spec: jama1
Galley: Final Galley
Click Busy.
An empty space across from the username or resource on the Individual
Schedules tab means that user or resource is available (Free) for that time. An
empty space across from a time on the Available Times tab means that no users
are scheduled for that time.
5
Click Auto-Select to select the first available meeting time or click AutoSelect until the time you want is displayed click OK to transfer the users,
resources, and selected time and duration back to the appointment you were
scheduling.
or
Click the Available Times tab to see possible meeting times click a time to
select it click OK to transfer the users, resources, and selected time and
duration back to the appointment you were scheduling.
46 Scheduling Appointments, Tasks, and Reminder Notes
Page time: 00:00:01
File time: 00:00:09
Date: 05-12-98 8:48am
User: RBALLARD
Queue: Q:PRNT
File: T:\TYPE\859\W\02\R_05SCHE.859
Page: 47 (7 of 21)
6
Plate: Composite
Spec: jama1
Galley: Final Galley
Complete and send the appointment.
Tips
•
If
appears to the left of the username or resource, you can click a
scheduled time across from the username or resource on the
Individual Schedules tab to display more information about the
appointment in the box below. However, the user or resource owner
must give you appointment Read rights in the Access List first.
•
To remove a user or resource from the Invite to Meeting list after the
search, click the Available Times tab click the username or
resource to remove press Delete click Yes. This is useful if you
include several conference rooms in the search to find one that is
available and then eliminate those you do not want.
•
To exclude a username or resource from the search without
removing it from the To box, click the Available Times tab
deselect the check box next to the user or resource to exclude.
Excluding a person or resource from the search is useful if a user (like
a CC recipient) should be invited to a meeting but does not
necessarily need to attend. To include a user or resource name that
has been excluded, select the check box next to the user or resource.
•
If you click a scheduled time on the Available Times tab, a crosshatched box is displayed next to the users in the Invite to Meeting
list who are already scheduled for that time.
•
If you want to do a busy search before opening an appointment,
click Tools Busy Search. Specify information in the Busy Search
dialog box
click OK to perform a busy search. When you find a
time you want for a meeting, click Request Meeting to transfer the
information to a new appointment view, then complete the
appointment.
•
You can change the search range for one appointment by scheduling
the appointment with Tools
Busy Search and changing the
number in the Number of Days to Search box. You can change the
search range, time, and days default for all appointments on the
Busy Search tab in Date Time Options.
•
Free, Tentative, Busy and Out of Office are Show Appointment As
types or levels of availability that affect the way an appointment is
displayed in Busy Search and in users’ Calendars. If an appointment
is marked Free, it appears on the user’s Calendar, but is not marked
as Busy in Busy Search.
•
Sending Tasks
For help on a dialog box option, click
the option.
A task is an item to be completed by a specified date and time which you can
assign to yourself, another GroupWise user, or a group of users.
Scheduling Appointments, Tasks, and Reminder Notes
Page time: 00:00:02
File time: 00:00:11
Date: 05-12-98 8:48am
User: RBALLARD
Queue: Q:PRNT
47
File: T:\TYPE\859\W\02\R_05SCHE.859
Page: 48 (8 of 21)
Plate: Composite
Spec: jama1
Galley: Final Galley
For example, if you have assigned someone to write a report that is due next
week, you can assign the report to that user as a task. The user can accept or
decline the task, but until it is declined or completed, the task appears on the
user’s Tasks List each day.
Once it is accepted, a task appears on the Calendar on its start date. When the
due date is past, the task displays in red on the Calendar. When you mark a task
Completed, it no longer carries over to the next day on your Calendar.
Once you finish a task, you can mark it Completed. As the originator of an
assigned task, you can have GroupWise send you notification when the task is
marked Completed. (You must have Notify installed to receive notification). A
Completed status, including the date and time the task was marked Completed,
is placed in the Properties window.
Assigning a Task to Another User
When you assign a task to another user, a copy of the task appears in your
Mailbox. You can assign an optional priority level to a task. There are two levels
of priority: alphabetical and numeric. For example, tasks may have priorities such
as A, A1, A2, B, B1, 1, 2, and so forth.
In addition to the priority level, you can assign a send priority (high, standard, or
low) in Send Options. The send priority determines how the task displays in the
recipient’s Mailbox. For example, if you assign a task a send priority of high, the
task icon is red in the recipient’s Mailbox.
1
Click
on the toolbar.
2
Type the name of the person you want to assign the task to.
3
Type the date you want the task to begin.
4
Type the date you want the task to be completed.
5
Type the subject.
48 Scheduling Appointments, Tasks, and Reminder Notes
Page time: 00:00:01
File time: 00:00:12
Date: 05-12-98 8:48am
User: RBALLARD
Queue: Q:PRNT
File: T:\TYPE\859\W\02\R_05SCHE.859
Page: 49 (9 of 21)
Plate: Composite
Spec: jama1
6
Type a priority for the task.
7
Type a description of the task.
8
Click Send.
Galley: Final Galley
Assigning a Task to Yourself
1
Click the arrow on the right of
2
Type a subject.
3
Type a priority for the task.
4
Type a starting date.
5
Type a due date.
6
Type a message.
7
Click OK.
on the toolbar
click Posted Task.
Tips
•
You can also specify starting dates and due dates using the Set Date
buttons to the right of the Start Date and Due On boxes.
•
Posted tasks are placed in your Calendar. They are not placed in
your Mailbox, or in any other user’s Mailbox.
Marking Tasks Completed
When you finish a task, you can mark it Completed. Tasks you mark Completed
are not carried over to the next day on your Calendar. Completed tasks are
distinguished by a check mark in your Calendar. Overdue tasks display in red.
Scheduling Appointments, Tasks, and Reminder Notes
Page time: 00:00:02
File time: 00:00:14
Date: 05-12-98 8:48am
User: RBALLARD
Queue: Q:PRNT
49
File: T:\TYPE\859\W\02\R_05SCHE.859
Page: 50 (10 of 21)
Plate: Composite
Spec: jama1
Galley: Final Galley
If you mark a task Completed, then realize you left some part of it incomplete,
you can unmark it. Unmarked tasks display on the current day in your Calendar.
When you mark a task Completed, GroupWise sends notification to the
originator of the task if he or she selected return notification in Send Options. A
Completed status, including the date and time the task was marked Completed,
is placed in the originator’s Properties window.
Marking a Task Completed
•
1
Click Window
Calendar.
2
Select the check box next to the task.
To unmark a task that has been marked Completed, deselect the marked
check box next to the task.
Checking the Completion Status of a Task
Sending Reminder
Notes
•
1
Click Sent Items on the display settings drop-down list.
2
Click the task you want to check the status of.
3
Click File
Properties.
A reminder note is an item that you post on a specific date on your own or
another person’s Calendar. You can use reminder notes to remind yourself or
others of deadlines, holidays, days off, and so forth. Posted reminder notes are
useful as reminders for birthdays, vacations, pay days, and so forth.
Writing a Posted Reminder Note
1
From your Calendar, open a view with a Reminder Notes List (for example,
the Day view).
50 Scheduling Appointments, Tasks, and Reminder Notes
Page time: 00:00:02
File time: 00:00:16
Date: 05-12-98 8:48am
User: RBALLARD
Queue: Q:PRNT
File: T:\TYPE\859\W\02\R_05SCHE.859
Page: 51 (11 of 21)
Plate: Composite
Spec: jama1
Galley: Final Galley
2
Click the date you want the reminder note to appear
empty space in the Reminder Notes List.
3
Type in a subject and message.
4
Click Post.
double-click an
Tips
•
To access the information later, open your Calendar and select the
date the information appears on. Double-click the reminder note in
the Reminder Notes List.
Sending a Reminder Note to Other Users
Accepting or Declining
Scheduled Items
1
Click File
New
Reminder Note.
2
Fill in the To, CC, and BC boxes. If you don’t know a username, click
Address.
3
In the Start Date box, type the date this reminder note should appear in the
recipients’ Calendars.
4
Type a subject (optional) and the reminder note message.
5
Click Send.
When you receive an appointment, task, or reminder note, you may or may not
be able to accept. In GroupWise, you can let the sender know if you accept or
decline, specify a level of acceptance or availability, and add additional
comments. You can also delegate the item to another user. The sender can find
your response by checking the item status.
Scheduling Appointments, Tasks, and Reminder Notes
Page time: 00:00:01
File time: 00:00:17
Date: 05-12-98 8:48am
User: RBALLARD
Queue: Q:PRNT
51
File: T:\TYPE\859\W\02\R_05SCHE.859
Page: 52 (12 of 21)
Plate: Composite
Spec: jama1
Galley: Final Galley
1
Double-click the item in the Mailbox to open it.
2
Click Accept or Decline.
3
If you accepted, select a Show As level of availability.
4
Type a comment (optional)
5
If the item is an Auto-Date item, you are prompted after you accept or
decline. Click This Instance to accept or decline this one Auto-Date item.
Click All Instances to accept or decline all instances of the Auto-Date item.
click OK.
Tips
•
As the owner of a resource, you can accept or decline requests for the
resource. The owner of a resource can also use Rules to automatically
reply to resource requests. See Creating Rules under Managing Your
Mailbox.
Specifying a Time Zone
for an Appointment
The Time Zone feature lets you schedule a meeting for recipients in different
time zones who will be meeting in a single location.
Normally, GroupWise automatically adjusts meeting times based on the
recipients’ time zones. For example, a meeting scheduled by a user in Utah for
10:00 would be displayed as 9:00 for a recipient in California and as 12:00 for a
user in New York because these users are in different time zones. Because
GroupWise adjusts the time, all the users scheduled for a conference call would
call in at the same moment, even though their local time may differ.
Use the Time Zone feature if you don’t want GroupWise to adjust to the
recipients’ local time zone. For example, if you are in the Saskatchewan time
zone and include users from the Mountain Time (US & Canada) time zone in
your appointment, you would use the Time Zone feature if these users are flying
to Saskatchewan for the appointment. Time Zone ensures that the appointment
in their Calendars and Mailboxes shows the correct Saskatchewan time.
1
Click
on the toolbar.
52 Scheduling Appointments, Tasks, and Reminder Notes
Page time: 00:00:02
File time: 00:00:19
Date: 05-12-98 8:48am
User: RBALLARD
Queue: Q:PRNT
File: T:\TYPE\859\W\02\R_05SCHE.859
Page: 53 (13 of 21)
Plate: Composite
Spec: jama1
Galley: Final Galley
2
Fill in the To, CC, and BC boxes with the names of users or resources to be
included in the appointment.
3
Specify the place, subject, and message in the appropriate boxes.
4
Click Actions Select Time Zone click the Time Zone drop-down list
and select the time zone for the appointment location click OK.
5
Specify the start date, start time, and duration of the appointment.
6
Click Send.
Tips
•
When the users you have scheduled with the Time Zone feature
receive the appointment, they will see a time annotation after the
subject when they see the appointment in their Mailboxes. For
example, if the subject of the meeting is “Marketing Conference”
and the time zone is Saskatchewan, users would see a subject and
time annotation similar to the following: Marketing Conference
(Saskatchewan). In the users’ Calendars, the place is annotated with
the time zone, rather than the subject.
Scheduling Appointments, Tasks, and Reminder Notes
Page time: 00:00:01
File time: 00:00:20
Date: 05-12-98 8:48am
User: RBALLARD
Queue: Q:PRNT
53
File: T:\TYPE\859\W\02\R_05SCHE.859
Page: 54 (14 of 21)
Plate: Composite
Spec: jama1
Galley: Final Galley
Scheduling Recurring Appointments
Use Auto-Date to schedule recurring appointments, tasks, and reminder notes.
For example, if you were responsible for scheduling a department meeting every
other week, you could create one auto-date appointment that would schedule the
meeting for the entire year. You could also reserve a room and projector with the
same appointment.
Auto-Dates can occur on the same day every week (for example, every Monday),
the same day(s) of the month (for example, the 15th and last day), or any other
defined series of dates. You can also use Auto-Date to schedule irregular or
infrequent events, such as holidays.
When you send an auto-date item, GroupWise copies the item and places one of
the defined dates in each copy of the item. For example, if you define five dates
for the event, GroupWise makes five copies of the item and schedules one copy
for each date. If you were to send the item to other users, you would have five
outgoing items with a five-occurrence auto-date. If you were to receive the event,
you would find five copies of the incoming item in your Mailbox, each
scheduled for a different date.
You can create an auto-date three ways. Example lets you schedule events on the
same day every week, the same day each month, or periodically. Dates lets you
select specific days from a year calendar. Formula lets you enter the scheduling
information in text format.
Scheduling Auto-Dates
by Dates
1
In an item you are scheduling, click Actions
2
Click the days to schedule
Auto-Date.
click OK.
Tips
•
Use the Dates tab to schedule an item on specific dates on a year
calendar. The Dates tab is useful when you are scheduling events
that don’t occur regularly, like holidays.
•
To move to a different year, click the year button type the new
year click OK.
•
To clear the Auto-Date dialog box, click Reset.
Scheduling Auto-Dates
by Example
1
In an appointment, task, or reminder note you are scheduling, click Actions
Auto-Date.
2
Click the Example tab.
54 Scheduling Recurring Appointments
Page time: 00:00:01
File time: 00:00:21
Date: 05-12-98 8:48am
User: RBALLARD
Queue: Q:PRNT
File: T:\TYPE\859\W\02\R_05SCHE.859
Page: 55 (15 of 21)
3
Plate: Composite
Spec: jama1
Galley: Final Galley
In the Range group box, specify the starting date and ending date.
or
To specify a certain number of occurrences rather than a range, specify the
starting date click the End drop-down list Occurrences specify the
number of occurrences.
4
Click the Days of the Week drop-down list
click an option.
5
Click the months to schedule. To schedule all of the months, double-click
any month.
6
If you clicked Days of the Month, click the On drop-down list an option
click the numbered days to schedule (for example, 1 and 15).
or
If you clicked Days of the Week, click the ordinal number across from the
day of the week to schedule (for example, 2nd Tue).
or
If you clicked Periodic, specify a period length (for example, every 15 days).
7
Click OK.
Tips
•
Use Example or Formula to schedule events that occur on the same
day of the week (for example, every Monday), the same day(s) of the
month (for example, the 15th and last day), or in a defined period of
time (for example, every 14 days).
•
If you have been using Formula or Dates and decide to change to
Example, click the Example tab.
•
To clear the Auto-Date dialog box, click Reset.
•
To verify that you scheduled the correct dates, click the Dates tab.
The dates you scheduled in the Example tab are selected in the
calendars. If you want to deselect any occurrence, click the days you
want to deselect on the Dates tab
click OK.
Scheduling Offset Days
of the Week
Use Offset Days to schedule an appointment, reminder note, or task a specified
number of days prior to or after a specified day of the week.
1
In an appointment, task, or reminder note you are scheduling, click Actions
Auto-Date.
2
Click the Example tab.
3
In the Range group box, specify the starting date and ending date.
Scheduling Recurring Appointments
Page time: 00:00:01
File time: 00:00:23
Date: 05-12-98 8:48am
User: RBALLARD
Queue: Q:PRNT
55
File: T:\TYPE\859\W\02\R_05SCHE.859
Page: 56 (16 of 21)
Plate: Composite
Spec: jama1
Galley: Final Galley
4
Click the months you want to include. To include all months, double-click
any month in the Months group box.
5
Click a day of the week (for example, Wed).
6
Specify the number of days to offset
7
Click one or more ordinal numbers in the row across from the selected day
of the week (for example, 1st, 3rd, and Last in the Wed row).
click OK.
To include all of the options, double-click any option in the row.
8
Click OK.
Tips
•
As an example, you might need to schedule a meeting on the
Monday following the first Sunday of each month (which may or
may not be the first Monday of the month). To do so, open the
Auto-Date dialog box click Days Of the Week click 1st in the
Sunday row click the Sunday button type 1 click OK twice.
Scheduling Offset Days
of the Month
Use Offset Days to schedule an appointment, reminder note, or task a specified
number of days prior to or after a specified day of the month.
1
In an appointment, task, or reminder note you are scheduling, click Actions
Auto-Date.
2
Click the Example tab.
3
In the Range group box, specify the starting date and ending date.
4
Click the months you want to include.
To include all months, double-click any month in the Months group
box.
5
Click the Days of the Week pop-up list
Days of the Month.
6
Click one or more days of the week (for example, Mon, Wed, and Fri).
To include all days, double-click any day in the group box.
7
Click Last
click the Last button.
56 Scheduling Recurring Appointments
Page time: 00:00:01
File time: 00:00:24
Date: 05-12-98 8:48am
User: RBALLARD
Queue: Q:PRNT
File: T:\TYPE\859\W\02\R_05SCHE.859
Page: 57 (17 of 21)
8
Plate: Composite
Spec: jama1
Specify the number of days to offset
Galley: Final Galley
click OK twice.
Tips
•
Here’s an example of how you could use offset days of the month. If
you want a reminder note to appear in your Reminder Notes List the
2nd to the last day of each month, type -1 in Step 8 above click
OK.
•
To verify that you scheduled the correct dates, click the Dates tab.
The dates you scheduled in the Example tab are selected in the
calendar.
Scheduling Auto-Dates
by Formula
1
In an appointment, task, or reminder note you are scheduling, click Actions
Auto-Date.
2
Click the Formula tab.
3
In the Range group box, specify the starting date and ending date.
or
To specify a certain number of occurrences rather than a range, specify the
starting date click the End drop-down list Occurrences specify the
number of occurrences.
4
Type the formula text
click OK.
Tips
•
Use Example or Formula to schedule events that occur on the same
day each week (for example, every Monday), the same day each
month (for example, the 15th and last day), or in a defined period of
time (for example, every 14 days).
•
For information on how to enter formula text, see Using Auto-Date
Formula Functions and Operators later in this section.
•
For additional examples later, create an auto-date using Example
click the Formula tab.
•
Formula uses the same syntax as WordPerfect® Office® 3.1.
•
To clear the Auto-Date dialog box, click Reset.
•
To verify that you have scheduled the correct days, click the Dates
tab. The days you scheduled are selected in the calendar. If you want
to deselect any occurrence, click the day you want to deselect on the
Dates tab
click OK.
Scheduling Recurring Appointments
Page time: 00:00:01
File time: 00:00:25
Date: 05-12-98 8:48am
User: RBALLARD
Queue: Q:PRNT
57
File: T:\TYPE\859\W\02\R_05SCHE.859
Using Auto-Date
Formula Functions and
Operators
Page: 58 (18 of 21)
Plate: Composite
Spec: jama1
Galley: Final Galley
You can use functions and operators to create an auto-date formula. Keep in
mind that you can create the same kind of auto-dates easily and quickly with the
Example tab. Formulas are provided for continuity and for those people who
prefer them.
Auto-Date Formula Operators
An operator is a character or word you insert in a formula to perform a specific
operation. Each operator is assigned a priority, meaning that when a formula is
evaluated, some operations are performed before others.
You can use grouping operators to group operators according to their priorities.
The table below lists operators and their priorities. Additional details about the
operators are provided following the table.
Function
A blank space (high-priority
And)
Plus or +
Minus or To or :
Every. . .Starting
Every. . .Ending
Before
On/Before
After
On/After
Near
Near/After
Or or,
Not o
And or & (low-priority And)
Priority
1
2
2
3
4
4
5
5
5
5
5
5
6
!
7
Grouping Operators • Use parentheses as grouping operators to change the
priority of operators or to group functions together for clarification.
For example, because the high-priority And operator (a space) has a higher
priority than the Or operator (a comma), the formula below means that all
scheduled days must fall on a Tuesday or must fall on a Thursday and be in
the month of July or must be in the month of August.
tue,thu jul,aug
In other words, the formula is performed as if parentheses were inserted as
follows:
(tue,thu) (jul,aug)
58 Scheduling Recurring Appointments
Page time: 00:00:01
File time: 00:00:26
Date: 05-12-98 8:48am
User: RBALLARD
Queue: Q:PRNT
File: T:\TYPE\859\W\02\R_05SCHE.859
Page: 59 (19 of 21)
Plate: Composite
Spec: jama1
Galley: Final Galley
Now examine the following formula:
(tue),(thu jul),(aug)
This formula would schedule all Tuesdays, all Thursdays in the month of
July, and all days in the months of August. Notice how the meaning changes
when parentheses are included as in the formula below.
(tue,thu) (jul,aug)
With the above formula, all scheduled days must fall on a Tuesday or
Thursday and must be in the month of July or August. The end result is that
only Tuesdays and Thursdays in July and August are scheduled.
High-Priority And • A space between two functions acts as an And
operator, meaning that both functions must hold true. For example, 25
means the 25th day of all months in all years. But 25 oct means that all
scheduled days must fall on the 25th day of the month and must be in October.
And 25 oct 1998 means that all scheduled days must fall on the 25th day of the
month and must be in October and must be in the year 1998.
Offset Operators • You can use a positive offset operator (+ or the word
PLUS) or a negative offset operator (- or the word MINUS) to add a relative
offset to a function or statement.
For example, to schedule an event three days before the first Thursday in
February for all years, you could enter the following formula:
thu(1) feb-3
Range • The range operator (: or to) functions like a series of Or operators
(see Or in this section) between each item (day, month, etc.) in the range.
For example, if you want to schedule the 15th of every month, but only if
the 15th is a weekday, you could enter either of the following formulas:
15&mon:fri
15(mon:fri)
This formula means that all scheduled days must fall on the 15th of the month
and must be a day from Monday to Friday. Another way of describing the formula
is that all scheduled days must fall on the 15th of the month and must be a
Monday or Tuesday or Wednesday or Thursday or Friday.
Periodic Operators • The three periodic operators are Every, Starting, and
Ending. Use Every in combination with Starting and/or Ending to schedule
days at regular intervals, beginning on a specific date and/or ending on a
specific date. For example, suppose you want to schedule a meeting for once
a week starting on March 3, 1998 and continuing through June 11, 1998.
You could use the following formula:
every 7 starting mar 3 1998 ending jun 11 1998
The formula will schedule every seventh day starting with March 3, 1998
and ending with June 11, 1998. The starting date is always scheduled as the
Scheduling Recurring Appointments
Page time: 00:00:01
File time: 00:00:27
Date: 05-12-98 8:48am
User: RBALLARD
Queue: Q:PRNT
59
File: T:\TYPE\859\W\02\R_05SCHE.859
Page: 60 (20 of 21)
Plate: Composite
Spec: jama1
Galley: Final Galley
first day and the ending date is scheduled only if it naturally falls at the Every
interval. If you do not use both the Starting and Ending operators, the
starting or ending date is the first or last date in the Calendar file.
For example, examine the following formula:
every 7 starting mar 3 1998
The above formula schedules every seventh day starting on March 3, 1998
and continuing to the last date in the Calendar file. The Every command will
work with numbers up to 30. For example, “every 45 starting mar 3 1998” is
not a valid formula.
Relative Operators • The six relative operators are Before, On/Before, After,
On/After, Near, and On/Near. Use these operators to schedule days relative
to a specific date. For example, to schedule the Monday closest to November
6 in all years, you could enter the following formula:
mon on/near nov 6
If you need to schedule the first Tuesday after November 6, 1998, you could
enter the following formula:
tue after nov 6 1998
Or • You can use the Or operator (, or the word Or) to indicate that one or
the other function or statement must hold true in order to schedule days.
For example, to schedule an appointment on the 15th day of each month in
the year 1998, but only if the 15th falls on a Tuesday or Thursday, enter the
following formula:
15 1998 (tue,thu)
Not • When placed before a function, the Not operator
negates that function.
or the word not)
For example, if you want to schedule all days in January, 1998 except for
Tuesdays and Thursdays, you could use the following formula:
jan 1998 !tue !thu
Low-Priority And • Like a space, the low-priority And operator (& or the
word And) between two functions indicates that both functions must hold
true. However, the low-priority And has the lowest priority of all operators.
For example, examine the following formula:
tue,thu jul,aug
This means that scheduled days must be a Tuesday or must be a Thursday and
must be in July or must be in August. However, suppose you were to substitute the
high-priority And (a space) with a low-priority And, as in the following formula:
tue,thu and jul,aug
60 Scheduling Recurring Appointments
Page time: 00:00:01
File time: 00:00:28
Date: 05-12-98 8:48am
User: RBALLARD
Queue: Q:PRNT
File: T:\TYPE\859\W\02\R_05SCHE.859
Page: 61 (21 of 21)
Plate: Composite
Spec: jama1
Galley: Final Galley
The above formula indicates that scheduled days must be a Tuesday or must
be a Thursday and must be in July or must be in August. In the first
formula, the And operator is evaluated before the Or operators. In the
second formula, the And operator is evaluated after the Or operators.
Auto-Date Formula Functions
Use the auto-date functions listed below to schedule specific days of a week,
month, or year. You must use the exact spelling of the functions. For example,
GroupWise reads “tue”, but not “tues”. GroupWise formula functions are not
case-sensitive.
Day of the Week • For example, TUE would schedule all Tuesdays.
Day of the Month • For example, the number 3 would schedule the 3rd day
of the month. Also, the word LAST would schedule the last day of the
month.
Day of the Year • For example, 35 would schedule the thirty-fifth day of the
year.
Month of the Year • For example, JAN would schedule all days in January.
Year • For example, 1998 would schedule all days in 1998.
Weekday of the Month • For example, TUE(1). This would schedule the
first Tuesday of the month. Also, SUN(LAST) would schedule the last
Sunday of the month, and FRI(LAST-1) would schedule the second to last
Friday of the month.
Scheduling Recurring Appointments
Page time: 00:00:01
File time: 00:00:29
Date: 05-12-98 8:48am
User: RBALLARD
Queue: Q:PRNT
61
File: T:\TYPE\859\W\02\R_07CNDR.859
Page: 62 (1 of 15)
Plate: Composite
Spec: jama1
Galley: Final Galley
•
Page time: 00:00:00
File time: 00:00:01
•
•
Date: 05-12-98 9:00am
•
•
•
•
•
•
•
User: RBALLARD
•
•
•
•
•
Queue: Q:PRNT
•
•
•
•
•
•
•
•
•
Using Your Calendar
Using Your Calendar
File: T:\TYPE\859\W\02\R_07CNDR.859
Page: 63 (2 of 15)
Plate: Composite
Spec: jama1
Galley: Final Galley
Using Your Daily Calendar
Use your Calendar to help you organize your time and your work. You can view
your appointments, tasks, and reminder notes in a variety of formats, read them
from your Calendar, save them, and print them out in various formats. You can
use Proxy with your Calendar to manage the schedules of other users or
resources.
Many types of calendar views and printouts are available to let you choose the
one that most effectively displays the information you need. See Printing Your
Schedule later in this section.
Viewing Your Calendar
GroupWise provides three organizational Calendar structures with variations for
viewing appointments, tasks, and reminder notes. These convenient methods of
viewing your scheduled items help you organize and focus on the information
that is most important to you.
Calendar Folder
You can find all your GroupWise scheduled items in this location without
opening a separate window. The Calendar displays views on tabs so you can
easily switch from one calendar view to another. You can add more tabs to the
Calendar and configure them however you want. The view that is displayed
when you exit your Calendar will be displayed when you open the Calendar
folder again.
Using Your Daily Calendar
Page time: 00:00:01
File time: 00:00:02
Date: 05-12-98 9:00am
User: RBALLARD
Queue: Q:PRNT
63
File: T:\TYPE\859\W\02\R_07CNDR.859
Page: 64 (3 of 15)
1
Click
Plate: Composite
Spec: jama1
Galley: Final Galley
in the Folder List.
Tips
•
You can use Graphical Display to show appointment duration in
blocks, in order to visualize time use in your schedule. Or you can
use Textual Display to better comprehend the sequence of your
appointments.
•
Time intervals in the Appointments List can be adjusted from ten
minutes to two hours, depending on how detailed you want your list
to be.
•
If you track your yearly progress by week numbers, you can display
them on your Calendar.
•
You can define your work schedule to display only your office hours
on your Calendar.
•
By using Show Appointment As, you can display levels of availability
for appointments in Busy Search and in your Calendar.
Calendar View
You can view your schedule in a day, week, month, year, task list, project
planner, multi-user, or specialized format. For example, the month view lets you
view a month schedule, while the multi-user view lets you view, compare, and
even manage the schedules of multiple users or resources to whose Calendars you
have Proxy rights. See Changing the Calendar View later in this section. You can
also specify a different default calendar view in Options. See Setting Options for
GroupWise under Customizing GroupWise. In addition to the views provided,
your system administrator can create custom calendar views for you with
GroupWise View Designer, which is found in the GroupWise Software
Developer’s Kit.
64 Using Your Daily Calendar
Page time: 00:00:02
File time: 00:00:04
Date: 05-12-98 9:00am
User: RBALLARD
Queue: Q:PRNT
File: T:\TYPE\859\W\02\R_07CNDR.859
Page: 65 (4 of 15)
1
Plate: Composite
Click Window
view.
Spec: jama1
Galley: Final Galley
Calendar to open a separate window displaying a calendar
or
Click
on the toolbar.
As Calendar
This method of viewing your Calendar is useful if you store all your
appointments or other items for a specific project or client in one folder and
want to see your schedule for that project only.
1
Click a project folder in the Folder List.
2
Click View As Calendar to display all scheduled, accepted items that are
saved in that folder.
Icons Appearing Next to Items in Your Calendar
The icons that appear in your calendar give you additional information about
items.
Icon
Description
An alarm is set for the item.
Group appointment, reminder note, or task.
The item is marked private.
Using Your Daily Calendar
Page time: 00:00:03
File time: 00:00:07
Date: 05-12-98 9:00am
User: RBALLARD
Queue: Q:PRNT
65
File: T:\TYPE\859\W\02\R_07CNDR.859
Reading an Item in
Your Calendar
Page: 66 (5 of 15)
Plate: Composite
Spec: jama1
1
Click
in the Folder List.
or
Click Window Calendar.
2
Double-click the item you want to read.
Galley: Final Galley
Tips
•
In all views except the Year view, you can rest your mouse pointer on
most items and see information such as Subject, Time, Place, and
To. You can also double-click an item to read it.
•
To close an item you have opened in your Calendar, click the close
box.
•
You can change the calendar view to a different format such as week,
year, and so on. In the Calendar folder, click the corresponding tab
or see Changing the Calendar View later in this section.
Saving an Item in Your
Calendar
1
Click
in the Folder List.
or
Click Window Calendar.
2
Click the item you want to save
3
In the Save File As box, type a filename for the item.
4
To save the item in a different directory than is shown in the Current
Directory box, click Browse click a drive click a folder OK.
5
If you want GroupWise to prompt you to replace an existing file with the
same name, select the Report Filename Conflicts check box.
6
Click Save
click File
Save As.
Close.
Tips
•
When you save a Calendar item, GroupWise provides a filename
using the subject line with a .MLM extension. You can use this
name or type a different filename in the Save File As box.
•
To save items, you can also right-click the item click Save As to
open the Save dialog box.
Viewing the Schedules
of Multiple Users
The Multi-User view lets you view the schedules of several people or resources
side-by-side. This is useful for management and for keeping track of who is
where. For example, you can use the Multi-User view to quickly find if any of
your company’s conference rooms is free for an impromptu meeting.
66 Using Your Daily Calendar
Page time: 00:00:01
File time: 00:00:08
Date: 05-12-98 9:00am
User: RBALLARD
Queue: Q:PRNT
File: T:\TYPE\859\W\02\R_07CNDR.859
Page: 67 (6 of 15)
Plate: Composite
Spec: jama1
Galley: Final Galley
You must have the appropriate Proxy rights for each user or resource in order to
include him or her in a multi-user view. For example, if you do not have Read
rights for appointments, you will not be able to see another person’s schedule in
the Multi-User view.
A multi-user view is controlled by a Multi-User List. For example, if you create
and use a list with users Alice, Becca, and Carl, you will see the schedule of these
users in the columns of the Multi-User view. The left column will display the
schedule of the first person in the list (Alice), the next column will display the
schedule of the second user listed (Becca), and so on. You can create multiple
multi-user views, each with its own Multi-User List, for various groups of users
or resources that you manage. These Multi-User Lists can be edited, and user
schedules within the list can be selected or deselected, depending on whose
schedule you need to view.
1
Click
in the Folder List.
2
Click the Multi-User tab.
or
If you have created multiple multi-user views, click the tab of the multi-user
view you want to display, then skip to Step 4.
3
Click
select the check boxes by the names of the users whose
schedules you want to view click OK.
4
View the users’ schedules. To view a different day, click Go to Day
the date click OK.
specify
Tips
•
If you have appropriate Proxy rights, you can schedule an
appointment by clicking and dragging from the appointment time
across the users you want to include in the appointment.
Using Your Daily Calendar
Page time: 00:00:02
File time: 00:00:10
Date: 05-12-98 9:00am
User: RBALLARD
Queue: Q:PRNT
67
File: T:\TYPE\859\W\02\R_07CNDR.859
Printing Calendar
Items
Page: 68 (7 of 15)
Plate: Composite
Spec: jama1
Galley: Final Galley
Use Print to print one or more items from your Calendar and any attachments.
You can also print an item that you are currently reading or creating. Set up your
printer using the Windows Printers Control Panel.
Use Print Calendar to print appointments, tasks, and reminder notes in different
formats and on various page sizes. For example, you could print a day calendar
with all your appointments or a week calendar with all your appointments and
tasks.
Print Calendar provides several categories of calendar print formats that vary
according to what you want to accomplish. These categories are called calendar
types. If you can’t find a calendar print format that does what you want, try a
different calendar type for a new group of formats. Descriptions of available
calendar types are provided below.
Franklin Quest
These graphical calendar formats correspond with Franklin Day Planner® pages.
These are ideal for people who want to coordinate their Franklin Day Planner
and GroupWise Calendar or who follow the Franklin Covey organizational
methodology. You can coordinate your Franklin Day Planner with your
GroupWise Calendar two ways. You can print your schedule onto blank paper in
various formats and sizes that can be trimmed to fit into your planner, or you
can print your GroupWise schedule on the preprinted pages that come with your
planner.
GroupWise
These graphical calendar formats allow for more complete text overflow than is
possible in the Franklin Covey formats, and they show appointment duration
graphically. For example, the Task List lets you print your Tasks List
unconnected to any specific day and also allows printing of completed tasks.
Multi-User
This multi-column calendar format lets you print the schedules of several users
side-by-side on one page. You must have Proxy rights for each user or resource
you include in the schedule.
Text
This textual format provides all available information without truncation, can be
printed to a file, and is good for lower-end printers.
Printing Your Schedule
1
Click
on the toolbar.
68 Using Your Daily Calendar
Page time: 00:00:01
File time: 00:00:11
Date: 05-12-98 9:00am
User: RBALLARD
Queue: Q:PRNT
File: T:\TYPE\859\W\02\R_07CNDR.859
Page: 69 (8 of 15)
2
Plate: Composite
Spec: jama1
Galley: Final Galley
Click a calendar type in the Calendar Type drop-down list.
You can see what the printed text
will look like in the View box.
3
Click an option in the Calendar Size drop-down list. The options available
depend on the calendar type selected.
4
Click an option in the Paper Style drop-down list. The options available
depend on your printer.
5
Click a page layout type in the Page Layout drop-down list. You can see
what the calendar looks like in the view box on the right. If you can’t find a
page layout that does what you want, select a different calendar type to see
other page layouts.
6
Specify the first date you want to print in the Starting Date box.
7
Specify the number of days to print in the Number of Days/Weeks/Month
box. (The name of this box varies, depending on the page layout selected.)
8
Click the Format tab type a header in the Header box if you want a title
on the page select any Footer or Display options.
9
Click the Calendar Type options tab. specify the options you want. (The
tab name and available options vary, depending on the calendar type
selected.)
10 Click Printer Setup
select a printer in the Name drop-down list.
11 If you are printing onto preprinted forms that will be fed manually into the
printer rather than fed from a paper tray, click Properties
the Paper Source drop-down list.
Manual Feed in
Using Your Daily Calendar
Page time: 00:00:01
File time: 00:00:12
Date: 05-12-98 9:00am
User: RBALLARD
Queue: Q:PRNT
69
File: T:\TYPE\859\W\02\R_07CNDR.859
Page: 70 (9 of 15)
Plate: Composite
12 Click OK twice
Spec: jama1
Galley: Final Galley
Print.
Tips
•
Click the Preview button to see how the schedule looks with the
selected options.
•
If you are acting as a proxy and printing out the schedules of several
users, select Name on the Format tab to print each user’s name on
his or her respective schedule in the footer so you can tell the
schedules apart at the printer.
•
To include week numbers on the printout, select Week Numbers on
the Format tab.
•
If you frequently update and reprint your schedule, select Current
Date and Time on the Format tab before printing so you can always
tell which schedule printout is more recent.
•
You can override the automatic settings for paper size. For example,
you may want to print a Franklin Day Planner Pocket style in a
landscape orientation on the printer paper, rather than in the normal
portrait. Or, you may want to print on a specific paper type in a
specific printer tray. Changing the paper size for the printer does not
affect the calendar size selected in Calendar setup. To change the size
of the paper used by the printer, click Printer Setup
Properties
click the Paper tab
select a paper size.
•
You can override the automatic settings for margin offset on the
Franklin Quest Options tab. Slight variations in paper cutting may
make margin adjustment necessary for some preprinted forms in
order for the text to fit well within the lines. To adjust the margin
offset vertically, specify the number of units to offset the text from
the top margin in the From the Top box. To adjust the margin
offset horizontally, specify the number of units to offset the text
from the left margin in the From the Left box. The margin offset
appears in the printed copy, not in the print preview.
•
Printing an
Appointments, Tasks,
or Reminder Notes List
1
For help on a dialog box option, click
Click
on the toolbar.
70 Using Your Daily Calendar
Page time: 00:00:01
File time: 00:00:13
Date: 05-12-98 9:00am
User: RBALLARD
Queue: Q:PRNT
the option.
File: T:\TYPE\859\W\02\R_07CNDR.859
Page: 71 (10 of 15)
Plate: Composite
Spec: jama1
Galley: Final Galley
2
Make sure GroupWise is selected from the Calendar Type drop-down list.
3
Click an option in the Calendar Size drop-down list.
4
Click a page layout type in the Page Layout drop-down list.
5
If you are printing an appointment layout, specify the first date you want to
print in the Starting Date box, then specify the number of days or weeks to
print in the Number of Days/Weeks box. (The name of this box varies,
depending on the page layout selected.)
6
Click the Format tab type a header in the Header box if you want a title
on the page select any Footer or Display options.
7
Click the GroupWise Options tab
8
Click Printer Setup
select the options you want.
select a printer in the Name drop-down list.
Using Your Daily Calendar
Page time: 00:00:02
File time: 00:00:15
Date: 05-12-98 9:00am
User: RBALLARD
Queue: Q:PRNT
71
File: T:\TYPE\859\W\02\R_07CNDR.859
Page: 72 (11 of 15)
9
Plate: Composite
Spec: jama1
Galley: Final Galley
Click Print.
Tips
•
If your job is task-focused, use a Task List page layout to print a list
of your current or current and completed tasks unconnected to any
day. Tasks are sorted by due date.
•
If you manage more than a few reminder notes, use a Note List page
layout to consolidate them into a notes-focused printout.
•
You can also print your appointments, tasks, and reminder notes
together in an integrated schedule. Integrated schedule page layouts
include the Day Organizer, Day Tri-Fold, and many of the Franklin
Quest calendar type page layouts.
•
Click the Preview button to see how the page layout looks with the
selected options.
•
To include week numbers in an appointment or reminder note
printout, select Week Numbers on the Format tab.
•
If you frequently update and reprint your Appointments, Tasks, or
Reminder Notes List, select Current Date and Time on the Format
tab before printing so you can always tell which schedule printout is
more recent.
•
For help on a dialog box option, click
the option.
Printing the Schedules
of Multiple Users
1
Make sure you have proxy Read rights to the Mailboxes of all the users
whose schedules you want to print.
2
Click
to make sure that all of the users whose schedules you want to
print appear in your Proxy List. If they do not appear on the list, add them.
3
Click
4
Click Multi-User in the Calendar Type drop-down list.
5
Click an option in the Calendar Size drop-down list.
6
Click a page layout type in the Page Layout drop-down list. If you are going
to include more than two or three users, you will probably want to select
Daily Calendar (Landscape) for legibility.
7
Specify the first date you want to print in the Starting Date box.
8
Specify the number of days to print in the Number of Days box.
on the toolbar.
72 Using Your Daily Calendar
Page time: 00:00:01
File time: 00:00:16
Date: 05-12-98 9:00am
User: RBALLARD
Queue: Q:PRNT
File: T:\TYPE\859\W\02\R_07CNDR.859
Page: 73 (12 of 15)
9
Plate: Composite
Spec: jama1
Click the Multi-User Options tab
the contents items to include.
Galley: Final Galley
select a text overflow option
select
10 Specify the Maximum Proxies Per Page. For example, if you are going to
print the schedules of nine users, but you only want three schedules per page,
specify 3.
11 In the Proxy List box, select the users whose schedules you want to print.
12 Click Printer Setup
13 Click OK
select a printer in the Name drop-down list.
Print.
Tips
•
Click the Preview button to see how the schedule looks with the
selected options.
•
Changing the Calendar
View
1
For help on a dialog box option, click
Click the arrow on the right of
on the toolbar
the option.
click a view.
Tips
•
Change the calendar view to see a year calendar, a weekly schedule, a
project planner view, and so on.
•
You can specify a different default Calendar view in Options. See
Setting Options for GroupWise under Customizing GroupWise.
Using Your Daily Calendar
Page time: 00:00:02
File time: 00:00:18
Date: 05-12-98 9:00am
User: RBALLARD
Queue: Q:PRNT
73
File: T:\TYPE\859\W\02\R_07CNDR.859
Changing the First Day
of the Week in Your
Calendar
Viewing a Different
Date in Calendar
Page: 74 (13 of 15)
Plate: Composite
Spec: jama1
Galley: Final Galley
1
Click Tools
Options.
2
Double-click Date & Time
3
Select a day in the Month Display Options group box
1
Click
in the Folder List.
or
Click Window Calendar.
2
If the view tab displayed has a Calendar toolbar, click the date in the
Calendar toolbar.
click the Calendar tab.
click OK.
or
If the view displayed has no toolbar, click View
date click OK.
3
If you want to return to today’s date, click View
Go to Date
specify a
Go to Today.
or
Click Today in the Calendar toolbar.
Tips
•
Use Go To Date to view the schedule of a day not visible on your
Calendar.
•
Going to a different date is not applicable to some views. For
example, a view that displays a Tasks List only is not connected to
one specific date.
•
For help on a dialog box option, click
the option.
74 Using Your Daily Calendar
Page time: 00:00:01
File time: 00:00:19
Date: 05-12-98 9:00am
User: RBALLARD
Queue: Q:PRNT
File: T:\TYPE\859\W\02\R_07CNDR.859
Page: 75 (14 of 15)
Plate: Composite
Spec: jama1
Galley: Final Galley
Setting Alarms for Calendar Items
GroupWise can sound an alarm to remind you of an upcoming appointment.
You can also choose to open a file or to run a program when the alarm goes off.
For example, you can set an appointment to back up your files when you aren’t
at work and your computer is on.
In Options, you can specify a default that automatically sets an alarm each time
you accept an appointment.
IMPORTANT: Notify must be open or minimized for the alarm to sound.
Setting an Alarm
1
In your Mailbox or Calendar, click an appointment.
2
Click Actions
3
Specify the number of hours or minutes before the appointment that you
want the alarm to sound click Set.
Alarm.
Tips
•
You can also right-click the appointment, then click Alarm to set an
alarm.
•
If Alarm is dimmed, make sure that the appointment time hasn’t
already passed.
•
To remove an alarm that has been set for appointment, click the
appointment Actions Alarm Clear.
•
In Options, you can choose to automatically set an alarm each time
you accept an appointment. See Setting Options for GroupWise under
Customizing GroupWise.
•
You can specify a path to an application so that the application
launches when the alarm goes off.
Specifying How Long
Before an Event the
Alarm Sounds
1
Click Tools
Options.
Setting Alarms for Calendar Items
Page time: 00:00:02
File time: 00:00:21
Date: 05-12-98 9:00am
User: RBALLARD
Queue: Q:PRNT
75
File: T:\TYPE\859\W\02\R_07CNDR.859
Page: 76 (15 of 15)
Plate: Composite
Spec: jama1
Galley: Final Galley
2
Double-click Date & Time
When Accepted is selected.
click the Calendar tab
3
Specify the hours and minutes before an event that you want an alarm to
sound.
4
Click OK.
Tips
•
For help on a dialog box option, click
76 Setting Alarms for Calendar Items
Page time: 00:00:01
File time: 00:00:22
Date: 05-12-98 9:00am
User: RBALLARD
Queue: Q:PRNT
make sure Set Alarm
the option.
File: T:\TYPE\859\W\02\R_09FOLD.859
Page: 77 (1 of 23)
Plate: Composite
Spec: jama1
Galley: Final Galley
•
Page time: 00:00:01
File time: 00:00:01
•
•
Date: 05-12-98 9:03am
•
•
•
•
•
•
User: RBALLARD
•
•
•
•
•
•
Queue: Q:PRNT
•
•
•
•
•
•
•
•
•
Managing Your Mailbox
Managing Your Mailbox
File: T:\TYPE\859\W\02\R_09FOLD.859
Page: 78 (2 of 23)
Plate: Composite
Spec: jama1
Galley: Final Galley
Using the Folder List
Use folders to store and organize incoming and outgoing items such as
appointments, reminder notes, tasks, document references, and mail or phone
messages in your Mailbox. Folders let you group all items related to a particular
task together. A typical user’s Folder List might look like this:
All folders in your Main Window are subfolders of your user folder. Your user
folder represents your user database, and contains all of your GroupWise®
information. Under the user folder there is the Mailbox, a Sent Items folder, the
Calendar, a Task List folder, the Documents folder, the Work In Progress folder,
the Cabinet (which contains all your personal folders), and the Trash. You can
organize items in your folders by moving or linking them. When you move an
item into a folder, it is taken from one location and placed in another. When you
link an item to a folder, the item still exists in its original folder and it also
appears in the new folder. When you change a linked item, it is also changed in
the other folders.
You can define a different set of properties for each folder in your Folder List.
These properties include which columns appear in the Item List, the order and
size of the columns, the sort order, and whether items are displayed by details or
discussion thread.
You can create as many display settings as you want, and apply them to any
folders in your Folder List. For example, you could use one display setting for
most of your folders, and have special display settings for a few personal folders.
You can store unfinished items in a pre-defined folder called Work In Progress.
See Saving Items in Your Mailbox under Managing Your Mailbox. You can store
all of your documents in the Documents. See Organizing Your Documents under
Creating and Working With Documents. You can also make folders public by
sharing them. See Using Shared Folders under Managing Your Mailbox.
Renaming Folders
1
In the Main Window, right-click the folder you want to rename
Rename.
78 Using the Folder List
Page time: 00:00:01
File time: 00:00:02
Date: 05-12-98 9:03am
User: RBALLARD
Queue: Q:PRNT
click
File: T:\TYPE\859\W\02\R_09FOLD.859
Page: 79 (3 of 23)
2
Plate: Composite
Spec: jama1
Galley: Final Galley
Type a new name for the folder.
Tips
•
You cannot rename the Calendar, Cabinet, Documents, Mailbox,
Work In Progress, or Trash folders.
Deleting Folders
1
Right-click the folder you want to delete
click Delete.
2
Click Items Only or Folder(s) and Items
OK.
Tips
•
You cannot delete the Calendar, Cabinet, Documents, Mailbox,
Work In Progress, or Trash folders.
•
To delete a folder that is shared with you, right-click the folder
click Delete Yes.
Creating a Personal
Folder
1
In the Folder List, click File
New
Folder.
2
Make sure Personal Folder is selected
3
Type the name and description for the new folder.
4
Click Up, Down, Right, or Left to position the folder where you want it in
the Folder List click Next.
5
Specify the display settings for the folder
click Next.
click Finish.
Tips
•
If you create a folder, then decide you want it in a different position,
drag the folder to a new position in the Folder List.
Creating a Shared
Folder
1
In the Folder List, click File
New
Folder.
2
Click Shared Folder
3
Type a name and description for the new folder.
4
Click Up, Down, Right, or Left to position the folder where you want it in
the Folder List click Next.
5
Specify the display settings for the folder
6
In the Name box, start typing the name of the user.
Next.
click Next.
Using the Folder List
Page time: 00:00:01
File time: 00:00:04
Date: 05-12-98 9:03am
User: RBALLARD
Queue: Q:PRNT
79
File: T:\TYPE\859\W\02\R_09FOLD.859
Page: 80 (4 of 23)
Plate: Composite
Spec: jama1
Galley: Final Galley
7
When the user’s name appears in the box, click Add User to move the user
into the Share List.
8
Click the user’s name in the Share List.
9
Select the access options you want for the user.
10 Repeat steps 6-9 for each user you want to share the folder with.
11 When you're done, click Finish.
Moving an Item to
Another Folder
1
Drag an item from the Item List to the folder you want.
Tips
•
To remove all links from an item when you move it, press Alt while
you drag an item onto a folder. The item is removed from all folders
it was previously linked to and is placed in only one folder.
•
To link an item to another folder and leave a copy in the original
folder, press Ctrl while you drag an item to another folder.
Putting Items in More
Than One Folder
1
Click an item in the Mailbox.
2
Click Edit
3
Select the check box next to each folder you want the item in.
4
Click Link.
Move/Link to Folders.
Tips
•
If you delete the original item, the copies in your other folders remain.
•
Click Delete Old Links to delete an item from all folders it was
previously linked to and to move the item to a new folder.
•
In the Main Window, press Alt while you drag an item onto a folder
to move the item into the folder. The item is removed from all
folders it was previously linked to and is placed in only one folder.
•
In the Main Window, press Ctrl while you drag an item onto a
folder to link the item to that folder.
Restoring Your Sent
Items Folder
1
In the Folder List, click File
New
Folder.
2
Click Find Results Folder
Items Next.
3
Click Up, Down, Right, or Left to position the folder where you want it in
the Folder List.
4
Click Finish.
Predefined Find Results Folder
80 Using the Folder List
Page time: 00:00:01
File time: 00:00:05
Date: 05-12-98 9:03am
User: RBALLARD
Queue: Q:PRNT
click Sent
File: T:\TYPE\859\W\02\R_09FOLD.859
Page: 81 (5 of 23)
Plate: Composite
Spec: jama1
Galley: Final Galley
Using Shared Folders
You can make personal folders in your Cabinet public by sharing them. For
example, if you want to have a place where everyone in your department can put
and view GroupWise items like mail messages, documents, and so forth, you can
share a folder. You choose whom to share the folder with, and what rights to
grant each user. Then, users can post messages to the shared folder, drag existing
items into the folder, and create discussion threads. This is what the contents of
a typical shared folder might look like:
If you use GroupWise Remote, changes in shared folders are updated whenever
you connect to the master GroupWise system. For example, if you add an item
to a shared folder from your Remote Mailbox, people in your office will see that
item in the shared folder only after you dial into the master GroupWise system.
Using Shared Folders
Page time: 00:00:02
File time: 00:00:07
Date: 05-12-98 9:03am
User: RBALLARD
Queue: Q:PRNT
81
File: T:\TYPE\859\W\02\R_09FOLD.859
Sharing an Existing
Folder with Other
GroupWise Users
Page: 82 (6 of 23)
Plate: Composite
Spec: jama1
Galley: Final Galley
1
In the Main Window, right-click the folder you want to share
Sharing.
click
2
Click Shared With.
3
In the Name box, start typing the name of a user.
4
When the user’s name appears in the box, click Add User to move the user
into the Share List.
5
Click the user’s name in the Share List.
6
Select the access options you want for the user.
7
Repeat Steps 3-6 for each user you want to share the folder with.
8
Click OK.
Tips
•
If you want the folder to have a specific function, you might create a
new display setting. For example, if the folder is for shared
discussions, you should create a setting that views items by reply
thread and contains both sent and received items. Right-click the
folder click Properties Display.
82 Using Shared Folders
Page time: 00:00:01
File time: 00:00:08
Date: 05-12-98 9:03am
User: RBALLARD
Queue: Q:PRNT
File: T:\TYPE\859\W\02\R_09FOLD.859
Posting a Message to a
Shared Folder
Page: 83 (7 of 23)
Plate: Composite
Spec: jama1
Galley: Final Galley
1
Click the shared folder in your Folder List to open it.
2
Click File
3
Type a subject.
4
Type your message.
5
Click Post.
New
Discussion.
Tips
•
To reply to an existing item in a shared folder, open the item click
Reply select a reply option click OK.
•
You can attach files to shared topics so that others can access those
files easily. See Attaching Files under Working with Items in Your
Mailbox.
Running Notify
Notify alerts you when you have new items placed in your Mailbox, when your
outgoing items are opened, or when you have an upcoming appointment. Notify
can alert you in four ways: a sound, a dialog box, a small icon, or by launching
an application. Each method is described in the following table:
Notify Method
Notify Icon on the Windows
Taskbar
Notify Sound
Notification List
Notify Dialog Box
Description
An envelope appears over the globe when
you receive a new item or alarm. If the
Notify icon doesn’t appear on the taskbar,
Notify is not running.
Notify plays a system beep or sound file
when you receive an item. When you receive
an alarm, the sound plays once every five
minutes until you clear the alarm from the
Notification List.
The Notification List is a dialog box that
lists all of the new, unopened items and
alarms you have received. You can leave it
open on your desktop, or open it from the
Notify icon when you want to see it.
The Notify dialog box opens in front of
whatever application you are using when you
receive a new item or alarm.
Running Notify 83
Page time: 00:00:01
File time: 00:00:09
Date: 05-12-98 9:03am
User: RBALLARD
Queue: Q:PRNT
File: T:\TYPE\859\W\02\R_09FOLD.859
Page: 84 (8 of 23)
Plate: Composite
Spec: jama1
Galley: Final Galley
You can receive alarms and notifications for another user if that user gives you
those rights in the Access List. See Giving Other People Access to Your Mailbox
under Managing Your Mailbox.
Notify is installed in the same folder as GroupWise when you run GroupWise
Setup. Notify runs minimized in the background while you run other programs.
appears on your Windows® taskbar.
When Notify is running, the globe icon
Starting Notify
1
Click Start on the Windows taskbar
GroupWise Notify.
Programs
GroupWise 5
Tips
•
To make access easier, create a shortcut to Notify on your Windows
desktop.
Reading an Item from
Notify
1
When the Notify dialog box appears, click Read.
Tips
•
If a Notify dialog box does not appear when you receive notification,
right-click
Displaying the Notify
Dialog Box When You
Receive Notification
Turning off Notification
Setting How Often
Notify Checks for New
Items
Setting How to be
Notified When
Outgoing Messages
Change Status
on the Windows taskbar
click Read Mail.
1
Right-click
on the Windows taskbar. (Notify must be running.)
2
Click Options
3
Make sure Show Dialog is selected for the item types and priorities you
want.
1
Make sure Notify is running.
2
Right-click
1
Make sure Notify is running.
2
Right-click
3
Type the number of minutes under Check for Mail Every.
1
Make sure Notify is running.
2
Right-click
3
Click the Return Status tab.
click the Notify tab.
on the Windows taskbar
on the Windows taskbar
on the Windows taskbar
click Exit.
click Options.
click Options.
84 Running Notify
Page time: 00:00:01
File time: 00:00:11
Date: 05-12-98 9:03am
User: RBALLARD
Queue: Q:PRNT
File: T:\TYPE\859\W\02\R_09FOLD.859
Page: 85 (9 of 23)
Plate: Composite
Spec: jama1
Galley: Final Galley
4
Deselect Use Same Settings for All Types.
5
Click the Settings For drop-down list
make selections for.
6
Click how you want to be notified for different status changes of that item
type.
click the item type you want to
Tips
•
Leave Use Same Settings for All Types selected if you want to be
notified the same way for all item types.
Setting How to be
Notified of Items in
Your Mailbox
1
Make sure Notify is running.
2
Right-click
3
Click the Notify tab.
4
Deselect Use Same Settings for All Types.
5
Click the Settings For drop-down list, then click the item type you want to
make selections for.
6
Click how you want to be notified for different priority levels of that item
type.
on the Windows taskbar
click Options.
Tips
•
Leave Use Same Settings for All Types selected if you want to be
notified the same way for all item types.
Getting Notified of
Someone Else’s
Messages
When you start GroupWise, you are already subscribed to Notify. To subscribe
to someone else’s notification,
1
In the Main Window, click Tools
Options.
2
Double-click Security
3
Type the name of a user for whom you proxy.
4
Click Add User.
5
Click the user’s name in the Notification List.
click the Notify tab.
Running Notify 85
Page time: 00:00:01
File time: 00:00:12
Date: 05-12-98 9:03am
User: RBALLARD
Queue: Q:PRNT
File: T:\TYPE\859\W\02\R_09FOLD.859
Page: 86 (10 of 23)
Plate: Composite
Spec: jama1
Galley: Final Galley
6
Make sure Subscribe to Notification and Subscribe to Alarms are selected.
7
Click OK.
Tips
•
Notify must be running for you to receive notification of alarms,
incoming items, or change in return status of outgoing items.
•
You can receive notification for someone else only if he or she has
given you proxy rights plus appropriate rights in his or her Access
List. See Giving Other People Access to Your Mailbox under Managing
Your Mailbox.
•
You cannot receive notification for someone who is on a different
post office than you.
Archiving the Items in Your Mailbox
Use Archive to save mail or phone messages, appointments, reminder notes, or
tasks to a designated database on a local drive. Archiving items saves network
space and keeps your Mailbox uncluttered. For example, if you have important
items in your Mailbox that are not currently relevant to your work, you can
86 Archiving the Items in Your Mailbox
Page time: 00:00:02
File time: 00:00:14
Date: 05-12-98 9:03am
User: RBALLARD
Queue: Q:PRNT
File: T:\TYPE\859\W\02\R_09FOLD.859
Page: 87 (11 of 23)
Plate: Composite
Spec: jama1
Galley: Final Galley
archive them. You can view archived items whenever you need to. You can also
unarchive any archived item. When you archive an item you have sent, you will
not be able to track the status of that item. Archive is not available in Remote.
Archive and Folders
When you move an item to a folder, it is not archived. Items in folders are still
affected by the Clean Up options you specify in Environment Options.
Archiving an Item in
Your Mailbox
1
If you have not previously done so, specify the archive path in File Location
in the Environment dialog box. See Setting Options for GroupWise under
Customizing GroupWise.
2
Select the items in your Mailbox you want to archive.
3
Click Actions
Archive.
Tips
•
When you archive an item you have sent, you cannot track the status
of that item.
Viewing Archived Items
1
In the Main Window, click File
Unarchiving Items
1
Click File
2
Click the item you want to unarchive
3
Click File
Open Archive.
Open Archive.
Actions
Archive.
Open Archive to return to the Main Window.
Tips
•
Unarchived messages are returned to the folder from which they
were archived. If the folder has been deleted, GroupWise creates a
new folder.
Archiving Items
Automatically
1
Click Tools
Options.
Archiving the Items in Your Mailbox
Page time: 00:00:01
File time: 00:00:15
Date: 05-12-98 9:03am
User: RBALLARD
Queue: Q:PRNT
87
File: T:\TYPE\859\W\02\R_09FOLD.859
Page: 88 (12 of 23)
Plate: Composite
Spec: jama1
Galley: Final Galley
2
Double-click Environment
click the Cleanup tab.
3
Select Auto-Archive After for the item type you want.
4
Specify the number of days after the item is delivered or completed that you
want it to be archived.
5
Click OK.
Printing Items in Your Mailbox
Use Print to print one or more items from your Mailbox or Calendar and any
attachments. You can also print an item that you are currently reading or
creating. Set up your printer using the Windows Printers Control Panel.
You can print an attached file from the application in which it was created, if you have
access to that application. Or, you can print an attached file from GroupWise. Printing
from GroupWise may save time since another application doesn’t have to be opened;
however, the attached file may print with slightly different formatting.
Use Print Calendar to print your schedule including appointments, tasks, and
reminder notes in different formats and on various page sizes. For example, you could
print a day calendar with all your appointments or a week calendar with all your
appointments and tasks. See Using Your Daily Calendar under Using Your Calendar.
Printing GroupWise
Items
1
In the Item List in your Mailbox, click or open the item you want to print.
Ctrl+click to select multiple items.
2
Click File
3
Click the items you want to print.
Print.
88 Printing Items in Your Mailbox
Page time: 00:00:01
File time: 00:00:16
Date: 05-12-98 9:03am
User: RBALLARD
Queue: Q:PRNT
File: T:\TYPE\859\W\02\R_09FOLD.859
Page: 89 (13 of 23)
4
Plate: Composite
Spec: jama1
Galley: Final Galley
Click Print.
Tips
•
You can print attachments from GroupWise. You can also print
attachments from the associated application.
Printing an Attached
File from GroupWise
1
Open or click the item containing the attached file.
2
Click File
3
Click the attached file you want to print.
Print.
Ctrl+click other files to print more than one attachment.
Printing an Attached
File from Another
Application
4
Click Print.
1
Open or click the item containing the attached file.
2
Click File
3
Click the attached file you want to print.
Print.
Ctrl+click other files to print more than one attachment.
Printing Status
Information About an
Item
4
Click Print Attachment with Associated Application
1
Right-click an item
2
Right-click in the Properties window
Print.
click Properties.
click Print.
The information is sent immediately to the printer.
Printing Items in Your Mailbox
Page time: 00:00:02
File time: 00:00:19
Date: 05-12-98 9:03am
User: RBALLARD
Queue: Q:PRNT
89
File: T:\TYPE\859\W\02\R_09FOLD.859
Page: 90 (14 of 23)
Plate: Composite
Spec: jama1
Galley: Final Galley
Creating Rules
Use Rules to define a set of conditions and actions to be performed when an
item meets those conditions. You can specify such actions as moving items to
folders, forwarding and replying to items, and more. Rules can help you organize
your Mailbox, automate your Mailbox when you are away, or delete unwanted
items.
When you create a rule, you must do the following:
•
•
•
•
•
Name the rule.
Select an event. The event is the trigger that starts the rule.
Select the types of items that will be affected by the rule.
Add an action. The action is what you want the rule to do when it is
triggered.
Save the rule.
You can specify many more options to limit which items a rule affects. For
example, you can apply a rule to only accepted appointments, to items with a
certain word in the Subject box, or to items with a high priority.
Assigning Rule Actions
Each rule must have an action assigned. The action is what the rule does when
the rule criteria is met. For example, if you’ve been reassigned to a new project,
you can create a rule that forwards each new item dealing with the old project to
your replacement. The following list explains each rule action.
Action
Send Mail
Forward
Delegate
Result
Sends a prepared mail message to the recipients you
specify when the rule conditions are met. For example,
assume you need to inform your boss each time you
receive a monthly report from another group of people.
Your boss may not want to see the report; he or she
simply needs to know that you’ve received it.
Forwards items to one or more users when the rule
conditions are met. For example, assume a co-worker has
agreed to handle your mail while you’re away. You decide
what type of incoming items you want your co-worker to
handle and create a rule to forward those items.
Delegates an appointment, reminder note, or task to
another user when the rule conditions are met. For
example, assume someone agrees to cover for you while
you’re away from the office. Your rule can delegate
appointments, tasks, or reminder notes to that person.
The original sender can find out whom you have
delegated the item to in the Properties window.
90 Creating Rules
Page time: 00:00:01
File time: 00:00:20
Date: 05-12-98 9:03am
User: RBALLARD
Queue: Q:PRNT
File: T:\TYPE\859\W\02\R_09FOLD.859
Page: 91 (15 of 23)
Plate: Composite
Action
Reply
Accept
Delete/Decline
Empty Item
Move to Folder
Link to Folder
Mark as Private
Mark as Read
Archive
Spec: jama1
Galley: Final Galley
Result
Sends a prepared reply to the sender when the rule
conditions are met. For example, if you have to be out of
the office for several days, your rule could send a reply to
the senders of incoming items indicating where you are,
when you’ll be back, and whom to contact for urgent
business.
When you send automatic replies, you should typically
reply only to high-priority items and items in which the
sender has requested a reply. This way, your replies aren’t
sent to mail list groups and company-wide mail.
Accepts an appointment, reminder note, or task when the
rule conditions are met. For example, your rule could
accept all appointments from a specific individual.
Deletes or declines any item when the rule conditions are
met. For example, your rule could decline any
appointment scheduled for a certain day of the week if
you are always unavailable for meetings on that day.
Deletes the items from the Trash when the rule
conditions are met. The items are not recoverable after
they are emptied from the Trash.
Moves items to a folder when the rule conditions are met.
For example, you may want all items with certain words
in the Subject box moved to a common folder.
Links items to one or more folders when the rule
conditions are met. Linking an item to a folder lets you
view the item from more than one folder. For example, if
you have an item that relates to Marketing and Personnel,
you can place it in the Marketing folder, then link it to
the Personnel folder. You can then open the item from
either folder.
Marks all items matching the rule conditions as private.
When an item is marked private, you can restrict your
proxies from accessing the item.
Marks all items matching the rule conditions as if they
have been read. For example, assume you are skimming a
reply thread in a shared folder. If you didn’t want to
follow the thread anymore, your rule could mark all the
items in the thread as if they had been read so they
wouldn’t sort at the top of the Item List.
Archives items when the rule conditions are met. For
example, your rule could archive all items regarding a
certain subject.
Creating Rules
Page time: 00:00:01
File time: 00:00:21
Date: 05-12-98 9:03am
User: RBALLARD
Queue: Q:PRNT
91
File: T:\TYPE\859\W\02\R_09FOLD.859
Page: 92 (16 of 23)
Plate: Composite
Action
Mark as Unread
Stop Rule
Processing
Selecting Events that
Trigger a Rule
Spec: jama1
Galley: Final Galley
Result
Marks all items matching the rule conditions as if they
have not been read. Usually, you will click Actions
Read Later to mark an item unread. A rule action is also
available in case you want to automate this process or
apply the unread status to several items at once.
Stops other rules from acting on items that meet the rule
conditions. Remember that rules are executed in the order
they are listed in the Rules dialog box. If there are other
rules that would normally affect these items, this rule
action will prevent the other rules from executing.
An event is the trigger that activates the rule. The different types of events are
explained below.
Event
New Item
Filed Item
Open Folder
Close Folder
Startup
Exit
User
Activated
Result
The rule is triggered when a new item is placed in your
GroupWise Mailbox. Clicking Received lets only incoming
items trigger the rule. Clicking Sent lets only items you send
trigger the rule. Clicking Posted triggers the rule each time
you create a posted appointment, reminder note, or task.
Clicking Draft lets only items marked as unfinished, or draft,
trigger the rule.
The rule is triggered when an item is placed in a specific
folder. If you do not specify a folder, the rule is triggered
when an item is moved to any folder.
The rule is triggered when you open a specific folder. If you
do not specify a folder, the rule is triggered when you open
any folder.
The rule is triggered when you close a specific folder. If you
do not specify a folder, the rule is triggered when you close
any folder.
The rule is triggered when you start GroupWise.
The rule is triggered when you exit GroupWise.
The rule can only be triggered manually by selecting the rule
in the Rules dialog box, then clicking Run.
92 Creating Rules
Page time: 00:00:01
File time: 00:00:22
Date: 05-12-98 9:03am
User: RBALLARD
Queue: Q:PRNT
File: T:\TYPE\859\W\02\R_09FOLD.859
Creating a Rule
Page: 93 (17 of 23)
Plate: Composite
Rules
Spec: jama1
Galley: Final Galley
1
Click Tools
New.
2
Type a name in the Rule Name box.
3
Click the When Event Is pop-up list
4
If you clicked New Item, Startup, Exit, or User Activated, click one or more
sources for the item. For example, click Received and Posted.
click an event to trigger the rule.
or
If you clicked Filed Item, Open Folder, or Close Folder, click the folder
icon a folder OK to display the folder name.
5
Click one or more types of items you want the rule to act on in the Item
Types list.
6
If you want to further restrict the items affected by the rule, click Define
Conditions click the appropriate options OK.
7
Click Add Action
click the action you want the rule to perform.
Some actions such as Send Mail and Reply require you to fill in additional
information.
8
Click Save.
Tips
•
If Save is dimmed, you may have forgotten to type a rule name or
add an action.
Creating Rules
Page time: 00:00:02
File time: 00:00:24
Date: 05-12-98 9:03am
User: RBALLARD
Queue: Q:PRNT
93
File: T:\TYPE\859\W\02\R_09FOLD.859
Copying a Rule to
Make a New Rule
Editing a Rule
Deleting a Rule
Limiting Items Affected
by a Rule
Page: 94 (18 of 23)
Plate: Composite
Spec: jama1
1
Click Tools
2
Click the rule you want to copy
3
Type the name of the new rule.
4
Make the appropriate changes to the rule.
5
Click Save.
1
Click Tools
2
Click the rule you want to edit
3
Make the appropriate changes to the rule.
4
Click Save.
1
Click Tools
2
Click the rule you want to delete
3
Click Yes.
Galley: Final Galley
Rules.
Copy.
Rules.
Edit.
Rules.
Delete.
Use Define Conditions to further limit the items affected by a rule. For example,
you can specify that you want the rule to affect appointments that have been
accepted, or mail messages with certain words in the Subject line, and numerous
other possibilities.
1
In the New or Edit Rules dialog box, click Define Conditions.
2
Click the first drop-down list
3
Click the operator drop-down list
4
Type the criteria for the filter.
or
If provided, click the drop-down list
click a field.
click an operator.
click an existing criteria.
If you type criteria, such as a person’s name or a subject, you can include
wildcard characters such as an asterisk (*) or a question mark (?). Text you
type is not case-sensitive.
5
Click the last drop-down list
click End.
or
Click And or Or to further limit the items affected by the rule.
Running a Rule
Manually
If you’ve created a rule that you don’t want to act on items continually, you can
run it manually as needed. For example, instead of a rule always moving certain
items into a folder, you may want the items to accumulate in your Mailbox until
you’re ready for them to be moved all at once.
1
Click the items or folders that you want affected by the rule.
2
Click Tools
Rules.
94 Creating Rules
Page time: 00:00:01
File time: 00:00:25
Date: 05-12-98 9:03am
User: RBALLARD
Queue: Q:PRNT
File: T:\TYPE\859\W\02\R_09FOLD.859
Page: 95 (19 of 23)
Plate: Composite
Spec: jama1
3
Click the rule you want to run manually.
4
Click Run
Galley: Final Galley
Close.
Tips
•
The rule actions occur after you close the Rules dialog box.
Enabling or Disabling a
Rule
A rule must be enabled before it can be triggered. When a rule is enabled it is
marked with a check. When you disable a rule, the rule cannot be triggered.
However, the rule is still listed in the Rules dialog box so you can enable the rule
when you need it again.
1
Click Tools
Rules.
2
Click the rule you want to enable or disable.
3
Click Enable or Disable.
This button toggles between Enable and Disable.
Tips
•
An enabled rule has a check mark in the box.
•
You can also click in the box next to the rule name to enable or
disable it.
Creating Rules
Page time: 00:00:01
File time: 00:00:26
Date: 05-12-98 9:03am
User: RBALLARD
Queue: Q:PRNT
95
File: T:\TYPE\859\W\02\R_09FOLD.859
Page: 96 (20 of 23)
Plate: Composite
Spec: jama1
Galley: Final Galley
Giving Other People Access to Your Mailbox
Proxy lets you manage another user’s Mailbox and Calendar. Proxy lets you
perform various actions, such as reading, accepting, and declining items on
behalf of another user, within the restrictions the other user sets.
Receiving Proxy Rights
Two steps must be completed before you can act as someone’s proxy. First, the
person for whom you plan to act as proxy must grant you rights in the Access
List in Options. Second, you must add that user’s name to your Proxy List so
you can access his or her Mailbox or Calendar easily.
Once you have completed the two steps above, in your Proxy pop-up list click
the name of the person you’re proxying for whenever you need to manage his or
her Mailbox or Calendar. You can also manage the schedules of users and
resources for whom you have proxy rights with the Multi-User Calendar view.
Granting Proxy Rights
Use the Access List in Security Options to give other users rights to proxy for
you. You can assign each user different rights to your calendaring and messaging
information. If you want to let users view specific information about your
appointments when they do a Busy Search on your Calendar, give them Read
access for appointments. The following table describes the rights you can grant
to users:
This right
Read
Write
Subscribe to my alarms
Subscribe to my
notifications
Modify
options/rules/folders
Lets your proxy do this
Read items you receive.
Create and send items in your name.
Receive the same alarms you receive.
Receive notification when you receive items.
Archive items
Read items marked Private
Editing Your Access
List
Change the options in your Mailbox. The
proxy can edit any of your Options settings,
including the access given to other users.
Store and read your items in his or her archive
folder. If you give a proxy Archive rights, items
archived by that proxy may be stored on his or
her hard disk and will be inaccessible to you.
Read the items you marked Private. If you
don’t give a proxy Private rights, all items
marked Private in your Mailbox are hidden
from that proxy.
1
Click Tools
Options.
2
Double-click Security
3
To add a user to the list, type the name in the Name box
name appears, click Add User.
click the Proxy Access tab.
96 Giving Other People Access to Your Mailbox
Page time: 00:00:01
File time: 00:00:27
Date: 05-12-98 9:03am
User: RBALLARD
Queue: Q:PRNT
when the full
File: T:\TYPE\859\W\02\R_09FOLD.859
Page: 97 (21 of 23)
Plate: Composite
Spec: jama1
Galley: Final Galley
4
Click a user in the Access List.
5
Select the rights you want to give to the user.
6
Repeat Steps 4-5 to assign rights to each user in the Access List.
7
Click OK.
Tips
•
To delete a user from the Access List, click the user Remove User.
•
You can select Minimum User Access in the Access List to assign a
default set of rights to all users in the Address Book. For example, if
you want all users to have rights to read your mail, you would assign
Read rights to Minimum User Access.
Managing Someone
Else’s Mailbox or
Calendar
1
In the Main Window or Calendar, click
to open the Proxy pop-up list.
2
Click the name of the person whose Mailbox you want to access.
Giving Other People Access to Your Mailbox
Page time: 00:00:02
File time: 00:00:29
Date: 05-12-98 9:03am
User: RBALLARD
Queue: Q:PRNT
97
File: T:\TYPE\859\W\02\R_09FOLD.859
Page: 98 (22 of 23)
3
Plate: Composite
Spec: jama1
Galley: Final Galley
When you have finished your work in the other person’s Mailbox, click
click your own name to return to your Mailbox.
Tips
•
Before you can act as a proxy for someone, that person must give
you proxy rights in his or her Access List in Options. Before you can
click that person’s name in your Proxy pop-up list, you must add it
to your Proxy List.
Adding a User to Your
Proxy Pop-up List
1
In the Main Window or Calendar, click
Proxy.
2
Specify the user whose Mailbox you want to access
click OK.
The user’s Mailbox opens. The name of the person you are a proxy for is
displayed at the top of the Folder List.
3
To return to your own Mailbox, click
your name.
Tips
•
Once you add a user’s name to your Proxy pop-up list, you can click
it whenever you want to access the Mailbox. To return to your own
Mailbox, click your own name in the Proxy pop-up list.
•
You need Proxy rights in the Access List in Options before you can
act as a proxy for another user.
•
If you have Proxy rights, you can view the schedules of multiple
users or resources side-by-side.
•
If you are a proxy for more than one person and all the people you
are proxy for give you Read and Write rights to their Calendars, you
can view and print their schedules side-by-side. See Using Your Daily
Calendar under Using Your Calendar.
•
As a proxy you can use Mark as Unread on the Actions menu to
change the icon next to messages you have opened so that the user
the messages belong to can keep track of the messages he or she has
read.
•
You may have limited access to the other user’s Mailbox, depending
on the rights the user assigned you in the Access List in Options.
•
You can act as a proxy for any user on your post office who gives you
rights. If you want to act as a proxy for a user on another post office,
client/server must be enabled on the destination post office.
•
You can work with several Mailboxes open at one time. You can tell
the Mailboxes apart by checking the Mailbox owner’s name, which
appears as the user label for each Mailbox.
98 Giving Other People Access to Your Mailbox
Page time: 00:00:01
File time: 00:00:30
Date: 05-12-98 9:03am
User: RBALLARD
Queue: Q:PRNT
File: T:\TYPE\859\W\02\R_09FOLD.859
Deleting a User from
Your Proxy Pop-up List
Page: 99 (23 of 23)
Plate: Composite
Spec: jama1
1
In the Main Window or Calendar, click
2
Click the name you want to remove
3
Click OK.
Galley: Final Galley
Proxy.
click Remove.
Tips
•
Remove a user from your Proxy pop-up list if you are no longer
acting as a proxy for that user.
•
Removing a user from your Proxy pop-up list does not remove your
rights to act as a proxy for that user. The user whose Mailbox you
access must change your rights in the Access List in Options.
Marking an Item
Private
You can limit a proxy’s access to individual items in your Mailbox or Calendar
by marking items Private.
When you mark an item Private, you prevent unauthorized proxies from
opening it. Unauthorized proxies are proxies to whom you have not given rights
to open items marked Private. Proxies cannot access items marked Private unless
you give them those rights in your Access List.
If you mark an item Private when you send it, neither your proxies nor the
recipient’s proxies can open the item without rights. If you mark an item Private
when you receive it, it cannot be read by your unauthorized proxies, but it can
be read by the sender’s proxies.
1
To mark an item in your Item List Private, click the item click Actions
Mark Private.
or
To mark an item in your Calendar Private, click an item in the
Appointments, Reminder Notes, or Tasks list click Actions Mark
Private.
Giving Other People Access to Your Mailbox
Page time: 00:00:01
File time: 00:00:31
Date: 05-12-98 9:03am
User: RBALLARD
Queue: Q:PRNT
99
File: T:\TYPE\859\W\02\R_12SNDR.859
Page: 100 (1 of 7)
Plate: Composite
Spec: jama1
Galley: Final Galley
Saving Items in Your Mailbox
You can save items and attachments as files on your hard disk, in a personal
network folder, or on a diskette. You can also save items and attachments as
documents in GroupWise Library.
When you save an item in your Mailbox, GroupWise leaves the item in your
Mailbox and saves a copy of the item in the location you specify. Items saved to
disk and to GroupWise Library are saved as WordPerfect® 5.1 documents.
Attachments retain their original format.
Once an item is saved, you can retrieve the item into another application, such as
WordPerfect.
Saving an Item in Your
Mailbox
1
Click the item you want to save
click File
Save As.
2
Type a filename for the item in the Save File As text box.
When you save an item, GroupWise uses the subject line as the filename
with a .MLM extension. You can use this name or type a different one in the
Filename text box.
3
If you want to save the item in a different directory than is shown in the
Current Directory text box, click Browse.
4
If you want GroupWise to prompt you to replace an existing file with the
same name, select Report Filename Conflicts.
5
Click Save
Close.
Tips
•
You can save attachments by selecting the attachments in the Items
to Save list box.
•
You can also right-click an item click Save As to open the Save
dialog box.
Saving an Attachment
1
Click the item containing the attachment you want to save.
2
Click File
Save As
click the attachment.
You can Shift+click or Ctrl+click multiple attachments to save them.
100 Saving Items in Your Mailbox
Page time: 00:00:01
File time: 00:00:01
Date: 05-12-98 9:07am
User: RBALLARD
Queue: Q:PRNT
File: T:\TYPE\859\W\02\R_12SNDR.859
Saving an Item or
Attachment as a
Document
Page: 101 (2 of 7)
Plate: Composite
Spec: jama1
Galley: Final Galley
3
In the Save File As box, type a filename for the attachment.
4
To save the item in a different directory than is shown in the Current
Directory box, click Browse click a drive click a folder OK.
5
If you want GroupWise to prompt you to replace an existing file with the
same name, select the Report Filename Conflicts check box.
6
Click Save
1
Click the item or attachment you want to save
2
In the first drop-down list, click Save to GroupWise Library.
3
Type a subject for the document.
4
Click a library to save the document in.
Close.
click File
Save As.
Tips
•
If you want new documents to use the default values you selected for
all the required fields in the document property sheet, select the Set
Properties Using Default Values check box. However, if you
haven’t selected default values for all the required fields, the property
sheet will appear when you click Save, regardless of whether the box
is selected.
•
Items are saved to the document library in WordPerfect 5.1 format.
Message headers, including the To and Subject fields, are included
in saved documents.
•
Attachments are saved to the document library in their original
format.
Saving Items in Your Mailbox
Page time: 00:00:02
File time: 00:00:03
Date: 05-12-98 9:07am
User: RBALLARD
Queue: Q:PRNT
101
File: T:\TYPE\859\W\02\R_12SNDR.859
Saving Status
Information
Page: 102 (3 of 7)
Plate: Composite
File
Spec: jama1
Galley: Final Galley
1
Click an item
Properties to display the status information.
2
Click File
3
Type a filename.
4
If you want the file to have an extension, type one in; GroupWise does not
add one for you.
5
Click Save.
Save As.
Tips
•
The text is saved in WordPerfect 5.1 format.
Saving an Unfinished
Item
1
From the item view, click File
Save Draft.
2
Click the folder you want to save the item to
click OK.
Tips
•
The draft message is placed in the folder you chose in Step 2. The
default folder for unfinished messages is the Work In Progress
Folder.
•
You can also save an item by clicking Cancel in the item view. Click
Yes when you are asked if you want to save the message. It is then
placed in the folder you specify.
Owning Resources
Resources are items that can be scheduled for meetings or other uses. Resources
can include rooms, overhead projectors, cars, and more. The system
administrator defines a resource by giving it an identifying name and assigning it
to a user on the same post office. A user assigned to a resource is the owner of
that resource and has full Proxy rights to receive notification of appointments
and accept or decline appointments.
Resources can be included in a Busy Search, just as users can. Resource IDs are
entered in the To box.
Accepting and
Declining Resource
Requests
1
In the Main Window or Calendar, click
2
Click the resource you own.
.
102 Owning Resources
Page time: 00:00:01
File time: 00:00:04
Date: 05-12-98 9:07am
User: RBALLARD
Queue: Q:PRNT
File: T:\TYPE\859\W\02\R_12SNDR.859
Page: 103 (4 of 7)
Plate: Composite
Spec: jama1
Galley: Final Galley
3
If the resource you own isn’t listed in the Proxy pop-up list, click Proxy
type the name of the resource you own in the Name box click OK.
4
Double-click the item you need to accept or decline.
5
Click Actions
Accept or Decline
OK.
Tips
•
You can accept or decline resource requests only if you are the owner
and have been granted Read and Write rights.
•
If you want to be the owner of a resource on a different post office,
client/server must be enabled on the resource’s post office.
Receiving Notification
When a User Requests
a Resource
1
In the Main Window, click Tools
click the Notify tab.
Options
double-click Security
2
In the Notification list box, click the resource.
3
Make sure Subscribe to Notification is selected
click OK.
Tips
•
If you do not see the resource listed in Step 2 above, type the
resource name click Add User.
Creating a Rule for a
Resource
As the owner of a resource, you have full Proxy rights to that resource, including
the ability to create rules for it. The following steps show you how to create a
rule that accepts all requests for an available resource. This is an example of one
rule that is useful for a resource. You can create numerous other rules that
perform different actions. For example, you might create a rule that declines
requests for a resource that is already scheduled. See Creating Rules under
Managing Your Mailbox.
1
In the bottom left corner of the Main Window or the top left corner of the
Calendar, click
2
.
Click the resource you own.
If the resource you own isn’t listed in the Proxy pop-up list, click Proxy
type the name of the resource you own in the Name box click OK.
3
Click Tools
Rules
New.
4
Type a name for the rule.
5
Click Appointment. Make sure the other item types are deselected.
6
Click the Appointment Conflict Exists drop-down list
click No.
Owning Resources
Page time: 00:00:01
File time: 00:00:05
Date: 05-12-98 9:07am
User: RBALLARD
Queue: Q:PRNT
103
File: T:\TYPE\859\W\02\R_12SNDR.859
Page: 104 (5 of 7)
7
Plate: Composite
Click Add Action
Accept
Spec: jama1
Galley: Final Galley
type a comment if desired
click OK.
Steps 6 and 7 instruct the rule to accept the appointment for the resource
only if the resource is available.
8
Click Save
Close.
Opening and Emptying the Trash
All deleted mail and phone messages, appointments, tasks, document references,
and reminder notes are stored in the Trash. Deleted items can be viewed,
opened, or returned to your Mailbox until the Trash is emptied (emptying the
Trash removes items in the Trash from the system). You can empty your entire
Trash, or empty only selected items. Items in the Trash are emptied according to
the days entered in the Cleanup tab in Environment Options, or you can empty
the Trash manually.
Opening Your Trash
1
In your Folder List, click
.
Tips
•
You can open, save, and view information on items in the Trash.
You can also remove items from the system or return them to the
Mailbox. Right-click an item in the Trash to see a QuickMenu™ of
these options.
Undeleting an Item in
the Trash
1
In your Folder List, click
.
2
Select the item(s) you want to undelete.
3
Click Edit
Undelete.
Tips
•
The undeleted item is placed in the folder from which it was
originally deleted. If the original folder no longer exists, the item is
placed in your Mailbox.
•
You can also restore an item by dragging it from the Trash folder to
any other folder.
104 Opening and Emptying the Trash
Page time: 00:00:01
File time: 00:00:07
Date: 05-12-98 9:07am
User: RBALLARD
Queue: Q:PRNT
File: T:\TYPE\859\W\02\R_12SNDR.859
Saving an Item That Is
in Your Trash
Page: 105 (6 of 7)
Plate: Composite
Spec: jama1
Galley: Final Galley
1
In the Folder List, click
.
2
Click the item you want to save.
3
Click File
4
In the Save File As box, type a filename for the item.
5
Click Browse to save the item in a different directory than is shown in the
Current Directory box click OK.
6
Click Save
Save As.
Close.
Tips
•
When you save an item that is in your Trash, GroupWise provides a
filename using the subject line with a .MLM extension. You can use
this name or type a different filename in the Save File As box.
•
To save items, you can also right-click the item click Save As to
open the Save dialog box.
•
To have GroupWise report any filename conflicts, select the Report
Filename Conflicts check box.
Emptying the Trash
1
Click Edit
Empty Trash
Yes.
Tips
•
You do not have to open the Trash folder to empty the Trash.
Emptying Selected
Items from the Trash
1
In your Folder List, click
2
Select one or more items.
.
To select more than one item, press Ctrl while you click the items.
3
Click Edit
Delete
Yes.
Tips
•
Shift+click to select a range of items.
Opening and Emptying the Trash
Page time: 00:00:01
File time: 00:00:08
Date: 05-12-98 9:07am
User: RBALLARD
Queue: Q:PRNT
105
File: T:\TYPE\859\W\02\R_12SNDR.859
Emptying the Trash
Automatically
Page: 106 (7 of 7)
Plate: Composite
Spec: jama1
Galley: Final Galley
1
Click Tools
Options.
2
Double-click Environment
3
Select the Automatic After button in the Empty Trash box
number of days between automatic deletions.
4
Click OK.
click the Cleanup tab.
specify the
Deleting Items from Your Mailbox
Use Delete to remove selected items from your Mailbox, selected text in an item,
connections, and more. You can also use Delete to retract items you have sent.
You can retract mail and phone messages if the recipients have not read them.
You can retract appointments, reminder notes, and tasks at any time.
Deleting an Item from
Your Mailbox
1
In the Main Window, click the item you want to delete. To select multiple
items, Ctrl+click each item.
2
Click Edit
Delete.
Tips
•
When you delete outgoing items, the Delete Item dialog box
appears. Select the appropriate Delete From option.
•
You can also right-click items in the Main Window and click Delete.
•
If you delete a document reference from your Mailbox, only the
reference is deleted. The document remains in the Library.
•
Deleted items are moved to your Trash, and remain there until the
Trash is emptied. You can view or undelete items in your Trash.
106 Deleting Items from Your Mailbox
Page time: 00:00:02
File time: 00:00:10
Date: 05-12-98 9:07am
User: RBALLARD
Queue: Q:PRNT
File: T:\TYPE\859\W\02\R_16ADDO.859
Page: 107 (1 of 29)
Plate: Composite
Spec: jama1
Galley: Final Galley
•
Page time: 00:00:01
File time: 00:00:01
•
•
Date: 05-12-98 9:10am
•
•
•
•
•
•
User: RBALLARD
•
•
•
•
•
•
Queue: Q:PRNT
•
•
•
•
•
•
•
•
•
Using the Address Book
Using the Address Book
File: T:\TYPE\859\W\02\R_16ADDO.859
Page: 108 (2 of 29)
Plate: Composite
Spec: jama1
Galley: Final Galley
Using the Address Book: An Overview
Use the Address Book like a phone book and information center for your
addressing needs. The Address Book can store names and addresses, e-mail
addresses, phone numbers, and more. You can also dial the phone from the
Address Book.
You can create multiple address books for your personal use. Open address
books are represented by tabs in the main Address Book window. You can
display one address book at a time.
Address books can store e-mail addresses as well as Internet addresses. An e-mail
address is the name a mail system uses to identify a person. Internet addresses
resemble regular e-mail addresses but apply to the Internet, meaning that you
can send and receive mail from locations outside of your organization. You can
use Lightweight Directory Access Protocol (LDAP) providers to access address
books on the Internet.
Searching for Users and Resources
You can quickly find entries in the displayed address book by using the Search
List. You can also specify search criteria by defining one or more filters. For
example, you can define a filter which displays only entries with last names that
begin with “D.”
When you begin typing a name in the To, CC, or BC boxes of an item you are
creating, Name Completion tries to complete the name for you. It searches the
address books in the order you specify in the Name Completion Search Order
dialog box for entries that match what you're typing.
If Name Completion finds the name you are looking for, you can stop typing. If
Name Completion doesn’t find it, continue typing: Name Completion searches
again after each new character you type. If Name Completion finds a name that
is close to but doesn’t exactly match the one you are looking for, you can use the
Up or Down arrows to scroll to adjacent names in the Address Book. You can
tell Name Completion to search your address books in a specific order.
However, Name Completion always searches the system address book last. You
can also search Internet address books by using Lightweight Directory Access
Protocol (LDAP). See Using LDAP in the Address Book under Using the Address
Book.
Searching for User,
Resource,
Organization, and
Group Addresses
1
Click
on the toolbar.
2
Click the tab of the address book where you want to search for addresses.
108 Searching for Users and Resources
Page time: 00:00:01
File time: 00:00:02
Date: 05-12-98 9:10am
User: RBALLARD
Queue: Q:PRNT
File: T:\TYPE\859\W\02\R_16ADDO.859
Page: 109 (3 of 29)
3
Plate: Composite
Spec: jama1
Galley: Final Galley
In a Search List box, begin typing what you are searching for.
Tips
•
Many columns in the Address Book have a Search List box. You can
search for addresses using any Search List box. To narrow your
search further, you can create a filter to tell the Address Book what
you are looking for.
Using Filters to Narrow
an Address Search
1
Click
on the toolbar.
2
Click View
Define Custom Filter.
Specify an operator
Specify a parameter
Specify a column
Specify additional filter options
3
Click the first drop-down list
4
Click
specify the column you want to filter.
specify an operator.
Searching for Users and Resources
Page time: 00:00:02
File time: 00:00:04
Date: 05-12-98 9:10am
User: RBALLARD
Queue: Q:PRNT
109
File: T:\TYPE\859\W\02\R_16ADDO.859
Page: 110 (4 of 29)
5
Plate: Composite
Spec: jama1
Type the parameter you want to filter by
Galley: Final Galley
click OK.
Tips
•
An operator is a symbol that represents a mathematical operation. A
parameter is a variable used with a command to indicate a specific
value or option. For example, to create a filter that lists only users
whose last name is Davis, click the Last Name column, click =, then
type Davis. In this example, =Equals is the operator and Davis is the
parameter:
•
•
Defining Name
Completion Search
Order
After a filter has been defined for an address book, you can enable
the filter again later by displaying the address book in which you
want to enable the filter and clicking View Custom Filter.
By selecting additional filter options in the last drop-down list, you
can add rows to and delete rows from your filter. You can also use
And and Or operators or New Group to further narrow the filter.
1
In the Address Book, click File
Name Completion Search Order.
2
In the Available Books box, click or Ctrl+click the books you want Name
Completion to search
click Add.
3
To change the search order of an address book, select the address book
click Down or Up.
4
To disable Name Completion, deselect the Disable Name Completion
check box.
5
Click OK.
Tips
•
To have Name Completion search a foreign address book, follow the
steps above, selecting the foreign address book in Step 2, and placing
it at the Selected Books list box in Step 3. To have Name
Completion search the foreign address book first, place the foreign
address book above the Frequent Contacts address book in the
Selected Books box.
•
To remove an address book from the search list, click the address
book
click Remove.
110 Searching for Users and Resources
Page time: 00:00:02
File time: 00:00:06
Date: 05-12-98 9:10am
User: RBALLARD
Queue: Q:PRNT
File: T:\TYPE\859\W\02\R_16ADDO.859
Page: 111 (5 of 29)
Plate: Composite
Spec: jama1
Galley: Final Galley
Using LDAP in the Address Book
The Address Book supports Lightweight Directory Access Protocol (LDAP)
technology, thus allowing you to use address books in foreign directories, such as
those on the Internet. With LDAP in place, you can search an Internet address
book with potentially millions of names available each time you begin typing in
the To field of a Send view.
Using LDAP in the
Address Book
1
You must first purchase or download an LDAP service provider and run its
setup program. Make sure the foreign address book is in the search list for
Name Completion. See Defining Name Completion Search Order under
Searching for Users and Resources.
2
Start typing a name in the To box or the Address Book Name box of the
LDAP address book tab
press Ctrl+Enter.
If you type in part of a name and GroupWise® completes the name for you, the
highlighted text is included in your search when you press Ctrl+Enter. You may
need to delete all or part of the highlighted portion of the name before pressing
Ctrl+Enter.
Tips
•
You can change an LDAP provider's properties from the Address
Book. See Modifying LDAP Provider Properties from the Address Book
below.
•
When you press Ctrl+Enter, the Address Book goes out to the server
you specified in the Properties dialog box and searches for names
matching the information you've typed in the To or Name box.
•
If there is one matching entry, LDAP places the entry in the
appropriate box. If there are no entries matching your criteria, the
criteria itself is entered into the appropriate box. If there are
multiple entries matching your criteria, a dialog box appears with the
entries listed. Select the entry or entries you want
click OK.
Modifying LDAP
Provider Properties
from the Address Book
1
From the Address Book, click File
Services.
2
Select the provider
3
Click the Connection tab
Server Name box.
4
Type the provider's server port in the Server Port box.
click Properties.
type the name of the provider's server in the
The default port number for most providers is 389.
5
Click the Searching tab
6
Click OK.
type the search base in the Search Base box.
Using LDAP in the Address Book
Page time: 00:00:01
File time: 00:00:07
Date: 05-12-98 9:10am
User: RBALLARD
Queue: Q:PRNT
111
File: T:\TYPE\859\W\02\R_16ADDO.859
Page: 112 (6 of 29)
7
Plate: Composite
Close GroupWise
Spec: jama1
Galley: Final Galley
restart GroupWise.
Tips
•
You must first purchase or download an LDAP service provider. If
necessary, unzip it. Run the setup program. The setup program will
guide you through the steps above.
•
For help on the service providers, click the Help button on the tabs
of the Directory Services dialog box.
•
You can access the properties of your LDAP provider from
Windows® through the Control Panel. Double-click the mail icon.
Using Groups to Address Items
A group is a list of users or resources you can send messages to. Use groups to
send a message to several users or resources by typing the group name in the To,
BC, or CC boxes. There are two types of groups: public and personal.
A public group is a list of users created by the system administrator and is
available for use by each GroupWise® user. For example, there may be a public
group for the Accounting Department. Each employee in Accounting is
included in the group. Public groups are listed in the system address book. A
personal group is a group created by you. For example, if you often send an
appointment to your work group, you can include each co-worker’s address or
name and a meeting place (a resource) in a personal group. Groups are marked
with the
icon.
112 Using Groups to Address Items
Page time: 00:00:01
File time: 00:00:08
Date: 05-12-98 9:10am
User: RBALLARD
Queue: Q:PRNT
File: T:\TYPE\859\W\02\R_16ADDO.859
Creating and Saving a
Personal Group
Page: 113 (7 of 29)
Plate: Composite
Spec: jama1
Galley: Final Galley
1
Click
on the toolbar.
2
If the Address List is not visible, click Address List.
3
Click To, CC, or BC double-click or Ctrl+click and drag the users and
resources for your group to the Address List.
4
Click Save Group.
5
Specify a name and personal address book for the group
Address List
The Save Group button is
dimmed when you’re in the
system address book.
click OK.
Tips
•
You can include users from different address books in one group.
•
•
Addressing Items to a
Group
Groups are marked with the
icon.
You can save groups in personal address books only.
You can save a group with any name you want. You can use spaces
or any characters in the group name.
1
In an item view, click Address.
2
Select a group
3
Repeat as necessary.
click To, CC, or BC.
Using Groups to Address Items
Page time: 00:00:02
File time: 00:00:10
Date: 05-12-98 9:10am
User: RBALLARD
Queue: Q:PRNT
113
File: T:\TYPE\859\W\02\R_16ADDO.859
Page: 114 (8 of 29)
4
Plate: Composite
Spec: jama1
Galley: Final Galley
Click OK to return to the item view.
Tips
•
Name Completion searches the Frequent Contacts address book, the
current address book, and the system address book, provided they
are open.
•
Public groups are located in the system address book.
Adding and Removing
Names from a Personal
Group
1
Click
the tab of the address book the group is located in.
2
Select the group
3
Modify the group in the Address List
click Edit
Edit Group.
click Save Group
OK.
Tips
•
To edit a group, you can also right-click the group entry in an
•
Viewing Group
Information
address book click Edit Group. Groups are marked by the
icon.
The group entries appear in the Address List. You can double-click
usernames in the address books to move them into the group or
double-click usernames in the Address List to remove them from the
group.
1
Click
on the toolbar.
2
To view the members of a group, click a group
click Edit
114 Using Groups to Address Items
Page time: 00:00:02
File time: 00:00:12
Date: 05-12-98 9:10am
User: RBALLARD
Queue: Q:PRNT
Edit Group.
File: T:\TYPE\859\W\02\R_16ADDO.859
Page: 115 (9 of 29)
Plate: Composite
Spec: jama1
Galley: Final Galley
The group is displayed in the Address List, where you can see the usernames.
If it is a personal group, you can edit it. See Creating Personal Address Books
under Using the Address Book.
3
To view a description of the group, select the group
click Information.
Moving Addresses from One Address Book to Another
If another user has created a personal address book that would be useful to you,
he or she can export a copy of it and send you the copy. You can then import
the copy of the other user’s personal address book instead of having to re-create
the book from scratch. The other user could also share the personal address book
with you. See Sharing a Personal Address Book with Another User under Setting
Personal Address Book Properties.
Importing Addresses
into a Personal
Address Book
1
If you have received a Novell® personal address book as an attachment, rightclick the attachment click Save As select the folder or floppy disk you
want to save it to click Save.
2
Open the address book you want to import addresses into. For steps, see
Displaying Different Information in the Address Book under Using the Address
Book.
or
Create a new personal address book to import the addresses into. For steps,
see Creating Personal Address Books under Using the Address Book.
3
Click File
Import.
Moving Addresses from One Address Book to Another
Page time: 00:00:01
File time: 00:00:14
Date: 05-12-98 9:10am
User: RBALLARD
Queue: Q:PRNT
115
File: T:\TYPE\859\W\02\R_16ADDO.859
Page: 116 (10 of 29)
4
Plate: Composite
Select the address book file
Spec: jama1
Galley: Final Galley
click Open.
Tips
•
To stop the import, press Esc click Yes.
•
Novell Address Book files have a .NAB extension. They are ASCII
files with specific formatting. If you want to import a non-Novell
address book file, look at a .NAB file to determine its format, then
mirror this format with your own address book’s information.
•
To change folders, click a folder in the Folders box. You cannot
import addresses into the system address book.
Exporting Addresses
from the Address Book
1
Open the address book from which you want to export names.
2
Select the addresses you want to export.
If you want to export an entire address book, you don’t need to select any
names.
3
Click File
Export.
4
Click Entire Address Book if you want to export the entire address book.
or
Click Selected Items if you want to export the addresses you have selected.
5
Click a folder for the file to be saved to
file click Save.
type a filename for the exported
Tips
•
To stop the export, press Esc click Yes.
•
The exported file is saved with a .NAB extension (Novell Address
Book).
•
Ctrl+click to select multiple addresses.
Importing Non-Novell
Address Books
1
From your non-Novell® e-mail application, export the address book you
want to import into GroupWise.
2
Open a DOS editor or Notepad
open the non-Novell address book file.
You can also open the file in any word processor. To make editing easier, set
the margins so that the lines do not wrap.
3
Export a small Novell address book. See Exporting Addresses from the Address
Book above.
116 Moving Addresses from One Address Book to Another
Page time: 00:00:01
File time: 00:00:15
Date: 05-12-98 9:10am
User: RBALLARD
Queue: Q:PRNT
File: T:\TYPE\859\W\02\R_16ADDO.859
Page: 117 (11 of 29)
Plate: Composite
Spec: jama1
Galley: Final Galley
4
Open the address book in a second copy or split window of the application
used in Step 2.
5
Cut, copy, and paste, or retype the fields for each entry from the non-Novell
book into the Novell address book. Place each field behind the comma
corresponding to the similar field in the first line of the Novell address book.
Each field should be enclosed in quotes.
The order of the fields for each entry must correspond to the order of the
fields in the first line of the Novell address book file. For example, if the
Name field follows the first comma in the first line, the Name field
information must also follow the first comma in the entry's line, for example:
"U","John Smith".
Each Novell address book entry starts with "C", "U", or "R". "C" is for
company entries, "U" is for user entries, and "R" is for resource entries. In
addition, groups are enclosed by "G>" and "G<" tags. This order (all "C"
entries before "U" entries, and "U" entries before "R" entries) is important if
you want user entries to be linked to their organizations and resource entries
to be linked to their owners. Groups can go anywhere after company entries
in this order.
When you are finished, the address book should look similar to this:
:::TAGMAP:::OFFE0003:***,3001001E:Name,3A06001E:First Name,3A11001E:Last Name,
“C”,”Novell GroupWise”,”Novell”,”GroupWise”,
“U”,”John Smith”,”John”,”Smith”,
“U”,”Kenichi Aoki”,”Kenichi”,”Aoki”,
“U”,”Marina Sanchez”,”Marina”,”Sanchez”,
“R”,”Conference Room One”,,,
“R”,”Overhead Projector”,,,
6
Delete all extra spaces at the end of each line
with a .NAB extention.
save your formatted file
7
In GroupWise, open the Address Book.
8
To import the entries into a new address book, click File
type a name
click OK.
New Book
or
To import the entries into an existing book, open the book you want to
import the names into.
Moving Addresses from One Address Book to Another
Page time: 00:00:01
File time: 00:00:16
Date: 05-12-98 9:10am
User: RBALLARD
Queue: Q:PRNT
117
File: T:\TYPE\859\W\02\R_16ADDO.859
Page: 118 (12 of 29)
9
Click File
Plate: Composite
Import
Spec: jama1
Galley: Final Galley
select the address book file
click OK.
Tips
•
Novell address book files are in ANSI-delimited format. In the first
line, the characters up to the first comma must not be edited. Each
field's title follows a comma. The hexadecimal numbers in each title
represent the MAPI tags. User-defined fields may share the same
hexadecimal number.
•
If you want to leave a field blank for an entry, you must type the
comma. This way you keep the fields lined up, so that, for example,
all information following the tenth comma of each entry goes to the
same field. There can be spaces inside of the quotes, but you must
delete all spaces outside of the quotes.
•
Each Group entry begins with a C, U, or R, and also contains a T
(To or primary recipient), C (carbon-copy recipient), or B (blindcopy recipient). For example, a "UT" entry is a user who will receive
an item as a primary recipient.
Displaying Different Information in the Address Book
You can control which address book tabs are displayed in the main Address Book
window by opening and closing address books. For example, you may have a
personal address book for an account that you deal with only six months out of
the year. You can close it when you don’t need it and open it again six months
later.
You can also control the information that is displayed in a single address book.
In order for you to change displayed information in an address book, that
address book must be opened.
Address books contain more information than can be displayed at one time. You
can change what information is displayed at any time by selecting different
column markers. You can also change column order, sort columns, or change
their widths.
Opening and Closing
Address Books
1
Click
on the toolbar.
118 Displaying Different Information in the Address Book
Page time: 00:00:01
File time: 00:00:17
Date: 05-12-98 9:10am
User: RBALLARD
Queue: Q:PRNT
File: T:\TYPE\859\W\02\R_16ADDO.859
Page: 119 (13 of 29)
2
Click File
Plate: Composite
Spec: jama1
Galley: Final Galley
Open Book.
If all of your address books are open, Open Book is dimmed.
3
Click or Ctrl+click one or more address books
4
To close an address book, click its tab
File
click OK.
Close Book.
Tips
•
When an address book is open, its name appears on a tab in the
Address Book window.
•
Closing an address book does not delete it; you can open it again at
any time.
•
You can open as many address books as you want. If you have more
address books open than can be displayed on one line, click the
arrows to the right of the tabs to display them.
Specifying the Columns
to Display in an
Address Book
1
Click
on the toolbar.
2
Click the tab of the address book you want to change the displayed columns
in.
Displaying Different Information in the Address Book
Page time: 00:00:01
File time: 00:00:19
Date: 05-12-98 9:10am
User: RBALLARD
Queue: Q:PRNT
119
File: T:\TYPE\859\W\02\R_16ADDO.859
Page: 120 (14 of 29)
Plate: Composite
Spec: jama1
Galley: Final Galley
3
Click Edit Columns click a column name on the menu to display it or
remove it from display.
4
If the column name you want is not displayed, click More Columns click
the column in the Selected Columns list box click Add or Remove.
120 Displaying Different Information in the Address Book
Page time: 00:00:02
File time: 00:00:21
Date: 05-12-98 9:10am
User: RBALLARD
Queue: Q:PRNT
File: T:\TYPE\859\W\02\R_16ADDO.859
Page: 121 (15 of 29)
Plate: Composite
Spec: jama1
Galley: Final Galley
Tips
•
To display another column of information, you can also right-click a
column marker, then click a column name. To arrange columns,
you can drag a column marker to another position.
•
To remove a column marker, you can drag away the marker.
•
You can select different column layouts for each address book.
Changing the Order of
Columns in the Address
Book
1
Click
on the toolbar.
2
Click the tab of the address book you want to change the displayed columns
in.
3
Drag a column heading to another position.
4
To add a column, right-click a column heading click a column name.
5
To remove a column, drag away the heading.
Tips
•
You can Ctrl+click column headings in either list box, then click
Add or Remove to move multiple columns at once.
•
You can also move columns in the Available Columns dialog box.
Click Edit Columns More Columns double-click column
headings in the Available Columns list box or the Selected Columns
list box to add or remove columns.
•
You can select different column layouts for each address book.
Displaying Different Information in the Address Book
Page time: 00:00:01
File time: 00:00:23
Date: 05-12-98 9:10am
User: RBALLARD
Queue: Q:PRNT
121
File: T:\TYPE\859\W\02\R_16ADDO.859
Page: 122 (16 of 29)
Plate: Composite
Spec: jama1
Galley: Final Galley
Using the Address Book to Send Messages
The Address Book makes sending mail messages, appointments, tasks, notes, and
phone messages easier and faster by helping you find the e-mail addresses of the
users you want to send an item to.
You can open an item view and then open Address Book to find addresses or you
can open Address Book first and open an item from there.
Using the Address
Book to Address an
Item
1
In an item view, click Address.
2
Click an address book tab.
3
If the To, CC, and BC boxes are not visible, click Address List at the bottom
of the Address Book.
This button toggles between
Close List and Address List.
122 Using the Address Book to Send Messages
Page time: 00:00:02
File time: 00:00:25
Date: 05-12-98 9:10am
User: RBALLARD
Queue: Q:PRNT
File: T:\TYPE\859\W\02\R_16ADDO.859
Page: 123 (17 of 29)
4
Plate: Composite
Spec: jama1
Galley: Final Galley
Double-click the names you want as primary (To) recipients of your message
click CC double-click the names you want as carbon copy recipients
repeat for blind copy recipients click Close.
Tips
•
If you know the person’s name, begin typing it in the To box of the
item view. Name Completion searches the Frequent Contacts
address book, the current address book, and the system address
book, provided they are listed in the Name Completion Search
Order. When Name Completion finds the person you want to send
a message to, you can stop typing. If Name Completion finds a
name that is close to but doesn’t exactly match the one you are
looking for, use the Up or Down arrows to scroll to adjacent names
in the Address Book.
•
To find an entry in an address book, click a Search List box and
begin typing. For example, begin typing a name in the Name
column.
•
You can also drag names to the Address List after clicking To, CC,
or BC. To select one entry, click the entry. To select multiple
entries, Ctrl+click them. To select all entries in the current address
book (up to 1,000), click Edit Select All.
Sending Mail from the
Address Book
1
Click
on the toolbar.
2
If the Address List is not visible, click Address List.
3
Double-click the users you want to send mail to.
This button toggles between
Close List and Address List.
Click to open a new mail
message view.
Using the Address Book to Send Messages
Page time: 00:00:02
File time: 00:00:27
Date: 05-12-98 9:10am
User: RBALLARD
Queue: Q:PRNT
123
File: T:\TYPE\859\W\02\R_16ADDO.859
Page: 124 (18 of 29)
4
Plate: Composite
Spec: jama1
Galley: Final Galley
To open a mail message view, click Mail.
Tips
•
Users you specified are listed in the To, CC, and BC boxes in the
item view.
Using Frequent Contacts
Use the Frequent Contacts tab in the Address Book to access your most
frequently used or most recently used entries. When you use an entry in a
message, the entry is copied to the Frequent Contacts address book if the book’s
options are set to do so. You can view the date and time you last used an entry
and the number of times you have used it.
Once an entry is placed in Frequent Contacts, it remains there until you delete it
from Frequent Contacts. The entry also remains in its original address book.
You can use Frequent Contacts Properties to decide which addresses to capture
(if any) from either received or sent items, and how long you want addresses to
remain in the address book before deleting them.
Using Frequent
Contacts to Address
Items
1
Open an item view.
2
Click Address.
3
If the Frequent Contacts tab is not displayed, click File
Frequent Contacts
OK.
This button toggles between
Close List and Address List.
124 Using Frequent Contacts
Page time: 00:00:02
File time: 00:00:30
Date: 05-12-98 9:10am
User: RBALLARD
Queue: Q:PRNT
Open Book
File: T:\TYPE\859\W\02\R_16ADDO.859
Page: 125 (19 of 29)
Plate: Composite
Spec: jama1
Galley: Final Galley
4
If the To, CC, and BC boxes are not visible, click Address List at the bottom
of the Address Book.
5
Click To double-click the names you want as primary recipients of your
message click CC double-click the names you want as carbon copy
recipients repeat for blind copy recipients click OK.
Tips
•
When you begin typing a name in the To, CC, or BC box, Name
Completion searches the Frequent Contacts address book, the
current address book, and the system address book, provided they
are listed in the Name Completion Search Order dialog box. When
Name Completion finds the person you want to send a message to,
you can stop typing.
•
You can remove address book columns or display other columns of
information about entries. See Displaying Different Information in
the Address Book under Using the Address Book.
•
The Frequent Contacts address book can be closed, but it cannot be
deleted.
Setting Frequent
Contacts Properties
1
Click the tab of your Frequent Contacts book.
If the tab is not visible, the book is not open.
Using Frequent Contacts
Page time: 00:00:01
File time: 00:00:31
Date: 05-12-98 9:10am
User: RBALLARD
Queue: Q:PRNT
125
File: T:\TYPE\859\W\02\R_16ADDO.859
Page: 126 (20 of 29)
Plate: Composite
Properties
Spec: jama1
Galley: Final Galley
2
Click File
click the Options tab.
3
Select the options you want.
4
To delete names from this book, select the Delete Addresses Not Referenced
within Time Period check box type a number in the Time Period box
click a time period from the drop-down list (from hours to years)
click
Delete Now to remove old addresses.
5
Click OK to save your changes and close the Properties dialog box.
or
Click Apply to save your changes and keep the Properties dialog box open.
Tips
•
To open an address book, click File Open Book click the
address book click OK.
•
To turn off names being placed into the Frequent Contacts address
book, click Auto-Saving Off.
Using Predefined
Filters for the Frequent
Contacts Address Book
1
If you have not already opened the Address Book, open an item view
Address.
2
Click the Frequent Contacts tab.
126 Using Frequent Contacts
Page time: 00:00:01
File time: 00:00:32
Date: 05-12-98 9:10am
User: RBALLARD
Queue: Q:PRNT
click
File: T:\TYPE\859\W\02\R_16ADDO.859
Page: 127 (21 of 29)
Plate: Composite
Spec: jama1
Galley: Final Galley
3
If there is no Frequent Contacts tab, you must open the Frequent Contacts
book. For steps, see Displaying Different Information in the Address Book
under Using the Address Book.
4
Click View
Filter for at Least 3 References.
or
Click View
Define Filter for References
type a number
click OK.
Tips
•
The number you type is the minimum number of references an
entry must have in order to be included in the filter. A reference is
the number of times you have sent or received items from an entry.
Creating Personal Address Books
A personal address book is one that you create for yourself to fit your particular
needs. You can create, edit, and save any number of personal address books. You
have full rights to add and delete names and address information for any person,
company, or resource you want in your personal address books.
When you create a personal address book, a tab is added to the main Address
Book window. When you create multiple address books, you can include the
same name and address in several books. If the entry is copied from an address
book and you edit the entry’s information in one book, it is updated in all
books.
Personal address books group addresses according to your preferences. You can
include Internet addresses or no address at all for the people you add to your
personal address books. You can send items to all entries in a personal address
book by clicking the To box above the Address List, then clicking Edit Select
All, or you can create a personal group. If you save a list of people as a group,
you only need to type the group name in the To box of an open send view to
send the entire group a message.
Creating a Personal
Address Book
1
Click
on the toolbar.
2
Click File
3
Type a name for the new book
New Book.
click OK.
Creating Personal Address Books
Page time: 00:00:01
File time: 00:00:34
Date: 05-12-98 9:10am
User: RBALLARD
Queue: Q:PRNT
127
File: T:\TYPE\859\W\02\R_16ADDO.859
Page: 128 (22 of 29)
Plate: Composite
Spec: jama1
Galley: Final Galley
4
To add names to the new address book, click Add.
5
Click the Entry Type
6
Fill in the fields for the entry.
7
Click OK.
click OK.
Tips
•
You can copy names from existing address books into your new
address book. See Editing a Personal Address Book later in this
section.
•
You can share a personal address book with other users. See Setting
Personal Address Book Properties under Using the Address Book.
•
You can add and modify records in your personal address books.
However, only the system administrator can add and modify records
in the system address book.
Deleting a Personal
Address Book
Click
1
on the toolbar.
128 Creating Personal Address Books
Page time: 00:00:02
File time: 00:00:36
Date: 05-12-98 9:10am
User: RBALLARD
Queue: Q:PRNT
File: T:\TYPE\859\W\02\R_16ADDO.859
Page: 129 (23 of 29)
Plate: Composite
Spec: jama1
Galley: Final Galley
2
Click File
Delete Book.
3
Click or Ctrl+click the books you want to delete
click OK
Yes.
Tips
•
You can delete only personal address books.
•
You cannot undelete a deleted address book from the Trash. Once it
is deleted, an address book cannot be recovered.
Editing a Personal
Address Book
In a personal address book, you can add or delete entries, edit existing
information, copy names from one book to another, or rename a book. You can
also create your own information fields.
Editing Names and Addresses in a Personal Address Book
1
Click
on the toolbar.
2
Click an address book tab
click the name you want to edit.
Creating Personal Address Books
Page time: 00:00:01
File time: 00:00:37
Date: 05-12-98 9:10am
User: RBALLARD
Queue: Q:PRNT
129
File: T:\TYPE\859\W\02\R_16ADDO.859
Page: 130 (24 of 29)
Plate: Composite
3
Click Edit
4
Edit the information
Spec: jama1
Galley: Final Galley
Edit.
click OK.
Copying Names to a New Personal Address Book
1
Click
on the toolbar.
2
Open the address book you want to copy.
3
Click File
Save as Book.
130 Creating Personal Address Books
Page time: 00:00:02
File time: 00:00:39
Date: 05-12-98 9:10am
User: RBALLARD
Queue: Q:PRNT
File: T:\TYPE\859\W\02\R_16ADDO.859
Page: 131 (25 of 29)
4
Plate: Composite
Spec: jama1
Galley: Final Galley
Type a name for your address book in the box
click OK.
The new address book is represented by a tab with the name you specified.
It is also listed in the list of available address books.
Removing Names from a Personal Address Book
1
Click
on the toolbar.
2
Click an address book tab
remove.
3
Click Remove
click or Ctrl+click the names you want to
Yes.
After you select names, you can also drag them off the address book to
remove them, press the Delete key, or click Edit Remove.
Synchronizing Address
Book Entries
You can use Synchronize to make sure that your personal address book entries
match the corresponding entries in the system address book. You can
synchronize an entire personal address book or selected entries only.
For example, you may have a personal address book containing the names of
your contacts in the Marketing department. When the Marketing department
changes buildings and phone numbers, Synchronize saves you from having to
create a new personal address book.
1
Click the tab of the personal address book you want to synchronize.
2
To synchronize an address book, click File
Synchronize
Current Book.
or
To synchronize selected entries, click the entries click File Synchronize
Selected Items. You may also Ctrl+click or Shift+click the entries to select
them.
Creating Personal Address Books
Page time: 00:00:01
File time: 00:00:41
Date: 05-12-98 9:10am
User: RBALLARD
Queue: Q:PRNT
131
File: T:\TYPE\859\W\02\R_16ADDO.859
Page: 132 (26 of 29)
Plate: Composite
Spec: jama1
Galley: Final Galley
Setting Personal Address Book Properties
Use the Address Book Properties dialog box to view the properties of each of
your address books (including the system address book). There are three
property tabs in the Address Book, not all of which are visible from every address
book.
The General tab is visible from all address books. Use the General tab to view
the name of the address book, the MAPI service provider (if known), a summary
of what the address book contains, and so forth. You can also use it to add a
description of the address book.
The Options tab is visible only from the Frequent Contacts address book. Use
the Options tab to specify what gets saved in Frequent Contacts and how this
address book should be cleaned up. See Using Frequent Contacts under Using the
Address Book.
The Sharing tab is visible for personal address books for which you are the
owner, including your Frequent Contacts book. Use the Sharing tab to choose
whether or not to share an address book, who to share it with, and which Access
rights each person should have.
You can also share your personal groups or distribution lists by placing them in
an address book you share with others.
Viewing an Address
Book’s Properties
1
Click the tab of the address book you want to view the properties of.
If the tab is not visible, the book is not open.
2
Click File
Properties.
132 Setting Personal Address Book Properties
Page time: 00:00:01
File time: 00:00:43
Date: 05-12-98 9:10am
User: RBALLARD
Queue: Q:PRNT
File: T:\TYPE\859\W\02\R_16ADDO.859
Page: 133 (27 of 29)
3
Plate: Composite
Spec: jama1
Galley: Final Galley
To view the number of individuals, resources, companies, and so forth, click
Contains.
If the address book is large, this may take some time. The status bar
measures the progress of this operation.
Sharing an Address
Book with Another User
4
To add or modify a description for the address book, click in the Description
box
type or edit the description.
5
Click OK to save your changes and close the Properties dialog box.
or
Click Apply to apply your changes and keep the Properties dialog box open.
1
Click the tab of the address book you want to share.
If the tab is not visible, the book is not open.
2
Click File
Sharing.
3
Click the Shared With radio button.
4
Type the name of the person with whom you want to share the address book
click Add User.
Name Completion works in the Name box. Begin typing the name, and
Name Completion will complete it.
Setting Personal Address Book Properties
Page time: 00:00:01
File time: 00:00:44
Date: 05-12-98 9:10am
User: RBALLARD
Queue: Q:PRNT
133
File: T:\TYPE\859\W\02\R_16ADDO.859
Page: 134 (28 of 29)
5
Plate: Composite
Spec: jama1
Click each user's name in the Share List
Click Shared With to share the
book.
Galley: Final Galley
assign him or her Access rights.
Type the name of the user you
want to share the book with.
Give the person rights for the
shared book.
6
Click OK to save your changes and close the Properties dialog box.
or
Click Apply to apply your changes and keep the Properties dialog box open.
Tips
•
To remove a user from the Share List, click the user click Remove
User.
•
When you click OK or Apply, the person with whom you want to share
the address book receives a notification. The Status column displays as
Pending until the user accepts or declines the shared address book request,
then the column is updated to reflect the user's selection.
•
You cannot share address books across external domains.
Viewing Groups, Organizations, or Resources in the Address Book
Use the predefined filters in the View menu to display only groups, users,
organizations, or resources in an address book.
Address books display all entries by default. While all groups, companies, and
resources are marked by icons, finding specific entries in large address books can prove
difficult. A predefined filter displays only the type of entry you are looking for.
There are two predefined filters which apply only to the Frequent Contacts
address book. You can use them to filter all entries with at least the number of
references you specify.
134 Viewing Groups, Organizations, or Resources in the AddressBook
Page time: 00:00:02
File time: 00:00:46
Date: 05-12-98 9:10am
User: RBALLARD
Queue: Q:PRNT
File: T:\TYPE\859\W\02\R_16ADDO.859
Page: 135 (29 of 29)
Plate: Composite
Spec: jama1
Galley: Final Galley
To view groups, organizations, or resources in an address book,
1
Click
on the toolbar.
2
Click View
3
To return to the non-filtered address book view, click View
click the filter you want to display.
Filter Off.
Tips
•
After a filter has been enabled, a black dot appears next to the Filter
•
•
•
option on the View menu and
appears in the upper-left corner
of an address book tab.
The predefined filters, Filter for at Least Three References and
Configure Filter for References, apply only to the Frequent Contacts
address book. They let you filter out entries with less than three
references or let you set the minimum number of references an entry
must have to be included in the filter.
The non-filtered address book displays all users, resources, groups,
and organizations.
The Address Book places icons by resources, groups, and
organizations in all address books:
Resources
Groups
Companies
Viewing Groups, Organizations, or Resources in the AddressBook
Page time: 00:00:02
File time: 00:00:48
Date: 05-12-98 9:10am
User: RBALLARD
Queue: Q:PRNT
135
File: T:\TYPE\859\W\02\R_21FIND.859
Page: 136 (1 of 22)
Plate: Composite
Spec: jama1
Galley: Final Galley
•
Page time: 00:00:00
File time: 00:00:01
•
•
•
Date: 05-29-98 10:42am
•
•
•
•
•
•
User: RBALLARD
•
•
•
•
•
•
Queue: Q:PRNT
•
•
•
•
•
•
•
•
Finding Items in Your Mailbox
Finding Items in Your
Mailbox
File: T:\TYPE\859\W\02\R_21FIND.859
Page: 137 (2 of 22)
Plate: Composite
Spec: jama1
Galley: Final Galley
Finding Items
Use Find to look for items that match the criteria you specify. You can tell Find
where to look (which folders or document libraries, for example), and precisely
which documents or messages to look for. You can save the results in a Find
folder, where you can retrieve them any time you open the folder.
If you use GroupWise® Remote, you can find items in both your Remote and
Master Mailboxes.
Finding an Item
1
Click
on the toolbar.
2
To search for specific text, select Full Text or Subject in the first drop-down
list type what you are looking for in the box.
3
To search for a name, select From/Author or To/CC in the second dropdown list type the name in the box.
4
Select each item type you are looking for
looking for.
5
To specify a date range, select the Created or Delivered Between check box
type or select the dates.
6
In the Look In list box, click the folders and/or libraries you want to search
in.
You may need to click the plus
sign (+) next to your user
folder to expand the folder
structure.
select each item source you are
Finding Items
Page time: 00:00:02
File time: 00:00:03
Date: 05-29-98 10:42am
User: RBALLARD
Queue: Q:PRNT
137
File: T:\TYPE\859\W\02\R_21FIND.859
Page: 138 (3 of 22)
7
Plate: Composite
Spec: jama1
Galley: Final Galley
Click OK.
Tips
•
The results of the search are displayed in the GroupWise Find
Results folder, which opens when the search is completed.
•
Use Advanced Find to make your search more specific. For example,
you may want to search for messages from two or three users at once.
•
Use Find Text rather than Find to look for text in an item you
currently have open. See Finding Text in Items under Finding Items
in Your Mailbox.
•
For additional information about finding items, click Help Help
Topics the Index tab type TIPS in the box press Enter to
open the Find Quick Tips help topic.
•
Select the Find Only Official Document Versions check box to
locate only the official document version of a document containing
multiple versions.
•
Your folders and library are marked for search by default with a
check in the box. Folders not marked contain dimmed boxes. To
speed up your search, unmark any folders you don’t want to search.
Saving the Results of a
Find
1
Click
on the toolbar.
2
Perform a Find. See Finding an Item above.
3
In the GroupWise Find Results dialog box, click File
138 Finding Items
Page time: 00:00:02
File time: 00:00:05
Date: 05-29-98 10:42am
User: RBALLARD
Queue: Q:PRNT
Save as Folder.
File: T:\TYPE\859\W\02\R_21FIND.859
Page: 139 (4 of 22)
4
Plate: Composite
Spec: jama1
Galley: Final Galley
Type a name for the folder type a description for the folder
click Up,
Down, Right, or Left to place your folder where you want it to display
click Finish.
Tips
•
You can update a Find folder each time you open it. Make sure Find
New Matching Items Each Time the Folder Is Opened is selected.
•
•
Finding an Item By
Example
The Find folder
is placed in the Cabinet in the Folder List.
To see your Find results at any time, select the folder.
You can look for items, including documents, that match an example you specify
in a field on the Find By Example tab. GroupWise finds all the items with fields
that match the information you specify and displays them in the Find Results
window.You can select any item type (mail message, document, appointment,
task, or reminder note) to search. The fields on the Find By Example tab vary
depending on the type of item you select.
Finding Documents By Example
When you use Find By Example to look for documents, GroupWise searches
your default library. You can specify find criteria for system (document type,
subject, and so on) and custom fields. GroupWise searches one library at a time.
The Find By Example tab is independent of the Find tab. This means
information you specify on the Find tab will not appear in the Find By Example
tab and vice versa.
Finding Items
Page time: 00:00:01
File time: 00:00:06
Date: 05-29-98 10:42am
User: RBALLARD
Queue: Q:PRNT
139
File: T:\TYPE\859\W\02\R_21FIND.859
Page: 140 (5 of 22)
Plate: Composite
Find
Spec: jama1
Galley: Final Galley
1
Click Tools
the Find By Example tab.
2
In the Item Type drop-down list, click the type of item you want to search
for.
3
If you selected Document in step 3, click the library you want to search in
the Library drop-down list.
4
In each field, specify the information you want to look for.
5
Click OK to begin the Find.
Tips
•
You can click Revise Find in the Find Results window to modify
your search criteria and redo the find.
Finding a Document
and Creating a
Reference to It in Your
Mailbox
1
Click File
New
Document Reference.
2
Click Find.
3
Click Full Text in the first drop-down list to search both the document
properties and the document content, then type the text you want to find.
or
Click Subject in the first drop-down list to search just the document subject,
then type the text you want to find.
4
If you know the name of the author of the document, click From/Author in
the second drop-down list type the name.
140 Finding Items
Page time: 00:00:02
File time: 00:00:08
Date: 05-29-98 10:42am
User: RBALLARD
Queue: Q:PRNT
File: T:\TYPE\859\W\02\R_21FIND.859
Page: 141 (6 of 22)
Plate: Composite
Spec: jama1
Galley: Final Galley
5
In the Item Type group box, click Document.
6
If you want to search all versions of the document, click Find Only Official
Document Versions to deselect it.
7
In the Look In list box, click the folders and libraries where you want to
search for the document.
8
Click OK to begin the Find.
9
In the GroupWise Find Results dialog box, click the document for which
you want to create a document reference click OK.
GroupWise creates a document reference in the current folder.
Tips
•
The GroupWise Find Results dialog box only displays the
documents to which you have at least View rights.
Looking for Multiple
Words in Items Using
Advanced Find
1
Click
on the toolbar.
2
Click Advanced Find.
3
Select a field in the first drop-down list
condition.
click an operator
type or select a
Finding Items
Page time: 00:00:02
File time: 00:00:10
Date: 05-29-98 10:42am
User: RBALLARD
Queue: Q:PRNT
141
File: T:\TYPE\859\W\02\R_21FIND.859
Page: 142 (7 of 22)
4
Plate: Composite
Spec: jama1
Galley: Final Galley
Click OK if your filter is complete.
or
Click the last drop-down list click And, Or, Insert Row, or New Group to
add more filter criteria add more criteria for your filter click End from
the last drop-down list OK.
Tips
•
The results of the search are displayed in the GroupWise Find
Results dialog box, which opens when the search is completed.
•
Find searches all folders and libraries selected in the Look In box. To
narrow your Find, deselect unnecessary folders and libraries.
•
Use Find Text rather than Find to look for text in an item you
currently have open.
•
Click Delete Row in the last drop-down list to remove a row from
your filter definition. You cannot delete a one-row filter.
•
Click Insert Row in the last drop-down list to make your filter more
specific. Additional rows narrow your search criteria even further.
For example, to search for items from John Smith that were carboncopied to Mary Jones, the first row searches for John Smith. The
second row searches for Mary Jones.
Using More than One
Group of Rows in an
Advanced Find
1
Follow Steps 1-3 in Looking for Multiple Words in Items Using Advanced Find
above.
2
Click the last drop-down list click And, Or, Insert Row, or New Group to
add more filter criteria add more criteria for your filter.
3
Click End from the last drop-down list
OK.
Tips
•
Click New Group in the last drop-down list to create a new row for
a filter whose first group of rows contains several parameters for one
column. For example, to create a filter to display all opened items
from John Smith and Mary Jones, click From in the first drop-down
list
the = Matches operator
type John Smith as the parameter
click Or in the last drop-down list. A second row appears. Click
From in the first drop-down list
click the = Matches operator
type Mary Jones as the parameter
click New Group. Click Item
Status in the first drop-down list
click the [] Includes operator
click Opened in the third box
click OK.
142 Finding Items
Page time: 00:00:01
File time: 00:00:11
Date: 05-29-98 10:42am
User: RBALLARD
Queue: Q:PRNT
File: T:\TYPE\859\W\02\R_21FIND.859
Narrowing an Advanced
Find Using Filter
Operators
Page: 143 (8 of 22)
Plate: Composite
Spec: jama1
Galley: Final Galley
When you click Advanced Find, the Advanced Find dialog box appears. Select
the operator from the Operator drop-down list box
. The list of available
operators changes depending on the selection you make in the first box. Some
operators, such as [], have two or more distinct names. While the name may
change, the purpose of the operator remains the same. For example, the []
operator in the table below finds all items containing John in the From box or
including a Sound file in the Attachment List. Click All Fields to see a list of all
available fields, including user-defined fields.
Table of Operators
Operator
[] Contains
-> Begins With
-> Within
<- Previous
= Matches, Equal To,
Equal To Field, On
! Does Not Include, Not
Equal To, Not Equal To
Field
< Before,Less Than, Less
Than Field
<= On or Before, Less
Than or Equal To, Less
Than or Equal To Field
> After, Greater Than,
Greater Than Field
>= On or After, Greater
Than or Equal To,
Greater Than or Equal
To Field
Include
All items containing the
condition
All items whose first
text begins with the
condition
All items falling within
a range starting from a
certain day forward
All items falling within
a range previous to a
certain day
All items that equal the
condition
All items except the
condition
Examples
From[]John,
Attachment List[]Sound
Author ->Karen
Created->5 Day
(created within 5 days
of today)
Created <-5 Day
(created 5 days or fewer
previous to today)
Cc=Jill, Document
Creator=JFerguson,
Retrieved
Date=Tomorro
Item Status!Opened,
Number Accepted!5
All items less than the
condition
Retrieved Date<Today,
Document
Number<1000
All items less than or
Retrieved
equal to the condition
Date<=Yesterday, Total
Recipients<=10
All items greater than
Retrieved Date>This
the condition
Week,Version
Number>4.0
All items greater than or Retrieved Date>=This
equal to the condition
Month, Number
Replied>=7
Finding Items
Page time: 00:00:01
File time: 00:00:12
Date: 05-29-98 10:42am
User: RBALLARD
Queue: Q:PRNT
143
File: T:\TYPE\859\W\02\R_21FIND.859
Page: 144 (9 of 22)
Plate: Composite
Spec: jama1
Galley: Final Galley
Finding Text in Items
Use Find Text to search for a string of text in an item you are reading or sending.
GroupWise searches only the text in the Message box or in an attachment that is
open in the Viewer. You can also search for text in the QuickViewer. To find
multiple words, or to search in multiple items, use Find in the Tools menu.
Finding Text in an Item
1
Open an item.
2
Click Edit
3
Type the text you want to search for in the Find What box.
4
Click Find Next to search for the text you typed.
Find Text.
Tips
•
To search for items that contain specific text, use Find in the Tools
menu. See Finding Items under Finding Items in Your Mailbox.
Filtering
If your Mailbox contains many items, you might have a difficult time finding
certain items. Filter lets you display items according to specific criteria. For
example, a filter can display only items that have a certain word in the subject.
You can also use a filter to hide items that you want to get out of your way.
Filter does not actually move or delete items; it displays certain items based on
the criteria you specify. Filters you create affect all folders. Once you clear the
filter, all the items reappear.
Displaying or Hiding
Items in Your Mailbox
Using Filter
1
Click a folder (such as Mailbox, Trash, or a folder you have created).
Filters affect all folders. By clicking a folder, you can see the filter results
immediately.
2
In the lower-right corner of the Main Window, double-click
144 Filtering
Page time: 00:00:01
File time: 00:00:13
Date: 05-29-98 10:42am
User: RBALLARD
Queue: Q:PRNT
.
File: T:\TYPE\859\W\02\R_21FIND.859
Page: 145 (10 of 22)
Plate: Composite
Spec: jama1
Galley: Final Galley
3
In the first drop-down list, click the field you want to filter. For example,
click From if you want to display items from a specific person. See
Understanding Filter and Rule Fields later in this section for more
information.
4
Click the operator drop-down list
click an operator. See Using Filter
and Rule Operators later in this section for more information.
5
Type the criteria for the filter.
or
If provided, click the drop-down list
click an existing criteria.
If you type criteria, such as a person’s name or a subject, you can include
wildcard characters such as an asterisk (*) or a question mark (?). Text you
type is not case-sensitive. See Using Filter and Rule Wildcard Characters and
Switches later in this section for more information.
6
Click the last drop-down list
click End.
or
Click the last drop-down list
click And or Or to narrow your filter by
adding more filter criteria. See Narrowing Your Filter later in this section for
more information.
Tips
•
Read the text in the dialog box beginning with “Include entries
where...” as you create your filter. This summarizes how your filter
will work.
•
The filter icon changes to
indicating that a filter is active.
•
To cancel the filter, click
Clear Filter.
Filtering
Page time: 00:00:02
File time: 00:00:15
Date: 05-29-98 10:42am
User: RBALLARD
Queue: Q:PRNT
145
File: T:\TYPE\859\W\02\R_21FIND.859
Displaying or Hiding
Items in Your Calendar
Using Filter
Page: 146 (11 of 22)
Plate: Composite
Spec: jama1
Galley: Final Galley
1
Click the Appointments, Reminder Notes, or Tasks List in a calendar view.
2
In the lower-right corner of the calendar view, click
3
In the first drop-down list, click the field you want to filter. For example,
click From if you want to display items from a specific person. See
Understanding Filter and Rule Fields later in this section for more
information.
4
Click the operator drop-down list
click an operator. See Using Filter
and Rule Operators later in this section for more information.
5
Type the criteria for the filter.
Filter.
or
If provided, click the drop-down list
click an existing criteria.
If you type criteria, such as a person’s name or a subject, you can include
wildcard characters such as an asterisk (*) or a question mark (?). Text you
type is not case-sensitive. See Using Filter and Rule Wildcard Characters and
Switches later in this section for more information.
6
Click the last drop-down list
click End.
or
Click the last drop-down list
click And or Or to narrow your filter by
adding more filter criteria. See Narrowing Your Filter later in this section for
more information.
Tips
•
Read the text in the dialog box beginning with “Include entries
where...” as you create your filter. This summarizes how your filter
will work.
•
The filter applies to all lists in the calendar view. For example, if you
click the Reminder Notes List in Step 1 above, the Appointments
and Tasks Lists are also affected by the filter.
Using an Existing Filter
1
•
The filter icon changes to
indicating that a filter is active.
•
To cancel the filter, click
Clear Filter.
In the lower-right corner of the Main Window or Calendar View, click
Filter.
146 Filtering
Page time: 00:00:01
File time: 00:00:16
Date: 05-29-98 10:42am
User: RBALLARD
Queue: Q:PRNT
File: T:\TYPE\859\W\02\R_21FIND.859
Page: 147 (12 of 22)
Plate: Composite
Spec: jama1
2
Click the Filter pull-down menu
3
Click the filter you want to use
Galley: Final Galley
Open.
OK.
Tips
•
If you’ve recently used a filter, you can select it by clicking View
Filter the filter. GroupWise lists the four most recently used
filters.
Clearing a Filter
1
In the lower-right corner of the Main Window, click
Clear Filter.
Tips
•
You can also right-click an item’s subject in the filtered view, then
click Clear Filter.
•
After you’ve cleared a filter, the icon in the lower-right corner of the
•
Deleting a Filter
Saving a Filter
Main Window changes back to
.
If the filter is saved, you can use it again by clicking View
Edit/Create Filter Open.
Filter
1
In the lower-right corner of the Main Window, double-click
.
2
Click the Filter pull-down menu
3
Click the filter you want to delete
1
In the lower-right corner of the Main Window or Calendar View, click
Open.
Delete.
Filter.
2
Specify the filter criteria.
Filtering
Page time: 00:00:02
File time: 00:00:18
Date: 05-29-98 10:42am
User: RBALLARD
Queue: Q:PRNT
147
File: T:\TYPE\859\W\02\R_21FIND.859
Page: 148 (13 of 22)
Plate: Composite
3
Click the Filter pull-down menu
4
Type a name in the Save As box
Spec: jama1
Galley: Final Galley
Save.
click OK.
Tips
•
To access a saved filter, click Filter Open in the Filter dialog box.
•
The Name box in the lower portion of the Save Filter dialog box lists
all the filters you have saved. You can click any existing filter name
and see its description in the Description box.
•
Filters are not saved to a file on a drive; they are saved to your user
database along with your mail messages, Options settings, and more.
Narrowing Your Filter
You may want to limit your filter further by specifying additional criteria. Each
filter criteria is displayed in a separate row. The last button on each row lets you
expand your filter criteria. The ways to add and delete rows to narrow your filter
are explained below.
And
Creates a new row. The filter will display items that match the conditions in each
row joined by And.
Or
Creates a new row. The filter will display items that match the conditions in
either row joined by Or. The items don’t have to match the conditions in both
rows.
Insert Row
Inserts a new row below the current row and pushes the remaining rows down.
Insert Row is useful if you’ve already created a filter, and you want to add more
criteria in the middle.
148 Filtering
Page time: 00:00:01
File time: 00:00:19
Date: 05-29-98 10:42am
User: RBALLARD
Queue: Q:PRNT
File: T:\TYPE\859\W\02\R_21FIND.859
Page: 149 (14 of 22)
Plate: Composite
Spec: jama1
Galley: Final Galley
Delete Row
Removes the current row from the filter.
New Group
Begins a new group of rows. You can then join the groups by an And or Or. If
two groups are joined by And, the items must match all conditions in both
groups. If two groups are joined by Or, the items must match all conditions in
either group, but not necessarily both.
End
Designates the last row of conditions in the filter. If you select End in a row that
is followed by other rows or groups, the subsequent rows and groups are deleted.
Using Filter and Rule
Wildcard Characters
and Switches
You can use the following wildcard characters and switches to narrow your filter
or specify rule conditions. These are available in the Filter dialog box and the
Define Conditions dialog box only when you’ve selected certain fields that
require you to type additional text. For example, if you select the Subject field,
you are required to type text that appears in the Subject box. Also, these wildcard
characters and switches are applicable only when you select the [] Contains
operator.
List of Wildcard Characters and Switches
Wildcard
Character(s) and
Switches
AND, &, or a
space
OR or
NOT or !
"
?
What the Filter or Rule Will Match
All items that meet two or more conditions. For
example, mountain & goat, mountain AND goat,
and mountain goat all find items containing the
words “mountain” and “goat.”
All items that meet one of two or more conditions. For
example, mountain goat and mountain OR goat
both find items containing “mountain” or “goat” or
both words.
All items containing one condition but not the other.
For example, mountain ! goat and mountain NOT
goat both find items containing the word “mountain”
but not the word “goat.” Items that contain both are
not included.
All text found within quotation marks. For example,
“mountain goats” finds all items containing the
phrase “mountain goats.” This does not work with
documents or document references.
Matches any one character. For example, jo?n finds all
items containing the word “john,” “joan,” “join,” and
so on.
Filtering
Page time: 00:00:01
File time: 00:00:20
Date: 05-29-98 10:42am
User: RBALLARD
Queue: Q:PRNT
149
File: T:\TYPE\859\W\02\R_21FIND.859
Page: 150 (15 of 22)
Plate: Composite
Galley: Final Galley
Wildcard
Character(s) and
Switches
*
What the Filter or Rule Will Match
/NOCASE
(default)
Items containing a specific word, regardless of case.
For example, /NOCASE ZOO finds both “Zoo” and
“zoo.”
Items that exactly match the case of a specific word.
For example, /CASE Zoo finds “Zoo” but not “zoo.”
Items containing the search terms where * and ? are
treated as wildcard characters. For example,
/WILDCARD jo?n finds “john”, “joan”, and “join.”
Items containing the search terms where * and ? are
treated as characters. For example, /NOWILDCARD
jo?n finds “jo?n.”
/CASE
/WILDCARD
(default)
/NOWILDCARD
Using Filter and Rule
Operators
Spec: jama1
Matches zero or more characters. For example,
mountain* finds all items containing the words
“mountain,” “mountains,” “mountainous,” and so on.
The following table explains the operators you can use when creating a filter or a
rule. The available operators depend on the field you have selected in the first
drop-down list.
Operator
= Equal To
! Not Equal To
< Less Than
Example
Item Type = Mail
Item Type !
Appointment
Number Accepted < 4
<= Less Than or
Equal To
> Greater Than
Number Accepted <=
4
Number Read > 6
>= Greater Than or
Equal To
= Equal to Field
Number Read >= 6
Number Accepted =
Total Recipients
Result Includes
Only mail messages
All item types except
appointments
Items in which fewer than
4 recipients accepted
Items in which 4 or fewer
recipients accepted
Items that more than 6
recipients read
Items that 6 or more
recipients read
Items in which the number
of recipients that accepted
equals the total number of
recipients
150 Filtering
Page time: 00:00:01
File time: 00:00:21
Date: 05-29-98 10:42am
User: RBALLARD
Queue: Q:PRNT
File: T:\TYPE\859\W\02\R_21FIND.859
Page: 151 (16 of 22)
Plate: Composite
Spec: jama1
Galley: Final Galley
Operator
! Not Equal to Field
Example
Number Read !
Number Accepted
< Less Than Field
Number Opened <
Total Recipients
<= Less Than or
Equal to Field
Number Opened <=
Total Recipients
> Greater Than Field
Number Opened >
Number Deleted
>= Greater Than or
Equal to Field
Number Opened >=
Number Deleted
[] Includes
! Does Not Include
Item Status []
Completed
Item Status ! Accepted
[] Contains
From [] Bill
-> Begins With
To -> cli
= Matches
Subject = customer
reports
Result Includes
Items in which the number
of recipients who read the
item is not equal to the
number of recipients who
accepted
Items in which the number
of recipients who opened
the item is less than the
total number of recipients
Items in which the number
of recipients who opened
the item is less than or
equal to the total number
of recipients
Items in which the number
of recipients who’ve
opened the item is greater
than the number of
recipients who’ve deleted
the item
Items in which the number
of recipients who’ve
opened the item is greater
than or equal to the
number of recipients
who’ve deleted the item
Items which have been
completed
Items which have not been
accepted
Items in which the From
field contains “Bill” such as
items from Bill Jones, Bill
Smith, and so on. Contains
does not support wildcard
characters.
Items in which the To field
begins with “cli” such as
“Client Group” or “Clive
Winters”
Items in which the Subject
line reads “Customer
Reports”
Filtering
Page time: 00:00:01
File time: 00:00:22
Date: 05-29-98 10:42am
User: RBALLARD
Queue: Q:PRNT
151
File: T:\TYPE\859\W\02\R_21FIND.859
Page: 152 (17 of 22)
Plate: Composite
Operator
= On
>= On or After
Example
Created = Today
Created >= Yesterday
> After
Created > Yesterday
< Before
Due/End Date <
Tomorrow
Due/End Date <=
Tomorrow
Due/End Date -> 3
Day
<= On or Before
-> Within
Understanding Filter
and Rule Fields
Spec: jama1
<- Previous
Due/End Date <- 3
Day
= On Date
Created = 5/29/99
> After Date
Created > 5/29/99
>= On or After Date
Created >= 5/29/99
< Before Date
Created < 5/29/99
<= On or Before
Date
Created <= 5/29/99
Galley: Final Galley
Result Includes
Items that were sent today
Items that were sent
yesterday or later
Items that were sent later
than but not including
yesterday
Tasks that are due before
tomorrow
Tasks that are due
tomorrow or earlier
Tasks that are due between
and including today and
three days after today
Tasks that were due
between and including
today and three days before
today
Items that were created on
May 29, 1999
Items that were created
after May 29, 1999
Items that were created on
or after May 29, 1999
Items that were created
before May 29, 1999
Items that were created on
or before May 29, 1999
The following table explains many of the fields available to you when you’re
creating a filter or a rule; however, it does not include user-defined fields.
Field Name
Assigned Date
Attachment List
This Field Refers to:
The start date of a task.
This is the date the task
begins appearing on your
Calendar. This date does
not change when your
task is carried forward a
day.
Types of attachments
such as files, sounds,
movies, or OLE objects.
152 Filtering
Page time: 00:00:01
File time: 00:00:23
Date: 05-29-98 10:42am
User: RBALLARD
Queue: Q:PRNT
Field Criteria Entry
Depending on the
operator, you can specify
a time period, select a
period of time that the
task falls within, or
specify an exact date.
Select an attachment
from the drop-down list.
File: T:\TYPE\859\W\02\R_21FIND.859
Page: 153 (18 of 22)
Plate: Composite
Field Name
Attachments
Author
BC
Caller’s Company
Caller’s Name
Caller’s Phone
Number
CC
Copy Type
Created
Current File
Current Location
Spec: jama1
Galley: Final Galley
This Field Refers to:
Attachments containing
certain text or phrases
that you specify.
The name of the person
who authored a
document.
Text appearing in the BC
box of an item.
Text appearing in the
Caller’s Company box of
a phone message.
Text appearing in the
Caller box of a phone
message.
A phone number
appearing in the Phone
box of a phone message.
Text appearing in the CC
box of an item.
The type of message a
user receives (To, CC, or
BC).
The date you clicked the
Send button. Also refers
to the date you posted a
posted item to your
Calendar.
The name of a document
in the staging directory
when the document is
opened or checked out.
(The staging directory is a
temporary directory
where GroupWise stores
documents while you
have them open.)
The pathname to the
staging directory when
the document is opened
or checked out.
Field Criteria Entry
Type attachment text.
Type the document
author’s name.
Type a BC recipient
name.
Type a company name.
Type a caller name.
Type a phone number.
Type a CC recipient
name.
Select To, CC, or BC
from the drop-down list.
Depending on the
operator, you can specify
a time period, select a
period of time that the
item falls within, or
specify an exact date.
Type a document name.
Type a staging directory
pathname.
Filtering
Page time: 00:00:01
File time: 00:00:24
Date: 05-29-98 10:42am
User: RBALLARD
Queue: Q:PRNT
153
File: T:\TYPE\859\W\02\R_21FIND.859
Page: 154 (19 of 22)
Plate: Composite
Spec: jama1
Galley: Final Galley
Field Name
Date Opened
This Field Refers to:
The date a document was
last opened.
Delivered
The date and time that
the item appeared in the
recipients’ Mailboxes.
Document Creator
The name of the person
who created the
document.
The number of a
document.
The type of a document
in the library such as a
form, expense report,
memo, and so forth.
The date that a task is
due, or the end date and
time of an appointment.
Document Number
Document Type
Due / End Date
Filename Extension
The filename extension of
a document in a library.
From
The name of a person in
the From box of an item.
Whether the item was
received, sent, posted, or
a draft.
Whether an item has
been accepted,
completed, opened, read,
marked private, or is
hidden.
Item Source
Item Status
154 Filtering
Page time: 00:00:01
File time: 00:00:25
Date: 05-29-98 10:42am
User: RBALLARD
Queue: Q:PRNT
Field Criteria Entry
Depending on the
operator, you can specify
a time period, select a
period of time that the
document falls within, or
specify an exact date.
Depending on the
operator, you can specify
a time period, select a
period of time that the
item falls within, or
specify an exact date.
Type the document
creator’s name.
Type an integer.
Type a document type.
Depending on the
operator, you can specify
a time period, select a
period of time that the
task or appointment falls
within, or specify an
exact date.
Type a filename
extension (for example,
.DOC).
Type the From box
name.
Select the item source
from the drop-down list.
Select the item status
from the drop-down list.
File: T:\TYPE\859\W\02\R_21FIND.859
Page: 155 (20 of 22)
Plate: Composite
Field Name
Item Type
Spec: jama1
Galley: Final Galley
This Field Refers to:
Types of items such as
mail messages,
appointments, tasks, and
so on.
The library in which
documents are stored.
Text appearing in the
Message box of an item.
Other items such as
forms, custom messages,
and C3PO™s.
The number of recipients
that have accepted an
item you’ve sent.
Library
Message
Message Class
Number Accepted
Number Completed
The number of recipients
that have completed an
item you’ve sent.
Number Deleted
The number of recipients
that have deleted an item
you’ve sent.
Number Opened
The number of recipients
that have opened an item
you’ve sent.
Field Criteria Entry
Select the item type from
the drop-down list.
Select the library from
the drop-down list.
Type part or all of the
Message box text.
Depending on the
operator, you can type
an integer or select a
variable from the dropdown list. For example,
Number Accepted Equal
to Total Recipients.
Depending on the
operator, you can type
an integer or select a
variable from the dropdown list. For example,
Number Completed
Equal to Total
Recipients.
Depending on the
operator, you can type
an integer or select a
variable from the dropdown list. For example,
Number Deleted Equal
to Total Recipients.
Depending on the
operator, you can type
an integer or select a
variable from the dropdown list. For example,
Number Opened Equal
to Total Recipients.
Filtering
Page time: 00:00:01
File time: 00:00:26
Date: 05-29-98 10:42am
User: RBALLARD
Queue: Q:PRNT
155
File: T:\TYPE\859\W\02\R_21FIND.859
Page: 156 (21 of 22)
Plate: Composite
Spec: jama1
Galley: Final Galley
Field Name
Number Replied
This Field Refers to:
The number of recipients
that have replied to an
item you’ve sent.
Opened By
The name of the person
who last opened this
version of a document.
Text appearing in the
Place box of an
appointment.
The priority of an item.
The priority can be high,
standard, or low.
Items with a reply
requested send option.
The size of an item
including its attachments.
The start date of a task.
When a task is carried
forward to the next day,
the start date becomes the
new date.
Place
Priority
Send Options
Size
Started
Subject
Task Category
Task Priority
To
File time: 00:00:27
Date: 05-29-98 10:42am
Type part or all of the
Place box text.
Select the priority from
the drop-down list.
Select the option from
the drop-down list.
Type an integer.
Depending on the
operator, you can specify
a time period, select a
period of time that the
task falls within, or
specify an exact date.
Type part or all of the
Subject box text.
Type a single letter.
Text appearing in the
Subject box of an item.
The alphabetical priority
of a task (A, B, C, and so
on).
The numerical priority of Type an integer.
a task (1, 2, 3, and so on).
A person’s name
Type a To box name.
appearing in the To box
of an item.
156 Filtering
Page time: 00:00:01
Field Criteria Entry
Depending on the
operator, you can type
an integer or select a
variable from the dropdown list. For example,
Number Replied Equal
to Total Recipients.
Type a name.
User: RBALLARD
Queue: Q:PRNT
File: T:\TYPE\859\W\02\R_21FIND.859
Page: 157 (22 of 22)
Plate: Composite
Spec: jama1
Galley: Final Galley
Field Name
Total Recipients
This Field Refers to:
The total number of
recipients of an item.
Version Created
Date
The date a specific
version of a document
was created.
Version Creator
The name of the person
who created this version
of a document.
The description of the
document version.
The version number of
the document.
Version Description
Version Number
Version Status
View Name
The current status of a
document.
The name of the view in
which you’re creating or
reading an item. The
view names correspond to
the names displayed when
you click the down-arrow
next to the item view
buttons on the toolbar.
Field Criteria Entry
Depending on the
operator, you can type
an integer or select a
variable from the dropdown list. For example,
Number Accepted Equal
to Total Recipients.
Depending on the
operator, you can specify
a time period, select a
period of time that the
document falls within, or
specify an exact date.
Type the document
creator’s name.
Type a document
version description.
Select the version from
the drop-down list, or
click Select Version and
specify the version
number.
Select a status from the
drop-down list.
Type a view name.
Filtering
Page time: 00:00:01
File time: 00:00:28
Date: 05-29-98 10:42am
User: RBALLARD
Queue: Q:PRNT
157
File: T:\TYPE\859\W\02\R_23DOCO.859
Page: 158 (1 of 38)
Plate: Composite
Spec: jama1
Galley: Final Galley
•
Page time: 00:00:01
File time: 00:00:01
•
•
•
Date: 05-29-98 12:05pm
•
•
•
•
•
•
User: RBALLARD
•
•
•
•
•
•
Queue: Q:PRNT
•
•
•
•
•
•
•
•
Creating and Working with Documents
Creating and Working
with Documents
File: T:\TYPE\859\W\02\R_23DOCO.859
Page: 159 (2 of 38)
Plate: Composite
Spec: jama1
Galley: Final Galley
Managing Your Documents in GroupWise
GroupWise® Library lets you manage all your documents from your Mailbox. In
GroupWise, your documents display as items in your Mailbox and folders along
with your mail messages, tasks, appointments, and so on.
Double-click the document
reference to open the
document. The icon shows
which application the
document was created in.
You can select a document reference to create, delete, check out, check in, open,
move, or copy the corresponding document.
In addition, GroupWise Library makes it easy to maintain multiple versions of a
document, determine who has access to a document, and share a document with
others.
Storing Documents in
Libraries
In GroupWise, all of your documents are stored in a library. GroupWise assigns
a unique number to each document. This number identifies the document and
makes it easy to find. You can look up a document in GroupWise Library by its
document number much like you can look up a book in a library by its catalog
number.
In each library, the documents are compressed and encrypted. This saves disk
space and maintains the security of documents because it makes it impossible to
view the contents of documents outside of GroupWise.
Before you can access any of the documents in a library, you must first have
rights to the library. Your system administrator determines which people have
access to each library.
Once you have imported or created a document in the GroupWise Library, you
can only access that document from GroupWise. This keeps your documents
secure. If you need to share the document with a user who does not have access
to GroupWise, you can attach the document reference to a mail message and
send it to that user, or you can click File Save As to save the document in an
external file, outside the GroupWise Library. In either case, the file is not
updated with any changes made to the document in GroupWise and is not
controlled by the sharing rights assigned in GroupWise.
Managing Your Documents in GroupWise
Page time: 00:00:02
File time: 00:00:03
Date: 05-29-98 12:05pm
User: RBALLARD
Queue: Q:PRNT
159
File: T:\TYPE\859\W\02\R_23DOCO.859
Page: 160 (3 of 38)
Plate: Composite
Spec: jama1
Galley: Final Galley
Specifying a Default Library
The default library is where all your documents are stored, unless you specify a
different library, and where Find searches for documents by default.
Understanding
Document References
1
Click Tools
Options
double-click Documents.
2
Click the library you want to use as a default.
3
Click Set Default
click OK.
The document items that appear in your Mailbox (and other folders) are called
document references. These document references are links to the actual
documents in the library.
Document references are created when you create a new document, import a
document, copy a document, select a document from the results of a Find, or
click File New Document Reference.
You can select a reference to check out, check in, open, view, copy, or delete the
corresponding document. Multiple document references can point to the same
document. For example, each employee in a company could create a reference to
the employee handbook.
Sharing Document References with Other Users
If you are the author of a document or if you have share rights to the document,
you can post the document reference in a shared folder and make it available to
all users who have access to the folder. In addition, you can attach document
references to send the document reference to another user.
Document References and Remote
If you use Remote, updating your Remote Mailbox always gives you all of the
document references, unless you choose to have none. You can use the document
references to retrieve copies of the documents into your Remote Mailbox.
Specifying Document
Properties
Every document in GroupWise must have a set of attributes associated with it,
such as the author’s name, the creation date, and the document type. These
attributes are called document properties. The document property information is
used for finding and categorizing documents.
160 Managing Your Documents in GroupWise
Page time: 00:00:02
File time: 00:00:05
Date: 05-29-98 12:05pm
User: RBALLARD
Queue: Q:PRNT
File: T:\TYPE\859\W\02\R_23DOCO.859
Page: 161 (4 of 38)
Plate: Composite
Spec: jama1
Galley: Final Galley
You can use the Document tab in Properties to view version information for the
specific version of a document, view the document activity history, and control
sharing of the document with other users.
You can determine which fields display on the Document tab in Properties and
customize their size and order using the options in the Library Setup Properties
dialog box. To open this dialog box, click Tools Options double-click
Documents click Properties.
Specifying a Default Value for a Document Properties Field
A default value is information (author, subject, and so on) that is automatically
inserted in the corresponding document property field for every document you
add to the selected library.
You can specify default values for the document property fields that can be
edited. The default values are used when you create a new document or import a
document into the selected library. If no default values have been specified for
Author and Document Type, GroupWise uses the creator’s name as the author
and Document as the Document Type.
1
Click Tools
Options
double-click Documents.
2
Click the library for which you want to specify default values.
3
Click Properties
4
Click a field type the default value. For example, you could type your
name as the default value for the Author field.
click the Document Defaults tab.
Managing Your Documents in GroupWise
Page time: 00:00:01
File time: 00:00:06
Date: 05-29-98 12:05pm
User: RBALLARD
Queue: Q:PRNT
161
File: T:\TYPE\859\W\02\R_23DOCO.859
Page: 162 (5 of 38)
5
Plate: Composite
Spec: jama1
Galley: Final Galley
Click OK.
Tips
•Field names that are indented under another field are related to that
field. For example, the “parent” field might be project name and the
“child” fields might be the sub-project names. If you want to specify a
default value for a child field, you must first specify a default value for its
parent field.
Understanding Document Types
Document type is a required property field for all documents in a GroupWise
Library. When you create a document in GroupWise you must select a
document type. The document type determines the life of the document in days.
By default, a document’s life is 365 days; however, your system administrator
can specify a document life as long as 2.1 billion days.
When a document expires the document type determines whether the document
is archived, deleted, or retained.
Document expiration is based on inactivity. For example, if a document’s life is
365 days, the document won’t be archived or deleted until 365 days have passed
since the last time it was viewed or opened. You can prolong the life of a
document that is close to its expiration date by viewing or opening the
document. This resets the document’s expiration date.
Creating Documents
When you create a document in GroupWise, you are adding a document to the
library. You can also add documents to the library by importing, copying, or
checking in an existing document.
When you create a new document using File New Document, GroupWise
prompts you to select a template for the document. You can use an application’s
template, a GroupWise template, or a file on disk as the foundation for your new
document.
Templates
Application Templates
Description
You can select an application to create a document
based on the application’s template file. The
Applications list box lists all the applications that
are registered as having templates in your
Windows® registry file.
162 Creating Documents
Page time: 00:00:01
File time: 00:00:07
Date: 05-29-98 12:05pm
User: RBALLARD
Queue: Q:PRNT
File: T:\TYPE\859\W\02\R_23DOCO.859
Page: 163 (6 of 38)
Plate: Composite
Templates
GroupWise Templates
Files as Templates
Creating a Document
Using a GroupWise
Template
New
Spec: jama1
Galley: Final Galley
Description
You can select GroupWise templates to use a
document in the library as the foundation of a new
document. You can store documents (such as
memos or expense reports) in GroupWise and
assign them a document type of template. All the
documents in the library with a document type of
template (that you have rights to) appear in the
Templates Library list.
File templates are documents that are not in the
library. You can select a file anywhere on your
system and use it as a foundation for a new
document.
1
Click File
Document.
2
Click Select a GroupWise Template
select a template in the list box.
To select a template from a different library, click the library in the dropdown list.
3
Click OK.
4
Type the subject of the document
click OK.
Creating Documents
Page time: 00:00:01
File time: 00:00:09
Date: 05-29-98 12:05pm
User: RBALLARD
Queue: Q:PRNT
163
File: T:\TYPE\859\W\02\R_23DOCO.859
Page: 164 (7 of 38)
Plate: Composite
Spec: jama1
Galley: Final Galley
To specify additional information about the document, such as author name
or document type, click Properties after you type the subject.
5
Double-click the document reference in the current folder to open the new
document.
Tips
•
You can click Open Document Now to immediately open the
document.
•
When you’re in your Remote Mailbox, you can’t see the values that
are available for custom fields in your Master Mailbox. For example,
if your system administrator defined a custom field called Client,
you can select a client name from a list of values when you’re in your
Master Mailbox, but when you’re in your Remote Mailbox, the list
of values does not display. As a result, you have to manually enter
the client name.
Creating a Document
Using a File as a
Template
1
Click File
New
Document.
2
Click Select a File.
3
Type the name of the file you want to use as a template for the new
document.
You can also click the Browse button to find the file.
4
Click OK.
5
Type a subject.
To specify additional information about the document, such as author name
or document type, click Properties after you type the subject.
6
Click OK.
164 Creating Documents
Page time: 00:00:02
File time: 00:00:11
Date: 05-29-98 12:05pm
User: RBALLARD
Queue: Q:PRNT
File: T:\TYPE\859\W\02\R_23DOCO.859
Creating a Document
Using an Application’s
Template
Page: 165 (8 of 38)
Plate: Composite
Spec: jama1
Galley: Final Galley
You can create a document using an application’s default template. For example,
you can select Word to create a new Word document, or you can select
WordPerfect to create a new WordPerfect document.
1
Click File
New
Document.
2
Click Select an Application click the application you want to use as a
template in the Applications list box click OK.
3
Type a subject for the document.
To specify additional information about the document, such as author or
document type, click Properties after you type the subject.
4
Click OK.
Tips
•
The Applications list box contains all the applications that are
registered as having templates in your Windows registry file.
Making Any Document
a Template
1
Click the document reference in your Mailbox.
2
Click File
3
In the Document Type box, type template
Properties.
click OK.
Tips
•
All documents with the document type of Template appear in the
Templates list in the New Documents dialog box.
Creating a Reference
to a Document
If a document already exists in the library, you just create a reference for it in
your Mailbox.
Creating Documents
Page time: 00:00:01
File time: 00:00:12
Date: 05-29-98 12:05pm
User: RBALLARD
Queue: Q:PRNT
165
File: T:\TYPE\859\W\02\R_23DOCO.859
Page: 166 (9 of 38)
Plate: Composite
New
Spec: jama1
Galley: Final Galley
1
Click File
Document Reference.
2
In the Library drop-down list, click the library that contains the document
you want to access.
3
In the Document # box, type the document number.
4
In the Version drop-down list, click the version you want the document
reference to point to.
5
Click OK.
Tips
•
If you don’t know the number of the document, click Find on the
Select Document dialog box to use Find to locate the document. To
add the document displayed in the Find results to your Mailbox,
click the document Edit Move/Link to Folder.
Organizing Your Documents
Your document references are organized in the Documents folder so you can
locate them easily. This folder is a system folder and cannot be deleted. The first
time you start GroupWise 5.5, three things will happen:
•
•
•
The 20 most recent document references from your Work in Progress folder
will be moved to the Documents folder.
If you have more than 20 document references in your Work in Progress
folder, the oldest document references will be deleted.
If you already had a folder named Documents, it will be renamed More
Documents.
166 Organizing Your Documents
Page time: 00:00:02
File time: 00:00:14
Date: 05-29-98 12:05pm
User: RBALLARD
Queue: Q:PRNT
File: T:\TYPE\859\W\02\R_23DOCO.859
Page: 167 (10 of 38)
•
•
Plate: Composite
Spec: jama1
Galley: Final Galley
Any document references you create or open will be added to the Documents
folder; if you so specify, any document references you view or import will
also be added.
You can also specify that none of these actions adds a document reference to
the Documents folder. The Work in Progress folder will no longer contain
any document references automatically.
The Documents folder can contain only documents. If any other type of item is
moved to this folder by a non-GroupWise 5.5 client (for example, from an older
version of GroupWise Remote), the item will eventually be deleted as described
below.
The Documents folder will contain, by default, your 20 most recent document
references. You can change this number from 0 to 5000 document references.
Once the maximum number is reached, an additional document reference added
to the Documents folder will cause the oldest document reference to be deleted.
You can also delete document references from the Documents folder manually.
Find Folders
The Documents folder has two Find folders. Authored contains document
references for all the documents which you are the author of.
Default Library contains document references for all the documents you have
access to in the default library. You can change or delete the Author and Default
Library folders. You can create other document Find folders according to your
needs. For example, you can create a Find folder for a specific library, subject,
author, or document type.
Organizing Your Documents
Page time: 00:00:01
File time: 00:00:15
Date: 05-29-98 12:05pm
User: RBALLARD
Queue: Q:PRNT
167
File: T:\TYPE\859\W\02\R_23DOCO.859
Specifying When
Document References
Are Added to the
Documents Folder
Page: 168 (11 of 38)
Plate: Composite
Spec: jama1
Galley: Final Galley
1
Right-click the Documents folder
click Properties.
2
Click the Documents tab.
3
Select the check boxes to indicate which actions will add document
references to the Documents folder.
Tips
•
Selecting View as an action will place any document reference in the
Documents folder that were viewed with the Viewer, not with the
QuickViewer.
•
If you leave all the check boxes unchecked, no document references
will be placed in the Documents folder.
•
By default, the Create and Open actions are checked. This means
document references will be placed in the Documents folder when
you create or open them.
Changing the Maximum
Number of References
in the Documents
Folder
1
Right-click the Documents folder
2
Click the Documents tab.
click Properties.
168 Organizing Your Documents
Page time: 00:00:01
File time: 00:00:17
Date: 05-29-98 12:05pm
User: RBALLARD
Queue: Q:PRNT
File: T:\TYPE\859\W\02\R_23DOCO.859
Page: 169 (12 of 38)
Plate: Composite
Spec: jama1
Galley: Final Galley
Type a number in the Number of Documents to Display box.
3
Tips
•
If you don’t want any document references placed in the Documents
folder, type 0.
•
The maximum number you can specify is 5000.
•
Once the maximum number is reached, an additional document
reference added to the Documents folder will cause the oldest
document reference to be deleted.
Importing Documents into a GroupWise Library
You can import documents created outside of GroupWise into GroupWise
Library using the Import Documents wizard.
Specifying Files to
Import
When you specify the documents you want to import, you can select individual
files, or you can select one or more folders and import all the documents in those
folders. This makes it easy to import large numbers of documents without
having to select each document individually.
Importing Folders
When you import a folder, GroupWise imports the documents in the folder;
however, GroupWise does not import the folder itself or the folder structure.
The folders aren’t imported because documents in GroupWise Library are not
stored in a folder structure, and so the folders have no meaning in the library.
When you import documents in a folder, you can specify whether you want to
import all, some, or none, of the documents that are contained in the folder’s
sub-folders. In addition, you can specify which types of files, such as Word or
WordPerfect, you want to import by specifying the file extensions in the File
Name Filter box.
Choosing an Import
Method
By default, GroupWise performs a Quick Import and copies the documents you
specify into your default library. If you want to have more control over how your
documents are imported, deselect the Quick Import check box. This lets you
perform a custom import.
When you perform a custom import you can specify the following information:
•
•
•
Whether you want to copy or move the documents into the library.
The filename and location of a log file for import status messages and errors.
The library where you want to store the documents.
Importing Documents into a GroupWise Library
Page time: 00:00:01
File time: 00:00:18
Date: 05-29-98 12:05pm
User: RBALLARD
Queue: Q:PRNT
169
File: T:\TYPE\859\W\02\R_23DOCO.859
Page: 170 (13 of 38)
•
•
•
Importing Documents
Using Quick Import
Plate: Composite
Spec: jama1
Galley: Final Galley
Whether or not you want to create document references in a folder. If you
create document references, you can specify the folder in which to store
them.
Whether you want to specify document properties for each document
individually or have GroupWise create document properties using the
default values.
Whether or not the current filenames will be used as part of the document
subject.
1
Click File
Import Documents.
2
Click Add Individual Files select the files you want to import click OK.
(To select multiple files to import, Ctrl+click each additional document.)
or
Click Add Entire Directory select the folder or folders that contain the
documents you want to import.
Type a file extension, such as *.doc or *.wpd, in the File Name Filter box if
you want to import specific types of files from the selected folder or folders
click OK.
170 Importing Documents into a GroupWise Library
Page time: 00:00:01
File time: 00:00:20
Date: 05-29-98 12:05pm
User: RBALLARD
Queue: Q:PRNT
File: T:\TYPE\859\W\02\R_23DOCO.859
Page: 171 (14 of 38)
Plate: Composite
Spec: jama1
Galley: Final Galley
3
Click Next.
4
If you want GroupWise to create document references for each document,
click Display Documents in Folder click the folder where you want to
store the document references.
or
If you do not want to create document references, click Import without
Displaying Documents in a Folder.
If you don’t create document references during the import, you can create
them later using File New Document Reference.
5
Click Finish to begin the import.
GroupWise copies the documents into the specified library and creates a
document reference for each document in the Cabinet folder.
Tips
•
You can also import a document by dragging it from a window or
your desktop to a GroupWise folder.
•
To remove a file from the Files to Import list, click the file
Remove Files.
Importing Documents
Using Custom Import
1
Click File
Import Documents.
2
Click Add Individual Files select the files you want to import click OK.
(To select multiple files to import, Ctrl+click each additional document.)
or
Click File select the folder or folders you want to import.
Importing Documents into a GroupWise Library
Page time: 00:00:02
File time: 00:00:22
Date: 05-29-98 12:05pm
User: RBALLARD
Queue: Q:PRNT
171
File: T:\TYPE\859\W\02\R_23DOCO.859
Page: 172 (15 of 38)
Plate: Composite
Spec: jama1
Galley: Final Galley
Type a file extension, such as *.doc or *.wpd, in the File Name Filter box if
you want import specific types of files from the selected folder or folders
click OK.
3
Make sure Quick Import is deselected.
4
Click Next.
5
Click Copy Files into GroupWise to place a copy of the files in the library
and leave the original files in the source location.
or
Click Move Files into GroupWise to move the files into the library and
delete the original files from the source location.
6
To save any import errors in a log file, click Store All Status and Error
Messages in a Log File specify a filename.
7
Click Next.
172 Importing Documents into a GroupWise Library
Page time: 00:00:02
File time: 00:00:24
Date: 05-29-98 12:05pm
User: RBALLARD
Queue: Q:PRNT
File: T:\TYPE\859\W\02\R_23DOCO.859
Page: 173 (16 of 38)
Plate: Composite
Spec: jama1
Galley: Final Galley
8
Click the library you want to store the documents in.
9
Click Next.
10 If you want GroupWise to create document references for each document,
click Display Documents in Folder
store them.
click the folder where you want to
or
If you do not want to create document references, click Import without
Displaying Documents in a Folder.
11 Click Next.
Importing Documents into a GroupWise Library
Page time: 00:00:02
File time: 00:00:26
Date: 05-29-98 12:05pm
User: RBALLARD
Queue: Q:PRNT
173
File: T:\TYPE\859\W\02\R_23DOCO.859
Page: 174 (17 of 38)
Plate: Composite
Spec: jama1
Galley: Final Galley
12 To specify properties for each document you are importing, click Prompt for
Properties of Each Document Individually.
or
To have GroupWise specify properties based on the default property values
specified in Document options, click Set Properties Using Default Values.
13 If you want to specify different default values for this import session only,
click Modify Default Values
specify the values
click OK.
14 Click Next.
15 Click Finish to begin the import.
Sharing Documents
When you create or import a document in GroupWise you can specify whether
you want to share the document with other users. If you share a document, you
can specify which users or group you want to share the document with and what
rights each user will have. In addition, you can specify which sharing rights, if
any, you want GroupWise to automatically apply to all the documents you
create.
When you create a new document, GroupWise inserts <General User> and
<Creator> in the Share List. By default, general users (all users with access to the
library) do not have any rights to the document and the author and creator have
full rights to the document. You can use the <General User> entry to grant the
same rights to all users who have access to the library, and you, assuming you're
the author of the document, can use the <Creator> entry to limit the rights of
the creator.
For example, say that your secretary creates several blank performance review
documents in the library, one for each employee in your team, and specifies you
as the author of each document. This gives you full rights to each document
because you're the author; however, this also gives your secretary full rights to
each document because he created them. Of course, you don't want your
secretary to be able to read everyone's performance reviews, so you could use the
<Creator> entry to remove your secretary's rights to the performance review
documents.
Specifying Users Who
Can Share the
Document
You can use the options on the Sharing tab in Properties to give sharing rights to
a document. You can use one of the following methods to give sharing rights:
•
•
You can click Not Shared to prevent other users from viewing, editing, or
deleting the document.
You can click Shared With to select specific users and groups and specify
sharing rights for each user or group.
174 Sharing Documents
Page time: 00:00:01
File time: 00:00:27
Date: 05-29-98 12:05pm
User: RBALLARD
Queue: Q:PRNT
File: T:\TYPE\859\W\02\R_23DOCO.859
Page: 175 (18 of 38)
Plate: Composite
Spec: jama1
Galley: Final Galley
When a user tries to access a document, GroupWise checks the rights of the
individual user. If the user doesn’t have rights to the document, GroupWise
checks for any rights the user inherits as a member of a group. If the user
doesn’t have rights to the document as a member of a group, GroupWise
checks the rights given to <General User>.
•
Specifying Default
Sharing Rights for
Documents
You can click Shared With and then click Version Level Security to give
users different rights for each version of the document.
If you typically share your documents with the same user or groups of users, you
can use the Sharing Defaults tab to specify default sharing rights for all the
documents you create. Once you have specified default sharing rights,
GroupWise applies these rights to every document you create or import into the
library.
If you don't specify any default sharing rights, the documents you create or
import are not shared, which means that only the author and the creator have
rights to the document.
Default sharing rights only apply to the documents you create in the selected
library. If you create documents in multiple libraries, you must specify default
sharing rights for each library.
1
Click Tools
Options
double-click Documents.
2
Click the library for which you want to specify default sharing rights.
3
Click Properties
4
Click Shared With.
5
In the Name box, type the name of the user or group you want to grant
rights to click Add User.
6
Click a user or group in the Share List.
7
Select the check boxes for the rights you want to grant to the selected user or
group.
8
Click OK.
the Sharing tab.
Default Sharing Rights and Proxy
If a proxy creates a document in your Mailbox, the new document receives the
default sharing rights the proxy specified in his or her Mailbox, not the default
sharing rights you specified in your Mailbox.
Default Sharing Rights and Remote
You can specify default sharing rights in your Remote Mailbox; however, the
default sharing rights you specify in Remote only affect the documents while
they are stored in your Remote Library.
Sharing Documents
Page time: 00:00:00
File time: 00:00:28
Date: 05-29-98 12:05pm
User: RBALLARD
Queue: Q:PRNT
175
File: T:\TYPE\859\W\02\R_23DOCO.859
Specifying Users’
Rights to the Document
Page: 176 (19 of 38)
Plate: Composite
Spec: jama1
Galley: Final Galley
You can give users rights to view, edit, delete, or share a document. When you
give users rights to share a document, they can put the document in a shared
folder. You can also give users rights to modify the security settings for a
document. To have Modify Sharing rights, a user must also have Edit rights. The
rights you specify are for all versions of a document. If you want to specify
different rights for each version of a document, click the Version Level Security
button.
When you grant users Edit or Delete rights, GroupWise automatically gives
them View rights to the document. If users don’t have View rights, they can’t
see the document in the results of a Find.
Giving a User Rights for
All Document Versions
1
Click the document reference in your Mailbox.
2
Click File
3
Click the Sharing tab.
4
Click Shared With.
5
In the Name box, type the name of the user or group you want to grant
rights to click Add User.
6
Click the user’s name in the Share List
you want to grant to this user.
Properties.
select the check boxes for the rights
176 Sharing Documents
Page time: 00:00:01
File time: 00:00:30
Date: 05-29-98 12:05pm
User: RBALLARD
Queue: Q:PRNT
File: T:\TYPE\859\W\02\R_23DOCO.859
Page: 177 (20 of 38)
7
Plate: Composite
Spec: jama1
Galley: Final Galley
Click OK.
Tips
•
Users must have Share rights to put the document reference in a
shared folder.
Giving a User Rights to
a Specific Document
Version
1
Click the document reference in your Mailbox.
2
Click File
3
Click the Sharing tab.
4
Click Shared With.
5
In the Name box, type the name of the user or group you want to grant
rights to click Add User.
6
Click the user’s name in the Share List
7
Select the check box for each right you want the user to have for the version
type click OK OK.
Properties.
click Version Level Security.
Tips
•
You must be the author or the creator of a document to grant access
rights, or the author or creator of the document must grant you
rights to modify security for the document.
•
Users must have sharing rights to put the document reference in a
shared folder.
Giving Users Rights to
Modify the Sharing
Settings for a
Document
1
Click the document reference in your Mailbox.
2
Click File
3
Click the Sharing tab.
4
Click Shared With.
Properties.
Sharing Documents
Page time: 00:00:01
File time: 00:00:31
Date: 05-29-98 12:05pm
User: RBALLARD
Queue: Q:PRNT
177
File: T:\TYPE\859\W\02\R_23DOCO.859
Page: 178 (21 of 38)
Plate: Composite
Spec: jama1
Galley: Final Galley
5
In the Name box, type the name of the person or group you want to grant
Modify Security rights to click Add User.
6
Click the user’s name in the Share List
Modify Security
OK.
Tips
•
You must be the creator or author of a document to grant rights to
modify security settings.
Preventing Other Users
from Accessing Your
Document
1
Click the document reference in your Mailbox.
2
Click File
3
Click the Sharing tab.
4
Click Not Shared
Properties.
OK.
178 Sharing Documents
Page time: 00:00:01
File time: 00:00:33
Date: 05-29-98 12:05pm
User: RBALLARD
Queue: Q:PRNT
File: T:\TYPE\859\W\02\R_23DOCO.859
Page: 179 (22 of 38)
Plate: Composite
Spec: jama1
Galley: Final Galley
Viewing the History of a Document
You can use the Activity Log to view the activity history for a document. The
Activity Log displays the date and time an activity occurred, the name of the user
who performed the activity, the type of activity (opened, checked out, deleted,
shared, and so forth) and the document version affected by the activity.
You can display the activities associated with the selected version of a document,
or you can display the activities associated with all versions of a document. The
most recent document activities display at the beginning of the list.
Document activity is also logged when you’re using GroupWise Remote;
however, you can only view remote activities from the activity log in your
Remote Mailbox.
Viewing the Activity
Log for Deleted
Documents
When you delete a document, GroupWise keeps a copy of the activity log for
that document. This makes it possible for you to view the events that took place
before the document was deleted. In addition, the system administrator can use
this information, specifically the blob filename, to restore specific versions of
deleted documents.
Viewing the Activity of
a Document
1
Click the document reference in your Mailbox.
2
Click File
3
Click the Activity Log tab.
Properties.
Any document activity appears in the list box (check out, check in, delete,
and so forth).
Viewing the History of a Document
Page time: 00:00:02
File time: 00:00:35
Date: 05-29-98 12:05pm
User: RBALLARD
Queue: Q:PRNT
179
File: T:\TYPE\859\W\02\R_23DOCO.859
Viewing Who Has a
Document Open or
Checked Out
Page: 180 (23 of 38)
Plate: Composite
Spec: jama1
Galley: Final Galley
1
Click the document reference in your Mailbox.
2
Click File
3
Click the Activity Log tab to view who has the document open or checked
out.
Properties.
Tips
•
You can also view who has a document open on the Version tab. To
do so, click the document reference File Properties Version.
•
To view document activity, you must have View rights for the
selected document version.
Checking Out Documents
Use Check Out when you want to lock the documents you are working on for
extended periods of time. For example, you can use Check Out to lock
documents you want to work on when you are at home or away from the office.
When a document is checked out, it is locked in the library and other users can’t
modify it; however, they can view it if they have View rights. GroupWise copies
the document to the check-out location you specify. The document remains
locked in the library until you check it back in.
IMPORTANT: You don’t need to use Check Out to lock a file every time you
edit it. When you open a document, GroupWise marks the document as In Use,
and it can’t be edited by other users until you close it.
You can select one or more documents to check out in the Main Window, and
you can specify a different filename for each document you check out. In
addition, you can specify a default check out location in the File Location tab in
Environment options.
Checking Out a
Document
1
In your Mailbox, click the document reference for the document you want
to check out.
180 Checking Out Documents
Page time: 00:00:01
File time: 00:00:36
Date: 05-29-98 12:05pm
User: RBALLARD
Queue: Q:PRNT
File: T:\TYPE\859\W\02\R_23DOCO.859
Page: 181 (24 of 38)
Plate: Composite
Spec: jama1
Galley: Final Galley
2
Click Actions
Check Out.
3
In the Checked Out Filename box, type a filename for the document.
Click Report Filename
Conflicts if you to be warned
when another file in the checkout location has the same
filename.
By default, GroupWise inserts the document number as the check-out
filename. If you don’t specify a different filename, make a note of the
numbered filename so you can locate your checked-out document.
4
In the Checked Out Location box, type the path to the location where you
want to store the checked-out document.
5
Click Check-Out.
Tips
•
Users can view the checked-out document in the library if they have
View rights.
•
Changes you make to the checked-out document do not appear in
the document in the library until you check the document back in or
update it.
•
Other users who have Edit rights cannot edit the document while it
is checked out.
•
Select Report Filename Conflicts if you want GroupWise to warn
you if another file in the check-out location has the same filename.
Checking Out Multiple
Documents
1
In your Mailbox, Ctrl+click the document references for the documents you
want to check out.
2
Click Actions
3
In the Selected Documents list box, click a document reference.
Check Out.
Checking Out Documents
Page time: 00:00:02
File time: 00:00:38
Date: 05-29-98 12:05pm
User: RBALLARD
Queue: Q:PRNT
181
File: T:\TYPE\859\W\02\R_23DOCO.859
Page: 182 (25 of 38)
4
Plate: Composite
Spec: jama1
Galley: Final Galley
In the Checked Out Filename box, specify a check-out filename.
By default, GroupWise inserts the document number, version, and extension
as the check-out filename. If you don’t specify a different filename, make a
note of the filename so you can locate your checked-out document.
5
Repeat Steps 3 and 4 until you have specified check-out filenames for each
document.
6
In the Selected Documents list box, Ctrl+click all the documents you want
to check out.
7
Click Check Out.
Tips
•
While the document is checked out, users who have View rights can
look at the copy of the document in the library.
•
Select Report Filename Conflicts if you want GroupWise to warn
you if another file in the check-out location has the same filename.
Viewing All the
Documents You Have
Checked Out
1
Click Actions
Check In.
2
Click Show All Checked-Out Documents in Selected Library.
Tips
•
You can select a different library in the Select Library drop-down list
to see the documents you have checked out in that library.
182 Checking Out Documents
Page time: 00:00:02
File time: 00:00:40
Date: 05-29-98 12:05pm
User: RBALLARD
Queue: Q:PRNT
File: T:\TYPE\859\W\02\R_23DOCO.859
Updating a CheckedOut Document Without
Checking It In
Page: 183 (26 of 38)
Plate: Composite
Spec: jama1
Galley: Final Galley
You can have GroupWise update a document in the library with any changes
you have made to the checked-out document without checking in the document.
Use Update Without Check In if you are still in the process of editing a
document but want to allow other users to view the changes you have made.
1
In your Mailbox, click the document reference for the document you want
to update in the library.
2
Click Actions
3
Click the Check In Method drop-down list
Checking In.
4
Click Update.
Check In.
click Update without
Tips
•
To update multiple documents, Ctrl+click the document references
in your Mailbox.
Checking In Documents
Use Check In to check in documents you have checked out. When you check in
a document, the document is unlocked in the library and other users can modify
it.
You can check in individual documents, or you can check in multiple
documents. The documents you check in can be in any location.
Checking In Documents
Page time: 00:00:01
File time: 00:00:41
Date: 05-29-98 12:05pm
User: RBALLARD
Queue: Q:PRNT
183
File: T:\TYPE\859\W\02\R_23DOCO.859
Page: 184 (27 of 38)
Plate: Composite
Spec: jama1
Galley: Final Galley
If one or more checked-out documents are selected when you click Check In,
GroupWise displays the selected documents in the Documents to be Checked In
list box. If no checked-out documents are selected, GroupWise displays a
warning and then displays all the documents you have checked out in the list.
There are four check-in methods.
Check-In Method
Check In and Move
Check In and Copy
Check In Only
Update Without Checking In
What It Does
Moves the document to the library and
deletes it from the check-out location.
Copies the document back to the library
and leaves a copy in the check-out location.
Checks in the document but does not
update the document in the library with any
changes you made to the checked-out
version.
Updates the document in the library with
any changes you have made, but does not
unlock the document.
When you check in a document, you can specify which version you want the
document checked in as. There are three possible versions:
Checked-Out Version
New Version
New Document
Checking in a
Document and Leaving
a Copy in the CheckOut Location
1
Updates the version of the document that you are
checking in.
Creates a new version of the document.
Creates a document and lets you specify new
document properties for it.
Click the document reference in your Mailbox.
184 Checking In Documents
Page time: 00:00:00
File time: 00:00:42
Date: 05-29-98 12:05pm
User: RBALLARD
Queue: Q:PRNT
File: T:\TYPE\859\W\02\R_23DOCO.859
Page: 185 (28 of 38)
Plate: Composite
Spec: jama1
Galley: Final Galley
2
Click Actions
Check In.
3
Click the Check In Method drop-down list
Document.
4
Click the Check In As drop-down list
5
In the Checked Out Location and Filename box, specify the path and
filename of the document you are checking in.
6
Click Check-In.
click Check In and Copy
click a version.
Tips
•
To check in multiple documents, Ctrl+click while you click the
documents in the Documents to Be Checked In list box.
•
To remove a document from the Documents to Be Checked In list,
click the document click Remove.
Checking in an
Unchanged Document
1
Click the document reference in your Mailbox.
2
Click Actions
3
Click the Check In Method drop-down list.
4
Click Check In Only.
Check In.
Checking In Documents
Page time: 00:00:01
File time: 00:00:44
Date: 05-29-98 12:05pm
User: RBALLARD
Queue: Q:PRNT
185
File: T:\TYPE\859\W\02\R_23DOCO.859
Page: 186 (29 of 38)
5
Plate: Composite
Spec: jama1
Galley: Final Galley
Click Check In.
Tips
•
GroupWise checks in the document without saving changes made
while the document was checked out.
•
To check in multiple documents, Ctrl+click while selecting the
documents in the Documents to Be Checked In list box.
Checking in a
Document and Deleting
It from the Check-Out
Location
1
Click the document reference in your Mailbox for the document you want to
check in.
2
Click Actions
3
Click the Check In Method drop-down list
Document.
4
Click the Check In As drop-down list
5
In the Checked Out Location and Filename box, specify the path and
filename of the document you are checking in.
6
Click Check In.
Check In.
click Check In and Move
click a version.
Tips
•
To check in multiple documents, Ctrl+click while you select the
document references in your Mailbox.
•
To remove a document from the Documents to Be Checked In list,
click the document click Remove.
Checking In a
Document and Making
It a New Version
1
In your Mailbox, click the document reference you want to check in and
make a new version.
2
Click Actions
3
Click the Check In Method drop-down list
4
Click the Check In As drop-down list
5
In the Checked Out Location and Filename box, specify the path and
filename of the file you are checking in.
Check In.
click a check-in method.
click New Version.
186 Checking In Documents
Page time: 00:00:01
File time: 00:00:45
Date: 05-29-98 12:05pm
User: RBALLARD
Queue: Q:PRNT
File: T:\TYPE\859\W\02\R_23DOCO.859
Page: 187 (30 of 38)
6
Plate: Composite
Spec: jama1
Galley: Final Galley
Click Check In.
Tips
•
To remove a document from the Documents to Be Checked In list,
click the document click Remove.
Deleting Documents
When you delete a document from one of your folders, you can specify whether
you want to remove the document reference from the folder, the selected version
of the document, or all versions of the document. You can delete any document
reference in your Mailbox or folders; however, to delete a selected version or all
versions of a document, you must have Delete rights. See Sharing Documents
under Creating and Working with Documents for more information about
document rights.
When you delete the document from the folder, the reference is removed from
the folder, but the document remains in the library. When you delete the
document version, the selected version of the document is removed from the
library and the document reference is removed from the folder. When you delete
all versions of the document in the library, all versions of the document are
removed from the library and the reference is removed from the folder.
When you drag a document reference to the Trash folder, the document
reference is deleted, but the document in the library is not deleted.
Deleting Documents According to Document Type
You can delete documents in your folders, or you can let GroupWise
automatically delete documents which have exceeded their defined document
life. GroupWise removes documents based on the document type assigned to the
document on the Document tab in Properties. Each document type has an
expiration date and a expiration action associated with it. The system
administrator defines the expiration date and action (delete, archive, or retain)
when he or she creates the library.
Deleting Groups of
Documents
You can delete a group of documents using the Mass Document Operations
wizard. To delete a group of documents, you must have Delete rights to each
document, or you must have Manage rights and be a librarian for the library. For
more information see Managing Groups of Documents under Creating and
Working with Documents.
Deleting Documents
Page time: 00:00:01
File time: 00:00:46
Date: 05-29-98 12:05pm
User: RBALLARD
Queue: Q:PRNT
187
File: T:\TYPE\859\W\02\R_23DOCO.859
Deleting a Document
from Your Mailbox
Page: 188 (31 of 38)
Plate: Composite
Spec: jama1
Galley: Final Galley
1
Click the document reference in your Mailbox.
2
Click Edit
3
Click Remove Document from Folder
Delete.
OK.
Tips
•
The document in the library is not deleted, and any users with
references to the document can still view, open, edit, or delete it,
depending on their rights.
Deleting a Specific
Version of a Document
Deleting All Versions
of a Document
1
Click the document reference in your Mailbox.
2
Click Actions
3
Click the version you want to delete.
4
Click Edit
1
Click the document reference in your Mailbox.
Version List.
Delete.
188 Deleting Documents
Page time: 00:00:02
File time: 00:00:48
Date: 05-29-98 12:05pm
User: RBALLARD
Queue: Q:PRNT
File: T:\TYPE\859\W\02\R_23DOCO.859
Page: 189 (32 of 38)
Plate: Composite
Spec: jama1
Galley: Final Galley
2
Click Edit
Delete.
3
Click Delete All Versions of Document from Library
click OK.
Tips
•
You can click Remove Document from Folder to remove a
document reference without deleting the corresponding document.
Copying Documents
You can copy documents and their properties to create similar documents.
Copying a document creates a new document in the library.
When you copy a document you can specify how you want to create document
properties for the new document. You can specify properties manually for the
document, or you can have GroupWise create properties for you using the values
in the original document.
Copying Groups of Documents
You can copy groups of documents using the Mass Document Operations
wizard. To copy a group of documents you must have View rights to each
document, or you must have Manage rights and be a librarian for the library. For
more information see Copying Groups of Documents under Managing Groups of
Documents.
Copying a Document
1
Click a document reference in your Mailbox.
Copying Documents
Page time: 00:00:02
File time: 00:00:50
Date: 05-29-98 12:05pm
User: RBALLARD
Queue: Q:PRNT
189
File: T:\TYPE\859\W\02\R_23DOCO.859
Copying a Document to
Another Library
Page: 190 (33 of 38)
Plate: Composite
Spec: jama1
Galley: Final Galley
2
Click Actions
Copy Document.
3
Select the method you want to use to create a property sheet for the
document.
4
Click OK.
1
Click the document reference in your Mailbox.
2
Click Actions
3
Select the library to which you want to copy the document in the Select
Library to Copy To drop-down list.
4
Select which method you want to use for creating document properties
click OK.
Copy Document.
Tips
•
The information in the system fields (Document Type, Author, and
Document Subject) is copied with the document to the new library.
Saving Documents
You can use Save As to save documents outside of GroupWise Library. Save As
lets you create a copy of a document outside of the library; however, when you
use Save As, any changes you make to the saved document are not updated in the
library.
Saving Items as Documents
You can save any of the items in your Mailbox as a document in the library.
Items are saved in WordPerfect 5.1 format. For more information see Saving
Items in Your Mailbox under Managing Your Mailbox.
190 Saving Documents
Page time: 00:00:01
File time: 00:00:51
Date: 05-29-98 12:05pm
User: RBALLARD
Queue: Q:PRNT
File: T:\TYPE\859\W\02\R_23DOCO.859
Saving Changes to a
Document's Contents
Page: 191 (34 of 38)
Plate: Composite
Spec: jama1
Galley: Final Galley
To save changes you have made to the contents of a document, use the Save
feature in the corresponding application.
The Save feature in your application functions differently depending on whether
you are using an integrated or a non-integrated application.
Saving Documents in Non-Integrated Applications
If you are using non-integrated applications (all Windows 3.1 applications and
many Windows 95 applications), you can’t save the document as a new version
from the application. To create a new version of the a document, you must
create the new version before you open the document. To make sure your
changes are saved in the library, don’t rename the document when you save it
from within the application.
Saving Documents in Integrated Applications
If you are using an integrated application (such as WordPerfect 7 or Word 7),
GroupWise can integrate the document management features with the
application’s Save As feature. When you select Save As in the application, you
have the option of saving the document as a new version in GroupWise Library.
In addition, you can select the GroupWise folder you want to save the document
in.
Saving Documents
Outside of the
GroupWise Library
1
Click the document reference in your Mailbox.
2
Click File
3
In the Save File As box, specify a name for the document.
4
Click Browse specify the path to the location where you want the
document saved click OK.
Save As.
Saving Documents
Page time: 00:00:01
File time: 00:00:53
Date: 05-29-98 12:05pm
User: RBALLARD
Queue: Q:PRNT
191
File: T:\TYPE\859\W\02\R_23DOCO.859
Page: 192 (35 of 38)
5
Plate: Composite
Spec: jama1
Galley: Final Galley
Click Save.
Tips
•
If you need to share documents with users who do not have access to
GroupWise, you can attach the document reference to a mail
message and send it to them, or you can use Save As to make a copy
of the document outside of the library.
Opening Documents
When you double-click a document reference in your Mailbox or folder,
GroupWise opens the document in the associated application. You can then edit
the document. If you only have rights to view the document, you can open the
document two ways: you can open the document as a read-only file in the
application, or you can open the document in the GroupWise viewer.
GroupWise sets the status of the selected version as In Use while you have it
open. This status locks the selected document version and prevents other users
from editing it while you have it open. When you exit the document, the In Use
status is removed and the version is unlocked.
If you want to lock a version of a document for multiple editing sessions, use
Check Out. Check Out lets you copy the selected version of a document to
another location, and it remains locked until you check it in.
Opening Read-Only Documents
If you don’t have Edit rights to a document, you can open a read-only copy of
the document in an application. This makes it possible for you to see graphics
and layout elements which may not display correctly in the GroupWise viewer.
If you have Edit rights to a document, read-only documents are also a useful way
to view a document if it is marked In Use or if it is checked out.
You can only open one read-only document at a time in each application.
Opening Documents in Non-Integrated Applications
If you are using non-integrated applications (most Windows 3.1 applications,
MS DOS applications, and many Windows 95 applications), GroupWise copies
the document back to the library when you close the application, not when you
close the document.
Opening Documents in Integrated Applications
If you are using an integrated application (such as WordPerfect 7 or Word 7),
GroupWise can integrate the document management features with the
application’s Open and Save As feature.
192 Opening Documents
Page time: 00:00:01
File time: 00:00:54
Date: 05-29-98 12:05pm
User: RBALLARD
Queue: Q:PRNT
File: T:\TYPE\859\W\02\R_23DOCO.859
Page: 193 (36 of 38)
Plate: Composite
Spec: jama1
Galley: Final Galley
When you select Open in the application, a dialog displays all the available
document references in your Mailbox. You can select a document reference to
open the document, or you can click the Select Document Using Application
Dialog button to use the application’s regular Open dialog box.
Opening Documents in GroupWise Remote
If you are using GroupWise Remote, you must manually mark the document
version as In Use when you retrieve it from your Master Mailbox. When you exit
the document, Remote prompts you to clear the In Use status.
Opening Documents
1
Double-click the document reference in your Mailbox.
Tips
•
If you do not have access to the application the document was
created in, GroupWise prompts you to specify an application. You
may be able to open the document in a related application.
Opening Multiple
Versions of a
Document
1
Click the document reference in your Mailbox.
2
Click Actions
3
Select the versions you want to open in the Version list box.
4
Click Actions
Version List.
Open.
Opening Documents
Page time: 00:00:02
File time: 00:00:56
Date: 05-29-98 12:05pm
User: RBALLARD
Queue: Q:PRNT
193
File: T:\TYPE\859\W\02\R_23DOCO.859
Page: 194 (37 of 38)
Plate: Composite
Spec: jama1
Galley: Final Galley
Storing Multiple Versions of a Document
You can store multiple versions of a document in GroupWise. Each document
reference in your Mailbox points to a single document version. You can view
information about a specific version of a document on the Version tab in
Properties. You can manage (open, check out, check in, and so forth) document
versions in the Version List dialog box. There are three categories of document
versions in GroupWise:
Current Version
The most recent revision of the document.
Official Version
The version you designate as official. When you designate an official version, you can
grant users different access rights to the official version than you grant them to all other
versions of the document. For example, you can grant all users rights to view the
official version of the employee handbook, but grant only yourself rights to view and
edit all other versions of the handbook. If you do not specify an official version of the
document, the current version is considered to be the official version. In the Item List,
a star displays next to the document reference for the official version.
Specific Version
A version of a document that is referenced directly by its version number. In the
Item List, the number symbol (#) displays next to the document reference. You
can grant different access rights for each version of the document. For example,
you can grant all users on your system View rights to the official version and
grant specific users View rights to the current version.
Creating a New Version
of a Document
1
In your Mailbox, click the document reference for the document you want
to create a new version of.
2
Click File
3
Type a description for this version of the document
New
Document Version.
click OK.
Tips
•
The selected version and its properties are copied to a new version.
194 Storing Multiple Versions of a Document
Page time: 00:00:02
File time: 00:00:58
Date: 05-29-98 12:05pm
User: RBALLARD
Queue: Q:PRNT
File: T:\TYPE\859\W\02\R_23DOCO.859
Page: 195 (38 of 38)
Plate: Composite
Spec: jama1
Galley: Final Galley
Viewing Version
Information for a
Document
1
Click the document reference in your Mailbox.
2
Click File
Specifying the Official
Version of a Document
1
Click the document reference in your Mailbox.
2
Click Actions
3
Click the version you want to mark official.
4
Click Actions
Properties
the Version tab.
Version List.
Mark Official Version.
Tips
•
To set the official version, you must have rights to modify security
settings and the system administrator must have given you rights to
set the official version of a document.
Storing Multiple Versions of a Document
Page time: 00:00:02
File time: 00:01:00
Date: 05-29-98 12:05pm
User: RBALLARD
Queue: Q:PRNT
195
File: T:\TYPE\859\W\02\R_30DOCM.859
Page: 196 (1 of 33)
Plate: Composite
Spec: jama1
Galley: Final Galley
Managing Groups of Documents
Whether you're a user responsible for twenty documents or a system
administrator responsible for thousands of documents, you can use the Mass
Document Operations wizard to efficiently manage groups of documents. Using
the wizard, you can perform all of the following tasks:
Move a group of documents to another library.
Share a group of documents with another user.
Copy a group of documents.
Delete a group of documents.
Assign a group of documents to a new author.
Modify the properties (subject, document type, and so on) of a group of
documents.
•
•
•
•
•
•
Preparing for a Mass
Operation
Before you can perform a mass operation on a group of documents you must
have sufficient rights to the documents. If you have Manage rights, you're called
a librarian, and you can perform the mass document operations on all the
documents in the library. If you’re not a librarian, you can only perform mass
document operations on the documents to which you have rights. The following
table shows which rights you must have to perform each operation:
Document Operation
Required Rights
Move
Requires View and Delete rights to the
document, or you must be a librarian for
the library. In addition, you must have Add
rights to the destination library.
Copy
Requires View rights to the document, or
you must be a librarian for the library. In
addition, you must have Add rights to the
destination library.
Delete
Requires Delete rights to the document, or
you must be a librarian for the library. In
addition, you must have Delete rights to
the library.
Share
Requires Modify Security rights to the
document, or you must be a librarian for
the library. In addition, you must have
Change rights to the library.
Assign documents to a
new author
Requires Edit and Modify Security rights
to the document, or you must be a librarian
for the library.
196 Managing Groups of Documents
Page time: 00:00:01
File time: 00:00:02
Date: 05-12-98 10:03am
User: RBALLARD
Queue: Q:PRNT
File: T:\TYPE\859\W\02\R_30DOCM.859
Page: 197 (2 of 33)
Plate: Composite
Modify document
properties
Selecting Documents
for the Mass Operation
Spec: jama1
Galley: Final Galley
You must have Edit rights, or be a librarian
for the library. In addition, you must have
Change rights to the library.
Before you begin the mass operation, you must specify which documents you
want to include. There are three methods you can use to select documents: You
can select the documents from a dialog box in the Mass Document Operations
wizard. You can select the documents in a folder or your Mailbox before you
open the Mass Document Operations wizard. Or, you can specify the name of a
file on disk that contains a list of document IDs.
Previewing the Results of a Move
When you use Find in the Mass Document Operations wizard to specify which
documents you want to move, copy, delete, or change, you can click the Preview
button (on the last dialog box in the wizard) to see a sample of the documents
that will be moved, copied, deleted, or changed based on the criteria you
specified in Find. This makes it possible for you to review these results and verify
that the criteria are accurate and select the correct documents. If not, you can
return to the wizard and modify the Find criteria to expand or limit the
documents included in the operation.
Using Mass Document Operations in Remote
The Mass Document Operations wizard is not available in your Remote
Mailbox. You can perform the same tasks on individual documents while you’re
in your Remote Mailbox, but not with groups of documents.
Acting as the Librarian
User
The system administrator can give users Manage rights to a library. When you
have Manage rights, you are called a librarian, and you can perform mass
document operations, such as changing document properties, moving
documents, and so on, on all the documents in the library.
The librarian can see and modify all the properties of a document, such as
author, creator, security, subject, document type, and so on, but the librarian
can't see the content of the document. (To see the content of a document, the
librarian must have View rights for that version of the document.) If the librarian
makes any changes to the author or sharing rights of a document, the original
author of the document receives a mail message that notifies him or her of the
change. This prevents the librarian from giving unauthorized users access to a
document.
In addition to modifying the properties listed above, the librarian can also
perform the following actions on all the documents in the library:
•
•
•
•
Delete a group of documents from the library.
Move or copy documents to a different library.
Change the document properties (author, document type, subject, an so on)
of a group of documents in the library.
Change the sharing rights to a group of documents in the library.
Managing Groups of Documents
Page time: 00:00:01
File time: 00:00:03
Date: 05-12-98 10:03am
User: RBALLARD
Queue: Q:PRNT
197
File: T:\TYPE\859\W\02\R_30DOCM.859
Page: 198 (3 of 33)
Plate: Composite
Spec: jama1
Galley: Final Galley
Reset a document's status.
Use the GroupWise 3rd-party APIs to generate reports on all the documents
in the library.
•
•
Librarian and GroupWise Remote
The librarian can see all the properties of a document from his or her Remote
Mailbox; however, the librarian can't change the author or sharing rights of a
document while he or she is using a Remote Mailbox.
Librarian and Older Versions of GroupWise
If a librarian accesses a library using an older version of the GroupWise Client,
such as GroupWise 5.1 or 5.2, he or she will not have librarian access to
documents, because neither the Manage right nor the librarian user existed in
earlier releases of GroupWise.
Copying a Group of
Documents
You can copy groups of documents using the Mass Document Operations
wizard. To copy a group of documents you must have View rights to each
document, or you must be a librarian for the library. In addition, you must have
Add rights in the library to which you want to copy the documents.
When you copy a group of documents, all versions of the document are copied.
In the destination library, each copy of the document receives a new document
number, but the document retains the same version number that it had in the
source library. For example, if document #458 had a version one, two, and five
in the Marketing library and you copy it to the Sales library, it would become
document #459 (or whatever the next number is) in the Sales library, but it
would still have a version one, two, and five. GroupWise copies all the document
properties, including document activity and custom fields, to the destination
library and stores them with the document; however, the custom fields will not
display in Document Properties if the destination library doesn't contain the
field. When you copy documents, document references are not updated.
Copying One Document • If you want to copy one document, click Copy
Document from the Actions menu.
198 Managing Groups of Documents
Page time: 00:00:01
File time: 00:00:04
Date: 05-12-98 10:03am
User: RBALLARD
Queue: Q:PRNT
File: T:\TYPE\859\W\02\R_30DOCM.859
Page: 199 (4 of 33)
Plate: Composite
Spec: jama1
Galley: Final Galley
Coping a Group of Documents
1
Click Tools
Mass Document Operations.
2
In the Operation group box, click Copy.
3
In the Selection Method group box, click Use Find/Advanced Find to Select
Documents Next.
4
Make sure Full Text is displayed on the first drop-down list to search both
the document properties and the document content, then type the text you
want to find.
or
Click the Full Text drop-down list click Subject to search just the
document subject, then type the text you want to find.
Managing Groups of Documents
Page time: 00:00:02
File time: 00:00:06
Date: 05-12-98 10:03am
User: RBALLARD
Queue: Q:PRNT
199
File: T:\TYPE\859\W\02\R_30DOCM.859
Page: 200 (5 of 33)
Plate: Composite
Spec: jama1
Galley: Final Galley
5
Make sure Author is selected, then specify the name or names of the author
of the documents you want to find.
6
If you want to search for documents that were created or received between
specific dates, select the Created or Delivered Between check box, then
specify a beginning and an ending date.
7
In the Look In list box, select the libraries you want to search.
8
Click Next.
9
In the Select Library To Copy Documents To list box, select the destination
library Next.
10 Click Preview to see a sample of the documents that will be copied based on
the Find criteria you specified.
You can click Close at any time in the Find Results dialog box to cancel the
Preview.
11 Specify the directory where you want to save the log file.
200 Managing Groups of Documents
Page time: 00:00:02
File time: 00:00:08
Date: 05-12-98 10:03am
User: RBALLARD
Queue: Q:PRNT
File: T:\TYPE\859\W\02\R_30DOCM.859
Page: 201 (6 of 33)
Plate: Composite
Spec: jama1
Galley: Final Galley
You can click Generate a Log File without Performing the Move Operation
to see the outcome of the move without actually copying the documents.
12 Click Finish to begin copying documents.
Copying a Group of Selected Documents
1
Select the documents you want to copy in your Mailbox or folders.
2
Click Tools
3
In the Operation group box, click Copy.
4
In the Selection Method group box, click Use Currently Selected
Documents Next.
5
In the Select Library To Copy Documents To list box, click the destination
library Next.
6
Specify the directory where you want to save the log file.
7
You can click Generate a Log File without Performing the Copy Operation
to see the outcome of the copy without actually copying the documents.
8
Click Finish to begin copying documents.
Mass Document Operations.
Copying a Group of Documents Listed in a File
1
Click Tools
Mass Document Operations.
2
In the Operation group box, click Copy.
3
In the Selection Method group box, click Use Documents Listed in a File.
4
Specify the name of the file that contains a list of documents you want to
copy click Next.
5
If the file you specify is a log file from a previous copy operation, you can
click Process Errors Only and GroupWise only processes the documents that
generated errors during the previous session.
6
In the Select Library To Copy Documents To list box, click the destination
library Next.
7
Specify the directory where you want to save the log file.
8
You can click Generate a Log File without Performing the Copy Operation
to see the outcome of the copy without actually copying the documents.
Managing Groups of Documents
Page time: 00:00:01
File time: 00:00:09
Date: 05-12-98 10:03am
User: RBALLARD
Queue: Q:PRNT
201
File: T:\TYPE\859\W\02\R_30DOCM.859
Page: 202 (7 of 33)
Plate: Composite
Spec: jama1
Galley: Final Galley
Click Finish to begin copying documents.
9
Tips
•
You can specify any text file (ASCII or ANSI) as the source file for a
copy operation as long as the file contains a list of document IDs. If
you're creating a file, make sure that each document ID is at the
beginning of a line and that there is only one document per line.
•
You can also specify the error file from a previous copy operation as
the source file.
Moving a Group of
Documents
You can move a group of documents to another library using the Mass
Document Operations wizard. To move a group of documents, you must have
View and Delete rights for each document you want to move, or you must be a
librarian for the selected library. In addition, you must have Add rights for the
destination library.
The documents you select for the move operation can be stored in multiple
libraries on different post offices. GroupWise moves all versions of the selected
documents and all document properties, including document activity and
custom fields. If the destination library doesn't contain one or more custom
fields that exist in the source library, GroupWise moves the value for the custom
field and stores it with the document in the new library; however, the value will
not display in Document Properties until the system administrator adds that
custom field to the destination library.
Notifying Authors and Users of Moved Documents
When the move is complete, GroupWise sends a message to you which contains
a list of all the moved documents. In addition, GroupWise sends a message to
the author of each moved document which shows the document's new location.
If a user is the author of multiple moved documents, the message contains a list
of all his or her moved documents and the new location of the documents. Other
users, who are not authors of the document, are not notified that the document
was moved.
GroupWise automatically updates any document references to moved
documents at the end of the move process. However, if a document reference is
attached to a mail message, GroupWise does not update the reference. Instead,
when a user clicks the attached document reference, a message displays that
explains the document was moved and gives the new location of the document.
202 Managing Groups of Documents
Page time: 00:00:01
File time: 00:00:10
Date: 05-12-98 10:03am
User: RBALLARD
Queue: Q:PRNT
File: T:\TYPE\859\W\02\R_30DOCM.859
Page: 203 (8 of 33)
Plate: Composite
Spec: jama1
Galley: Final Galley
Moving a Group of Documents
1
Click Tools
Mass Document Operations.
2
In the Operation group box, click Move.
3
In the Selection Method group box, click Use Find/Advanced Find to Select
Documents Next.
4
If you want to search both the document properties and the document
content, make sure that Full Text appears on the drop-down list, then type
the text you want to find.
or
If you want to search just the document subject, click the Full Text dropdown list Subject, then type the text you want to find.
Managing Groups of Documents
Page time: 00:00:02
File time: 00:00:13
Date: 05-12-98 10:03am
User: RBALLARD
Queue: Q:PRNT
203
File: T:\TYPE\859\W\02\R_30DOCM.859
Page: 204 (9 of 33)
Plate: Composite
Spec: jama1
Galley: Final Galley
5
Make sure Author is selected, then specify the name or names of the author
of the documents you want to find.
6
If you want to search for documents that were created or sent between
specific dates, select the Created or Delivered Between check box, then
specify a beginning and an ending date.
7
In the Look In list box, click the libraries you want to search
8
In the Select Library To Move Documents To list box, click the destination
library Next.
9
Click Preview to see a sample of the documents that will be moved based on
the Find criteria you specified.
click Next.
You can click Close at any time in the Find Results dialog box to cancel the
preview.
10 Specify the directory where you want to save the log file.
11 You can click Generate a Log File without Performing the Operation to see
the outcome of the move without actually moving the documents.
12 Click Finish to begin moving documents.
Moving a Group of Selected Documents
1
Select the documents you want to move in your Mailbox or folder.
2
Click Tools
3
In the Operation group box, click Move.
4
In the Selection Method group box, click Use Currently Selected
Documents Next.
5
In the Select Library To Move Documents To list box, click the destination
library click Next.
6
Specify the directory where you want to save the log file.
7
You can click Generate a Log File without Performing the Move Operation
to see the outcome of the move without actually moving the documents.
Mass Document Operations.
204 Managing Groups of Documents
Page time: 00:00:02
File time: 00:00:15
Date: 05-12-98 10:03am
User: RBALLARD
Queue: Q:PRNT
File: T:\TYPE\859\W\02\R_30DOCM.859
Page: 205 (10 of 33)
8
Plate: Composite
Spec: jama1
Galley: Final Galley
Click Finish to begin moving documents.
Moving a Group Documents in a File
1
Click Tools
Mass Document Operations.
2
In the Operation group box, click Move.
3
In the Selection Method group box, click Use Documents Listed in a File.
4
Specify the name of the file that contains the list of documents you want to
move click Next.
If the file you specify is a log file from a previous move operation, you can
click Process Errors Only and GroupWise will only process the documents
that generated errors during the previous session.
5
In the Select Library To Move Documents To list box, click the destination
library click Next.
6
Specify the directory where you want to save the log file.
7
You can click Generate a Log File without Performing the Move Operation
to see the outcome of the delete without actually moving the documents.
8
Click Finish to begin moving documents.
Tips
•
You can specify any text file (ASCII or ANSI) as the source file for a
move operation as long as the file contains a list of document IDs. If
you're creating a file, make sure that each document ID is at the
beginning of a line and that there is only one document per each
line.
•
You can also specify the error file from a previous move operation as
the source file.
Changing the
Properties of a Group
of Documents
As you manage your GroupWise documents, you often need to change the
properties of several documents at the same time. For example, if an employee
leaves the company, you may need to reassign all of his or her documents to
another person, or if a new employee joins the company, you may need to give
him or her access to several documents. You can use the Change Properties in
the Mass Document Operations wizard to efficiently perform these types of tasks
(reassigning documents, changing document types, and so on) for groups of
documents.
You can change the subject, author, or document type for a group of documents.
In addition, you can change the value of any custom fields defined in the library.
The fields you can modify vary depending on the location of the documents you
select for the mass change operation. If the documents you select are all stored in
the same library, you can make changes to both system fields (subject, author,
Managing Groups of Documents
Page time: 00:00:01
File time: 00:00:16
Date: 05-12-98 10:03am
User: RBALLARD
Queue: Q:PRNT
205
File: T:\TYPE\859\W\02\R_30DOCM.859
Page: 206 (11 of 33)
Plate: Composite
Spec: jama1
Galley: Final Galley
and document type) and custom fields. If the documents you select are stored in
different libraries, you can only modify system fields. GroupWise imposes this
restriction because the libraries you select may not contain the same custom
fields.
Changing the Properties of a Group of Documents
1
Click Tools
Mass Document Operations.
2
In the Operation group box, click Change Properties.
3
In the Selection Method group box, click Use Find/Advanced Find to Select
Documents Next.
206 Managing Groups of Documents
Page time: 00:00:02
File time: 00:00:18
Date: 05-12-98 10:03am
User: RBALLARD
Queue: Q:PRNT
File: T:\TYPE\859\W\02\R_30DOCM.859
Page: 207 (12 of 33)
Plate: Composite
Spec: jama1
Galley: Final Galley
4
Make sure Full Text appears on the first drop-down list to search both the
document properties and the document content, then type the text you want
to find.
or
Click the Full Text drop-down list Subject to search just the document
subject, then type the text you want to find.
5
Make sure Author is selected, then specify the name or names of the author
of the documents you want to find.
6
If you want to search for documents that were created or sent between
specific dates, select the Created or Delivered Between check box, then
specify a beginning and an ending date.
7
Click Next.
8
Specify new values for any of the document properties
click Next.
Managing Groups of Documents
Page time: 00:00:02
File time: 00:00:20
Date: 05-12-98 10:03am
User: RBALLARD
Queue: Q:PRNT
207
File: T:\TYPE\859\W\02\R_30DOCM.859
Page: 208 (13 of 33)
Plate: Composite
Spec: jama1
Galley: Final Galley
Click Preview to see a sample of the documents that will be modified based
on the Find criteria you specified.
9
You can click Close at any time in the Find Results dialog box to cancel the
preview.
10 Specify the directory where you want to save the log file.
You can click Generate a Log File without Performing the Operation to see
the outcome of the operation without actually changing the documents.
11 Click Finish to begin.
Changing the Properties for Selected Documents
1
Select the documents for which you want to modify properties in your
Mailbox or folder.
2
Click Tools
3
In the Operation group box, click Change Properties.
4
In the Selection Method group box, click Use Currently Selected
Documents Next.
5
Specify new values for any of the document property fields
6
Click Preview to see a sample of the documents that will be modified based
on the Find criteria you specified.
Mass Document Operations.
click Next.
You can click Close at any time in the Find Results dialog box to cancel the
preview.
Specify the directory where you want to save the log file.
7
You can click Generate a Log File without Performing the Operation to see
the outcome of the operation without actually modifying the documents.
Click Finish to begin.
8
208 Managing Groups of Documents
Page time: 00:00:01
File time: 00:00:21
Date: 05-12-98 10:03am
User: RBALLARD
Queue: Q:PRNT
File: T:\TYPE\859\W\02\R_30DOCM.859
Page: 209 (14 of 33)
Plate: Composite
Spec: jama1
Galley: Final Galley
Changing the Properties for a Group of Documents in a File
1
Click Tools
Mass Document Operations.
2
In the Operation group box, click Change Properties.
3
In the Selection Method group box, click Use Documents Listed in a File.
4
Specify the name of the file that contains the list of documents for which you
want to change properties click Next.
If the file you specify is a log file from a previous session, you can click
Process Errors Only and GroupWise only processes the documents that
generated errors during that session.
5
Specify new values for any of the document properties fields
click Next.
6
Click Preview to see a sample of the documents that will be modified based
on the Find criteria you specified.
You can click Close at any time in the Find Results dialog box to cancel the
preview.
7
Specify the directory where you want to save the log file.
You can click Generate a Log File without Performing the Operation to see
the outcome of the operation without actually modifying the documents.
8
Click Finish to begin.
Tips
•
You can specify any text file (ASCII or ANSI) as the source file for a
change properties operation as long as the file contains a list of
document IDs. If you're creating a file, make sure that each
document ID is at the beginning of a line and that there is only one
document ID on each line.
•
You can also specify the error file from a previous change properties
operation as the source file.
Changing Sharing for a
Group of Documents
You can give, modify, or remove a user's access to a group of documents. You
can do this two ways: you can modify a user's rights in the existing Share List for
the group of documents, or you can create a new Share List which will replace
the existing Share List for each document in the group.
Modify the Existing Share List
If you select Add New Users and Rights to the Selected Documents, you can
add, remove, or change a user's rights to the group of documents without
changing any of the rights you've given to other users. For example, you could
grant a new employee rights to all the benefit documents in the library. This
adds the new employee to the Share List for each document in the group, but it
doesn't modify the rights of any of the other employees.
Managing Groups of Documents
Page time: 00:00:02
File time: 00:00:23
Date: 05-12-98 10:03am
User: RBALLARD
Queue: Q:PRNT
209
File: T:\TYPE\859\W\02\R_30DOCM.859
Page: 210 (15 of 33)
Plate: Composite
Spec: jama1
Galley: Final Galley
If the user you want to add already has rights to one or more of the documents
in the group, the rights you specify in the wizard will replace any previous rights
this user had to the documents, but it will not reduce rights the user already has.
For example, suppose you give Pam View rights for a group of documents which
includes Document A, but Pam already has both View and Edit rights to
Document A. In this case, GroupWise will give Pam View rights to all the
documents in the group, including Document A, but GroupWise will not
remove Pam's Edit rights to Document A.
Replacing an Existing Share List with a New Share List
If you select Replace Share List for Selected Documents, you can create a new
Share List for each of the selected documents. This new Share List replaces the
existing Share List, and only the users on the new Share List have rights to the
selected documents.
Changing the Sharing Rights for a Group of Documents
1
Click Tools
Mass Document Operations.
2
In the Operation group box, click Change Sharing.
210 Managing Groups of Documents
Page time: 00:00:01
File time: 00:00:24
Date: 05-12-98 10:03am
User: RBALLARD
Queue: Q:PRNT
File: T:\TYPE\859\W\02\R_30DOCM.859
Page: 211 (16 of 33)
Plate: Composite
Spec: jama1
Galley: Final Galley
3
In the Selection Method group box, click Use Find/Advanced Find to Select
Documents Next.
4
Make sure that Full Text appears on the first drop-down list if you want to
search both the document properties and the document content, then type
the text you want to find.
or
Click the Full Text drop-down list click Subject to search just the
document subject, then type the text you want to find.
5
Make sure Author is selected, then specify the name or names of the author
of the documents you want to find.
6
If you want to search only for documents that were created or received
between specific dates, select the Created or Delivered Between check box,
then specify a beginning and an ending date.
Managing Groups of Documents
Page time: 00:00:02
File time: 00:00:26
Date: 05-12-98 10:03am
User: RBALLARD
Queue: Q:PRNT
211
File: T:\TYPE\859\W\02\R_30DOCM.859
Page: 212 (17 of 33)
Plate: Composite
Spec: jama1
Galley: Final Galley
7
In the Look In list box, click the libraries you want to search
click Next.
8
Click Add New Users and Rights to Selected Documents to modify the
existing Share Lists for each document in the group.
or
Click Replace Share Lists for Selected Documents to create a new Share List
that will replace the existing Share List for each document in the group.
9
In the Name box, type the name of the user for which you want to modify
sharing click Add User
10 In the Share List, click the name of the user for whom you want to modify
sharing rights.
11 In the Rights for All Versions group box, click the rights you want to give
the user to the selected group of documents.
12 If you want to specify sharing rights for specific versions, click Version Level
Security, specify the rights for each version
click OK.
13 Click Next.
212 Managing Groups of Documents
Page time: 00:00:01
File time: 00:00:27
Date: 05-12-98 10:03am
User: RBALLARD
Queue: Q:PRNT
File: T:\TYPE\859\W\02\R_30DOCM.859
Page: 213 (18 of 33)
Plate: Composite
Spec: jama1
Galley: Final Galley
14 Click Preview to see a sample of the documents that will be modified based
on the Find criteria you specified.
You can click Close at any time in the Find Results dialog box to cancel the
preview.
15 Specify the directory where you want to save the log file.
You can click Generate a Log File without Performing the Operation to see
the outcome of the operation without actually modifying the documents.
16 Click Finish to begin modifying the document sharing.
Changing Sharing Rights for Selected Documents
1
Select the documents in your Mailbox and folders for which you want to
change sharing rights.
2
Click Tools
3
In the Operation group box, click Change Sharing.
4
In the Selection Method group box, click Use Currently Selected
Documents Next.
5
To modify the existing Share Lists for each document in the group, click
Add New Users and Rights to Selected Documents.
or
To create a new Share List that will replace the existing Share List for each
document in the group, click Replace Share Lists for Selected Documents.
6
In the Name box, type the name of the user for whom you want to modify
sharing rights click Add User.
7
In the Share List, click the name of the user for whom you want to modify
sharing rights.
8
In the Rights for All Versions group box, click the rights you want to give
the user to the selected group of documents.
9
If you want to specify sharing rights for specific versions, click Version Level
Security, specify the rights for each version click OK.
Mass Document Operations.
Managing Groups of Documents
Page time: 00:00:02
File time: 00:00:29
Date: 05-12-98 10:03am
User: RBALLARD
Queue: Q:PRNT
213
File: T:\TYPE\859\W\02\R_30DOCM.859
Page: 214 (19 of 33)
Plate: Composite
Spec: jama1
Galley: Final Galley
10 Click Next.
11 Click Preview to see a sample of the documents that will be modified based
on the Find criteria you specified.
You can click Close at any time in the Find Results dialog box to cancel the
preview.
12 Specify the directory where you want to save the log file.
You can click Generate a Log File without Performing the Operation to see
the outcome of the operation without actually modifying the documents.
13 Click Finish to begin.
Changing Sharing Rights for Documents in a File
1
Click Tools
Mass Document Operations.
2
In the Operation group box, click Change Sharing.
3
In the Selection Method group box, click Use Documents Listed in a File.
4
Specify the name of the file that contains a list of the documents for which
you want to change sharing rights click Next.
If the file you specify is a log file from a previous operation, you can click
Process Errors Only and GroupWise only processes the documents that
generated errors during the previous session.
5
Click Add New Users and Rights to Selected Documents to modify the
existing Share Lists for each document in the group.
or
Click Replace Share Lists for Selected Documents to create a new Share List
that will replace the existing Share List for each document in the group.
6
In the Name box, type the name of the user for whom you want to modify
sharing rights click Add User.
7
In the Share List, click the name of the user for whom you want to modify
sharing rights.
8
In the Rights for All Versions group box, click the rights you want to give
the user to the selected group of documents.
9
If you want to specify sharing rights for specific versions, click Version Level
Security, specify the rights for each version click OK.
10 Click Next.
11 Click Preview to see a sample of the documents that will be modified based
on the Find criteria you specified.
You can click Close at any time in the Find Results dialog box to cancel the
preview.
12 Specify the directory where you want to save the log file.
214 Managing Groups of Documents
Page time: 00:00:01
File time: 00:00:30
Date: 05-12-98 10:03am
User: RBALLARD
Queue: Q:PRNT
File: T:\TYPE\859\W\02\R_30DOCM.859
Page: 215 (20 of 33)
Plate: Composite
Spec: jama1
Galley: Final Galley
You can click Generate a Log File without Performing the Operation to see
the outcome of the operation without actually modifying the documents.
13 Click Finish to begin.
Deleting a Group of
Documents
You can delete a group of documents using the Mass Document Operations
wizard. To delete a group of documents you must have Delete rights to the
documents, or you must be a librarian for the library. In addition, you must have
Delete rights to the library from which you want to remove the documents.
When you delete a group of documents, all versions of the documents are
deleted; however, the activity logs for the deleted documents are not removed.
Document references that point to deleted documents are not deleted. If you
click a document reference to a deleted document, a message appears telling you
that the document has been deleted.
Deleting a Group of Documents
1
Click Tools
Mass Document Operations.
2
In the Operation group box, click Delete.
Managing Groups of Documents
Page time: 00:00:02
File time: 00:00:32
Date: 05-12-98 10:03am
User: RBALLARD
Queue: Q:PRNT
215
File: T:\TYPE\859\W\02\R_30DOCM.859
Page: 216 (21 of 33)
Plate: Composite
Spec: jama1
Galley: Final Galley
3
In the Selection Method group box, click Use Find/Advanced Find to Select
Documents Next.
4
If you want to search both the document properties and the document
content, make sure that Full Text appears on the drop-down list, then type
the text you want to find.
or
If you want to search just the document subject, click the Full Text dropdown list Subject, then type the text you want to find.
5
Make sure Author is selected, then specify the name or names of the author
of the documents you want to find.
6
If you want to search for documents that were created or sent between
specific dates, select the Created or Delivered Between check box, then
specify a beginning and an ending date.
7
In the Look In list box, click the libraries you want to search
216 Managing Groups of Documents
Page time: 00:00:01
File time: 00:00:33
Date: 05-12-98 10:03am
User: RBALLARD
Queue: Q:PRNT
click Next.
File: T:\TYPE\859\W\02\R_30DOCM.859
Page: 217 (22 of 33)
Plate: Composite
Spec: jama1
Galley: Final Galley
8
Click Preview to see a sample of the documents that will be deleted based on
the Find criteria you specified.
9
You can click Close at any time in the Find Results dialog box to cancel the
preview.
10 Specify the directory where you want to save the log file.
11 You can click Generate a Log File without Performing the Delete
Operation to see the outcome of the delete without actually deleting the
documents.
12 Click Finish to begin deleting documents.
Tips
•
You must have Delete rights to all of the documents and Delete
rights in the library to delete a group of documents, or you must
have Manage rights and be a librarian for library.
Deleting a Group of Selected Documents
1
In your Mailbox or folders, click the document references for the documents
you want to delete.
2
Click Tools
3
In the Operation group box, click Delete
4
In the Selection Method group box, click Use Currently Selected
Documents Next.
5
Specify the directory where you want to save the log file.
6
You can click Generate a Log File without Performing the Delete
Operation to see the outcome of the delete without actually deleting the
documents.
7
Click Finish to begin deleting documents.
Mass Document Operations.
Managing Groups of Documents
Page time: 00:00:02
File time: 00:00:35
Date: 05-12-98 10:03am
User: RBALLARD
Queue: Q:PRNT
217
File: T:\TYPE\859\W\02\R_30DOCM.859
Page: 218 (23 of 33)
Plate: Composite
Spec: jama1
Galley: Final Galley
Deleting a Group of Documents Listed in a File
1
Click Tools
Mass Document Operations.
2
In the Operation group box, click Delete.
3
In the Selection Method group box, click Use Documents Listed in a File.
4
Specify the name of the file that contains the list of documents you want to
delete click Next.
5
If the file you specify is a log file from a previous delete operation, you can
click Process Errors Only and GroupWise will only process the documents
that generated errors during the previous session.
6
Specify the directory where you want to save the log file.
7
You can click Generate a Log File without Performing the Delete
Operation to see the outcome of the delete without actually deleting the
documents.
8
Click Finish to begin deleting documents.
Tips
•
You must have Delete rights to all of the documents and Delete
rights in the library to delete a group of documents, or you must
have Manage rights and be a librarian for library.
Viewing Documents When Your Network or GroupWise Is Unavailable
After you have edited and closed a document or documents in your Master
Mailbox, you can have a copy of every document you edited placed in your
Remote Library. This is called document echoing. Then when your network,
GroupWise Library, or GroupWise post office is unavailable, you can open and
modify your latest edited documents in Remote. Document echoing will also
save the time of downloading documents when you are running Remote.
If you have a workstation install of GroupWise, you need to be connected to the
network to use document echoing. If you have a standard or custom (local)
install of GroupWise, you do not need to be connected to the network.
You must have a Remote Mailbox on your machine for document echoing to
occur. Documents are echoed whenever you close or check-in a document in
your Master Mailbox. The document reference for the document is added to
your Documents folder in your Remote Mailbox, and the document is copied to
your Remote Library. You can use Remote Disk Space Management to remove
218 Viewing Documents When Your Network or GroupWise Is Unavailable
Page time: 00:00:01
File time: 00:00:36
Date: 05-12-98 10:03am
User: RBALLARD
Queue: Q:PRNT
File: T:\TYPE\859\W\02\R_30DOCM.859
Page: 219 (24 of 33)
Plate: Composite
Spec: jama1
Galley: Final Galley
unneeded documents that take up extra disk space. Document echoing does not
occur when you close or check-in documents in your Remote Mailbox.
1
Click Tools
Options
double-click Documents.
2
Click the General tab.
3
Click Echo Documents to GroupWise Remote
4
If prompted, type your Master Mailbox password.
5
If prompted, specify the path where you would like the Remote Mailbox
created on this machine click Next.
6
Select the gateway phone numbers you will use to connect to GroupWise
when you run Remote click Finish.
7
If you are running GroupWise with a workstation install, you are prompted
to install a local copy. If you click Yes, GroupWise exits and setup starts.
Follow the prompts for a custom or standard install.
click OK.
Whether you are running GroupWise with a workstation or standard install,
documents will be echoed to your Remote Mailbox. However, you need a
standard install to access these documents if the network is unavailable.
8
Edit documents that you would like copied (echoed) to your Remote
Library.
9
Run Remote when your GroupWise post office, GroupWise Library, or
network is unavailable.
Viewing Documents When Your Network or GroupWise Is Unavailable
Page time: 00:00:01
File time: 00:00:38
Date: 05-12-98 10:03am
User: RBALLARD
Queue: Q:PRNT
219
File: T:\TYPE\859\W\02\R_30DOCM.859
Page: 220 (25 of 33)
Plate: Composite
Spec: jama1
Galley: Final Galley
10 Click a document reference in your Documents folder.
Tips
•
If you connect your laptop to the network and turn on document
echoing before you edit documents, you will be able to travel with
your latest edited documents.
•
Documents are echoed whenever you close or check-in a document
in your Master Mailbox. The document is copied to your Remote
Library, and the document reference for the document is added to
your Documents folder in your Remote Mailbox.
•
You must have a Remote Mailbox on your machine for document
echoing to occur. When you create a Remote Mailbox in step 5, only
a basic Remote Mailbox is created. If you want to download specific
folders and items to your Remote Mailbox, you can run Hit the
Road later.
•
Document echoing does not occur when you close or check-in
documents in your Remote Mailbox.
•
You can use Remote Disk Space Management to remove unneeded
documents that take up extra disk space in your Remote Library.
Integrating GroupWise with Your Applications
GroupWise Integrations make it possible for you to link your applications to
your GroupWise Mailbox. In an integrated application, you can see the
documents in your Mailbox and folders when you select Open in the
application. In addition, you can save a document as a new version using the
application's Save As feature. Integrating makes it possible for you to create, edit,
and save GroupWise documents within your applications.
GroupWise can integrate with applications one of two ways: through the Open
Document Management API (ODMA) supplied by the application, or through a
point-to-point integration macro.
GroupWise supplies point-to-point integration macros for Word 7, Excel™ 95,
and Excel 97; however, anyone can create a point-to-point integration macro.
You can also integrate GroupWise with all ODMA enabled applications
including: Word 97, PowerPoint®, Binder, Word Pro™, WordPerfect® 7,
WordPerfect 8, Corel Presentations™ 7, Corel Presentations 8, Quattro Pro® 7,
and Quattro Pro 8. (This list contains the applications that are currently ODMA
enabled, and will change as more applications implement ODMA.)
220 Integrating GroupWise with Your Applications
Page time: 00:00:01
File time: 00:00:39
Date: 05-12-98 10:03am
User: RBALLARD
Queue: Q:PRNT
File: T:\TYPE\859\W\02\R_30DOCM.859
Page: 221 (26 of 33)
Plate: Composite
Spec: jama1
Galley: Final Galley
Integrating
Applications During
Setup
If Setup detects that you have an ODMA enabled application, such as
WordPerfect, Microsoft Word, or Excel properly installed, Setup prompts you to
specify whether you want GroupWise to integrate with the application. If you
integrate your applications and later want to disable the integration, you can turn
off the integration in the Documents Setup dialog box.
Integrating
Applications After
Setup
If your applications are ODMA enabled or have a point-to-point integration
macro, GroupWise prompts you to enable integrations with your applications
during Setup; however, if you don't enable the integrations during Setup but
later decide you do want to use integrations, you must run Setup again to install
them. After you've run Setup, you can turn integrations on or off for each
application on the Integrations tab in Documents Setup.
Once you've enabled integrations, you can turn them on or off at any time.
Turning Integrations
Off
You can turn off integrations for one application or for all your applications.
When you turn off integrations, your applications work like non-integrated
applications, and GroupWise can't monitor when you open and save documents.
As a result, your documents are returned to the library when you close the
application, not when you close the document.
Turning Off Integrations for All Your Applications
1
Click Tools
Options
double-click Documents.
2
Click the Integrations tab.
3
Deselect the Enable Integrations check box.
Turning Off Integrations for One Application
1
Click Tools
Options
double-click Documents.
2
Click the Integrations tab.
3
Make sure the Enable Integrations check box is selected.
Integrating GroupWise with Your Applications
Page time: 00:00:02
File time: 00:00:41
Date: 05-12-98 10:03am
User: RBALLARD
Queue: Q:PRNT
221
File: T:\TYPE\859\W\02\R_30DOCM.859
Page: 222 (27 of 33)
Plate: Composite
Spec: jama1
Galley: Final Galley
4
In the Registered Applications box, click the application for which you want
to turn off integrations.
5
Click Disabled
OK.
Tips
•
When an application is disabled, no text displays to the right of the
application name in the Registered Applications list box.
Turning On Integrations
You can turn integration on for one application or for all your eligible
applications.
Before you turn on integration, verify that the application is ODMA enabled or
is supported by a point-to-point integration macro. The list of applications on
the Integrations tab shows all the applications that are registered on your
machine. It is not a list of ODMA enabled applications. It is a list of registered
applications. If you select an application that is not ODMA enabled and try to
turn on integration, GroupWise displays a message warning you that the
application is not ODMA enabled. If you proceed and register the non-ODMA
application, the integration will not work for that application.
If the application for which you are turning on integrations has two executable
files (for example, WordPerfect) you must specify the name of the main
executable file (such as WPWIN.EXE for WordPerfect) on the Executable tab in
Advanced Integrations. GroupWise launches the executable you specify, and that
executable launches the application.
Turning On Integrations for All Your Applications
1
Click Tools
Options
double-click Documents.
2
Click the Integrations tab.
3
Select the Enable Integrations check box
OK.
Tips
•
This turns on integrations for all your integrated applications. It
doesn’t have any affect on non-integrated applications.
Turning On Integrations for One Application
1
Click Tools
Options
double-click Documents.
2
Click the Integrations tab.
3
Select the Enable Integrations check box.
222 Integrating GroupWise with Your Applications
Page time: 00:00:01
File time: 00:00:42
Date: 05-12-98 10:03am
User: RBALLARD
Queue: Q:PRNT
File: T:\TYPE\859\W\02\R_30DOCM.859
Using Non-Integrated
Applications
Page: 223 (28 of 33)
Plate: Composite
Spec: jama1
Galley: Final Galley
4
In the Registered Applications list box, click the application for which you
want to turn on integration.
5
Click Enabled
OK.
If you're using non-integrated applications (most Windows 3.1 applications, MS
DOS applications, and many Windows 95 applications), you can't integrate
GroupWise with your application; however, this does not mean that you can't
use GroupWise documents with these applications. It just means that you can't
take advantage of the integrated Open and Save features. You can use the options
on the Non-Integrated tab in Advanced Integration options to specify whether
or not you want GroupWise to display a warning message when GroupWise
loses contact with a non-integrated application. This message reminds you that
you must manually return the document to the library. You can also specify how
many seconds you want GroupWise to wait for non-integrated applications to
open.
Turning the Warning Message for Non-Integrated Applications On or Off
GroupWise displays the warning message when it loses contact with the
application. The message reminds you to manually return the document to the
library.
1
Click Tools
Options
double-click Documents.
2
Click the Integrations tab click Advanced click the Non-Integrated tab.
or
To turn off the warning message, deselect the Display Message check box.
Specifying How Long GroupWise Should Wait for a Non-Integrated Application to
Open
GroupWise waits the number of seconds you specify for the non-integrated
application to open. If GroupWise doesn’t detect the application opening,
GroupWise times out and loses contact with the document, which means
GroupWise can’t return it to the library.
If you have an application that loads very slowly, you can increase the wait
interval to prevent GroupWise from timing out before the application opens.
1
Click Tools
Options
double-click Documents.
2
Click the Integrations tab.
3
In the Registered Application box, click the application for which you want
to specify the wait interval.
Integrating GroupWise with Your Applications
Page time: 00:00:01
File time: 00:00:43
Date: 05-12-98 10:03am
User: RBALLARD
Queue: Q:PRNT
223
File: T:\TYPE\859\W\02\R_30DOCM.859
Page: 224 (29 of 33)
Plate: Composite
Spec: jama1
Galley: Final Galley
4
Click Advanced
click the Non-Integrated tab.
5
Click This Application to apply the wait interval to the selected application.
or
Click Default for All Applications to apply the wait interval to all nonintegrated applications.
6
In the Wait Time to Detect Application box, type the number of seconds
GroupWise should wait for the application to open.
7
Click OK.
Returning Documents to the Library
Most of the time you open a document, make changes, and save it in the library
without any interruptions; however, once in a while, the power goes out or the
network goes down, and GroupWise can't copy your document back to the
library. This also happens if you exit GroupWise while a document is open in an
application or if you exit GroupWise before you close a non-integrated
application. In these cases, GroupWise stores the document (including any
changes) in the staging directory. The document stays in the staging directory
until you return it to the library; however, as long as the document is in the
staging directory, the document status is open and no one (including you) can
open or edit the document.
When you have a document with an Open status in the staging directory, you
can return it to the library and change its status two ways: you can use the Reset
Document Status option, or you can use the Unreturned Documents dialog box.
Using Reset Document
Status
Reset Document Status is available any time you right-click a document
reference in your Mailbox or folders. You can use this option to immediately
return a document to the library. When you do this, you can specify whether or
not you want GroupWise to update the document in the library with the
document in the staging directory.
224 Returning Documents to the Library
Page time: 00:00:02
File time: 00:00:45
Date: 05-12-98 10:03am
User: RBALLARD
Queue: Q:PRNT
File: T:\TYPE\859\W\02\R_30DOCM.859
Page: 225 (30 of 33)
Plate: Composite
Spec: jama1
Galley: Final Galley
If you have GroupWise update the document, GroupWise moves the document
out of the staging directory, updates the document in the library with any
changes, and makes the document available. If you do not have GroupWise
update the document, GroupWise deletes the document out of the staging
directory and makes the document available.
Returning a Document to the Library and Marking it Available
1
Right-click the document reference in your Mailbox or folder.
2
Click Reset Document Status.
3
Make sure that both Mark the Document as Available and Return the
Document to the Library are selected OK.
Marking a Document Available Only
1
Right-click the document reference in your Mailbox or folder.
2
Click Reset Document Status.
3
Click Mark the Document as Available.
4
Make sure that Return the Document to the Library is not selected.
5
Click OK.
Tips
•
This changes the status of the document in the library and makes the
document available; however, this does not update the document in
the library with any changes you made while you had the document
open.
Using Reset Document
Status in Remote
When you use Reset Document Status in your Remote Mailbox, you can specify
whether or not you want to return the document to the Master Library. Use the
Make the Document Available in the Master Library option to remove the In
Use status and make the document available in the Master Library without
updating the document.
1
Right-click the document reference in your Remote Mailbox.
Returning Documents to the Library
Page time: 00:00:01
File time: 00:00:46
Date: 05-12-98 10:03am
User: RBALLARD
Queue: Q:PRNT
225
File: T:\TYPE\859\W\02\R_30DOCM.859
Using the Unreturned
Documents Dialog Box
Page: 226 (31 of 33)
Plate: Composite
Spec: jama1
Galley: Final Galley
2
Click Reset Document Status.
3
To make the document available without updating the document in the
Remote Library, click Mark the Document as Available in the Remote
Library.
or
To make the document available and update the document in the Remote
Library, click Mark the Document as Available in the Remote Library
click Return the Document to the Remote Library.
4
To change the document status from In Use to Available in the Master
Library, click Mark the Document as Available in the Master Library.
When you start or exit GroupWise, GroupWise checks the registry file to see if
you have any documents open in the staging directory. If you do, GroupWise
lists all the documents in the Unreturned Documents dialog box. (Unlike the
Reset Document Status option, there's no way to manually access the
Unreturned Documents dialog box.)
At this point, you can click the check box to select the documents (by default all
are selected) you want to return to the library, and have GroupWise return them.
Or you can switch to the application in which you created the document and
return the documents (by saving or closing them) yourself. If you switch to an
integrated application, closing the document returns it to the library. If you
switch to a non-integrated application, you must close the application to return
the document to the library.
226 Returning Documents to the Library
Page time: 00:00:02
File time: 00:00:48
Date: 05-12-98 10:03am
User: RBALLARD
Queue: Q:PRNT
File: T:\TYPE\859\W\02\R_30DOCM.859
Page: 227 (32 of 33)
Plate: Composite
Spec: jama1
Galley: Final Galley
Replacing a Document with a File from Backup
You can replace a document in the library with a file you've restored from a
backup system or with any other file. This is useful if documents have become
corrupt through machine failures, network problems, and so on. To do this, you
must be a librarian in the GroupWise Library where the document is found, or
you must be a librarian in any GroupWise Library and have Edit rights to the
document.
If a file needs to be restored from a backup system and you are uncertain which
one to restore, you can see a list of all the blob filenames that have ever been
assigned to that document version. To restore a file from a backup, follow the
directions for your standard backup software. Then you can replace the corrupt
document with the restored file in GroupWise using Replace Document with
Backup.
You can use this feature in Remote only if the document has been downloaded
and marked In Use.
1
Click the document reference.
2
Click Tools
3
If necessary, look at the entire list of blob filenames that have been assigned
to that document version and decide which file needs to be restored from
backup files.
or
Skip to Step 6.
4
If necessary, exit GroupWise. Using standard backup software, restore the
file.
5
Start GroupWise and repeat Steps 1 and 2.
Replace Document with Backup.
Replacing a Document with a File from Backup
Page time: 00:00:01
File time: 00:00:49
Date: 05-12-98 10:03am
User: RBALLARD
Queue: Q:PRNT
227
File: T:\TYPE\859\W\02\R_30DOCM.859
Page: 228 (33 of 33)
6
Plate: Composite
Spec: jama1
Galley: Final Galley
Specify the path and filename for the file that will replace the document.
Tips
•
To replace a document, you must be a librarian in the GroupWise
Library where the document is found, or you must be a librarian in
any GroupWise Library and have Edit rights to the document.
•
Use this feature when documents become corrupt through system
failures and other problems.
•
You can use this feature in Remote only if the document has been
downloaded and marked In Use.
228 Replacing a Document with a File from Backup
Page time: 00:00:01
File time: 00:00:50
Date: 05-12-98 10:03am
User: RBALLARD
Queue: Q:PRNT
File: T:\TYPE\859\W\02\R_35REMO.859
Page: 229 (1 of 30)
Plate: Composite
Spec: jama1
Galley: Final Galley
•
Page time: 00:00:00
File time: 00:00:01
•
•
Date: 05-29-98 11:09am
•
•
•
•
•
•
•
User: RBALLARD
•
•
•
•
•
•
Queue: Q:PRNT
•
•
•
•
•
•
•
•
Using GroupWise Away from the Office
Using GroupWise Away
from the Office
File: T:\TYPE\859\W\02\R_35REMO.859
Page: 230 (2 of 30)
Plate: Composite
Spec: jama1
Galley: Final Galley
Using GroupWise Remote: An Overview
GroupWise® Remote makes it possible for you to access your Mailbox and send
and receive mail, among other things, when you are away from the office.
Master and Remote Mailboxes
To use GroupWise away from your office, you must have an existing GroupWise
Mailbox, called your Master Mailbox, in your master GroupWise system. You
retrieve a copy of your Master Mailbox to your laptop or home computer. This
copy is called your Remote Mailbox.
Remote exchanges items and information between your Master Mailbox and the
Mailbox on your Remote computer. When you use GroupWise in the office, the
Mailbox you open is your Master Mailbox. When you use GroupWise away
from your office, the Mailbox you open is your Remote Mailbox.
When you send an item from your Remote Mailbox, Remote sends the item to
your master GroupWise system the next time you connect. From there,
GroupWise distributes it to the recipients. When someone at your master
GroupWise system sends an item to you, it is delivered to your Master Mailbox.
You then use Remote to retrieve the item to your Remote Mailbox.
Sending and Retrieving Items
Whenever you perform an action, such as sending a mail message, that requires
information to be sent to your Master Mailbox, Remote creates a request. For
example, requests are created whenever you perform any of the following actions:
•
•
•
•
•
•
•
Send, forward, or reply to an item
Create a posted item, folder, group, or rule
Open, delete, retract, or undelete an item; or empty the Trash
Request to download items, folders, and more from your Master Mailbox
Move an item to or from a folder
Change, enable, or disable a rule
Delete a folder or rule
All requests are listed in the Pending Requests to Master Mailbox dialog box.
When you connect to your GroupWise system, listed requests are sent to your
Master Mailbox. For example, if you request all unopened mail messages, that
retrieval request is sent to your Master Mailbox. Your Master Mailbox collects
the items you requested, then GroupWise retrieves them to your Remote
Mailbox.
Connection Types
To access your Master Mailbox, you must connect to your GroupWise system
through a modem connection, a network connection, or a TCP/IP connection.
You will most likely use Remote away from the office with a computer that has
no network access. In these situations, you can use a TCP/IP connection or a
modem connection to connect to your master GroupWise system. Modem
connections dial into a gateway in your GroupWise system. TCP/IP connections
use unique IP (Internet Protocol) address and port information to connect to
your master GroupWise system.
230 Using GroupWise Remote: An Overview
Page time: 00:00:01
File time: 00:00:03
Date: 05-29-98 11:09am
User: RBALLARD
Queue: Q:PRNT
File: T:\TYPE\859\W\02\R_35REMO.859
Page: 231 (3 of 30)
Plate: Composite
Spec: jama1
Galley: Final Galley
You can also use Remote in your office and connect to your master GroupWise
system via a TCP/IP connection or a network drive mapping. These connections
are useful to download large quantities of information, such as your system
address book.
Using GroupWise
Features in Remote
After setting up your Remote Mailbox on a laptop or on a desktop computer
that is not in your office, you can use GroupWise away from your office.
When performing the following common GroupWise tasks in your Remote
Mailbox, the actions are saved as requests. The next time you connect to your
master GroupWise system, the requests are processed by your Master Mailbox.
•
•
•
•
•
•
•
•
•
Read, edit, or delete an item
Reply to an item
Forward, delegate, or resend an item
Move or link an item
Accept, decline, or complete an item
Empty the Trash
Create folders or move items into folders
Create or edit rules
Create or edit personal address books
Other common GroupWise tasks remain specific to your Remote Mailbox setup
and are never sent to or retrieved from your Master Mailbox.
•
•
•
•
•
•
Set options
Create, delete, or save views
Set alarms
Print
Filter or sort items
Spell-check
The following GroupWise features are not available in your Remote Mailbox
because they do not apply in a remote situation.
•
•
•
Using Smart Docking
Access List
Archive
Proxy
GroupWise automatically processes outstanding Remote requests when you run
GroupWise on your docked laptop after you return to the office. For example,
you may have sent an item while you were away from your office, but didn’t
connect to the master GroupWise system to process that request. When you
return to the office and run GroupWise, you are asked if you want to process the
outstanding requests. To see what requests still need to be processed, click
Requests.
Using GroupWise Remote: An Overview
Page time: 00:00:01
File time: 00:00:04
Date: 05-29-98 11:09am
User: RBALLARD
Queue: Q:PRNT
231
File: T:\TYPE\859\W\02\R_35REMO.859
Making Sure You’re
Using Your Remote
Mailbox
Page: 232 (4 of 30)
Plate: Composite
Spec: jama1
Galley: Final Galley
The Remote Mailbox and Master Mailbox are almost identical. However, you
can tell which Mailbox you are using by looking at the menu bar. If your menu
bar includes the Remote menu, you are running GroupWise against your
Remote Mailbox.
The Remote menu displays
when you are using your
Remote Mailbox.
Preparing to Use Remote
Before leaving the office, you need to use Hit the Road to set up and update
your Remote Mailbox. If you run GroupWise on a docked laptop in your office,
use Hit the Road to create your Remote Mailbox on the same machine. You can
also use Hit the Road to create setup files on a diskette to set up your Remote
Mailbox on a laptop or a computer that’s not connected to your network, such
as your home computer. Multiple users can also set up their Remote Mailboxes
on a single computer, such as a shared notebook computer.
When you first use Hit the Road, it does the following:
•
•
•
•
Prompts you to assign a password to your Master Mailbox if you haven’t
assigned one yet.
Sets up your Remote Mailbox on the docked laptop that is currently
connected to the network with your master GroupWise system, or copies
setup files on a diskette so you can set up a computer that has no direct
network access.
Creates a network (direct) connection if you’re connected to the post office
via a drive mapping, or creates a TCP/IP connection if you’re running
GroupWise in client/server mode.
Creates the modem connections you choose from a list of asynchronous
gateways detected in your master GroupWise system.
232 Preparing to Use Remote
Page time: 00:00:02
File time: 00:00:06
Date: 05-29-98 11:09am
User: RBALLARD
Queue: Q:PRNT
File: T:\TYPE\859\W\02\R_35REMO.859
Page: 233 (5 of 30)
Plate: Composite
Spec: jama1
Galley: Final Galley
When your laptop is docked and you’re running GroupWise on the network,
use Hit the Road to update your Remote Mailbox with messages, rules, address
books, and documents from your Master Mailbox. Updating your Remote
Mailbox before leaving your office saves you time and money, and ensures that
you have the necessary information with you. When you’re away from your
office, use Send/Retrieve to retrieve the Master Mailbox items.
Setting Up Your
Remote Mailbox
1
Make sure GroupWise is installed on the computer where you want to set up
your Remote Mailbox.
2
Make sure you have a password on your Master Mailbox.
3
Run GroupWise in your office on your docked laptop or a workstation.
4
Click Tools
5
Type your Mailbox password
Hit the Road.
click OK.
If a Remote Mailbox has been set up previously and you want to create
additional setup diskettes, click Back Back.
6
To create your Remote Mailbox on the docked laptop that is currently
connected to the network with your master GroupWise system, click This
Machine Next.
If you click This Machine and GroupWise is not installed on the docked
laptop, you are prompted to install GroupWise. To use GroupWise away
from your office, click Yes to install GroupWise on the computer you’re
traveling with.
or
To create a setup diskette for another computer, such as your home
computer, click Another Machine Next. Have a diskette ready. When
your setup diskette is created, insert it into the computer where you want to
set up your Remote Mailbox (such as your home computer)
run
SETUP.EXE from the diskette. Go to Step 10.
Preparing to Use Remote
Page time: 00:00:01
File time: 00:00:07
Date: 05-29-98 11:09am
User: RBALLARD
Queue: Q:PRNT
233
File: T:\TYPE\859\W\02\R_35REMO.859
Page: 234 (6 of 30)
Plate: Composite
Spec: jama1
Galley: Final Galley
7
Type the path for your Remote Mailbox
click Next.
8
Select the phone numbers you’ll use to connect to your Master Mailbox.
9
Select the items you want to copy to your Remote Mailbox
click Finish.
10 Exit GroupWise.
11 Right-click the Windows desktop
New
Shortcut.
12 In the Command Line box, type c:\novell\groupwise\grpwise.exe /ps-<PATH
TO REMOTE MAILBOX>. See Step 7 for path information.
13 Click Next.
14 Type a name for the shortcut, such as Remote.
15 Click Finish.
After setting up your Remote Mailbox, you can begin sending/retrieving
items and Address Book information from your Master Mailbox.
Setting Up Multiple
Remote Mailboxes On a
Shared Computer
1
Run the network version of GroupWise
click Tools
Hit the Road.
2
To create a Remote Mailbox setup diskette, click Another Machine.
3
Log in to Windows on the shared computer using a unique username.
4
Insert the setup diskette into the shared computer
the diskette.
run SETUP.EXE from
Make sure GroupWise is installed on the shared computer.
5
Select a folder for your Remote Mailbox files
click OK.
This folder will not be shared with other users.
6
To run GroupWise against your Remote Mailbox, each user should log in to
Windows with a unique username before starting GroupWise.
Tips
•
The above steps should be completed by each user who is setting up
a Remote Mailbox on the shared computer.
234 Preparing to Use Remote
Page time: 00:00:01
File time: 00:00:08
Date: 05-29-98 11:09am
User: RBALLARD
Queue: Q:PRNT
File: T:\TYPE\859\W\02\R_35REMO.859
Updating Your Remote
Mailbox
Page: 235 (7 of 30)
1
Plate: Composite
Spec: jama1
Galley: Final Galley
If you’re running GroupWise in your office on a computer that has a
connection to the network or a TCP/IP connection, click Tools Hit the
Road type your Master Mailbox password click OK.
or
If you’re running GroupWise away from your office, click Remote
Send/Retrieve to retrieve your Master Mailbox items through a modem or
TCP/IP connection.
2
To retrieve messages, make sure Items is selected click Advanced click
available options on the Retrieve, Items, Size Limits, and Folders tabs click
OK.
3
To retrieve rules, click Rules to select it.
4
To retrieve addresses from the system address book, click System Address
Book Filter specify the addresses to retrieve click OK.
5
To retrieve your personal address books, click Personal Address Books to
select it.
6
To retrieve copies of documents from your Master Mailbox, select the
Documents check box click Documents select your documents mark
applicable documents as In Use click OK.
Marking a document as In Use prevents others from modifying the
document. If you don’t plan to edit a document, don’t mark it In Use.
When you exit an In Use document, you’re asked to send the document to
the Master Library and mark it as Available. If you’re done with the
document, the document should be marked Available to allow others editing
access to it. To use Remote to mark a document Available or to send the
document to the Master Mailbox without marking it Available, you must be
using GroupWise 5.5 and a GroupWise 5.5 Post Office Agent.
Preparing to Use Remote
Page time: 00:00:01
File time: 00:00:10
Date: 05-29-98 11:09am
User: RBALLARD
Queue: Q:PRNT
235
File: T:\TYPE\859\W\02\R_35REMO.859
Page: 236 (8 of 30)
7
Plate: Composite
Spec: jama1
Galley: Final Galley
Click Connect or Finish.
Tips
•
If you don’t mark a document as In Use, someone can edit it while
you have the copy in your Remote Mailbox. If you then edit the
document and return it to the Master Library, your document is
saved as a new version. When this happens, a mail message notifies
you, the remote user, and other users that a new document version is
created. Other users include the document creator, the document
author, the creator of the version you retrieved into your Remote
Mailbox, and the last person who opened or checked out that
version. If you get this notification, you should make sure that all
updates are included in the new document version.
•
You can unmark the In Use status of a document that you’re not
currently editing. Right-click the document in your Mailbox click
Reset Document Status.
•
When your laptop is docked and you’re running GroupWise on the
network, you can update your Remote Mailbox without using a
modem connection.
•
For help on a dialog box option, click
the option.
Specifying Remote
Options
When you use Hit the Road to set up your Remote Mailbox, your connection,
modem, user, and system information is set up for you in Remote Options. If
any of this information changes or if you want to set up additional connections,
enter the new information in Remote Options. Your user ID, domain, and post
office information is in the system address book. If you need help getting this
information, ask your system administrator.
Remote Options also lets you automatically connect to your Master Mailbox at
regular intervals to update your Remote Mailbox with new items. GroupWise
uses the connection you last used. For example, if you’re at home and connected
to your Master Mailbox with a modem connection, the same connection will be
used for the periodic updates.
If you travel to an area outside of your usual time zone for an extended period of
time, you can change the time zone in Windows® to match the local time.
Remote Options lets you access the Windows Date/Time Properties dialog box
to change your time zone settings.
By default, deletions in the Remote Mailbox and Master Mailbox are
synchronized. For example, if you delete an item from your Remote Mailbox,
the item will be deleted from your Master Mailbox the next time you connect.
You can use Remote Options to change the deletion options, so that an item
deleted from your Remote Mailbox will stay in your Master Mailbox.
Conversely, you can set the deletion options to leave items deleted from the
Master Mailbox intact in your Remote Mailbox.
236 Preparing to Use Remote
Page time: 00:00:01
File time: 00:00:11
Date: 05-29-98 11:09am
User: RBALLARD
Queue: Q:PRNT
File: T:\TYPE\859\W\02\R_35REMO.859
Page: 237 (9 of 30)
Plate: Composite
Spec: jama1
Galley: Final Galley
Specifying Time Zone Settings
The items in your Calendar are scheduled according to the time zone settings in
the Windows Date/Time Properties. You can access this dialog box in Remote
Options. If you use GroupWise in another time zone, you can change to that
new time zone so that your scheduled items reflect the time zone difference.
Typically, if you’re leaving your office for several days, you will use your
Calendar information to attend and schedule appointments. Therefore, you will
need to use the local time zone. However, if you’re leaving your office for a short
time, (for example, a day), you will probably keep the same time zone as your
master GroupWise system.
IMPORTANT: If you change time zone settings, be sure to change your
computer’s clock to match the new time zone. For more information about
using Date/Time Properties, see your Windows documentation.
1
Click Tools
Options
2
Click Time Zone
double-click Remote.
the current time zone
click OK.
You can click your current time zone in the map or the drop-down list.
3
Change your computer’s clock to match the new time zone.
Connecting to Your Master Mailbox At Regular Intervals
1
Click Tools
Options
double-click Remote.
2
Select Check for New Messages
3
Click OK.
specify the period in minutes.
Tips
•
Your computer must stay connected to the network or phone line,
depending on the connection you’re using.
•
If GroupWise is unable to connect to the master GroupWise system,
you are prompted whether you want to keep trying to connect at the
interval you have specified or whether you want to turn Check for
New Messages off.
Specifying User and System Information for Your Remote Mailbox
1
Click Tools
Options
double-click Remote.
2
In the Full Name box, type your first and last name.
This name appears in the From box of an item you send someone. The name
is also used as your user folder name.
3
Type your GroupWise user ID.
Preparing to Use Remote
Page time: 00:00:01
File time: 00:00:13
Date: 05-29-98 11:09am
User: RBALLARD
Queue: Q:PRNT
237
File: T:\TYPE\859\W\02\R_35REMO.859
Page: 238 (10 of 30)
4
Plate: Composite
Spec: jama1
Galley: Final Galley
Click Password type your Master Mailbox password
the password click OK.
click OK
retype
Your Master Mailbox must have a password before you can use Remote.
5
Type the domain name of your Master Mailbox.
6
Type the post office name of your Master Mailbox.
Tips
•
If you have not assigned a password to your Master Mailbox, do so
in Security Options while running GroupWise in your office. You
cannot use Remote to assign or change your Master Mailbox
password. To set a password for your Remote Mailbox only, run
GroupWise against your Remote Mailbox click Tools Options
double-click Security type the password type the password
again click OK.
Changing Remote Delete Options
1
Click Tools
Options
double-click Remote.
2
Click the Delete Options tab.
3
Make your changes
click OK.
Tips
•
If you are not using GroupWise 5.5 and a GroupWise 5.5 Post
Office Agent, the Never Delete The Item From Remote Mailbox
option will not work; items that you delete from your Master
Mailbox will be deleted from your Remote Mailbox.
Sending and Retrieving Items in Remote
Use Send/Retrieve to synchronize your Master Remote Mailboxes.
When you connect to your master GroupWise system, items you sent from your
Remote Mailbox are delivered to the recipients. Remote also sends a request to
your Master Mailbox to retrieve your items, such as mail. Your master
GroupWise system processes the request, then sends your items to your Remote
Mailbox, restricting the items according to the limits you set in the Retrieve
Options dialog box.
238 Sending and Retrieving Items in Remote
Page time: 00:00:01
File time: 00:00:14
Date: 05-29-98 11:09am
User: RBALLARD
Queue: Q:PRNT
File: T:\TYPE\859\W\02\R_35REMO.859
Page: 239 (11 of 30)
Plate: Composite
Spec: jama1
Galley: Final Galley
In addition to mail, you can retrieve appointments, tasks, reminder notes, rules,
documents, and address books. When retrieving documents, mark a document
as In Use when you want to prevent others from modifying it. If you don’t mark
a document as In Use, someone can edit it while you have a copy in your
Remote Mailbox. If you then edit the document and return it to the Master
Library, your document is saved as a new version. When this happens, a mail
message notifies you, the remote user, and other users that a new document
version is created. Other users include the document creator, the document
author, the creator of the version you retrieved into your Remote Mailbox, and
the last person who opened or checked out that version. If you get this
notification, you should make sure all updates are included in the new document
version.
When you exit an In Use document, you’re asked to send the document to the
Master Library and mark it as Available. If you’re done with the document, the
document should be marked Available to allow other users editing access to it.
To use Remote to mark a document Available or to send the document to the
Master Library without marking it Available, you must be using GroupWise 5.5
and a GroupWise 5.5 Post Office Agent.
Sending Mail from Your
Remote Mailbox
1
On the toolbar, click
.
2
In the To box, type the recipient names.
You can also use the Address Book to select recipient names.
3
Type the subject and the message
click Send.
Remote places the mail in the Pending Requests list. When you connect to
your master GroupWise system, all items in the Pending Requests list are
sent. For more information, see Viewing Pending Requests later in this
section.
Sending and Retrieving Items in Remote
Page time: 00:00:02
File time: 00:00:16
Date: 05-29-98 11:09am
User: RBALLARD
Queue: Q:PRNT
239
File: T:\TYPE\859\W\02\R_35REMO.859
Page: 240 (12 of 30)
Plate: Composite
Spec: jama1
Galley: Final Galley
4
Click Remote
Send/Retrieve.
5
To specify where you’re dialing from, click Configure
From drop-down list the remote location.
6
To select a connection to your Master Mailbox, click the Connecting To
drop-down list the modem, network, or TCP/IP connection to your
Master Mailbox OK.
7
Click Connect.
the Connecting
Tips
•
Besides mail, you can send other items, including appointments,
reminder notes, and so on.
•
You can click Remote
Send/Retrieve
Configure
Connect
From to access the Windows Dialing Properties dialog box to create
additional remote locations or change existing settings. For help on
this dialog box, see your Windows documentation.
•
You can switch between connection types (network, modem, and
TCP/IP) if there are no pending requests on the connection you are
switching from. For example, if you’re sending and retrieving items
with a network connection and disconnect before the transmission is
complete, you should not switch to a modem connection later to
process the requests. Complete the original request with the original
connection.
Viewing Pending
Requests
Whenever you perform an action that requires information to be sent from your
Remote Mailbox to your Master Mailbox, Remote creates a request that is placed
in the Pending Requests list. When you connect to your master GroupWise
system, all the requests are sent to your Master Mailbox. Use Pending Requests
to check for outstanding requests.
240 Sending and Retrieving Items in Remote
Page time: 00:00:01
File time: 00:00:17
Date: 05-29-98 11:09am
User: RBALLARD
Queue: Q:PRNT
File: T:\TYPE\859\W\02\R_35REMO.859
Page: 241 (13 of 30)
1
Click Remote
Plate: Composite
Spec: jama1
Galley: Final Galley
Pending Requests.
Tips
•
To prevent a request from being processed, click the request
Delete. Only requests that haven’t been sent to the master
GroupWise system and have the “Waiting to be Sent” status can be
deleted. If you’ve already sent a request to the master GroupWise
system, you cannot cancel the request.
Retrieving Items from
Your Master Mailbox
1
Click Remote
Send/Retrieve
make sure Items is selected
Advanced.
2
To specify the items to retrieve, click the appropriate options from the
Retrieve, Items, Size Limits, and Folders tabs click OK.
3
To retrieve copies of documents from your Master Mailbox, select the
Documents check box
click Documents
select the documents
mark applicable documents as In Use
click OK.
Marking a document as In Use prevents others from modifying the
document. If you don’t plan to edit a document, don’t mark it In Use.
When you exit an In Use document, you’re asked to send the document to
the Master Library and mark it Available. If you’re done with the document,
the document should be marked Available to allow others editing access to it.
To use Remote to mark a document Available or to send the document to
the Master Library without marking it Available, you must be using
GroupWise 5.5 and a GroupWise 5.5 Post Office Agent.
4
To specify where you’re dialing from, click Configure
From drop-down list the remote location.
the Connecting
5
To select a connection to your Master Mailbox, click the Connecting To
drop-down list click the modem, TCP/IP, or network connection to your
Master Mailbox click OK.
Sending and Retrieving Items in Remote
Page time: 00:00:02
File time: 00:00:19
Date: 05-29-98 11:09am
User: RBALLARD
Queue: Q:PRNT
241
File: T:\TYPE\859\W\02\R_35REMO.859
Page: 242 (14 of 30)
6
Plate: Composite
Spec: jama1
Galley: Final Galley
Click Connect.
Tips
•
If documents on your server are deleted while you’re away, they are
deleted from your Remote Mailbox the next time you connect to
your master GroupWise system.
•
If you don’t mark a document as In Use, someone can edit it while
you have the copy in your Remote Mailbox. If you then edit the
document and return it to the Master Library, your document is
saved as a new version. When this happens, a mail message notifies
you, the remote user, and other users that a new document version is
created. Other users include the document creator, the document
author, the creator of the version you retrieved into your Remote
Mailbox, and the last person who opened or checked out that
version. If you get this notification, you should make sure that all
updates are included in the new document version.
•
You can unmark the In Use status of a document that you’re not
currently editing. Right-click the document in your Mailbox
click Reset Document Status.
•
You can click Remote
Send/Retrieve
Configure
Connect
From to access the Windows Dialing Properties to create additional
remote locations or to change existing settings. For help on this
dialog box, see your Windows documentation.
•
By default, GroupWise transfers all document references in your
Master Mailbox to your Remote Mailbox. If you don’t want the
document references, click the Documents pop-up list None.
•
When you send requests to retrieve items from your Master
Mailbox, the master GroupWise system processes the request, then
GroupWise retrieves the items into your Remote Mailbox. In
addition, any items waiting to be sent to your Master Mailbox will
be delivered when you connect.
•
You can switch between connection types (network, modem, and
TCP/IP) if there are no pending requests on the connection you are
switching from. For example, if you’re sending and retrieving items
with a network connection and disconnect before the transmission is
complete, you should not switch to a modem connection later to
process the requests. Complete the original requests with the original
connection.
242 Sending and Retrieving Items in Remote
Page time: 00:00:01
File time: 00:00:20
Date: 05-29-98 11:09am
User: RBALLARD
Queue: Q:PRNT
File: T:\TYPE\859\W\02\R_35REMO.859
Page: 243 (15 of 30)
Plate: Composite
Spec: jama1
Galley: Final Galley
Retrieving Documents into Your Remote Mailbox
1
If you’re away from your office and running GroupWise against your
Remote Mailbox, click Remote Send/Retrieve select the Documents
check box click Documents.
or
If you’re in your office and run GroupWise against your Master Mailbox,
click Tools Hit the Road type your Master Mailbox password click
OK select the Documents check box click Documents.
2
Click the documents you want in the upper list box.
Sending and Retrieving Items in Remote
Page time: 00:00:02
File time: 00:00:22
Date: 05-29-98 11:09am
User: RBALLARD
Queue: Q:PRNT
243
File: T:\TYPE\859\W\02\R_35REMO.859
Page: 244 (16 of 30)
3
Plate: Composite
Spec: jama1
Galley: Final Galley
As selected documents appear in the lower list box, click the documents you
want to edit to mark them as In Use OK.
Tips
•
If a document is deleted in the Master Library while you are using
Remote, it is deleted from your Remote Mailbox the next time you
connect to your master GroupWise system.
•
Mark a document as In Use only when you want to prevent others
from modifying it. If you don’t mark a document as In Use,
someone can edit it while you have a copy in your Remote Mailbox.
If you then edit the document and return it to the Master Library,
your document is saved as a new version. When this happens, a mail
message notifies you, the remote user, and other users that a new
document version is created. Other users include the document
creator, the document author, the creator of the version you
retrieved into your Remote Mailbox, and the last person who opened
or checked out that version. If you get this notification, you should
make sure all updates are included in the new document version.
•
When you exit a document, a prompt lets you choose to send the
document to the Master Library and mark it as Available. If you’re
done with the document, it should be marked Available to allow
others editing access to it. To use Remote to mark a document
Available or to send the document to the Master Library without
marking it Available, you must be using GroupWise 5.5 and a
GroupWise 5.5 Post Office Agent.
•
You can also right-click the document in your Mailbox
Reset
Document Status to clear the In Use status.
Limiting the Items You
Retrieve
You can save time and disk space by restricting the items you retrieve from your
Master Mailbox. You can retrieve items of a specific size or from a specific folder.
You can specify the range of dates of items you want to retrieve, or retrieve all
items since you last connected. In addition, you can retrieve just the subject line
of items so you can review an item before you retrieve it in its entirety.
Retrieving Items of a Specific Size Only
1
If you’re away from your office and running GroupWise against your
Remote Mailbox, click Remote Send/Retrieve Advanced.
or
If you’re in your office and running GroupWise against your Master
Mailbox, click Tools Hit the Road type your Master Mailbox password
click OK Advanced.
244 Sending and Retrieving Items in Remote
Page time: 00:00:01
File time: 00:00:23
Date: 05-29-98 11:09am
User: RBALLARD
Queue: Q:PRNT
File: T:\TYPE\859\W\02\R_35REMO.859
Page: 245 (17 of 30)
Plate: Composite
Spec: jama1
Galley: Final Galley
2
Click the Size Limits tab.
3
Click Get Contents If Smaller Than.
4
Specify the size limits (in kilobytes) for the message text, attachments, and
the addressing fields.
Tips
•
If you retrieve an item that exceeds one of the size limits, the part of
the item that exceeds the limits will not be retrieved. For example, if
an attachment exceeds the size limit, only the message text and
addressing field information will be retrieved. To retrieve the
attachment, double-click the attachment icon in the opened item.
Click Yes when prompted whether you want to retrieve the
attachment.
•
For help on a dialog box, click
the options.
Retrieving Items from Specific Folders
1
If you’re away from your office and running GroupWise against your
Remote Mailbox, click Remote Send/Retrieve Advanced.
or
If you’re in your office and running GroupWise against your Master
Mailbox, click Tools Hit the Road type your Master Mailbox password
click OK Advanced.
2
Click the Folders tab
the folders
OK.
A check mark indicates a folder is selected. To select items from all folders,
leave all the folders unselected.
Sending and Retrieving Items in Remote
Page time: 00:00:01
File time: 00:00:24
Date: 05-29-98 11:09am
User: RBALLARD
Queue: Q:PRNT
245
File: T:\TYPE\859\W\02\R_35REMO.859
Page: 246 (18 of 30)
Plate: Composite
Spec: jama1
Galley: Final Galley
Retrieving Items Received Between Specific Days or Since You Last Connected
1
If you’re away from your office and running GroupWise against your
Remote Mailbox, click Remote Send/Retrieve Advanced.
or
If you’re in your office and running GroupWise against your Master
Mailbox, click Tools Hit the Road type your Master Mailbox password
click OK Advanced.
2
Click the Retrieve tab.
3
Click Retrieve All Changes Since I Last Connected.
or
Click Retrieve Only Items within the Date Range
days prior to or after today
OK.
specify the number of
Tips
•
Specifying 365 in the Days After Today box allows you to retrieve
appointments scheduled up to a year from today.
•
For help on a dialog box option, click
the option.
Retrieving the Subject Line Only of Items
1
If you’re away from your office and running GroupWise against your
Remote Mailbox, click Remote Send/Retrieve Advanced.
or
If you’re in your office and running GroupWise against your Master
Mailbox, click Tools Hit the Road type your Master Mailbox password
click OK Advanced.
2
Click the Size Limits tab
Get Subject Line Only
Tips
•
For help on a dialog box option, click
Retrieving Selected
Items
File time: 00:00:26
the option.
If you use the Get Subject Line Only and Get Contents If Smaller Than options
to retrieve items from your Master Mailbox, you can scan the retrieved items and
decide which ones to retrieve in their entirety. Use Retrieve Selected Items to
retrieve the rest of a selected item, including the entire message and any
attachments, regardless of previous size and filter criteria.
246 Sending and Retrieving Items in Remote
Page time: 00:00:02
OK.
Date: 05-29-98 11:09am
User: RBALLARD
Queue: Q:PRNT
File: T:\TYPE\859\W\02\R_35REMO.859
Page: 247 (19 of 30)
Plate: Composite
Spec: jama1
Galley: Final Galley
1
Select the items in your Remote Mailbox.
2
Click Remote
3
To connect immediately to your Master Mailbox, click Connect Now.
Retrieve Selected Items.
or
To create the request but not send it, click Connect Later. This way, you can
wait until you have several requests and connect later.
Tips
•
To retrieve an item, you can also right-click the item
Retrieve Selected Items.
Retrieving a Personal
Address Book
1
click
If you’re away from your office and running GroupWise against your
Remote Mailbox, click Remote Send/Retrieve.
or
If you’re in your office and running GroupWise against your Master
Mailbox, click Tools Hit the Road type your Master Mailbox password
click OK.
2
Click Personal Address Books
deselect all other options
click Connect.
Tips
•
Because retrieving an address book can take a long time, we
recommend retrieving it through a network or TCP/IP connection
while you’re at your office.
Sending and Retrieving Items in Remote
Page time: 00:00:01
File time: 00:00:27
Date: 05-29-98 11:09am
User: RBALLARD
Queue: Q:PRNT
247
File: T:\TYPE\859\W\02\R_35REMO.859
Using Busy Search in
Remote
Page: 248 (20 of 30)
Plate: Composite
Spec: jama1
Galley: Final Galley
1
On the toolbar, click
.
2
Type the participants and resources in the To box.
If you’re typing several user and resource IDs in the To box, press Enter
between entries.
3
To select the first possible meeting day, click
a date
OK.
4
Click Busy.
5
To immediately connect to your master GroupWise system and search for
available times, click Connect Now.
or
To search for available times later, click Connect Later.
Clicking Connect Later creates a Busy Search request, but doesn’t send the
request to the master GroupWise system. You can save your appointment as
a draft item in the Work In Progress folder until you are ready to send it.
248 Sending and Retrieving Items in Remote
Page time: 00:00:02
File time: 00:00:29
Date: 05-29-98 11:09am
User: RBALLARD
Queue: Q:PRNT
File: T:\TYPE\859\W\02\R_35REMO.859
Page: 249 (21 of 30)
Plate: Composite
Spec: jama1
Galley: Final Galley
When you’re ready to check appointment times later, click Busy
Now.
6
Connect
When the Choose Appointment Time window appears, click Auto-Select for
the first available meeting time. Click Auto-Select until the best available
time is displayed click OK.
or
Instead of using Auto-Select, click the Available Times tab
time OK.
7
Complete the appointment
an available
click Send.
Tips
•
If you’re disconnected before all schedule information returns from a
busy search, clicking Busy again lets you update the information
from the original busy search request.
•
To remove a user or resource from the Invite To Meeting list after
the search, click the Available Times tab the user or resource
press Delete Yes. This is useful when, for example, you are
searching several conference rooms for availability; you can find the
one that meets your needs and eliminate the rest.
•
If you’re inviting someone to the meeting whose schedule has no
impact on the meeting time, such as a carbon copy recipient, you
can exclude that user from the busy search. Click the Available
Times tab
deselect the check box next to the user or resource.
The check mark by the name disappears.
•
To specify where you’re dialing from, click Remote
Send/Retrieve
Configure the Connecting From drop-down
list the remote location OK.
•
To select a connection to your Master Mailbox, click Remote
Send/Retrieve Configure the Connecting To drop-down list
the modem, TCP/IP, or network connection to your Master
Mailbox OK.
•
For help on a dialog box option, click
the option.
Filtering the System
Address Book for Your
Remote Mailbox
The system address book is usually large, because it contains information for
your entire organization. If you don’t need all the information in the system
address book when using GroupWise away from your office, use System Address
Book Filter to retrieve only the user addresses, resource addresses, and public
groups you need from the GroupWise system.
For example, the filter statement, Dept [] Marketing, instructs GroupWise to
retrieve all addresses with “Marketing” in the Department column in the
Address Book. This way you can contact anyone from your Marketing
department while you’re traveling.
Sending and Retrieving Items in Remote
Page time: 00:00:01
File time: 00:00:30
Date: 05-29-98 11:09am
User: RBALLARD
Queue: Q:PRNT
249
File: T:\TYPE\859\W\02\R_35REMO.859
Page: 250 (22 of 30)
Plate: Composite
Spec: jama1
Galley: Final Galley
You should also retrieve system address book information before leaving your
office to save downloading time and costs, especially if you’re planning to travel
to a location where you will incur long-distance phone charges.
1
Before leaving your office, click Tools
Hit the Road.
2
If you’re prompted for a password, type your Mailbox password
click OK.
If you haven’t set up your Remote Mailbox, do so now.
3
Click System Address Book
Filter.
4
Click an Address Book column in the first drop-down list.
For example, click Dept to search for addresses from a specific department.
5
Click the operator drop-down list click an operator
criteria in the box or click a value, if provided.
type your search
For example, click [] type Accounts to search for addresses from the
Accounts department. Use the operator that is most appropriate for your
search. Your search criteria, such as a person’s name or a subject, can include
wildcard characters such as an asterisk (*) or a question mark (?) Filter is not
case-sensitive to the criteria you type.
6
To add more filter conditions, click the last drop-down list
And.
7
After specifying all filter conditions, click OK.
8
Read the text beginning with “Include entries where...” as you create your
filter. This summarizes how your filter will work.
Tips
•
To filter the system Address Book while you’re away from the office,
click Remote Send/Retrieve and follow Steps 3 to 7. It is best to
retrieve your Address Book through a network connection while
you’re at your office, since this process can take a long time.
•
If you have defined several rows of filter conditions, you can remove
a row by clicking the last drop-down list
Delete Row.
•
For more information on operators see Filtering under Finding Items
in Your Mailbox.
250 Sending and Retrieving Items in Remote
Page time: 00:00:02
File time: 00:00:32
Date: 05-29-98 11:09am
User: RBALLARD
Queue: Q:PRNT
File: T:\TYPE\859\W\02\R_35REMO.859
Deleting Items in Your
Remote Mailbox
Page: 251 (23 of 30)
Plate: Composite
Spec: jama1
Galley: Final Galley
Use Delete, Empty Trash, and Remote Disk Space Management to remove
items from your Remote Mailbox and to free up disk space.
Deleting Items In Your Remote Mailbox
If you sent an item with old or wrong information, or you need to reschedule an
appointment, use Delete to retract that obsolete item from the recipients’
Mailboxes. You can retract mail and phone messages from the Mailboxes of
those recipients who haven’t opened them. Appointments, reminder notes, and
tasks can be retracted at any time.
The next time you connect to your master GroupWise system, the changes in
your Remote and Master Mailboxes will automatically synchronize. You can turn
off this synchronization by changing the delete options in Remote Options. See
Preparing to Use Remote under Using GroupWise Away from the Office.
1
Click the item in your Mailbox.
2
Click Edit
3
If you’re deleting an outgoing item, click one of the available options.
4
To free up disk space, click Edit
Delete.
Empty Trash.
This permanently removes all deleted items from your Remote Mailbox.
5
To synchronize your Remote and Master Mailboxes, connect to your master
GroupWise system.
Tips
•
Waiting until you have several send and retrieve requests before
connecting saves you time and money.
•
In Step 2, you can also click an item press the Delete key.
•
If you don’t want to synchronize deletions between your Remote
Mailbox and Master Mailbox, click Tools Options double-click
Remote click the Delete Options tab click the options you
want.
•
For help on a dialog box option, click
the option.
Removing Unneeded Files From Your Remote Mailbox
Remote Disk Space Management lets you delete unneeded documents and
stranded files from your Remote Mailbox. You see a list of the documents in
your Remote Library, the document sizes, the document and version numbers,
and the last accessed or modified dates. The list is sorted by file size.
When you work in a document after connecting to the Master Mailbox, the date
of that action appears in the Accessed column. Actions include opening, viewing,
printing a document and so on, but don’t include retrieving a file from the
Sending and Retrieving Items in Remote
Page time: 00:00:01
File time: 00:00:33
Date: 05-29-98 11:09am
User: RBALLARD
Queue: Q:PRNT
251
File: T:\TYPE\859\W\02\R_35REMO.859
Page: 252 (24 of 30)
Plate: Composite
Spec: jama1
Galley: Final Galley
Master Library. Documents that are opened after connecting to your Master
Mailbox also have a date logged in the Modified column.
Deleting files with Remote Disk Space Management will not remove them from
the Master Library. It will also not remove the document references for the
deleted documents. The files are only removed from the computer where you
have your Remote Mailbox, freeing disk space for you. If you delete an In Use
document, its status is reset to Available in the Master Library the next time you
connect.
1
Click Remote
Disk Space Management.
2
Click the document you want to delete
3
When you’re done, click Close.
click Delete.
Tips
•
You can select multiple documents using Shift+click for consecutive
documents or Ctrl+click for nonconsecutive documents.
Configuring Your Remote Connections
To access your Master Mailbox to send or retrieve information, you must
connect to your master GroupWise system through a modem connection, a
network connection, or a TCP/IP connection. When you use Hit the Road to
set up your Remote Mailbox, GroupWise creates the appropriate connections
based on how you are currently running GroupWise.
For example, if you use a drive mapping to connect to your GroupWise post
office, GroupWise creates a network connection and the modem connections for
all asynchronous gateways detected in your master GroupWise system. If you’re
running GroupWise in client/server mode, GroupWise creates a TCP/IP
connection instead of a network connection. You can create new connections as
well as change or delete existing ones. When creating a new connection, you can
copy an existing connection, then edit the duplicated settings to create the new
connection without redoing every setting.
252 Configuring Your Remote Connections
Page time: 00:00:01
File time: 00:00:34
Date: 05-29-98 11:09am
User: RBALLARD
Queue: Q:PRNT
File: T:\TYPE\859\W\02\R_35REMO.859
Page: 253 (25 of 30)
Plate: Composite
Spec: jama1
Galley: Final Galley
Modem Connections
In most cases, you will use a modem to connect to your master GroupWise
system via a gateway when you are away from the office.
MASTER GROUPWISE SYSTEM
Post Office
with Your
Master
Mailbox
Gateway
Modem
Connection
Your Remote
Computer
Your modem uses the information from the Connection Configuration dialog
box to connect to your Master Mailbox.
A modem connection is similar to a phone call. You need the telephone number
of your master GroupWise system that is part of the Connect To information.
Other Connect To information includes the ID and password of the gateway
you’re connecting to.
As in a phone call, dialing prefixes may change when you connect from a
different location. For example, when you’re at a hotel, you often need to dial 9
to access an outside line. If you’re at home, you don’t need this prefix. You’ll
need to set up the dialing information for each remote location. After setting up
the dialing properties for your remote locations, use Connect From in the
Connection Configuration dialog box to select a remote location when
connecting to your Master Mailbox. For more information about setting dialing
properties for each remote location, see your Windows documentation.
TCP/IP Connections
TCP/IP connections use an IP (Internet Protocol) address and port to connect to
your master GroupWise system.
If you use a toll-free Internet provider while you are away from the office, you
can avoid phone charges by using a TCP/IP connection. In addition, you don’t
need to exit an Internet connection and hang up the phone to connect to your
Configuring Your Remote Connections
Page time: 00:00:01
File time: 00:00:36
Date: 05-29-98 11:09am
User: RBALLARD
Queue: Q:PRNT
253
File: T:\TYPE\859\W\02\R_35REMO.859
Page: 254 (26 of 30)
Plate: Composite
Spec: jama1
Galley: Final Galley
master GroupWise system via a modem connection. You can use the same
Internet connection to connect to your master GroupWise system. If you’re
connected to your Master Mailbox in client/server mode and use Hit the Road
to set up your Remote Mailbox, GroupWise detects the IP information and uses
it to create a TCP/IP connection for you. If you need the IP information, check
with your system administrator.
Network Connections
When you’re at the office, you can run GroupWise against your Remote
Mailbox and connect to your master GroupWise system through the network.
MASTER GROUPWISE SYSTEM
File
Server
Computer
with your
Remote
mailbox
Post Office
with Your
Master
Mailbox
File
Server
Post Office
A network connection is useful for retrieving large amounts of information, such
as your system address book, because it transfers information faster than a
modem connection and saves long-distance phone charges.
Creating a Modem
Connection
1
Click Tools
Options
2
Click Connections
double-click Remote.
Connect To
New.
254 Configuring Your Remote Connections
Page time: 00:00:02
File time: 00:00:38
Date: 05-29-98 11:09am
User: RBALLARD
Queue: Q:PRNT
File: T:\TYPE\859\W\02\R_35REMO.859
Page: 255 (27 of 30)
Plate: Composite
Spec: jama1
Galley: Final Galley
3
Make sure Modem is selected
click OK.
4
In the Connection Name box, type a description.
For Steps 5, 6, and 7 below, contact your system administrator for your
gateway’s phone number, login ID, and password.
5
Click the country code type the area code and phone number for the
gateway to your master GroupWise system.
6
Type the gateway login ID.
7
Click Password type the gateway password
password click OK.
8
Click the Advanced tab.
9
If your modem requires a script, click Edit Script
When Given and Respond With commands.
click OK
retype the
specify the necessary
To save the script without changing its filename, click Save
Close.
or
To save the script with a new filename, click Save As
Close.
10 Click a disconnection method.
11 Click Attempts
specify the number of times to redial if the line is busy.
12 Click Retry Interval
specify the time interval between each redial attempt.
Configuring Your Remote Connections
Page time: 00:00:02
File time: 00:00:40
Date: 05-29-98 11:09am
User: RBALLARD
Queue: Q:PRNT
255
File: T:\TYPE\859\W\02\R_35REMO.859
Page: 256 (28 of 30)
13 Click OK
Plate: Composite
Spec: jama1
Galley: Final Galley
Close.
Tips
•
If your modem requires a script to access your Master Mailbox,
contact your system administrator. To retrieve an existing script file,
click
•
Creating a TCP/IP
Connection
after Step 8
select the script file
For help on a dialog box option, click
Options
click Open.
the option.
1
Click Tools
double-click Remote.
2
Click Connections
3
Click TCP/IP
4
Type a descriptive name for the TCP/IP connection.
5
Type the IP address and port information provided by your system
administrator.
Connect To
New.
OK.
Instead of an IP address, you can also type the DNS host name in the IP
Address box. Check with your system administrator.
6
Click a disconnection method
OK
Close.
Tips
•
You can also click Remote Send/Retrieve Configure to create a
TCP/IP connection.
•
For help on a dialog box option, click
the option.
Creating a Network
Connection
1
Click Tools
Options
2
Click Connections
double-click Remote.
Connect To
New.
256 Configuring Your Remote Connections
Page time: 00:00:01
File time: 00:00:41
Date: 05-29-98 11:09am
User: RBALLARD
Queue: Q:PRNT
File: T:\TYPE\859\W\02\R_35REMO.859
Page: 257 (29 of 30)
Plate: Composite
Spec: jama1
Galley: Final Galley
3
Click Network
OK.
4
Type a descriptive name for the network connection.
5
Type the path to any post office directory in your master GroupWise system.
Contact your system administrator for the path to your post office. You can
also connect to any post office in your master GroupWise system to access
your Master Mailbox. You don’t need to connect to the post office
containing your Master Mailbox.
6
Click a disconnection method
OK
Close.
Tips
•
You can also click Remote Send/Retrieve Configure to create a
network connection.
•
For help on a dialog box option, click
the option.
Copying a Modem,
Network, or TCP/IP
Connection
Editing a Modem,
Network, or TCP/IP
Connection
Deleting a Modem,
Network, or TCP/IP
Connection
1
Click Tools
Options
double-click Remote.
2
Click Connections
3
Modify the connection
click OK.
1
Click Tools
double-click Remote.
2
Click Connections
3
Make the necessary changes
1
Click Tools
2
Click Connections
3
Click Delete
Connect To
Options
Connect To
Options
a connection
Copy.
the connection
Edit.
click OK.
double-click Remote.
Connect To
the connection.
Yes.
Configuring Your Remote Connections
Page time: 00:00:02
File time: 00:00:43
Date: 05-29-98 11:09am
User: RBALLARD
Queue: Q:PRNT
257
File: T:\TYPE\859\W\02\R_35REMO.859
Specifying Your
Remote Location
Page: 258 (30 of 30)
Plate: Composite
Spec: jama1
Options double-click Remote
Galley: Final Galley
1
Click Tools
click Connections.
2
To select your remote location, click the Connect From drop-down list
the remote location.
3
To change the dialing properties of your modem, click Connect From
specify changes in the Dialing Properties dialog box click OK.
Tips
•
For help on specifying Dialing Properties, see your Windows
documentation.
258 Configuring Your Remote Connections
Page time: 00:00:01
File time: 00:00:44
Date: 05-29-98 11:09am
User: RBALLARD
Queue: Q:PRNT
File: T:\TYPE\859\W\02\R_37PHON.859
Page: 259 (1 of 6)
Plate: Composite
Spec: jama1
Galley: Final Galley
•
Page time: 00:00:00
File time: 00:00:01
•
•
Date: 05-26-98 3:34pm
•
•
•
•
•
•
User: RBALLARD
•
•
•
•
•
•
Queue: Q:PRNT
•
•
•
•
•
•
•
•
•
Using Your Phone with GroupWise
Using Your Phone with
GroupWise
File: T:\TYPE\859\W\02\R_37PHON.859
Page: 260 (2 of 6)
Plate: Composite
Spec: jama1
Galley: Final Galley
Using Dial Sender
Use Dial Sender to call the sender of an item. When you click Dial Sender,
Conversation Place opens and completes your telephone call.
Calling the Sender of
an Item
1
Click Tools
Dial Sender.
Conversation Place opens, then it completes the telephone call for you.
Tips
•
The sender must have a telephone number in order for Conversation
Place to complete the call.
Using Conversation Place
Conversation Place lets you manage your telephone directly from your desktop.
You can answer your phone, place callers on hold, use the speaker phone,
conference other callers, and more. You can even look up phone numbers and
dial numbers directly from Conversation Place.
Conversation Place is a component within the GroupWise environment. It
exposes and simplifies many commonly available, yet little-used features of the
telephone. Address Book is closely integrated with Conversation Place to provide
quick and easy access to any user information listed in corporate and personal
address books.
Conversation Place can control phones using either TAPI or TSAPI. TAPI
requires either a modem or a TAPI service provider and TAPI32.DLL installed
on client computers. TAPI32.DLL is installed by default when Windows® is
installed. TSAPI requires a working TSAPI TServer, CSTA32.DLL, and Novell®
Client 32™ installed on client computers.
260 Using Conversation Place
Page time: 00:00:01
File time: 00:00:02
Date: 05-26-98 3:34pm
User: RBALLARD
Queue: Q:PRNT
File: T:\TYPE\859\W\02\R_37PHON.859
Page: 261 (3 of 6)
Plate: Composite
Spec: jama1
Galley: Final Galley
Starting Conversation
Place
1
In the GroupWise Main Window, click Tools
Calling Someone
1
Begin typing the name of the person in the Enter Name box until the name
you want appears.
2
Click Dial.
Conversation Place.
Tips
•
If the person you want to call is not listed in your GroupWise
Address Book, type the number you want to call in the Enter Phone
Number box.
•
To dial one of the ten most recent outgoing or incoming numbers,
click Recent Calls the number.
•
To quickly dial someone on your Speed Dial list, click Speed Dial
the name.
•
To look up names and numbers in the GroupWise Address Book,
click
Placing a Conversation
on Hold
1
.
Click Hold.
Tips
•
To reactivate a conversation, click Hold again. You can also click the
button representing the conversation you want to reactivate on the
Callbar at the bottom of the Conversation Place window.
Using Conversation Place
Page time: 00:00:02
File time: 00:00:04
Date: 05-26-98 3:34pm
User: RBALLARD
Queue: Q:PRNT
261
File: T:\TYPE\859\W\02\R_37PHON.859
Page: 262 (4 of 6)
Plate: Composite
Spec: jama1
Galley: Final Galley
Hanging Up
1
Click Hang Up.
Transferring a Call
1
Click Transfer.
2
Begin typing the name of the person in the Enter Name box until the correct
name appears.
3
To announce the new call to the person you are transferring to, click Dial
announce the call click Transfer.
or
To transfer immediately, click Transfer.
Tips
•
If the person you want to call is not listed in your GroupWise
Address Book, type the number you want in the Enter Phone
Number box.
•
To look up names and numbers in the GroupWise Address Book,
click
Dialing a Recently
Used Number
1
.
Click Recent Calls
the phone number or name.
Tips
•
The ten most recent outgoing and incoming numbers appear on the
Recent Calls list.
Dialing a Number Using
Speed Dial
Placing a Conference
Call
You can add numbers to your Speed Dial list in Conversation Place Options.
1
Click Speed Dial
the number.
1
While you have either an active conversation or a caller on hold, click
Conference.
2
Begin typing the name of the person you want to conference in the Enter
Name box until the correct name appears.
3
Click Dial.
Tips
•
To look up names and numbers in the GroupWise Address Book,
click
.
262 Using Conversation Place
Page time: 00:00:01
File time: 00:00:05
Date: 05-26-98 3:34pm
User: RBALLARD
Queue: Q:PRNT
File: T:\TYPE\859\W\02\R_37PHON.859
Merging Conversations
Page: 263 (5 of 6)
Spec: jama1
Galley: Final Galley
Use Merge to connect two existing conversations. For example, if you are talking
to one caller while you have another caller on hold and you realize all three of
you need to be in the same conversation, instead of hanging up on one caller and
calling back to conference, you can simply merge the calls. If you have more than
two active conversations, Conversation Place lets you choose the conversations
you want to merge. To add a new caller to an existing conversation, use
Conference.
1
Using the Phone Log
Plate: Composite
While you have one caller on hold and an active conversation, click Merge.
When you use Conversation Place to manage your phone, GroupWise creates a
folder in the Folder List called Phone Log. Each time you make or receive a
phone call while Conversation Place is open, GroupWise creates a corresponding
item in the Phone Log folder that records the details of the call, such as the time
of the call, the duration, and the identity of the caller. You can also record
reminder notes about the details of calls you make and receive. GroupWise
records these reminder notes as part of the item created in the Phone Log, and
you can view the reminder notes at any time, just like any other item in your
Folder List.
Creating Notes in the Phone Log
1
If the Notes Box isn’t displayed, click
Place window.
in the main Conversation
2
Type in the Notes box that appears at the bottom of the Conversation Place
window.
3
Click Close to terminate the conversation.
The notes you type are recorded along with other details about the call in the
Phone Log folder in the Folder List of the GroupWise Main Window.
Specifying Information
About Your Location
Use Location Information to tell Conversation Place how your phone system
works so your calls are dialed correctly. You can set default phone systems,
extension number ranges, access methods, and city codes. You can create several
settings and select the one appropriate to where you are working.
Creating a Location Setting
1
Click Tools
Locations.
2
Specify the location options you want for this location.
3
Click New.
Using Conversation Place
Page time: 00:00:01
File time: 00:00:06
Date: 05-26-98 3:34pm
User: RBALLARD
Queue: Q:PRNT
263
File: T:\TYPE\859\W\02\R_37PHON.859
Page: 264 (6 of 6)
4
Plate: Composite
Spec: jama1
Type a name for the new setting
Galley: Final Galley
click OK.
Tips
•
You can create as many location settings as you want, and then use
them wherever you go.
Selecting a Location Setting
1
Click Tools
Locations.
2
Click a location name in the Location Name drop-down list.
264 Using Conversation Place
Page time: 00:00:01
File time: 00:00:07
Date: 05-26-98 3:34pm
User: RBALLARD
Queue: Q:PRNT
File: T:\TYPE\859\W\02\R_39OPTI.859
Page: 265 (1 of 16)
Plate: Composite
Spec: jama1
Galley: Final Galley
•
Page time: 00:00:00
File time: 00:00:01
•
•
Date: 05-26-98 3:37pm
•
•
•
•
•
•
User: RBALLARD
•
•
•
•
•
•
Queue: Q:PRNT
•
•
•
•
•
•
•
•
•
Customizing GroupWise
Customizing GroupWise
File: T:\TYPE\859\W\02\R_39OPTI.859
Page: 266 (2 of 16)
Plate: Composite
Spec: jama1
Galley: Final Galley
Setting Options for GroupWise
Use Options to customize GroupWise® by setting options that are in effect each
time you start GroupWise. You can set options that make your work more
efficient, change how GroupWise looks, and accomplish specific tasks.
For example, you can use Environment Options to change the interface language
GroupWise uses, or you can use Send Options to specify that you get a return
receipt for every message you send. You can also use Options to subscribe to
Notify, specify an archive folder, and so forth.
Delaying Delivery of an
Item
1
To delay the delivery of one item, open an item view
Properties.
click File
or
To delay delivery of all items you send, click Tools
click Send.
Options
double-
2
Click Delay Delivery.
3
In the Until boxes, specify the day and time you want the item delivered.
The day and time the item
will be delivered appear in the
Until boxes.
Getting a Return
Receipt for Items You
Send
4
Click OK.
1
To get a return receipt for one item, open an item view
Properties.
click File
or
To always get a return receipt for items you send, click Tools
double-click Send.
266 Setting Options for GroupWise
Page time: 00:00:02
File time: 00:00:03
Date: 05-26-98 3:37pm
User: RBALLARD
Queue: Q:PRNT
Options
File: T:\TYPE\859\W\02\R_39OPTI.859
Page: 267 (3 of 16)
Plate: Composite
Spec: jama1
Galley: Final Galley
2
Click the Status Tracking tab.
3
In the Return Notification group box, specify the type of return receipt you
want.
4
Click OK.
Tips
•
To get a return receipt through Notify, you must first subscribe to
Notify. See Running Notify.
Requesting a Reply for
Mail and Phone
Messages You Send
1
To request a reply for one item, open an item view
click File
Properties.
or
To request a reply for all items you send, click Tools
click Send.
2
Options
double-
Click Reply Requested.
Setting Options for GroupWise
Page time: 00:00:01
File time: 00:00:04
Date: 05-26-98 3:37pm
User: RBALLARD
Queue: Q:PRNT
267
File: T:\TYPE\859\W\02\R_39OPTI.859
Page: 268 (4 of 16)
Plate: Composite
Spec: jama1
3
Specify when you want to receive the reply.
4
Click OK.
Galley: Final Galley
Tips
•
The recipient sees
at the top of the message. If you select When
Convenient, "Reply Requested: When convenient" appears at the
top of the message. If you select Within x Days, "Reply Requested:
By xx/xx/xx" appears at the top of the message.
Specifying Where
Archived Items Are
Stored
1
Click Tools
Options.
2
Double-click Environment
click the File Location tab.
268 Setting Options for GroupWise
Page time: 00:00:01
File time: 00:00:06
Date: 05-26-98 3:37pm
User: RBALLARD
Queue: Q:PRNT
File: T:\TYPE\859\W\02\R_39OPTI.859
Changing the Priority
of Items You Send
Page: 269 (5 of 16)
Plate: Composite
Spec: jama1
Galley: Final Galley
3
Specify the location of your archive directory in the Archive Directory box.
4
Click OK.
1
To change the priority of one item, open an item view
Properties.
click File
or
To change the priority of all items you send, click Tools
double-click Send.
2
Options
In the Priority group box, select High, Standard, or Low.
Setting Options for GroupWise
Page time: 00:00:02
File time: 00:00:08
Date: 05-26-98 3:37pm
User: RBALLARD
Queue: Q:PRNT
269
File: T:\TYPE\859\W\02\R_39OPTI.859
Page: 270 (6 of 16)
3
Plate: Composite
Spec: jama1
Galley: Final Galley
Click OK.
Tips
•
The small icon next to an item in the Mailbox is red when the
priority is high, white when the priority is standard, and gray when
the priority is low.
Changing the
GroupWise Interface
Language
Changing Your Default
Views
1
Click Tools
Options.
2
Double-click Environment
3
Click a language in the Interface Language drop-down list
1
Click Tools
click the General tab.
Options.
270 Setting Options for GroupWise
Page time: 00:00:02
File time: 00:00:10
Date: 05-26-98 3:37pm
User: RBALLARD
Queue: Q:PRNT
click OK.
File: T:\TYPE\859\W\02\R_39OPTI.859
Page: 271 (7 of 16)
Plate: Composite
Spec: jama1
Galley: Final Galley
2
Double-click Environment
click the Views tab.
3
Click an item type.
4
If the selected item type is Task, Appointment, or Reminder Note, select
Posted or Group.
5
Click the view you want as your default in the Views list box.
6
Click Set Default View.
GroupWise marks the item as the default by placing an asterisk (*) next to
the view name in the list box.
7
Repeat Steps 3-6 until you have selected a default view for each view type.
8
Click OK.
Tips
•
The group default views you select appear when you click the toolbar
buttons. The personal default views you select appear when you
double-click the Appointments, Reminder Notes, or Task Lists in
the Calendar.
Specifying How Long
Before an Event an
Alarm Sounds
1
Click Tools
Options.
2
Double-click Date & Time
3
Make sure Set Alarm When Accepted is selected.
click the Calendar tab.
Setting Options for GroupWise
Page time: 00:00:01
File time: 00:00:11
Date: 05-26-98 3:37pm
User: RBALLARD
Queue: Q:PRNT
271
File: T:\TYPE\859\W\02\R_39OPTI.859
Automatically SpellChecking Every
Message You Send
Page: 272 (8 of 16)
Plate: Composite
Spec: jama1
Galley: Final Galley
4
Specify the minutes before an event that you want an alarm to sound.
5
Click OK.
1
Click Tools
2
Click Check Spelling Before Send.
Options
double-click Environment.
Assigning Passwords to Your Mailbox
You can assign a password to your Mailbox to prevent others from accessing your
GroupWise items without permission. Passwords are case-sensitive (for example,
Wednesday is not the same as WEDNESDAY). Once you assign a password,
you are prompted for it each time you open GroupWise. If you decide you no
longer want to be prompted for a password, you can remove it.
If you want Windows® to remember your password the next time you log in as
yourself on the machine, click Remember Password. You can also click No
Password Required with NDS in Security Options to have Novell Directory
Services store your GroupWise password. You can then log into GroupWise
without typing in your password at any machine, as long as you are logged into
NDS as yourself first.
If you forget your password, you will not have access to any of your items.
Setting a password for your Mailbox does not affect your proxies’ ability to
access your Mailbox. A proxy’s ability to access your Mailbox is determined by
the rights you assign him or her in your Access List.
272 Assigning Passwords to Your Mailbox
Page time: 00:00:02
File time: 00:00:13
Date: 05-26-98 3:37pm
User: RBALLARD
Queue: Q:PRNT
File: T:\TYPE\859\W\02\R_39OPTI.859
Page: 273 (9 of 16)
Plate: Composite
Spec: jama1
Galley: Final Galley
To use GroupWise Remote, you must assign a password to your Master
Mailbox. If you assign a password when you’re running Remote, the password
you create affects your Remote Mailbox only. For example, if you are running
GroupWise Remote at home and you create a password in Security Options, the
password you create is in effect only for your Remote Mailbox. The password
does not affect your Master Mailbox at the office. If you selected No Password
Required with NDS, you will still be prompted for a password when using
Remote.
Creating a Password
for Your Mailbox
Removing Your
Password
Changing Your
Password
1
In the Main Window, click Tools
Options.
2
Double-click Security
3
In the New Password box, type the password.
4
In the Confirm New Password box, type the password
1
Click Tools
2
Double-click Security
3
Type your old password
4
Click Clear Password.
5
Click OK
1
In the Main Window, click Tools
2
Double-click Security
3
In the Old Password box, type the password you want to change.
4
In the New Password box, type the new password.
5
In the Confirm New Password box, type the new password again
OK Close.
click the Password tab.
click OK
Close.
Options.
click the Password tab.
click OK.
Close.
Options.
click the Password tab.
click
Tips
•
If you forget your password, you will not be able to access
GroupWise. Contact your system administrator for assistance.
•
Passwords are case-sensitive.
Assigning Passwords to Your Mailbox
Page time: 00:00:01
File time: 00:00:14
Date: 05-26-98 3:37pm
User: RBALLARD
Queue: Q:PRNT
273
File: T:\TYPE\859\W\02\R_39OPTI.859
Page: 274 (10 of 16)
Plate: Composite
Spec: jama1
Galley: Final Galley
Customizing Your Toolbar
Use the toolbar to access many of the features and options found in GroupWise.
When you use certain features (for example, when you are in your Calendar), the
toolbar for that feature appears.
To find out about a toolbar button, move the mouse pointer over the button
and read the tool tip that appears.
Use the display settings drop-down list on the toolbar to change the display of
your Item List. For example, you can display sent, received, or posted items.
Click the drop-down arrow to see the available display settings.
You can customize each toolbar by adding and deleting buttons, choosing button
order, and placing separators between buttons.
Choosing How Your
Toolbar Appears
Customizing Your
Toolbar
1
If the toolbar is not displayed, click View
Toolbar.
2
Right-click the toolbar
3
Click the Show tab.
4
Choose how you want the toolbar to appear
1
If the toolbar is not displayed, click View
2
Right-click the toolbar
3
Click the Show tab.
4
To remove or show the display settings drop-down list, deselect or select the
Show Display Settings Drop-Down List check box.
5
Click the Customize tab.
6
To add a button, click a category from the Categories list box
button in the Controls box click Add Button.
click Properties.
click OK.
Toolbar.
click Properties.
click a
Categories are menu titles in the Main Window. The buttons in the
Controls box correspond to features found under the menu title. For
example, the buttons for the File category are actions under the File menu
(opening views, printing, saving, and so on).
7
To remove a button, drag it off the toolbar.
8
To change the order of a button on a toolbar, drag it to where you want it to
display.
9
To add or remove space between buttons, drag one button away from or
toward the other button.
274 Customizing Your Toolbar
Page time: 00:00:01
File time: 00:00:15
Date: 05-26-98 3:37pm
User: RBALLARD
Queue: Q:PRNT
File: T:\TYPE\859\W\02\R_39OPTI.859
Page: 275 (11 of 16)
Plate: Composite
Spec: jama1
Galley: Final Galley
10 Click OK.
Tips
•
When you drag buttons off the toolbar and move buttons around,
the Toolbar Properties dialog box must be open.
•
Toolbars change depending on the view you are in. To customize a
toolbar, you must be in the view displaying that toolbar.
•
You can also add buttons by dragging them from the Controls box
onto the toolbar.
•
If you want to view a description of a button, select the button in
the Controls box read the button’s description in the Description
box.
•
You can choose if toolbars display with pictures only or with both
pictures and text. You can also choose to display your buttons in
one row only or in multiple rows, depending on the number of
buttons.
Customizing Your Library Settings
GroupWise lets you customize settings for the libraries in which you store and
create documents. You can specify a default library, default sharing rights,
default document properties layout (such as the order and size of fields), and
default values for document properties. You can also specify whether you want to
use the short or long form of the property sheet. The library and property
settings you specify only affect your library setup. You cannot modify other
users’ settings.
Default Library
You can change the default library. When you create, import, or copy a
document in GroupWise, it is saved in the default library, unless you specify a
different library. In addition, Find searches for documents in the default library
first. See Managing Your Documents in GroupWise under Creating and Working
with Documents.
Default Property Values
You can specify default values for the document property fields that can be
edited. The default values are used when you create a new document or import a
document into the selected library. If no default values have been specified for
author and document type, GroupWise uses the creator’s name as the author
and Document as the document type. See Managing Your Documents in
GroupWise under Creating and Working with Documents.
Customizing Your Library Settings
Page time: 00:00:01
File time: 00:00:16
Date: 05-26-98 3:37pm
User: RBALLARD
Queue: Q:PRNT
275
File: T:\TYPE\859\W\02\R_39OPTI.859
Page: 276 (12 of 16)
Plate: Composite
Spec: jama1
Galley: Final Galley
Default Sharing Rights
If you usually share your documents with the same users or groups, you can
specify default sharing rights for all the documents you create. Once you've
specified default sharing rights, GroupWise applies these rights to each
document you create or import into the selected library. See Managing Your
Documents in GroupWise under Creating and Working with Documents.
Document Tab Configuration
You can customize the display of the Document tab in Properties. The
Document tab appears each time you create, import, copy, or select Properties
for a document. You can specify which fields you want to display on the
Document tab. In addition, you can specify the number of lines in each field, the
field’s order on the dialog box, and you can insert blank lines and separators on
the dialog box.
Document Property Sheets
When you create a new document or a new version of a document, GroupWise
prompts you to specify document properties. You can specify whether you want
GroupWise to prompt you for the document subject only or for all the
document properties. See Managing Your Documents in GroupWise under
Creating and Working with Documents.
Document Management Integration with Other Applications
If you are using integrated applications, such as WordPerfect or Microsoft Word,
you can specify whether you want GroupWise Library features integrated with
the application's Save and Open features. To use the integration, you must have
installed Integrations during GroupWise Setup. If you didn't install Integrations,
you can run Setup again to install them now. See Managing Your Documents in
GroupWise under Creating and Working with Documents.
Setting the Default
Library
You can change the default library. When you create, import, or copy a
document in GroupWise, it is saved in the default library, unless you specify a
different library. In addition, Find searches for documents in the default library
first.
1
Click Tools
Options
double-click Documents.
276 Customizing Your Library Settings
Page time: 00:00:01
File time: 00:00:18
Date: 05-26-98 3:37pm
User: RBALLARD
Queue: Q:PRNT
File: T:\TYPE\859\W\02\R_39OPTI.859
Page: 277 (13 of 16)
Plate: Composite
Spec: jama1
Galley: Final Galley
2
Click the library you want to use as a default.
3
Click Set Default
OK.
Using Startup Options
GroupWise has optional commands that you can use when you start the
program. Some of these options are for your convenience, while others are
necessary to run GroupWise on your particular hardware. You can run startup
options by specifying them after the command line in the target for your
GroupWise shortcut.
GroupWise Startup Options
This Startup Option
/@u-?
/@u-USER ID
/bl
/c
Does This
Displays a login dialog box whenever you open
GroupWise, allowing you to supply any
necessary login information.
Lets you use your GroupWise user ID to open
GroupWise as yourself on another user's
computer. The other user remains logged on
to the network.
Prevents the GroupWise splash screen from
being displayed when you enter the program.
Checks for unopened items. If there are
unopened items, GroupWise opens as usual.
Otherwise, GroupWise does not start.
Using Startup Options
Page time: 00:00:01
File time: 00:00:19
Date: 05-26-98 3:37pm
User: RBALLARD
Queue: Q:PRNT
277
File: T:\TYPE\859\W\02\R_39OPTI.859
Page: 278 (14 of 16)
Plate: Composite
This Startup Option
/cm
/ipa-<IP ADDRESS>
/ipp-X
/l-XX
/la-<NETWORK ID>
/nu
/ph-PATHNAME
/ps-PATH TO REMOTE
DATABASE
Spec: jama1
Galley: Final Galley
Does This
Checks for unopened items. If there are
unopened items, GroupWise opens minimized
and a beep sounds. Otherwise, GroupWise
does not start.
Lets you specify the IP address. Type the
address in place of <IP ADDRESS>.
Lets you specify the IP port. Type the port
number in place of X.
Applies only if you have two or more language
versions or language modules. This option
instructs GroupWise to override the default
environment language (under General
Environment in Options) with the language
specified by the language code (XX). The
language codes are listed below.
Lets you log on to another user’s computer
using your network ID. The other user remains
logged on to the network. Type your network
ID in place of <NETWORK ID>.
Turns off AutoUpdate. If this option is
selected, click View Refresh whenever you
want to update the display with the items
currently in your Mailbox.
Lets you specify the path to the post office.
Opens GroupWise in Remote mode. This
startup option can be used in the Target box
only.
GroupWise Language Codes
The following table lists the language codes used by all Novell® products.
GroupWise may not yet be available in some of the listed languages. For current
information, contact your local reseller.
Language
Afrikaans
Arabic
Catalan
Croatian
Czechoslovakian
Danish
Dutch
English-Australia
Language Code
AF
AR
CA
HR
CS
DK
NL
OZ
278 Using Startup Options
Page time: 00:00:01
File time: 00:00:20
Date: 05-26-98 3:37pm
User: RBALLARD
Queue: Q:PRNT
File: T:\TYPE\859\W\02\R_39OPTI.859
Page: 279 (15 of 16)
Plate: Composite
Language
English-Canada
English-United Kingdom
English-United States
Finnish
French-Canada
French-France
Galician
German-Germany
German-Switzerland
Greek
Hebrew
Hungarian
Icelandic
Italian
Japanese
Norwegian
Polish
Portuguese-Brazil
Portuguese-Portugal
Russian
Slovak
Spanish
Swedish
Turkish
Ukrainian
Using a GroupWise
Startup Option
Spec: jama1
Galley: Final Galley
Language Code
CE
UK
US
SU
CF
FR
GA
DE
SD
GR
HE
MA
IS
IT
NI
NO
PL
BR
PO
RU
SL
ES
SV
TR
YK
1
Right-click the GroupWise icon on the desktop
2
Click the Shortcut tab.
click Properties.
Using Startup Options
Page time: 00:00:01
File time: 00:00:21
Date: 05-26-98 3:37pm
User: RBALLARD
Queue: Q:PRNT
279
File: T:\TYPE\859\W\02\R_39OPTI.859
Page: 280 (16 of 16)
Plate: Composite
Spec: jama1
Galley: Final Galley
3
In the Target box, after the GroupWise executable, type a space
startup option(s) click OK.
4
Restart GroupWise.
type the
Tips
•
In the example above, the option /@u-? is used to display a login
dialog box a user can supply with login information whenever he or
she opens GroupWise. This option is useful when two or more users
share a workstation but have separate GroupWise Mailboxes.
280 Using Startup Options
Page time: 00:00:02
File time: 00:00:23
Date: 05-26-98 3:37pm
User: RBALLARD
Queue: Q:PRNT
File: T:\TYPE\859\W\02\R_42DKTP.859
Page: 281 (1 of 13)
Plate: Composite
Spec: jama1
Galley: Final Galley
•
Page time: 00:00:01
File time: 00:00:01
•
•
Date: 05-26-98 3:42pm
•
•
•
•
•
•
User: RBALLARD
•
•
•
•
•
•
Queue: Q:PRNT
•
•
•
•
•
•
•
•
•
Using GroupWise Desktop
Using GroupWise Desktop
File: T:\TYPE\859\W\02\R_42DKTP.859
Page: 282 (2 of 13)
Plate: Composite
Spec: jama1
Galley: Final Galley
Using GroupWise Desktop
Use GroupWise® Desktop (GW Desktop) to access your appointments,
reminder notes, and tasks quickly without having to open the GroupWise
Client, thus freeing up system resources for other uses. GW Desktop displays
your Calendar as well as the GroupWise Marquee (GW Marquee), which runs
across the bottom of the window. GW Marquee displays the most recent
information arriving in your Mailbox, and can also be run independently of GW
Desktop.
Use GW Desktop if you spend a lot of time in GroupWise, but do not like to
interrupt what you're currently doing to view your appointments, tasks, or
reminder notes.
From GW Desktop, you can perform most of the actions possible from the
GroupWise Client on your appointments, tasks, reminder notes, and messages.
You can read items, accept or decline them, delete them, mark them private,
move them to other dates, and mark your tasks completed.
When you send a message or schedule an appointment from GW Desktop, the
GroupWise Client opens, allowing you to finish filling out the message or
appointment.
Actions You Can Complete from GW Desktop
You can read incoming items in your GroupWise Desktop Calendar or Day
Schedule view, or GW Marquee. Posted appointments, tasks, and reminder
notes appear in your GW Desktop Calendar and GW Marquee. Once accepted,
they appear in your Calendar only. Once you have read an item, it appears as
Read in the sender's status Properties.
Alarms are set by default for all appointments, but you can remove an alarm if
you want. You can also move items to a different date.
Reading Items
1
In GW Marquee, place the mouse pointer over the item's title.
2
If the item is a message, the message text appears. If the item is an
appointment, task, or reminder note, the Subject, Time, Date, Place, From,
and To boxes are shown.
282 Actions You Can Complete from GW Desktop
Page time: 00:00:01
File time: 00:00:02
Date: 05-26-98 3:42pm
User: RBALLARD
Queue: Q:PRNT
File: T:\TYPE\859\W\02\R_42DKTP.859
Page: 283 (3 of 13)
3
Plate: Composite
Spec: jama1
Galley: Final Galley
When you are finished, move the pointer outside of the pop-up window to
close the message.
or
Right-click in the message information area above the message text
Delete.
Accepting or Declining
Items
click
1
From the GW Desktop Calendar or Day Schedule view, right-click the
appointment, task, or reminder note.
2
Click Accept or Decline.
3
If the item is an Auto-Date item, click This Instance or All Instances.
4
If the item is an appointment you accepted, right-click the appointment
again
click Show As
select a level of availability.
5
If you do not want an alarm set for this item, click Remove Alarm.
Tips
•
Unaccepted or undeclined items are in italics. When they are
accepted, the text displays normally.
•
Free, Tentative, Busy, and Out of Office are Show Appointment As
types or levels of availability that affect the way the appointment is
displayed in Busy Search and in your Calendar.
Moving Items to a New
Date
1
From the GW Desktop, double-click the day that displays the item you want
to move.
2
Drag the Day Schedule view so that you can see your GW Desktop Calendar
move to the month containing the date you want to move the item to. If
Actions You Can Complete from GW Desktop
Page time: 00:00:01
File time: 00:00:03
Date: 05-26-98 3:42pm
User: RBALLARD
Queue: Q:PRNT
283
File: T:\TYPE\859\W\02\R_42DKTP.859
Page: 284 (4 of 13)
Plate: Composite
Spec: jama1
Galley: Final Galley
the date is beyond the current month, click the month or year title above the
current month to pick a new month or year.
Deleting Items
Marking Tasks
Completed
3
From a Day Schedule view, drag the appointment, task, or reminder note to
the new date in the GW Desktop Calendar.
1
In the GW Desktop Calendar, right-click the item you want to delete.
2
Click Delete.
3
If the item is an auto-date item, click This Instance or All Instances.
1
Click the day that displays the task.
Unmarked tasks display on the current day, and display in red.
2
Select the check box next to the task.
Tips
•
When you mark a task Completed, a check mark appears in the
check box.
•
To unmark a Completed task, deselect the check box next to the
task.
•
For more information, see Marking Tasks Completed under Sending
and Receiving Items.
Marking Items Private
1
Right-click an item
click Mark Private.
Tips
•
For more information, see Marking an Item Private under Giving
Other People Access to Your Mailbox.
Setting Alarms for
Items
1
In the GW Desktop Calendar or Day Schedule view, right-click an
appointment.
284 Actions You Can Complete from GW Desktop
Page time: 00:00:00
File time: 00:00:04
Date: 05-26-98 3:42pm
User: RBALLARD
Queue: Q:PRNT
File: T:\TYPE\859\W\02\R_42DKTP.859
Page: 285 (5 of 13)
2
Plate: Composite
Spec: jama1
Galley: Final Galley
Click Set Alarm.
Tips
•
Alarms are set by default for appointments. To remove the alarm,
right-click the appointment
click Remove Alarm.
•
The alarm will sound the number of minutes before the
appointment you specify in GroupWise Date & Time Options.
•
Notify must be running for the alarm to sound.
•
If Set Alarm is not visible when you right-click the appointment,
make sure that the appointment time hasn't already passed.
•
In GroupWise Date & Time Options, you can choose to
automatically set an alarm each time you accept an appointment.
•
For more information, see Setting Alarms for Calendar Items.
Sending a Mail
Message from GW
Desktop
1
In GW Desktop, click
on the toolbar.
2
In the To box, type a username
3
To select usernames from a list, click Address
click OK.
4
Type a subject.
5
Type a message.
6
Click Send.
press Enter. Repeat for additional users.
double-click each user
Tips
•
When you click
on the toolbar, the GroupWise Client opens,
taking you directly to a mail message view.
Scheduling an
Appointment from GW
Desktop
1
In GW Desktop, click
on the toolbar.
2
In the To, CC, and BC boxes, type the names of the people you want to
invite. In addition, include any resource IDs in the To box. If you do not
know a resource ID, click Address.
3
Type the place description in the Place box.
4
Specify the start date, start time, and duration.
5
Type a subject and message.
Actions You Can Complete from GW Desktop
Page time: 00:00:01
File time: 00:00:06
Date: 05-26-98 3:42pm
User: RBALLARD
Queue: Q:PRNT
285
File: T:\TYPE\859\W\02\R_42DKTP.859
Page: 286 (6 of 13)
6
Plate: Composite
Spec: jama1
Galley: Final Galley
Click Send.
Tips
•
If you want to make sure the people and resources for the meeting
are available, you can do a busy search. See Checking When Everyone
Is Available under Scheduling Appointments.
•
Duration can be in minutes, hours, or days. If you are scheduling a
three-day conference, you can schedule one appointment with a
duration of three days to cover the entire period.
Opening GroupWise
from GW Desktop
1
Click
on the toolbar.
Tips
•
This opens the GroupWise Client, from which you have access to all
GroupWise features.
Viewing Your Folder
List from GW Desktop
1
Click
on the toolbar.
2
Click + to expand or - to contract the Folder List.
3
Click a folder to see the items in it.
4
To read an item, double-click it.
Tips
•
Double-clicking an item opens the GroupWise Client, from which
you can read the item.
286 Actions You Can Complete from GW Desktop
Page time: 00:00:01
File time: 00:00:07
Date: 05-26-98 3:42pm
User: RBALLARD
Queue: Q:PRNT
File: T:\TYPE\859\W\02\R_42DKTP.859
Page: 287 (7 of 13)
Plate: Composite
Spec: jama1
Galley: Final Galley
Using Date Navigator
Use Date Navigator to select the month or day you want to view. Date
Navigator is a tool that lets you move more freely between dates in the GW
Desktop Calendar or Day Schedule view. It appears as a title bar listing the
month and year at the top of these two views, and includes the day if you are in
the Day Schedule view.
Viewing Date Navigator
General Properties
1
Right-click Date Navigator.
2
Click Properties.
Date Navigator
Tips
•
The Date Navigator general properties are not changeable.
Using Date Navigator
Page time: 00:00:01
File time: 00:00:08
Date: 05-26-98 3:42pm
User: RBALLARD
Queue: Q:PRNT
287
File: T:\TYPE\859\W\02\R_42DKTP.859
Changing Dates Using
Date Navigator
Page: 288 (8 of 13)
Plate: Composite
Spec: jama1
Galley: Final Galley
1
To change days in the Day Schedule view, click the date number (for
example, click 25 in the date 25 October 1998)
click a day.
2
To change months, click the current month name in the GW Desktop
Calendar or the Day Schedule view
click a month.
3
To change years, click the current year in the GW Desktop Calendar or the
Day Schedule view
click a year.
Tips
•
The date number is only visible from the Day Schedule view.
•
You can also use the right- and left-arrows to change months in a
GroupWise view or to change days in the Day Schedule view.
Viewing Your GW Desktop Calendar
When you open GW Desktop, you see a Calendar. From the Calendar, you can
view your reminder notes, tasks, and appointments. You can also view all your
items for a given day.
Viewing Today’s
Schedule in GW
Desktop
1
Click
.
2
To change which items are displayed, click the down-arrow on the
button click Show Appointments, Show Notes, or Show Tasks.
288 Viewing Your GW Desktop Calendar
Page time: 00:00:02
File time: 00:00:10
Date: 05-26-98 3:42pm
User: RBALLARD
Queue: Q:PRNT
File: T:\TYPE\859\W\02\R_42DKTP.859
Page: 289 (9 of 13)
3
Plate: Composite
Spec: jama1
Galley: Final Galley
To display an expanded view, double-click the day in GW Desktop
Calendar.
Tips
•
A check mark next to Show Appointments, Show Notes, or Show
Tasks means that the checked item is displayed below the Calendar.
•
To go to a different day, click the day in GW Desktop Calendar.
Viewing a New Date in
GW Desktop
1
If the new date is in the same month as the current date, click the new date.
or
If the date is in a different month or year, click the Month or Year in Date
Navigator
select the month or year
click the new date.
Tips
•
If the month calendar is visible, you can view a day's items at the
bottom of the view by clicking the day you want to view.
•
To display an expanded view of a day, double-click the day in the
Calendar.
Viewing Your GW Desktop Calendar
Page time: 00:00:02
File time: 00:00:12
Date: 05-26-98 3:42pm
User: RBALLARD
Queue: Q:PRNT
289
File: T:\TYPE\859\W\02\R_42DKTP.859
Viewing Another User’s
Calendar in GW
Desktop
Page: 290 (10 of 13)
Plate: Composite
Spec: jama1
Galley: Final Galley
1
Right-click any view (for example, the Day Schedule view)
click Proxy.
2
Click the name of the person whose Mailbox you want to access.
3
When you have finished your work in the other person's Mailbox, right-click
the view
click your own name to return to your Mailbox.
Tips
•
Before you can act as a proxy for someone, that person must give
you proxy rights in his or her Access List in Options in GroupWise.
Before you can click that person's name in your Proxy pop-up list,
you must add it to your Proxy List in GroupWise.
•
You may have limited access to the other user's Mailbox, depending
on the rights the user assigned you in the Access List in Options in
GroupWise.
•
You can act as a proxy for any user on your post office who gives you
rights. If you want to act as a proxy for a user on another post office,
client/server must be enabled on the destination post office.
•
For more information on Proxy, see Giving Other People Access to
Your Mailbox.
Using GroupWise Marquee
Use GroupWise Marquee (GW Marquee) to display the most recent information
arriving in your Mailbox. GW Marquee scrolls information about the items you
specify. You can customize GW Marquee to display only the items you want to
see. If you rest your pointer on an item, additional information about the item
appears. You can open GW Marquee independently or view it across the bottom
of the GW Desktop Calendar. For a list of icons, see Reading Items You Receive
under Managing Sent Items.
Displaying New Items
in GW Marquee
Use Refresh to display new items in GroupWise Marquee. For example, if a mail
message has been delivered to you, but it hasn't yet appeared in GW Marquee,
Refresh displays the pending message.
You can change the default refresh interval in the Options tab under GW
Marquee Properties. See Selecting What GW Marquee Displays below.
1
Using the GW Desktop
Item List
Right-click GW Marquee
click Refresh.
The Item List in Desktop or Marquee is a list of your unopened items. You can
open unread items from the Item List by double-clicking them. The Item List is
divided into columns. Each column displays information about the items in the
list. For example, columns may display the subject of items, the date, and so
290 Using GroupWise Marquee
Page time: 00:00:01
File time: 00:00:13
Date: 05-26-98 3:42pm
User: RBALLARD
Queue: Q:PRNT
File: T:\TYPE\859\W\02\R_42DKTP.859
Page: 291 (11 of 13)
Plate: Composite
Spec: jama1
Galley: Final Galley
forth. You can customize the column display by changing column widths, by
adding or deleting columns, and by changing the order of columns.
Add Columns to the GW Desktop Item List
1
Right-click GW Marquee
click Item List.
2
Right-click a column heading
click More Columns
Available Columns list box
click Add
OK.
a column in the
Tips
•
You can select multiple columns to add by pressing Ctrl while you
click columns.
Change the Order of the Columns in GW Desktop
1
Right-click GW Marquee
click Item List.
2
Right-click a column heading
3
Click a column name in the Selected Columns box.
4
Click Down or Up.
5
Click OK.
click More Columns.
Remove Columns from the GW Desktop Item List
1
Right-click GW Marquee
click Item List.
2
Right-click a column heading
3
Click a column in the Selected Columns box
click More Columns.
click Remove.
Resize Columns in the GW Desktop Item List
Changing How GW
Marquee Displays Your
Items
1
Right-click GW Marquee
click Item List.
2
Position the mouse pointer over the edge of a column heading until a twoheaded arrow appears
drag to resize the column.
1
Right-click GW Marquee
2
If necessary, click the General tab.
click Properties.
Using GroupWise Marquee
Page time: 00:00:01
File time: 00:00:14
Date: 05-26-98 3:42pm
User: RBALLARD
Queue: Q:PRNT
291
File: T:\TYPE\859\W\02\R_42DKTP.859
Page: 292 (12 of 13)
Plate: Composite
Spec: jama1
Galley: Final Galley
3
Set the scroll speed and scroll smoothness.
4
To stop GW Marquee from scrolling, deselect the Cache Ticker Data check
box.
5
To offset the subject of the item from the rest of the item's information,
select Offset Subject Text Vertically.
6
To view the version number and other GW Marquee information, click
About GroupWise Marquee.
7
Click OK to save your changes and close the dialog box.
or
Click Apply to save your changes and keep the dialog box open.
Selecting What GW
Marquee Displays
1
Right-click GW Marquee
click Properties.
2
Click the Options tab.
3
Select the items you want to include in GW Marquee.
4
Select the number of seconds you want GW Marquee to delay in displaying
the item's information.
292 Using GroupWise Marquee
Page time: 00:00:01
File time: 00:00:16
Date: 05-26-98 3:42pm
User: RBALLARD
Queue: Q:PRNT
File: T:\TYPE\859\W\02\R_42DKTP.859
Page: 293 (13 of 13)
Plate: Composite
Spec: jama1
Galley: Final Galley
This is the amount of time from the instant you place the pointer over the
item until the item's information displays in a window.
5
Select the interval between times GW Desktop reads the database for new
items.
6
Click OK to save your changes and close the dialog box.
or
Click Apply to save your changes and keep the dialog box open.
Setting GW Marquee
and Date Navigator
Font Properties
1
Right-click the Date Navigator or GW Marquee
click Properties.
2
Click the Fonts tab.
3
Click a font and a font style.
4
Click a size.
5
Click Strikeout or Underline if you want.
6
Click OK to save your changes and close the dialog box.
or
Click Apply to save your changes and keep the dialog box open.
Tips
•
You can see how the new font, font style, or size looks in the Sample
box.
Setting GW Marquee
Color Properties
1
Right-click GW Marquee
click Properties.
2
Click the Colors tab.
3
Select a property name from the Property Name drop-down list
color you want to associate with the property name.
4
Select a system color click a color you want to associate with the system color.
5
Click OK to save your changes and close the dialog box.
click the
or
Click Apply to save your changes and keep the dialog box open.
Tips
•
The selected color for each property has a sculptured appearance,
like this:
.
Using GroupWise Marquee
Page time: 00:00:01
File time: 00:00:17
Date: 05-26-98 3:42pm
User: RBALLARD
Queue: Q:PRNT
293
File: T:\TYPE\859\W\02\R_43IMAG.859
Page: 294 (1 of 7)
Plate: Composite
Spec: jama1
Galley: Final Galley
•
Page time: 00:00:00
File time: 00:00:00
•
•
•
Date: 05-29-98 11:17am
•
•
•
•
•
•
User: RBALLARD
•
•
•
•
•
•
Queue: Q:PRNT
•
•
•
•
•
•
•
•
Using GroupWise Imaging
Using GroupWise Imaging
File: T:\TYPE\859\W\02\R_43IMAG.859
Page: 295 (2 of 7)
Plate: Composite
Spec: jama1
Galley: Final Galley
Using Imaging: An Overview
The ability to convert paper-based information into a usable electronic format
can free up your time and make you more productive. GroupWise® Imaging is
an application which allows you to convert such information (for example,
photographs, line drawings, and text documents) into digitized scanned images
that can be sized and moved as well as annotated, e-mailed, faxed, or printed.
Depending on the file format, image files may contain one or more images and
can be black and white, grayscale, or color. When loading and saving image files,
system performance will vary according to the hardware being used and the
image size.
Supported File Types
Supported file types can be displayed, manipulated, and saved as either the same
file type or a similar one. The following file types are currently supported.
File
EVY
Description
Envoy™ image
BMP
Bitmap
JPG
Joint Photographic Experts Group
AWD
Fax
DCX
PC Paintbrush
PCX
PC Paintbrush
XIF
Xerox® Image Format
TIF
Tagged Image File Format
Tips
•
If you want to convert an image to a different file type, click File
Save As click a file type from the Save As Type drop-down list.
Using Imaging: An Overview
Page time: 00:00:02
File time: 00:00:02
Date: 05-29-98 11:17am
User: RBALLARD
Queue: Q:PRNT
295
File: T:\TYPE\859\W\02\R_43IMAG.859
Page: 296 (3 of 7)
Plate: Composite
Spec: jama1
Galley: Final Galley
Using Annotations
Annotations are electronic versions of the marks commonly used on paper-based
documents, for example, highlights, rubber stamps, and text notes. However,
because GroupWise Imaging annotations are digitized, they make adding,
moving, and deleting editing marks much easier. Also, the attributes of digitized
annotations (such as color, size, text, and visibility) can be more readily modified
than paper-based.
Annotation
Icon
Tool Name
Annotation Selection
Straight Line
Freehand Line
Hollow Rectangle
Text from a File
Filled Rectangle
Highlighting Pen
Text
Attach-a-Note
Rubber Stamp
296 Using Annotations
Page time: 00:00:01
File time: 00:00:03
Date: 05-29-98 11:17am
User: RBALLARD
Queue: Q:PRNT
File: T:\TYPE\859\W\02\R_43IMAG.859
Displaying the
Annotation Toolbar
Page: 297 (4 of 7)
1
Click
Plate: Composite
Spec: jama1
Galley: Final Galley
on the main toolbar.
Tips
•
You can also click View Show Annotation Toolbar.
•
The annotation toolbar can only be displayed if the file type
supports annotations.
Selecting an Existing
Annotation
1
Click
on the main toolbar.
Using Annotations
Page time: 00:00:02
File time: 00:00:05
Date: 05-29-98 11:17am
User: RBALLARD
Queue: Q:PRNT
297
File: T:\TYPE\859\W\02\R_43IMAG.859
Page: 298 (5 of 7)
Plate: Composite
2
Click
3
Click an annotation.
Spec: jama1
Galley: Final Galley
on the annotation toolbar.
Tips
•
Any annotation you wish to move, modify, or delete must first be
selected using this tool. Once the annotation is selected, it is
redisplayed with handles. To resize the annotation, click a handle
and drag the pointer.
•
The annotation toolbar can only be displayed if the file type
supports annotations.
Scanning
Scanning enables you to capture paper-based data as electronic images. A
scanner is connected to a PC or network and is controlled by an application
program. The application program communicates with the scanner through an
interface called the scanner data source (driver), which is usually supplied by the
scanner’s manufacturer. The most common scanner data source is TWAIN.
TWAIN is an industry-standard specification for image capture and is supported
by most scanners.
298 Scanning
Page time: 00:00:02
File time: 00:00:07
Date: 05-29-98 11:17am
User: RBALLARD
Queue: Q:PRNT
File: T:\TYPE\859\W\02\R_43IMAG.859
Selecting a Scanner
Page: 299 (6 of 7)
Plate: Composite
1
Click Tools
2
Click Scanner.
3
Click Select Scanner
4
Click OK.
Spec: jama1
Galley: Final Galley
Options.
scanner name
OK.
Tips
•
If you are using the Enhanced Version of Imaging, click ISIS or
TWAIN after you select the scanner.
Scanning an Image
1
Click Scan
2
Click Scan.
3
Click OK.
New File.
Tips
•
No scan features will be enabled until a scanner is selected.
•
If your scanner uses a TWAIN driver, you may have to wait until
you are prompted to insert the page.
Opening an Existing Image
1
Click
on the main toolbar.
2
Click the folder you want to look in.
3
Click the filename.
4
Click Open.
Tips
•
You can also open a registered file by right-clicking the file, then
clicking Open.
Opening an Existing Image
Page time: 00:00:01
File time: 00:00:08
Date: 05-29-98 11:17am
User: RBALLARD
Queue: Q:PRNT
299
File: T:\TYPE\859\W\02\R_43IMAG.859
Page: 300 (7 of 7)
Plate: Composite
Spec: jama1
Galley: Final Galley
E-mailing an Image
GroupWise Imaging lets you e-mail images to other users to view, to add
changes and annotations to, and so forth.
1
Click
on the main toolbar.
2
Type your password. (A password will only be required if one was assigned
during the creation of the Mailbox.)
3
Click OK.
4
In the To box, type the names of the people you want to send the image to.
If you need to look up names in the Address Book, click Address.
5
Click the Subject box
6
Click the Message box
7
Click Send.
type a subject.
type your message.
Tips
•
If the Send tool button is disabled, Windows® messaging has not
been installed on your workstation.
•
You can also e-mail a registered file by right-clicking the file, then
clicking Send.
300 E-mailing an Image
Page time: 00:00:01
File time: 00:00:09
Date: 05-29-98 11:17am
User: RBALLARD
Queue: Q:PRNT
File: T:\TYPE\859\W\02\R_44WRKF.859
Page: 301 (1 of 7)
Plate: Composite
Spec: jama1
Galley: Final Galley
•
Page time: 00:00:02
File time: 00:00:02
Date: 05-29-98 12:29pm
•
•
•
•
•
•
•
User: RBALLARD
•
•
•
•
•
Queue: Q:PRNT
•
•
•
•
•
•
•
•
•
•
Sending and Receiving Workflow Items
Sending and Receiving
Workflow Items
File: T:\TYPE\859\W\02\R_44WRKF.859
Page: 302 (2 of 7)
Plate: Composite
Spec: jama1
Galley: Final Galley
Using Workflow: An Overview
A workflow is a series of steps or tasks done by several people to accomplish a
goal. Typically, a workflow contains an attached file which recipients can open
in its source application. For example, rather than printing, copying, and
delivering a file for review or approval, you can route it electronically as part of a
workflow.
IMPORTANT: Workflow is an optional GroupWise component that you install
during Setup. If you didn’t install Workflow during Setup, you won’t have
access to any of the Workflow features described in this section.
A workflow recipient can be anyone in the Address Book.
You can send a broadcast workflow to all recipients at once. You can also send a
sequential workflow to recipients in the order that you selected them from the
Address Book, depending on how you want the work to be completed.
A workflow can have one attachment. An attachment can be a file or a link. In
sequential workflows, changes made by recipients to attached files can be seen by
the next recipients. Each recipient receives a work item in the Mailbox. When a
recipient opens the work item, an attached file can be opened or edited. The four
types of attachments are explained in the table below.
Attachment Type
Description
File (sent with
workflow)
A copy of a file from your local or network drive. Each
workflow recipient receives a separate copy of the file.
File (link)
A link to a file stored on a network or shared location.
Each workflow recipient opens the same file from the
linked location. Use the
\\SERVER\PATH\FILENAME format to specify a file
link, such as \\NETWORK\DATA\RESUME.DOC.
DMS document
A link to a document in your GroupWise® Library.
Workflow recipients can check out, check in, view, or
open an attached document reference in the application
that was used to create it, depending on the security
privileges given to the recipients.
Internet address
A link to an Internet location using a uniform resource
locator, such as http://www.novell.com/products.html.
When workflow recipients open an Internet
attachment, their Internet browser opens to the
attached Internet address.
As the workflow progresses, you can use your Mailbox or WorkFlow Central to
check the workflow status. The status is updated each time a recipient completes
a work item. When all work items are complete, you receive a workflow report,
which displays the results of the workflow.
302 Using Workflow: An Overview
Page time: 00:00:01
File time: 00:00:03
Date: 05-29-98 12:12pm
User: RBALLARD
Queue: Q:PRNT
File: T:\TYPE\859\W\02\R_44WRKF.859
Creating a Workflow
Page: 303 (3 of 7)
Plate: Composite
Spec: jama1
Galley: Final Galley
As a workflow originator, you decide what kind of workflow you want to send
(broadcast or sequential). You should include instructions so recipients know
what they should do. To check the progress of a workflow you sent, see Tracking
a Workflow’s Status later in this section.
1
In GroupWise, click File
New
WorkFlow.
2
Type a subject to identify the workflow.
3
To add recipients, click
4
To send the workflow to recipients one after another, make sure Sequential
is selected.
click their names in the Address Book.
or
To send to all recipients at once, click Broadcast.
5
6
To attach a file, click Attach click the Type drop-down list an
attachment type Browse click the file to attach Open OK.
or
In the Attachment box, type the filename, path, or Internet address
OK.
click
Type instructions for the recipients.
Using Workflow: An Overview
Page time: 00:00:01
File time: 00:00:04
Date: 05-29-98 12:12pm
User: RBALLARD
Queue: Q:PRNT
303
File: T:\TYPE\859\W\02\R_44WRKF.859
Page: 304 (4 of 7)
7
Plate: Composite
Spec: jama1
Galley: Final Galley
Click Start.
Tips
•
To add a recipient to a workflow, you can type the e-mail address in
the Recipients box press Enter.
•
To change the recipient order in a sequential workflow, click a name
Move Up or Move Down.
•
To remove a recipient from the list, click a name Remove. To
remove all recipients, click Remove All.
Participating in a
Workflow
As a workflow participant, you receive a work item which you must complete for
the workflow to continue. You can open work items in your Mailbox or
WorkFlow Central.
A work item should contain instructions from the originator of the workflow
explaining what to do. Typically, a work item also contains an attached file
which you can open in its source application. Status information shows the
workflow type (sequential or broadcast) and recipient information.
1
In your Mailbox or WorkFlow Central, open a work item.
2
Read the instructions.
3
Type your comments.
4
To open the attachment or go to the attached Internet address, click Open.
or
To open a document from your GroupWise Library, click Check Out.
When you’re done with the document, click Check In.
5
To display a recipient’s comments, click the Status tab
Name list.
6
To send a mail message to another recipient, click the Status tab
Reply.
7
To complete the work item and send it to the next recipient, click Done.
click a name in the
a name
Tips
•
When you open an Internet attachment, your Internet browser
opens to the attached Internet address.
•
To close the work item without completing it, click Close. The
workflow will not continue to the next recipient until you open the
work item again and click Done.
•
To send a mail message to the person who started the workflow,
click Reply. This is useful when you need more information to
complete the work item.
304 Using Workflow: An Overview
Page time: 00:00:01
File time: 00:00:05
Date: 05-29-98 12:12pm
User: RBALLARD
Queue: Q:PRNT
File: T:\TYPE\859\W\02\R_44WRKF.859
Viewing Status
Information from a
Work Item
Tracking a Workflow’s
Status
Page: 305 (5 of 7)
Plate: Composite
Spec: jama1
Galley: Final Galley
1
Click the Status tab.
2
To display a recipient’s comments, click a name in the Name list.
3
To send a mail message to a recipient, click a name
Reply.
A workflow status message shows information about a workflow you have sent.
It is updated each time a recipient completes a work item. You can open status
messages in your Mailbox or WorkFlow Central.
A status message lists the recipients, their comments, and dates for completed
work items. A check indicates the recipient has completed his or her work item.
Viewing a Workflow
Report
1
In your Mailbox or WorkFlow Central, double-click a status message.
2
To display a recipient’s comments, click a name in the Name list.
3
To send a mail message to a recipient, click a name
4
Click Close.
Reply.
If you sent a sequential workflow, a workflow report arrives in your Mailbox
after the last work item is completed. If you sent a broadcast workflow, you
receive a report after the first recipient completes a work item. The report is
updated each time another recipient completes a work item. You can open
reports in your Mailbox or WorkFlow Central.
A report shows the date that each work item was completed and the recipients’
comments. You can open the attached file or reply to a recipient from a report.
1
In your Mailbox or WorkFlow Central, double-click a report.
2
To open or edit the attached file, click Open.
Using Workflow: An Overview
Page time: 00:00:00
File time: 00:00:06
Date: 05-29-98 12:12pm
User: RBALLARD
Queue: Q:PRNT
305
File: T:\TYPE\859\W\02\R_44WRKF.859
Viewing, Managing,
and Deleting Your
Workflows
Page: 306 (6 of 7)
Plate: Composite
Spec: jama1
Galley: Final Galley
3
To display a recipient’s comments, click the Status tab
Name list.
click a name in the
4
To send a mail message to another recipient, click the Status tab
Reply.
5
Click Done.
a name
WorkFlow Central keeps track of the workflows you create and participate in.
Use WorkFlow Central to view, open, save, or delete work items, status
messages, and reports.
WorkFlow Central gets information directly from the Data folder, the location
where workflow message information is stored, typically C:\GWWF\DATA. If
you delete a workflow message in your Mailbox, you can still open it in
WorkFlow Central. If you delete a workflow message in WorkFlow Central, it is
deleted in both WorkFlow Central and your Mailbox.
When a new workflow message is delivered to your Mailbox, a WorkFlow
Central icon appears on the Windows® taskbar near the clock. Double-click the
icon to start WorkFlow Central or display it on top of other windows. After you
open the message, the icon disappears.
1
From your desktop, open WorkFlow Central.
or
In GroupWise, click Tools WorkFlow Central.
2
In WorkFlow Central, double-click a work item, status message, or report.
306 Using Workflow: An Overview
Page time: 00:00:02
File time: 00:00:08
Date: 05-29-98 12:12pm
User: RBALLARD
Queue: Q:PRNT
File: T:\TYPE\859\W\02\R_44WRKF.859
Page: 307 (7 of 7)
3
Plate: Composite
To delete an item, click it
Spec: jama1
Galley: Final Galley
Remove.
Tips
•
When deleting items, a confirmation message appears if the item has
not been completed.
•
To delete multiple items, Ctrl+click each item click Remove.
•
To delete a range of items, click the first item Shift+click the last
item click Remove.
Using Workflow: An Overview
Page time: 00:00:01
File time: 00:00:09
Date: 05-29-98 12:12pm
User: RBALLARD
Queue: Q:PRNT
307
File: T:\TYPE\859\W\02\Y_INDEX.859
Page: 309 (1 of 10)
Plate: Composite
Spec: lubbock1.ind
Galley: Final Galley
•
Page time: 00:00:00
File time: 00:00:01
Date: 05-26-98 4:22pm
•
•
•
•
•
•
User: RBALLARD
•
•
•
•
•
•
Queue: Q:PRNT
•
•
•
•
•
•
•
•
•
•
•
Index
Index
File: T:\TYPE\859\W\02\Y_INDEX.859
Page: 310 (2 of 10)
Plate: Composite
Spec: lubbock1.ind
Galley: Final Galley
Index
A
accept items within GW Desktop 283
Accepting
appointments, notes, and tasks 51
resource requests 102
Access List
editing 96
giving others rights 96
Actions for rules 90
Active Desktop (GroupWise), concepts
282
Activity document, viewing 179
Adding
names to personal address books 127
users to Proxy list 98
Address Book
importing non-Novell address books
into 116
setting properties of individual books
within 132
sharing with another user 133
using LDAP with 111
Address Books
addressing items 122
changing display 118
closing 118
column order, changing 121
concepts 108
copying from other users 115
copying names to personal 130
creating personal 127
deleting 128
editing 129
exporting addresses 116
frequent contacts 124
importing addresses 115
moving 115
opening and closing 118
predefined filters 126
removing names from personal 131
retrieving in Remote 247
selecting addresses 122
sending mail from 123
specifying displayed columns 119
synchronizing entries 131
user-created 127
using in Remote 249
using to send items 122
viewing group information 114
Address columns, displaying 119
Address filters, searching for addresses
109
Address information, changing display
121
Addresses
exporting 116
importing 115
moving 115
searching for 108
alarm, setting in GW Desktop 284
Alarms 75
Notify 83
specifying 271
Annotation toolbar, displaying 297
Annotations
Imaging 296
selecting existing 297
Applications
documents, saving 191
integrating 221
integrating with GroupWise 220
non-integrated, using 223
using non-integrated with GroupWise
223
appointment, sending from GW
Desktop 285
Appointments
addressing 122
canceling 43
changing to other item types 37
checking status 31
confirming delivery 29
delegating 39
in GW Desktop 282
personal 44, 45
printing 68, 70
reading 66
receiving 51
recipients across time zones 52
recurring 54, 57, 58
reminding yourself 75
rescheduling 43
resending 30
saving 66
scheduling 42, 45
scheduling recurring 54
setting alarms 75
spell-checking 24
viewing 63
Archive
automatically 87
specifying default folder 268
unarchiving items 87
using 86
viewing 87
Attach-a-note annotations 296
Attaching
document references 27
files 26
sound files 28
Attachments
deleting 27
opening 28
printing 89
saving 100
viewing 28
viewing in QuickViewer 33
workflow 302
Authored folder 167
Auto-Date 54
Auto-dates 54-56, 58
accepting 51
declining 51
examples 54-56
formula functions and operators 58
automatically spell-check 272
B
/bl, startup option 277
Backup, replacing document with 227
Blind copy (bc) 22
Blocking out time 44, 45
Bolded items, in Mailbox 9
Broadcast workflow 303
Browser window see Main Window
Busy 44
Busy Search 45
owning resources 102
using in Remote 248
Button Bar see Toolbar
C
/c, startup option 277
/cm, startup option 278
Calendar 74
appointment time intervals 64
available printed formats 68
changing items 38
changing views 73
concepts 63
310 Index
Page time: 00:00:01
File time: 00:00:02
Date: 05-26-98 4:22pm
User: RBALLARD
Queue: Q:PRNT
File: T:\TYPE\859\W\02\Y_INDEX.859
Page: 311 (3 of 10)
custom calendar views 64
filtering 146
first day of week 74
graphical display 64
icons 65
items, reading 66
overriding print settings 70
printing 68
printing the schedules of multiple
users 72
printing with current date and time
70
saving items in 66
show appointment as 64
textual display 64
viewing 63
viewing another date 74
viewing in GW Desktop 288
viewing Mailbox as 12
viewing the schedules of multiple users
66
views 64
week numbers 64
Calendar folder 63
Calling
Conversation Place 261
the sender of items 260
Canceling appointments 43
Carbon copy (cc) 22
change dates with Date Navigator 288
Changing
item priority 269
item types 37
passwords 273
check off Task in GW Desktop 284
Checked-out
document status 180
documents, updating 183
documents, viewing 182
Checking in
documents 183
methods of 184
new versions of documents 186
unchanged documents 185
Checking out
documents 180
multiple documents 181
Clearing filters 147
Client/server 19
clock icon 65
Closing address books 118
Codes, language 278
Plate: Composite
Spec: lubbock1.ind
color properties, setting for GW
Marquee 293
column order, changing in GW
Marquee 291
columns
adding to Item List in GW Marquee
291
adding to Mailbox 13
changing order 13, 121
displaying 119
removing 14
removing from GW Marquee Item
List 291
resizing 13
resizing in GW Marquee Item List
291
sorting 13
Company information, viewing 134
complete Task in GW Desktop 284
Conditions, searching for addresses 109
Conference calls 262
Conference rooms, scheduling 102
Connections
configuring for Remote 252
modem 253, 254
network 254, 256
Remote types 230
TCP/IP in Remote 256
Contacts, frequent 124
Context-sensitive help 4
Conversation Place 260
calling someone 261
conference calls 262
dialing recent numbers 262
hanging up 262
merging calls 263
placing calls on hold 261
specifying location 263
starting 261
transferring calls 262
Cool Solutions, FAQ 5
Cool Solutions magazine 5
Quick Start Cards, downloading 6
sending questions to 5
Copying
documents 189
other users’ address books 115
Remote connections 257
rules 94
Create, document reference 140
Creating
auto-dates 54, 57
discussion threads 83
Galley: Final Galley
document references 165
document versions 194
documents 162
folders 79
groups 113
passwords 273
personal address books 127
resource rules 103
rules 90, 93
TCP/IP Remote connections 256
workflows 303
Current version, documents 194
Custom Import 171
D
Database, Remote 19
Date 74
moving item to new in GW Desktop
283
Date Navigator
changing dates with 288
concepts 287
setting font properties for 293
viewing general properties of 287
Day
calendar 73
changing first in week 74
Days
of the month, auto-date 54
of the week, auto-date 54
to search 45
decline items within GW Desktop 283
Declining
appointments, tasks, and notes 51
resource requests 102
Default library folder 167
Default library, setting 276
Defaults
document properties 161
library 160
Defaults, alarms 75
define Name Completion search order
110
Delaying delivery of items 266
Delegating items 39
delete items within GW Desktop 284
Deleting
appointments 43
attachments 27
documents 187
documents, specific versions 188
filters 147
folders 79
Index
Page time: 00:00:01
File time: 00:00:03
Date: 05-26-98 4:22pm
User: RBALLARD
Queue: Q:PRNT
311
File: T:\TYPE\859\W\02\Y_INDEX.859
Page: 312 (4 of 10)
items in Remote 251
Mailbox items 106
personal address books 128
Remote connections 257
rules 94
sent items 30
users from your Proxy list 99
workflow messages 306
Delivery, delay 266
Details, viewing items by 11
Dial Sender
calling 260
using 260
Dialing recently used numbers 262
Different calendar view 73
Disabling, integrations 221
Disabling rules 95
Discussion threads
creating 83
viewing items by 11
Disk Space Management, in Remote
251
Display
of items, changing 7
selecting in GW Marquee 292
Display settings drop-down list 7
display today's schedule in GW Desktop
288
Displaying
address books 118
address columns 119
annotation toolbar 297
different address book information
118
Displays, filtering 144
DMS documents, workflow attachments
302
Document histories, viewing 179
Document property sheets 276
Document references, attaching 27
Document tabs, configuration 276
Document types, deleting 187
Documents
accessing when GroupWise is not
available 218
activity, viewing 179
adding to Documents folder 168
checked-out 183
checking in 183
checking out 180
checking out multiple 181
checking status 180
concepts 159
Plate: Composite
Spec: lubbock1.ind
copying 189
copying to another library 190
creating 162
creating references to 165
default properties for 161
deleting 187
echoing 218
finding 140
folder 8
giving rights to versions 177
importing 169
integrating with applications 220
limiting access 178
new versions 194
official versions, specifying 195
opening 193
opening multiple versions 193
organizing 166
permission to modify rights 177
references 160
Remote, opening in 193
replacing with a backup file 227
retrieving in Remote 243
returning to the library 224
rights, all versions 176
saving 190
sharing 174
specifying properties of 160
storing in libraries 159
templates for 165
versions 194
versions, deleting all 188
who checked out, viewing 180
Documents folder, number of references
in 168
Downloading, items from Master
Mailbox 241
E
E-mail images 300
Echoing, documents 218
Editing
Access List 96
groups in address books 114
personal address books 127-129
Remote connections 257
rules 94
Emptying your Trash 105
Enabling, integrations 222
Enabling rules 95
Events, triggering rules 92
Existing
annotations, selecting 297
Galley: Final Galley
images, opening 299
Exporting addresses 116
F
FAQ, reading in Cool Solutions 5
Fields for filters and rules 152
File types, supported by Imaging 295
Files
attaching 26
documents, saving as 191
link, workflow attachment 302
opening attached 28
printing 89
routing 302
sent with workflow 302
sound, attaching 28
viewing attached 28
Filtering
displaying or hiding items 144
fields 152
system address book in Remote 249
Filters 144
clearing 147
creating 144
deleting 147
narrowing 148
operators 150
predefined 126, 134
saving 147
searching for addresses 109
using existing 146
wildcard characters and switches 149
Find
advanced 141, 142
documents 140
filtering 144
narrowing with operators 143
Results folders 138
saving results 138
searching with filters 109
specifying scope 137
Finding
addresses 108, 122
items 137
text in items 144
finish Task in GW Desktop 284
First day of week, specifying 74
Folder displays, creating 78
Folder List
icons in 8
using 78
viewing from GW Desktop 286
Folders
312 Index
Page time: 00:00:01
File time: 00:00:05
Date: 05-26-98 4:22pm
User: RBALLARD
Queue: Q:PRNT
File: T:\TYPE\859\W\02\Y_INDEX.859
Page: 313 (5 of 10)
Plate: Composite
Spec: lubbock1.ind
authored 167
calendar 63
creating 79
creating subfolders 78
customizing documents 168
default library 167
defining properties 78
deleting 79
documents 8, 166
linking items 80
moving items 80
number of references in documents
folder 168
posting to shared folders 83
renaming 78
sharing 81, 82
font properties, setting for GW Marquee
and Date Navigator 293
foreign address books, importing 116
Formulas, auto-date functions and
operators 58
forwarding items 37
Franklin Day Planners, coordinating
with GroupWise 68
Franklin Quest, printed calendar format
68
Free 44
Freehand line annotations 296
Frequent Contacts 124
addressing items 124
using predefined filters 126
Frequent Contacts Address Book, setting
properties for 125
Functions, auto-date 58, 61
integrating with applications 220
logging in to 17
opening from GW Desktop 286
overview 2
printed calendar format 68
starting 2
GroupWise Imaging, overview 295
GroupWise Library 159
GW Desktop
accepting or declining items within
283
concepts 282
deleting items within 284
moving items to new date within 283
opening GroupWise from 286
reading items within 282
scheduling appointment within 285
sending mail within 285
viewing Calendar in 288
viewing Folder List from 286
viewing Item List within 290
viewing proxy's schedule in 290
viewing today's schedule in 288
GW Marquee
adding column to Item List 291
changing column order in Item List
291
changing how displays items 291
concepts 290
refresh 290
removing column from Item List 291
resizing columns in Item List 291
selecting what displays 292
setting font properties for 293
G
Giving access to your Mailbox 96
Go to date 74
Granting proxy rights 96
Group appointments, scheduling 42
Group information
viewing 134
viewing in address books 114
Group items, changing to personal items
39
Groups
addressing 112, 113
creating 113
editing 114
retrieving 114
searching for addresses 108
selecting addresses 122
GroupWise
H
Help, getting 2
Hiding items using Filter 144
Highlighting pen annotations 296
History document, viewing 179
Hit the Road 232
Hold, putting calls on 261
Holidays, scheduling 54
Hollow rectangle annotations 296
Home Office, using GroupWise 230
HTML Messages, reading 40
I
/ipa-<IP, startup option 278
/ipp-x, startup option 278
Icons
calendar 65
Folder List 8
Galley: Final Galley
item 9
Mailbox 32
Images, e-mailing 300
Imaging
annotations 296
e-mailing images 300
opening images 299
overview 295
scanning 298
selecting scanners 299
supported file types 295
Importing
addresses 115
documents 169
non-Novell address books 116
In Use status 239, 244
Incoming items, reading in Calendar 66
Information, displaying different address
book 118
Installing
GroupWise 2
Remote 233
Integrating, applications with
GroupWise 221
Integrating GroupWise with applications
221
Integrations
turning off 221
turning on 222
Interface language, changing 270
Internet
sending messages 22
workflow attachments 302
Internet messages, retracting 31
Item List
filtering 144
viewing in GW Marquee 290
Items
addressing with frequent contacts 124
changing type of 37
checking status 31
confirming delivery 29
creating documents 165
delaying delivery 266
delegating to others 39
deleting 106
deleting in Remote 251
displaying sent 29
documents 160
finding 137
forwarding 37
getting receipts 266
HTML 40
Index
Page time: 00:00:01
File time: 00:00:06
Date: 05-26-98 4:22pm
User: RBALLARD
Queue: Q:PRNT
313
File: T:\TYPE\859\W\02\Y_INDEX.859
Page: 314 (6 of 10)
marking unread 34
printing 88
reading 32, 66
reading in QuickViewer 33
replying to 35
resending 30
retracting 30
retrieving in Remote 237
routing 302
saving 100
sending from Remote 239
spell-checking 24
using address books to send 122
L
/l-xx, startup option 278
/la-<network, startup option 278
Languages
changing interface 270
codes 278
Laptop, using GroupWise on 230
Launching applications with alarms 75
LDAP
modifying provider properties of 111
using in the Address Book 111
Libraries
customizing settings 275
default 160
documents, copying to 190
documents, saving outside 191
linking documents to workflows 302
returning documents to 224
setting default 276
storing documents 159
Lightweight Directory Access Protocol,
using in Address Book 111
Linking, items to folders 80
list of messages, viewing in GW Marquee
290
Listing groups 112
Location, specifying phone information
263
Locking documents 178
Logging in 17
client/server 19
concepts 17
path to Remote database 19
remembering passwords 18
to network post office 20
Plate: Composite
Spec: lubbock1.ind
M
mail, sending from GW Desktop 285
Mail Message
marking Private in GW Desktop 284
sending in GW Desktop 285
Mail messages
addressing 122
changing to other item types 37
checking status 31
confirming delivery 29
forwarding 37
including in reply 36
replying to 35
resending 30
routing 302
sending 22
sending from address books 123
sending from Remote 239
spell-checking 24
Mailbox
adding columns 13
bolded items 9
changing column order 13
changing items 38
deleting documents 188
giving others proxy access 96
icons 9, 32
logging in 17
logging in from another workstation
17
passwords in Remote 237
removing columns 14
resizing columns 13
sorting columns 13
updating Remote 235
viewing options 11
Main Window concepts 7
Manage, disk space 251
Managing other's Mailboxes 97
Mark item Private in GW Desktop 284
Marking completed tasks 49
Master Mailbox 230
retrieving items in Remote 241
Meetings
accepting 51
canceling 43
declining 51
recipients across time zones 52
rescheduling 43
scheduling 42
Merging telephone calls 263
message
marking Private in GW Desktop 284
Galley: Final Galley
sending in GW Desktop 285
Messages
in GW Desktop 282
printing 88
reading in Calendar 66
sending from Address Book 123
Modem, creating connections in Remote
254
Modify rights 177
Month offset days 56
move items to new date in GW Desktop
283
Moving
address books 115
items in folders 80
Multi-User, printed calendar format 68
Multi-User List 67
Multiple Users
printing the schedules of 72
setting up Remote on a shared
computer 234
viewing the schedules of 66
Mutiple documents, checking out 181
N
/nu, startup option 278
Name Completion concepts 108
Name Completion search order, defining
110
Names, adding to personal address books
127
Network post office 20
New address books, creating 127
Non-Integrated applications 223
Notes
accepting 51
addressing 122
changing to other item types 37
declining 51
personal 50
printing 68, 70
recurring 54, 57, 58
saving 66
scheduling recurring 54
sending 50, 51
viewing 63
Notify
getting proxy notification 85
reading items from 84
running 83
setting options 84
starting 84
turning off 84
314 Index
Page time: 00:00:01
File time: 00:00:07
Date: 05-26-98 4:22pm
User: RBALLARD
Queue: Q:PRNT
File: T:\TYPE\859\W\02\Y_INDEX.859
Page: 315 (7 of 10)
O
ODMA 220
Official version 194, 195
Offset days 55, 56
open GroupWise from GW Desktop
286
Opening
address books 118
attachments 28
documents 193
documents, multiple versions 193
existing images 299
items in Calendar 66
Trash 104
WorkFlow Central 306
Operators
auto-date 58
filters and rules 150
Find 143
Options
alarms 271
default Archive folder 268
default views 270
interface language 270
item priority 269
Remote 236
replies for sent items 267
return receipts 266
setting 266
Order, changing in columns 121
Organizations, searching for addresses of
108
Out of Office 44
Overview, GroupWise Imaging 295
Owning resources 102
P
/ph-pathname, startup option 278
/ps-path to Remote database, startup
option 278
padlock icon 65
Participating in workflows 304
Passwords 17, 18, 272
changing 273
Mailbox 273
removing 273
Path
to host 20
to Remote database 19
Pending items, accepting or declining
51
Pending requests 240
Periodic scheduling, auto-dates 54
Plate: Composite
Spec: lubbock1.ind
personal address book
setting properties of 132
sharing with another user 133
Personal address books
adding names to 127
concepts 127
copying 115
copying names to 130
creating 127
deleting 128
removing names from 131
synchronizing entries 131
Personal groups 112, 113
editing 114
Personal items
changing to group items 39
scheduling 42, 44, 45
Phone messages
addressing 122
changing to other item types 37
sending 23
Phone, using with GroupWise 260
POA 19
Post office 20
Post office agent 19
Posted items, scheduling 42, 44, 45
Posting to shared folders 83
Predefined filters 134
concepts 134
frequent contacts 126
Preferences see Options
Print
attached files 89
calendar items 68
schedules 68
schedules of multiple users 72
Priorities
auto-date operators 58
changing 269
private, marking item within GW
Desktop 284
Private, marking items 99
Programs, launching with alarms 75
Prompting for appointments 75
Properties
checking status of items 31
document, defaults for 161
modifying LDAP provider 111
printing 89
setting an address book's 132
setting color for GW Marquee 293
setting for Frequent Contacts book
125
Galley: Final Galley
setting GW Marquee 291
specifying document 160
viewing Date Navigator 287
viewing for an address book 132
Property values, default 275
Proxy 96
editing the Access List 96
granting rights 96
managing other's Mailboxes 97
marking items private 99
printing a user's name on a printed
calendar 70
printing the schedules of multiple
users 72
receiving rights 96
subscribing to proxy notification 85
viewing schedule in GW Desktop 290
viewing the schedules of multiple users
66
Proxy List
adding users 98
deleting users 99
Public groups 112, 113
Q
Quick Import 170
QuickViewer, viewing attachments 33
QuickViewer, reading items 33
R
Range, auto-dates 54
read items in GW Desktop 282
Reading
Calendar items 66
items later 34
Mailbox items 33
received items 32
Receipts, sent items 266
Received items, displaying 7
Received items, reading 32
Receiving proxy rights 96
Recipients, workflow 304
Recurring appointments 54
References
creating 165
documents 160
refresh GW Marquee 290
Regular appointments 54
Remember password 18
Reminder Notes
in GW Desktop 282
printing 68, 70
saving 66
Index
Page time: 00:00:01
File time: 00:00:08
Date: 05-26-98 4:22pm
User: RBALLARD
Queue: Q:PRNT
315
File: T:\TYPE\859\W\02\Y_INDEX.859
Page: 316 (8 of 10)
scheduling recurring 54
sending 50
viewing 63
Reminders, alarms before appointments
75
Remote
concepts 230
connecting at regular intervals 236,
237
connection types 230
connections 252
copying connections 257
creating modem connections 254
creating network connections 256
creating TCP/IP connections 256
database 19
deleting connections 257
deleting items 251
deleting items in Mailbox 238
Disk Space Management 251
documents, opening 193
editing connections 257
filtering system address book 249
limiting the items you retrieve 244
Mailbox 230
marking a document as In Use 241,
244
marking a document In Use 239, 244
options 236
retrieving documents 243
retrieving items received between
specific days 246
retrieving items since you last
connected 246
retrieving personal address books 247
retrieving selected items 246
retrieving specific items 244, 245
retrieving subjects only 246
returning to the office 231
sending items 239
setting up 233
setting up on a shared computer 234
smart docking 231
specifying location 258
specifying time zone 237
synchronizing deletions with Master
Mailbox 238
updating Mailbox 235
user and system information 237
using Busy Search 248
verifying you're in 232
viewing pending requests 240
Removing
Plate: Composite
Spec: lubbock1.ind
names from address books 131
your password 273
removing items within GW Desktop
284
Renaming folders 78
Replies, requesting 267
Replying
including message text 36
items in shared folders 36
received items 35
to workflow originator 304
Reports, workflow 305
Requesting replies for sent items 267
Rescheduling 43
Resending items 30
Reserving time 44, 45
Reset document status, Reset 224
Resources
accepting and declining requests 102
creating rules for 103
notifications 103
owning 102
searching for addresses 108
viewing information 134
viewing the availability of multiple
resources 66
Retracting items 30
Retrieve
items in Remote at regular intervals
237
selected items 246
Retrieving
documents 193
groups in address books 114
items of a specific size 244
items, Remote 241
personal address books, Remote 247
specific items, Remote 245
Return receipts, getting 266
Returning, documents to the library 224
Rights
document versions, all 176
document, specific versions 177
documents, giving 176
granting proxy 96
modify permission, documents 177
receiving proxy 96
Routing slip 302
Rules
actions 90
copying 94
creating 90, 93
deleting 94
Galley: Final Galley
editing 94
enabling or disabling 95
events 92
fields 152
limiting scope 94
resources 103
running manually 94
Running
Notify 83
rules manually 94
S
Saving
attachments 100
Calendar items 66
documents 190
filters 147
groups 113
Mailbox items 100
status information 102
unfinished items 102
usernames to address books 130
Scanners, selecting 299
Scanning, Imaging 298
Schedule
printing 68
recurring appointments 54
viewing todays' schedule in GW
Desktop 288
schedule appointment from GW
Desktop 285
Schedules
printing 68
viewing 63
Scheduling
appointments 42
meetings across multiple time zones
52
personal appointments 44, 45
search order, defining Name Completion
110
Searching
addresses 108
filters 109
for available meeting times 45
Security, passwords 272
Selecting
existing annotations 297
scanners 299
items again 30
items from address books 123
items using address books 122
mail messages 22
316 Index
Page time: 00:00:01
File time: 00:00:09
Date: 05-26-98 4:22pm
User: RBALLARD
Queue: Q:PRNT
File: T:\TYPE\859\W\02\Y_INDEX.859
Page: 317 (9 of 10)
notes 50
phone messages 23
reminder notes 50
tasks 47
Sent items
checking status of 31
confirming delivery 29
displaying 7
retracting 30
viewing 29
Sequential workflow 303
set alarm in GW Desktop 284
Setting
alarms 75
Notify options 84
Setup
integrating applications during 221
integrating document management
221
Remote 233
running 2
Share, address book with another user
133
Shared Computer, setting up Remote
Mailboxes on 234
Shared folders
posting items 83
replying to items 36
using 81
Sharing
documents 174
folders 82
rights to documents 176
Showing appointment information 45
Smart docking 231
Sounds
alarms 75
attaching 28
Specific versions 194
Specifying address book columns 119
Speed Dial 262
Spell Check, automatically 25
Spell-Check, automatically 272
Spell-checking items 24
Starting
Conversation Place 261
GroupWise 2
Notify 84
Workflow 303
Startup
dialog box, concepts 17
options 277, 279
Status 50
Plate: Composite
Spec: lubbock1.ind
checking document 180
information, printing 89
information, saving 102
information, workflows 305
messages 305
Straight line annotations 296
Supported file types 295
Switches 149
synchronize Mailboxes 238
Synchronizing
address book entries 131
address books 131
T
task, marking completed in GW
Desktop 284
Tasks
accepting 51
addressing 122
assigning 48
changing to other item types 37
checking completion status 50
declining 51
delegating 39
in GW Desktop 282
marking completed 49
personal 49
printing 68, 70
reading 66
recurring 54, 57, 58
routing 302
saving 66
scheduling recurring 54
sending 47
unmarking completed 50
viewing 63
TCP/IP 19
creating connection in Remote 256
Telephones, using with GroupWise 260
Templates, creating GroupWise 165
Tentative 44
Text, printed calendar format 68
Text annotations 296
Text, finding in items 144
Text-from-a-file annotations 296
third-party address books, importing
116
Time
reserve 44, 45
zone 52
zone, specifying in Remote 237
Time Out, specifying seconds before
223
Galley: Final Galley
To do see Tasks
Today, go to 74
Toolbar, display settings drop-down list
7
Toolbars 14, 274
adding and removing buttons 274
customizing 274
displaying annotation 297
Tracking, workflow status 305
Transferring calls 262
Trash
opening and emptying 104
restoring items 104
saving deleted items 105
Traveling, using GroupWise 230
Turning off Notify 84
U
Unarchiving items 87
Undeleting items in your Trash 104
Unread items 9
Unsetting, alarms 75
Updating documents, checked-out 183
Uploading items from Remote 239
Usernames, copying to address books
130
Users, addresses 108
V
Versions
deleting all 188
deleting document 188
documents, creating 194
documents, storing 194
official, specifying 195
opening multiple 193
rights to all 176
rights to specific 177
viewing 195
view 218
view an address book's properties 132
view Folder List from GW Desktop 286
Viewing
archived items 87
attachments 28
calendar, items as 12
details, items by 11
different calendar dates 74
discussion threads, items by 11
document activity 179
document history 179
documents when network is down
218
Index
Page time: 00:00:01
File time: 00:00:10
Date: 05-26-98 4:22pm
User: RBALLARD
Queue: Q:PRNT
317
File: T:\TYPE\859\W\02\Y_INDEX.859
Page: 318 (10 of 10)
Plate: Composite
Spec: lubbock1.ind
documents, checked-out 182
group information in address books
114
items in QuickViewer 33
pending requests 240
schedules 63
schedules of multiple users 66
sent items 29
Views
changing 73
changing defaults 270
W
Wait interval, specifying for
non-integrated applications 223
Web-based Information Sites, receiving
HTML messages from 40
Week
first day of 74
offset days 55
Week calendar 73
Wildcard characters 149
Work in Progress folder, saving items in
102
Work items 304
WorkFlow Central, opening 306
Workflows 302
attachment types 302
broadcast 303
creating 303
participating in 304
report 305
sending reply to originator 304
sequential 303
status information 305
taskbar icon 306
tracking 305
work items 304
WorkFlow Central 306
Y
Year calendar 73
Z
Zone, time 52
318 Index
Page time: 00:00:01
File time: 00:00:11
Date: 05-26-98 4:22pm
User: RBALLARD
Queue: Q:PRNT
Galley: Final Galley