1
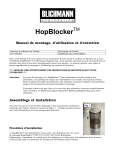
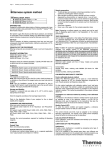
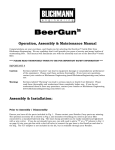
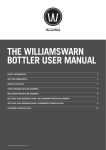
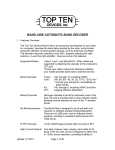
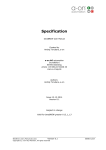
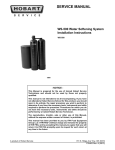
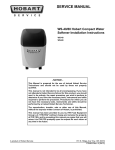
MBAA DISTRICT ST. LOUIS
Home Brewing System
Rev 1.5
3/6/2010
This document is a guide to use and cleaning of the brewing system. Comments on safe use of this
system are included to make you aware of many, but not all, of the precautions that you should take.
Ultimately you are responsible for safe operation of the system.
MBAA District St. Louis Brewing System Manual
Introduction
Please read through this manual prior to using the system. It will make you familiar with system
components as well as proper use and care of the components.
This brewing system was purchased by the district to give all of the members the opportunity to get
firsthand experience brewing beer. It is the responsibility of the members using the system to make
sure that it is not abused so we can get many years of service from it.
The brewer must return the system by the date agreed to on the loan form. This is a shared system. It
is important to remember that other members may be waiting to use it.
Brewing system components
Fig. 1 - Brew pot with lid
Fig. 2 - Washer, dip tube, kettle strainer and false bottom
These components will work together to allow you to make hot liquor (hot water) for mashing, to mash
and lauter, to boil the wort and to separate hot trub from the wort (whirlpool).
The dip tube and false bottom should be installed prior to mashing. It is important that the end of the
dip tube that is inserted into the drain valve assembly (the end with the stainless steel ring on it) is
wetted before inserting it to prevent premature failure of the o-ring in the valve body. Please see page 6
of the BoilerMaker Brew Pot manual for detailed instructions.
•
The brew pot and dip tube are used to make hot liquor and in all other brewing processes.
•
The false bottom should be installed in the brew pot for mashing and lautering with the button
side up (support stem down). The washer should be positioned on the dip tube prior to inserting
the dip tube into the hole in the false bottom. See page 9 of the BoilerMaker Brew Pot manual
2
MBAA District St. Louis Brewing System Manual
for detailed instructions. The false bottom and washer should be removed after lautering and
removal of the spent grain.
•
The boil kettle strainer should be installed prior to filling the brew pot with wort for boiling. See
page 9 of the BoilerMaker Brew Pot manual for detailed instructions. Pelletized bittering hops
should be put into a fine mesh re-usable nylon bag to prevent the hops from plugging the boil
kettle strainer. These are available through home brewing suppliers. Whole hops for bittering or
aroma should not present a plugging problem.
Boil pot stand, burner, heat shield and propane tank
Fig. 3 – Stand, heat shield and Propane tank (second propane tank not pictured)
It is important that these components are used outside a minimum of 5 feet away from any flammable
structure or material. The system should not be used under any overhanging trees or shrubbery. It is
very important to place the brew pot on the stand so that the thermometer and valve are directly above
the heat shield. This will prevent damage to the valve components and thermometer.
3
MBAA District St. Louis Brewing System Manual
A level and smooth concrete, asphalt or brick patio or driveway is the best surface is brewing. Brewing
on a grass or dirt surface is not recommended because the brew pot and stand could be unstable. The
propane tank should be located up wind from the stand and as far away from the stand as the hose
allows.
Follow the instructions on the stand for connecting the propane tank to the burner and for lighting.
Please make sure that the flame is never so high that it laps around the edges of the brew pot and that
the brew pot is never removed from the stand when the level is over 8 gallons. The brew pot should
always be moved by two people whenever any liquid is in it. Please purchase a new propane tank if you
empty one during brewing. You will be reimbursed if you present the district with a receipt.
Sparge water tank and hoses
The sparge water tank holds water that was heated in the brewpot for
sparging the mash. The water should be heated to about 180 F
before it is put into the hot liquor tank so that it does not cool to
below sparging temperature before it is used.
The vent on the lid should be closed to keep the water hot and
opened before the valve on the tank is opened.
Fig. 4 Sparge water tank, hose and valve
Stand for insulated sparge water tank
The wooden stand for the insulated hot liquor tank is designed to
hold the tank high enough to allow the spare water to gravity feed
into the sparge ring. The spigot on the tank is used to start and stop
sparge water flow and the in-line ball valve is used to control sparge
water flow rate.
Fig. 5 Hot Liquor Tank on stand shown with insulated brewpot and brewpot stand
4
MBAA District St. Louis Brewing System Manual
Sparge ring
The sparge ring is used to gently add water to the lauter tun to help rinse all
of the extract from the grain bed. Please use gloves when removing the
sparge ring because it could be as warm as 160 F.
Fig. 6 Sparge ring shown in top of Brewpot, connected to sparge water tank
Insulating Jacket for Brewpot and lid
The insulating jacket should be used for mashing in and sparging. The jacket
is made of vinyl so that it is easy to keep clean. Please prevent it from
coming into contact with the hot burner stand.
Fig. 7 Insulating jacket installed on brewpot and lid
Stainless steel brewing paddle
This paddle should be used to mix the
water and grist during mashing, for
cutting the bed when lautering and for
creating the whirlpool prior to knocking
out of the Brewkettle
Fig. 8 – Stainless steel brewing paddle
5
MBAA District St. Louis Brewing System Manual
Hot Liquor and Lauter Run-off Buckets
These two 7-1/2 gal. buckets will safely hold about 6-1/2
gallons of liquid each. Use them to hold the hot water for
mashing in and for hot wort run-off from lautering. Notice
that the spigots can be rotated 90 degrees. Please be sure
to put them in this position before setting the buckets down
to prevent damaging them.
Fig. 9 – Hot Liquor and Lauter Run-off buckets
Iodophor concentrate and sanitizing solution
Proper sanitizing is key to producing stable beer. This solution should be used
to sanitize all vessels and the copper tube in the on all surfaces that beer or
wort will come into contact with prior to use. This solution should not be
rinsed off. Mix 5 mL of concentrate with water to make 1 gal. of sanitizing
solution. The gallon jug will be supplied with the Iodophor in it.
Fig. 10 - Iodophor concentrate and spray bottle
Refractometer and sample pipette
The refractometer is a precision analytical
device and should be treated with great care. It
will indicate the %sugars by mass (Degrees
Balling, Plato or Brix). It is used to determine if
the sugar concentration of the wort is within
specifications for the beer that you are making.
It should be housed in its case when not being
used to protect it from damage. The rubber
cover over the calibration screw may come off
during use. Please replace if immediately if it
does come off to prevent damage to the
refractometer. Please keep it clean dry
and never immerse it in water. The sample
pipette should be cleaned thoroughly after use.
Fig. 11 – Refractometer, sample pipette and case
Directions for use are inside case and not shown
6
MBAA District St. Louis Brewing System Manual
Silver Snake wort cooler and stand
These components are used to cool the wort. The Silver Snake should be
oriented on the stand so that the end with the tubing fitting is higher than the
end with the vinyl hose on it. This should make it easy to attach the tubing
fitting directly to the fitting on the brew pot valve. The cooling water supply
should be attached to the cooling water shut off valve on the short gray hose.
This arrangement creates an efficient counter flow heat exchanger. Adjust the
valve on the cooling water inlet so that the wort leaving the heat exchanger is at
the proper fermenting temperature.
Fig. 12 - Silver snake, cooling water hose with shut off valve, wort hose and clamp and stand.
Primary Fermenters
Two 6-1/2 gal primary fermeters with airlocks will hold a
little over 11 gal. of wort. The airlocks allows the CO2
generated during fermentation to escape without letting air
in. They should be filled to about the ½ way point with
water or preferably clear, potable alcohol such as vodka. If
the airlocks do not begin to bubble at the start of
fermentation check to make sure that the lids are seated
properly and sealed.
Fig. 13 - Primary Fermenters, lids and airlocks
Siphon tube, clip, hose and bottle filler
Fill the siphon tube, hose and bottle filler with sterilized water.
This will help initiate siphoning of the beer from the fermenter.
Spray the outside of the siphon tube and bottle filler with
isopropyl alcohol. After it dries, insert the siphon tube into the
fermenter, clip the siphon tube to the bucket and adjust it so
that the black tip is just above the layer of yeast at the bottom.
Orient the filler tube vertically with the tip of the filling tube
several inches below the level of the fermenter. Depress the
black tip of the bottle filler until beer begins to flow from it. You
are now ready to begin bottling. Insert the filler tube into a
sterilized bottle and press the black tip on the bottom of the
bottle to initiate flow. Release the filling tube when the beer
reaches the top of the bottle.
Fig. 14 – Siphon tube, clip, hose and bottle filler
7
MBAA District St. Louis Brewing System Manual
Cappers
Two cappers are available for use. One is
a bench style capper that has automatic
locking and adjustment to any bottle
height. The other is a hand held capper.
Please read the instructions for the use of
the bench style Ferrari capper below prior
to use.
Preparatory steps – center the bottle on
the base of the stand. Apply the crown
cap to the magnet inside the crimping cup
“A”.
Fig. 15 – Bench top and hand held capper
Capping – Hold the lever “B” and bring it to the vertical position (1) then slide
unit “C” down just above the bottle neck. Cap the bottle by pressing lever to
the limit stop position (2). From position (1) to position (2) the adjustment and
locking are automatic, regardless of bottle height.
Note: The inside of the crimping cup should be slightly greased before use.
Vaseline works well.
Documentation
Fig. 16 - This manual, the BoilerMaker Brew Pot manual and the book “Brewing Classic Styles” are part of
the system and are stored in a black portfolio.
8
MBAA District St. Louis Brewing System Manual
Other equipment that must be provided by the brewer
Pots to make the hot liquor for sparging, all brewing ingredients, nylon mesh bags for hops, bottles, and
caps as well as cleaner designed for brewing equipment must be purchased by the brewer. One source
for these items is:
St. Louis Wine and Beermaking
251 Lamp and Lantern Village
Chesterfield, MO 63017-8209
(636) 230-8277
St. Louis Wine and Beermaking offers a 10% discount on most of the items in the store to MBAA
members. Please be sure to mention that you are a member prior to making your purchase.
Preparing the system for brewing
Even though the prior brewer has cleaned the system thoroughly it is important that you make sure that
the system has been cleaned and sanitized, as required, prior to using it.
System cleaning
A clean brewing system is key to making great beer. It is important to make sure that the system is
suitable for brewing prior to use and to be considerate and clean thoroughly dry the system after use to
make sure that it is ready for the next brewer.
•
•
Cleaning the system before use
The brewing system should be clean enough to use when you pick it up but it is always a good
idea to rinse the inside and out of all components prior to using them. Take care to prevent
putting a direct stream of water on the thermometer face.
Cleaning the system after use
Brew pot and accessories - These items should be cleaned thoroughly after use. Take care to
prevent putting a direct stream of water on the thermometer face. After cleaning the brew pot,
lid, dip tube, false bottom and kettle strainer and paddle thoroughly with a homebrewing
caustic cleaner such as B-Brite or PBW 5-Star and a Scotch Brite pad and be sure to flush the
valve and level indicator and rinse the brew pot completely with clean water and then dry all
components.
Silver Snake – This item can be attached to the brew pot for cleaning. Some of the hot caustic
cleaner used to clean the brew pot can be flushed through the inner copper coil of the Silver
Snake. It should be rinsed thoroughly with cool water afterwards. It should be rotated several
times after cleaning to remove as much water from the inside of the outer silver hose as
possible. If you have access to wet/dry vac you should connect the suction on one end of the
cooling water hose for several minutes to remove as much water from the cooling hose as
possible. Do not draw air through the inner copper coil as this may be contaminate the tube.
Brew pot stand and propane tanks – Please be sure to remove all dirt and debris from these
components prior to returning them.
9