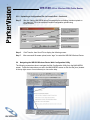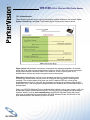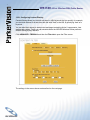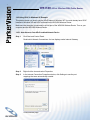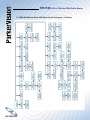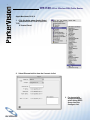
1
ParkerVision
®
Wireless
to the MAX
SIGNAL
WR1500
4-Port Wireless DSL/Cable Router
USER’S GUIDE
WWW.PARKERVISION.COM
REVISION: 2 / VERSION: 030904a / DATE: June 2004
®
WR1500 4-Port Wireless DSL/Cable Router
COPYRIGHT
©2004 ParkerVision Inc. All rights reserved. ParkerVision Horizons™ and D2D™ Technology are
registered trademarks of ParkerVision Inc. All specifications are subject to change without notice.
May include one or more of the following patents: US6421534, US6049706, US6266518, US6061555,
US6061551,US6353735, US6091940, US6370371 Additional Patents Pending.
Designed and manufactured in the USA.
FCC INTERFERENCE STATEMENT
FCC ID: JFE-D2D00003
This device complies with Part 15 of the FCC rules. Operation is subject to the following two conditions:
This device may not cause harmful interference.
This device must accept any interference received, including interference that may cause undesired
operations.
This equipment has been tested and found to comply with the limits for a Class B digital device
pursuant to Part 15 of the FCC Rules. These limits are designed to provide reasonable protection
against harmful interference in a commercial environment. This equipment generates, uses, and can
radiate radio frequency energy, and if not used in accordance with the instructions, may cause harmful
interference to radio communications.
If this equipment does cause harmful interference to radio/television reception, which can be determined
by turning the equipment off and on, the user is encouraged to try to correct the nterference by one of
more of the following measures:
Reorient or relocate the receiving antenna.
Increase the separation between the equipment and the receiver.
Connect the equipment to an outlet on a circuit different from that to which the receiver is connected.
Consult the dealer or an experienced radio/TV technician for help.
INFORMATION TO USER: THE USER’S MANUAL OR INSTRUCTION MANUAL FOR AN I
NTENTIONAL OR UNINTENTIONAL RADIATOR SHALL CAUTION THE USER THAT CHANGES
OR MODIFICATIONS NOT EXPRESSLY APPROVED BY THE PARTY RESPONSIBLE FOR
COMPLIANCE COULD VOID THE USER’S AUTHORITY TO OPERATE THE EQUIPMENT.
“FCC RF exposure requirements: When in operation, the device should be located such that it is more
than 20 cm. away from people and their person. This transmitter is restricted for use with the specific
antenna(s) tested in the application for Certification. The antenna(s) used for this transmitter must not
be co-located or operating in conjunction with any other antenna or transmitter.”
®
WR1500 4-Port Wireless DSL/Cable Router
LIMITED WARRANTY
PLEASE READ THIS MANUFACTURER’S GUARANTEE CAREFULLY TO UNDERSTAND YOUR
RIGHTS AND OBLIGATIONS.
MANUFACTURER’S GUARANTEE AND LIMITATION OF LIABILITY
Note: The following guarantee is not restricted to any territory and does not affect any statutory rights
that you may have. The term “Hardware Device” means the enclosed Direct2Data™ Technologies
Hardware Device. This Manufacturer’s Guarantee does not cover your data, or any separate software,
whether or not packaged or included with the Hardware Device.
Direct2Data Technologies GUARANTEE. Direct2Data Technologies guarantees (this “Guarantee”)
that on the day you receive the Hardware Device and for the next (1) year thereafter (a) the Hardware
Device will be substantially free from defects in materials and workmanship, and (b) any support
services provided by Direct2Data Technologies will be substantially as described in applicable written
materials provided to you by Direct2Data Technologies, and Direct2Data Technologies support
engineers will use reasonable efforts, care and skill to solve any problem issues. In the event that
the Hardware Device fails to comply with this Guarantee, Direct2Data Technologies shall either, at
Direct2Data Technologies’ option, (a) repair or replace the Hardware Device or (b) return the price you
paid for the Hardware Device (if any), provided that you return the Hardware Device to Direct2Data
Technologies with a copy of your receipt of purchase. You may exercise this remedy without charge,
except that you are responsible for any expenses you may incur. This Guarantee is void if failure of
the Hardware Device results from any accident, abuse or misapplication. Any replacement Hardware
Device shall be guaranteed for the remainder of the original Guarantee period or thirty (30) days,
whichever is longer. Direct2Data Technologies shall not be liable for any loss or damage that you could
have reasonably avoided, for example, by backing up your software and files regularly,
In addition, you may receive a full refund of your purchase price within the first 30 days following the
purchase of the Hardware Device for any reason provided that you return the Hardware Device to the
Manufacturer in its original condition, accompanied by the receipt of purchase.
EXCLUSION OF ALL OTHER TERMS. YOU AGREE THAT THIS GUARANTEE IS YOUR SOLE
GUARANTEE IN RELATION TO THE HARDWARE DEVICE AND ANY SUPPORT SERVICES.
DIRECT2DATA TECHNOLOGIES AND ITS SUPPLIERS MAKE NO OTHER GUARANTEES OR
WARRANTIES WITH RESPECT TO THE HARDWARE DEVICE, THE SUPPORT SERVICES AND ANY
PRODUCT MANUAL(S) OR OTHER WRITTEN MATERIALS THAT ACCOMPANY THE HARDWARE
DEVICE. TO THE MAXIMUM EXTENT PERMITTED BY APPLICABLE LAW AND SUBJECT TO THIS
GUARANTEE, DIRECT2DATA TECHNOLOGIES AND ITS SUPPLIERS DISCLAIM ALL WARRANTIES,
CONDITIONS AND OTHER TERMS, EITHER EXPRESS OR IMPLIED (WHETHER BY STATUTE,
COMMON LAW, COLLATERALLY OR OTHERWISE), INCLUDING BUT NOT LIMITED TO ANY (IF
ANY) IMPLIED WARRANTIES OR CONDITIONS OF MERCHANTABILITY, SATISFACTORY QUALITY
AND FITNESS FOR PARTICULAR PURPOSE, LACK OF VIRUSES, LACK OF NEGLIGENCE, LACK
OF WORKMANLIKE EFFORT, TITLE, AUTHORITY, OR NONINFRINGEMENT WITH RESPECT
TO THE HARDWARE DEVICE, THE SUPPORT SERVICES AND THE PRODUCT MANUAL(S) OR
OTHER WRITTEN MATERIALS THAT ACCOMPANY THE HARDWARE DEVICE.
Continued Next Page
®
WR1500 4-Port Wireless DSL/Cable Router
ANY IMPLIED WARRANTIES THAT ARE NOT DEEMED EXCLUDED ARE LIMITED TO THE ORIGINAL GUARANTEE
PERIOD OR TO THE SHORTEST PERIOD PERMITTED BY APPLICABLE LAW, WHICHEVER IS GREATER. LIMITATION
OF LIABILITY. TO THE MAXIMUM EXTENT PERMITTED BY APPLICABLE LAW AND EXCEPT AS PROVIDED IN THIS
GUARANTEE, DIRECT2DATA TECHNOLOGIES AND ITS SUPPLIERS SHALL NOT BE LIABLE FOR ANY DAMAGES
WHATSOEVER (INCLUDING WITHOUT LIMITATION, SPECIAL, INCIDENTAL, INDIRECT OR CONSEQUENTIAL
DAMAGES, DAMAGES FOR LOSS OF BUSINESS PROFITS, BUSINESS INTERRUPTION, LOSS OF BUSINESS
INFORMATION OR OTHER PECUNIARY LOSS, FOR PERSONAL INJURY OR FOR FAILURE TO MEET ANY DUTY
INCLUDING GOOD FAITH OR REASONABLE CARE, OR FOR NEGLIGENCE) ARISING OUT OF THE USE OR INABILITY
TO USE THE HARDWARE DEVICE, EVEN IF DIRECT2DATA TECHNOLOGIES HAS BEEN ADVISED OF THE POSSIBILITY
OF SUCH DAMAGES. IN ANY CASE DIRECT2DATA TECHNOLOGIES’S ENTIRE LIABILITY UNDER ANY PROVISION
OF THIS AGREEMENT SHALL BE LIMITED TO THE AMOUNT ACTUALLY PAID BY YOU FOR THE HARDWARE DEVICE.
THESE LIMITATIONS DO NOT APPLY TO ANY LIABILITIES THAT CANNOT BE EXCLUDED OR LIMITED BY APPLICABLE
LAWS. THE FOREGOING LIMITATIONS, EXCLUSIONS AND DISCLAIMERS SHALL APPLY TO THE MAXIMUM EXTENT
PERMITTED BY APPLICABLE LAW, EVEN IF ANY REMEDY FAILS ITS ESSENTIAL PURPOSE.
REGISTRATION. You need not return the registration card for this Guarantee to be effective.
BENEFICIARY. To the extent allowed by applicable law, this Guarantee is only made to you, the first user of the
Hardware Device, and there are no third party beneficiaries of this Guarantee. It is not intended for and does not
apply to anyone else (except as required by law).
GOVERNING LAW. If you acquired the Hardware Device in the United States of America, the laws of the State of
Florida, U.S.A., apply to this agreement.
QUESTIONS. Should you have any questions concerning this agreement, or if you desire to contact Direct2Data
Technologies for any reason, please use the address information enclosed in this Hardware Device to contact
Direct2Data Technologies, or visit Direct2Data Technologies on the World Wide Web at http://www.Direct2Data.com/.
PACKAGE CONTENTS
• D2D™ Wireless WR1500 Wireless Router
• AC Power Adapter
• Manual on CD ROM
• CAT-5 Ethernet Cable
• Latest manual and software on-line at www.direct2data.com
SYSTEM REQUIREMENTS
• Computer with a 10/100 Ethernet Port, and a Web Browser equivalent to Internet Explorer Version 6
ParkerVision Horizons WR1500 Wireless Router works with any 802.11b/802.11g-compatible Wireless LAN
network, communicating with other computers using either a wireless 802.11b/802.11g interface, or with hard-wired
PC laptop/desktops with an available 10/100 LAN Port
This product is available for purchase in the U.S. only.
CUSTOMER SUPPORT
You can access customer support 24 hours a day online at www.direct2data.com. This is the quickest way to access:
• Troubleshooting Guides
• Manuals
• Answers to Frequently Asked Questions
• Updated Drivers
You can also request help by sending an email to [email protected] or calling
customer support directly at 1-800-231-1759.
®
WR1500 4-Port Wireless DSL/Cable Router
TABLE OF CONTENTS
INTRODUCTION .....................................................................................................................7
PART I - GETTING STARTED ................................................................................................7
Chapter 1 - Getting to Know Your WR1500 ................................................................9
Chapter 2 - Introduction to the Web Configuration Utility ..........................................16
Chapter 3 - Wizard Setup .........................................................................................19
PART II - SYSTEM, LAN, AND WIRELESS .........................................................................30
Chapter 4 - System Screens .....................................................................................31
Chapter 5 - LAN Screens ..........................................................................................32
Chapter 6 - Wireless Configuration ...........................................................................33
Chapter 7 - Wireless Security ...................................................................................45
PART III - WAN’S - WIDE AREA NETWORKS ....................................................................57
Chapter 8 - WAN Configuration Screens ..................................................................58
PART IV - SUA, NAT, AND STATIC ROUTE .......................................................................68
Chapter 9 - Single User Account (SUA) /
Network Address Translation (NAT) ......................................................68
Chapter 10 - Static Route .........................................................................................78
PART V - FIREWALL AND REMOTE MANAGEMENT ........................................................81
Chapter 11 - Introduction to Firewalls .......................................................................82
Chapter 12 - Firewall Configuration Screens ............................................................88
Chapter 13 - Remote Management ..........................................................................99
PART VI - UPnP AND LOGS ..............................................................................................109
Chapter 14 - Universal Plug -n- Play (UPNP) Configuration Screens ....................110
Chapter 15 - Logs Screen .......................................................................................116
PART VII - MAINTENANCE ................................................................................................125
Chapter 16 - Maintenance Information ...................................................................126
PART VIII - SMT GETTING STARTED SCREENS .............................................................136
Chapter 17 - Introducing the System Management Terminal (SMT) .......................137
Chapter 18 - General and WAN Setup....................................................................142
Chapter 19 - LAN Setup ..........................................................................................147
Chapter 20 - Internet Access ..................................................................................156
PART IX - APPENDICES ....................................................................................................159
Appendix A - Troubleshooting .................................................................................160
Appendix B - Setting Up Your Computer’s IP Address ............................................164
Appendix C - PPoE .................................................................................................173
Appendix D - PPTP .................................................................................................176
®
WR1500 4-Port Wireless DSL/Cable Router
INTRODUCTION
All ParkerVision Horizons products are designed and manufactured
by Direct2Data Technologies. Products are fully compliant with
IEEE 802.11b standards and are optimized to provide maximum
possible speed and bandwidth through your Internet connection for
fastest uploads and downloads.
The distance capabilities of your wireless network equipment
directly affect your signal quality. Distance capabilities are usually
stated in terms of outdoor, open field reach. However, this reach is
greatly diminished indoors by walls, doors, construction techniques
and appliances that may block the radio signal. A wireless
network adapter that tests outdoors at 200 feet could, in an indoor
environment, provide 20 feet in one direction and as little as 5 or 10
feet in another direction. Factors such as building materials, floor
plans and furnishings can greatly impact the signal range, quality
and rate of data transmission. The extent to which your signal is
affected varies greatly depending on your environment.
Wireless network products powered by D2D technology will provide
better performance than other products because they can achieve
open field distances of up to one mile, (when a D2D enabled
adapter is used in conjunction with a D2D enabled base station).
The D2D adapter alone provides 3 to 7 times the distance of other
leading brands. This is sufficient to reach all rooms in most homes
or small offices.
®
WR1500 4-Port Wireless DSL/Cable Router
Part I
Getting Started
The following chapters are structured as
a step-by-step guide to help you connect,
install and setup your ParkerVision WR1500
Wireless Router.
®
WR1500 4-Port Wireless DSL/Cable Router
Chapter 1:
Getting to Know Your ParkerVision
WR1500 Wireless Router
This chapter introduces the main features of the ParkerVision WR1500 Wireless Router
1.1 Introduction
The ParkerVision WR1500 Wireless Router provides wireless connectivity. As an Internet
gateway, your WR1500 Wireless Router can share an Internet connection (through a
cable or xDSL modem) with multiple computers using SUA/NAT and DHCP. The WR1500
Wireless Router offers highly secured wireless connectivity to your wired network with IEEE
802. lx, WEP data encryption and MAC address filtering.
The WR1500 Wireless Router is easy to install and configure. The embedded webbased configurator and SNMP network management enables remote configuration and
management of your WR1500 Wireless Router.
1.2 Features of the ParkerVision PC WR1500 Wireless Router
The following are the essential features of the ParkerVision WR1500 Wireless Router .
4-Port Switch
A combination of switch and router makes your WR1500 Wireless Router a cost-effective and
viable network solution. You can connect up to four computers to the LAN ports on your WR150
Wireless Router without the cost of a hub.
10/100M Auto-negotiating Ethernet/Fast Ethernet Interface
This auto-negotiating feature allows the WR1500 Wireless Router to detect the speed of
incoming transmissions and adjust appropriately without manual intervention. It allows data
transfer of either 10 Mbps or 100 Mbps in either half-duplex or full-duplex mode depending on
your Ethernet network.
10/100M Auto-crossover Ethernet/Fast Ethernet Interface.
The LAN interface automatically adjusts to either a crossover or straight-through
Ethernet cable. 10/100 Mbps Ethernet WAN.
The 10/100 Mbps Ethernet WAN port attaches to the Internet via broadband modem or
router.
Reset Button
The WR1500 Wireless Router reset button is built into the rear panel. Use this button to restore
the factory default password to 1234; IP address to 192.168.1.1, subnet mask to 255.255.255.0
and DHCP sever enabled with a pool of 32 IP addresses starting at 192.168.1.33.
Brute-Force Password Guessing Protection
The WR1500 Wireless Router has a special protection mechanism to discourage brute-force
password guessing attacks on the WR1500 Wireless Router’s management interfaces. You
can specify a wait-time that must expire before entering a fourth password after three incorrect
passwords have been entered. Please see the appendix for details about this feature.
®
WR1500 4-Port Wireless DSL/Cable Router
WR1500 Wireless Router LED
The blue WR1500 Wireless Router LED (also known as the Breathing LED) is on when the WR1500
Wireless Router is on and blinks (or breaths) when data is being transmitted to/from its wireless stations.
You may use the web configurator to turn this LED off even when the WR1500 Wireless Router is on and
data is being transmitted/received.
802.11b Wireless LAN Standard
WR1500 Wireless Router products containing the letter “B” in the model name, such as WR1500
Wireless Router B-2000, WR1500 Wireless Router B-2000 v.2, comply with the 802.1 lb wireless
standard.
The 802.1 lb data rate and corresponding modulation techniques are as follows. The modulation
technique defines how bits are encoded onto radio waves.
Output Power Management
Power Management is the ability to set the level of output power.
There may be interference or difficulty with channel assignment when there is a high density
of APs within a coverage area. In this case you can lower the output power of each Wireless
Router, thus enabling you to place Wireless Routers closer together.
Limit the number of Client Connections
You may set a maximum number of wireless stations that may connect to the WR1500
Wireless Router. This may be necessary if for example, there is difficulty with channel
assignment due to a high density of APs within a coverage area.
SSL Passthrough
SSL (Secure Sockets Layer) uses a public key to encrypt data that’s transmitted over an
SSL connection. Both Netscape Navigator and Internet Explorer support SSL, and many web
sites use the protocol to obtain confidential user information, such as credit card numbers.
By convention, URLs that require an SSL connection start with “https” instead of “http”. The
WR1500 Wireless Router allows SSL connections to take place through the WR1500 Wireless
Router.
Firewall
The WR1500 Wireless Router employs a stateful inspection firewall with DoS (Denial of
Service) protection. By default, when the firewall is activated, all incoming traffic from the WAN
to the LAN is blocked unless it is initiated from the LAN. The WR1500 Wireless Router firewall
supports TCP/UDP inspection, DoS detection and prevention, real time alerts, reports and logs.
IEEE 802.1 x Network Security
The WR1500 Wireless Router supports the IEEE 802. lx standard to enhance user
authentication. Use the built-in user profile database to authenticate up to 32 users using MD5
encryption. Use an EAP-compatible RADIUS (RFC2138,2139 - Remote Authentication Dial
In User Service) server to authenticate a limitless number of users using EAP (Extensible
Authentication Protocol). EAP is an authentication protocol that supports multiple types of
authentication.
Wireless LAN MAC Address Filtering
Your WR1500 Wireless Router checks the MAC address of the wireless station against a list
of allowed or denied MAC addresses.
Universal Plug and Play (UPnP)
Using the standard TCP/IP protocol, the WR1500 Wireless Router and other UPnP-enabled
devices can dynamically join a network, obtain an IP address and convey its capabilities to
other devices on the network.
®
WR1500 4-Port Wireless DSL/Cable Router
Dynamic DNS Support
With Dynamic DNS support, you can have a static hostname alias for a dynamic IP address,
allowing the host to be more easily accessible from various locations on the Internet. You must
register for this service.
PPPoE Support (RFC2516)
PPPoE (Point-to-Point Protocol over Ethernet) emulates a dial-up connection. It allows your ISP
to use their existing network configuration with newer broadband technologies such as ADSL. The
PPPoE driver on the WR1500 Wireless Router is transparent to the computers on the LAN, which
see only Ethernet and are not aware of PPPoE thus saving you from having to manage PPPoE
clients on individual computers.
PPTP Encapsulation
Point-to-Point Tunneling Protocol (PPTP) is a network protocol that enables secure transfer of
data from a remote client to a private server, creating a Virtual Private Network (VPN) using a
TCP/IP-based network. PPTP supports on-demand, multi-protocol and virtual private networking
over public networks, such as the Internet. Use PPTP to connect to a broadband modem to
achieve access to high-speed data networks via a familiar “dial-up networking” user interface.
Network Address Translation (NAT)
NAT (Network Address Translation - NAT, RFC 1631) allows the translations of multiple IP
addresses used within one network to different IP addresses known within another network.
NAT for Single-IP-address Internet Access
The WR1500 Wireless Router’s SUA (Single User Account) feature allows multiple-user Internet
access for the cost of a single IP account. NAT supports popular Internet applications such as
MS traceroute, CuSeeMe, IRC, RealPlayer, VDOLive, Quake, and PPTP. No configuration is
needed to support these applications.
DHCP (Dynamic Host Configuration Protocol)
DHCP (Dynamic Host Configuration Protocol) allows the individual clients (computers) to obtain
the TCP/IP configuration at start-up from a centralized DHCP server. The WR1500 Wireless
Router has built-in DHCP server capability enabled by default. It can assign IP addresses, an IP
default gateway and DNS servers to DHCP clients. The WR1500 Wireless Router also acts as a
surrogate DHCP server (DHCP Relay) where it relays IP address assignment from the actual real
DHCP server to the clients.
Multicast
Traditionally, IP packets are transmitted in two ways - unicast or broadcast. Multicast is a third
way to deliver IP packets to a group of hosts. IGMP (Internet Group Management Protocol) is the
protocol used to support multicast groups. The latest version is version 2 (see RFC 2236). The
WR1500 Wireless Router supports versions 1 and 2.
IP Alias
IP Alias allows you to partition a physical network into logical networks over the same Ethernet
interface. The WR1500 Wireless Router supports three logical LAN interfaces via its single
physical Ethernet LAN interface with the WR1500 Wireless Router itself as the gateway for each
LAN network.
IP Policy Routing
IP Policy Routing provides a mechanism to override the default routing behavior and alter
packet forwarding based on the policies defined by the network administrator.
- Continued
®
WR1500 4-Port Wireless DSL/Cable Router
SNMP
SNMP (Simple Network Management Protocol) is a protocol used for exchanging
management information between network devices. SNMP is a member of the TCP/IP
protocol suite. Your WR1500 Wireless Router supports SNMP agent functionality, which allows a
manger station to manage and monitor the SNMP
WR1500 Wireless Router through the network. The WR1500 Wireless Router supports SNMP
version one (SNMPvl) and version two c (SNMPv2c).
Full Network Management
The embedded web configurator is an all-platform web-based utility that allows you to easily
access the WR1500 Wireless Router’s management settings. Most functions of the WR1500
Wireless Router are also software configurable via the SMT(System Management Terminal)
interface. The SMT is a menu-driven interface that you can access from a terminal emulator
through the console port or over a telnet connection.
• Logging and Tracing
• Built-in message logging and packet tracing.
• Unix syslog facility support.
• Diagnostics Capabilities
The WR1500 Wireless Router can perform self-diagnostic tests. These tests check the
integrity of the following circuitry:
•
•
•
•
FLASH memory
DRAM
LAN port
Wireless port
Embedded FTP and TFTP Servers
The WR1500 Wireless Router’s embedded FTP and TFTP servers enable fast firmware upgrades
as well as configuration file backups and restoration.
Wireless Association List
With the Wireless Association List, you can see the list of the wireless stations that are currently
using the WR1500 Wireless Router to access your wired network.
Wireless LAN Channel Usage
The Wireless Channel Usage displays whether the radio channels are used by other wireless
devices within the transmission range of the WR1500 Wireless Router. This allows you to select
the channel with minimum interference for your WR1500 Wireless Router.
®
WR1500 4-Port Wireless DSL/Cable Router
1.3
Application for the WR1500 Wireless Router
Here is an application example of what you can do with your WR1500 Wireless Router.
1.3.1 Internet Access Application
Add a wireless LAN to your existing network without expensive network cables. Wireless stations
can move freely anywhere in the coverage area and use resources on the wired network.
®
WR1500 4-Port Wireless DSL/Cable Router
1.4
Installing Your WR1500 Wireless Router
This section will show you how to physically hook up your WR1500 Wireless Router.
1.4.1 Installation Options
The WR1500 is a powerful, feature-rich wireless router that can be used in a variety of installation
schemes.
The following sections will detail the most common installation schemes. More advanced setups
are explained in detail in later chapters of this manual.
1.4.2
Box Contents
The box your WR1500 came in should contain the following items:
•
•
•
•
•
•
1.4.3
WR1500 Wireless Router Unit
Two Antennas
One CAT-5 Ethernet Cable
One AC Power Adapter
Printed Quick Start Guide
CD ROM containing the electronic version of this manual
What You Will Need to Install and Setup the WR1500
It is possible to setup the WR1500 using an existing Wi-Fi connected computer or laptop.
However, for security reasons it is advised that you perform the initial setup using a computer
that is connected to the WR1500 with a common CAT-5 Ethernet Cable, as shown below.
®
WR1500 4-Port Wireless DSL/Cable Router
1.4.3
Connecting the WR1500 to Your Computer for Initial Configuration
The rear panel of the WR1500 contains several ports, as described below:
Plug your computer’s Ethernet
cable into Port 1. The
remaining ports can to be used
with other computers in a hardwired router fashion
Plug your cable or DSL
modem’s Ethernet
Cable into this port
Plug the AC Adapter
into this port.
For initial setup, you should have:
• The power adapter plugged into the WR1500 as shown, and this adapter plugged into a surgeprotected electrical outlet
• Your Cable or DSL modem’s Ethernet cable plugged into the Internet In port as shown above
• An Ethernet cable plugged into the router port 1 as shown above, and the other end of this cable
plugged into your computer’s Ethernet port
Now Proceed to the Next Page to Begin Setting Up Your WR1500
®
WR1500 4-Port Wireless DSL/Cable Router
Chapter 2:
Introducing
the Web Configuration Utility
This chapter describes how to access the WR1500 Wireless Router Web Configuration Utility and
provides an overview of its screens.
2.1
Web Configuration Utility Overview
The Web Configuration Utility makes it easy to configure and manage the WR1500 Wireless
Router. The screens you see in the Web Configuration Utility may vary somewhat from the ones
shown in this document due to differences between individual WR1500 Wireless Router models or
firmware versions.
2.2
Accessing the WR1500 Wireless Router Web Configuration Utility
Step 1.
Make sure your WR1500 Wireless Router hardware is properly connected (refer to the
Chapter 1 of this manual).
Step 2.
Prepare your computer to connect to the WR1500 Wireless Router
(refer to the Setting Up
Your Computer’s IP Address appendix).
Step 3.
Launch your web browser.
Step 4.
Type “http://192.168.1.1” as the URL Address field.
Step 5.
Type “1234” (default) as the password and click Login. In some versions, the default
password appears automatically - if this is the case, click Login.
Step 6.
You should see a screen asking you to change your password (highly recommended)
as shown next. Type a new password (and retype it to confirm) and click Apply or click
Ignore to allow access without password change.
Note - If the default password
of “1234” is not accepted,
refer to the next page of this
manual and go through the
reset procedure to set all
parameters back to factory
defaults.
Then try the above steps
again.
®
WR1500 4-Port Wireless DSL/Cable Router
2.2
Accessing the WR1500 Wireless Router Web Configuration Utility - Continued
Step 7.
You should now see the MAIN MENU screen.
The WR1500 Wireless Router automatically times out after five minutes of inactivity.
Simply log back into the WR1500 Wireless Router if this happens to you.
2.3
Resetting the WR1500 Wireless Router
If you forget your password or cannot access the WR1500 Wireless Router, you will need to
reload the factory-default configuration file or use the RESET button on the side panel of the
WR1500 Wireless Router. Uploading this configuration file replaces the current configuration
file with the factory-default configuration file. This means that you will lose all configurations that
you had previously and the speed of the console port will be reset to the default of 9600bps
with 8 data bit, no parity, one stop bit and flow control set to none. The password will be reset to
“1234”, also.
2.3.1 Procedure to Use the Reset Button
Make sure the SYS LED is on (not blinking) before you begin this procedure.
Step 1.
Press the RESET button for more than five seconds, and then release it. If the
SYS LED begins to blink, the defaults have been restored and the WR1500 Wireless
Router restarts. Otherwise, go to step 2.
Step 2.
Turn the WR1500 Wireless Router off.
Step 3.
While pressing the RESET button, turn the WR1500 Wireless Router on.
Step 4.
Continue to hold the RESET button. The SYS LED will begin to blink and flicker very
quickly after about 10 or 15 seconds. This indicates that the defaults have been
restored and the WR1500 Wireless Router is now restarting.
Step 5.
Release the RESET button and wait for the WR1500 Wireless Router to finish
restarting.
2.3.2 Uploading a Configuration File via Console Port
This method is only applicable to WR1500 Wireless Router models with a console port
.
Step 1. Download the default configuration file from the WR1500 Wireless Router FTP site,
unzip it and save it in a folder.
Step 2.
Turn off the WR1500 Wireless Router, begin a terminal emulation software session
and turn on the WR1500 Wireless Router again.
When you see the message “Press any key to enter Debug Mode within 3 seconds”,
press any key to enter debug mode.
Step 3.
Enter “y” at the prompt below to go into debug mode.
Step 4.
Enter “atlc” after “Enter Debug Mode” message.
Continued on next page
®
WR1500 4-Port Wireless DSL/Cable Router
2.3.2 Uploading a Configuration File via Console Port - Continued
Step 5.
Wait for “Starting XMODEM upload” message before activating Xmodem upload on
your terminal. This is an example Xmodem configuration upload using
HyperTerminal.
Step 6.
Click Transfer, then Send File to display the following screen.
Step 7.
After successful firmware upload, enter “atgo” to restart the WR1500 Wireless Router.
2.4
Navigating the WR1500 Wireless Router Web Configuration Utility
The following summarizes how to navigate the Web Configuration Utility from the MAIN MENU
screen. Follow the instructions you see in the MAIN MENU screen or click the IBs] icon (located
in the top right corner of most screens) to view online help.
®
WR1500 4-Port Wireless DSL/Cable Router
Chapter 3:
Wizard Setup
This chapter provides information on the Wizard Setup screens in the Web Configuration
Utility.
3.1
Wizard Setup Overview
The Web Configuration Utility’s setup wizard helps you configure your WR1500 Wireless
Router for Internet access and set up wireless LAN.
3.1.1
Channel
The range of radio frequencies used by IEEE 802.1 lb wireless devices is called a “channel”.
Channels available depend on your geographical area. You may have a choice of channels
(for your region) so you should use a different channel than an adjacent AP (Wireless Router)
to reduce interference. Interference occurs when radio signals from different Wireless Routers
overlap causing interference and degrading performance.
Adjacent channels partially overlap however. To avoid interference due to overlap, your AP
should be on a channel at least five channels away from a channel that an adjacent AP is
using. For example, if your region has 11 channels and an adjacent AP is using channel 1,
then you need to select a channel between 6 or 11.
The WR1500 Wireless Router’s “Scan” function is especially designed to automatically scan
for a channel with the least interference.
3.1.2
ESS ID
An Extended Service Set (ESS) is a group of Wireless Routers or wireless gateways
connected to a wired LAN on the same subnet. An ESS ID uniquely identifies each set. All
Wireless Routers or wireless gateways and their associated wireless stations in the same set
must have the same ESSID.
3.1.3
WEP Encryption
WEP (Wired Equivalent Privacy) encrypts data frames before transmitting over the wireless
network. WEP encryption scrambles the data transmitted between the wireless stations
and the Wireless Routers to keep network communications private. It encrypts unicast and
multicast communications in a network. Both the wireless stations and the Wireless Routers
must use the same WEP key for data encryption and decryption.
®
WR1500 4-Port Wireless DSL/Cable Router
3.2
Wizard Setup: General Setup
General Setup contains administrative and system-related information.
The following table describes the labels in this screen.
LABEL
DESCRIPTION
System Name
It is recommended you type your computer’s “Computer name”, some ISPs check this name
you should enter your computer’s “Computer Name”.
> In Windows 2000, click Start, Settings, Control Panel and then double-click System.
Click the Network Identification tab and then the Properties button. Note the entry for the
Computer name field and enter it as the System Name.
> In Windows XP, click Start, My Computer, View system information and then click the
Computer Name tab. Note the entry in the Full computer name field and enter it as the
WR1500 Wireless Router System Name.
This name can be up to 30 alphanumeric characters long. Spaces are not allowed, but
dashes”-” and underscores”_” are accepted.
Domain Name
The Domain Name entry is what is propagated to the DHCP clients on the LAN. Type the
domain name (if you know it) here. If you leave this field blank, the ISP may assign a domain
name via DHCP. The domain name entered by you is given priority over the ISP assigned
domain name.
Next
Click Next to proceed to the next screen.
®
WR1500 4-Port Wireless DSL/Cable Router
3.3
Wizard Setup: Wireless LAN Setup
Set up your wireless LAN using the second wizard screen.
LABEL
DESCRIPTION
ESSID
Enter a descriptive name (up to 32 printable 7-bit ASCII characters) for the wireless LAN.
If you change this field on the WR1500 Wireless Router, make sure all wireless stations use
the same ESSID in order to access the network.
Choose
Channel ID
To manually set the WR1500 Wireless Router to use a channel, select a channel from the
drop-down list box. Open the Channel Usage Table screen to make sure the channel is not
already used by another AP or independent peer-to-peer wireless network.
To have the WR1500 Wireless Router automatically select a channel, click Scan instead.
Scan
Click this button to have the WR1500 Wireless Router automatically scan for and select a
channel with the least interference.
WEP
Encryption
Select Disable allows all wireless computers to communicate with the Wireless Routers
without any data encryption.
Select 64-bit WEP or 128-bit WEP to allow data encryption.
ASCII
Select this option in order to enter ASCII characters as the WEP keys.
HEX
Select this option to enter hexadecimal characters as the WEP keys.
The preceding “Ox” is entered automatically. Leave this in front of
your key.
Key 1 to Key 4
used to encrypt data. Both the WR1500 Wireless Router and the wireless stations must use
the same WEP key for data transmission.
If you chose 64-bit WEP, then enter any 5 ASCII characters or 10 hexadecimal characters
(“0-9”, “A-F”). If you chose 128-bit WEP, then enter 13 ASCII characters or 26 hexadecimal
characters (“0-9”, “A-F”).
You must configure all four keys, but only one key can be activated at any one time. The
default key is key 1.
Next
Click Next to continue.
Back
Click Back to return to the previous screen.
Refer to the chapter on wireless LAN for more information.
®
WR1500 4-Port Wireless DSL/Cable Router
3.4
Wizard Setup: ISP Parameters
The WR1500 Wireless Router offers three choices of encapsulation. They are Ethernet, PPTP
or PPPoE. The screen varies depending upon the type chosen.
3.4.1 Ethernet
The following table describes the labels in this screen.
LABEL
DESCRIPTION
ISP Parameters for Internet Access
Encapsulation
You must choose the Ethernet option when the WAN port is used as a regular
Ethernet. Otherwise, choose PPPoE or PPTP for a dial-up connection.
Service Type
Select from Standard, RR-Toshiba (RoadRunner Toshiba authentication method),
RR-Manager (Roadrunner Manager authentication method), RR-Telstra or Telia
Login. Choose a Roadrunner service type if your ISP is Time Warner’s Roadrunner;
otherwise choose Standard.
The User Name, Password and Login Server IP Address fields are not applicable
(N/A) for the Standard service type.
Continued next page
®
WR1500 4-Port Wireless DSL/Cable Router
3.4.1 Wizard Setup - Ethernet - Continued
LABEL
DESCRIPTION
User Name
Type the username given to you by your ISP.
Password
Type the password associated with the username above.
Login Server IP
Address
The WR1500 Wireless Router will find the Roadrunner Server IP if this field is left
blank. If it does not, then you must enter the authentication server IP address.
Login Server (Telia Type the domain name of the Telia login server, for example “logini .telia.com”.
Login only)
This field is not available on all models.
Relogin Every(min) The Telia server logs the WR1500 Wireless Router out if the WR1500 Wireless
(Telia Login only)
Router does not log in periodically. Type the number of minutes from 1 to 59 (30
recommended) for the WR1500 Wireless Router to wait between logins.
This field is not available on all models.
Next
Click Next to proceed to the next page.
Back
Click Back to go back to the previous page.
3.4.2 PPTP Encapsulation
Point-to-Point Tunneling Protocol (PPTP) is a network protocol that enables transfers of data
from a remote client to a private server, creating a Virtual Private Network (VPN) using TCP/IPbased networks.
PPTP supports on-demand, multi-protocol, and virtual private networking over public networks,
such as the Internet.
Refer to the appendix for more information on PPTP.
The WR1500 Wireless Router supports one PPTP server connection at any given time.
®
WR1500 4-Port Wireless DSL/Cable Router
3.4.2 PPTP Encapsulation - Continued
The following table describes the labels in the screen on the previous page.
LABEL
DESCRIPTION
ISP Parameters for Internet Access
Encapsulation
Select PPTP from the drop-down list box.
User Name
Type the user name given to you by your ISP. Most home user will need to use their
name with their domain designation, such as [email protected]
Password
Type the password associated with the User Name above.
Nailed Up
Connection
Select Nailed Up Connection if you do not want the connection to time out.
Idle Timeout
Type the time in seconds that elapses before the WR1500 Wireless Router
automatically disconnects from the PPTP server.
PPTP Configuration
My IP Address
Type the (static) IP address assigned to you by your ISP.
My IP Subnet
Mask
Type the subnet mask assigned to you by your ISP (if given).
Server IP Address
Type the IP address of the PPTP server.
Connection
ID/Name
If your ISP has provided a connection ID name, enter it in this field exactly as
provided.
Next
Click Next to continue.
Back
Click Back to return to the previous screen.
3.4.3 PPPoE Encapsulation
Point-to-Point Protocol over Ethernet (PPPoE) functions as a dial-up connection. PPPoE is an
IETF (Internet Engineering Task Force) draft standard specifying how a host personal computer
interacts with a broadband modem (for example xDSL, cable, wireless, etc.) to achieve access
to high-speed data networks. It preserves the existing Microsoft Dial-Up Networking experience
and requires no new learning or procedures.
For the service provider, PPPoE offers an access and authentication method that works with
existing access control systems (for instance, RADIUS). For the user, PPPoE provides a login
and authentication method that the existing Microsoft Dial-Up Networking software can activate,
and therefore requires no new learning or procedures for Windows users.
One of the benefits of PPPoE is the ability to let end users access one of multiple network
services, a function known as dynamic service selection. This enables the service provider to
easily create and offer new IP services for specific users.
Operationally, PPPoE saves significant effort for both the subscriber and the ISP/carrier, as it
requires no specific configuration of the broadband modem at the subscriber’s site.
By implementing PPPoE directly on the WR1500 Wireless Router (rather than individual
computers), the computers on the LAN do not need PPPoE software installed, since the
WR1500 Wireless Router does that part of the task. Furthermore, with NAT, all of the LAN’s
computers will have Internet access.
Refer to the appendix for more information on PPPoE, and to the next page for setup details.
®
WR1500 4-Port Wireless DSL/Cable Router
3.4.3 PPPoE Encapsulation - Continued
PPoE Wizard Setup Screen
The following table describes the labels in this screen.
LABEL
DESCRIPTION
ISP Parameter for Internet Access
Encapsulation
Choose an encapsulation method from the pull-down list box. PPPoE forms a dial-up
connection.
Service Name
Type the name of your service provider.
User Name
Type the user name given to you by your ISP.
Password
Type the password associated with the user name above.
Nailed Up
Connection
Select Nailed Up Connection if you do not want the connection to time out.
Idle Timeout
Type the time in seconds that elapses before the WR1500 Wireless Router automatically
disconnects from the PPPoE server.
Next
Click Next to continue.
Back
Click Back to return to the previous screen.
®
WR1500 4-Port Wireless DSL/Cable Router
3.5
Wizard Setup: WAN and DNS
The fourth wizard screen allows you to configure WAN IP address assignment, DNS server address assignment and the WAN MAC address.
3.5.1 WAN IP Address Assignment
Every computer on the Internet must have a unique IP address. If your networks are isolated
from the Internet, for instance, only between your two branch offices, you can assign any IP
addresses to the hosts without problems. However, the Internet Assigned Numbers Authority
(IANA) has reserved the following three blocks of IP addresses specifically for private networks.
10.0.0.0
-
10.255.255.255
172.16.0.0
-
172.31.255.255
192.168.0.0 -
192.168.255.255
You can obtain your IP address from the IANA, from an ISP or have it assigned by a private
network. If you belong to a small organization and your Internet access is through an ISP, the
ISP can provide you with the Internet addresses for your local networks. On the other hand, if
you are part of a much larger organization, you should consult your network administrator for
the appropriate IP addresses.
Regardless of your particular situation, do not create an arbitrary IP address;
always follow the guidelines above. For more information on address assignment,
please refer to RFC 1597, Address Allocation for Private Internets and RFC 1466,
Guidelines for Management of IP Address Space.
3.5.2
IP Address and Subnet Mask
Similar to the way houses on a street share a common street name, so too do computers on a
LAN share one common network number. Where you obtain your network number depends on
your particular situation. If the ISP or your network administrator assigns you a block of registered IP addresses, follow their instructions in selecting the IP addresses and the subnet mask.
If the ISP did not explicitly give you an IP network number, then most likely you have a single
user account and the ISP will assign you a dynamic IP address when the connection is established. If this is the case, it is recommended that you select a network number from 192.168.0.0
to 192.168.255.0 and you must enable the Network Address Translation (NAT) feature of the
WR1500 Wireless Router. The Internet Assigned Number Authority (IANA) reserved this block of
addresses specifically for private use; please do not use any other number unless you are told
otherwise. Let’s say you select 192.168.1.0 as the network number; which covers 254 individual
addresses, from 192.168.1.1 to 192.168.1.254 (zero and 255 are reserved). In other words, the
first three numbers specify the network number while the last number identifies an individual
computer on that network.
Once you have decided on the network number, pick an IP address that is easy to remember, for
instance, 192.168.1.1, for your WR1500 Wireless Router, but make sure that no other device on
your network is using that IP address.
Continued on next page
®
WR1500 4-Port Wireless DSL/Cable Router
3.5.2
IP Address and Subnet Mask-Continued
The subnet mask specifies the network number portion of an IP address. Your WR3000
Wireless Router will compute the subnet mask automatically based on the IP address that you
entered. You don’t need to change the subnet mask computed by the WR3000 Wireless Router
unless you are instructed to do otherwise.
3.5.3
DNS Server Address Assignment
Use DNS (Domain Name System) to map a domain name to its corresponding IP address and
vice versa. For instance, the IP address of a web site with an URL of www.anycompany.com
could be 192.168.3.1. The DNS server is extremely important because without it, you must
know the IP address of a computer before you can access it.
There are two ways that an ISP disseminates the DNS server addresses.
1. The ISP tells you the DNS server addresses, usually in the form of an information sheet,
when you sign up. If your ISP gives you DNS server addresses, enter them in the DNS
Server fields in DHCP Setup.
2. Leave the DNS Server fields in DHCP Setup blank (for example 0.0.0.0). The WR1500
Access Point acts as a DNS proxy when this field is blank.
3.5.4 WAN MAC Address
Every Ethernet device has a unique MAC (Media Access Control) address. The MAC address is
assigned at the factory and consists of six pairs of hexadecimal characters, for example, 00:A0:
C5:00:00:02.
You can configure the WAN port’s MAC address by either using the factory default or cloning the
MAC address from a workstation on your LAN. Once it is successfully configured, the address
will be copied to the “rom” file (ZyNOS configuration file). It will not change unless you change
the setting or upload a different “rom” file.
ParkerVision recommends you clone the MAC address from a workstation on your LAN even if
your ISP does not require MAC address authentication.
Your WR1500 Wireless Router WAN port is always set at half-duplex mode as most cable/DSL
modems only support half-duplex mode. Make sure your modem is in half-duplex mode. Your
WR1500 Wireless Router supports full duplex mode on the LAN side.
Example of Network Properties for LAN Servers with Fixed IP Addresses:
Choose an IP address
192.168.1.2-192.168.1.32; 192.168.1.65-192.168.1.254.
Subnet mask
255.255.255.0
Gateway (or default route)
192.168.1.1(WR1500 Wireless RouterLANIP)
®
WR1500 4-Port Wireless DSL/Cable Router
3.5.4 WAN MAC Address - Continued
The following table describes the labels in the screen above.
LABEL
DESCRIPTION
WAN IP Address Assignment
Get automatically from ISP
Select this option If your ISP did not assign you a fixed IP address. This is the default selection.
Use fixed IP address
Select this option If the ISP assigned a fixed IP address.
My WAN IP Address
Enter your WAN IP address in this field if you selected Use Fixed IP Address.
My WAN IP Subnet Mask
Enter the IP subnet mask in this field if you selected Use Fixed IP Address. This field is not available when
you select PPPoE encapsulation in the previous wizard screen.
Gateway IP Address
Enter the gateway IP address in this field if you selected Use Fixed IP Address. This field is not
available when you select PPPoE encapsulation in the previous wizard screen.
DNS Server Address Assignment
Get automatically from ISP
Select this option if your ISP does not give you DNS server addresses. This option is selected by
default.
Select this option If your ISP provides you a DNS server address.
Use fixed IP address -DNS
Server IP Address
Primary/Secondary DNS Server If you selected the Use fixed IP address - Primary/Secondary DNS Server
option, enter the provided DNS addresses in these fields.
WAN MAC Address: The MAC address field allows you to configure the WAN port’s MAC address by either using the factory default or
cloning the MAC address from a workstation on your LAN.
Factory Default
Select this option to use the factory assigned default MAC address.
Spoof this Computer’s MAC
address - IP Address
Select this option and enter the IP address of the computer on the LAN whose MAC address you are
cloning. Once it is successfully configured, the MAC address will be copied to the rom file (ZyNOS
configuration file). It will not change unless you change the setting or upload a different rom file. It is
advisable to clone the MAC address from a computer on your LAN even if your ISP does not presently
require MAC address authentication.
Back
Click Back to return to the previous screen.
Next
Click Next to continue.
®
WR1500 4-Port Wireless DSL/Cable Router
3.6
Basic Setup Complete
Click Finish to complete and save the wizard setup.
If you are currently using a wireless (LAN) adapter to access this WR1500 Router/Wireless
Router and you made changes to the ESSID, then you will need to make the same changed to
your wireless (LAN) adapter after you click the Finish button.
®
WR1500 4-Port Wireless DSL/Cable Router
Part II
System, LAN, and Wireless
This part discusses the System, LAN, and
Wireless Setup Screens
®
WR1500 4-Port Wireless DSL/Cable Router
Chapter 4:
System Screens
This chapter provides information on the System screens.
4.1
System Overview
This section provides information on general system setup.
4.2
Configuring General Setup
Click ADVANCED and then SYSTEM to open the General screen.
The table on the next page describes the labels in the above screen.
®
WR1500 4-Port Wireless DSL/Cable Router
4.2
Configuring General Setup - Continued
LABEL
DESCRIPTION
System Name
Type a descriptive name for identification purposes. Some ISPs check this name, so it is
recommended you enter your computer’s “Computer name”
This name can be up to 30 alphanumeric characters long. Spaces are not allowed, but dashes”” and underscores”_” are accepted.
Domain Name
Type the domain name (if you know it) here. If you leave this field blank, the ISP may assign
a domain name via DHCP. The domain name entered by you is given priority over the ISP
assigned domain name.
Administrator
Inactivity Timer
Type how many minutes a management session (either via the web configuration utility or SMT)
can be left idle before the session times out.
The default is 5 minutes. After it times out you have to log in with your password again. Very
long idle timeouts may have security risks.
A value of “0” means a management session never times out, no matter how long it has been
left idle (not recommended).
System DNS Servers
First DNS Server
Second DNS
Server
Third DNS Server
Select From ISP if your ISP dynamically assigns DNS server information (and the WR1500’s
WAN IP address). The field to the right displays the (read-only) DNS server IP address that the
ISP assigns.
Select User-Defined if you have the IP address of a DNS server. Enter the DNS server’s IP
address in the field to the right. If you chose User-Defined, but leave the IP address set to
0.0.0.0, User-Defined changes to None after you click Apply. If you set a second choice to
User-Defined, and enter the same IP address, the second User-Defined changes to None
after you click Apply.
Select None if you do not want to configure DNS servers. If you do not configure a DNS server,
you must know the IP address of a machine in order to access it.
Apply
Click Apply to save your changes back to the WR1500.
Reset
Click Reset to reload the previous configuration for this screen.
4.3
Dynamic DNS
Dynamic DNS allows you to update your current dynamic IP address with one or many dynamic
DNS services so that anyone can contact you (in NetMeeting, CU-SeeMe, etc.). You can also access your FTP server or web site on your own computer using a DNS-like address (for instance
myhost.dhs.org, where myhost is a name of your choice) that will never change instead of using
an IP address that changes each time you reconnect. Your friends or relatives will always be able
to call you even if they don’t know your IP address.
First of all, you need to have registered a dynamic DNS account with www.dyndns.org. This is
for people with a dynamic IP from their ISP or DHCP server that would still like to have a DNS
name. The dynamic DNS service provider will give you a password or key.
4.3.1 DYNDNS Wildcard
Enabling the wildcard feature for your host causes *.yourhost.dyndns.org to be aliased to the
same IP address as yourhost.dyndns.org. This feature is useful if you want to be able to use, for
example, www.yourhost.dyndns.org and still reach your hostname.
If you have a private WAN IP address, then you cannot use Dynamic DNS.
®
WR1500 4-Port Wireless DSL/Cable Router
4.4
Configuring Dynamic DNS
To change your WR1500’s DDNS, click ADVANCED, SYSTEM and then the DDNS tab. The
screen appears as shown.
The following table describes the labels in this screen.
LABEL
DESCRIPTION
Active
Select this check box to activate DDNS.
Service Provider
Select the name of your DDNS service provider.
DDNS Type
Select the type of service that you are registered for from your DDNS service provider.
Options are Dynamic DNS, Static DNS or Custom DNS.
Host Names 1-3
Enter your host names in the three fields provided. You can specify up to two host
names in each field separated by a comma (“,”).
User
Type your user name.
Password
Type the password assigned to you.
Enable Wildcard
Your WR1500 supports DYNDNS wildcard. Select the check box to enable.
Off Line
This option is available when CustomDNS is selected in the DDNS Type field. Check with
your dynamic DNS service provider to have traffic redirected to a URL (that you can specify)
while you are off line.
Edit Update IP Address:
Server Auto Detect
Select this option to update the IP address of the host name(s) automatically by the DDNS
server. It is recommended that you select this option.
User Specify
Select this option to update the IP address of the host name(s) to the IP address specified
below. Use this option if you have a static IP address.
IP Address
Enter the IP address if you select the User Specify option.
Apply
Click Apply to save your changes back to the WR1500.
Reset
Click Reset to reload the previous configuration for this screen.
®
WR1500 4-Port Wireless DSL/Cable Router
4.5
Configuring Password
To change your router’s password (recommended), click ADVANCED, SYSTEM and then the
Password tab. The screen appears as shown. This screen allows you to change the router’s
password.
If you forget your password (or the WR1500 Wireless Routers IP address), you will need to
reset the router or upload the default configuration file via console port. See the Resetting the
Wireless Router section for details.
The following table describes the labels in this screen.
LABEL
DESCRIPTION
Old Password
Type in your existing system password (1234 is the default password).
New Password
Type your new system password (up to 31 characters). Note that as you type a
password, the screen displays an asterisk (*) for each character you type.
Retype to Confirm
Retype your new system password for confirmation.
Apply
Click Apply to save your changes back to the WR1500 Router.
Reset
Click Reset to reload the previous configuration for this screen.
®
WR1500 4-Port Wireless DSL/Cable Router
4.6
Configuring Time Setting
To change your WR1500’s time and date, click ADVANCED, SYSTEM and then the Time Setting
tab. The screen appears as shown. Use this screen to configure the router time based on your
local time zone.
The following table describes the labels in this screen.
LABEL
Time Protocol
DESCRIPTION
Select the time service protocol that your time server sends when you turn on the router. Not all time servers
support all protocols, so you may have to check with your ISP/network administrator or use trial and error to find a
protocol that works.
The main difference between them is the format. Daytime (RFC 867) format is day/month/year/time zone of the
server. Time (RFC 868) format displays a 4-byte integer giving the total number of seconds since 1970/1/1 at 0:0:0.
The default, NTP (RFC 1305), is similar to Time (RFC 868). Select None to enter the time and date manually.
Time Server
Address
Enter the IP address or the URL of your time server. Check with your ISP/network administrator if you are unsure
of this information (the default is tick.stdtime.gov.tw).
Current Time (hh:
mm:ss)
New Time (hh:
mm:ss)
This field displays the time of your WR1500. Each time you reload this page, the WR1500 synchronizes the
time with the time server.
Current Date
(yyyy/mm/dd)
This field displays the date of your WR1500 Router. Each time you reload this page, the WR1500 Router
synchronizes the time with the time server.
New Date (yyyy/
mm/dd)
This field displays the last updated date from the time server. When you select None in the Time Protocol
field, enter the new date in this field and then click Apply.
Time Zone
Choose the time zone of your location. This will set the time difference between your time zone and Greenwich
Mean Time (GMT).
Daylight Savings
Select this option if you use daylight savings time. Daylight saving is a period from late spring to early fall
when many countries set their clocks ahead of normal local time by one hour to give more daytime light in the
evening.
Start Date (mm-dd)
Enter the month and day that your daylight-savings time starts on if you selected Daylight Savings.
End Date (mm-dd)
Enter the month and day that your daylight-savings time ends on if you selected Daylight Savings.
This field displays the last updated time from the time server. When you select None in the Time Protocol
field, enter the new time in this field and then click Apply.
Apply
Click Apply to save your changes back to the WR1500 Router.
Reset
Click Reset to reload the previous configuration for this screen.
®
WR1500 4-Port Wireless DSL/Cable Router
Chapter 5:
LAN Screens
This chapter describes how to configure LAN settings.
5.1
LAN Overview
Local Area Network (LAN) is a shared communication system to which many computers are
attached. The LAN screens can help you configure a LAN DHCP server, manage IP addresses,
and partition your physical network into logical networks.Please see the Wizard Setup chapter
for the background information about Primary and Secondary DNS Server and IP Address and
Subnet Mask.
5.2
LANs and WANs
A LAN is a computer network limited to the immediate area, usually the same building or floor
of a building. A WAN (Wide Area Network), on the other hand, is an outside connection to
another network or the Internet.
5.2.1 LANs, WANs and the WR1500 Wireless Router
The actual physical connection determines whether the WR1500 Wireless Router ports are
LAN or WAN ports. There are two separate IP networks, one inside, the LAN network; the other
outside: the WAN network as shown next:
®
WR1500 4-Port Wireless DSL/Cable Router
5.3
DHCP Setup
DHCP (Dynamic Host Configuration Protocol, RFC 2131 and RFC 2132) allows individual clients
to obtain TCP/IP configuration at start-up from a server. You can configure the WR1500 Wireless Router as a DHCP server or disable it. When configured as a server, the WR1500 Wireless
Router provides the TCP/IP configuration for the clients. If set to None, DHCP service will be
disabled and you must have another DHCP server on your LAN, or else the computer must be
manually configured.
5.4
Factory LAN Defaults
The LAN parameters of the WR1500 Wireless Router are preset in the factory with the following
values:
• IP address of 192.168.1.1 with subnet mask of 255.255.255.0 (24 bits)
• DHCP server enabled with 32 client IP addresses starting from 192.168.1.33.
IP Pool Setup
The WR1500 Wireless Router is pre-configured with a pool of 32 IP addresses starting from
192.168.1.33 to 192.168.1.64. This configuration leaves 31 IP addresses (excluding the WR1500
Wireless Router itself) in the lower range for other server computers, for instance, servers for
mail, FTP, TFTP, web, etc., that you may have.
These parameters should work for the majority of installations. If your ISP gives you explicit DNS
server address(es), read the embedded Web Configuration Utility help regarding what fields need
to be configured.
5.5 RIP Setup
RIP (Routing Information Protocol, RFC 1058 and RFC 1389) allows a router to exchange routing
information with other routers. RIP Direction controls the sending and receiving of RIP packets.
When set to:
1. Both - the WR1500 Wireless Router will broadcast its routing table periodically and incorporate the RIP
information that it receives.
2. In Only - the WR1500 Wireless Router will not send any RIP packets but will accept all RIP
packets received.
3. Out Only - the WR1500 Wireless Router will send out RIP packets but will not accept any RIP
packets received.
4. None - the WR1500 Wireless Router will not send any RIP packets and will ignore any RIP
packets received.
RIP Version controls the format and the broadcasting method of the RIP packets that the
WR1500 Wireless Router sends (it recognizes both formats when receiving). RIP-1 is universally
supported; but RIP-2 carries more information. RIP-1 is probably adequate for most networks, unless you have an unusual network topology.
Both RIP-2B and RIP-2M send routing data in RIP-2 format; the difference being that RIP-2B
uses subnet broadcasting while RIP-2M uses multicasting. Multicasting can reduce the load on
non-router machines since they generally do not listen to the RIP multicast address and so will
not receive the RIP packets. However, if one router uses multicasting, then all routers on your
network must use multicasting, also.
By default, RIP Direction is set to Both and RIP Version to RIP-1.
®
WR1500 4-Port Wireless DSL/Cable Router
5.6
Multicast
Traditionally, IP packets are transmitted in one of either two ways - Unicast (1 sender -1 recipient) or
Broadcast (1 sender - everybody on the network). Multicast delivers IP packets to a group of hosts
on the network - not everybody and not just 1.
IGMP (Internet Group Multicast Protocol) is a network-layer protocol used to establish membership
in a Multicast group - it is not used to carry user data. IGMP version 2 (RFC 2236) is an improvement
over version 1 (RFC 1112) but IGMP version 1 is still in wide use. If you would like to read more
detailed information about interoperability between IGMP version 2 and version 1, please see sections
4 and 5 of RFC 2236.
The class D IP address is used to identify host groups and can be in the range 224.0.0.0 to
239.255.255.255. The address 224.0.0.0 is not assigned to any group and is used by IP multicast
computers. The address 224.0.0.1 is used for query messages and is assigned to the permanent
group of all IP hosts (including gateways).
All hosts must join the 224.0.0.1 group in order to participate in IGMP. The address 224.0.0.2 is
assigned to the multicast routers group.
The WR1500 Wireless Router supports both IGMP version 1 (IGMP-vl) and IGMP version 2
(IGMP-v2).
At start up, the WR1500 Wireless Router queries all directly connected networks to gather group
membership. After that, the WR1500 Wireless Router periodically updates this information. IP
multicasting can be enabled/disabled on the WR1500 Wireless Router LAN and/or WAN interfaces
in the Web Configuration Utility (LAN; WAN). Select None to disable IP multicasting on these
interfaces.
5.7
Configuring the LAN IP Screens
Click ADVANCED and then LAN to open the IP Screen.
This screen’s options are described on the next page.
®
WR1500 4-Port Wireless DSL/Cable Router
5.7
Configuring the LAN IP Screens - Continued
The following table describes the options of the LAN Screen, from the previous page.
LABEL
DESCRIPTION
DHCP Setup (refer to your User’s Guide for background information)
DHCP Server
Select this option to allow your WR1500 Wireless Router to assign IP addresses, an IP
default gateway and DNS servers to Windows 95, Windows NT and other systems that
support the DHCP client.
When DHCP is used, the following items need to be set:
IP Pool Starting
Address
This field specifies the first of the contiguous addresses in the IP address pool.
Pool Size
This field specifies the size or count of the IP address pool.
DNS Servers Assigned by DHCP Server
Select From ISP if your ISP dynamically assigns DNS server information (and the
First DNS Server
Second DNS Server WR1500 Wireless Router’s WAN IP address). The field to the right displays the (read-only)
DNS server IP address that the ISP assigns.
Third DNS Server
Select User-Defined if you have the IP address of a DNS server. Enter the DNS server’s
IP address in the field to the right. If you chose User-Defined, but leave the IP address
set to 0.0.0.0, User-Defined changes to None after you click Apply. If you set a second
choice to User-Defined, and enter the same IP address, the second User-Defined
changes to None after you click Apply.
Select DNS Relay to have the WR1500 Wireless Router act as a DNS proxy. The
WR1500 Wireless Router’s LAN IP address displays in the field to the right (read-only).
The WR1500 Wireless Router tells the DHCP clients on the LAN that the WR1500
Wireless Router itself is the DNS server. When a computer on the LAN sends a DNS
query to the WR1500 Wireless Router, the WR1500 Wireless Router forwards the query to
the WR1500 Wireless Router’s system DNS server (configured in the SYSTEM General
screen) and relays the response back to the computer. You can only select DNS Relay for
one of the three servers; if you select DNS Relay for a second or third DNS server, that
choice changes to None after you click Apply.
Select None if you do not want to configure DNS servers. If you do not configure a DNS
server, you must know the IP address of a machine in order to access it.
LAN TCP/IP
IP Address
Type the IP address of your WR1500 Wireless Router in dotted decimal notation,
for example, 192.168.1.1 (factory default).
IP Subnet Mask
Type the subnet mask assigned to you by your ISP (if given).
RIP Direction
Select the RIP direction from None, Both, In Only and Out Only.
RIP Version
Select the RIP version from RIP-1, RIP-2B and RIP-2M.
Multicast
IGMP (Internet Group Multicast Protocol) is a session-layer protocol used to establish
membership in a multicast group. The WR1500 Wireless Router supports both IGMP
version 1 (IGMP-v-l) and IGMP-v2. Select None to disable it.
Windows Networking (NetBIOS over TCP/IP)
Allow between LAN
and WAN
Select this option to forward NetBIOS packets between the LAN port and the WAN port.
Apply
Click Apply to save your changes back to the WR1500 Wireless Router.
Reset
Click Reset to reload the previous configuration for this screen.
®
WR1500 4-Port Wireless DSL/Cable Router
Chapter 6:
Wireless Configuration
This chapter discusses how to configure the Wireless screens on the
WR1500 Wireless Router.
6.1
Wireless LAN Overview
This section introduces the wireless LAN(WLAN) and some basic scenarios.
6.1.1 IBSS
An Independent Basic Service Set (IBSS), also called an Ad-hoc network, is the simplest
WLAN configuration. An IBSS is defined as two or more computers with wireless adapters
within range of each other that from an independent (wireless) network without the need of an
Wireless Router (AP).
6.1.2 BSS
A Basic Service Set (BSS) exists when all communications between wireless stations or
between a wireless station and a wired network client go through one Wireless Router (AP).
Intra-BSS traffic is traffic between wireless stations in the BSS. When Intra-BSS is enabled,
wireless station A and B can access the wired network and communicate with each other.
When Intra-BSS is disabled, wireless station A and B can still access the wired network but
cannot communicate with each other.
The illustration on the next page describes a BSS setup.
®
WR1500 4-Port Wireless DSL/Cable Router
6.1.2 BSS - Continued
6.1.3 ESS
An Extended Service Set (ESS) consists of a series of overlapping BSSs, each containing an
Wireless Router, with each Wireless Router connected together by a wired network.
This wired connection between APs is called a Distribution System (DS). An ESSID (ESS
Identification) uniquely identifies each ESS. All Wireless Routers and their associated wireless
stations within the same ESS must have the same ESSID in order to communicate.
®
WR1500 4-Port Wireless DSL/Cable Router
6.2
Wireless LAN Basics
6.2.1 RTS/CTS
A hidden node occurs when two stations are within range of the same Wireless Router, but
are not within range of each other. The following figure illustrates a hidden node. Both stations
(STA) are within range of the Wireless Router (AP) or wireless gateway, but out-of-range of
each other, so they cannot “hear” each other, that is they do not know if the channel is currently
being used. Therefore, they are considered hidden from each other.
When station A sends data to the WR1500 Wireless Router, it might not know that station B
is already using the channel. If these two stations send data at the same time, collisions may
occur when both sets of data arrive at the AP at the same time, resulting in a loss of messages
for both stations.
RTS/CTS is designed to prevent collisions due to hidden nodes. An RTS/CTS defines the
biggest size data frame you can send before an RTS (Request To Send)/CTS (Clear to Send)
handshake is invoked.
When a data frame exceeds the RTS/CTS value you set (between 0 to 2432 bytes), the station
that wants to transmit this frame must first send an RTS (Request To Send) message to the
AP for permission to send it. The AP then responds with a CTS (Clear to Send) message to
all other stations within its range to notify them to defer their transmission. It also reserves and
confirms with the requesting station the time frame for the requested transmission.
Stations can send frames smaller than the specified RTS/CTS directly to the AP without the
RTS (Request To Send)/CTS (Clear to Send) handshake.
You should only configure RTS/CTS if the possibility of hidden nodes exists on your network
and the “cost” of resending large frames is more than the extra network overhead involved in
the RTS (Request To Send)/CTS (Clear to Send) handshake.
If the RTS/CTS value is greater than the Fragmentation Threshold value (see next), then the
RTS (Request To Send)/CTS (Clear to Send) handshake will never occur as data frames will
be fragmented before they reach RTS/CTS size.
Enabling the RTS Threshold causes redundant network overhead that could
negatively affect the throughput performance instead of providing a remedy.
®
WR1500 4-Port Wireless DSL/Cable Router
6.2.2 Fragmentation Threshold
A Fragmentation Threshold is the maximum data fragment size (between 256 and 2432
bytes) that can be sent in the wireless network before the WR1500 Wireless Router will
fragment the packet into smaller data frames.
A large Fragmentation Threshold is recommended for networks not prone to interference while
you should set a smaller threshold for busy networks or networks that are prone to interference.
If the Fragmentation Threshold value is smaller than the RTS/CTS value (see previously) you
set, then the RTS (Request To Send)/CTS (Clear to Send) handshake will never occur as data
frames will be fragmented before they reach RTS/CTS size.
6.3
Configuring Wireless
If you are configuring the WR1500 Wireless Router from a computer connected to the wireless
LAN and you change the WR1500 Wireless Router’s ESSID or WEP settings, you will lose your
wireless connection when you press Apply to confirm.
You must then change the wireless settings of your computer to match the WR1500 Wireless
Router’s new settings.
Click ADVANCED and then WIRELESS to open the Wireless screen.
The table on the next page describes the options in this screen.
®
WR1500 4-Port Wireless DSL/Cable Router
6.3
Configuring Wireless - Continued
The following table describes the options on the screen shown on the previous page.
LABEL
DESCRIPTION
Enable Wireless Click the check box to activate wireless LAN.
LAN
ESSID
(Extended Service Set IDentity) The ESSID identifies the Service Set with which a
wireless station is associated. Wireless stations associating to the Wireless Router
(AP) must have the same ESSID. Enter a descriptive name (up to 32 printable 7-bit
ASCII characters) for the wireless LAN.
If you are configuring the WR1500 Wireless Router from a
computer connected to the wireless LAN and you change
the WR1500 Wireless Router’s ESSID or WEP settings, you
will lose your wireless connection when you press Apply
to confirm. You must then change the wireless settings of
your computer to match the WR1500 Wireless Router’s new
settings.
Hide ESSID
Select this check box to hide the ESSID in the outgoing beacon frame so a station cannot
obtain the ESSID through passive scanning using a site survey tool.
Choose
Channel ID
Set the operating frequency/channel depending on your particular region.
Scan
Click this button to have the WR1500 Wireless Router automatically scan for and select a
channel with the least interference.
RTS/CTS
Threshold
Enter a value between 0 and 2432. The default is 2432.
Fragmentation
Threshold
Enter a value between 256 and 2432. The default is 2432. It is the maximum data
fragment size that can be sent.
Apply
Click Apply to save your changes back to the WR1500 Wireless Router.
Reset
Click Reset to reload the previous configuration for this screen.
To manually set the WR1500 Wireless Router to use a channel, select a channel from
the drop-down list box. Click MAINTENANCE, WIRELESS and then the Channel Usage
tab to open the Channel Usage screen to make sure the channel is not already used by
another AP or independent peer-to-peer wireless network.
To have the WR1500 Wireless Router automatically select a channel, click Scan instead.
Refer to the Wizard Setup chapter for more information on channels.
See the Wireless Security chapter for information on the other labels in this screen.
®
WR1500 4-Port Wireless DSL/Cable Router
Chapter 7:
Wireless Security
This Chapter describes how to use the MAC Filter, 802. lx, Local User Database and RADIUS
to configure wireless security on your WR1500 Wireless Router.
7.1
Wireless Security Overview
Wireless security is vital to your network to protect wireless communication between wireless
stations, Wireless Routers and the wired network.
The figure below shows the possible wireless security levels on your WR1500 Wireless
Router. The highest security level relies on EAP (Extensible Authentication Protocol) for
authentication and utilizes dynamic WEP key exchange. It requires interaction with a RADIUS
(Remote Authentication Dial-In User Service) server either on the WAN or your LAN to provide
authentication service for wireless stations.
IMPORTANT - If you do not enable any wireless security on your WR1500 Wireless
Router, your network is accessible to any wireless networking device that is within
range.
7.2
WEP Overview
WEP (Wired Equivalent Privacy) as specified in the IEEE 802.11 standard provides methods
for both data encryption and wireless station authentication.
7.2.1 Data Encryption
WEP provides a mechanism for encrypting data using encryption keys. Both the AP and the
wireless stations must use the same WEP key to encrypt and decrypt data. Your WR1500
Wireless Router allows you to configure up to four 64-bit or 128-bit WEP keys, but only one
key can be enabled at any one time.
®
WR1500 4-Port Wireless DSL/Cable Router
7.2.2 Authentication
Three different methods can be used to authenticate wireless stations to the network: Open
System, Shared Key, and Auto. The following figure illustrates the steps involved.
Open system authentication involves an unencrypted two-message procedure. A wireless
station sends an open system authentication request to the AP, which will then automatically
accept and connect the wireless station to the network. In effect, open system is not
authentication at all as any station can gain access to the network.
Shared key authentication involves a four-message procedure. A wireless station sends
a shared key authentication request to the AP, which will then reply with a challenge text
message. The wireless station must then use the AP’s default WEP key to encrypt the
challenge text and return it to the AP, which attempts to decrypt the message using the AP’s
default WEP key. If the decrypted message matches the challenge text, the wireless station is
authenticated.
When your WR1500 Wireless Router’s authentication method is set to open system, it will only
accept open system authentication requests. The same is true for shared key authentication.
However, when it is set to auto authentication, the WR1500 Wireless Router will accept
either type of authentication request and the WR1500 Wireless Router will fall back to use
open authentication if the shared key does not match.
®
WR1500 4-Port Wireless DSL/Cable Router
7.3
Configuring WEP Encryption
In order to configure and enable WEP encryption; click ADVANCED and then WIRELESS to
display the Wireless screen.
The following table describes the wireless LAN security labels in this screen.
LABEL
DESCRIPTION
WEP
Encryption
Select Disable to allow wireless stations to communicate with the Wireless Routers
without any data encryption. Select 64-bit WEP or 128-bit WEP to enable data
encryption.
Authentication
Method
This field is activated when you select 64-bit WEP or 128-bit WEP in the WEP
Encryption field.
Select Auto, Open System or Shared Key from the drop-down list box.
ASCII
Select this option in order to enter ASCII characters as the WEP keys.
Hex
Select this option in order to enter hexadecimal characters as the WEP keys.
The preceding “Ox”, that identifies a hexadecimal key, is entered automatically.
Key 1 to Key 4
The WEP keys are used to encrypt data. Both the WR1500 Wireless Router and the
wireless stations must use the same WEP key for data transmission.
If you chose 64-bit WEP, then enter any 5 ASCII characters or 10 hexadecimal characters
(“0-9”, “A-F”). If you chose 128-bit WEP, then enter 13 ASCII characters or 26 hexadecimal
characters (“0-9”, “A-F”).
You must configure all four keys, but only one key can be activated at any one time. The
default key is key 1.
Continued on next page.
®
WR1500 4-Port Wireless DSL/Cable Router
7.3
Configuring WEP Encryption - Continued
Table continued from preceding page.
LABEL
DESCRIPTION
Enable IntraBSS Traffic
Intra-BSS traffic is traffic between wireless stations in the BSS. Select this check box to
enable Intra-BSS Traffic.
Enable
Breathing
LED
Select this check box to enable the Breathing LED, also known as the WR1500 Wireless
Router LED.
The blue WR1500 Wireless Router LED is on when the WR1500 Wireless Router is on
and blinks (or breaths) when data is being transmitted to/from its wireless stations. Clear
the check box to turn this LED off even when the WR1500 Wireless Router is on and
data is being transmitted/received.
Number of
Wireless
Stations
Allowed
Use this field to set a maximum number of wireless stations that may connect to the
WR1500 Wireless Router.
Output Power
Set the output power of the WR1500 Wireless Router in this field. If there is a high density
of APs within an area, decrease the output power of the WR1500 Wireless Router to
reduce interference with other APs.
Enter the number (from 1 to 32) of wireless stations allowed.
The options are 11dBm (50mW), 13dBm (32mW), 15dBm (20mW) or 17dBm (12.6mW).
Apply
Click Apply to save your changes back to the WR1500 Wireless Router.
Reset
Click Reset to reload the previous configuration for this screen.
7.4
MAC Filter
The MAC filter screen allows you to configure the WR1500 Wireless Router to give exclusive
access to up to 32 devices (Allow Association) or exclude up to 32 devices from accessing the
WR1500 Wireless Router (Deny Association). Every Ethernet device has a unique MAC
(Media Access Control) address. The MAC address is assigned at the factory and consists of
six pairs of hexadecimal characters, for example, 00:A0:C5:00:00:02. You need to know the
MAC address of the devices to configure this screen.
To change your WR1500 Wireless Router’s MAC filter settings, click ADVANCED, WIRELESS
and then the MAC Filter tab.
The screen appears as shown on the next page.
®
WR1500 4-Port Wireless DSL/Cable Router
7.4
MAC Filter - Continued
MAC Filter Configuration Screen:
The following table describes the labels in this menu.
LABEL
DESCRIPTION
Active
Select Yes from the drop down list box to enable MAC address filtering.
Filter Action
Define the filter action for the list of MAC addresses in the MAC Address table.
Select Deny Association to block access to the WR1500 Wireless Router, MAC addresses not
listed will be allowed to access the WR1500 Wireless Router
Select Allow Association to permit access to the WR1500 Wireless Router, MAC addresses not
listed will be denied access to the WR1500 Wireless Router.
MAC
Address
Enter the MAC addresses (in XX:XX:XX:XX:XX:XX format) of the wireless station that are allowed
or denied access to the WR1500 Wireless Router in these address fields.
Apply
Click Apply to save your changes back to the WR1500 Wireless Router.
Reset
Click Reset to reload the previous configuration for this screen.
®
WR1500 4-Port Wireless DSL/Cable Router
7.5
802.1 x Overview
The IEEE 802. lx standard outlines enhanced security methods for both the authentication of
wireless stations and encryption key management. Authentication can be done using the local
user database internal to the WR1500 Wireless Router (authenticate up to 32 users) or an
external RADIUS server for an unlimited number of users.
7.6
Introduction to RADIUS
RADIUS is based on a client-sever model that supports authentication and accounting, where
Wireless Router is the client and the server is the RADIUS server. The RADIUS server handles
the following tasks among others:
• Authentication - Determines the identity of the users.
• Accounting - Keeps track of the client’s network activity.
RADIUS user is a simple package exchange in which your WR1500 Wireless Router acts as a
message relay between the wireless station and the network RADIUS server.
Types of RADIUS Messages
The following types of RADIUS messages are exchanged between the Wireless Router and the
RADIUS server for user authentication:
•
•
•
•
Access-Request - Sent by an Wireless Router requesting authentication.
Access-Reject - Sent by a RADIUS server rejecting access.
Access-Accept - Sent by a RADIUS server allowing access.
Access-Challenge - Sent by a RADIUS server requesting more information in order to
allow access.
The Wireless Router sends a proper response from the user and then sends another
Access-Request message.
The following types of RADIUS messages are exchanged between the Wireless Router and
the RADIUS server for user accounting:
• Accounting-Request - Sent by the Wireless Router requesting accounting.
• Accounting-Response - Sent by the RADIUS server to indicate that it has started or
stopped accounting.
In order to ensure network security, the Wireless Router and the RADIUS server use a shared
secret key, which is a password, they both know. The key is not sent over the network. In
addition to the shared key, password information exchanged is also encrypted to protect the
wired network from unauthorized access.
7.6.1 EAP Authentication Overview
EAP (Extensible Authentication Protocol) is an authentication protocol that runs on top of the
IEEE802.1x transport mechanism in order to support multiple types of user authentication. By
using EAP to interact with an EAP-compatible RADIUS server, the Wireless Router helps a
wireless station and a RADIUS server perform authentication.
Continued on next page
®
WR1500 4-Port Wireless DSL/Cable Router
7.6.1 EAP Authentication Overview - Continued
The type of authentication you use depends on the RADIUS server or the AP. The WR1500
Wireless Router supports EAP-TLS, EAP-TTLS and DEAP with RADIUS. Refer to the Types of
EAP Authentication appendix for descriptions on the four common types.
Your WR1500 Wireless Router supports EAP-MD5 (Message-Digest Algorithm 5) with the local
user database and RADIUS. The following figure shows an overview of authentication when you
specify a RADIUS server on your Wireless Router.
The details below provide a general description of how IEEE 802. lx EAP authentication works.
For an example list of EAP-MD5 authentication steps, see the IEEE 802.lx appendix.
• The wireless station sends a “start” message to the WR1500 Wireless Router.
• The WR1500 Wireless Router sends a “request identity” message to the wireless station for
identity information.
• The wireless station replies with identity information, including username and password.
• The RADIUS server checks the user information against its user profile database and
determines whether or not to authenticate the wireless station.
7.7
Dynamic WEP Key Exchange
The AP maps a unique key that is generated with the RADIUS server. This key expires when
the wireless connection times out, disconnects or reauthentication times out. A new WEP key is
generated each time reauthentication is performed.
If this feature is enabled, it is not necessary to configure a default encryption key in the Wireless
screen. You may still configure and store keys here, but they will not be used while Dynamic
WEP is enabled.
To use Dynamic WEP, enable and configure the RADIUS server (see section 7.11) and enable
Dynamic WEP Key Exchange in the 802.lx screen. Ensure that the wireless station’s EAP type
is configured to one of the following:
• EAP-TLS
• EAP-TTLS
• PEAP
EAP-MD5 cannot be used with Dynamic WEP Key Exchange.
®
WR1500 4-Port Wireless DSL/Cable Router
7.8
Introduction to Local User Database
By storing user profiles locally on the WR1500 Wireless Router, your WR1500 Wireless Router is
able to authenticate wireless users without interacting with a network RADIUS server. However,
there is a limit on the number of users you may authenticate in this way.
7.9
Configuring 802.1 x
To change your WR1500 Wireless Router’s authentication settings, click ADVANCED,
WIRELESS and then the 802.1x tab. The screen appears as shown below.
The following table describes the settings on this screen.
LABEL
Wireless Port
Control
DESCRIPTION
To control wireless stations access to the wired network, select a control method from the
drop-down list box. Choose from No Authentication Required, Authentication Required
and No Access Allowed.
No Authentication Required allows all wireless stations access to the wired network without
entering usernames and passwords. This is the default setting.
Authentication Required means that all wireless stations have to enter usernames and
passwords before access to the wired network is allowed.
No Access Allowed blocks all wireless stations access to the wired network.
ReAuthentication
Timer
(in seconds)
Specify how often wireless stations have to reenter usernames and passwords in order to
stay connected. This field is activated only when you select Authentication Required in the
Wireless Port Control field.
Enter a time interval between 10 and 9999 seconds. The default time interval is 1800 seconds
(30 minutes).
If wireless station authentication is done using a RADIUS server,
the reauthentication timer on the RADIUS server has priority.
Idle Timeout
The WR1500 Wireless Router automatically disconnects a wireless station from the wired
network after a period of inactivity. The wireless station needs to enter the username and
password again before access to the wired network is allowed.
This field is activated only when you select Authentication Required in the Wireless Port
Control field. The default time interval is 3600 seconds (or 1 hour).
Table continued on next page.
®
WR1500 4-Port Wireless DSL/Cable Router
7.9
Configuring 802.1 x - Continued
LABEL
Authentication
Databases
DESCRIPTION
This field is activated only when you select Authentication Required in the Wireless Port
Control field.
The authentication database contains wireless station login information. The local user
database is the built-in database on the WR1500 Wireless Router. The RADIUS is an external
server. Use this drop-down list box to select which database the WR1500 Wireless Router
should use (first) to authenticate a wireless station.
Before you specify the priority, make sure you have set up the corresponding database
correctly first.
Select Local User Database Only to have the WR1500 Wireless Router just check the builtin user database on the WR1500 Wireless Router for a wireless station’s username and
password.
Select RADIUS Only to have the WR1500 Wireless Router just check the user database on the
specified RADIUS server for a wireless station’s username and password.
Select Local first, then RADIUS to have the WR1500 Wireless Router first check the user
database on the WR1500 Wireless Router for a wireless station’s username and password. If
the user name is not found, the WR1500 Wireless Router then checks the user database on
the specified RADIUS server.
Select RADIUS first, then Local to have the WR1500 Wireless Router first check the user
database on the specified RADIUS server for a wireless station’s username and password. If
the WR1500 Wireless Router cannot reach the RADIUS server, the WR1500 Wireless Router
then checks the local user database on the WR1500 Wireless Router. When the user name
is not found or password does not match in the RADIUS server, the WR1500 Wireless Router
will not check the local user database and the authentication fails.
Dynamic WEP
Key Exchange
This field is activated only when you select Authentication Required in the Wireless Port
Control field. Also set the Authentication Databases field to RADIUS Only. Local user
database may not be used.
Select Disable to allow wireless stations to communicate with the Wireless Routers without
using dynamic WEP key exchange.
Select 64-bit WEP or 128-bit WEP to enable data encryption.
Up to 32 stations can access the WR1500 Wireless Router when you configure dynamic WEP
key exchange.
Apply
Click Apply to save your changes back to the WR1500 Wireless Router.
Reset
Click Reset to reload the previous configuration for this screen.
Once you enable user authentication, you need to specify an external RADIUS server or
create local user accounts on the WR1500 Wireless Router for authentication.
®
WR1500 4-Port Wireless DSL/Cable Router
7.10 Configuring Local User Database
To change your WR1500 Wireless Router’s local user database, click ADVANCED,
WIRELESS and then the Local User Database tab. The screen appears as shown
(some of the screen’s blank rows are not shown).
The descriptions for the settings in this screen are described on the next page.
®
WR1500 4-Port Wireless DSL/Cable Router
7.10 Configuring Local User Database - Continued
The following table describes the labels in the screen shown on the preceding page.
LABEL
DESCRIPTION
Active
Select this option to activate the user profile.
User Name
Enter the username (up to 31 characters) for this user profile.
Password
Type a password (up to 31 characters) for this user profile. Note that as you type a
password, the screen displays a (*) for each character you type.
Apply
Click Apply to save your changes back to the WR1500 Wireless Router.
Reset
Click Reset to reload the previous configuration for this screen.
7.11 Configuring RADIUS
Use RADIUS if you want to authenticate wireless users using an external server.
To specify a RADIUS server, click ADVANCED, WIRELESS and then the RADIUS tab.
The screen appears as shown below.
The descriptions for the labels in the screen above are shown on the next page.
®
WR1500 4-Port Wireless DSL/Cable Router
7.11 Configuring RADIUS - Continued
The following table describes the labels in this screen on the preceding page.
LABEL
DESCRIPTION
Authentication Server
Active
Select Yes from the drop down list box to enable user authentication through an
external authentication server.
Server IP Address
Enter the IP address of the external authentication server in dotted decimal
notation.
Port Number
Enter the port number of the external authentication server. The default port number
is 1812. You need not change this value unless your network administrator instructs
you to do so with additional information.
Shared Secret
Enter a password (up to 31 alphanumeric characters) as the key to be shared
between the external authentication server and the WR1500 Wireless Router.
The key must be the same on the external authentication server and your WR1500
Wireless Router. The key is not sent over the network.
Accounting Server
Active
Select Yes from the drop down list box to enable user accounting through an
external authentication server.
Server IP Address
Enter the IP address of the external accounting server in dotted decimal notation.
Port Number
Enter the port number of the external accounting server. The default port number is
1813. You need not change this value unless your network administrator instructs you
to do so with additional information.
Shared Secret
Enter a password (up to 31 alphanumeric characters) as the key to be shared
between the external accounting server and the WR1500 Wireless Router.
The key must be the same on the external accounting server and your WR1500
Wireless Router. The key is not sent over the network.
Apply
Click Apply to save your changes back to the WR1500 Wireless Router.
Reset
Click Reset to reload the previous configuration for this screen.
®
WR1500 4-Port Wireless DSL/Cable Router
Part III
WAN’s - Wide Area Networks
This part discusses Wide Area Network (WAN)
Setup Screens
®
WR1500 4-Port Wireless DSL/Cable Router
Chapter 8:
WAN Configuration Screens
This chapter describes how to configure the WR1500 Wireless Router WAN screens.
8.1
WAN Overview
A WAN (Wide Area Network) is an outside connection to another network or the Internet.
See the Wizard Setup chapter for more background information on most fields in the WAN
screens.
Background information on WAN fields not included in the Wizard is described here.
8.2
Configuring WAN ISP
To change your WR1500 Wireless Router’s WAN ISP settings, click ADVANCED, WAN and
then the ISP tab. The screen differs by the encapsulation.
8.2.1 Ethernet Encapsulation
The screen shown next is for Ethernet encapsulation.
The descriptions for the labels in the screen above are shown on the next page.
®
WR1500 4-Port Wireless DSL/Cable Router
8.2.1 Ethernet Encapsulation - Continued
The following table describes the labels on the screen on the preceding page.
Ethernet Encapsulation
LABEL
DESCRIPTION
Encapsulation
You must choose the Ethernet option when the WAN port is used as a regular
Ethernet.
Service Type
Select from Standard, RR-Toshiba (RoadRunner Toshiba authentication method),
RR-Manager (Roadrunner Manager authentication method), RR-Telstra or Telia
Login. Choose a Roadrunner service type if your ISP is Time Warner’s Roadrunner;
otherwise choose Standard.
Apply
Click Apply to save your changes back to the WR1500 Wireless Router.
Reset
Click Reset to begin configuring this screen afresh.
Service Type
The screen varies according to the service type you select. You need a username and
password if your ISP is Time Warner’s Roadrunner.
The descriptions for the labels in the screen above are shown on the next page.
®
WR1500 4-Port Wireless DSL/Cable Router
8.2.1 Ethernet Encapsulation Service Type - Continued
The following table describes the labels on the screen on the preceding page.
LABEL
DESCRIPTION
Encapsulation
You must choose the Ethernet option when the WAN port is used as a regular
Ethernet.
Service Type
Select from Standard, RR-Toshiba (RoadRunner Toshiba authentication method),
RR-Manager (Roadrunner Manager authentication method) RR-Telstra or Telia
Login. Choose a Roadrunner service type if your ISP is Time Warner’s Roadrunner;
otherwise choose Standard.
User Name
Enter the username given to you by your ISP.
Password
Enter the password associated with the login name above.
Retype to
Confirm
Type your password again here to ensure that what you entered in the Password
field above was what you intended.
Login Server IP
Address
The WR1500 Wireless Router will find the Roadrunner Server IP address if this
field is left blank. If it does not, then you must enter the authentication server IP
address.
Login Server (Telia
Login only)
Type the domain name of the Telia login server, for example “logini .telia.com”.
This field is not available on all models.
Relogin Every(min) The Telia server logs the WR1500 Wireless Router out if the WR1500 Wireless
(Telia Login only)
Router does not log in periodically. Type the number of minutes from 1 to 59 (30
recommended) for the WR1500 Wireless Router to wait between logins.
This field is not available on all models.
Apply
Click Apply to save your changes back to the WR1500 Wireless Router.
Reset
Click Reset to begin configuring this screen afresh.
8.2.2 PPPoE Encapsulation
PPPoE (Point-to-Point Protocol over Ethernet) is an IETF Draft standard (RFC 2516) specifying
how a personal computer (PC) interacts with a broadband modem (DSL, cable, wireless, etc.)
connection. The PPP over Ethernet option is for a dial-up connection using PPPoE.
The screen shown on the next page is for PPP over Ethernet encapsulation.
®
WR1500 4-Port Wireless DSL/Cable Router
8.2.2 PPPoE Encapsulation - Continued
The following table describes the labels in this screen.
LABEL
DESCRIPTION
ISP Parameters for Internet Access
Encapsulation
The PPP over Ethernet choice is for a dial-up connection using PPPoE. The WR1500
Wireless Router supports PPPoE (Point-to-Point Protocol over Ethernet).
Service Name
Type the PPPoE service name provided to you. PPPoE uses a service name to
identify and reach the PPPoE server.
User Name
Type the username given to you by your ISP.
Password
Type the password associated with the user name above.
Retype to Confirm
Type your password again here to ensure that what you entered in the Password
field above was what you intended.
Nailed Up
Connection
Select Nailed Up Connection if you do not want the connection to time out.
Idle Timeout
Specify the time in seconds that elapses before the WR1500 Wireless
Router automatically disconnects from the PPPoE server.
Apply
Click Apply to save your changes back to the WR1500 Wireless Router.
Reset
Click Reset to begin configuring this screen afresh.
®
WR1500 4-Port Wireless DSL/Cable Router
8.2.3 PPTP Encapsulation
Point-to-Point Tunneling Protocol (PPTP) is a network protocol that enables secure transfer of
data from a remote client to a private server, creating a Virtual Private Network (VPN) using
TCP/IP-based networks.
PPTP supports on-demand, multi-protocol and virtual private networking over public networks,
such as the Internet.
The screen shown below is for PPTP encapsulation.
The descriptions for the labels in the screen above are shown on the next page.
®
WR1500 4-Port Wireless DSL/Cable Router
8.2.3 PPTP Encapsulation - Continued
The following table describes the labels on the screen on the preceding page.
LABEL
DESCRIPTION
ISP Parameters for Internet Access
Encapsulation
PPTP supports on-demand, multi-protocol, and virtual private networking over
public networks, such as the Internet. The WR1500 Wireless Router supports only
one PPTP server connection at any given time. To configure a PPTP client, you
must configure the My Login and Password fields for a PPP connection and the
PPTP parameters for a PPTP connection.
User Name
Type the user name given to you by your ISP.
Password
Type the password associated with the user name above.
Retype to Confirm
Type your password again here to ensure that what you entered in the Password
field above was what you intended.
Nailed-up
Connection
Select Nailed Up Connection if you do not want the connection to time out.
Idle Timeout
Specify the time in seconds that elapses before the WR1500 Wireless
Router automatically disconnects from the PPTP server.
PPTP Configuration
My IP Address
Type the (static) IP address assigned to you by your ISP.
My IP Subnet Mask
Type the subnet mask assigned to you by your ISP (if given).
Server IP Address
Type the IP address of the PPTP server.
Connection ID/Name
Type your identification name for the PPTP server.
Apply
Click Apply to save your changes back to the WR1500 Wireless Router.
Reset
Click Reset to begin configuring this screen afresh.
8.3
TCP/IP Priority (Metric)
The metric represents the “cost of transmission”. A router determines the best route for
transmission by choosing a path with the lowest “cost”. RIP routing uses hop count as the
measurement of cost, with a minimum of “ 1” for directly connected networks. The number
must be between “ 1” and “ 15”; a number greater than “15” means the link is down. The
smaller the number, the lower the “cost”.
The metric sets the priority for the WR1500 Wireless Router’s routes to the Internet, if any
two of the default routes have the same metric.
®
WR1500 4-Port Wireless DSL/Cable Router
8.4
Configuring WAN IP
To change your WR1500 Wireless Router’s WAN IP settings, click ADVANCED, WAN and then
the IP tab.
The table on the following page describes the labels in this screen.
LABEL
DESCRIPTION
WAN IP Address Assignment
Get automatically from ISP option
Select this selection if your ISP did not assign you a fixed IP address.
This is the default
®
WR1500 4-Port Wireless DSL/Cable Router
8.4
Configuring WAN IP - Continued
The following table describes the labels on the screen on the preceding page.
LABEL
DESCRIPTION
WAN IP Address Assignment
Get automatically from ISP
option
Select this selection if your ISP did not assign you a fixed IP address. This is the
default
Use fixed IP address
Select this option If the ISP assigned a fixed IP address.
My WAN IP Address
Enter the WR1500 Wireless Router WAN IP address in this field if you selected
Use Fixed IP Address.
My WAN IP Subnet Mask
(Ethernet encapsulation)
Enter the WR1500 Wireless Router WAN IP subnet mask (if your ISP gave
you one) in this field if you selected Use Fixed IP Address.
Remote IP Address (or Gateway
IP Address)
Type the IP address of the remote network or gateway. The gateway is an
immediate neighbor of your WR1500 Wireless Router that will forward the packet
to the destination. On the LAN, the gateway must be a router on the same
segment as your WR1500 Wireless Router; over the WAN, the gateway must be
the IP address of one of the remote nodes.
Remote IP Subnet Mask (PPPoE When using a LAN to LAN application, type the IP subnet mask of the
and PPTP encapsulation)
destination network. If you need to specify a route to a single host, use a
subnet mask of 255.255.255.255, in the subnet mask field, to force the
network number to be identical to the host ID.
Network Address Translation
Network Address Translation (NAT) allows the translation of an Internet protocol
address used within one network to a different IP address known within another
network.
SUA (Single User Account) is a subset of NAT that supports two types of
mapping: Many-to-One and Server. When you select this option the WR1500
Wireless Router will use Address Mapping Set 255 in the SMT.
Choose SUA Only if you have just one public WAN IP address for your
WR1500 Wireless Router. Choose Full Feature if you have multiple public
WAN IP addresses for your WR1500 Wireless Router. For more information
about NAT refer to the MAT chapter in this User’s Guide.
Metric (PPPoE and PPTP only)
Type a number that approximates the cost for this link. Metric represents the
“cost” of transmission for routing purposes. IP routing uses hop count as the
measurement of cost, with a minimum of 1 for directly connected networks. The
number need not be precise, but it must be between 1 and 15. In practice, 2 or 3
is usually a good number.
Private (PPPoE and PPTP
only)
This parameter determines if the WR1500 Wireless Router will include the
route to this remote node in its RIP broadcasts. If select Yes, this route is kept
private and not included in RIP broadcast. If select No, the route to this remote
node will be propagated to other hosts through RIP broadcasts.
Continued Next Page
®
WR1500 4-Port Wireless DSL/Cable Router
8.4
Configuring WAN IP - Continued
The following table describes the labels on the screen on the preceding pages.
LABEL
RIP Direction
DESCRIPTION
RIP (Routing Information Protocol) allows a router to exchange routing information with other
routers. The RIP Direction field controls the sending and receiving of RIP packets.
Choose Both, None, In Only or Out Only. When set to Both or Out Only, the WR1500
Wireless Router will broadcast its routing table periodically.
When set to Both or In Only, the WR1500 Wireless Router will incorporate RIP information
that it receives.
When set to None, the WR1500 Wireless Router will not send any RIP packets and will ignore
any RIP packets received.
By default, RIP Direction is set to Both.
RIP Version
The RIP Version field controls the format and the broadcasting method of the RIP packets that
the WR1500 Wireless Router sends (it recognizes both formats when receiving).
Choose RIP-1, RIP-2B or RIP-2M.
RIP-1 is universally supported; but RIP-2 carries more information. RIP-1 is probably adequate
for most networks, unless you have an unusual network topology. Both RIP-2B and RIP2M sends the routing data in RIP-2 format; the difference being that RIP-2B uses subnet
broadcasting while RIP-2M uses multicasting. Multicasting can reduce the load on non-router
machines since they generally do not listen to the RIP multicast address and so will not
receive the RIP packets. However, if one router uses multicasting, then all routers on your
network must use multicasting, also. By default, the RIP Version field is set to RIP-1.
Choose None (default), IGMP-V1 or IGMP-V2. IGMP (Internet Group Multicast Protocol) is
a session-layer protocol used to establish membership in a Multicast group - it is not used to
carry user data. IGMP version 2 (RFC 2236) is an improvement over version 1 (RFC 1112) but
IGMP version 1 is still in wide use. If you would like to read more detailed information about
interoperability between IGMP version 2 and version 1, please see sections 4 and 5 of RFC
2236.
Windows Networking (NetBIOS over TCP/IP): NetBIOS (Network Basic Input/Output System) are TCP or UDP
broadcast packets that enable a computer to connect to and communicate with a LAN. For some dial-up services
such as PPPoE or PPTP, NetBIOS packets cause unwanted calls.
Multicast
Allow From WAN
to LAN
Select this option to forward NetBIOS packets from the WAN port to the LAN port.
Allow Trigger Dial
Select this option to allow NetBIOS packets to initiate calls.
Apply
Click Apply to save your changes back to the WR1500 Wireless Router.
Reset
Click Reset to begin configuring this screen afresh.
®
WR1500 4-Port Wireless DSL/Cable Router
8.5
Configuring WAN MAC
To change your WR1500 Wireless Router’s WAN MAC settings, click ADVANCED, WAN and
then the MAC tab. The screen appears as shown.
The MAC address screen allows users to configure the WAN port’s MAC address by either
using the factory default or cloning the MAC address from a computer on your LAN.
Choose Factory Default to select the factory assigned default MAC address.
®
WR1500 4-Port Wireless DSL/Cable Router
Part IV
SUA (Single User Account)/
NAT (Network Address
Translation) and STATIC ROUTE
This part covers the information about SUA/NAT
and Static Route setup.
®
WR1500 4-Port Wireless DSL/Cable Router
Chapter 9:
Single User Account (SUA) /
Network Address Translation (NAT)
This chapter discusses how to configure SUA/NAT on the WR1500 Wireless Router.
9.1
NAT Overview
NAT (Network Address Translation - NAT, RFC 1631) is the translation of the IP address of
a host in a packet. For example, the source address of an outgoing packet, used within one
network is changed to a different IP address known within another network.
9.1.1 NAT Definitions
Inside/outside denotes where a host is located relative to the WR1500 Wireless Router For
example, the computers of your subscribers are the inside hosts, while the web servers on the
Internet are the outside hosts.
Global/local denotes the IP address of a host in a packet as the packet traverses a router. For
example, the local address refers to the IP address of a host when the packet is in the local
network, while the global address refers to the IP address of the host when the same packet is
traveling in the WAN side.
Note that inside/outside refers to the location of a host, while global/local refers to the IP
address of a host used in a packet. Thus, an inside local address (ILA) is the IP address of
an inside host in a packet when the packet is still in the local network, while an inside global
address (IGA) is the IP address of the same inside host when the packet is on the WAN side.
The following table summarizes this information.
TERM
DESCRIPTION
Inside
This refers to the host on the LAN.
Outside
This refers to the host on the WAN.
Local
This refers to the packet address (source or destination) as the packet travels on the LAN.
Global
This refers to the packet address (source or destination) as the packet travels on the WAN.
NAT never changes the IP address (either local or global) of an outside host.
®
WR1500 4-Port Wireless DSL/Cable Router
9.1
9.1.2
NAT Overview - Continued
What NAT Does
In the simplest form, NAT changes the source IP address in a packet received from a subscriber
(the inside local address) to another (the inside global address) before forwarding the packet
to the WAN side. When the response comes back, NAT translates the destination address (the
inside global address) back to the inside local address before forwarding it to the original inside
host. Note that the IP address (either local or global) of an outside host is never changed.
The global IP addresses for the inside hosts can be either static or dynamically assigned by
the ISP. In addition, you can designate servers (for example a web server and a telnet server)
on your local network and make them accessible to the outside world. Although you can make
designated servers on the LAN accessible to the outside world, it is strongly recommended that
you attach those servers to the DMZ port instead. If you do not define any servers (for Many-toOne and Many-to-Many Overload mapping), NAT offers the additional benefit of firewall
protection. With no servers defined, your WR1500 Wireless Router filters out all incoming
inquiries, thus preventing intruders from probing your network. For more information on IP
address translation, refer to RFC 1631, The IP Network Address Translator (NAT).
9.1.3
How NAT Works
Each packet has two addresses - a source address and a destination address. For outgoing
packets, the ILA (Inside Local Address) is the source address on the LAN, and the IGA (Inside
Global Address) is the source address on the WAN. For incoming packets, the ILA is the
destination address on the LAN, and the IGA is the destination address on the WAN. NAT
maps private (local) IP addresses to globally unique ones required for communication with
hosts on other networks. It replaces the original IP source address (and TCP or UDP source
port numbers for Many-to-One and Many-to-Many Overload NAT mapping) in each packet and
then forwards it to the Internet. The WR1500 Wireless Router keeps track of the original
addresses and port numbers so incoming reply packets can have their original values restored.
The following figure illustrates this.
®
WR1500 4-Port Wireless DSL/Cable Router
9.1
NAT Overview - Continued
9.1.4 NAT Application
The following figure illustrates a possible NAT application, where three inside LANs (logical
LANs using IP Alias) behind the WR1500 Wireless Router can communicate with three
distinct WAN networks. More examples follow at the end of this chapter.
®
WR1500 4-Port Wireless DSL/Cable Router
9.1
NAT Overview - Continued
9.1.5 NAT Mapping Types
NAT supports five types of IP/port mapping. They are:
> One to One: In One-to-One mode, the WR1500 Wireless Router maps one local IP address
to one global IP address.
> Many to One: In Many-to-One mode, the WR1500 Wireless Router maps multiple local
IP addresses to one global IP address. This is equivalent to SUA (i.e., PAT, port address
translation), ParkerVision’s Single User Account feature (the SUA Only option).
> Many to Many Overload: In Many-to-Many Overload mode, the WR1500 Wireless Router
maps the multiple local IP addresses to shared global IP addresses.
> Many One to One: In Many-One-to-One mode, the WR1500 Wireless Router maps each
local IP address to a unique global IP address.
> Server: This type allows you to specify inside servers of different services behind the NAT
to be accessible to the outside world.
Port numbers do not change for One-to-One and Many-One-to-One NAT mapping types.
The following table summarizes these types.
TYPE
IP MAPPING
SMT ABBREVIATION
One-to-One
ILA1 < > IGA1
1-1
Many-to-One (SUA/PAT)
ILA1 < > IGA1
ILA2 < > IGA1
M-1
Many-to-Many Overload
ILA1 < > IGA1
ILA2 < > IGA2
ILA3 < > IGA1
ILA4 < > IGA2
M-MOv
Many-One-to-One
ILA1 < > IGA1
ILA2< > IGA2
ILA3< > IGA3
M-1-1
Server 1 IP< > IGA1
Server 2 IP< > IGA1
Server 3 IP< > IGA1
Server
Server
®
WR1500 4-Port Wireless DSL/Cable Router
9.1
NAT Overview - Continued
9.1.6 SUA (Single User Account) Versus NAT
SUA (Single User Account) is a ParkerVision implementation of a subset of NAT that supports
two types of mapping, Many-to-One and Server. The WR1500 Wireless Router also supports
Full Feature NAT to map multiple global IP addresses to multiple private LAN IP addresses of
clients or servers using mapping types. Select either SUA Only or Full Feature in WAN IP.
9.2
SUA Server
An SUA server set is a list of inside (behind NAT on the LAN) servers, for example, web or
FTP, that you can make visible to the outside world even though SUA makes your whole
inside network appear as a single computer to the outside world.
You may enter a single port number or a range of port numbers to be forwarded, and the local
IP address of the desired server. The port number identifies a service; for example, web service
is on port 80 and FTP on port 21. In some cases, such as for unknown services or where one
server can support more than one service (for example both FTP and web service), it might be
better to specify a range of port numbers. You can allocate a server IP address that corresponds
to a port or a range of ports.
Many residential broadband ISP accounts do not allow you to run any server processes (such
as a Web or FTP server) from your location. Your ISP may periodically check for servers and
may suspend your account if it discovers any active services at your location. If you are unsure,
refer to your ISP.
Default Server IP Address
In addition to the servers for specified services, NAT supports a default server IP address.
A default server receives packets from ports that are not specified in this screen.
If you do not assign a Default Server IP Address, then all packets received for ports
not specified in this screen will be discarded.
9.2.1 Port Forwarding: Services and Port Numbers
In addition to the servers for specified services, NAT supports a default server. A service
request that does not have a server explicitly designated for it is forwarded to the default
server. If the default server is not defined, the service request is simply discarded.
Many residential broadband ISP accounts do not allow you to run any server
processes (such as a Web or FTP server) from your location. Your ISP may
periodically check for servers and may suspend your account if it discovers any
active services at your location. If you are unsure, refer to your ISP.
The most often used port numbers are shown in the table on the following page.
®
WR1500 4-Port Wireless DSL/Cable Router
9.2.1 Port Forwarding: Services and Port Numbers - Continued
Services and Port Numbers
SERVICES
PORT NUMBER
ECHO
7
FTP (File Transfer Protocol)
21
SMTP (Simple Mail Transfer Protocol)
25
DNS (Domain Name System)
53
Finger
79
HTTP (Hyper Text Transfer protocol or WWW, Web)
80
P0P3 (Post Office Protocol)
110
NNTP (Network News Transport Protocol)
119
SNMP (Simple Network Management Protocol)
161
SNMP trap
162
PPTP (Point-to-Point Tunneling Protocol)
1723
9.2.2 Configuring Servers Behind SUA (Example)
Let’s say you want to assign ports 22-25 to one server, port 80 to another and assign a default
server IP address of 192.168.1.35 as shown in the figure below.
The NAT network appears as a single host on the Internet
®
WR1500 4-Port Wireless DSL/Cable Router
9.3 Configuring SUA Server
If you do not assign a Default Server IP address, then all packets received for ports
not specified in this screen will be discarded.
Click ADVANCED and then SU A/NAT to open the SUA Server screen. Refer to the table in the
previous section for port numbers commonly used for particular services.
The table below describes the settings in this screen.
LABEL
DESCRIPTION
Default Server
In addition to the servers for specified services, NAT supports a default server. A default
server receives packets from ports that are not specified in this screen. If you do not
assign a default server IP address, then all packets received for ports not specified in this
screen will be discarded.
#
This field displays the number of an individual SUA server entry.
Active
Select this check box to enable the SUA server entry. Clear this checkbox to disallow
forwarding of these ports to an inside server without having to delete the entry.
Name
Enter a name to identify this port-forwarding rule.
Start Port
End Port
Enter a port number here.
To forward only one port, enter the port number in the Start Port field and then type it
again in the End Port field.
To specify a range of ports, enter the start port number in the Start Port field and the
last port to be forwarded in the End Port field.
Server IP
Address
Apply
Enter the inside IP address of the server here.
Click Apply to save your changes back to the WR1500 Wireless Router.
Reset
Click Reset to begin configuring this screen afresh.
®
WR1500 4-Port Wireless DSL/Cable Router
9.4
Configuring Address Mapping
Ordering your rules is important because the WR1500 Wireless Router applies the rules in the
order that you specify. When a rule matches the current packet, the WR1500 Wireless Router
takes the corresponding action and the remaining rules are ignored. If there are any empty rules
before your new configured rule, your configured rule will be pushed up by that number of empty
rules. For example, if you have already configured rules 1 to 6 in your current set and now you
configure rule number 9. In the set summary screen, the new rule will be rule 7, not 9. Now if
you delete rule 4, rules 5 to 7 will be pushed up by 1 rule, so old rules 5,6 and 7 become new
rules 4, 5 and 6.
To change your WR1500 Wireless Router’s address mapping settings, click ADVANCED, SUA/
NAT and then the Address Mapping tab. The screen appears as shown.
The table below describes the setting in the above screen.
LABEL
DESCRIPTION
#
This field displays the index number of the address mapping rule.
Local Start IP
This refers to the Inside Local Address (ILA), that is the starting local IP address. Local IP
addresses are N/A for Server port mapping.
Local End IP
This is the end local IP address. If the rule is for all local IP addresses, then this field
displays 0.0.0.0 and 255.255.255.255 as the Local End IP address. This field is N/A for
One-to-One and Server mapping types.
Global Start IP
This refers to the global IP address. 0.0.0.0 is for a dynamic IP address from your ISP
with Many-to-One and Server mapping types.
Global End IP
This is the ending Inside Global Address (IGA), that is the starting global IP address.
This field is N/A for One-to-One, Many-to-One and Server mapping types.
Type
Choose the port mapping type from the drop down list.
Insert
Click Insert to insert a new mapping rule before an existing one.
Edit
Click Edit to go to the Address Mapping Rule screen.
Delete
Click Delete to delete an address mapping rule.
®
WR1500 4-Port Wireless DSL/Cable Router
9.4.1 Configuring Address Mapping Rule
To edit an address mapping rule, click the Edit button to display the screen shown next.
The following table describes the labels in this screen.
LABEL
DESCRIPTION
Type
Choose the port mapping type from the drop down list.
Local Start IP
This is the starting local IP address (ILA). Local IP addresses are N/A for Server port
mapping.
Local End IP
This is the end local IP address (ILA). If your rule is for all local IP addresses, then
enter 0.0.0.0 as the Local Start IP address and 255.255.255.255 as the Local End
IP address.
This field is N/A for One-to-One and Server mapping types.
Global Start IP
This is the starting global IP address (IGA). Enter 0.0.0.0 here if you have a dynamic IP
address from your ISP.
Global End IP
This is the ending global IP address (IGA). This field is N/A for One-to-One, Many-toOne and Server mapping types.
Apply
Click Apply to save your changes back to the WR1500 Wireless Router.
Cancel
Click Cancel to exit this screen without saving.
®
WR1500 4-Port Wireless DSL/Cable Router
Chapter 10:
Static Route
This chapter shows you how to configure static routes for your WR1500 Wireless Router.
10.1 Static Route Overview
Each remote node specifies only the network to which the gateway is directly connected,
and the WR1500 Wireless Router has no knowledge of the networks beyond. For instance,
the WR1500 Wireless Router knows about network N2 in the following figure through remote
node Router 1. However, the WR1500 Wireless Router is unable to route a packet to network
N3 because it doesn’t know that there is a route through the same remote node Router 1 (via
gateway Router 2). The static routes are for you to tell the WR1500 Wireless Router about the
networks beyond the remote nodes.
®
WR1500 4-Port Wireless DSL/Cable Router
10.2 Configuring IP Static Route
Click ADVANCED and then STATIC ROUTE to open the screen shown next.
The following table describes the labels in this screen.
IP Static Route Summary
LABEL
DESCRIPTION
#
This field displays an individual static route index number.
Name
This field displays the name that describes or identifies this route.
Active
This field shows whether this static route is active (Yes) or not (No).
Destination
This parameter specifies the IP network address of the final destination. Routing is
always based on network number.
Gateway
This field displays the IP address of the gateway. The gateway is an immediate
neighbor of your WR1500 Wireless Router that will forward the packet to the destination.
On the LAN, the gateway must be a router on the same segment as your WR1500
Wireless Router; over the WAN, the gateway must be the IP address of one of the
remote nodes.
Edit
To set up a static route on the WR1500 Wireless Router, click the radio button next
to the static route index number you want to configure, then click Edit to go to the
Static Route -Edit screen.
Delete
To remove a static route on the WR1500 Wireless Router, click the radio button next to the
static route index number you want to remove, then click Delete.
®
WR1500 4-Port Wireless DSL/Cable Router
10.2.1 Configuring Route Entry
Select a static route index number and click Edit. The screen shown next appears. Fill in the
required information for each static route.
The following table describes the labels in this screen.
Edit IP Static Route
LABEL
DESCRIPTION
Route Name
Enter a descriptive name for this route. This is for identification purposes only.
Active
Select this check box to activate this static route.
Destination IP
Address
Type the IP network address of the final destination. Routing is always based on network
number. If you need to specify a route to a single host, use a subnet mask of 255.255.255.255 in
the subnet mask field to force the network number to be identical to the host ID.
IP Subnet Mask
Type the IP subnet mask here.
Gateway IP
Address
Type the IP address of the gateway. The gateway is an immediate neighbor of your WR1500
Wireless Router that will forward the packet to the destination. On the LAN, the gateway must be
a router on the same segment as your WR1500 Wireless Router; over the WAN, the gateway
must be the IP address of one of the remote nodes.
Metric
Type a number that approximates the cost for this link. Metric represents the “cost” of
transmission for routing purposes. IP routing uses hop count as the measurement of cost, with
a minimum of 1 for directly connected networks. The number need not be precise, but it must be
between 1 and 15. In practice, 2 or 3 is usually a good number.
Private
This parameter determines if the WR1500 Wireless Router will include the route to this remote
node in its RIP broadcasts. If this check box is selected, this route is kept private and not included
in RIP broadcast. If it is not selected, the route to this remote node will be propagated to other
hosts through RIP broadcasts.
Apply
Click Apply to save your changes back to the WR1500 Wireless Router.
Cancel
Click Cancel to exit this screen without saving.
®
WR1500 4-Port Wireless DSL/Cable Router
Part V
Firewall and Remote
Management
This part introduces firewalls in general and the WR1500
Wireless Router firewall.
It also explains custom ports and gives example firewall
rules and information on Remote Management.
®
WR1500 4-Port Wireless DSL/Cable Router
Chapter 11:
Introduction to Firewalls
This chapter gives some background information on firewalls and
introduces the WR1500 Wireless Router firewall.
11.1
Firewall Overview
Originally, the term Firewall referred to a construction technique designed to prevent the
spread of fire from one room to another. The networking term “firewall” is a system or group of
systems that enforces an access-control policy between two networks. It may also be defined
as a mechanism used to protect a trusted network from an untrusted network. Of course,
firewalls cannot solve every security problem. A firewall is one of the mechanisms used to
establish a network security perimeter in support of a network security policy. It should never be
the only mechanism or method employed. For a firewall to guard effectively, you must design
and deploy it appropriately. This requires integrating the firewall into a broad informationsecurity policy. In addition, specific policies must be implemented within the firewall itself.
11.2
Types of Firewalls
There are three main types of firewalls:
1. Packet Filtering Firewalls
2. Application-level Firewalls
3. Stateful Inspection Firewalls
11.2.1 Packet Filtering Firewalls
Packet filtering firewalls restrict access based on the source/destination computer network
address of a packet and the type of application.
11.2.2 Application-level Firewalls
Application-level firewalls restrict access by serving as proxies for external servers. Since they
use programs written for specific Internet services, such as HTTP, FTP and telnet, they can
evaluate network packets for valid application-specific data. Application-level gateways have a
number of general advantages over the default mode of permitting application traffic directly to
internal hosts:
i. Information hiding prevents the names of internal systems from being made known via DNS
to outside systems, since the application gateway is the only host whose name must be made
known to outside systems.
ii. Robust authentication and logging pre-authenticates application traffic before it reaches
internal hosts and causes it to be logged more effectively than if it were logged with standard
host logging. Filtering rules at the packet filtering router can be less complex than they would be
if the router needed to filter application traffic and direct it to a number of specific systems.
The router need only allow application traffic destined for the application gateway and reject
the rest.
®
WR1500 4-Port Wireless DSL/Cable Router
11.2.3 Stateful Inspection Firewalls
Stateful inspection firewalls restrict access by screening data packets against defined access
rules. They make access control decisions based on IP address and protocol. They also
“inspect” the session data to assure the integrity of the connection and to adapt to dynamic
protocols. These firewalls generally provide the best speed and transparency; however, they
may lack the granular application level access control or caching that some proxies support.
See section 11.5 for more information on Stateful Inspection.
Firewalls, of one type or another, have become an integral part of standard security solutions
for enterprises.
11.3
Introduction to ParkerVision’s Firewall
The WR1500 Wireless Router firewall is a stateful inspection firewall and is designed to
protect against Denial of Service attacks when activated (in SMT menu 21.2 or in the Web
Configuration Utility). The WR1500 Wireless Router’s purpose is to allow a private Local Area
Network (LAN) to be securely connected to the Internet. The WR1500 Wireless Router can be
used to prevent theft, destruction and modification of data, as well as log events, which may
be important to the security of your network. The WR1500 Wireless Router also has packetfiltering capabilities.
11.4
Denial of Service
Denials of Service (DoS) attacks are aimed at devices and networks with a connection to the
Internet. Their goal is not to steal information, but to disable a device or network so users no
longer have access to network resources. The WR1500 Wireless Router is pre-configured to
automatically detect and thwart all known DoS attacks.
®
WR1500 4-Port Wireless DSL/Cable Router
11.4.1 Basics
Computers share information over the Internet using a common language called TCP/IP.
TCP/IP, in turn, is a set of application protocols that perform specific functions. An “extension
number”, called the “TCP port” or “UDP port” identifies these protocols, such as HTTP (Web),
FTP (File Transfer Protocol), POP3 (E-mail), etc. For example, Web traffic by default uses
TCP port 80.
When computers communicate on the Internet, they are using the client/server model, where
the server “listens” on a specific TCP/UDP port for information requests from remote client
computers on the network. For example, a Web server typically listens on port 80. Please note
that while a computer may be intended for use over a single port, such as Web on port 80,
other ports are also active. If the person configuring or managing the computer is not careful,
a hacker could attack it over an unprotected port.
Some of the most common IP ports are:
11.4.2 Types of DoS Attacks
There are four types of DoS attacks:
1.
2.
3.
4.
Those that exploit bugs in a TCP/IP implementation.
Those that exploit weaknesses in the TCP/IP specification.
Brute-force attacks that flood a network with useless data.
IP Spoofing.
1. “Ping of Death” and “Teardrop” attacks exploit bugs in the TCP/IP implementations of
various
computer and host systems.
1-a Ping of Death uses a “ping” utility to create an IP packet that exceeds the maximum
65,536 bytes of data allowed by the IP specification. The oversize packet is then sent to
an unsuspecting system. Systems may crash, hang or reboot.
1-b Teardrop attack exploits weaknesses in the reassembly of IP packet fragments.
As data is transmitted through a network, IP packets are often broken up into smaller
chunks. Each fragment looks like the original IP packet except that it contains an offset
field that says, for instance, “This fragment is carrying bytes 200 through 400 of the
original (non fragmented) IP packet.” The Teardrop program creates a series of IP
fragments with overlapping offset fields. When these fragments are reassembled at the
destination, some systems will crash, hang, or reboot.
2. Weaknesses in the TCP/IP specification leave it open to “SYN Flood” and “LAND” attacks.
These attacks are executed during the handshake that initiates a communication session
between two applications.
®
WR1500 4-Port Wireless DSL/Cable Router
11.4.2 Types of DoS Attacks - Continued
Under normal circumstances, the application that initiates a
session sends a SYN (synchronize) packet to the receiving
server. The receiver sends back an ACK (acknowledgment)
packet and its own SYN, and then the initiator responds
with an ACK (acknowledgment). After this handshake, a
connection is established.
2. a) A SYN Attack floods a targeted system with a series
of SYN packets. Each packet causes the targeted system
to issue a SYN-ACK response. While the targeted system
waits for the ACK that follows the SYN-ACK, it queues up
all outstanding SYN-ACK responses on what is known as
a backlog queue. SYN-ACKs are moved off the queue only
when an ACK comes back or when an internal timer (which
is set at relatively long intervals) terminates the three-way
handshake. Once the queue is full, the system will ignore all
incoming SYN requests, making the system unavailable for
legitimate users.
2. b) In a LAND Attack, hackers flood SYN packets into the
network with a spoofed source IP address of the targeted
system. This makes it appear as if the host computer sent
the packets to itself, making the system unavailable while the
target system tries to respond to itself.
3. A brute-force attack, such as a “Smurf’ attack, targets
a feature in the IP specification known as directed or subnet
broadcasting, to quickly flood the target network with useless
data. A Smurf hacker floods a router with Internet Control
Message Protocol (ICMP) echo request packets (pings).
Since the destination IP address of each packet is the
broadcast address of the network, the router will broadcast
the ICMP echo request packet to all hosts on the network.
If there are numerous hosts, this will create a large
amount of ICMP echo request and response traffic. If a hacker chooses to spoof the source IP
address of the ICMP echo request packet, the resulting ICMP traffic will not only clog up the
“intermediary” network, but will also congest the network of the spoofed source IP address,
known as the “victim” network.
This flood of broadcast traffic consumes all available bandwidth, making communications
impossible.
®
WR1500 4-Port Wireless DSL/Cable Router
11.4.2 Types of DoS Attacks - Continued
ICMP Vulnerability
ICMP is an error-reporting protocol that works in concert with IP. The following ICMP types
trigger an alert:
Illegal Commands (NetBIOS and SMTP)
The only legal NetBIOS commands are the following - all others are illegal.
All SMTP commands are illegal except for those displayed in the following table.
Traceroute
Traceroute is a utility used to determine the path a packet takes between two endpoints.
Sometimes when a packet filter firewall is configured incorrectly an attacker can traceroute the
firewall gaining knowledge of the network topology inside the firewall.
4. Often, many DoS attacks also employ a technique known as “IP Spoofing” as part of
their attack. IP Spoofing may be used to break into systems, to hide the hacker’s identity, or
to magnify the effect of the DoS attack. IP Spoofing is a technique used to gain unauthorized
access to computers by tricking a router or firewall into thinking that the communications are
coming from within the trusted network. To engage in IP spoofing, a hacker must modify the
packet headers so that it appears that the packets originate from a trusted host and should
be allowed through the router or firewall. The WR1500 Wireless Router blocks all IP Spoofing
attempts.
®
WR1500 4-Port Wireless DSL/Cable Router
11.5 Stateful Inspection
Stateful inspection means the WR1500 Wireless Router records packet information, such as port
number and source/destination addresses and then allows or denies the response depending on
your firewall rules.
The default rules allow LAN-to-WAN traffic and deny traffic initiated from WAN-to-LAN.
The previous figure shows the WR1500 Wireless Router’s default firewall rules in action as well
as demonstrates how stateful inspection works. User A can initiate a Telnet session from within
the LAN and responses to this request are allowed. However other Telnet traffic initiated from the
WAN is blocked.
®
WR1500 4-Port Wireless DSL/Cable Router
Chapter 12:
Firewall Screens
This chapter shows you how to configure your WR1500 Wireless Router firewall.
12.1
Access Methods
The Web Configuration Utility is, by far, the most comprehensive firewall configuration tool your
WR1500 Wireless Router has to offer. For this reason, it is recommended that you configure
your firewall using the Web Configuration Utility. SMT screens allow you to activate the firewall.
12.2
Firewall Policies Overview
Firewall rules are grouped based on the direction of travel of packets to which they apply:
•
•
•
•
LAN to LAN/WR1500 Wireless Router
WAN to LAN
LAN to WAN
WAN to WAN/WR1500 Wireless Router
By default, the WR1500 Wireless Router’s stateful packet inspection allows packets traveling in
the following directions:
• LAN to LAN/WR1500 Wireless Router
This allows computers on the LAN to manage the WR1500 Wireless Router and communicate
between networks or subnets connected to the LAN interface.
• LAN to WAN
By default, the WR1500 Wireless Router’s stateful packet inspection blocks packets traveling in
the following directions:
• WAN to LAN
• WAN to WAN/WR1500 Wireless Router
This prevents computers on the WAN from using the WR1500 Wireless Router as a gateway
to communicate with other computers on the WAN and/or managing the WR1500 Wireless
Router.
You may define additional rules and sets or modify existing ones but please exercise extreme
caution in doing so.
®
WR1500 4-Port Wireless DSL/Cable Router
12.2
Firewall Policies Overview - Continued
If you configure firewall rules without a good understanding of how they work, you might
inadvertently introduce security risks to the firewall and to the protected network. Make
sure you test your rules after you configure them.
For example, you may create rules to:
•
•
•
•
Block certain types of traffic, such as IRC (Internet Relay Chat), from the LAN to the Internet.
Allow certain types of traffic, such as Lotus Notes database synchronization, from specific
hosts on the Internet to specific hosts on the LAN.
Allow everyone except your competitors to access a Web server.
Restrict use of certain protocols, such as Telnet, to authorized users on the LAN.
These custom rules work by comparing the Source IP address, Destination IP address and
IP protocol type of network traffic to rules set by the administrator. Your customized rules take
precedence and override the WR1500 Wireless Router’s default rules.
12.3 Rule Logic Overview
Study these points carefully before configuring rules.
12.3.1 Rule Checklist
1.
2.
3.
4.
5.
State the intent of the rule. For example, “This restricts all IRC access from the LAN to the
Internet.” Or, “This allows a remote Lotus Notes server to synchronize over the Internet to
an inside Notes server.”
Is the intent of the rule to forward or block traffic?
What direction of traffic does the rule apply to (refer to 12.2)1
What IP services will be affected?
What computers on the Internet will be affected? The more specific, the better. For example,
if traffic is being allowed from the Internet to the LAN, it is better to allow only certain
machines on the Internet to access the LAN.
12.3.2 Security Ramifications
Once the logic of the rule has been defined, it is critical to consider the security ramifications
created by the rule:
1.
Does this rule stop LAN users from accessing critical resources on the Internet? For
example, if IRC is blocked, are there users that require this service?
2.
Is it possible to modify the rule to be more specific? For example, if IRC is blocked for all
users, will a rule that blocks just certain users be more effective?
3.
Does a rule that allows Internet users access to resources on the LAN create a security
vulnerability? For example, if FTP ports (TCP 20,21) are allowed from the Internet to the
LAN, Internet users may be able to connect to computers with running FTP servers.
4.
Does this rule conflict with any existing rules?
Once these questions have been answered, adding rules is simply a matter of plugging the
information into the correct fields in the Web Configuration Utility screensSource Address
®
WR1500 4-Port Wireless DSL/Cable Router
12.3.3 Key Fields For Configuring Rules Action
Should the action be to Block or Forward?
“Block” means the firewall silently discards the packet.
Service
Select the service from the Service scrolling list box. If the service is not listed, it is necessary to
first define it. See section 12.5.3 for more information on predefined services.
Source Address
What is the connection’s source address; is it on the LAN or WAN? Is it a single IP, a range of Ips
or a subnet?
Destination Address
What is the connection’s destination address; is it on the LAN or WAN? Is it a single IP, a range
of Ips or a subnet?
12.4 Connection Direction Examples
This section describes examples for firewall rules for connections going from LAN to WAN and
from WAN to LAN.
LAN to LAN/WR1500 Wireless Router and WAN to WAN/WR1500 Wireless Router rules apply to
packets coming in on the associated interface (LAN or WAN respectively). LAN to LAN/WR1500
Wireless Router means policies for LAN-to-WR1500 Wireless Router (the policies for managing
the WR1500 Wireless Router through the LAN interface) and policies for LAN-to-LAN (the
policies that control routing between two subnets on the LAN).
12.4.1 LAN to WAN Rules
The default rule for LAN to WAN traffic is that all users on the LAN are allowed non-restricted
access to the WAN. When you configure a LAN to WAN rule, you in essence want to limit some
or all users from accessing certain services on the WAN. See the following figure.
®
WR1500 4-Port Wireless DSL/Cable Router
12.4.2 WAN to LAN Rules
The default rule for WAN to LAN traffic blocks all incoming connections (WAN to LAN). If you
wish to allow certain WAN users to have access to your LAN, you will need to create custom
rules to allow it.
See the following figure.
12.5 Enabling Firewall
The ordering of your rules is very important as rules are applied in turn.
The default rules allow LAN-to-WAN traffic and deny traffic initiated from WAN-to-LAN. You may
block traffic initiated from the LAN by configuring blocked services in the Services screen. You
may allow traffic initiated from the WAN by configuring port-forwarding rules, one-to-one/many
one-to-one mapping rules and/or allow remote management.
The firewall is automatically enabled when you configure blocked services. When you configure
a remote management menu to allow access to the WR1500 Wireless Router, a firewall rule
(WAN-to-WAN) is automatically created.
Click ADVANCED and FIREWALL to open the Settings screen. Enable (or activate) the firewall
by selecting the Enable Firewall check box as seen in the screen on the following page.
®
WR1500 4-Port Wireless DSL/Cable Router
12.5 Enabling Firewall - Continued
The following table describes the labels in this screen.
Firewall Settings
LABEL
DESCRIPTION
Enable Firewall
Select this check box to activate the firewall. The WR1500 Wireless Router performs access
control and protects against Denial of Service (DoS) attacks when the firewall is activated.
LAN to WAN
To log packets related to firewall rules, make sure that Access Control under Log is selected in
the Logs, Log Settings screen.
Packets to Log
Choose what LAN to WAN packets to log. Choose from:
WAN to LAN
Packets to Log
• No Log
• Log Blocked (blocked LAN to WAN services appear in the Blocked Services
textbox in the
Services screen (with Enable Services Blocking selected))
• Log All (log all LAN to WAN packets)
To log packets related to firewall rules, make sure that Access Control under Log is selected in
the Logs, Log Settings screen.
Choose what WAN to LAN and WAN to WAN/Prestige packets to log. Choose from: •
Log •
Log Forwarded •
Log All (log all WAN to LAN packets).
Allow one specific computer full access to all blocked resources.
Trusted
Computer IP
Address
You can allow a specific computer to access all Internet resources without restriction.
Enter the IP address of the trusted computer in this field.
Apply
Click Apply to save your changes back to the WR1500 Wireless Router.
Reset
Click Reset to begin configuring this screen afresh.
No
®
WR1500 4-Port Wireless DSL/Cable Router
12.5.1 Configuring Content Filtering
Content filtering allows you to block web sites by URL keywords that you specify, for example,
you can block access to all web sites with the word “bad” in the URL by specifying “bad’ as a
keyword.
You can also block access to web proxies and pages containing Active X components, Java
applets and cookies. Finally you can schedule when the WR1500 Wireless Router performs
content filtering by day and time.
Click ADVANCED, FIREWALL and then the Filter tab to open the Filter screen.
The settings in the screen above are described on the next page.
®
WR1500 4-Port Wireless DSL/Cable Router
12.5.1 Configuring Content Filtering - Continued
The following table describes the labels in the screen on the preceding page.
Firewall Filter
LABEL
DESCRIPTION
Restrict Web
Features
Select the categories of web features that you want to restrict.
ActiveX
ActiveX is a tool for building dynamic and active Web pages and distributed object
applications. When you visit an ActiveX Web site, ActiveX controls are downloaded to
your browser, where they remain in case you visit the site again.
Java
Java is a programming language and development environment for building
downloadable Web components or Internet and intranet business applications of all
kinds.
Cookies
Web servers that track usage and provide service based on ID use cookies.
Web Proxy
This is a server that acts as an intermediary between a user and the Internet to
provide security, administrative control, and caching service. When a proxy server
is located on the WAN it is possible for LAN users to circumvent content filtering by
pointing to this proxy server.
Enable URL Keyword
Blocking
Select this check box to block the URL containing the keywords in the keyword list
Keyword
Type a keyword in this field. You may use any character (up to 64 characters).
Wildcards are not allowed.
Keyword List
This is a list of keywords that will be inaccessible to computers on your LAN once
you enable URL keyword blocking.
Add
Type a keyword in the Keyword field and click then Add to add a keyword to the
Keyword List.
Delete
Select a keyword from the Keyword List and then click Delete to remove this
keyword from the list.
Clear All
Click Clear All to empty the Keyword List.
Day to Block
Select everyday or the day(s) of the week to activate blocking.
Time of Day to Block
(24-Hour Format)
Select All Day or enter the start and end times in the hour-minute format to activate
blocking.
Apply
Click Apply to save your customized settings.
Reset
Click Reset to reload the previous configuration for this screen.
12.5.2 Configuring Firewall Services
Click ADVANCED, FIREWALL and then the Services tab to open the Services screen. Use
this screen to enable service blocking, enter/delete/modify the services you want to block and
the date/time you want to block them.
®
WR1500 4-Port Wireless DSL/Cable Router
12.5.2 Configuring Firewall Services - Continued
The following table describes the labels in this screen.
Creating/Editing A Firewall Rule
LABEL
DESCRIPTION
Enable Services
Blocking
Select the check box to activate service blocking.
Available Services
This is a list of pre-defined services (ports) you may prohibit your LAN computers
from using. Select the port you want to block using the drop-down list and click Add to
add the port to the Blocked Service field.
Please see Table 12-4 for more information on services available
Blocked Services
This is a list of services (ports) that will be inaccessible to computers on your LAN
once you enable service blocking. Choose the IP port (TCP, UDP orTCP/UDP) that
defines your customized port from the drop down list box.
Custom Port
A custom port is a service that is not available in the pre-defined Available
Services list and you must define using the next two fields.
For a comprehensive list of port numbers and services, visit the IANA (Internet
Assigned Number Authority) web site.
Table continued on next page.
®
WR1500 4-Port Wireless DSL/Cable Router
12.5.2 Configuring Firewall Services - Continued
Creating/Editing A Firewall Rule - Continued
LABEL
DESCRIPTION
Type
Services are either TCP and/or UDP. Select from either TCP or UDP.
Port Number
Enter the port number range that defines the service. For example, suppose you want to
define the Gnutella service. Select TCP type and enter a port range from 6345-6349.
Add
Select a service from the Available Services drop-down list and then click Add to add a
service to the Blocked Service.
Delete
Select a service from the Blocked Services List and then click Delete to remove this
service from the list.
Clear All
Click Clear All to empty the Blocked Service.
Day to Block
Select everyday or the day(s) of the week to activate blocking.
Time of Day to
Block (24-Hour
Format)
Select the time of day you want service blocking to take effect. Configure blocking to take
effect all day by selecting the All Day check box. You can also configure specific times
that by entering the start time in the Start (hr) and Start (min) fields and the end time in
the End (hr) and End (min) fields. Enter times in 24-hour format, for example, “3:00pm”
should be entered as “15:00”.
Apply
Click Apply to save your customized settings.
Reset
Click Reset to reload the previous configuration for this screen.
12.5.3 Predefined Services
The Available Services list box in the Services screen displays all predefined services that the
WR1500 Wireless Router already supports. Next to the name of the service, two fields appear
in brackets.
The first field indicates the IP protocol type (TCP, UDP, or ICMP). The second field indicates the
IP port number that defines the service. (Note that there may be more than one IP protocol type.
For example, look at the default configuration labeled “(DNS)”. (UDP/TCP:53) means UDP port
53 and TCP port 53. Up to 128 entries are supported.
Custom services may also be configured using the Custom Ports function discussed later.
See the next page for a list of predefined services.
®
WR1500 4-Port Wireless DSL/Cable Router
12.5.3 Predefined Services - Continued
Predefined Services
SERVICE
DESCRIPTION
BGP(TCP:179)
Border Gateway Protocol.
BOOTP_CLIENT(UDP:68)
DHCP Client.
BOOTP_SERVER(UDP:67)
DHCP Server.
CU-SEEME (TCP/UDP:
7648, 24032)
DNS(UDP/TCP:53)
A popular videoconferencing solution from White Pines Software.
FINGER(TCP:79)
Finger is a UNIX or Internet related command that can be used to find out if a
user is logged on.
FTP(TCP:20.21)
File Transfer Program, a program to enable fast transfer of files, including large
files that may not be possible by e-mail.
HTTP(TCP:80)
Hyper Text Transfer Protocol - a client/server protocol for the world wide web.
ICQ(UDP:4000)
This is a popular Internet chat program.
IPSEC_TUNNEL(ESP:O)
The IPSEC ESP (Encapsulation Security Protocol) tunneling protocol uses this
service.
IRC(TCP/UDP:6667)
This is another popular Internet chat program.
MULTICAST(IGMP:O)
Internet Group Multicast Protocol is used when sending packets to a specific
group of hosts.
NEWS(TCP:144)
A protocol for news groups.
NFS(UDP:2049)
Network File System - NFS is a client/server distributed file service that
provides transparent file sharing for network environments.
NNTP(TCP:119)
Network News Transport Protocol is the delivery mechanism for the
USENET newsgroup service.
PING(ICMP:O)
Packet INternet Groper is a protocol that sends out ICMP echo requests to test
whether or not a remote host is reachable.
PPTP(TCP:1723)
Point-to-Point Tunneling Protocol enables secure transfer of data over public
networks. This is the control channel.
PPTP_TUNNEL(GRE:O)
Point-to-Point Tunneling Protocol enables secure transfer of data over public
networks. This is the data channel.
RCMD(TCP:512)
Remote Command Service.
REAL_AUDIO(TCP:7070)
A streaming audio service that enables real time sound over the web.
REXEC(TCP:514)
Remote Execution Daemon.
RLOGIN(TCP:513)
Remote Login.
RTELNET(TCP:107)
Remote Telnet.
RTSP(TCP/UDP:554)
The Real Time Streaming (media control) Protocol (RTSP) is a remote
control for multimedia on the Internet.
SFTP(TCP:115)
Simple File Transfer Protocol.
SMTP(TCP:25)
Simple Mail Transfer Protocol is the message-exchange standard for the
Internet. SMTP enables you to move messages from one e-mail server to
another.
Domain Name Server, a service that matches web names (e.g.
www.ParkerVision.com) to IP numbers.
®
WR1500 4-Port Wireless DSL/Cable Router
12.5.3 Predefined Services - Continued
Predefined Services
SERVICE
DESCRIPTION
SNMP(TCP/UDP:161)
Simple Network Management Program.
SNMP-TRAPS(TCP/
UDP:162)
Traps for use with the SNMP (RFC:1215).
SQL-NET(TCP:1521)
Structured Query Language is an interface to access data on many different
types of database systems, including mainframes, midrange systems, UNIX
systems and network servers.
SSH(TCP/UDP:22)
Secure Shell Remote Login Program.
STRM WORKS(UDP:1558)
Stream Works Protocol.
TELNET(TCP:23)
Telnet is the login and terminal emulation protocol common on the Internet and
in UNIX environments. It operates over TCP/IP networks. Its primary function
is to allow users to log into remote host systems.
TFTP(UDP:69)
Trivial File Transfer Protocol is an Internet file transfer protocol similar
to FTP, but uses the UDP (User Datagram Protocol) rather than TCP
(Transmission Control Protocol).
VDOLIVE(TCP:7000)
Another videoconferencing solution.
®
WR1500 4-Port Wireless DSL/Cable Router
Chapter 13:
Remote Management
This chapter provides information on the Remote Management screens.
13.1 Remote Management Overview
Remote management allows you to determine which services/protocols can access which
WR1500 Wireless Router interface (if any) from which computers. You can customize the
service port, access interface and the secured client IP address to enhance security and
flexibility.
When you configure remote management to allow management from the WAN, you
still need to configure a firewall rule to allow access. See the firewall chapters for
details on configuring firewall rules.
You may manage your WR1500 Wireless Router from a remote location via:
•
•
Internet (WAN only)
LAN only,
•
•
ALL (LAN and WAN)
Neither (Disable).
When you Choose WAN only or ALL (LAN & WAN),
you still need to configure a firewall rule to allow access.
To disable remote management of a service, select Disable in the corresponding Server
Access field.
13.1.1 Remote Management Limitations
Remote management over LAN or WAN will not work when:
1. A filter in SMT menu 3.1 (LAN) or in menu 11.5 (WAN) is applied to block a Telnet, FTP
or Web service.
2. You have disabled that service in one of the remote management screens.
3. The IP address in the Secured Client IP field does not match the client IP address. If it
does not match, the WR1500 Wireless Router will disconnect the session immediately.
4. There is an SMT console session running.
5. There is already another remote management session of the same type (web, FTP or Telnet)
running. You may only have one remote management session of the same type running at
one time.
6. There is a web remote management session running with a Telnet session. A Telnet session will
be disconnected if you begin a web session; it will not begin if there already is a web session.
®
WR1500 4-Port Wireless DSL/Cable Router
13.1.2 Remote Management and NAT
When NAT is enabled:
• Use the WR1500 Wireless Router’s WAN IP address when configuring from the WAN. y
Use the WR1500 Wireless Router’s LAN IP address when configuring from the LAN.
13.1.3 System Timeout
There is a system timeout of five minutes (three hundred seconds) for either the console port
or telnet/web/FTP connections. Your WR1500 Wireless Router automatically logs you out if
you do nothing in this timeout period, except when it is continuously updating the status in
menu 24.1 or when sys stdio has been changed on the command line.
13.2 Telnet
You can telnet into the WR1500 Wireless Router to perform remote management.
13.3 Configuring TELNET
Click ADVANCED and then REMOTE MANAGEMENT to open the TELNET screen, shown on
the next page.
®
WR1500 4-Port Wireless DSL/Cable Router
13.3 Configuring TELNET - Continued
The following table describes the labels in this screen.
Telnet
LABEL
DESCRIPTION
Server Port
You may change the server port number for a service if needed, however you must use
the same port number in order to use that service for remote management.
Server Access
Select the interface(s) through which a computer may access the WR1500 Wireless
Router using this service.
Secured Client
IP Address
A secured client is a “trusted” computer that is allowed to communicate with the WR1500
Wireless Router using this service.
Select All to allow any computer to access the WR1500 Wireless Router using this service.
Choose Selected to just allow the computer with the IP address that you specify to access the
WR1500 Wireless Router using this service.
Apply
Click Apply to save your changes back to the WR1500 Wireless Router.
Reset
Click Reset to begin configuring this screen afresh.
®
WR1500 4-Port Wireless DSL/Cable Router
13.4 Configuring FTP
You can upload and download the WR1500 Wireless Router’s firmware and configuration files
using FTP, please see the chapter on firmware and configuration file maintenance for details.
To use this feature, your computer must have an FTP client.
To change your WR1500 Wireless Router’s FTP settings, click ADVANCED, REMOTE
MANAGEMENT and then the FTP tab. The screen appears as shown.
The following table describes the labels in this screen.
FTP
LABEL
DESCRIPTION
Server Port
You may change the server port number for a service if needed, however you must
use the same port number in order to use that service for remote management.
Server Access
Select the interface(s) through which a computer may access the WR1500 Wireless
Router using this service.
Secured Client
IP Address
A secured client is a “trusted” computer that is allowed to communicate with the WR1500
Wireless Router using this service.
Select All to allow any computer to access the WR1500 Wireless Router using this
service.
Choose Selected to just allow the computer with the IP address that you specify to
access the WR1500 Wireless Router using this service.
Apply
Click Apply to save your changes back to the WR1500 Wireless Router.
Reset
Click Reset to begin configuring this screen afresh.
®
WR1500 4-Port Wireless DSL/Cable Router
13.5 Configuring WWW
To change your WR1500 Wireless Router’s World Wide Web settings, click ADVANCED,
REMOTE MANAGEMENT and then the WWW tab. The screen appears as shown.
The following table describes the labels in this screen.
WWW
LABEL
DESCRIPTION
Server Port
You may change the server port number for a service if needed, however you must
use the same port number in order to use that service for remote management.
Server Access
Select the interface(s) through which a computer may access the WR1500 Wireless
Router using this service.
Secured Client
IP Address
A secured client is a “trusted” computer that is allowed to communicate with the WR1500
Wireless Router using this service.
Select All to allow any computer to access the WR1500 Wireless Router using this
service.
Choose Selected to just allow the computer with the IP address that you specify to
access the WR1500 Wireless Router using this service.
Apply
Click Apply to save your changes back to the WR1500 Wireless Router.
Reset
Click Reset to begin configuring this screen afresh.
®
WR1500 4-Port Wireless DSL/Cable Router
13.6 Configuring SNMP
Simple Network Management Protocol is a protocol used for exchanging management
information between network devices. SNMP is a member of the TCP/IP protocol suite. Your
WR1500 Wireless Router supports SNMP agent functionality, which allows a manager station
to manage and monitor the WR1500 Wireless Router through the network. The WR1500
Wireless Router supports SNMP version one (SNMPvl) and version two c (SNMPv2c).
The next figure illustrates an SNMP management operation. SNMP is only available if TCP/IP
is configured.
An SNMP managed network consists of
two main types of component: agents
and a manager.
An agent is a management software
module that resides in a managed
device (the WR1500 Wireless
Router). An agent translates the local
management information from the
managed device into a form compatible
with SNMP. The manager is the console
through which network administrators
perform network management functions.
It executes applications that control and
monitor managed devices.
The managed devices contain object
variables/managed objects that define
each piece of information to be collected
about a device. Examples of variables
include the number of packets received,
node port status etc. A Management
Information Base (MIB) is a collection
of managed objects. SNMP allows a
manager and agents to communicate for
the purpose of accessing these objects.
SNMP itself is a simple request/response protocol based on the manager/agent model. The
manager issues a request and the agent returns responses using the following protocol
operations:
• Get - Allows the manager to retrieve an object variable from the agent.
• GetNext - Allows the manager to retrieve the next object variable from a table or list within
an agent. In SNMPvl, when a manager wants to retrieve all elements of a table from an
agent, it initiates a Get operation, followed by a series of GetNext operations.
• Set - Allows the manager to set values for object variables within an agent.
• Trap - Used by the agent to inform the manager of some events.
®
WR1500 4-Port Wireless DSL/Cable Router
13.6.1 Supported MIBs
The WR1500 Wireless Router supports MIB II that is defined in RFC-1213 and RFC-1215.
The focus of the MIBs is to let administrators collect statistical data and monitor status and
performance.
13.6.2 SNMP Traps
The WR1500 Wireless Router will send traps to the SNMP manager when any one of the
following events occurs:
SNMP Traps
TRAP*
TRAP NAME
DESCRIPTION
1
coldStart (defined in RFC-1215)
A trap is sent after booting (power on).
2
warmStart (defined in RFC-1215)
A trap is sent after booting (software reboot).
3
NnkUp (defined in RFC-1215)
A trap is sent when the port is up.
4
authenticationFailure (defined in
RFC-1215)
A trap is sent to the manager when receiving any
SNMP get or set requirements with wrong community
(password).
6
NnkDown (defined in RFC-1215)
A trap is sent when the port is down.
The following table maps the physical port and encapsulation to the interface type.
Ports and Interface Types
PHYSICAL PORT/ENCAP
INTERFACE TYPE
LAN port(s)
enetO
Wireless port
eneti
PPPoE encap
pppoe
1483 encap
mpoa
Ethernet encap
enet-encap
PPPoA
PPP
®
WR1500 4-Port Wireless DSL/Cable Router
13.6.3 REMOTE MANAGEMENT: SNMP
To change your WR1500 Wireless Router’s SNMP settings, click ADVANCED, REMOTE
MANAGEMENT and then the SNMP tab. The screen appears as shown.
The following table describes the labels in this screen.
SNMP
LABEL
DESCRIPTION
SNMP Configuration
Get Community
Enter the Get Community, which is the password for the requests from the management station.
incoming Get and GetNext
Set Community
Enter the Set community, which is the password for incoming Set requests from the
management station.
Trusted Host
If you enter a trusted host, your WR1500 Wireless Router will only respond to SNMP messages
from this address. A blank (default) field means your WR1500 Wireless Router will respond to all
SNMP messages it receives, regardless of source.
Trap
Community
Type the trap community, which is the password sent with each trap to the SNMP manager.
Destination
Type the IP address of the station to send your SNMP traps to.
SNMP
Server Port
You may change the server port number for a service if needed, however you must use the
same port number in order to use that service for remote management.
Server Access
Select the interface(s) through which a computer may access the WR1500 Wireless Router
using this service.
Secured Client
IP Address
A secured client is a “trusted” computer that is allowed to communicate with the WR1500
Wireless Router using this service.
Select All to allow any computer to access the WR1500 Wireless Router using this service.
Choose Selected to just allow the computer with the IP address that you specify to access the
WR1500 Wireless Router using this service.
Apply
Click Apply to save your changes back to the WR1500 Wireless Router.
Reset
Click Reset to begin configuring this screen afresh.
®
WR1500 4-Port Wireless DSL/Cable Router
13.7 Configuring DNS
Use DNS (Domain Name System) to map a domain name to its corresponding IP address and
vice versa, for example, the IP address of www.ParkerVision.com is 204.217.0.2. Refer to the
Internet Access chapter for more information.
To change your WR1500 Wireless Router’s DNS settings, click ADVANCED, REMOTE
MANAGEMENT and then the DNS tab. The screen appears as shown.
The following table describes the labels in this screen.
DNS
LABEL
DESCRIPTION
Server Port
The DNS service port number is 53 and cannot be changed here.
Server Access
Select the interface(s) through which a computer may send DNS queries to the WR1500
Wireless Router.
Secured Client
IP Address
A secured client is a “trusted” computer that is allowed to send DNS queries to the
WR1500 Wireless Router.
Select All to allow any computer to send DNS queries to the WR1500 Wireless Router.
Choose Selected to just allow the computer with the IP address that you specify to
send DNS queries to the WR1500 Wireless Router.
Apply
Click Apply to save your changes back to the WR1500 Wireless Router.
Reset
Click Reset to begin configuring this screen afresh.
NOTE - If you modify the port numbers, you should choose different port numbers for
each service, and ensure that the port numbers you choose are not default ports for other
common services.
®
WR1500 4-Port Wireless DSL/Cable Router
13.8 Configuring Security
To change your WR1500 Wireless Router’s security settings, click ADVANCED, REMOTE
MANAGEMENT and then the Security tab. The screen appears as shown.
If an outside user attempts to probe an unsupported port on your WR1500 Wireless Router,
an ICMP response packet is automatically returned. This allows the outside user to know the
WR1500 Wireless Router exists. The WR1500 Wireless Router series support anti-probing,
which prevents the ICMP response packet from being sent. This keeps outsiders from
discovering your WR1500 Wireless Router when unsupported ports are probed.
The following table describes the labels in this screen.
Security
LABEL
DESCRIPTION
ICMP
Internet Control Message Protocol is a message control and error-reporting protocol
between a host server and a gateway to the Internet. ICMP uses Internet Protocol
(IP) datagrams, but the messages are processed by the TCP/IP software and directly
apparent to the application user.
Respond to Ping
on
The WR1500 Wireless Router will not respond to any incoming Ping requests when
Disable is selected. Select LAN to reply to incoming LAN Ping requests. Select WAN
to reply to incoming WAN Ping requests. Otherwise select LAN&WAN to reply to both
incoming LAN and WAN Ping requests.
Do not respond
to requests for
unauthorized
services
Select this option to prevent hackers from finding the WR1500 Wireless Router by
probing for unused ports. If you select this option, the WR1500 Wireless Router will
not send ICMP response packets to port request(s) for unused ports, thus leaving the
unused ports and the WR1500 Wireless Router unseen.
If the firewall blocks a packet from the WAN, the WR1500 Wireless Router sends
a TCP reset packet. Use the “sys firewall tcprst rst off’ command in the command
interpreter if you want to stop the WR1500 Wireless Router from sending TCP reset
packets.
Apply
Click Apply to save your changes back to the WR1500 Wireless Router.
Reset
Click Reset to begin configuring this screen afresh.
®
WR1500 4-Port Wireless DSL/Cable Router
Part VI
UPnP and LOGS
This part provides information and configuration
instructions for UPnP
(Universal Plug and Play) and the logs.
®
WR1500 4-Port Wireless DSL/Cable Router
Chapter 14:
UPnP Screen
This chapter introduces the Universal Plug and Play feature of the WR1500
14.1 Universal Plug and Play Overview
Universal Plug and Play (UPnP) is a distributed, open networking standard that uses TCP/IP for
simple peer-to-peer network connectivity between devices. A UPnP device can dynamically join
a network, obtain an IP address, convey its capabilities and learn about other devices on the
network. In turn, a device can leave a network smoothly and automatically when it is no longer
in use.
14.1.1 How Do I Know If I’m Using UPnP?
UPnP hardware is identified as an icon in the Network Connections folder (Windows XP). Each
UPnP compatible device installed on your network will appear as a separate icon. Selecting the
icon of a UPnP device will allow you to access the information and properties of that device.
14.1.2 NAT Traversal
UPnP NAT traversal automates the process of allowing an application to operate through
NAT. UPnP network devices can automatically configure network addressing, announce their
presence in the network to other UPnP devices and enable exchange of simple product and
service descriptions. NAT traversal allows the following:
• Dynamic port mapping
• Learning public IP addresses
• Assigning lease times to mappings
Windows Messenger is an example of an application that supports NAT traversal and UPnP.
See the SUA/NAT chapter for further information about NAT.
14.2 Cautions with UPnP
The automated nature of NAT traversal applications in establishing their own services
and opening firewall ports may present network security issues. Network information and
configuration may also be obtained and modified by users in some network environments.
All UPnP-enabled devices may communicate freely with each other without additional
configuration. Disable UPnP if this is not your intention.
14.3 Configuring UPnP
Click ADVANCED and then UPnP to display the screen shown on the next page.
®
WR1500 4-Port Wireless DSL/Cable Router
14.3 Configuring UPnP - Continued
The following table describes the labels in this screen.
Configuring UPnP
LABEL
DESCRIPTION
Enable the Universal Plug
and Play (UPnP) feature
Select this check box to activate UPnP. Be aware that anyone could use a
UPnP application to open the Web Configuration Utility’s login screen without
entering the WR1500 Wireless Router’s IP address (although you must still
enter the password to access the Web Configuration Utility).
Allow users to make
configuration changes
through UPnP
Select this check box to allow UPnP-enabled applications to automatically
configure the WR1500 Wireless Router so that they can communicate
through the WR1500 Wireless Router, for example by using NAT traversal,
UPnP applications automatically reserve a NAT forwarding port in order to
communicate with another UPnP enabled device; this eliminates the need to
manually configure port forwarding for the UPnP enabled application.
Allow UPnP to pass
through Firewall
Select this check box to create a static LAN to LAN/WR1500 Wireless Router
rule that allows forwarding of ports 1900 and 80. Selecting this check box also
creates a dynamic firewall rule every time a NAT forwarding port is reserved
for UPnP. This setting remains active until you disable UPnP or clear this
check box.
Clear this check box to have the firewall block all UPnP application packets
(for example, MSN packets) instead of creating a firewall rule for them.
UPnP Name
This identifies the WR1500 Wireless Router in UPnP applications.
Apply
Click Apply to save your changes back to the WR1500 Wireless Router.
Reset
Click Reset to begin configuring this screen afresh.
®
WR1500 4-Port Wireless DSL/Cable Router
14.4 Installing UPnP in Windows Example
This section shows how to install UPnP in Windows XP
14.4.2 Installing UPnP in Windows XP
Follow the steps below to install UPnP in
Windows XP.
Step 1.
Click Start and Control Panel.
Step 2.
Double-click Network Connections.
Step 3.
In the Network Connections window,
click Advanced in the main menu
and
displays.
select Optional Networking
Components ....
The Windows Optional Networking
Components Wizard window
Step 4.
Select Networking Service in the
Components selection box and click
Details.
Step 5.
In the Networking Services window,
select the Universal Plug and Play
check box.
Step 6.
Click OK to go back to the Windows
Optional Networking Component
Wizard window and click Next.
®
WR1500 4-Port Wireless DSL/Cable Router
14.5 Using UPnP in Windows XP Example
This section shows you how to use the UPnP feature in Windows XP. You must already have UPnP
installed in Windows XP and UPnP activated on the WR1500 Wireless Router.
Make sure the computer is connected to a LAN port of the WR1500 Wireless Router. Turn on your
computer and the WR1500 Wireless Router.
14.5.1 Auto-discover Your UPnP-enabled Network Device
Step 1.
Click Start and Control Panel.
Double-click Network Connections. An icon displays under Internet Gateway.
Step 2.
Right-click the icon and select Properties.
Step 3.
In the Internet Connection Properties window, click Settings to see the port
mappings that were automatically created.
Continued next page
®
WR1500 4-Port Wireless DSL/Cable Router
14.5.1 Auto-discover Your UPnP-enabled Network Device - Continued
Step 4.
You may edit or delete the port mappings or click Add to manually add port mappings.
When the UPnP-enabled device is disconnected from your computer,
all port mappings will be deleted automatically.
Step 5.
Select the Show icon in notification area
Step 6.
Double-click the icon to display your
current Internet connection status.
®
WR1500 4-Port Wireless DSL/Cable Router
14.5.2 Web Configuration Utility Easy Access
With UPnP, you can access the web-based Web Configuration Utility on the WR1500 Wireless
Router without finding out the IP address of the WR1500 Wireless Router first. This is helpful if
you do not know the IP address of the WR1500 Wireless Router.
Follow the steps below to access the Web Configuration Utility.
Step 1.
Click start and then Control Panel.
Step 2.
Double-click Network Connections.
Step 3.
Select My Network Places under
Other Places.
Step 4.
An icon with the description for each
UPnP-enabled device displays under
Local Network.
Step 5.
Right-click the icon for your WR1500
Wireless Router and select Invoke.
The Web Configuration Utility
login screen displays.
Step 6.
Right-click the icon for your WR1500
Wireless Router and select
Properties. A properties window
displays with basic information about
the WR1500 Wireless Router.
(Screen not shown)
®
WR1500 4-Port Wireless DSL/Cable Router
Chapter 15:
Logs Screens
This chapter contains information about configuring general log settings and viewing the
WR1500 Wireless Router’s logs. Refer to the appendix for example log message explanations.
15.1 Using the View Log Screen
The Web Configuration Utility allows you to look at all of the WR1500 Wireless Router’s logs in
one location.
Click ADVANCED and then LOGS to open the View Log screen. Use the View Log screen to
see the logs for the categories that you selected in the Log Settings screen (see section 15.2).
Options include logs about system maintenance, system errors, access control, allowed or
blocked web sites, blocked web features (such as ActiveX controls, Java and cookies), attacks
(such as DoS) and IPSec.
You can view logs and alert messages in this page. Log entries in red indicate system error logs.
Once the log entries are all used, the log will wrap around and the old logs will be deleted.
Click a column heading to sort the entries. A triangle indicates the direction of the sort order.
The table on the following page describes the labels in the screen above.
®
WR1500 4-Port Wireless DSL/Cable Router
15.1 Using the View Log Screen - Continued
The following table describes the labels in the screen on the proceeding page.
View Log
LABEL
DESCRIPTION
Display
Select a log category from the drop down list box to display logs within the selected
category. To view all logs, select All Logs. The number of categories shown in the drop
down list box depends on the selection in the Log Settings page.
Time
This field displays the time the log was recorded.
Message
This field states the reason for the log.
Source
This field lists the source IP address and the port number of the incoming packet.
Destination
This field lists the destination IP address and the port number of the incoming packet.
Notes
This field displays additional information about the log entry.
Email Log Now
Click Email Log Now to send the log screen to the e-mail address specified in the
Log Settings page.
Refresh
Click Refresh to renew the log screen.
Clear Log
Click Clear Log to clear all the logs.
15.2 Configuring Log Settings
To change your WR1500 Wireless Router’s log settings, click ADVANCED, LOGS and then the
Log Settings tab. The screen appears as shown.
Use the Log Settings screen to configure to where the WR1500 Wireless Router is to send the
logs; the schedule for when the WR1500 Wireless Router is to send the logs and which logs
and/or immediate alerts the WR1500 Wireless Router is to send.
An alert is a type of log that warrants more serious attention. They include system errors, attacks (access control) and attempted access to blocked web sites or web sites with restricted
web features such as cookies, Active X and so on. Some categories such as System Errors
consist of both logs and alerts. You may differentiate them by their color in the View Log screen.
Alerts are displayed in red and logs are displayed in black.
®
WR1500 4-Port Wireless DSL/Cable Router
15.2 Configuring Log Settings - Continued
The table on the following page describes the labels in the screen above.
®
WR1500 4-Port Wireless DSL/Cable Router
15.2 Configuring Log Settings - Continued
The following table describes the labels in the screen on the proceeding page.
Log Settings
LABEL
DESCRIPTION
Address Info
Mail Server
Enter the server name or the IP address of the mail server for the e-mail
addresses specified below. If this field is left blank, logs and alert messages will
not be sent via e-mail.
Mail Subject
Type a title that you want to be in the subject line of the log e-mail message that
the WR1500 Wireless Router sends.
Send Log to
Logs are sent to the e-mail address specified in this field. If this field is left blank,
logs will not be sent via e-mail.
Send Alerts to
Enter the e-mail address where the alert messages will be sent. Alerts include
system errors, attacks and attempted access to blocked web sites. If this field is
left blank, alert messages will not be sent via e-mail.
Syslog Logging
UNIX syslog sends a log to an external UNIX server used to store logs.
Active
Click Active to enable UNIX syslog.
Syslog Server IP
Address
Enter the server name or the IP address of the syslog server that will log the CDR
(Call Detail Record) and system messages.
Log Facility
Select the Local from the drop down list box. The log facility allows you to log the
messages to different files in the syslog server. Refer to your UNIX manual for
more information.
Send Log
Log Schedule
This drop-down menu is used to configure the frequency of log messages being sent
as E-mail:
•
Daily • Weekly •
Hourly • When the Log is Full • None.
If the Weekly or the Daily option is selected, specify a time of day when the E-mail
should be sent. If the Weekly option is selected, then also specify which day of the
week the E-mail should be sent. If the When Log is Full option is selected, an alert
is sent when the log fills up. If you select None, no log messages are sent.
Day for Sending Log
This field is only available when you select Weekly in the Log Schedule field.
Use the drop down list box to select which day of the week to send the logs.
Time for Sending Log
Enter the time of the day in 24-hour format (for example 23:00 equals 11:00 pm) to
send the logs.
Log
Select the categories of logs that you want to record.
Send Immediate Alert
Select the categories of alerts for which you want the WR1500 Wireless Router to
immediately send e-mail alerts.
Apply
Click Apply to save your changes back to the WR1500 Wireless Router.
Reset
Click Reset to begin configuring this screen afresh.
®
WR1500 4-Port Wireless DSL/Cable Router
15.3 Configuring Reports
To change your WR1500 Wireless Router’s log reports, click ADVANCED, LOGS and then the
Reports tab. The screen appears as shown.
The Reports screen displays which computers on the LAN send and receive the most traffic, what
kinds of traffic are used the most and which web sites are visited the most often. Use the Reports
screen to view information about bandwidth usage :
> Web sites visited the most often
> Number of times the most visited web sites were visited
> The most-used protocols or service ports
> The amount of traffic for the most used protocols or service ports
> The LAN IP addresses to and/or from which the most traffic has been sent
> How much traffic has been sent to and from the LAN IP addresses to and/or from which the
most traffic has been sent
The web site hit count may not be 100% accurate because sometimes when an individual
web page loads, it may contain references to other web sites that also get counted as hits.
The WR1500 Wireless Router records web site hits by counting the HTTP GET packets. Many
web sites include HTTP GET references to other web sites and the WR1500 Wireless Router may
count these as hits, thus the web hit count is not (yet) 100% accurate.
Enabling the WR1500 Wireless Router’s reporting function decreases the
overall throughput by about 1 Mbps.
The table on the following page describes the labels in the screen above.
®
WR1500 4-Port Wireless DSL/Cable Router
15.3 Configuring Reports - Continued
The following table describes the labels in the screen on the proceeding page.
Reports
LABEL
Report Type
DESCRIPTION
Use the drop-down list box to select the type of reports to display.
Web Site Hits displays the web sites that have been visited the most often from the LAN
and how many times they have been visited.
Protocol/Port displays the protocols or service ports that have been used the most and
the amount of traffic for the most used protocols or service ports.
LAN IP Address displays the LAN IP addresses to and /or from which the most traffic
has been sent and how much traffic has been sent to and from those IP addresses.
Start Collection/
Stop Collection
The button text shows Start Collection when the WR1500 Wireless Router is not
recording report data and Stop Collection when the WR1500 Wireless Router is
recording report data.
Click Start Collection to have the WR1500 Wireless Router record report data. Click
Stop Collection to halt the WR1500 Wireless Router from recording more data.
Refresh
Click Refresh to update the report display. The report also refreshes automatically
when you close and reopen the screen.
#
This field displays the index number of an individual web site.
Web Site
Web Site displays the web site address(es) that have been visited the most often
from the LAN.
Hits
Hits displays the total number of visits to each web site.
®
WR1500 4-Port Wireless DSL/Cable Router
15.3.1 Viewing Protocol/Port
In the Reports screen, select Protocol/Port from the Report Type drop-down list box to have the
WR1500 Wireless Router record and display which protocols or service ports have been used the
most and the amount of traffic for the most used protocols or service ports.
The following table describes the labels in this screen.
Protocol/Port Report
LABEL
DESCRIPTION
Protocol/Port
This column lists the protocols or service ports for which the most traffic has gone
through the WR1500 Wireless Router. The protocols or service ports are listed in
descending order with the most used protocol or service port listed first.
Start Collection/
Stop Collection
The button text shows Start Collection when the WR1500 Wireless Router is not
recording report data and Stop Collection when the WR1500 Wireless Router is
recording report data.
Click Start Collection to have the WR1500 Wireless Router record report data. Click
Stop Collection to halt the WR1500 Wireless Router from recording more data.
Refresh
Click Refresh to update the report display. The report also refreshes automatically when
you close and reopen the screen.
Bytes
This column lists how much traffic has been sent and/or received for each protocol or
service port. The measurement unit shown (bytes, Kbytes, Mbytes or Gbytes) varies with
the amount of traffic for the particular protocol or service port. The count starts over at 0 if
a protocol or port passes the bytes count limit (see Table 15-6).
®
WR1500 4-Port Wireless DSL/Cable Router
15.3.2 Viewing LAN IP Address
In the Reports screen, select LAN IP Address from the Report Type drop-down list box to have
the WR1500 Wireless Router record and display the LAN IP addresses that the most traffic has
been sent to and/or from and how much traffic has been sent to and/or from those IP addresses.
Computers take turns using dynamically assigned LAN IP addresses.
The WR1500 Wireless Router continues recording the bytes sent to or from a LAN IP
address when it is assigned to a different computer.
LAN IP Address Report
LABEL
Start Collection/
Stop Collection
DESCRIPTION
The button text shows Start Collection when the WR1500 Wireless Router is not
recording report data and Stop Collection when the WR1500 Wireless Router is
recording report data.
Click Start Collection to have the WR1500 Wireless Router record report data. Click
Stop Collection to halt the WR1500 Wireless Router from recording more data.
Refresh
Click Refresh to update the report display. The report also refreshes automatically when
you close and reopen the screen.
IP Address
This column lists the LAN IP addresses to and/or from which the most traffic has been
sent. The LAN IP addresses are listed in descending order with the LAN IP address to
and/or from which the most traffic was sent listed first.
Bytes
This column displays how much traffic has gone to and from the listed LAN IP
addresses. The measurement unit shown (bytes, Kbytes, Mbytes or Gbytes) varies with
the amount of traffic sent to and from the LAN IP address. The count starts over at 0 if
the total traffic sent to and from a LAN IP passes the bytes count limit (see Table 15-6).
®
WR1500 4-Port Wireless DSL/Cable Router
15.3.3 Reports Specifications
The following table lists detailed specifications on the reports feature.
Report Specifications
LABEL
DESCRIPTION
Number of web
sites/protocols
or ports/IP
addresses listed:
20
Hit count limit:
Up to 232 hits can be counted per web site. The count starts over at 0 if it passes four
billion.
Bytes count
limit:
Up to 264 bytes can be counted per protocol/port or LAN IP address. The count starts
over at 0 if it passes 264 bytes.
®
WR1500 4-Port Wireless DSL/Cable Router
Part VII
Maintenance
This part describes the Maintenance Web
Configuration Utility screens.
®
WR1500 4-Port Wireless DSL/Cable Router
Chapter 16:
Maintenance
This chapter displays system information such as firmware,
port IP addresses and port traffic statistics.
16.1
Maintenance Overview
The maintenance screens can help you view system information, upload new firmware, manage
configuration and restart your WR1500 Wireless Router.
16.2
System Status Screen
Click MAINTENANCE to open the System Status screen, where you can use to monitor your
WR1500 Wireless Router. Note that these fields are READ-ONLY and are meant to be used for
diagnostic purposes.
The following table describes the information in the SYSTEM STATUS screen:
LABEL
DESCRIPTION
System Name
This is the System Name you enter in the first Internet Access Wizard screen. It is for
identification purposes.
Firmware Version
This is the firmware version and the date created.
Routing Protocols
This shows the routing protocol - IP for which the WR1500 Wireless Router is configured.
WAN Port
IP Address
This is the WAN port IP address.
IP Subnet Mask
This is the WAN port subnet mask.
DHCP
This is the WAN port DHCP role - Client or None.
LAN Port
IP Address
This is the LAN port IP address.
IP Subnet Mask
This is the LAN port subnet mask.
DHCP
This is the LAN port DHCP role - Server, Client or None.
Show Statistics
Click Show Statistics to see router performance statistics such as number of packets sent
and number of packets received for each port.
®
WR1500 4-Port Wireless DSL/Cable Router
16.2.1 System Statistics
Read-only information here includes port status and packet specific statistics. Also provided are
“system up time” and “poll interval(s)”. The Poll Interval field is configurable.
The following table describes the labels in this screen.
System Status: Show Statistics
LABEL
DESCRIPTION
Port
This is the LAN or WAN port.
Status
This shows the port speed and duplex setting if you are using Ethernet encapsulation for
the Ethernet port. This shows the transmission speed only for wireless port.
TxPkts
This is the number of transmitted packets on this port.
RxPkts
This is the number of received packets on this port.
Collisions
This is the number of collisions on this port.
TxB/s
This shows the transmission speed in bytes per second on this port.
RxB/s
This shows the reception speed in bytes per second on this port.
Up Time
This is the total amount of time the line has been up.
System Up Time This is the total time the WR1500 Wireless Router has been on.
Poll Interval
Enter the time interval for refreshing statistics.
Set Interval
Click this button to apply the new poll interval you entered above.
Stop
Click this button to stop refreshing statistics.
®
WR1500 4-Port Wireless DSL/Cable Router
16.3 DHCP Table Screen
DHCP (Dynamic Host Configuration Protocol, RFC 2131 and RFC 2132) allows individual clients
to obtain TCP/IP configuration at start-up from a server. You can configure the WR1500 Wireless Router as a DHCP server or disable it. When configured as a server, the WR1500 Wireless
Router provides the TCP/IP configuration for the clients. If set to None, DHCP service will be
disabled and you must have another DHCP server on your LAN, or else the computer must be
manually configured.
Click MAINTENANCE and then DHCP TABLE. Read-only information here relates to your
DHCP status. The DHCP table shows current DHCP client information (including IP Address,
Host Name and MAC Address) of all network clients using the DHCP server.
The following table describes the labels in this screen.
DHCP Table
LABEL
DESCRIPTION
#
This is the index number of an associated wireless station.
IP Address
This field displays the IP Address relative to the # field listed above.
Host Name
This field displays the computer host name.
MAC Address
The MAC (Media Access Control) or Ethernet address on a LAN (Local Area Network) is
unique to your computer (six pairs of hexadecimal notation).
A network interface card, such as an Ethernet adapter, has a hardwired address that is
assigned at the factory. This address follows an industry standard that ensures no other
adapter has a similar address.
Refresh
Click Refresh to reload the DHDCP table.
®
WR1500 4-Port Wireless DSL/Cable Router
16.4 Wireless Screen
View the wireless stations that are currently associated to the WR1500 in the Association List
Screen. Click Maintenance, and then Wireless to bring up the screen shown below.
The following table describes the labels in this screen.
Association List
LABEL
DESCRIPTION
#
This is the index number of an associated wireless station.
MAC Address
This field displays the MAC address of an associated wireless station.
Association Time
This field displays the time a wireless station first associated with the WR1500 Wireless
Router.
Refresh
Click Refresh to reload the screen.
®
WR1500 4-Port Wireless DSL/Cable Router
16.4.1 Channel Usage
The Channel Usage screen displays whether a channel is used by another wireless network or
not. If a channel is being used, you should select a channel removed from it by five channels to
completely avoid overlap.
Click MAINTENANCE, WIRELESS and then the Channel Usage tab to display the screen
shown next. Wait a moment while the WR1500 Wireless Router compiles the information.
The following table describes the labels in this screen.
Channel Usage
LABEL
DESCRIPTION
SSID
This is the Service Set IDentification name of the AP in an infrastructure wireless network or wireless
station in an Ad-Hoc wireless network. For our purposes, we define an Infrastructure network as a
wireless network that uses an AP and an Ad-Hoc network (also known as Independent Basic Service
Set (IBSS)) as one that doesn’t. See the Wireless Configuration and Roaming chapter for more
information on basic service sets (BSS) and extended service sets (ESS).
MAC
Address
This field displays the MAC address of the AP in an Infrastructure wireless network. It is randomly
generated (so ignore it) in an Ad-Hoc wireless network.
Channel
This is the index number of the channel currently used by the associated AP in an
Infrastructure wireless network or wireless station in an Ad-Hoc wireless network.
Signal
This field displays the strength of the AP’s signal. If you must choose a channel that’s currently
in use, choose one with low signal strength for minimum interference.
Network
Mode
“Network mode” in this screen refers to your wireless LAN infrastructure (refer to the Wireless LAN
chapter) and WEP setup.
Refresh
Network modes are: Infrastructure (same as an extended service set ESS)), Infrastructure with WEP
(WEP encryption is enabled), Ad-Hoc (same as an independent basic service set IBSS)), or Ad-Hoc
with WEP.
Click Refresh to reload the screen.
®
WR1500 4-Port Wireless DSL/Cable Router
16.5 F/W Upload Screen
Occasionally, we will make an updated version of firmware available for download. To check
and see if a newer version of firmware is available for your WR1500, go to the following page
on our web site: www.direct2data.com/downloads.htm Under the section for the WR1500 on
that page, you will see a link for a firmware update for the WR1500 (if available). The upload
process uses HTTP (Hypertext Transfer Protocol) and may take up to two minutes. After a
successful upload, the system will reboot. See the Firmware and Configuration File
Maintenance chapter for upgrading firmware using FTP/TFTP commands.
Click MAINTENANCE, and then the FAV UPLOAD tab. Follow the instructions in this screen
to upload firmware to your WR1500 Wireless Router.
The following table describes the labels in this screen.
Firmware Upload
Firmware
LABEL
DESCRIPTION
File Path
Type in the location of the file you want to upload in this field or click Browse ... to find it.
Browse...
Click Browse... to find the .bin file you want to upload. Remember that you must decompress
compressed (.zip) files before you can upload them.
Upload
Click Upload to begin the upload process. This process may take up to two minutes.
Do not turn off the device while firmware upload is in progress!
After you see the Firmware Upload in Process screen, (see next page for this screen)
wait two minutes before logging into the device again.
Continued on Next Page
®
WR1500 4-Port Wireless DSL/Cable Router
16.5 F/W Upload Screen - Continued
Wait two minutes before logging into the device again, after you see the above screen.
The WR1500 Wireless Router automatically restarts in this time causing a temporary network disconnect. In some operating systems, you may see the following icon on your desktop.
After two minutes, log in again and check your new firmware version in the System Status screen.
If the upload was not successful, the following screen will appear. Click Return to go back to the
F/W Upload screen.
®
WR1500 4-Port Wireless DSL/Cable Router
16.6 Configuration Screen
The Web Configuration Utility uses TFTP to transfer files. See the Firmware and Configuration
File Maintenance chapter for transferring configuration files using FTP/TFTP commands.
Click MAINTENANCE and then the Configuration tab. Information related to backup
configuration, restoring configuration and factory defaults appears as shown next.
16.6.1 Backup Configuration
Backup configuration allows you to backup (save) the current system (WR1500 Wireless
Router) configuration to your computer. Backup is highly recommended once your WR1500
Wireless Router is functioning properly.
Click Backup to save your current WR1500 Wireless Router configuration to your computer.
16.6.2 Restore Configuration
Restore configuration replaces your WR1500 Wireless Router’s current configuration (content
filters, firewall settings, etc.) with a previously saved configuration. Restore files (usually) have a
.ROM extension, e.g., “WR1500 Wireless Router ROM”. The system reboots automatically after
the file transfer is complete and uses the configured values in the file.
WARNING! Do not interrupt the file transfer process as this may
PERMANENTLY DAMAGE YOUR WR1500 WIRELESS ROUTER!
When the Restore Configuration process is complete, the WR1500 Wireless
Router will automatically restart. Click the Restore tab to display the screen shown next.
The screen above is explained on the next page.
®
WR1500 4-Port Wireless DSL/Cable Router
16.6.2 Restore Configuration - Continued
The following table describes the labels in the screen on the preceding page.
Restore Configuration
Firmware
LABEL
DESCRIPTION
File Path
Type in the location of the file you want to upload in this field or click Browse ... to find it.
Browse...
Click Browse... to find the file you want to upload. Remember that you must decompress compressed
(.ZIP) files before you can upload them.
Upload
Click Upload to begin the upload process.
Do not turn off the device while configuration file upload is in progress.
After you see a “configuration upload successful” screen, you must then wait one minute before
logging into the WR1500 Wireless Router again.
The WR1500 Wireless Router automatically restarts in this time causing a temporary network
disconnect. In some operating systems, you may see the following icon on your desktop.
If you uploaded the default configuration file you may
need to change the IP address of your computer to
be in the same subnet as that of the default WR1500
Wireless Router IP address (192.168.1.1). See the
appendix for details on how to set up your computer’s
IP address.
If the upload was not successful, the following screen
will appear. Click Return to go back to the Configuration screen.
®
WR1500 4-Port Wireless DSL/Cable Router
16.6.3 Back to Factory Defaults
Clicking the Reset button in this section clears all user-entered configuration information and
returns the WR1500 Wireless Router to its factory defaults as shown on the screen. This will
erase all configurations that you have applied.
Click the Default tab to display the screen shown next.
Clicking the Reset button will cause the following screen to be displayed:
You can also press the RESET button on the side panel to reset the factory defaults of your
WR1500 Wireless Router. Refer to the Resetting the WR1500 Wireless Router section for more
information on the RESET button.
®
WR1500 4-Port Wireless DSL/Cable Router
Part VIII
SMT Getting Started Menus
This part introduces the SMT (System Management
Terminal) and discusses the “Getting Started” SMT
menus.
See the Web Configuration Utility parts of this guide for
background information on features configurable by Web
Configuration Utility and SMT.
®
WR1500 4-Port Wireless DSL/Cable Router
Chapter 17:
Introducing the SMT
This chapter describes how to access the SMT and provides an overview of its menus.
17.1
Connect to your WR1500 Wireless Router Using Telnet
The following procedure details how to telnet into your WR1500 Wireless Router.
Step 1.
Make sure your computer IP address and the WR1500 Wireless Router IP
address are on the same subnet. Refer to the Setting Up Your Computer IP
Address appendix.
Step 2.
In Windows, click Start (usually in the bottom left corner), Run and then type “telnet
192.168.1.1” (the default IP address) and click OK.
Step 3.
For your first login, enter 1234 in the Password field. As you type the password, the
screen displays an “x” for each character you type.
Step 4.
After entering the password you will see the main menu.
Please note that if there is no activity for longer than five minutes
(default timeout period)
after you log in, your WR1500 Wireless Router will automatically log you out.
17.2.1 Initial Screen
When you turn on your WR1500 Wireless Router, it performs several internal tests as well
as line initialization. After the initialization, the WR1500 Wireless Router asks you to press
[ENTER] to continue, as shown.
®
WR1500 4-Port Wireless DSL/Cable Router
17.2.2 Entering Password
The login screen appears after you press [ENTER], prompting you to enter the password, as
shown next.
For your first login, enter the default password “1234”. As you type the password, the screen
displays an “x” for each character you type.
17.3 Changing the System Password
Change the WR1500 Wireless Router default password by following the steps shown next.
Step 1.
Enter 23 in the main menu to open Menu 23 - System Security.
Step 2.
Enter 1 to display Menu 23.1 - System Security - Change Password as shown next.
Step 3.
Type your existing system password in the Old Password field, for example “1234”,
and press [ENTER].
Step 4.
Type your new system password in the New Password field (up to 30 characters),
and press [ENTER].
Step 5.
Re-type your new system password in the Retype to confirm field for confirmation
and press [ENTER].
Note that as you type a password, the screen displays an asterisk “*” for each character
you type.
17.4 WR1500 Wireless Router SMT Menu Overview Example
We use the WR1500 Wireless Router v.2 SMT menus in this guide as an example. The SMT
menus for your model may vary slightly.
The diagram on the following page gives you an example overview of the various SMT menu
screens for your WR1500 Wireless Router B-2000 v.2.
®
WR1500 4-Port Wireless DSL/Cable Router
17.4 WR1500 Wireless Router SMT Menu Overview Example - Continued
®
WR1500 4-Port Wireless DSL/Cable Router
17.5 Navigating the SMT Interface
Several operations that you should be familiar with before you attempt to modify the
configuration are listed in the table below.
Main Menu Commands
OPERATION
KEYSTROKE
DESCRIPTION
Move down to
another menu
[ENTER]
To move forward to a submenu, type in the number of the desired
submenu and press [ENTER].
Move up to a
previous menu
[ESC]
Press [ESC] to move back to the previous menu.
Move to a “hidden”
menu
Press [SPACE
Fields beginning with “Edit” lead to hidden menus and have a
BAR] to change No default setting of No. Press [SPACE BAR] once to change No to
to Yes then press
Yes, then press [ENTER] to go to the “hidden” menu.
[ENTER].
Move the cursor
[ENTER] or [UP]/
Within a menu, press [ENTER] to move to the next field. You can
[DOWN] arrow keys. also use the [UP]/[DOWN] arrow keys to move to the previous
and the next field, respectively.
Entering
information
Type in or press
You need to fill in two types of fields. The first requires you to type
[SPACE BAR], then in the appropriate information. The second allows you to cycle
press [ENTER].
through the available choices by pressing [SPACE BAR].
Required fields
<?> or ChangeMe
All fields with the symbol <?> must be filled in order to be able to
save the new configuration.
All fields with ChangeMe must not be left blank in order to be
able to save the new configuration.
N/A fields
<N/A>
Some of the fields in the SMT will show a <N/A>. This symbol
refers to an option that is Not Applicable.
Save your
configuration
[ENTER]
Save your configuration by pressing [ENTER] at the message
“Press ENTER to confirm or ESC to cancel”. Saving the data on
the screen will take you, in most cases to the previous menu.
Exit the SMT
Type 99, then press Type 99 at the main menu prompt and press [ENTER] to exit the
[ENTER].
SMT interface.
After you enter the password, the SMT displays the main menu, as shown on the next page.
®
WR1500 4-Port Wireless DSL/Cable Router
17.5 Navigating the SMT Interface - Continued
17.5.1 System Management Terminal Interface Summary
Main Menu Summary
#
MENU TITLE
DESCRIPTION
1
General Setup
Use this menu to set up your general information.
2
WAN Setup
Use this menu to set up your WAN connection.
3
LAN Setup
Use this menu to set up your LAN and WLAN connection.
4
Internet Access Setup
A quick and easy way to set up an Internet connection.
11
Remote Node Setup
Use this menu to set up the Remote Node for LAN-to-LAN connection,
including Internet connection.
12
Static Routing Setup
Use this menu to set up static routes.
14
Dial-in User Setup
Use this menu to set up local user profiles on the WR1500 Wireless
Router.
15
NAT Setup
Use this menu to specify inside servers when NAT is enabled.
21
Filter and Firewall Setup Use this menu to set up filters and firewall to provide security, etc.
22
SNMP Configuration
Use this menu to set up SNMP related parameters.
23
System Security
Use this menu to change your password and set up wireless security.
24
System Maintenance
This menu provides system status, diagnostics, software upload, etc.
26
Schedule Setup
Use this menu to schedule outgoing calls.
99
Exit
Use this to exit from SMT and return to a blank screen.
®
WR1500 4-Port Wireless DSL/Cable Router
Chapter 18:
General and WAN Setup
The chapter shews you the information on general setup and how to configure the WAN.
18.1 General Setup
Menu 1 - General Setup contains administrative and system-related information (shown next).
The System Name field is for identification purposes. However, because some ISPs check this
name you should enter your computer’s “Computer Name”.
The Domain Name entry is what is propagated to the DHCP clients on the LAN. If you leave
this blank, the domain name obtained by DHCP from the ISP is used. While you must enter
the host name (System Name) on each individual computer, the domain name can be assigned from the WR1500 Wireless Router via DHCP.
18.1.1 Dynamic DNS
To use this service, you must register with the Dynamic DNS service provider. The Dynamic
DNS service provider will give you a password or key. The WR1500 Wireless Router supports
www.dyndns.org. You can apply to this service provider for Dynamic DNS service.
DYNDNS Wildcard
Enabling the wildcard feature for your host causes *.yourhost.dyndns.org to be aliased to the
same IP address as yourhost.dyndns.org. This feature is useful if you want to be able to use,
for example, www.yourhost.dyndns.org and still reach your hostname.
18.1.2 Procedure To Configure Menu 1
Step 1.
Enter 1 in the Main Menu to open Menu 1 - General Setup as shown next.
®
WR1500 4-Port Wireless DSL/Cable Router
18.1.2 Procedure To Configure Menu 1 - Continued
Step 2.
Fill in the required fields. Refer to the table shown next for more information about
these fields.
Menu 1 General Setup
FIELD
DESCRIPTION
EXAMPLE
System Name
Choose a descriptive name for identification purposes. This name
can be up to 30 alphanumeric characters long. Spaces are not
allowed, but dashes”-” and underscores “_” are accepted.
WR1500 Wireless
Router
Domain Name
Enter the domain name (if you know it) here. If you leave this field
blank, the ISP may assign a domain name via DHCP. You can go to
menu 24.8 and type “sys domainname” to see the current domain
name used by your gateway.
parkervision.com
If you want to clear this field just press the [SPACE BAR]. The domain
name entered by you is given priority over the ISP assigned domain
name.
First System DNS
Server
Second System
DNS Server
Third System DNS
Server
Press [SPACE BAR] to select From ISP, User Defined or None and
press [ENTER].
From ISP
IP Address
Enter the IP addresses of the DNS servers. This field is available
when you select User-Defined in the field above.
N/A
Edit Dynamic DNS
Press [SPACE BAR] to select Yes and press [ENTER] to configure
Menu 1.1 - Configure Dynamic DNS (discussed next).
No
When you have completed this menu, press [ENTER] at the prompt “Press ENTER to Confirm...” to save your
configuration, or press [ESC] at any time to cancel.
18.1.3 Procedure to Configure Dynamic DNS
If you have a private WAN IP address, then you cannot use Dynamic DNS.
Step 1. To configure Dynamic DNS, go to Menu 1 - General Setup and select Yes in the Edit
Dynamic DNS field. Press [ENTER] to display Menu 1.1— Configure Dynamic DNS as shown on the
next page.
®
WR1500 4-Port Wireless DSL/Cable Router
18.1.3 Procedure to Configure Dynamic DNS - Continued
The following table describes the fields in this menu.
Menu 1.1 Configure Dynamic DNS
FIELD
DESCRIPTION
Service Provider This is the name of your Dynamic DNS service provider.
EXAMPLE
WWW.DynDNS.ORG
(default)
Active
Press [SPACE BAR] to select Yes and then press [ENTER] to make
dynamic DNS active.
Yes
DDNS Type
Press [SPACE BAR] and then [ENTER] to select DynamicDNS if
you have a dynamic IP address(es). Select StaticDNS if you have a
static IP address(s).
Select CustomDNS to have dyns.org provide DNS service for
a domain name that you already have from a source other than
dyndns.org.
DynamicDNS
(default)
Host1-3
Enter your host name(s) in the fields provided. You can specify up to
two host names separated by a comma in each field.
me.dyndns.org
USER
Enter your user name.
Password
Enter the password assigned to you.
Enable Wildcard
Your WR1500 Wireless Router supports DYNDNS wildcard. Press
[SPACE BAR] and then [ENTER] to select Yes or No This field is N/A
when you choose DDNS client as your service provider.
No
Offline
This field is only available when CustomDNS is selected in the
DDNS Type field. Press [SPACE BAR] and then [ENTER] to select
Yes. When Yes is selected, traffic is redirected to a URL that you
have previously specified (see www.dvndns.org for details).
Yes
EUpdate IP Address:
You can select Yes in either the Use Server Detected IP field (recommended) or the User Specified IP Addr
field, but not both.
With the Use Server Detected IP and User Specified IP Addr fields both set to No, the DDNS server
automatically updates the IP address of the host name(s) with the WR1500 Wireless Router’s WAN IP
address.
DDNS does not work with a private IP address. When both fields are set to No, the WR1500 Wireless Router
must have a public WAN IP address in order for DDNS to work.
Continued on next page
®
WR1500 4-Port Wireless DSL/Cable Router
18.1.3 Procedure to Configure Dynamic DNS - Continued
Menu 1.1 Configure Dynamic DNS - Continued
FIELD
Use Server
Detected IP
DESCRIPTION
EXAMPLE
Press [SPACE BAR] to select Yes and then press [ENTER] to have
the DDNS server automatically update the IP address of the host
name(s) with the public IP address that the WR1500 Wireless Router
uses or is behind.
You can set this field to Yes whether the IP address is public or
private, static or dynamic.
User Specified IP Press [SPACE BAR] to select Yes and then press [ENTER] to
Address
update the IP address of the host name(s) to the IP address
specified below.
Yes
No
Only select Yes if the WR1500 Wireless Router uses or is
behind a static public IP address.
IP Address
Enter the static public IP address if you select Yes in the User
Specified IP Addr field.
N/A
When you have completed this menu, press [ENTER] at the prompt “Press ENTER to Confirm...” to save
your configuration, or press [ESC] at any time to cancel.
18.2 WAN Setup
The MAC address field allows users to configure the WAN port’s MAC address by either
using the factory default or cloning the MAC address from a computer on your LAN. Once it
is successfully configured, the address will be copied to the rom file. It will not change unless
you change the setting or upload a different rom file.
ParkerVision recommends you clone the MAC address from a workstation on your LAN
even if your ISP does not require MAC address authentication.
From the main menu, enter 2 to display Menu 2-WAN Setup screen as shown.
The table on the following page describes the fields in this menu.
®
WR1500 4-Port Wireless DSL/Cable Router
18.2 WAN Setup - Continued
The table below describes the fields in the menu on the previous page.
FIELD
DESCRIPTION
EXAMPLE
MAC Address
Assigned By
IP Address
Press [SPACE BAR] to select Factory default and press [ENTER] to
use the factory assigned MAC address.
Select IP address attached on LAN and enter the IP address in the IP
Address field below to clone the MAC address of the computer on the
Ethernet.
Enter the IP address of the computer whose MAC address you are
cloning. This field is available if you select IP address attached on
LAN in the Assigned By field.
Factory default
N/A
When you have completed this menu, press [ENTER] at the prompt “Press ENTER to Confirm...” to save
your configuration, or press [ESC] at any time to cancel.
®
WR1500 4-Port Wireless DSL/Cable Router
Chapter 19:
LAN Setup
This chapter shows you how to configure the LAN on your WR1500 Wireless Router.
19.1 LAN Setup
This section describes how to configure the Ethernet using Menu 3 - LAN Setup. From the
main menu, enter 3 to display menu 3.
Detailed explanation about the LAN Setup screens is given in the next chapter.
19.1.1 General Ethernet Port Filter Setup
This menu allows you to specify filter set(s) that you wish to apply to the Ethernet traffic. You
seldom need to filter Ethernet traffic; however, the filter sets may be useful to block certain
packets, reduce traffic and prevent security breaches.
If you need to define filters, please read the Filter Set Configuration chapter first, then return to
this menu to define the filter sets.
®
WR1500 4-Port Wireless DSL/Cable Router
19.2 TCP/IP Ethernet and DHCP Setup
Use menu 3.2 to configure your WR1500 Wireless Router for TCP/IP.
To edit menu 3.2, enter 3 from the main menu to display Menu 3-Ethernet Setup. When menu
3 appears, press 2 and press [ENTER] to display Menu 3.2-TCP/IP and DHCP Ethernet
Setup, as shown next:
Follow the instructions in the table on the following page to configure the DHCP fields.
®
WR1500 4-Port Wireless DSL/Cable Router
19.2 TCP/IP Ethernet and DHCP Setup - Continued
Follow the instructions in the table below to configure the DHCP fields.
DHCP Ethernet Setup
FIELD
DHCP
DESCRIPTION
EXAMPLE
If set to Server, your WR1500 Wireless Router can assign IP
addresses, an IP default gateway and DNS servers to Windows 95,
Windows NT and other systems that support the DHCP client.
Server
(default)
If set to None, the DHCP server will be disabled. If set to Relay, the
WR1500 Wireless Router acts as a surrogate DHCP server and relays
DHCP requests and responses between the remote server and the
clients. Enter the IP address of the actual, remote DHCP server in the
Remote DHCP Server in this case.
When DHCP is used, the following items need to be set:
Starting Address
This field specifies the first of the contiguous addresses in the IP
address pool.
Size of Client IP Pool
This field specifies the size or count of the IP address pool.
First DNS Server
Press [SPACE BAR] to select From ISP, User Defined, DNS Relay
or None and press [ENTER].
Second DNS Server
Third DNS Server
The DNS servers are passed to the DHCP clients along with the IP
address and the subnet mask.
IP Address
Enter the IP addresses of the DNS servers. This field is available
when you select User-Defined in the field above.
DHCP Server
Address
If Relay is selected in the DHCP field above then enter the IP address
of the actual remote DHCP server here.
192.168.1.33
32
From ISP
N/A
Follow the instructions in the following table to configure TCP/IP parameters for the Ethernet port.
TCP/IP Ethernet Setup
FIELD
DESCRIPTION
EXAMPLE
IP Address
Enter the (LAN) IP address of your WR1500 Wireless Router in dotted
decimal notation
192.168.1.1
IP Subnet Mask
Your WR1500 Wireless Router will automatically calculate the subnet
mask based on the IP address that you assign. Unless you are
implementing subnetting, use the subnet mask computed by the
WR1500 Wireless Router.
255.255.255.0
RIP Direction
Press [SPACE BAR] to select the RIP direction. Choices are Both, In
Only, Out Only or None.
Both
TCP/IP Setup
Continued on the next page.
®
WR1500 4-Port Wireless DSL/Cable Router
19.2 TCP/IP Ethernet and DHCP Setup - Continued
TCP/IP Ethernet Setup - Continued
FIELD
DESCRIPTION
EXAMPLE
Version
Press [SPACE BAR] to select the RIP version. Choices are RIP-1,
RIP-2B or RIP-2M.
RIP-1
Multicast
IGMP (Internet Group Multicast Protocol) is a session-layer protocol
used to establish membership in a Multicast group. The WR1500
Wireless Router supports both IGMP version 1(IGMP-v1) and version
2 (IGMP-v2). Press the [SPACE BAR] to enable IP Multicasting or
select None to disable it.
None
Edit IP Alias
The WR1500 Wireless Router supports three logical LAN interfaces via
its single physical Ethernet interface with the WR1500 Wireless Router
itself as the gateway for each LAN network. Press [SPACE BAR] to
select Yes and press [ENTER] to go to menu 3.2.1.
No
When you have completed this menu, press [ENTER] at the prompt “Press ENTER to Confirm...” to save
your configuration, or press [ESC] at any time to cancel.
19.3 IP Alias
IP Alias allows you to partition a physical network into different logical networks over the same
Ethernet interface. The WR1500 Wireless Router supports three logical LAN interfaces via its
single physical Ethernet interface with the WR1500 Wireless Router itself as the gateway for
each LAN network.
Use menu 3.2.1 to configure IP Alias on your WR1500 Wireless Router.
®
WR1500 4-Port Wireless DSL/Cable Router
19.3.1 IP Alias Setup
Use menu 3.2 to configure the first network. Move the cursor to Edit IP Alias field and press
[SPACE BAR] to choose Yes and press [ENTER] to configure the second and third network.
Press [ENTER] to display Menu 3.2.1-IP Alias Setup, as shown next.
Follow the instructions in the table on the next page to configure IP Alias parameters.
®
WR1500 4-Port Wireless DSL/Cable Router
19.3.1 IP Alias Setup - Continued
FIELD
DESCRIPTION
IP Alias
Choose Yes to configure the LAN network for the WR1500 Wireless
Router.
IP Address
Enter the IP address of your WR1500 Wireless Router in dotted decimal
notation
IP Subnet Mask Your WR1500 Wireless Router will automatically calculate the subnet
mask based on the IP address that you assign. Unless you are
implementing subnetting, use the subnet mask computed by the
WR1500 Wireless Router
EXAMPLE
Yes
192.168.1.1
255.255.255.0
RIP Direction
Press [SPACE BAR] to select the RIP direction. Choices are None,
Both, In Only or Out Only.
None
Version
Press [SPACE BAR] to select the RIP version. Choices are RIP-1,
RIP-2B or RIP-2M.
RIP-1
Incoming
Protocol Filters
Enter the filter set(s) you wish to apply to the incoming traffic between
this node and the WR1500 Wireless Router.
Outgoing
Protocol Filters
Enter the filter set(s) you wish to apply to the outgoing traffic between
this node and the WR1500 Wireless Router.
When you have completed this menu, press [ENTER] at the prompt “Press ENTER to Confirm...” to save
your configuration, or press [ESC] at any time to cancel.
19.4 Wireless LAN Setup
Use menu 3.5 to set up your WR1500 Wireless Router as the Wireless Router. To edit menu
3.5, enter 3 from the main menu to display Menu 3 - LAN Setup. When menu 3 appears, press
5 and then press [ENTER] to display Menu 3.5 - Wireless LAN Setup as shown next.
The table on the following page describes the fields in this menu.
®
WR1500 4-Port Wireless DSL/Cable Router
19.4 Wireless LAN Setup - Continued
FIELD
ESSID
DESCRIPTION
EXAMPLE
The ESSID (Extended Service Set IDentity) identifies the AP the wireless
station is to associate to. Wireless stations associating to the AP must have
the same ESSID. Enter a descriptive name up to 32 printable 7-bit ASCII
characters.
Wireless
Hide ESSID Press [SPACE BAR] and select Yes to hide the ESSID in the outgoing data
frame so a intruder cannot obtain the ESSID through passive scanning.
No
CH01
2412MHz
Channel ID
Press [SPACE BAR] to select a channel. This allows you to set the
operating frequency/channel depending on your particular region.
RTS
Threshold
Setting this attribute to zero turns on the RTS/CTS handshake. Enter a
value between 0 and 2432.
2432
Fragment
Threshold
This is the maximum data fragment size that can be sent. Enter a value
between 256 and 2432.
2432
WEP
Select Disable to allow wireless stations to communicate with the Wireless
Routers without any data encryption. Select 64-bit WEP or 128-bit WEP
to enable data encryption.
Disable
Default Key
Enter the key number (1 to 4) in this field. Only one key can be enabled at
any one time. This key must be the same on the WR1500 Wireless Router
and the wireless stations to communicate.
1
Key 1 to
Key 4
The WEP keys are used to encrypt data. Both the WR1500 Wireless
Router and the wireless stations must use the same WEP key for data
transmission.
If you chose 64-bit WEP in the WEP Encryption field, then enter any 5
ASCII characters or 10 hexadecimal characters (“0-9”, “A-F”). If you chose
128-bit WEP in the WEP Encryption field, then enter 13 ASCII characters
or 26 hexadecimal characters (“0-9”, “A-F”).
0x12345abcde
Enter “Ox” before the key to denote a hexadecimal
key. Don’t enter “Ox” before the key to denote a ASCII
key.
Press [SPACE BAR] to select Auto, Open System Only or Shared Key
Only and press [ENTER].
Authen.
Method
Auto
This field is N/A if WEP is not activated. If WEP encryption is activated,
the default setting is Auto.
Block IntraBSS Traffic
Press [SPACE BAR] to select Yes or No and press [ENTER].
Number of
Associated
Stations
Enter the maximum number of wireless stations that may connect to the
WR1500 Wireless Router. The number should be from 1 to 32.
Breathing
LED
Press [SPACE BAR] to select Yes or No and press [ENTER].
Output
Power
Press [SPACE BAR] to select 11 dBm, 13dBm, 15dBm or 17dBm and
press [ENTER].
No
Yes
17dBm
When you have completed this menu, press [ENTER] at the prompt “Press ENTER to confirm or
ESC to cancel” to save your configuration or press [ESC] to cancel and go back to the previous screen.
®
WR1500 4-Port Wireless DSL/Cable Router
19.4.1 Configuring MAC Address Filter
Your WR1500 Wireless Router checks the MAC address of the wireless station device
against a list of allowed or denied MAC addresses. However, intruders could fake allowed
MAC addresses so MAC-based authentication is less secure than EAP authentication.
Follow the steps below to create the MAC address table on your WR1500 Wireless Router.
Step 1 - From the main menu, enter 3 to open Menu 3 - LAN Setup.
Step 2 - Enter 5 to display Menu 3.5 - Wireless LAN Setup.
Step 3 - In the Edit MAC Address Filtering field, press [SPACE BAR] to select Yes and press
[ENTER].
Menu 3.5.1 - WLAN MAC Address Filter displays as shown next.
The table on the next page describes the fields in this menu.
®
WR1500 4-Port Wireless DSL/Cable Router
19.4.1 Configuring MAC Address Filter - Continued
FIELD
DESCRIPTION
Active
To enable MAC address filtering, press [SPACE BAR] to select Yes and press [ENTER].
Filter Action
Define the filter action for the list of MAC addresses in the MAC address filter table.
To deny access to the WR1500 Wireless Router, press [SPACE BAR] to select Deny
Association and press [ENTER]. MAC addresses not listed will be allowed to access the
router.
The default action, Allowed Association, permits association with the WR1500 Wireless
Router. MAC addresses not listed will be denied access to the router.
MAC Address Filter
1..32
Enter the MAC addresses (in XX:XX:XX:XX:XX:XX format) of the client computers that are
allowed or denied access to the WR1500 Wireless Router in these address fields.
When you have completed this menu, press [ENTER] at the prompt “Press ENTER to confirm or ESC to cancel”
to save your configuration or press [ESC] to cancel and go back to the previous screen.
®
WR1500 4-Port Wireless DSL/Cable Router
Chapter 20:
Internet Access
This chapter describes how to configure the WR1500 Wireless Router for Internet Access.
20.1 Internet Access Configuration
Menu 4 allows you to enter the Internet Access information in one screen. Menu 4 is actually
a simplified setup for one of the remote nodes that you can access in menu 11. Before you
configure your WR1500 Wireless Router for Internet access, you need to collect your Internet
account information from your ISP and telephone company.
Use the following table to record your Internet Account Information.
Note that if you are using PPP or PPPoE encapsulation, then the only ISP information you
need is a login name and password.
FIELD
DESCRIPTION
System Name
Enter the name of the WR1500 Wireless Router
(optional).
Service Name
(PPPoE)
Enter the PPPoE service name if the ISP
supplies one. Enter “any if the ISP does not
assign you one.
Encapsulation
Select Ethernet, PPPoE or PPTP
My Login
Enter the login name assigned by your ISP (for
PPP/PPPoE only).
My Password
Enter the password associated with your ISP
assigned My Login (for PPP/PPPoE only).
Idle Timeout
(PPPoE or
PPP)
Enter the time lapse, in seconds, before you
automatically disconnect from the PPPoE or PPP
server.
IP Address
Enter if your IP address is not dynamically
assigned.
Network
Address
Translation
Select Full Feature, SUA Only or None.
DNS Server
Address
Assignment
Primary DNS server Secondary DNS server
Enter when using RFC 1483 Encapsulation or a
static IP address.
YOUR INFORMATION
®
WR1500 4-Port Wireless DSL/Cable Router
20.2 Internet Access Setup
From the main menu, type 4 to display Menu 4 - Internet Access Setup, as shown next.
The following table contains instructions on how to configure your WR1500 Wireless Router for Internet
access.
Internet Access Setup
FIELD
DESCRIPTION
ISP’s Name
Enter the name of your Internet Service Provider. This information is for identification
purposes only.
Encapsulation
Press [SPACE BAR] to select the method of encapsulation used by your ISP.
Choices are PPPoE, PPP or Ethernet.
Service Type
This field is available if you select the Ethernet encapsulation. Press [SPACE BAR]
to select the service type then press [ENTER].
EXAMPLE
ChangeMe
Ethernet
Standard
Choose a RoadRunner flavor if your ISP is using Time Warner’s RoadRunner;
otherwise choose Standard. The User Name, Password and Login Server fields
are not applicable (N/A) for the latter.
Choose from Standard, Telstra (RoadRunner Telstra or BigPond authentication
method), RR-Manager (RoadRunner Manager authentication method) or RRToshiba (RoadRunner Toshiba authentication method).
My Login
Configure the My Login and My Password fields for PPP and PPPoE
encapsulation only. Enter the login name exactly as your ISP gives you.
N/A
My Password
Enter the password associated with the login name above.
N/A
Login Server
Enter the IP address of the login server in dotted decimal notation.
IP Address
Assignment
Press [SPACE BAR] and then [ENTER] to select Static or Dynamic address
assignment.
IP Address
Enter the IP address supplied by your ISP if applicable.
Table continued on next page.
10.11.12.13
Static
10.11.12.20
®
WR1500 4-Port Wireless DSL/Cable Router
20.2 Internet Access Setup - Continued
IP Subnet Mask
Your WR1500 Wireless Router will automatically calculate the subnet mask
based on the IP address that you entered. Unless you are implementing
subnetting, use the subnet mask computed by the WR1500 Wireless Router.
Gateway IP Address Type the IP address of the gateway. The gateway is an immediate neighbor of
your WR1500 Wireless Router that will forward the packet to the destination.
On the LAN, the gateway must be a router on the same segment as your
WR1500 Wireless Router.
Network Address
Translation
Press [SPACE BAR] and then [ENTER] to select None, SUA Only or Full
Feature. Please see the NAT Chapter for more details.
SUA Only
When you have completed this menu, press [ENTER] at the prompt “Press ENTER to Confirm...” to save your
configuration, or press [ESC] at any time to cancel.
If all your settings are correct your WR1500 Wireless Router should connect automatically to the
Internet. If the connection fails, note the error message that you receive on the screen and take
the appropriate troubleshooting steps.
®
WR1500 4-Port Wireless DSL/Cable Router
Part IX
Appendices
This part contains appendices that are designed to assist
you with setup and troubleshooting of the WR1500
®
WR1500 4-Port Wireless DSL/Cable Router
Appendix A
Troubleshooting
This appendix covers potential problems and possible remedies. After each problem
description, some instructions are provided to help you to diagnose and to solve the problem.
Problems Starting Up the WR1500 Wireless Router
Troubleshooting the Start-Up of Your WR1500 Wireless Router
PROBLEM
CORRECTIVE ACTION
None of the LEDs
turn on when I
plug in the power
adaptor.
Make sure you are using the supplied power adaptor and that it is plugged in to an
appropriate power source. Check that the power source is turned on.
If the problem persists, you may have a hardware problem. In this case, you should
contact your local vendor.
I cannot access
the WR1500
Wireless Router
via the console
port.
1. Check to see if the WR1500 Wireless Router is connected to your computer’s
console port.
2. Check to see if the
communications program
is configured correctly. The
communications software
should be configured as
follows:
VT100 terminal emulation.
9600 bps is the default speed on leaving the factory.
Try other speeds in case the speed has been
changed.
No parity, 8 data bits, 1 stop bit, data flow set to
none.
Problems with the Password - Troubleshooting the Password
PROBLEM
I cannot access the
WR1500 Wireless
Router.
CORRECTIVE ACTION
The Password and Username fields are case-sensitive. Make sure that you enter the
correct password and username using the proper casing.
Use the RESET button on the side panel of the WR1500 Wireless Router to restore the
factory default configuration file (hold this button in for more than five seconds). This will
restore all of the factory defaults including the password.
®
WR1500 4-Port Wireless DSL/Cable Router
Problems with the Ethernet Interface - Troubleshooting the Ethernet Interface
PROBLEM
CORRECTIVE ACTION
I cannot access
the WR1500
Wireless Router
from the Ethernet
If all of the LAN LEDs on the front panel are off, check the Ethernet cable connection
between your WR1500 Wireless Router and the computer connected to the LAN port.
Check for faulty Ethernet cables. Make sure the computer’s Ethernet adapter is
installed and working properly.
Verify that the IP addresses and the subnet masks of the WR1500 Wireless Router
and the computer are on the same subnet.
I cannot ping any
computer on the
LAN.
If all of the LAN LEDs on the front panel are off, check the Ethernet cable connection
between your WR1500 Wireless Router and the computer connected to the LAN port.
Verify that the IP addresses and the subnet masks of the WR1500 Wireless Router
and the computers are on the same subnet.
Problems with the WAN Interface - Troubleshooting the WAN Interface
PROBLEM
CORRECTIVE ACTION
I cannot get a WAN IP
address from the ISP.
The ISP provides the WAN IP address after authenticating you. Authentication may be
through the user name and password, the MAC address or the host name.
The username and password apply to PPPoE and PPTP encapsulation only. Make
sure that you have entered the correct Service Type, User Name and Password (be
sure to use the correct casing). Refer to the WAN Screens chapter (Web Configuration
Utility) or the Internet Access chapter (SMT).
Clone the MAC address from your computer on the LAN as the WR1500 Wireless
Router’s WAN MAC address. Refer to the WAN Screens chapter (Web Configuration
Utility) or the General and WAN Setup chapter (SMT). It is recommended that you
clone your computer’s MAC address, even if your ISP presently does not require MAC
address authentication.
Configure your computer’s name as the WR1500 Wireless Router’s system name.
Refer to the Wizard Setup chapter (Web Configuration Utility) or the General and WAN
Setup chapter (SMT).
®
WR1500 4-Port Wireless DSL/Cable Router
Problems with Internet Access - Troubleshooting Internet Access
PROBLEM
I cannot access the
Internet.
CORRECTIVE ACTION
Connect your cable/DSL modem to the WR1500 Wireless Router using the
appropriate cable.
Check with the manufacturer of your cable/DSL device about your cable requirement
because for some devices may require a crossover cable and others a straightthrough Ethernet cable.
Verify your WAN settings. Refer to the WAN chapter (Web Configuration Utility) or the
Internet Access chapter (SMT).
Make sure you entered the correct user name and password.
For wireless stations, check that both the WR1500 Wireless Router and wireless
station(s) are using the same ESSID, channel and WEP keys (if WEP encryption is
activated).
Internet connection
disconnects
If you use PPTP or PPPoE encapsulation, check the idle time-out setting.
Refer to the WAN chapter (Web Configuration Utility) or the Remote Node
Configuration chapter (SMT).
Contact your ISP.
Problems with Telnet - Troubleshooting Telnet
PROBLEM
CORRECTIVE ACTION
I cannot access the
Refer to the Problems with the Ethernet Interface section for instructions on checking
WR1500 Wireless
your Ethernet connection.
Router through Telnet.
®
WR1500 4-Port Wireless DSL/Cable Router
Problems with the WLAN Interface - Troubleshooting the WLAN Interface
PROBLEM
I cannot ping any
computer on the
WLAN.
CORRECTIVE ACTION
Make sure the wireless card is properly inserted in the WR1500 Wireless Router and
the WLAN LED is on.
Make sure the wireless adapter on the wireless station is working properly.
Check that both the WR1500 Wireless Router and wireless station(s) are using the
same ESSID, channel and WEP keys (if WEP encryption is activated).
®
WR1500 4-Port Wireless DSL/Cable Router
Appendix B
Setting Up Your Computer’s IP Address
All computers must have a 10M or 100M Ethernet adapter card and TCP/IP installed.
Windows 95/98/Me/NT/2000/XP, Macintosh OS 7 and later operating systems and all versions
of UNIX/LINUX include the software components you need to install and use TCP/IP on your
computer. Windows 3.1 requires the purchase of a third-party TCP/IP application package.
TCP/IP should already be installed on computers using Windows NT/2000/XP, Macintosh OS 7
and later operating systems.
After the appropriate TCP/IP components are installed, configure the TCP/IP settings in order to
“communicate” with your network.
If you manually assign IP information instead of using dynamic assignment, make sure that your
computers have IP addresses that place them in the same subnet as the WR1500 Wireless
Router’s LAN port.
Note - Although the WR1500 can communicate with computers running all of the above
OS’, be advised that other products in the 1500 family (1500WLAN and 1500USB) are
compatible with computers running only Windows 2000 or XP.
Windows 95/98/Me
Click Start, Settings, Control Panel and double-click
the Network icon to open the Network window.
The Network window Configuration tab displays a list of
installed components. You need a network adapter, the
TCP/IP protocol and Client for Microsoft Networks.
If you need the adapter:
a. In the Network window, click Add.
b. Select Adapter and then click Add.
c. Select the manufacturer and model of your network
adapter and then click OK.
If you need TCP/IP:
a. In the Network window, click Add.
b. Select Protocol and then click Add.
c. Select Microsoft from the list of manufacturers.
d. Select TCP/IP from the list of network protocols and
then click OK.
If you need Client for Microsoft Networks:
a. Click Add.
b. Select Client and then click Add.
c. Select Microsoft from the list of manufacturers.
d. Select Client for Microsoft Networks from the list of network clients and then click OK.
e. Restart your computer so the changes you made take effect.
In the Network window Configuration tab, select your
network adapter’s TCP/IP entry and click Properties.
®
WR1500 4-Port Wireless DSL/Cable Router
Windows 95/98/Me - Continued
1. Click the IP Address tab.
-If your IP address is dynamic, select Obtain an IP
address automatically.
-If you have a static IP address, select Specify an IP
address and type your information into the IP Address
and Subnet Mask fields.
2. Click the DNS Configuration tab.
-If you do not know your DNS information, select
Disable DNS.
-If you know your DNS information, select Enable
DNS and type the information in the fields below (you
may not need to fill them all in).
®
WR1500 4-Port Wireless DSL/Cable Router
Windows 95/98/Me - Continued
3. Click the Gateway tab.
-If you do not know your gateway’s IP address, remove
previously installed gateways.
-If you have a gateway IP address, type it in the New
gateway field and click Add.
4. Click OK to save and close the TCP/IP
Properties window.
5. Click OK to close the Network window. Insert
the Windows CD if prompted.
6. Turn on your WR1500 Wireless Router and re
start your computer when prompted.
Verifying Your Computer’s IP Address
1. Click Start and then Run.
2. In the Run window, type “winipcfg” and then click OK to open the IP
Configuration window.
3. Select your network adapter. You should see your computer’s IP address, subnet
mask and default gateway.
®
WR1500 4-Port Wireless DSL/Cable Router
Windows 2000/XP
1. For Windows XP, click start, Control Panel.
In Windows 2000/NT, click Start, Settings,
Control Panel.
2. For Windows XP, click Network
Connections. For Windows 2000/NT, click
Network and Dial-up Connections.
3. Right-click Local Area Connection and
then click Properties.
®
WR1500 4-Port Wireless DSL/Cable Router
Windows 2000/XP - Continued
4. Select Internet Protocol (TCP/IP) (under
the General tab in Win XP) and click
Properties.
5. The Internet Protocol TCP/IP Properties
window opens (the General tab in
Windows XP).
-If you have a dynamic IP address click Obtain an
IP address automatically.
-If you have a static IP address click Use the
following IP Address and fill in the IP address,
Subnet mask, and Default gateway fields.
Click Advanced.
®
WR1500 4-Port Wireless DSL/Cable Router
Windows 2000/XP - Continued
6. If you do not know your gateway’s IP
address, remove any previously installed
gateways in the IP Settings tab and
click OK.
Do one or more of the following if you want to
configure additional IP addresses:
-In the IP Settings tab, in IP addresses, click Add.
-In TCP/IP Address, type an IP address in IP
address and a subnet mask in Subnet mask, and
then click Add.
-Repeat the above two steps for each IP address
you want to add.
-Configure additional default gateways in the IP
Settings tab by clicking Add in Default gateways.
-In TCP/IP Gateway Address, type the IP address of the default gateway in Gateway.
To manually configure a default metric (the number of transmission hops), clear the Automatic
metric check box and type a metric in Metric.
-Click Add.
-Repeat the previous three steps for each default gateway you want to add.
-Click OK when finished
®
WR1500 4-Port Wireless DSL/Cable Router
Windows 2000/XP - Continued
7. In the Internet Protocol TCP/IP Properties
window (the General tab in Windows XP):
-Click Obtain DNS server address automatically if
you do not know your DNS server IP address(es).
-If you know your DNS server IP address(es),
click Use the following DNS server addresses,
and type them in the Preferred DNS server and
Alternate DNS server fields.
If you have previously configured DNS servers,
click Advanced and then the DNS tab to order
them.
8. Click OK to close the Internet Protocol
(TCP/IP) Properties window.
9. Click OK to close the Local Area Connection
Properties window.
10. Turn on your WR1500 Wireless Router and restart your computer (if prompted).
Verifying Your Computer’s IP Address
1. Click Start, All Programs, Accessories and then Command Prompt.
2. In the Command Prompt window, type “ipconfig” and then press [ENTER]. You can
also open Network Connections, right-click a network connection, click Status and
then click the Support tab.
®
WR1500 4-Port Wireless DSL/Cable Router
Apple Macintosh OS 8 / 9
1. Click the Apple menu, Control Panel
and double-click TCP/IP to open the
TCP/
IP Control Panel.
2. Select Ethernet built-in from the Connect via list.
3. For dynamically
assigned settings,
select Using DHCP
Server from the
Configure: list.
®
WR1500 4-Port Wireless DSL/Cable Router
Apple Macintosh OS 8 / 9 - Continued
4. For statically assigned settings, do the following:
-From the Configure box, select Manually.
-Type your IP address in the IP Address box.
-Type your subnet mask in the Subnet mask box.
-Type the IP address of your WR1500 Wireless Router in the Router address box.
5. Close the TCP/IP Control Panel.
6. Click Save if prompted, to save changes to your configuration.
7. Turn on your WR1500 Wireless Router and restart your computer (if prompted).
Verifying Your Computer’s IP Address
Check your TCP/IP properties in the TCP/IP Control Panel window.
Macintosh OS X
1. Click the Apple menu, and click
System Preferences to open the
System Preferences window.
®
WR1500 4-Port Wireless DSL/Cable Router
Macintosh OS X - Continued
2. Click Network in the
icon bar.
- Select Automatic from
the Location list.
- Select Built-in Ethernet
from the Show list.
- Click the TCP/IP tab.
3. For dynamically assigned settings, select Using DHCP from the Configure list.
4. For statically assigned settings, do the following:
- From the Configure box, select Manually.
- Type your IP address in the IP Address box.
- Type your subnet mask in the Subnet mask box.
- Type the IP address of your WR1500 Wireless Router in the Router address box.
5. Click Apply Now and close the window.
6. Turn on your WR1500 Wireless Router and restart your computer (if prompted).
Verifying Your Computer’s IP Address
Check your TCP/IP properties in the Network window.
®
WR1500 4-Port Wireless DSL/Cable Router
Appendix C
PPoE
PPPoE in Action
An ADSL modem bridges a PPP session over Ethernet (PPP over Ethernet, RFC 2516) from
your PC to an ATM PVC (Permanent Virtual Circuit), which connects to a DSL Access Concentrator where the PPP session terminates (see the next figure). One PVC can support any
number of PPP sessions from your LAN. PPPoE provides access control and billing functionality in a manner similar to dial-up services using PPP.
Benefits of PPPoE
PPPoE offers the following benefits:
1. It provides you with a familiar dial-up networking (DUN) user interface.
2. It lessens the burden on the carriers of provisioning virtual circuits all the way to the ISP
on multiple switches for thousands of users. For GSTN (PSTN & ISDN), the switching
fabric is already in place.
3. It allows the ISP to use the existing dial-up model to authenticate and (optionally) to
provide differentiated services.
Traditional Dial-up Scenario
The following diagram depicts a typical hardware configuration where the PCs use traditional
dial-up networking.
®
WR1500 4-Port Wireless DSL/Cable Router
How PPPoE Works
The PPPoE driver makes the Ethernet appear as a serial link to the PC and the PC runs PPP
over it, while the modem bridges the Ethernet frames to the Access Concentrator (AC). Between
the AC and an ISP, the AC is acting as a L2TP (Layer 2 Tunneling Protocol) LAC (L2TP Access
Concentrator) and tunnels the PPP frames to the ISP. The L2TP tunnel is capable of carrying
multiple PPP sessions.
With PPPoE, the VC (Virtual Circuit) is equivalent to the dial-up connection and is between
the modem and the AC, as opposed to all the way to the ISP. However, the PPP negotiation is
between the PC and the ISP.
WR1500 Wireless Router as a PPPoE Client
When using the WR1500 Wireless Router as a PPPoE client, the PCs on the LAN see only
Ethernet and are not aware of PPPoE. This alleviates the administrator from having to manage
the PPPoE clients on the individual PCs.
®
WR1500 4-Port Wireless DSL/Cable Router
Appendix D
PPTP
What is PPTP?
PPTP (Point-to-Point Tunneling Protocol) is a Microsoft proprietary protocol (RFC 2637 for
PPTP is informational only) to tunnel PPP frames.
How can we transport PPP frames from a PC to a broadband modem over Ethernet?
A solution is to build PPTP into the ANT (ADSL Network Termination) where PPTP is used
only over the short haul between the PC and the modem over Ethernet. For the rest of the
connection, the PPP frames are transported with PPP over AAL5 (RFC 2364). The PPP
connection, however, is still between the PC and the ISP. The various connections in this
setup are depicted in the following diagram. The drawback of this solution is that it requires
one separate ATM VC per destination.
PPTP and the WR1500 Wireless Router
When the WR1500 Wireless Router is deployed in such a setup, it appears as a PC to the
ANT.
In Windows VPN or PPTP Pass-Through feature, the PPTP tunneling is created from Windows 95,98 and NT clients to an NT server in a remote location.
The pass-through feature allows users on the network to access a different remote server
using the WR1500 Wireless Router’s Internet connection. In NAT mode, the WR1500
Wireless Router is able to pass the PPTP packets to the internal PPTP server (i.e. NT server)
behind the NAT. Users need to forward PPTP packets to port 1723 by configuring the server
in Menu 15.2 - Server Set Setup.
In the case above as the remote PPTP Client initializes the PPTP connection, the user must
configure the PPTP clients. The WR1500 Wireless Router initializes the PPTP connection
hence; there is no need to configure the remote PPTP clients.
®
WR1500 4-Port Wireless DSL/Cable Router
PPTP Protocol Overview
PPTP is very similar to L2TP, since L2TP is based on both PPTP and L2F (Cisco’s Layer 2
Forwarding). Conceptually, there are three parties in PPTP, namely the PNS (PPTP Network
Server), the PAC (PPTP Access Concentrator) and the PPTP user. The PNS is the box that
hosts both the PPP and the PPTP stacks and forms one end of the PPTP tunnel.
The PAC is the box that dials/answers the phone calls and relays the PPP frames to the PNS.
The PPTP user is not necessarily a PPP client (can be a PPP server too). Both the PNS and
the PAC must have IP connectivity; however, the PAC must in addition have dial-up capability.
The phone call is between the user and the PAC and the PAC tunnels the PPP frames to the
PNS. The PPTP user is unaware of the tunnel between the PAC and the PNS.
Microsoft includes PPTP as a part of the Windows OS. In Microsoft’s implementation, the PC,
and hence the WR1500 Wireless Router, is the PNS that requests the PAC (the ANT) to place
an outgoing call over AAL5 to an RFC 2364 server.
Control & PPP connections
Each PPTP session has distinct control connection and PPP data connection.
Call Connection
The control connection runs over TCP. Similar to L2TP, a tunnel control connection is first
established before call control messages can be exchanged. Please note that a tunnel control
connection supports multiple call sessions.
The following diagram depicts the message exchange of a successful call setup between a
PC and an ANT.
The PPP frames are tunneled between the PNS and PAC over GRE (General Routing Encapsulation, RFC 1701,1702). The individual calls within a tunnel are distinguished using the Call
ID field in the GRE header.
®
WR1500 4-Port Wireless DSL/Cable Router
Copyright © 2004 ParkerVision, Inc.
All Rights Reserved
The items ParkerVision, Horizons and others are trademarks of ParkerVision,
Inc. - Other product names and trademarks used in this product manual are
trademarks of their respective companies.
Information contained herein is subject to change at any time without notice due
to continual product evolution. The latest version of this document is always
available at www.direct2data.com