1
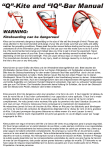
BEST KITEBOARDING USER MANUAL
Thank you for purchasing a Best kite. Please read this manual carefully and in its
entirety before using your new Best kite.
WARNING
Kiteboarding/kitesurfing/snowkiting are extreme sports. They have numerous
inherent risks and dangers, and pose substantial risk of cuts, scrapes, bruises,
broken bones, loss of limbs, loss of vision, paralysis, and other serious, permanent
and disabling injuries and death to the rider and others. Some of the sources of these
risks include but are not limited to:
•
•
•
•
•
•
•
•
Being lifted by the kite and then dropped or slammed into the ground, snow,
trees, rocks, buildings, piers, jetties and/or other structures or surfaces.
Being dropped or slammed into other people and/or property.
Contact with kite lines under tension, and/or watercraft.
Drowning.
Underwater conditions and/or objects such as sharp shells, broken glass,
sand bars, shoals, reefs, oyster beds, and/or concrete.
Contact with sea life such as sting rays, sharks, sea turtles, jelly fish, etc.
Weather conditions and/or changes in weather conditions such as increasing
or decreasing wind, waves, updrafts, lightning and/or water spouts.
Equipment performance. Kiteboarding is a new sport. Kiteboarding equipment
and safety gear are NOT 100% reliable. Safety designs and features are
often new and unproven. Kites may behave unfavorably and unpredictably.
Lines can twist, tangle, or break, resulting in serious injury and/or loss of
control of the kite.
When using this product, you are responsible for your own safety and the safety of
others around you. Never use this product as a flying device. Never touch flying lines
when the kite is in use.
RELEASE OF LIABILITY AND ASSUMPTION OF RISK
DO NOT USE THIS PRODUCT UNLESS YOU AGREE WITH THE
FOLLOWING TERMS AND CONDITIONS:
Before using this product, the purchaser/user has carefully reviewed, understood and
agrees to comply with the terms of this User Manual. Use of this product and any of
its components involves certain inherent risks, dangers and hazards, which can
result in serious personal injury or death. The purchaser/user of this product
understands that the seller is not responsible for any damage to property or injury
caused by negligent operation of this product by the purchaser/user, and the
purchaser/user releases the seller from all such liability. In the event of your death or
incapacity, this Agreement shall be effective and binding upon your heirs, next of kin,
executors, administrators, assigns and representatives.
The purchaser/user of this product expressly assumes the risk of any and all bodily
injury, death and/or liability which may result from the purchaser or user’s
participation in kiteboarding. The purchaser/user agrees to hold Ride Best, LLC
harmless from any and all liability, and waive and release any and all claims or
potential claims against Ride Best, LLC and any of its respective agents, affiliates,
subsidiaries, employees, instructors, officers, directors, shareholders, suppliers and
manufacturers in the event of any such bodily injury or death which may result from
the purchase and/or use of Ride Best LLC (d/b/a Best Kiteboarding, LLC) products.
© 2008 Best Action Sports INC.
08 BEST BAR: USER MANUAL.
Thank you for purchasing an 08 Best Bar. The 08 Bar has been designed in direct response
to rider and customer feedback: we added in the features you asked for, kept the ones you
liked, and tweaked the ones you thought could be improved upon. Thank you for helping us to
make things better.
Description:
An entirely new full-carbon bar molding allows us to create a lighter and stronger bar than
previously possible. The seamless construction means we have been able to increase the
size of the centre bush. Gently radiused and mirror polished, this new centre hole
arrangement gives reduced drag when sheeting in and out for improved steering control. The
reinforced carbon centre of the bar also mates perfectly with our Stiffy Disc, locking the
chickenloop in place whenever you unhook.
New ‘colour-handed’ EVA bar grips with raised ‘finger form’ provides comfort whatever the
riding conditions, ensuring you remain in control at all times. Revised bar ends come with
integral foam hand protectors for unhooking and kite-looping with maximum comfort.
The depower strap and swivel arrangement has been revised with the swivel positioned under
the depower strap to facilitate easier un-spinning and ensure that the new front line selflanding handles are always in the perfect position for deployment. An accessory front line
safety system will follow initial production.
The new 08 Best Bar is designed to be practical, versatile and above all else as safe as
possible, it is the perfect complement to the Waroo 08 and Nemesis HP SLE kites.
Bar set up:
Your new 08 Best Bar comes ready rigged with colour-coded 25m lines (22m lines +3m
extensions. The line length, combined with the leader lines and the bridles lines on the kite,
give an accumulative line length comparable to a standard 27m line set. The bar comes with
the lines wrapped around the bar ends and tied in place with rip-stop ribbons.
Remove the rip stop ribbons and detach the supplied bypass leash with snap-gate karabiner.
Place the bypass leash to one side and inspect your bar thoroughly to make sure that all
attachment knots and loops are a snug fit. Check all figure of eight knots on your lines and
safety set-up to make sure they are firmly cinched down and secure.
The supplied leash is intended to be used with the bypass leash attachment; it is not for
clipping directly to the chicken loop, to be used as a suicide/handlepass leash. The correct
attachment point for the supplied bypass leash is detailed below.
08 Bar Features:
Flying lines 22m+3m:
For 08 we have selected a new high tenacity flying line.
Rated at over 350kN breaking strain, with minimal
elongation under load; these new flying lines will mean
your kite is more responsive, turns faster, and feels crisper
than ever before.
2-Piece Stainless Bar Bushing:
Press fit 316-stainless steel bar inserts. Increased aperture
diameter allows for easy bar control, especially for faster
turning and unhooked riding.
Front Line OSR Handles:
For 08 we have introduced dual front-line landing handles
above the trim strap. These additional handles mean you
can now land your kite using any of the front or rear flying
lines.
A single front line landing handle can be used as an emergency
leash in combination with a suitable length leash.
Dual Depower Line with Stopper Ball:
Having dual depower lines that run through the bar enables
the use of a simple and effective adjustable stopper ball.
This allows a rider to limit bar travel according to personal
preference for maximum depower, and also allows the rider
to freely un-spin the bar without the kite going into autosafety.
The dual centre lines increase durability and the entire depower rope, from stopper knot to
bypass leash ring, can be swapped out quickly and easily without the need to replace the
entire chickenloop assembly. Replacement stopper balls will be available as spares and
should be replaced whenever the depower lines are swapped.
The depower rope can also be shortened by tying an additional knot at the chickenloop, allowing C-kite
riders to reduce total bar throw in line with the depower characteristics of their chosen kite. The spare rope
can be neatly tucked away within the chickenloop cover should they wish to switch between kites regularly.
Handlepass/Bypass Leash:
The 08 Best Bar comes equipped with a high quality
handlepass/bypass leash. This leash clips to the bottom of
the dual depower line and activates full depower by
shortening the depower rope whenever the bar is dropped.
Riders wishing to perform handlepass manoeuvres and
stay directly leashed to their chickenloop, bypassing this
depower/safety functionality, should choose a different leash to the supplied bypass leash.
Warning: When attached directly to the chickenloop, the maximum depower of the kite - if the bar is dropped
from the riders grip - will be limited solely by the position of the stopper ball on the depower line. In this
situation, the kite can remain partially powered and out of the riders reach.
Rear Line OSR Handles:
For landing your kite, you now have the additional option of
using either L&R front line grab handles as well as either
L&R rear line grab handles. So you can now land your kite
using any flying line, regardless of beach aspect and wind
direction.
Stiffy Disc:
Designed for unhooking, the 08 bar has an integral ‘stiffydisc’ situated on the depower line between the top of the
chickenloop and the underside of the bar. When a rider
unhooks, the bar is pulled flush with the ‘stiffy-disc’ locking
the chickenloop in place so that it neither rotates nor
wobbles, meaning that your chickenloop remains fixed to
the underside of the bar for easy re-hooking.
Straight Plate:
To further facilitate hooking and unhooking and to
maximize the lifespan of the chickenloop, the 08 Best Bar
comes with an integrated chickenloop cross brace. This
stainless steel bar stops the chickenloop structure from
deforming under load. This benefits re-hooking of the loop
and also ensures that the quick release mechanism is
never put under any unexpected load.
New 08 Bar End Design:
For 08 we have doubled the overlap between the bar and
the bar-ends, and then beefed up the connection point with
a double screw fixing. The Best Bar is now tougher than
ever.
Ergonomic Non-slip Grip:
The 08 Best Bar has indented finger ridges across the top
of the bar and a new color scheme with left- and righthanded bar colors. The new front and back grip pattern and
color scheme will allow you to ascertain which way round
the bar should be as quickly as possible, if the bar has
been released.
The EVA foam grip used has been improved over the 07 bar to deliver greater feel and
durability with improved abrasion resistance and adhesion to the underlying carbon bar.
EVA Foam Bar End Bumpers:
If you ride unhooked and are throwing unhooked tricks,
then the new bar end bumpers are just for you. They will
stop the bar ends cutting into your hands and help you ride
longer every session.
Below Trim-Strap Swivel:
A new ‘below trim-strap’ front line swivel ensures that your
front lines can be untwisted anytime with a flick of the trim
strap. With your front lines always in the correct position
you can make maximum use of the new dual front line
landing handles.
Metal-on-Metal Safety Release:
The 08 Best Bar has a dual-loop metal-on-metal safety
release. The release pin is positioned through a small
stainless-steel ring, passing over a single loop of low
friction line.
After activation of the safety, a rider can easily reassemble
the chickenloop in the water, if he/she is attached to the
end of the bypass leash.
Warning: It is not recommended to try and rebuild the QR if attached to one of the ‘OSR’ handles due to the
potential complications created by having slack lines in the water around the rider.
QR safety considerations:
Best Kiteboarding advises that riders always use a secondary attachment to their kites, in addition to being
hooked into the chickenloop via the spreader-bar hook. Activating the chickenloop-mounted QR mechanism
when not having an additional safety leash will result in the rider becoming completely disconnected from
the kite.
Riders should note that completely releasing the kite should only be considered as an absolute last option,
and should be reserved only for situations where continuing to be connected to their kites puts themselves
and others around them at greater risk than having an out of control kite tumbling up the beach.
Activating the Chickenloop QR:
When hooked into the chickenloop, riders can activate the
safety by pulling down on the red webbing tab. The
webbing tab is stitched permanently to the outside of the
chickenloop and retained with a Velcro patch.
Pulling down firmly on the webbing handle will retract the
QR pin, and the pin will slide out from its sleeve, releasing
the short captive rope loop and releasing the stainless loop attached to the retained end of
the chickenloop.
With the QR pin fully retracted, the retained end of the
chickenloop will slide out under the load of the kite. The kite
will then only be attached to the rider by whatever
secondary leash system he’s chosen to employ. We supply
the Handlepass/Bypass leash for exactly this purpose.
Attachment instructions for the ‘Bypass leash’ are given on the
following pages.
Reassembling the Chickenloop QR:
The 08 QR is based on the 07 design with modifications made to the stitching around the
grab handle to ensure greater longevity. Please read the assembly instructions carefully and
practice assembly of the QR a few times with the instructions in front of you before venturing
out onto the water. Correct assembly of the QR mechanism will ensure faultless operation.
The individual parts of the QR
mechanism are shown labelled in
the diagram left.
To correctly assemble the QR after
activation, follow the steps outlined
below.
Ensure that the steel oval passes
directly through the circular ring
exposed at the end of the ‘Straight
Plate.’ Correct assembly through
the ‘Straight Plate’ as shown
ensures minimal friction load on
the QR.
For the next step, the steel oval
must pass through the grey rope
loop as shown.
The steel oval is curved specifically
to facilitate a low release pressure.
Please ensure that steel oval
curves upwards as shown. If it is
facing the opposite direction, it can
be twisted around by hand within
the black PU tubing.
With the steel oval located
correctly through the grey rope
loop, you can now slide the pin
home through the steel oval,
making sure it sits above the grey
rope loop.
Positioning the pin above the rope
loop transfers friction from the pin
to the rope loop, ensuring easy
release under load.
Adjusting depower length for
rider comfort:
The dual depower line configuration on the Best
Bar not only allows for the use of our ‘bar travel
stopper’ but also allows easy adjustment of total
depower reach to accommodate different rider
sizes and a wide range of rider preferences for
bar travel and trim strap position.
To adjust the complete bar travel take the
knotted end of the grey depower rope, loosen
the stopper ball from the knot, and slide the ball
upwards away from the knotted end of the rope.
Then carefully tie a single overhand knot above
the current knot position, ensuring that it
remains beneath the stopper ball.
Due to the dual line configuration of the depower
set up, if you create a new knot 6” inches above
the current knot location you will have effectively
shortened the total depower throw by half that
amount. There is sufficient overlap between the
bar-depower, trim-strap adjustment and the rear
flying line settings of the kite for you to be able
to create a new stopper knot 10” above the
current knot position.
Any spare rope can be neatly tucked away
under the neoprene chicklenloop cover.
Correct Attachment of Handlepass/Bypass
Leash to Chickenloop:
The dual depower rope on the 08 Best Bar has
been fitted with an additional spacer ball
beneath the Stiffy Disc, shown on the left side.
This facilitates much easier fitting and removal
of the handlepass/bypass leash than was
possible previously, ensuring that it now
becomes a one handed operation.
To fit your bypass leash, simply clip the
karabiner directly to the leash ring shown left.
Handlepass/Bypass Leash Use and Assembly:
A detailed parts assembly for the leash QR
mechanism is shown at right. This lists all the
parts of the QR mechanism and the correct
naming terms for each part that will be used in the
following section.
Activation of the Leash QR:
Sliding the red plastic QR collar away from the
tension adjuster ball will activate the internal QR
mechanism.
This action will completely separate you from your kite
if you are already unhooked from the chickenloop.
Only consider this as a last course of action in
situations where remaining attached to your kite
is likely to be more dangerous to yourself and
bystanders than releasing the kite completely.
Handlepass/Bypass Leash QR Reassembly:
When activated, the QR mechanism splits into
two separate parts. These are shown in detail
on the previous page. To refit the QR, slide the
tip of either side of the ‘flip/flop pin’ through the
‘grey rope loop’ and then flip the pin over by
ninety degrees to catch the loop.
Gently slide the QR collar upwards and over the
tip of the ‘flip/flop pin’, then push the QR collar
home until it rests snugly against the ‘tension adjuster’ as shown in the previous image above.
Adjusting the QR Tension:
The release tension of the handlepass/bypass
leash QR can be adjusted to suit your personal
preference. Riders performing handlepass and
unhooked tricks are much more likely to require
increased protection from false releases of the
leash.
Two methods exist to increase the release
tension.
Method one: loosen the grub screw on the tension adjuster (with the Allen key that is
supplied with the bar), then carefully slide the clear PU tubing that sits inside the tension
adjuster towards the rope loop. Move the PU tubing no more than 1/8 inch before reassembling and testing the QR to ensure you can still release the mechanism. Ensure the
grub screw in the tension adjuster is firmly secured before using on the water.
Method two: loosen off the grub screw
inserted into the tension adjuster ball and slide
the adjuster ball downwards towards the
karabiner. Remember to fully tighten the grub
screw before attempting to use the leash.
Only small adjustments in adjuster position are
required for a significant increase in release
tension, we suggest that you move it a
maximum of 1/4” Inch at any one time before
testing the QR function.
The combination of moving the PU tubing away from the Karabiner and moving the tension
adjuster ball towards the karabiner by the recommended increments should always give a
sufficient increase in release tension to preclude accidental release.
Warning: do not modify the QR mechanism with the addition of any materials or modification of any
components as this will reduce the functionality of the system and may put the rider at increased risk.
Landing using the front ‘Landing’ handles:
The landing handles are retained to
the depower strap with a set of Velcro
tabs for each handle. One handle sits
in front of the strap, and the other sit
behind it.
If you intend on using the handles, you must
detach them from the depower strap before
use by opening the Velcro tabs.
Also ensure that the front lines are
completely free from twists before using the
landing handles, failure to remove twists
may result in the front lines cutting through
each other under tension.
To self land your kite, fly the kite down to the edge of the window so that the lower wingtip
touches the ground. Pull the depower strap in to the maximum depower position.
Detach the bypass leash by unclipping it from the chickenloop attachment. With one hand still
steering the kite and controlling the bar, reach up and grab one of the landing handles and
move your bar to the fully depowered position. With a firm grasp on either landing handle,
reach down with your other hand and unhook from the chicken loop and drop the bar in one
fluid movement.
With a firm grasp on the front line handle and the kite now fully depowered your kite will flip
over and come to rest on the ground. Secure the grab handle to a suitable static object - you
could clip your leash to the handle and secure the leash to the board if you are able to weight
the board down. Then make your way towards the kite, travelling up the front line, and secure
your kite by weighting it down with sand.
Bar and line calibration image on following page.
08 Line Length Calibration Chart:
The 2008 Waroo Bar: Stay connected
Should you have any questions about any item of bar functionality that has not been covered sufficiently please
forward them to [email protected] or contact your local dealer for further info. Answers to pertinent
product questions submitted by Best riders will be added to the online product manuals as will all product updates.