1
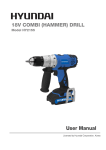
4.5"/9" ANGLE GRINDER
Models HY2156 - HY2157
User Manual
CONTENTS
Section Description
1. OWNER’S MANUAL & SAFETY INSTRUCTIONS
Page No/No’s
3
2. GENERAL SAFETY
3–5
3. SPECIFIC SAFETY INSTRUCTIONS
5–6
4. QUICK REFERENCE GUIDE and USE
5. ASSEMBLY
6. OPERATING INSTRUCTIONS
7
7–9
9 – 10
7. GENERAL MAINTENANCE
10
8. SYMBOLS
10
9. ENVIRONMENTAL
11
10. GENPOWER CONTACT DETAILS
11
11. DECLARATIONS OF CONFORMITY
11
Page 2
1. OWNER’S MANUAL & SAFETY INSTRUCTIONS
1.1. How to read the manual.
1.1.1. Keep this manual for the safety warnings and precautions, assembly, operation, inspection,
maintenance and cleaning procedures.
1.1.2. Write the product’s serial number in the back of the manual near the assembly diagram (or
month and year of purchase if product has no number).
1.1.3. Keep this manual and the receipt in a safe and dry place for future reference.
1.1.4. The term “power tool” in the warnings refers to your mains operated (corded) power tool or
battery-operated (cordless) power tool.
1.1.5. This combi drill is intended for inserting and removing screws and bolts within the drill’s
capability.
2. GENERAL SAFETY
Non-observance
will result in the
risk of serious
injury or death to
oneself or others.
Non- observance
will result in the
risk of injury to
oneself or others.
Indicates a hazard
which, if not
avoided, might
result in minor or
moderate injury.
NOTE or
IMPORTANT These
give details or
further
information on
what has already
been said, and aim
to prevent damage
to the machine or
cause other
damage.
Read Manual
DO NOT let comfort or familiarity with product (gained from repeated use) replace
strict adherence to safety rules for the subject product.
MISUSE or failure to follow the safety rules stated in this instruction manual may
cause serious personal injury.
2.1. Work Area Safety
2.1.1. Keep work area clean and well lit. Cluttered or dark areas invite accidents.
2.1.2. Do not operate power tools in explosive atmospheres, such as in the presence of flammable
liquids, gases or dust. Power tools create sparks which may ignite the dust or fumes.
2.1.3. Keep children and bystanders away while operating a power tool. Distractions can cause you
to lose control.
2.2. Electrical Safety.
2.2.1. Power tool plugs must match the outlet. Never modify the plug in any way. Do not use any
adapter plugs with earthed (grounded) power tools. Unmodified plugs and matching outlets
will reduce risk of electric shock.
2.2.2. Avoid body contact with earthed or grounded surfaces, such as pipes, radiators, ranges and
refrigerators. There is an increased risk of electric shock if your body is earthed or grounded.
2.2.3.
Page 3
2.2.4. Do not expose power tools to rain or wet conditions. Water entering a power tool will
increase the risk of electric shock.
2.2.5. Do not abuse the cord. Never use the cord for carrying, pulling or unplugging the power
tool. Keep cord away from heat, oil, sharp edges and moving parts. Damaged or entangled
cords increase the risk of electric shock.
2.2.6. When operating a power tool outdoors, use an extension cord suitable for outdoor use.
2.2.7. Use of a cord suitable for outdoor use reduces the risk of electric shock.
2.2.8. If operating a power tool in a damp location is unavoidable, use a residual current device
(RCD) protected supply. Use of an RCD reduces the risk of electric shock.
2.3. Personal Safety.
2.3.1. Stay alert, watch what you are doing and use common sense when operating a power tool.
Do not use a power tool while you are tired or under the influence of drugs, alcohol or
medication. A moment of inattention while operating power tools may result in serious
personal injury.
2.3.2. Use personal protective equipment. Always wear eye protection. Protective equipment such
as dust mask, non-skid safety shoes, hard hat, or hearing protection used for appropriate
conditions will reduce personal injuries.
2.3.3. Prevent unintentional starting. Ensure the switch is in the off-position before connecting to
power source and/or battery pack, picking up or carrying the tool. Carrying power tools with
your finger on the switch or energizing power tools that have the switch on invites accidents.
2.3.4. Remove any adjusting key or wrench before turning the power tool on. A wrench or a key
left attached to a rotating part of the power tool may result in personal injury.
2.3.5. Do not overreach. Keep proper footing and balance at all times. This enables better control
of the power tool in unexpected situations.
2.3.6. Dress properly. Do not wear loose clothing or jewellery. Keep your hair, clothing and gloves
away from moving parts. Loose clothes, jewellery or long hair can be caught in moving parts.
2.3.7. If devices are provided for the connection of dust extraction and collection facilities, ensure
these are connected and properly used. Use of dust collection can reduce dust-related
hazards.
2.4. Power Tool Use and Care.
2.4.1. Do not force the power tool. Use the correct power tool for your application. The correct
power tool will do the job better and safer at the rate for which it was designed.
2.4.2. Do not use the power tool if the switch does not turn it on and off. Any power tool that
cannot be controlled with the switch is dangerous and must be repaired.
2.4.3. Disconnect the plug from the power source and/or the battery pack from the power tool
before making any adjustments, changing accessories, or storing power tools. Such preventive
safety measures reduce the risk of starting the power tool accidentally.
2.4.4. Store idle power tools out of the reach of children and do not allow persons unfamiliar with
the power tool or these instructions to operate the power tool. Power tools are dangerous in
the hands of untrained users.
2.4.5. Maintain power tools. Check for misalignment or binding of moving parts, breakage of parts
and any other condition that may affect the power tool’s operation. If damaged, have the
power tool repaired before use. Many accidents are caused by poorly maintained power tools.
2.4.6. Keep cutting tools sharp and clean. Properly maintained cutting tools with sharp cutting
edges are less likely to bind and are easier to control.
Page 4
2.4.7. Use the power tool, accessories and tool bits etc. in accordance with these instructions,
taking into account the working conditions and the work to be performed.
2.4.8. Use of the power tool for operations different from those intended could result in a
hazardous situation.
2.5. Service.
2.5.1. Have your power tool serviced by a qualified repair person using only identical replacement
parts. This will ensure that the safety of the power tool is maintained.
3. SPECIFIC SAFETY INSTRUCTIONS
Kickback, kickback is a sudden reaction to a pinched, bound or misaligned wheel
causing an uncontrolled cut-off tool to lift up and out of the work piece toward the
operator.
Do not use the angle grinder in areas where there is a risk of explosion or fire from
combustible materials, flammable liquids, paint, varnish, petrol etc. flammable
gases and dust of an explosive nature.
As a precaution it is recommended that you consult an expert on a suitable fire
extinguisher and its use.
It is not advisable to use this angle grinder above head height.
3.1. Kickback Prevention:
3.1.1. Kickback is a sudden reaction to a pinched, bound or misaligned wheel causing an
uncontrolled tool to lift up and out of the work piece toward the operator.
3.1.2. Kickback results from tool misuse and/or incorrect operating procedures or conditions and
can be avoided by taking the following precautions;
3.1.2.1. Maintain a firm grip with both hands on the unit and position your body and arms to
allow you to resist kickback forces.
3.1.2.2. When wheel is binding, or when interrupting a cut for any reason, release the trigger
and hold the unit motionless in the material until the wheel comes to a complete stop.
Never attempt to remove the unit from the work or pull the unit backward while the
wheel is in motion or kickback may occur.
3.1.2.3. When restarting a cut-off tool in the work piece, check that the wheel in not
engaged into the material.
3.1.2.4. If the wheel is binding, it may walk up or kickback from the work piece as the tool is
restarted.
3.1.2.5. Support large panels to minimize the risk of wheel pinching and kickback. Large
panels tend to sag under their own weight. Support must be placed under the panel on
both sides, near the line of cut and near the edge of the panel.
3.2. This angle grinder requires the use of two hands to ensure safe operation and should not be used
when working from ladders and step ladders.
3.3. If this angle grinder is to be used when working at height a suitable stable platform or scaffold
tower with hand rails and kick boards should be used.
3.4. Use approved safety glasses or goggles, face mask, ear defenders and safety helmet.
3.5. Before servicing, lubricating or making adjustments and when changing accessories such as
cutting/grinding discs. Make sure that angle grinder is disconnected from the mains supply when
not in use.
Page 5
3.6. Always use the correct type of disc for the operation to be carried out. Do not use a grinding disc
as a cutting disc.
3.7. Only use cutting and grinding discs that are in good condition. This will improve cutting and reduce
the load on the machine ensuring a longer life of the cutting tools and the angle grinder.
3.8. Never use damaged grinding or cutting discs. Discs that are cracked, chipped or worn could shatter
causing injury to the operator and bystanders and damage to the machine.
3.9. Do not use discs that are larger than specified; only use discs that are rated for the angle grinder.
The rotational speed (min-1) shown on the disc should always be HIGHER than the rotational
speed (min-1) of the angle grinder.
3.10.
Use only cutting and grinding discs that are recommended by the manufacturer.
3.11.
Do not attempt to modify the angle grinder, guarding or its accessories in any way.
3.12.
Do not use excessive force on the angle grinder.
3.13.
Only use gradual pressure as this will reduce the wear on the angle grinder and discs and
increase its efficiency and operating life.
3.14.
Never cut or grid towards you as the disc could run up the work piece causing injury.
3.15.
Always cut or grind away from your body.
3.16.
The metal particles (sparks) which are produced during grinding and cutting steel are hot
and could ignite any combustible material in the vicinity of the operation.
3.17.
When cutting paving slabs always adopt a firm stance and wear approved safety shoes or
boots.
3.18.
Safe Use of Angle Grinder Cutting & Grinding Discs
3.19.
Under no circumstances should any type of diamond coated disc be used for cutting or
grinding metals
3.20.
Grinding and cutting discs are breakable and should be handled with the utmost care. The
use of damaged, incorrectly mounted or worn grinding and cutting discs is dangerous and can
cause serious injury.
3.21.
Grinding and cutting discs should be handled and transported with care grinding and cutting
discs should be stored in such a way as to prevent mechanical damage and contamination with
substances that could cause deterioration of the bonding material.
3.22.
The information on the grinding and cutting discs relating to restriction of use, safety
indications or any other information should be followed. In case of doubt concerning the correct
selection of grinding and cutting discs the user should request information from the manufacturer
or supplier.
3.23.
Before mounting and before each use the grinding or cutting disc should be visually
inspected for any cracks, chips, excessive wear, contamination or any other damage that could
affect safe operation.
3.24.
The grinding or cutting disc should be mounted in accordance with the instructions in the
product manual. After mounting the grinding or cutting disc should be run for a reasonable time, if
any unusual noise or excessive vibration is evident the machine must be stopped immediately and
the cause investigated.
3.25.
All guards must be correctly and securely fitted and positioned correctly. The angle grinder
must not be used without the guard fitted.
3.26.
Personal protective equipment (PPE) suitable for the work being carried out should be
worn. PPE should include suitable work gloves, ear protection, eye protection, respiratory
protection and steel toe cap shoes or boots.
3.27.
Only use grinding or cutting disc suitable for the work being done and observe all safety
instructions and restrictions of use. Use of the wrong type of grinding or cutting disc could result in
serious injury.
Page 6
3.28.
When using a cutting disc, the disc should be prevented from jamming in the cut by the use
of side pressure. When cutting off the cutting disc should be placed in the cutting gap in a straight
position.
3.29.
When using a grinding disc the angle between the grinding disc and work piece should be
between 30° and 40°.
3.30.
Before placing the angle grinder on the workbench or floor it must be switched off and the
grinding or cutting disc must have stopped rotating.
3.31.
Angle grinders must not be used above shoulder height.
3.32.
Grinding or cutting discs must not be run at a rotational speed greater than that shown on
the grinding or cutting disc.
3.33.
Cutting discs must not be used for face or side grinding.
3.34.
Grinding and cutting discs must be used dry.
3.35.
Using water is highly dangerous and could result in an electric shock.
4. QUICK REFERENCE GUIDE and USE
Model Shown HY2157
PARTS
1 Spindle Lock Button.
5 Inner Flange.
2 Shaft Direction.
6 Cutting Disc.
9 Primary Hold.
10 Power Switch.
MODEL
No-Load (rpm/min).
Voltage – Frequency - Power (w).
Wheel Diameter (mm).
Spindle Screw Thread.
Weight (Kg).
Electrical Class Protection Grade.
Noise Levels.
Vibration Level.
3 Spindle.
7 Outer Flange.
11 Power Switch Lock
Button.
SPECIFICATIONS
HY2156 - 4.5”
10,500
230VAC – 50Hz - 600
115
M14
1.8
回/II
88 dB (A) LpA - 99 dB (A) LwA
Ah,AG = 8.1 m/s2
4 Non-Cutting Guard.
8 Spanner.
12 Side Handle.
HY2157 – 9.0”
6,200
230VAC – 50Hz - 2,100
230
M14
6.1
回/II
88 dB (A) LpA - 99 dB (A) LwA
Ah,AG = 8.1 m/s2
Page 7
5. ASSEMBLY
Power supply the power tool supply must match the data plate on tool.
5.1. Attaching the side handle.
5.1.1. Thread side handle into side handle socket on desired
position and tighten securely. Please use the side handle
Tool must be used the side handle.
fully.
5.2. Adjusting and disassembling guard.
5.2.1. When you fit the guard, make sure that the
prominence on the hoop of the guard coincides with the
groove in the gear-case cover.
5.2.2. Then turn the guard to the working position counterclockwise. Lastly, tighten the bolt.
5.2.3. Before operation, make sure that the guard is fixed
securely.
5.2.4. By loosening the fixing screw, the guard can be adjusted to desired position, tighten the
fixing screw firmly to fix the guard in the position.
5.3. Fitting cutting discs.
Unplug tool before changing discs and carrying out maintenance.
Only use grinding wheels with maximum safe operating speed rated at or above
80m/s. Never use damaged or imbalance grinding wheels.
N.B See part locations on previous page.
5.3.1. Lock the spindle in position by pressing the spindle lock
button (1).
5.3.2. Slip the inner flange (5) onto the spindle and the side of
“O” ring towards outside, wheel (6) loaded withstood the
inner flange.
5.3.3. Then thread on the flange (7) screw together to the
spindle (Pay attention to the outer flange the installation direction following chart to show,
when installing the grinding wheel and cutting disc uses different surfaces on the contact
piece.
5.3.4. Check the compatibility of the wheel (6) and flange, there is no clearance is allowed.
5.3.5. Lastly tighten the outer flange (7) with the spanner (8).
5.4. Switching ON and OFF.
Make that the ON/OFF switch operates freely and turn it OFF before connecting
grinder to main supply.
Page 8
N.B See part locations on previous page.
5.4.1. To turn ON press the power switch (10), tool starts, then
press the switch lock button (11) when it is pressed, the tool is
in its working state.
5.4.2. To turn OFF press and release (10) and the switch lock
button will automatically pop out, the tool will stop working.
5.4.3. Once the safety brushes are worn the tool will stop working
to avoid damage to the motor.
5.5. Grinding.
5.5.1. Always select and use grinding discs that are suitable for the
material to be ground. Make sure that the minimum operating
speed of any accessory disc is no less than 10000rpm.
5.5.2. Grinding operations on flat surfaces should be done with the
disc at an angle of between 5° and 15° to the work piece.
5.6. Cutting.
5.6.1. The cutting angle is more precise than when grinding.
5.6.2. Do not press the side of a cut-off wheel.
5.6.3. Start from the smallest cross section when cutting outline.
5.6.4. Cut masonry only with the cutting guide – select correct disc.
5.6.5. The cutting direction is very important.
5.6.6. Always use the tool in opposite direction of disc rotation.
6. OPERATING INSTRUCTIONS
6.1. The grinding disc should be replaced when the diameter of the disc reaches 85mm.
6.2. Hold the grinder in front and away from you with both hands, keeping the grinding disc away from
the work piece.
6.3. Turn on the grinder and let motor build up to full speed. Gradually lower the grinder until the
grinding disc comes into contact with the work piece.
6.4. Move the grinder back and forth or up and down over the work piece at a steady, consistent
speed. Keep the grinder moving to prevent excessive amounts of material being removed from a
single place?
6.5. If the grinder is held in one place for too long, it will cut grooves into the work piece. Do not hold
the grinder at too sharp an angle as it will gouge the work piece because of too much pressure IN
one area.
6.6. Do not apply excessive pressure whilst grinding.
6.7. Usually the weight of the grinder alone is adequate for most grinding jobs. Use light pressure when
grinding jagged edges or where there is a risk for the grinder to snag.
6.8. When grinding lift the grinder away from the work piece before turning the grinder off.
6.9. When cutting turn the grinder off before removing disc from work piece, once it has stopped
remove it from the work piece.
Page 9
6.10.
During use it is advisable to periodically check the security of the disc clamping nut, side
handle and disc guard.
6.11.
Never immerse the grinding/cutting disc into any type of lubricant including water. The
angle grinder is a dry grinder/cutter. Failure to observe this may result in a fatal electric shock.
6.12.
Always keep mains power lead to the rear of the work being cut or ground.
6.13.
The sound intensity level for the operator may exceed 85dB (A). Suitable ear protection
must be worn by the operator.
6.14.
Lubrication
6.15.
All of the bearings in this tool are lubricated with a sufficient amount of high grade lubricant
for the life of the unit under normal operating conditions. Therefore, no further lubrication is
required.
7. GENERAL MAINTENANCE
Do not at any time let brake fluids, gasoline, petroleum based products,
penetrating oils, etc., come in contact with plastic parts.
Chemicals can damage, weaken or destroy plastic which may result in serious
personal injury.
7.1. Avoid using solvents when cleaning plastic parts. Most plastics are susceptible to damage from
various types of commercial solvents and may be damaged by their use. Use clean clothes to
remove dirt, dust, oil, grease, etc.
7.2. Lubrication
7.2.1. All of the bearings in this tool are lubricated with a sufficient amount of high grade lubricant
for the life of the unit under normal operating conditions. Therefore, no further lubrication is
required.
8. SYMBOLS
8.1. The rating plate on this product may show some or all of the following symbols.
8.2. These represent important information about the product or instructions on its use.
Wear hearing protection.
Wear eye protection.
Wear respiratory protection.
Product conforms to RoHs
requirements
Page 10
Conforms to relevant safety
standards.
General warning
Double insulated for
additional protection.
Read the instruction manual.
Waste electrical products should not be disposed of with
household waste.
Please recycle where facilities exist.
Check with your Local Authority or retailer for recycling
advice.
9. ENVIRONMENTAL
9.1. Do not dispose of electric equipment together with household waste material! In observance of
European Directive 2012/19/EC on waste electrical and electronic equipment and its
implementation in accordance with national law, electric equipment that have reached the end of
their life must be collected separately and returned to an environmentally compatible recycling
facility. If electrical appliances are disposed of in landfills or dumps hazardous substances can leak
into the groundwater and get into the food chain, damaging your health and well-being.
9.2. For further information on the disposal of this product, please contact your dealer or your nearest
domestic waste collection service.
9.3.
Reduce – Reuse - Recycle unwanted materials instead of disposing of them as waste. All
tools, accessories and packaging should be sorted, taken to a recycling centre and disposed of in a
manner which is compatible with the environment.
9.4.
When the product is no longer required, it must be disposed of in a manner which is
compatible with the environment.
10. GENPOWER CONTACT DETAILS
10.1.
Postal address;
Genpower Limited, Isaac Way, Pembroke Dock,
Pembrokeshire, SA72 4RW, UK.
10.2.
Telephone contact number;
Office
+44 (0) 1646 687880
10.3.
Email contact;
Technical
[email protected]
10.4.
Web site;
www.hyundaipowerequipment.co.uk
11. DECLARATIONS OF CONFORMITY
11.1.
Genpower Ltd confirms that this Hyundai product conform to the following CE Directives;
11.1.1. 2006/42/EC Machinery Directive
11.1.2. 2004/108/EC EMC Directive
11.1.3. 2006/95/EC Low Voltage Directive
Page 11
Page 12