1
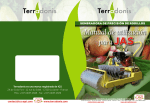
PRECISION ROLLER SEEDER
JP1 User Manual
Terradonis is a registered trademark of ICS
ZA de Croix Fort - 12 rue du Soleil - 17220 La Jarrie - France
Tel: +33 5 4635 2828, Fax: +33 5 4635 2829
Terradonis is a registered trademark of ICS
[email protected]
www.terradonis.com
ZA de Croix Fort - 12 rue du Soleil - 17220 La Jarrie - France - Tel: +33 5 4635 2828, Fax: +33 5 4635 2829
[email protected]
www.terradonis.com
SUMMARY
IDENTIFICATION AND FEATURES
Sliding handle
left and right
p.3 Identification and characteristics
Your detailed seeder
p.4 Cautions of use
Procedure for an optimum start-up of the seeder
p.5-6 Settings
For use adapted to your specific needs
p.7-9 Sowing seeds in rows
Seed distance table
Correspondence rollers/crops
p.10-11 Removal of the hopper for positioning of the roller
Step by step routine
Hopper
Cover
Handle
Drive wheel
Scraper
Chassis
Compaction wheel
p.12-14 Spare parts and consumables lists
p.15 Adjustment of the sliding handle
Step by step routine
Filler blade
Chain box
p.16 Our different shoes
Types and mounting
Standard adjustable shoe
p.17 The Row-marker - Add-on hopper
Cover
p.18-19 JPN fertilizer
Mounting
p.20-21 JPN Fertilizer
Spare Parts and consumables
p.22 Twinning set
Description and mounting
Transparent and graded hopper
Nut
Hair brush
Seed guide
Roller box
p.23 Notes
2
Height adjustable
handle
Reinforcement
Seed roller
with options to be selected
Roller spindle
Terradonis is a registered trademark of ICS
ZA de Croix Fort - 12 rue du Soleil - 17220 La Jarrie - France - Tel: +33 5 4635 2828, Fax: +33 5 4635 2829
[email protected]
www.terradonis.com
3
INSTRUCTIONS FOR USE
➜ Lubricate all rotating parts except the seed roller.
➜ The brush, the guide plate, the spongy rubber of the transmission wheel
and the spongy rubber of the compaction wheel are consumables.
Check them regularly and replace as necessary.
➜ Make sure the seedbed is uniform.
➜ Check whether the seed roller is caked in dirt, pesticides or seed
casing residues. If it is, it should be cleaned.
➜ Prepare a seedbed by carefully hoeing and levelling.
➜ When you sow beans or grains, a bypass can occur in the seed
hopper. In this case, gently tap the hopper and fill the hopper
half full instead.
➜ When you disassemble the sower, make sure the free roller
is not caked in dirt, etc. ...
SETTINGS
➜ BRUSH: In its default position, the brush lightly touches the seed roller.
To increase the volume of seeds, put the brush in a high position
(loosen the wing nut and lift the brush).
If you use coated seed: The brush should touch the seeds, and exercise slight
pressure on them. It is necessary to find the right adjustment for your seeds, because
if the brush is too low, it will wear very (too) quickly. If it is too high, the seeds will
break.
➜ GUIDE PLATE: The guide plate forms
a cavity between the roller, the brush
Opening
and the guide plate.
Without this space, the seeds might break.
The end of the guide plate
Guide Plate
must be in close contact with the roller.
If the guide plate becomes misaligned,
you can realign it using the diagram opposite.
In a general way, guide plate should be removed
as soon as the brush is raised.
➜ SEEDING DISTANCES: The distances between the seeding can be adjusted by
adjusting the pinions and the number of holes in the roller,
see the seed distance table.
Note: the actual planting distances may vary depending on soil quality and speed
of work. Test intervals based on the ground before you start planting.
4
Terradonis is a registered trademark of ICS
ZA de Croix Fort - 12 rue du Soleil - 17220 La Jarrie - France - Tel: +33 5 4635 2828, Fax: +33 5 4635 2829
[email protected]
www.terradonis.com
5
SOWING SEEDS IN ROWS
…SETTINGS
➜ PLANTING DEPTH: Planting depth may be adjusted by lowering or raising
the shoe.
➜ SOIL COVER: Adjust the angle of the filler blade for optimal soil cover.
➜ HEIGHT OF THE HANDLE: The handle height can be adjusted by loosening
the screws at the base of the fork of the handle and the buttons on each
of its removable parts and by adjusting them according to your needs.
➜ CLEANING: If soil sticks to the compaction wheel, the contact surface
must be cleaned before it sticks (it might deposit oil or dirt).
➜ HOPPER COVER: The hopper cover is made of different molded holes
representing the holes of the different rollers offered. They will enable you to
verify that seeds and
rollers are well-chosen and suitable. Under each mold, the size of the hole.
The table below shows the sizes of the roller holes enabling you to find the
roller that you need.
➜ The quantity of seed is adjusted
by the combination of 3 elements:
-Number of holes on the seed roller
-Size of the holes in the seed roller
-Number of sprocket teeth used
For the number of holes you need: refer to the table of distances below:
TABLE OF DISTANCES (in mm)
Front
Back
TABLE OF ROLLER HOLE SIZES (in mm)
Hole
Hole depth
Length if hole in X
size
The letter indicates the type of hole. Refer to the table of distances to decide on the right number of holes for your needs.
Ref.
A
AA
C
F
FJ
G
J
L
LJ
M
MJ
MM
N
Q
Hole size
Hole depth
Length if hole in X
13,50
6,00
12,00
6,00
11,00
5,50
5,00
2,50
5,00
3,00
9,00
4,50
SPECIAL FORM (½ hole of 1.5mm))
7,00
2,50
7,00
3,70
5,00
2,00
6,00
3,50
6,00
2,50
SPECIAL FORM (16mm x 6mm)
8,00
3,00
-
Ref.
R
S-4
U-4
X
XY
XYY
Y
YJ
YK
YX
YXX
YYJ
YYX
Z without hole
9,00
3,50
SPECIAL FORM (19mm x 8mm)
SPECIAL FORM (19mm x 10mm)
4,00
2,00
2,50
1,20
5,00
2,00
1,20
4,00
3,50
1,50
3,00
2,00
3,50
2,30
2,50
1,50
2,50
1,80
3,00
1,70
2,00
1,8
External diameter 59.85mm
Number
of holes
per
seed
roller
2
3
4
6
8
10 Small
grain
12 seeders
16
20
24
30
36
14
9
320
210
160
105
80
64
53
40
32
27
21
18
14
10
360
230
180
115
90
72
58
45
36
29
24
20
NUMBER OF TEETH PER SPROCKET
13
13
11
11
10
11
10
11
10
11
11
13
380 420 460 500 540 580
250 280 300 330 360 390
190 210 230 250 270 290
125 140 150 165 180 195
95
105 115 125 135 145
76
84
92
100 108 116
63
70
75
83
90
98
48
53
58
63
68
73
38
42
46
50
54
58
32
35
38
42
45
49
25
28
31
33
36
39
21
23
26
28
30
32
10
13
640
430
320
215
160
128
108
80
64
54
43
36
10
14
700
460
350
230
175
140
115
88
70
58
47
39
9
14
760
510
380
255
190
152
128
95
76
64
51
42
➜ PLANTING DISTANCE: see table above.
Feel free to contact us for any special request of seed rollers
(for other dimensions than the one quoted in the table).
Quoted dimensions may vary, our website www.terradonis.com is updated accordingly.
6
Terradonis is a registered trademark of ICS
ZA de Croix Fort - 12 rue du Soleil - 17220 La Jarrie - France - Tel: +33 5 4635 2828, Fax: +33 5 4635 2829
[email protected]
www.terradonis.com
7
SOWING SEEDS IN ROWS…
…SOWING SEEDS IN ROWS
➜ NUMBER OF SEEDS/HOLE:
The number of seeds differs depending on seed size, which in turn depends on
the species and the year and the adjustment of the brush.
Therefore numbers shown in the table of distances are given as a guideline
only. Below are some examples of correspondence between rollers and crops,
on the basis of one seed per hole:
Planting
distance
Seeds/hole
(average number
of seeds in a hole
on the seed roller)
EXAMPLES OF CORRESPONDENCE BETWEEN ROLLERS AND CROPS
CROP
Basil
Beetroot
Broccoli
Carrot
Camomile
Celery
Chicory
Cabbage
Pak Choi
Frisée
Spring onion
ROLLER
YX24
MJ12
YYJ6
X24, XYY24, XY24
YYX24
YYX12
XYY12
YYJ6
YYJ6
YYJ6
Y24
CROP
Flax
Lamb’s lettuce
Mint
Onion (raw)
Sorrel
Parsnip
Parsley
Leek
Peas
8
CROP
Endive
Radish
Rocket
Wheel with no hole
Tomato
Thyme
Spinach
Fennel
Green beans
Lettuce (coated)
Lettuce (raw)
ROLLER
Y24
F24, FJ12
YYX 12 or 24
X24
YYX12 or 24
L12, L24
YYJ24
Y24
AA12
ROLLER
XYY12
X24
X12
Z
X2
YYX12
FJ24
X12
N6
MJ12
XYY12 or 24
3 to 10 cm
normally
Number of seeds per metre
(Seeds/distance) =
seeds/hole x 100 cm
placement interval
Caution: the planting distance depends on the combination of sprocket teeth
(11 adjustment positions) and the number of holes on the metering roll.
The drive wheel may slip depending on soil quality and placement speed.
Therefore, the number of seeds is a guideline only.
If the transmission wheel skids, planting distances will be larger, reducing the number
of seedings. So make sure that the wheel does not slip.
Seed dispersal: Seeds are dispersed in a hole according to the direction of the
motion until they are sown, and roll on the ground.
The dispersal length varies depending on the size of the hole, the soil quality,
the seed size and can vary between 3 and 10cm.
Terradonis is a registered trademark of ICS
ZA de Croix Fort - 12 rue du Soleil - 17220 La Jarrie - France - Tel: +33 5 4635 2828, Fax: +33 5 4635 2829
[email protected]
www.terradonis.com
9
REMOVAL OF THE HOPPER FOR
➊ Press the metal element to unclip the hopper, then lift.
➋ Unclipped element.
10
POSITIONING OF THE ROLLER
➌ Unscrew the white knob and open the retractable portion of the hopper
➍
To remove the pin, turn it as
shown in photo below and pull, to
release the pin and the roller.
roller can now
➎ The
be changed.
Terradonis is a registered trademark of ICS
ZA de Croix Fort - 12 rue du Soleil - 17220 La Jarrie - France - Tel: +33 5 4635 2828, Fax: +33 5 4635 2829
[email protected]
www.terradonis.com
11
SPARE PARTS
SPARE PARTS
132
43
41
42
55
58 48
46
49
53
40
115
50
50
44
45
57
30
33
28
25
24
66
35
29 36
63
60
61
62
106
107
105
103
104
13 11
12
15
20
23
65
18
19 17 7
5
10
16
9
21
85 84
99
2
1
3
6 123
95
93
121
92
102
94 88
122
86
83 129 124
89
130
90 91
107
125
108
123
126127
128
8
12
101
31
26
22
64
59
115
70
77
69
68
67
32
36
27
131
56
N
1
2
3
5
6
7
8
9
10
11
12
13
14
15
16
17
18
19
20
21
22
23
24
25
26
27
28
29
30
31
32
33
35
36
40
NAME
Drive wheel
Drive wheel guard
Drive wheel shaft
M12 Washer
Pin
Ring
Left side bar
Right side bar
Roller protection
Gear shaft
Bearing
M5 bolt
Hexagonal Nut M5
Sealing washer M5
Left chain box
11 tooth sprocket
Chain tightening tab
Chain
Nut (allen 6) for chain box
M8 Flange
Right chain box
Label
Label
Knob M6
Plate flange
Handle support
Drive wheel scraper
Hexagonal nut (M6)
Handle
Plate flange M6
Flange M6
Hexagonal nut (M6)
Flange M6
Hexagonal nut (M6)
Hopper
QTY
1
1
1
2
1
1
1
1
2
1
2
2
2
2
1
2
1
1
2
2
1
1
1
2
2
1
1
2
1
2
2
2
2
4
1
N
41
42
43
44
45
46
48
49
50
53
54
55
56
57
58
60
61
62
63
64
65
66
67
68
69
70
71
72
73
74
75
76
77
78
79
NAME
Label
Hopper cover
Seed distance label
Hopper protection
Drive shaft
Wheel protection
Bolt
Grommet
Guide plate
Brush
Wing bolt
Plate flange M5
Knob
Hopper sprocket
Pin
Hexagonal Nut (M5)
Knob
10 tooth sprocket
10 tooth sprocket
Sleeve ring
Chain
Wing bolt M8
Hexagonal Nut (M8)
Hexagonal Screw (M8)
Hopper release element
Hexagonal nut M4
Flange
Blade
Blade arm
Upper blade pin
Spring
Hexagonal nut M6
Hexagonal nut
Filler blade
Drive shaft
QTY
2
1
1
1
1
2
6
2
1
1
1
1
1
1
1
2
2
1
1
1
1
1
1
1
1
2
2
1
1
1
1
1
1
1
2
Terradonis is a registered trademark of ICS
ZA de Croix Fort - 12 rue du Soleil - 17220 La Jarrie - France - Tel: +33 5 4635 2828, Fax: +33 5 4635 2829
[email protected]
www.terradonis.com
13
SPARE PARTS
N
80
83
84
85
86
88
89
90
91
92
93
94
95
99
101
102
103
104
105
106
NAME
Hexagonal nut
Hexagonal shaft
Gear hub collar
Gear hub one direction
Pin
Compaction wheel spindle
Flange
Washer
Hexagonal nut
Compaction wheel
Compaction wheel protection
Spacer/wheel spindle
Scraper
Handle assembly lug
Bolt M6
Flange M8
Washer M8
Plate washer M8
Hexagonal nut M8
Hexagonal nut M8
QTY
1
1
1
1
1
1
2
2
2
1
1
2
1
2
2
2
2
2
2
2
N
107
108
110
111
112
113
115
121
122
123
124
125
126
127
128
129
130
131
132
133
ADJUSTMENT OF THE SLIDING HANDLE
NAME
Sealing flange
Hexagonal bolt M8
9 tooth sprocket
10 tooth sprocket
13 tooth sprocket
14 tooth sprocket
Handle sleeve
Left arm for compaction wheel
Right arm for compaction wheel
Hexagonal nut M8
Hexagonal nut M8
Support
Ring
Support cover
Round head nut
Hexagonal screw M5
Washer M5
T handle
Knob
Nut M8
QTY
2
2
1
1
1
1
1
1
1
2
1
1
1
1
2
1
1
1
1
1
CONSUMABLES
NAME
Brush
Chain Guide
Spongy rubber drive wheel cover
Spongy rubber compaction wheel cover
14
➊ The handle can be adjusted by loosening the knob.
slide the handle to the left or right
➋ When unscrewed,
depending on your need.
you to position yourself on the side of the row
➌ This allows
while maintaining sufficient thrust force.
REPLACEMENT
These elements are subject to wear and tear.
They should be replaced therefore when they can
no longer carry out their function.
Terradonis is a registered trademark of ICS
ZA de Croix Fort - 12 rue du Soleil - 17220 La Jarrie - France - Tel: +33 5 4635 2828, Fax: +33 5 4635 2829
[email protected]
www.terradonis.com
15
OUR DIFFERENT SHOES
THE ROW-MARKER
➜ DOUBLE ROW SHOE:
It allows to sow two rows, distant of 45mm, by seeding unit.
It is delivered with a plastic seed divider.
To get a higher density, we recommend to use a roller
with 30 or 36 holes.
Recommended for radish, carott, small vegetable…
standard
soil opener
➜ THE ROW MARKER IS MADE TO MARK THE NEXT ROW.
➊
Take the handle off,
with the help of a key of 10.
➋
Unscrew the bolts placed
of each part of the handle with a key of 13.
“double row”
soil opener option
➜ SOIL OPENERS: (exist in 60mm, 75mm and 120mm wide)
Allows sowing in bed, rather than in line.
In the case of sowing in seed nursery, it allows a better cover of soil
surface, and then a better density is obtained.
➜ DISC SOIL OPENER :
It is recommended for stony and tough soil.
➌ Place the row marker, screw the fixing paws, and then screw the side bolts.
SETTING OF THE SHOES
➊ Remove the standard shoe
unscrewing the bolt,
as shown on the picture.
➋
Mount the shoe to be used
and screw the bolt.
Caution: do not force to screw.
As soon as the shoe is maintained,
stop screwing.
16
ADD-ON HOPPER
➜ THIS OPTION ALLOWS TO INCREASE THE STANDARD HOPPER CAPACITY
FROM 1.2L TO 3L.
➊ Take the hopper cover off.
➋ Place the add-on on the top of the hopper,
to superimpose the holes of the hopper
to the holes of the add-on.
➌
Screw the white knobs. The cover of the hopper
can be placed at the top of the add-on.
Terradonis is a registered trademark of ICS
ZA de Croix Fort - 12 rue du Soleil - 17220 La Jarrie - France - Tel: +33 5 4635 2828, Fax: +33 5 4635 2829
[email protected]
www.terradonis.com
17
MOUNTING OF THE JPN FERTILIZER…
Replace the sprocket ot the seeder’s hopper
➊ by
the double sprocket from the JPN Kit.
located in front of the rear wheel of the seeder
➋ Unscrew thetoaxle
place the bearing plate of the JPN.
➌
18
Think about replacing the
shaft before screwing!
➍
Mount the bearing
of the JPN.
…MOUNTING OF THE JPN FERTILIZER
➎
Place the spacer
on the shaft where the
hopper will be mounted
and mount the hopper.
the chain in the seeder hopper sprocket and in the sprocket
➏ Engage
of the JPN. Place the sprocket on the JPN hopper shaft.
the white knob and settle the chain
➐ Unscrew
housing. Screw the white knob.
Install the hose
➑(with
the divider
at the top) and
mount it at the
bottom of the
hopper.
Terradonis is a registered trademark of ICS
ZA de Croix Fort - 12 rue du Soleil - 17220 La Jarrie - France - Tel: +33 5 4635 2828, Fax: +33 5 4635 2829
[email protected]
www.terradonis.com
19
JPN FERTILIZER
➜ For the seeding distances, please confer
to the seeding distance table of the seeder
(page 7). The distribution roller for the fertilizer
has 8 holes.
SPARE PARTS FOR JPN
Hopper
Hose
Double
sprocket
Carter
Roller
Spacer
Sprocket
8
7
3
Bearing
1
40
18
9
4
2
6
10 11
5
43 42
33 28
35
37
30 27
31
26
32 26
23 21
36
22
38
28
48
12
13
14
29 16
29
15
26 27
45
25
24
27
19
36
20
Chain
17
JPN bearing
N°
1
2
3
4
5
6
7
8
9
10
11
12
13
14
15
16
17
18
19
20
21
22
23
Name
Quantity N°
Hopper
1
24
Eye of the drive shaft of the roller
2
25
Sticker
2
26
Sticker
1
27
Protection of the roller
2
28
Screw
6
29
Hopper cover
1
30
Sticker
1
31
Brush
2
32
Screw
1
33
Butterfly screw
2
35
Granule guide
2
36
Roller carter
2
37
Knob
2
38
Driving shaft
1
39
Clutch axle of the roller
2
40
Pin
1
41
Roller
1
42
JPN Bearing
2
43
Bolt
2
44
Ring
4
45
Ring
1
46
Nut
2
48
CONSUMABLES FOR JPN
44
NOM
40
41
20
Name
Quantity
Fixing plate
1
Fixing plate of the roller housing
1
Bolt
1
Bolt
4
Ring
4
Bolt
4
Clutch shaft
1
Roulement
2
Rondelle
1
Bearing carter
1
Driving sprocket
1
Base of the JPN
1
Sprocket
1
Chain – 58 links
1
Chain carter
1
Ring
1
Knob
1
Plastic cone
1
Hose
1
Tube
1
User manual
1
Security plate
1
Axle
1
Brush
Replacement
These elements have sometimes to be replaced.
Please replace them when necessary.
Terradonis is a registered trademark of ICS
ZA de Croix Fort - 12 rue du Soleil - 17220 La Jarrie - France - Tel: +33 5 4635 2828, Fax: +33 5 4635 2829
[email protected]
www.terradonis.com
21
TWINNING SET
NOTES
➜ COMPOSITION OF THE KIT
• 3 bars
• 2 parts in which the upper bar slides, which will become the handle
of the seeder
• 2 parts in which the middle bar slides
• 2 parts in which the lower bar slides
➊
Assemble the handles and mount them on the JP1
yellow frame as shown in the picture:
+
=
Mount the part to be mounted
➋
on the side of the driving wheel
as shown hereafter:
Finally, drag the 3 bars through
➌
the mounted elements, adjust
the distance between the 2 JP1 as
per your needs and screw the knobs
to fasten the assembled parts.
22
Terradonis is a registered trademark of ICS
ZA de Croix Fort - 12 rue du Soleil - 17220 La Jarrie - France - Tel: +33 5 4635 2828, Fax: +33 5 4635 2829
[email protected]
www.terradonis.com
23