1
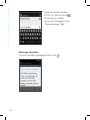
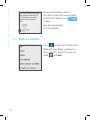
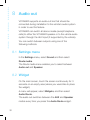
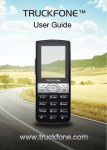
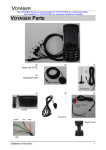
Thank you for choosing VOYAGER™
VOYAGER is a 3G Connected Vehicle Smartphone using software
based on Android OS.
VOYAGER was created specifically for use in a vehicle. The device
was designed with a number of special features for operating a
cellular based connected vehicle device*, with an emphasis on audio
quality, easy dialing and easy operation capabilities through the
physical keyboard and touch screen.
VOYAGER supports a variety of applications and navigation services,
features a 3.5” display as well as large physical buttons and is
designed to enable you to use the connected vehicle device easily.
Proper and safe installation by a qualified Accel Telecom Ltd.
authorized installer, will ensure you a pleasant driving experience.
This guide provides an overview of the device’s many possibilities,
innovations, and functions, with clear explanations on how to use the
device in the easiest and most efficient manner.
* Features available may depend on your network operator.
NOTE:
The device must be installed by an Accel Telecom approved
qualified and professional installer.
Warranty is valid for one year with an invoice from an
authorized Accel Telecom dealer showing the purchase date.
If you have any questions or require support, please contact
us at: [email protected]
Table of Contents
1. For your safety
4
2. Your VOYAGER
7
2.1
Kit contents 7
2.2 Keys and connectors
8
2.3 Indicators and key functions
10
2.4 Display indicators 11
3. Basic operations
3.1 Switching the device on/off
12
3.2 Home screens
12
3.3 Receiving a call
13
3.4 Making a call
13
3.4.1 Making a call using the keyboard
14
3.4.2 Making a call from the Call log
14
3.4.3 Making a call from the Contacts list
15
3.4.4 Making a speed dial call
16
3.4.5 Voice speed dial
16
3.5 Available options during an active call
19
3.6 SMS
19
4. Contacts
2
12
21
4.1 Search for a contact
21
4.2 Add a new contact
21
4.3 Edit a contact
22
5. Smart dialing
23
6. Accounts & Sync
24
6.1 Google contacts
25
6.2 iCloud contacts
26
7. Settings menu
27
7.1 Wireless & networks
28
7.2 Device
29
7.3 Personal
30
7.4 System
31
8. Audio out
32
8.1 Settings menu
32
8.2 Widget
32
9. Wi-Fi portable hotspot
33
9.1 Using the Settings menu
33
9.2 Using the Widget
33
10. Using an BT SIM service
34
3
1 For your safety
NOTE: To decrease the risk of injury, please read the
following important safety information before using this
device. The manufacturer will not be held responsible
for any damage resulting from non-standard use or
usage contrary to instructions appearing in this manual.
Driving safely and in compliance with all applicable laws
is your responsibility!
Service!
Do not disassemble the installed device or its accessories.
In the event of device malfunction, please contact your
nearest authorized service center.
Vehicle systems!
The radio frequency (RF) signals might affect electronic
systems inappropriately installed in motorized vehicles or
that are not properly protected. Please consult your vehicle
manufacture or its representative regarding your vehicle. Prior
to installing any equipment in your vehicle, you should also
consult with the equipment manufacturer for information on
radio frequency signals.
Vehicles with installed airbags!
Airbags inflate with great power. When installing the device in
the vehicle, the qualified professional installer must verify that
the device is installed within a safe distance from the airbag.
Any installation that blocks the inflating airbag might cause
very serious injuries.
4
Warning signs!
Make sure you turn off your phone in accordance with any
warning signs or instructions.
Turn off your device and follow all signs and instructions in
potentially explosive areas. Potentially explosive areas include
fueling areas such as gas stations, areas with high content of
chemicals, grains, dust or metal dust in the air and any other
area where it is customary to be advised to turn off a vehicle
motor or cellular devices.
Antenna!
When installing the device, a designated antenna fitted for use
with this device will be installed in your vehicle. You must use
only the original antenna supplied with the device. Any use of
an unauthorized antenna, or changes or additions made to
the antenna supplied with the device, might cause damage to
the device and affect its quality of use.
Road Safety!
Please check and abide by all applicable laws and regulations
on the use of the device in a vehicle or when driving.
Disclaimers
• The VOYAGER device must be installed by an Accel
Telecom Ltd. qualified professional installer.
• Accel Telecom Ltd. will not be responsible for any issues
related to the device installation or for any damage to the
vehicle resulting from the installation or from the use of the
device in your vehicle.
• The audio-out feature will work only in vehicles that support
5
an auxiliary (AUX) input to the vehicle sound system.
In vehicles that do not support an auxiliary input, a thirdparty solution may be necessary.
• Accel Telecom Ltd. is not responsible for any third-party
accessories that were not supplied with the product,
and /or any damage caused to the product by any thirdparty accessories.
• VOYAGER does not include cellular or data connectivity.
These should be purchased separately from your local
mobile provider and depend on network plans in your
region. Any use of the device is subject to the purchase of
such plans and may be limited depended on the services
provided by your cellular operator.
• Accel Telecom Ltd. is not responsible for any thirdparty applications and cannot guarantee that any such
application will work on the device.
• The use of third party software applications installed on
the device is subject to the acceptance of the terms and
conditions of the specific software application and is limited
in accordance with the applicable vendor terms.
• Certain trademarks used in connection with the product are
registered trademarks of their respective owners.
Use the VOYAGER device only in accordance with
applicable laws and regulations and keep your full
attention on driving and the road at all times
Drive safely and follow the law!
6
2 Your VOYAGER
2.1 Kit contents
Your purchased VOYAGER device includes the following
original items:
• VOYAGER device
• Cable set
•Microphone
• Speaker
• GPS antenna
• Cellular antenna
• Swivel mount
• Screws set
• User Manual
NOTE: We have made every effort to ensure that
the product arrives complete and in working order. If
you discover any problems with this product, please
contact the point of sale immediately.
7
2.2 Keys and connectors
3.5” color display
Home key
Search key
Menu key
Back key
Send key
End key
OK key
Keypad
8
USIM slot
Volume keys
Micro SD slot
Mini USB
connector
USB charging
connector
Reset
Voice dial key
Navigation key
9
2.3 Indicators and key functions
In Standby mode – View call logs (“All calls”)
When receiving a call – Answer incoming call
After keying in numbers – Dial call
During call – Shift to call waiting
During call – End call
Incoming call – Reject incoming call
In Menu mode – Return to Standby Mode
Touch and hold – Switch phone on/off
Access available options
Short press:
Outside Home screen – Return to Home screen
In Home screen – Show all Home screens
Long press:
Show recently used applications
Search
Back to previous screen
In Text Edit mode – Add space
In Standby mode – Change income call ring volume
In Talk mode – Change talk volume
Touch to see all applications
Touch to go to Home screens with selected favorite
applications
10
2.4 Display indicators
Current signal strength
for the selected network
No SIM card found
HSPA connected
UMTS connected
Bluetooth is on
Flight mode
Silent mode
Wi-Fi is on
Call
No sound
Portable hotspot active
Call forward
No connectivity
11
Downloading in progress
Unread SMS
External SIM
* Some apps have their own icons.
3 Basic operations
3.1 Switching the device on/off
If the device is connected to the vehicle’s ignition switch, the
device can be turned on/off automatically using the ignition
.
switch. For manual operation press and hold the key
Notice that the phone should be powered off to remove
the SIM.
3.2 Home screens
There are 3 Home screens. You can switch between them by
swiping right or left. You can place your favorite applications
on the Home screen. To add an application touch
.
Long press the app icon you want to add to the Home
screen. Drag the icon to a position on one of the Home
screens and lift your finger.
12
3.3 Receiving a call
When receiving a call, the device’s view screen will change its
display and show incoming call details.
To accept the call, press
on
the phone, or swipe the screen to
the right.
To reject the call (or to disconnect
after completing the call) press
on the phone, or swipe the screen
to the left.
3.4 Making a call
13
3.4.1 Making a call using the keyboard
Enter in the desired number using the keyboard. To correct a
dialed number, touch the
or press
to delete the last
digit. Press
to make the call.
To disconnect after completing the call, press
phone or
on the screen.
on the
3.4.2Making a call from the Call log
The Call log displays the last
calls made.
In Phone mode, press
Touch
.
to view the last calls:
Missed calls
, outgoing calls ,
incoming calls , and outgoing &
incoming calls
.
Scroll the list and touch
near
the name you want to call.
14
3.4.3Making a call from the Contacts list
Touch
to open the Contacts list.
After locating the contact, touch the record and touch the
number you want to call.
You can set which contacts will be displayed on the list:
For instruction on how to add Google Contacts
see section 6.1.
15
3.4.4Making a speed dial call
The device has 9 speed dial cells for dialing a number defined
as a speed dial. To speed dial press the cell’s number in the
following manner:
• For cell 1: Dial Voicemail from the SIM.
• For cells 2 through 9: A long press on the cell’s number.
The device will dial the number associated with the defined
number and display the contact’s name.
3.4.5Voice Speed Dial
Introduction
Voice Speed Dial is a voice recognition application which
provides Speaker-Dependent (SD) recognition for voice dialing
and launching applications. It is simple, easy-to-use, and
highly accurate. After creating “voice tags” in advance for
specified phone numbers of contacts or applications to be
launched by voice, a user can make a phone call or open an
application simply by saying the voice tag.
Getting Started
You can open Voice Speed Dial by tapping the Voice Dial
button on the top of the VOYAGER
.
When no voice tag exists, you will be prompted to go to the
Settings page after 3 seconds.
Creating voice tags
• Entering Settings
Voice tags are created in the Settings page. You can enter
Settings by tapping Menu of the application then select
Settings, or taping the Settings icon on the main page directly.
16
• Creating voice tags for Contacts
1. In Settings, select the CONTACTS tab and you will
see all contacts from your phone books.
2. Tap the contact you would like to assign a voice tag to,
and all phone numbers of that contact will be listed.
3. Tap the Recording icon on the right side of
a phone number.
4. After a beep sound, please say the “voice tag” for
this number within 3 seconds.
5. If the voice tag is successfully created, you will hear
the recording played for confirmation.
• Creating voice tags for Applications
1. In Settings, select the APPLICATION tab and you will
see names of all applications on your phone.
2. Tap the Recording icon on the right side of the
application you’d like to create a voice tag for.
3. After the beep sound, please say the “voice tag” for
this number within 3 seconds.
4. If the voice tag is successfully created, you will hear
the recording played for confirmation.
Voice Recognition
Once some voice tags have been created, whenever you start
the Voice Speed Dial, the application will listen for a voice tag
after the beep sound. Please say a recorded voice tag within
6 seconds.
• Making phone call
If the voice tag of a contact’s phone number is recognized,
the app will repeat the voice tag (by playing back the
recorded voice), then dial the number.
17
• Voice tags that cannot be recognized
If a voice command is not recognized, the app will try
the recognition process for a second time. If the second
recognition attempt still fails, Voice Speed Dial will
terminate.
During the recognition process, you can tap the restart icon
on the main page to restart the process.
Settings
Besides creating voice tags, additional functions are provided
in the Setting pages:
• Voice tag editing
Tap an item with an associated voice tag to play the voice
tag, delete it, or record again from the pop-up menu.
• VOICE TAG tab
You can find all items with voice tags under the VOICE TAG
tab. In the CONTACTS or APPLICATION tab, you can edit
voice tags as in the respective tab. In addition, when you
tap Menu of this tab, you can import/export voice tags, as
well as delete all voice tags.
• OTHERS tab
The OTHERS tab is similar to features in the Menu of the
VOICE TAG tab. You can import/export voice tags, and
delete all voice tags here.
18
3.5 Available options during an active call
During an active call, the following
additional actions are possible:
• End – End call
• Dial pad – Screen dial pad
• Changing volume
• Mute – Silence the microphone
• Call on hold – Place the call
on hold
• Conference call
3.6 SMS
Drive safely! Check and abide by all applicable laws.
You can send and receive SMS
(Short Message Service).
Touch
Touch
to enter the SMS screen.
to start a new message.
19
Type the phone number
in the ‘To’ field or touch
to choose a contact.
Type your message in the
‘Type message’ field.
Message template
You can choose a message from a list
20
:
Edit text
You can edit the text you have entered.
- Click twice on the text you wish to edit.
- The selected text will be highlighted in blue.
- Drag the highlighting tab to change the range
of your selection.
- A menu will display the options
Copy, Cut and Paste.
- Hold the word and a menu will open.
Select the option you need.
The paste option is only available after you cut
or copy text.
4 Contacts
4.1 Search for a contact
Touch
to open the Contacts list.
Slide with your finger up/down to find a contact,
or touch
to search by name.
4.2 Add a new contact
Touch
to open the Contacts list.
Touch
to add a new contact.
21
Choose the location where
you wish to save the new contact,
and fill in the fields. Touch
to save.
See the next section
for more details.
4.3 Edit a contact
Touch
to open the Contacts list.
Slide with your finger up/down to
find a contact. Select the one you
need,
and Edit.
22
5 Smart dialing
The VOYAGER device supports a special smart dialing
option that enables you to dial directly from the Home screen.
To begin searching with Smart Dial, press the device keys
while on the Home screen and the device will load the results
and update them for each key that is pressed.
Smart dial will search numbers and names based on the
sequence of keys pressed.
To search for the contact ‘John’, press the following
sequence of keys 5, 6, 4, 6, and the Smart Dial will show
the results based on this sequence of keys, including for
example, ‘John’.
23
6 Accounts & Sync
Use this option to synchronize
contacts and calendar.
Touch Settings, Accounts & Sync
and select Add Account.
Note that this feature requires an
active Internet connection.
Touch Add Account.
Most accounts require a username
and password. The specific details
depend on the type of account and
the requirements of the service to
which you are connecting.
Depending on the type of account,
you may be asked to define
what types of data you want to
synchronize, input an account
name and specify certain details.
24
Cal-Sync
Synchronize calendar from Gmail
and iCloud accounts.
Cont-Sync
Synchronize contacts from Gmail
and iCloud accounts.
Corporate
Synchronize contacts & calendar
from corporate email account.
Email
Synchronize contacts & calendar
from email account.
6.1 Google Contacts
You can import all your Google contacts. In the Contact
screen choose
and Accounts.
Select Add Account
at the bottom of the screen.
Select Cont-Sync.
Select Google.
25
Sign in with your Google Account,
and all your contacts will be added
to the Contacts list. You may choose
what to display.
6.2 iCloud Contacts
You can import all your iCloud contacts. In the Contact screen
choose
and Accounts.
Select Add Account
at the bottom of the screen.
Select Cont-Sync.
Select CardDav.
26
You will need to enter the iCloud server information,
type the server name — contacts.icloud.com under the
Server name or URL.
Under Username enter the iCloud
ID (login email account) and the
iCloud password under Password.
Make sure that the Use SSL
checkbox is selected.
Press Next to enter a name for this
account and finish the setup.
7 Settings menu
The Settings menu includes all application and phone
menu settings.
On the main screen,
touch
to open
the Settings menu.
27
7.1 Wireless & networks
28
WLAN
Select Wi-Fi on/off. After enabling
Wi-Fi, touch WLAN. The device
will search and display available
networks. Select an available
network. If the network is secured,
you will be required to enter a
password.
Bluetooth
Select Bluetooth on/off. After
enabling Bluetooth, you can access
Bluetooth settings.
Data usage
Set mobile data limit
Airplane mode
Turn off all wireless connections and
communications.
VPN
Set and manage your Virtual Private
Networks (VPNs).
Tethering &
portable hotspot
Set your device as a wireless router
or router to which you can connect
via a USB cable, and share your
device’s data connection with other
devices.
WLAN Direct
settings
Connect two devices via WLAN
without requiring an access point.
Mobile networks
Mobile networks settings.
7.2 Device
Sound
Volumes
Silent mode
Route media
Shutdown message
Phone ringtone
Default notification
Dial pad touch tones
Touch sounds
Screen lock sound
Display
Brightness
Wallpaper
Font size
Reboot timeout
Shutdown timer
Storage
Internal storage
SD card
USB storage
Manage apps
Apps
Preferred install location
29
7.3 Personal
Accounts & sync
Location services
Google’s location service
GPS satellites
Security
Screen lock
Set up SIM card lock
Show passwords
Device administrators
Unknown sources
Trusted credentials
Install from SD card
Language & input
Language
Spelling correction
Personal dictionary
Keyboard & input methods
Voice search
Text-to-speech output
Pointer speed
Backup & reset
30
Factory data reset
7.4 System
Date & time
Automatic date & time
Automatic time zone
Set date
Set time
Select time zone
Accessibility
Large text
Speak passwords
Touch & hold delay
Install web scripts
Developer options
About phone
System updates
Status
Legal information
Model number
Android version
Baseband version
Kernel version
Build number
31
8 Audio out
VOYAGER supports an audio out line that should be
connected during installation to the vehicle’s audio system
in order to use this feature.
VOYAGER can switch all device media (except telephone
calls) to either the VOYAGER speaker or to the vehicle audio
system through the AUX input (if supported by the vehicle).
You can switch between outputs using one of the
following methods.
8.1 Settings menu
In the Settings menu, select Sound and then select
Route media.
The Route media menu enables you to select between
Audio out and Speaker.
8.2 Widget
On the main screen, touch the screen continuously for 3
seconds on an empty area (where you would like to place
the widget).
A menu will appear; select Widgets, and then select
Audio Route.
The audio out switches between the AUX and Speaker
modes every time you press the Audio Route widget.
32
9 Wi-Fi portable hotspot
VOYAGER supports a portable hotspot mode that can be
turned on and off in two ways. The use of the device as a
hotspot may be limited or subject to additional payments to
the cellular operator.
9.1 Using the Settings menu
In the Settings menu, select More under Wireless &
Networks. Select Tethering & portable hotspot and then
select the checkbox Portable WLAN hotspot to enable or
clear the checkbox to disable the portable hotspot feature.
9.2 Using the Widget
On the main screen, touch the screen continuously for 3
seconds on an empty area (where you would like to place
the widget).
A menu will appear; select Widgets, and then select Hotspot.
The hotspot widget turns the portable hotspot feature on and
off each time you press the Hotspot widget.
33
10Using an BT SIM service
The VOYAGER device allows use even when there is no
SIM in the phone itself and for this the “BT SIM” service
is presented.
This service relies on a BT connection between
the VOYAGER device and a cellphone/smartphone that
supports the Remote SIM feature.
Note: BT SIM is not a Bluetooth Handsfree solution but
actually only uses the Bluetooth for remotely acquiring
the SIM information from the handheld device. All
network connections and calls are handled directly by
the VOYAGER device.
Activate the BT SIM
application.
34
To add your device to the list,
press Add New Device.
Then the device will present the
Bluetooth Settings screen, where
it is required to verify that the
Bluetooth is activated and visible
to other Bluetooth devices. To do
this, simply tap the name of the
device at the top of the screen.
At this stage, search for new Bluetooth devices in your
personal device and select the VOYAGER device (which name
appears in the previous section), after selecting the device the
connection must be confirmed on both devices.
35
This concludes the matching
process between the two devices
and now you can return to the
BT SIM application and see your
personal device’s name listed there.
Now you can configure an
automatic connection, so that in
fact every time you turn on the
VOYAGER device (starting the
vehicle) it will automatically connect
to your personal device.
To do this, press the Menu (three dots at the top right corner)
and select Settings, now check the option Auto Connect.
To connect to a device, click on the requested device in the
list and then confirm (if necessary) the connection in your
personal device.
When the VOYAGER is connected to your personal device
and receives its SIM data, its name will appear in bright green
in the list.
36