1
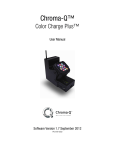
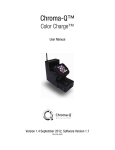
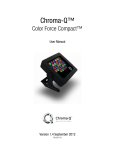
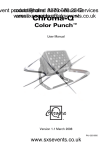
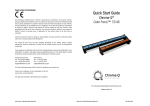
Approvals & Disclaimer
Quick Start Guide
Color Charge™
The information contained herein is offered in good faith and is believed to be accurate. However,
because conditions and methods of use of our products are beyond our control, this information should
not be used in substitution for customer's tests to ensure that Chroma-Q products are safe, effective,
and fully satisfactory for the intended end use. Suggestions of use shall not be taken as inducements
to infringe any patent. Chroma-Q sole warranty is that the product will meet the Chroma-Q sales
specifications in effect at the time of shipment. Your exclusive remedy for breach of such warranty is
limited to refund of purchase price or replacement of any product shown to be other than as
warranted.
Chroma-Q reserves the right to change or make alteration to devices and their functionality without
notice due to on-going research and development.
The Chroma-Q Color Charge has been designed specifically for the lighting industry. Regular
maintenance should be performed to ensure that the products perform well in the entertainment
environment.
If you experience any difficulties with any Chroma-Q products please contact your selling dealer. If your
selling dealer is unable to help please contact [email protected]. If the selling dealer is unable
to satisfy your servicing needs, please contact the following for full factory service:
Outside North America:
Tel: +44 (0)1494 446000
Fax: +44 (0)1494 461024
[email protected]
North America:
Tel: +1 416-255-9494
Fax: +1 416-255-3514
[email protected]
For further information please visit the Chroma-Q website at www.chroma-com.
Chroma-Q is a trademark, for more information on this visit www.chroma-q.com/trademarks.
The rights and ownership of all trademarks are recognised.
For a full product manual please visit www.chroma-q.com
Color Charge Quick Start Guide V1.1
Color Charge Quick Start Guide V1.1
PN: 618-0501
save settings. Main menu will show Battery capacity (%), battery life (no of days/hours/minutes), control mode, DMX status
(Wired/Wireless DMX On/Off), and DMX address.
1. Overview
The Color Charge battery powered LED fixture is an ultra portable, RGBA 600 hot lumen light source, which combines
wireless control with an advanced feature set.
• Powered by an internal rechargeable NiMH battery pack with an operating capacity of up to 30 hours, and a product
life of up to 1000 battery recharges.
• Interchangeable head with a total of 12 high powered LED’s (3 x RGBA)
• Wireless control capability, wireless syncing with other units, standalone or remote control operation via ANSI E1.11
USITT DMX 512-A protocol.
2. Safety
1.
2.
Caution
3.
This product is for professional use only. It is NOT intended for domestic or outdoor use.
The bright flash of light during power-up and continuous strobe effect may cause epileptic seizure.
This product must be used with safety cable.
3. Power Switch & Cabling
Charging is through a male IEC connector for power input, and the 2 XLR 5-pin connectors are for wired DMX control
data input and through. The On/Off switch is located at the side.
4. Mounting
Designed for floor mounting with a provision for truss mounting at the bottom, we recommend the use of a ½"-13UNC x
¾" long bolt to avoid damage. Secure with a safety bond that can be attached through a fixing hold built in the chassis.
5. Battery
Charging will take around 4 hours to complete (98%-100%). The LCD display will light-up when the unit is plugged into
a power source. Battery voltage, current and temperature can be monitored through the ‘Information’ menu. The Color
Charge wireless reception/transmission and light output will shutdown automatically when battery life is at 2%.
6. Control
Control functions are accessed through the LCD display on the front cover with 4 push buttons.
Control
Exit
Up Arrow
Down Arrow
Back Arrow
Function
Back to previous menu
Increases (+) the mode level or value
Decreases (-) the mode level or value
(Enter) Stores the menu choice
Control Options:
1.
3 Channel HSI (Hue, Saturation and Intensity): 2 colour channels for hue (255 colours) and saturation, and a
separate intensity channel.
2.
3 Channel RGB (Red, Green and Blue with *Magic Amber): 3 colour channels that directly affect the intensity of
the corresponding LED.
3.
3 channel RGB(A) + 1 intensity channel (Red, Green, Blue with *Magic Amber and Intensity): 3 control channels
directly affecting the intensity of the corresponding LED, and 1 channel affecting the intensity of all RGB(A)
channels.
4.
4 channel RGBA (Red, Green, Blue and Amber): 4 control channels directly affecting the intensity of the
corresponding LED.
5.
Internal FX engine: features 6 variable parameters. See user manual for control details.
Note: All internal FX are referenced back to the group base HSI colour and intensity levels.
* Magic Amber is the term used for the unit's ability to bring in Amber when mixing colors that require it with the use of
only 3 control channels.
Control Menu
Home / DMX Address
To set the DMX start address, press Enter and then Up/Down buttons to adjust DMX start address, press Enter for 2 seconds to
Color Charge Quick Start Guide V1.1
Control Mode
There are 5 DMX controlled modes with 5 control options: FxHSI, HSI, RGB (with *Magic Amber), RGBA, RGBI (with *Magic Amber),
pre-programmed looks and standalone effects. From the main menu, press Up button to access Control Mode, press Enter and then
Up/Down buttons to select the mode, press Enter for 2 seconds to save settings. Display will automatically go to the main menu.
Control Mode
B [3ch]
RGBA [4ch]
DMX1 Look Select
DEMO
Standalon Master
StRGBI [5ch]
Fx HSI [5ch]
Ch
3
4
1
5
5
Description
RGB
RGBA
1 DMX channel Look Select
Pre-programmed Demo Sequence
Stand-alone Master / Slave A / Slave B
RGBI (with *Magic Amber + Intensity Fx
HSI + 2Fx
To setup Stand-alone Master unit: select ‘Standalon Master’, Enter and Up/Down to select ‘Master’, press Enter for 2 sec to save.
To setup Slave unit: press ‘Standalon Master’ once and Up/Down to select ‘SlaveA’ or ‘SlaveB’ press Enter for 2 sec to save
settings.
Output
If DMX is not detected various output options can be selected: select ‘Output’ from menu, press Up/Down to select from these
options: Off, Hold - hold the last valid DMX state; Look 1-20 - snap to the Look of your choice; Chase 1-10 - snap to Chase of your
choice; press Enter to save.
Look Store
There are 20 internal preset FX Looks for stand-alone operation. To replay a Look, select ‘Look Store’ from the menu, press Enter,
press Up/Down to select the Look and press Enter for 2 sec to save.
To replay a Look with a DMX console, select ‘DMX1 Look Select’ from menu and press Enter for 2 sec. Assign a DMX channel to
the console to playback the Looks. (1-20 looks in 1 single channel)
Looks can be recorded to the internal flash memory and will be preserved on power down. Looks will be returned to default settings
upon reset. Refer to user manual for simple and advanced recording.
Chase Store
The Looks stored can be linked together in a Chase: refer to user manual for details.
DMX Levels
This menu indicates the level of wireless or wired DMX data signal from an external source.
Information
This menu indicates the voltage ‘BatV’, current ‘BatI’ and temperature ‘BatT’ of the internal battery.
Wireless W-DMX (Model of Wireless Receiver card in the unit)
Activate wireless signal from generic transmitter to the Color Charge as Receiver unit:
1. Set up Color Charge as Receiver unit – from the main menu, press Up/Down to access ‘Wireless W-DMX’, press Enter, Up/Down
to select ‘Receiver’, press Enter for 2 sec to save, display shows ‘Wireless W-DMX’, press Enter to show ‘Receiver’, press Enter to
show ‘Unlink frm Trnsm’, press Enter, ‘Unlink frm Trnsm’ will blink and then go to the main menu.
2. Set up generic Transmitter unit - connect DMX control to generic Transmitter unit, set to transmitter mode, unlink from previous
links, initiate signal search.
Activate wireless signal between Color Charge as Transmitter and next Color Charge as Receiver:
1. Set up Color Charge as Receiver unit: (same steps as above no. 1)
2. Set up Color Charge as Transmitter unit, connect DMX control (XLR5), press Up/Down to access ‘Wireless W-DMX’, press Enter
and Up/Down to select ‘Transmitter’, press Enter for 2 sec to save, display shows ‘Wireless W-DMX’, press Enter to show
‘Transmitter’, press Enter to show ‘Add Receivers’, press Enter, ‘Add Receivers’ will blink and then go to the main menu.
To unlink receivers, press Up/Down to select ‘Transmitter’, press Enter and Up/Down to select ‘Unlink Receivers’, press Enter,
‘Unlink Receivers’ will blink and then go to the main menu.
Activated:
The main menu of the Color Charge receiver will indicate ‘Wireless On’ when wireless connection is activated and signal strength is
indicated by the horizontal bars beside (4 bars maximum).
Note: Signal from the Color Charge transmitter unit will be indicated in the Color Charge receiver units even if not connected to the
DMX control console. Receiver display will show ‘WiredDMX On’.
Reset to Default
Press Enter for 2 seconds to reset all menu items to factory defaults: DMX address = 001, Control Mode = RGB, Output = Hold,
Looks = 20, Chase = 01, Wireless = ‘Off’
7. Further Information
Please refer to the Chroma-Q Color Charge manual for more detailed information. A copy of the manual can be found at
the Chroma-Q website – www.chroma-q.com – under Support.
Color Charge Quick Start Guide V1.1