1
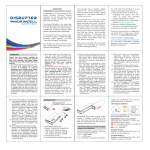
GGTS Golden Greek Telescopic Storm 2011 User guide & operating instructions GG is Intellectual property of Imeo Thanasis, developer, designer & manufacturer of Golden Greek products http://www.ggecig.com/ for further references - ECF Forum: http://www.e-cigarette-forum.com/forum/gg/ GG Products Wikipedia: www.e-cigarette-wiki.com/index.php?title=Golden_Greek The ultimate PV: The GG (Golden Greek) personal vaporizer, is the first all mechanical PV that was made. There are no wires to pinch, burn, or fail. GG is the most user friendly vaping device. Everything inside each expertly crafted GG is user serviceable, removeable, and replaceable. Each GG is hand made in Greece using the latest techniques for shaping, coating, and threading fine metals. GG is a vaping piece of art. The Golden Greek by Imeo Thanasis - © The Golden Greek Telescopic Storm (GGTS) was born from the brilliant mind of its inventor, Imeo Thanasis. Fully handcrafted, built with quality materials such as avional aluminum and stainless steel, producing the higher quantity and quality of vapor, GGTS stays at the top of the mods wolrdwide. The GG is versatile and has the unique ability to fit different atomizers and cartomizers. In fact it can fit two types of atomizers (510 and 801) and using a small rethreater that can be attached to the atomizer, can be used also with 901 atomizers and 808 D cartomizers. The GGTS is therefore a brilliant device. The current version 2011 is the last one and includes several improvements: ✔ Lightweight; ✔ aluminum construction (avional) with nickel treatment; ✔ tank attack on the new model with removable top; ✔ control ring that can adjust the way you inhale and also the air that comes inside the atomizer (usefull for different types of atomizers it's possible to make adjustments based on the type of atomizers or cartomizers in use). Other usefull characteristics are: ✔ the switch with safety lock; ✔ magnetic switch (optional); ✔ the battery compartment (Telescopic accommodate all combinations of batteries. system) that GGTS it's made to be extremely personalized by users, so a lot of optional detailed parts can be separately purchased to achieve your own personal GG experience: • • • • additional alluminium or brass telescopic sleeve; • • • • • • • • • • • • Security fuse; AVS (Automating Vaping System); CR Top Cap for 801 atomizers (Alluminium, Brass or Nickel); CR Brass Top Cap for 510/901 atomizers (Alluminium or Nickel Cap is standard with the base unit). Additional extension Sleeve for holding till 2 for 18650 batteries; AVS 901 Tank; AVS 510 Tank; UFS 510 Tank; Additional Steel UFS tank piece for more e-juice filling; AVS-AFS Metal Mouthpiece; AVS-AFS Flat Metal Mouthpiece; UFS Metal Mouthpiece; AFS V3 with 901 connector; AVS adapter to convert AVS on AFS V3; Magnetic Button for modding switch springs system. can Because its handmade, some parts cannot be avaiable every time, but only for some periods. For the same reason it's possible for the parts to have some little imperfections due to the handmaded working, but they dont affect the functionality of the GG and obviously are not covered from the lifetime warranty The Golden Greek by Imeo Thanasis - © Special features of GGTS: GG Button is in ergonomic position; GG's button can be locked when you carry it in pockets or bags; GG does not use wires, soldering, glues, epoxy, pushed objects and ready from stores products. Even the GG specific atomizers are specially produced for the GG; GG is very attractive with engraving on it (options for gold caps); GG works with any kind of batteries because of its telescopic system; GG works with 3 kind of volts (3,7 and 6 and 7,4) without buying 3 devices; GG is light but still robust; GG will never need repair. Even the button is unbreakable; GG does not roll, it stays where you leave it; Locking liquid option for AFS too so no leakage any more when you carry it in pockets; Collection tank that collects the liquid that goes off the atomizer when you vape so no leakage or a very very small one even if the liquid is unlocked!!; Fuse to avoid short circuits; Flat metal mouthpiece; Adjustable liquid control, so that you can adjust the liquid inside atomizer and clear window that gives you the ability to check the level of the liquid inside the tank). Coming soon: Version 2011 SS – Stainless Steel (GGTS) Fully repairable Atomizer (Iatty) GG will never get damaged by accident or malfunction; GG's dripping is easy because you dont need to hold it in your hands, it stands on a table in a straight position; GG's length can vary from 62mm to 110mm (depending on battery and atomizer configuration chosen). Width is 23mm n; GG currently comes in 2 versions: GGTS and Slim; GG has optional auto-feeding-liquid system. You dont have to refill carts anymore!!!; GG is made from the best and most expensive aluminium in the market, which is harder than middle steel; 801, 901, 510, & cartomisers fit as standard on the GGTS multi connector without the purchase of additional adapters!!!; GGTS can be powered from the mains with an optional component kit; You can clean the contacts very easy so it will be like new always; Adjustable draw, so that you can adjust how hard or how soft you inhale; The Golden Greek by Imeo Thanasis - © List of possibles Batteries combinations: n° Type of Battery Result • for vaping at 3.7V 1 x 14.500 / 3.7V 3.7V • for vaping at 3.7V 1 x 14.650 / 3.7V 3.7V • for vaping at 3.7V 1 x CR123A / 3.7V 3.7V • for vaping at 3.7V 1 x 16.340 / 3.7V 3.7V • for vaping at 3.7V 1 x 17.500 / 3.7V 3.7V • for vaping at 3.7V 1 x 17.670 / 3.7V 3.7V • for vaping at 3.7V 1 x 18.350 / 3.7V 3.7V • for vaping at 3.7V 1 x 18.500 / 3.7V 3.7V • for vaping at 3.7V 1 x 18.650 / 3.7V 3.7V • for vaping at 6,0 V 2 x CR2 / 3.0V 6.0V • for vaping at 6,0 V 2 x CR123A / 3.0V 6.0V • for vaping at 6,4 V 2 x 17.340 / 3.2V 6.4V • for vaping at 7,2 V 2 x CR123A / 3.6V 7,2 V • for vaping at 7,4 V 2 x 16.340 / 3,7V 7,4 V • for vaping at 7,4 V 2 x CR123A / 3.7V 7,4 V GGTS Golden Greek Telescopic Storm 2011 The GG Lifetime Warranty Every GG product (except those clearly labeled otherwise) has a life time warranty (excepts springs and oxidation of the surface). This warranty applies to all GG products both brand new and second/third hand. This warranty covers all situations (user’s fault, manufacturing fault etc) and it starts from the first day that user receives the unit. The only 2 things required from the user is to send 10 euros per faulty part (or 15 euros for steel.GGTS) and a photo or a video showing the faulty product to the manufacturer and the manufacturer will ship a new part to the user. In case of problem with a new unit, first contact the supplier you've bought the unit from. Otherwise contact Imeo for details. The Golden Greek by Imeo Thanasis - © Diagram 1 – Main parts of GGTS: ITEM QTY Diagram 2 – The Collection Tank DESCRIPTION ITEM QTY DESCRIPTION 1 1 Bottom Cap 1 1 Center Post Nut 2 1 Lower Battery Tube 2 1 Collection Tank Center Post 3 1 Brass Telescope Tube 3 2 Battery Plunger O-Ring 4 1 Upper Battery Tube 4 1 Collection Tank Center Post Plastic Stop 5 1 Switch Assembly 5 1 Collection Tank Center Post Plastic Stop O-Ring 6 1 Collection Tank 6 1 Control Ring 7 1 AVS Tank Assembly 7 1 Control Ring O-Ring 8 1 Collection Tank - Bottom 9 1 Collection Tank - Top 10 1 Collection Tank Lower O-Ring The Golden Greek by Imeo Thanasis - © Diagram 3 – Sectioned view of GGTS Diagram 4 – Switch Button ITEM QTY DESCRIPTION 1 1 Switch Body 2 1 Switch Spring 3 1 Switch Lock Ring 4 1 Switch Button 5 1 Switch Plunger The Golden Greek by Imeo Thanasis - © Diagram 5 – Bottom Cap ITEM QTY DESCRIPTION 1 1 Bottom Cap 2 1 Plastic Baffle 3 1 Bottom Cap Post 4 1 Battery Spring General Overview: Be careful to not overtighten the GG! Tightening the GG too much could lead to damage of batteries or the atomiser. The atomiser center pin could be pushed in causing a short circuit, while the batteries contain dangerous chemicals which could vent (possibly with flames). It is best to slightly unscrew the telescoping section to make sure all the parts are loose, before removing any one part of the GG. Using Different Atomisers 1. Unscrew the telescope about 7-8 turns; 2. Screw on the atomiser; 3. Screw the telescope until you feel a resistance, then stop screwing it. Removing, Adjusting and Modifying the Button 1. Lock the Button; 2. Firmly turn the button in the direction it typically locks; 3. Grab the part that touches the fuse/spring section and the part that you push (you might need thin nose shaped pliers for this and a cloth rag) (New button has polygonal nuts so you can grab it very easily); 4. Now twist the parts counterclockwise; 5. Replace the spring or install magnets; 6. Screw everything back together as tight as you can (probably not worth over tightening though, in case you want to take it apart again); 7. Install on the GGTS, be careful to not crossthread it. The Golden Greek by Imeo Thanasis - © Replacing the Top cap center pole o-rings: 1. Unscrew polygonal nut from the plastic; 2. Take out the center pin and the polygonal nut out of the connector; 3. Push out the o-rings from the connector if they are stuck inside (use the center pin); 4. Put vaseline on O-Rings; 5. Put the polygonal nut onto the center pin; 6. Put the o-rings on the center pin so that the polygonal nut is stuck between the bottom of the center pin and the o-rings; 7. Push the assembly carefully into the plastic; 8. Screw the polygonal nut back into the plastic. Installing the Optional Fuse Upgrade: 1. Unscrew the piece that holds the spring from the plastic piece in the bottom cap; 2. Screw in the Fuse Upgrade; 3. If you notice low connectivity, take off the single spring that fuse has inside its tube, put on it a second one till they will exactly match (one into the other) and will look like a single piece, screw them to the metallic part of the fuse and then put them back into the spring holder This way you will have greater conductivity without reducing system security. GGTS Cleaning: It is recommended to clean the GG, when you notice a performance drop or when you feel it needs it. 1. Pay particular attention to cleaning the threads of the GG to make sure electricity flows fine through it. 2. Put Vaseline (or any other neutral oil) on all threads to keep them in good condition; 3. Use a product that shines metals as “autosol” and shine the center pole nail, the button’s bottom part which touches the fuse/spring and the fuse/spring holder. Also a piece of rubber like the one found on tops of pencils could be used to clean the contacts because it does not scratch the surfaces but is still effective in removing the oxidation. To bring back the shine of the GGTS it is recommended to use a polishing compound such as: • Cape Cod Polishing Cloths • Autosol Metal Polish • Mother's Billet Metal Polish You could also try any other polishing compound which works for aluminium and brass and preferably leaves a protecting coat The Golden Greek by Imeo Thanasis - © Troubleshooting • • • • Did you shine the base of the button? • • • Did you clean ALL the threads of the GG? Tricks Did you shine the bottom's cap axis? ___________________________________________________________ Did you take apart the button to clean it? ___________________________________________________________ Did you try to smoke GG without the spring on the bottom's cap axis? ___________________________________________________________ Did you shine the adjustable nail in the atomizer's cap? Did you screw the telescope a little more to see if GG is firing If anything of this works for you, ask your reseller about your issue or read the GG section on http://www.e-cigarette-forum.com/forum/ where there are houndreds of usefull suggestions. Also a lot of kindly users will help you on using your device and Imeo himself can answer to all of your question on forum. ___________________________________________________________ ___________________________________________________________ ___________________________________________________________ ___________________________________________________________ ___________________________________________________________ ___________________________________________________________ ___________________________________________________________ ___________________________________________________________ ___________________________________________________________ ___________________________________________________________ ___________________________________________________________ ___________________________________________________________ ___________________________________________________________ ___________________________________________________________ ___________________________________________________________ ___________________________________________________________ ___________________________________________________________ ___________________________________________________________ ___________________________________________________________ ___________________________________________________________ ___________________________________________________________ ___________________________________________________________ The Golden Greek by Imeo Thanasis - © Diagram 1 – AVS Tank Assembly – Part List AVS AVS is shorthand for Automatic Vapn System. It is a different design than the AFS v2. ITEM QTY DESCRIPTION 1 1 AVS Tank Sub-Assembly It is specifically designed and made for the GGTS with the Revision 2 top cap and collector tank feature. 2 1 AVS Center Post 3 1 901 Atomizer For the Revision 1 of the GGTS, one would need to buy the AVS together with Collector tank part, suplliers bundle this as the "older GGTS upgrade" package. 4 1 Top Cap Assembly Features • Allows to automatically feed e-liquid into the atomiser, thus usually lasting for a full day of vaping. • • Holds around 6ml of liquid. • Works together with the adjustable draw feature of the GGTS and the collector tank in such a way that the atomiser is fed both from the main tank and the collector tank, thus reducing the need for primary inhales. • The o-rings are hidden. As standard accepts 901 atomisers (without the need to modify the atties) and 808D cartomisers (small modifications required) The Golden Greek by Imeo Thanasis - © Diagram 2 – AVS Tank Assembly Exploded– Part List ITEM QTY DESCRIPTION Diagram 3 – Collector Tank Assembly – Part List ITEM QTY DESCRIPTION 1 1 AVS Tank 1 1 Center Post Nut 2 1 AVS Tank Lower O-Ring 2 1 Collection Tank Center Post 3 1 AVS Center Post Mount 3 2 Battery Plunger O-Ring 4 1 AVS Center Post Standoff 4 1 Collection Tank Center Post Plastic Stop 5 1 AVS Center Post 5 1 Collection Tank Center Post Plastic Stop O-Ring 6 1 AVS Post O-Ring 6 1 Control Ring 7 1 901 Atomizer 7 1 Control Ring O-Ring 8 1 Mouth Piece Cap 8 1 Collection Tank - Bottom 9 1 Black Delrin Mouthpiece 9 1 Collection Tank - Top 10 1 AVS Tank Top Cap 10 1 Collection Tank Lower O-Ring 11 1 Upper Atomiser O-Ring 12 1 AVS Tank Cap O-Ring The Golden Greek by Imeo Thanasis - © Assembly and Use Official way to assembly AVS (901 Version) Atomisers 1. Put the smaller of the o-rings (Diagram 2 part. 6) around the bottom of the atomiser The AVS comes standard with a 901 connector which will accomodate a 901 atomiser or an 808D cartomiser without adapters. 2. Screw the atomiser onto the connector part (Diagram 2 – part. 3) 3. Slide the o-ring down so it touches the connector part at the bottom of the atomiser (Diagram 1 – Part. 2 & Part. 3) 4. Slide the connector part and the atomiser (Diagram 1 – Part. 2 & Part. 3) through the bottom of the liquid tank (Diagram 1 – Part. 1, Diagram 2 – Part. 1), now screw it in fingertight 5. Screw the liquid tank onto the collector tank 6. Make sure the draw adjustment control ring is fully closed (screw it towards the bottom of the GGTS) 7. Put E-liquid in the liquid tank, don't go above where the threads start 8. Put the bigger of the top rings (Diagram 2 – Part. 10) onto the liquid tank, screw it in slowly 9. Put the bigger of the o-rings (Diagram 2 – Part. 11) around the atomiser so it goes into the groove between the atomiser and the bigger top ring 10.Screw the smaller top ring (Diagram 2 – Part. 8) onto the bigger ring until you feel it touch the o-ring 11.Screw the mouthpiece (Diagram 2 – Part. 9) on top of the smaller top ring • • 901 atomisers require no modifications • it can be ordered with a more recent 510 connector, that can use every atomizer or cartomizer that adopt the 510 style connector: • 510 atomisers and catromisers using the 510 connector require no modification • 801 attys - see Cappy's video (ecf user) on youtube: 808D cartomisers require drilling or punching a side hole of 1,2-2 mm in diameter at a distance of 8 mm from the connector; http://www.youtube.com/watch? v=dlJA0NxOaJA&feature=player_embedded The Golden Greek by Imeo Thanasis - © Alternative Method Control Ring Basics – The C.R. This method is particularly useful for LR atomisers. If there is too much liquid dropped into the collector tank at the refill time, atomiser doesn't fire properly because it need an almost empty collector tank to function. The more you close the Control Ring the more liquid is being fed into the atomiser from the AVS tank. That means that you will have more flavour but also a higher chance to flood your atomiser and overfill the collector tank So when you put together the juice tank and the atomiser as per above instructions The more you open the control ring the less liquid is being fed into the atomiser. That means potentially higher vapour production but if open too much you run the risk of burning the atomiser. This also means that you will most likely empty out the collector tank 1. Do not screw the assembly onto the collector tank; 2. Plug the juice tank bottom hole with your finger 3. Fill it with juice and put on the top rings as per above instructions while still plugging the hole with your finger 4. Screw the complete juice tank on the collector tank If you don't feel comfortable with this procedure you can just try to empty the collector tank after a refill, by unscrewing the juice tank and either dumping the liquid out or using a syringe to suck it out of the collector tank. Thus it is important to find the correct spot for the Control Ring, in which not too much and not too little liquid is being fed into the atomiser. It is best to adjust as you go along. So if you have too much liquid in the collector tank and you feel you're close to flooding the atomiser, open up the control ring. If atom is still flooded, probably there is too much liquid in the CT. Primary Inhales If you take the GG vertical with CR open you upload more of the liquid on CT. If you take GG orizontal you can vape the excess liquid inside CT and inside the atomizer more confortable. There are two main options in getting the AVS ready to be vaped when you first fill it up with juice: Use an angle to fit more your way of vape and smoke the excess juice: AVS more orizontal if you inhale hard or more vertical if you inhale usually soft It is not as important to know where inside the tank the side hole of the atomiser is, but it is still a good idea to check when your AVS is fully assembled in what position the hole (901 atomizers) is towards the ground (when tank is running low, this will mean the hole is in the juice). This helps when the tank is low and you wish to suck all of the juice. If you feel a burnt taste, it is probably a good idea to close the control ring a bit more. Option 1 1. Open a little the adjustable draw Control Ring (CR) 2. Blow slowly into the mouthpiece 1 or 2 times, to make sure some of the liquid goes into the Colletor Tank, this way the atomiser will be directly fed from the bottom hole. Option 2 Cleaning the AVS The same ideas apply as for the GGTS; however, it is better to use Vaseline or any other chemically neutral lubricant over the threads as there is a chance of it coming into contact with the e-liquid that will be vaped. At least once a week put vaseline on all the o-rings to prolong their lifespan. Make sure to wash off any polishing residue with soap and water. Clean gasoline (used for cleaning clothes) or alcohol is effective to remove tarnishing caused by e-liquid. 1. Almost completely close the CR 2. Inhale without pressing the button, this gets some of the liquid sucked into the atomiser, through its side hole. The Golden Greek by Imeo Thanasis - © AVS O-rings sizes Cartomizers in the AFS and AVS In case you wish to buy your own o-rings here is a list of diameter/thickness parameters for the o-rings, it is recommended to just purchase the ready sets from the suppliers though. There are a number of different methods possible to use the 808D style cartomisers in the AFS and the AVS, The basic idea behind all of them is to make a side hole similar to that of a 901 atomiser in the 808D cartomiser. Make sure you use appropriate materials which can withstand high temperatures: 510 Cartom work very good by default on the 510 connector AVS Models. Basic Instructions • 8/2 - atomizer near connector • 9/2,5 - between 2 caps • 18/1,5 - refill cap between collector tank and connector of GGTS • 18/1,5 - connection between collector tank and connector of GGTS • 10/1 - mouthpiece • 13/1,5 - connection between AVS and collector tank • 21/1,5 - inside CR • 2 x 2/1 - tiny o-rings inside connector • 15/1 - lids • 9/1,5 - 901 lid • 11/1,5 - 801 lid 1. If your cartomiser has coloured plastic wrapped around it (ie. it is not stainless steel on the outside), it is best to remove this label. After removing the label, also make sure to remove the glue residue left on the cartomiser. There are many variations on this, just remember that whatever product you use it will come into contact with the e-juice. Try Vodka, Goo Gone, Everclear, 100% Alcohol. You could also boil the carto in water, salt and winegar which has the same effect. 2. Make a hole on the side of the cartomiser approximately 1.2-2mm diameter and 8 mm from the bottom of the cartomiser. This can be achieved by using either a finishing nail and a hammer, or an automatic center punch which has been sharpened on some rough sand paper, or using a drill and an appropriate drill bit. 3. Make sure you haven't damaged the wiring inside the atomiser (a multimeter is very useful for this). 4. Remove the top white plastic cap from the cartomiser.(optional) 5. Assemble the cartomiser inside the AFS or AVS like you would with a 901 atomiser. 6. Vape! This set up usually gives very good results at 6 volts. The Golden Greek by Imeo Thanasis - © UFS Inside the UFS system: UFS is GGTS's ultimate system for automatic e- juice feeding Apart from the above said materials, the bottom, which is the CT/CR block, also houses the sleeve, which raises atomizers to the floor level of the liquid tank. Differently from the previous alluminium style systems, UFS is made of steel with a clear window in Plexiglas (optionally with a more capable steel tank) it is composed by 3 part: the new steel Collector Tank with CR, the ejuice clear tank, and the superior steel cap with a plastic (metallic option) mouthpiece. Screwing the UFS tank on its own collector tank we uncover the side holes of the atomizer so liquid can flow inside. Liquid excesses, as the previous system, end up in the collector tank (CT) from which they can be vaped turning off liquid flow and CR. It screw on 2010 and 2011 GGTS series which are prefectly set on. Previous metallic mouthpieces from AVS and AFS (rounded and Flat) are not compatible . Conceptually, the innovation brought by UFS ( additionally to controlling the level of unused liquid) is the external regulation of the liquid driven to the atomizer. You control the liquid by turning the tank on its axis. So you can adjust the richness of your vape experience, combining the two adjustments ( Air (CR) and liquid (tank)), adapting the use to your needs or what is required by atom / batteries combination. UFS currently uses only 510 atomizers. The UFS System The UFS System sectioned The Golden Greek by Imeo Thanasis - © Diagram 1 – UFS Tank Assemmbly exploded – Part list" ITEM QTY DESCRIPTION 1 1 UFS Tank Bottom 2 1 14 x 1,5 O-Ring 3 1 Clear Tank Section 4 1 16 x 1,5 O-Ring 5 1 18 x 1,5 O-Ring 6 1 UFS Tank Top 7 1 UFS Top Cap 8 1 9 x 2,0 O-Ring 9 1 510 Atomizer (Reference) 10 1 510 Atomizer Extension 11 1 5 x 1,5 O-Ring 12 1 UFS MouthPiece The upper block of UFS is composed of the juice reservoir, which can be a transparent plexiglass window to check the fluid level, or a steel section, slightly larger, which replaces the "Clear Tank Section". The steel tank allows for an additional ml of liquid available. The atomizer, actually only 510 model, is screwed Inside the tank. The tank's block is then attached to the collector tank group. Rotating the tank the flow of liquidi is adjusted t inside the atomizer. The liquid should be fully loaded with the block rotated counterclockwise (i.e. by adjusting the liquid completely closed) to prevent the liquid falls directly on atomizer and from there into the collector tank. The Golden Greek by Imeo Thanasis - © Diagram 2 – Collection Tank Assembly exploded ITEM QTY DESCRIPTION 1 1 UFS Collection Tank 2 1 21 x 1,5 O-Ring 3 1 UFS Control Ring 4 2 UFS Connector Assembly UFS – Collection Tank Assembly The Golden Greek by Imeo Thanasis - © Diagram 3 – UFS Connector exploded ITEM QTY DESCRIPTION 1 1 Collector Tank Battery Post 2 1 3 x 1,5 O-Ring 3 1 UFS Center Post Nut 4 2 2 x 1,0 O-Ring 5 1 UFS Battery Post Plastic Stop 6 1 UFS Collector Tank Core 7 1 18 x 1,5 O-Ring 8 2 9 x 1,5 O-Ring UFS – Collector Tank Core The sleeve of the collector tank enters directly into the top of the UFS, where it became the housing of our atomizer and the pivot around which turns the lock of the tank liquid. To smooth the rotation of liquid control, you can remove the lower O-Ring N. 8 Screw the atomizer tightly into place, to avoid it unscrewing itself during adjustment of the liquid. The Golden Greek by Imeo Thanasis - © Example of UFS assembly INTERNATIONAL DEALERS: Clouds of Vapor (USA) – USA http://www.cloudsofvapor.com E-Cigz UK (UK) - Rest of the World http://www.e-cigz.co.uk GG E-Cigs (Australia) - Rest of the World http://www.ggecigs.net BitFumo (Italy) – Italy http://www.bitfumo.it Here several precautions to take the best from your device: If it dries • • Loose a little the mouthpiece; Use the air (CR) almost full closed: the strength of drows must be equal to that which occurs with an analog cigarette; • Screw and unscrew a little the cap of the tank about 3-4 times. If it is flooding: • • • GG E-Cigs (Philippines) – Philippines http://www.pcrus.ph G.G. Série France (France) – France http://e-cigarette-gg-france.com A little blown into the mouthpiece; Ggurgle: almost completely solved by closing the air; by removing the top cap and screw the nozzle and let it loose. Remove the o-ring from the thread fastening the tank to the CT or the lower of the 2 o-rings placed onto the connector (Collector Tank Core). The Golden Greek by Imeo Thanasis - © Manufacturer's website, Imeo Thanasis: http://www.ggecig.com/ Reference Forum – ECF: http://www.e-cigarette-forum.com/forum/gg/ Wikipedia GG Products: http://www.e-cigarette-wiki.com/index.php?title=Golden_Greek Credits: The inventor and manifacturer: Imeo Thanasis Material taken from e-cigarette-wiki, bitfumo.it, user experiences posted on the Italian forum dedicated to the electronic cigarette “esigarettaportal.it”, practice and use by the undersigned. Original Texts and ideas: www.e-cigarette-wiki.com Other Texts: Gino S. Barletta www.bitfumo.it Smokin_Alex esigarettaportal.it Pictures by: vecchiemaniere esigarettaportal.it Images & Drawings: Zoranth Translation, paging and additions by ECF Forum Alessandro Zanon aka: Smokin_Alex The Golden Greek by Imeo Thanasis - ©