1
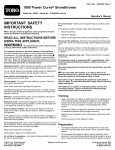
Form No. 3379-685 Rev B
14in Electric Trimmer
Model No. 51480—Serial No. 312000001 and Up
Operator's Manual
If you have questions or problems, contact us at www.Toro.com or
call toll free 1-800-237-2654 (US) or 1-800-248-3258 (Canada) before
returning this product.
Importer: SERVICIOS HOME DEPOT, S. DE R.L. DE C.V.
F.
Ricardo Margain 605, Santa Engracia, San Pedro Garza García,
Nuevo León, México, C.P. 66267 Tel. 01 800 004 6633
The warranty printed in the manual is not valid for Mexico.
General Safety Rules
WARNING: When using electric gardening appliances, basic
safety precautions should always be followed to reduce the risk of
fire, electric shock, and personal injury, including the following:
Read all instructions.
The term “power tool” in all of the warnings refers to your
mains-operated (corded) power tool or battery-operated (cordless)
power tool.
1. Work area safety
A. Keep work area clean and well lit. Cluttered or dark
areas invite accidents.
B. Do not operate power tools in explosive
atmospheres, such as in the presence of flammable
liquids, gases, or dust. Power tools create sparks,
which may ignite the dust or fumes.
C. Keep children and bystanders away while operating
a power tool. Distractions can cause you to lose
control.
2. Electrical safety
A. Power tool plugs must match the outlet. Never
modify the plug in any way. Do not use any
adapter plugs with earthed (grounded) power tools.
Unmodified plugs and matching outlets will reduce risk
of electric shock.
B. Avoid body contact with earthed or grounded
surfaces. There is an increased risk of electric shock if
your body is earthed or grounded.
C. Do not abuse the cord. Never use the cord for
carrying, pulling, or unplugging the power tool.
Keep cord away from heat, oil, sharp edges, or
moving parts. Damaged or entangled cords increase
the risk of electric shock.
D. Do not expose power tools to rain or wet conditions.
Water entering a power tool will increase the risk of
electric shock.
E. If operating a power tool in a damp location is
unavoidable, use a supply protected by a residual
current device (RCD) in AUS or a ground fault
interrupt (GFI) in the USA.
Use of an RCD or GFI reduces the risk of electric shock.
© 2014—The Toro® Company
8111 Lyndale Avenue South
Bloomington, MN 55420
Register at www.Toro.com.
When operating a power tool outdoors, use an
extension cord suitable for outdoor use. Use of a
cord suitable for outdoor use reduces the risk of electric
shock.
G. Disconnect the plug from the power source when
the appliance is not in use.
3. Personal safety
A. Stay alert; watch what you are doing, and use
common sense when operating a power tool. Do
not use a power tool while you are tired or under
the influence of drugs, alcohol, or medication. A
moment of inattention while operating power tools may
result in serious personal injury.
B. Use personal protective equipment. Always wear
eye protection. Protective equipment such as dust
mask, non-skid safety shoes, hard hat, or hearing
protection used for appropriate conditions will reduce
personal injuries.
C. Prevent unintentional starting. Ensure the switch
is in the off-position before connecting to power
source and/or battery pack, picking up or carrying
the tool. Carrying power tools with your finger on the
switch or energizing power tools that have the switch
on invites accidents.
D. Do not overreach. Keep proper footing and balance
at all times. This enables better control of the power
tool in unexpected situations.
E. Dress properly. Do not wear loose clothing or
jewelry. Keep your hair, clothing and gloves away
from moving parts. Loose clothes, jewelry, or long hair
can be caught in moving parts.
F.
Keep hands and feet away from the cutting area.
G. The device should not be used by persons
(including children) with reduced physical, sensory
or mental abilities, or lack of experience or
knowledge, unless such persons are supervision
or training to operate the appliance by a person
responsible for their safety. Children should be
supervised to not use the device as a toy.
4. Power tool use and care
A. Do not force the power tool. Use the correct power
tool for your application. The correct power tool will
do the job better and safer at the rate for which it was
designed.
B. Do not use the power tool if the switch does not turn
it on and off. Any power tool that cannot be controlled
with the switch is dangerous and must be repaired.
C. Disconnect the plug from the power source and/or
the battery pack from the power tool before making
any adjustments, changing accessories, or storing
Original Instructions (EN)
Printed in China
All Rights Reserved *3379-685* B
power tools. Such preventive safety measures reduce
the risk of starting the power tool accidentally.
A. Have your power tool serviced by a qualified repair
person using only identical replacement parts.
This will ensure that the safety of the power tool is
maintained.
D. Remove the battery pack from the power tool before
making any adjustments, changing accessories, or
storing power tools. Such preventive safety measures
reduce the risk of starting the power tool accidentally.
B. If the cord is damaged, it must be replaced by the
manufacturer, its authorized service agent or a
similarly qualified in order to avoid hazard.
E. Store idle power tools out of the reach of children,
and do not allow persons unfamiliar with the power
tool or these instructions to operate the power tool.
Power tools are dangerous in the hands of untrained
users.
F.
6. Extension Cord
Ensure that your extension cord is in good condition. When
using an extension cord, use one heavy enough to carry
the current your product will draw. An undersized extension
cord will cause a drop in line voltage, resulting in loss of
power and overheating. The following table lists the correct
cord size depending on the length of the cord. If you are in
doubt, use the next heavier gauge. The smaller the gauge
number, the heavier the gauge.
Store idle appliances indoors. When not in use,
appliances should be stored indoors in a dry and high
or locked-up place, out of the reach of children.
G. Maintain power tools. Check for misalignment or
binding of moving parts, breakage of parts, and
any other condition that may affect the operation
of the power tool. If damaged, have the power tool
repaired before use. Many accidents are caused by
poorly maintained power tools.
H. Keep cutting tools sharp and clean. Properly
maintained cutting tools with sharp cutting edges are
less likely to bind and are easier to control.
Extension Cord Length
Minimum Wire Gauge
(A.W.G.)
32.8 m (100 ft)
16
49.2 m (150 ft)
14
Note: Do not use an extension cord over 49.2 m (150 ft)
long.
I. Use the power tool in accordance with these
instructions and in the manner intended for the
particular type of power tool, taking into account the
working conditions and the work to be performed.
Use of the power tool for operations different from those
intended could result in a hazardous situation.
To reduce the risk of disconnection of the extension cord
during use, connect the extension cord to the trimmer as
illustrated in Operation (page 5).
SAVE THESE INSTRUCTIONS
J. Keep guards in place and in working order.
Electrical specifications: 120V ~ 60Hz 5A
5. Service
Safety and Instructional Decals
Safety decals and instructions are easily visible to the operator and are located near any area of potential danger.
Replace any decal that is damaged or lost.
Symbol
Name
Designation/Explanation
AC
Alternating current
Type of current
A
Amperes
Current
Hz
Hertz
Frequency (cycles
per second)
rpm
Revolutions per
minute
Speed of string
V
Volts
Voltage
121–7615
125–8323
2
125–8325
121–7617
125–8326
125–3274
1. Warning—read the Operator’s Manual; do not operate in
wet conditions; do not operate if the cord is damaged; wear
eye protection.
Setup
Loose Parts
Use the chart below to verify that all parts have been shipped.
Procedure
1
2
3
4
Description
Use
Qty.
Auxiliary handle
Latch
Brace
Guard
Phillips screw
1
1
1
1
1
Edge guard
1
Install the edge guard.
No parts required
–
Adjust the trimmer height and the base
position.
3
Install the auxiliary handle.
Install the guard.
1
2
Installing the Auxiliary Handle
1
Parts needed for this procedure:
1
Auxiliary handle
1
Latch
1
Brace
1. Position the auxiliary handle on the shaft of the trimmer with
the smooth surface facing the operator (Figure 1).
G015656
1
Figure 2
1. Phillips screw
2. Guard
2. Secure the guard using the Phillips screw.
3
3
Installing the Edge Guard
G017277
2
Figure 1
1. Auxiliary handle
Parts needed for this procedure:
3. Brace
1
2. Latch
Edge guard
2. Slide the brace into the auxiliary handle so that the brace
rests in the groove along the shaft (Figure 1).
Procedure
3. Slide the latch from the left through the handle and brace,
and tighten the latch screw with a Phillips screwdriver
(Figure 1).
Insert the ends of the edge guard into the holes in the trimmer
housing as shown in Figure 3.
2
Installing the Guard
Parts needed for this procedure:
1
Guard
1
Phillips screw
Procedure
1. Slide the guard onto the trimmer base as shown in Figure 2.
4
G015655
Figure 4
1
1. Auxiliary handle
3. Height-adjustment latch
2. Auxiliary-handle latch
•
To adjust the trimmer height, open the height adjustment
latch, then slide the shaft up or down to desired height,
securing it in place with the latch (Figure 4).
•
To adjust the position of the base, press down on the rotator
button located at the base of the shaft, then move the base
to face the desired direction (Figure 5).
G017621
Figure 3
1. Edge guard
4
Figure 5
Adjusting the Trimmer Height
and Base Position
1. Rotator button
No Parts Required
Operation
Procedure
•
G015683
1
Connecting to a Power Source
To adjust the auxiliary handle height, release the auxiliary
handle latch, slide the auxiliary handle up or down to the
desired height, then secure the auxiliary handle in place by
closing the auxiliary latch (Figure 4).
WARNING
If you do not fully seat the extension cord on the inlet
plug, the loose plug could lead to overheating and
cause a fire, possibly burning you or others.
Ensure that you fully seat the cord on the plug and use
the cord lock feature to secure the cord.
NOTICE! Do not use a damaged cord.
5
Advancing the Line Manually
3
Disconnect the string trimmer from the power supply, then push
the red button at the base of the spool retainer while pulling on the
trimmer line to manually advance the line.
Trimming
1
2
G015693
Figure 6
1. Inlet plug
3. Cord lock
2. Extension cord
Starting the Trimmer
To start the trimmer, slide the lock switch back to the On position,
then squeeze the trigger (Figure 6).
1
2
Figure 8
G015658
Figure 7
1. Lock switch
Edging
2. Trigger
To convert the trimmer to an edger, press the rotator button and
rotate the head as shown in Figure 9.
Stopping the Trimmer
To stop the trimmer, release the trigger.
2
Advancing the Line
1
Note: The trimmer is equipped with an auto-feed head.
1. With the trimmer running, release the switch trigger.
G015660
Figure 9
2. Wait 2 seconds, then press the switch trigger.
1. Rotator button
Note: The line will extend approximately 6 mm (1/4 inch)
with each stop and start of the switch trimmer until the line
reaches the length of the grass deflector blade.
3. Resume trimming.
6
2. Edger guide
Operating Tips
1. Push in the tabs on the side of the spool retainer (Figure 11).
•
Keep the trimmer tilted toward the area being cut; this is the
best cutting area.
1
•
The string trimmer cuts when passing the unit from left to
right. This avoids throwing debris at the operator.
2
•
Use the tip of the string to do the cutting; do not force the
string head into uncut grass.
3
•
Using the trimmer along wire and picket fences, stone and
brick walls, curbs, and wood can cause the line to rapidly
wear and even break.
•
Avoid trees and shrubs. Tree bark, wood moldings, siding,
and fence posts can easily be damaged by the strings.
2
4
G023662
Figure 11
G023661
1. Spool retainer
3. Slots
2. Spool
4. Tabs
2. Pull the spool retainer up to remove it.
3. Remove the spool.
Figure 10
1. Direction of rotation
4. Install the new spool, making sure that the strings are
captured in the retaining slots on the new spool.
3. String path
Note: Make sure that the ends of the strings extend
approximately 152 mm (6 in).
2. Ideal cutting range
5. Install the new spool so that the string ends align with
the eyelets in the string head, and thread the string ends
through the eyelets.
Maintenance
6. Pull the strings extending from the string head so that the
strings release from the slots in the spool.
After each use of the trimmer, complete the following:
7. Install the spool retainer by pressing the tabs into the slots
and pushing down on the spool until the spool retainer clicks
into place.
1. Wipe the trimmer clean with a damp cloth. Do not hose the
trimmer down or submerge it in water.
2. Wipe or scrape clean any debris from the cutting-head area.
3. Check and tighten all fasteners. If any part is damaged or
lost, repair or replace it.
Replacing the String
4. Brush debris away from the air intake vents on the motor
housing to prevent the motor from overheating.
Important: Use only .065 inch (1.65 mm) diameter
monofilament string. Do not use any other gauge or type of
string, as this could damage the trimmer.
Replacing the Spool
1. Remove the spool; refer to Replacing the Spool (page 7).
Note: Use only 1.65 mm (065 in) diameter monofilament string.
For best performance, use only Toro replacement string (part
number 88512).
3. Insert the string into the anchor hole in the upper part of
the spool (Figure 12).
2. Remove any string remaining on the spool.
Important: Using a larger diameter string may cause the
motor to overheat and fail.
7
Service
Toro has designed this product to give you years of trouble-free
use. Should it need service, bring the product to an Authorized
Toro Service Dealer who is specially trained to repair Toro
products.
Double-insulated Appliance
In a double-insulated appliance, 2 systems of insulation are
provided instead of grounding. No grounding means is provided
on a double-insulated appliance, nor should a means for
grounding be added to the appliance. Servicing a double-insulated
appliance requires extreme care and knowledge of the system,
and should be done only by the qualified service personnel at
your Authorized Toro Service Dealer. Replacement parts for a
double-insulated appliance must be identical to the parts that they
replace. A double-insulated appliance is marked with the words
“Double Insulation” or “Double Insulated.” The symbol (square
within a square) may also be marked on the appliance.
Figure 12
1. Slot in upper spool flange
3. Slot in lower spool flange
2. Hole
Note: Wind the string onto the spool in the direction shown
by the arrows on the spool.
Storage
Note: The spool can accept up to 4.6 m (15 ft) of string.
4. Place the string ends in the slots on the upper spool flange,
leaving about 152 mm (6 in) beyond the slot.
Store the trimmer and the extension cord indoors in a cool, dry
location and out of the reach of children and animals.
Note: Do not overfill the spool. After winding the string,
there should be at least 6 mm (1/4 inch) between each of the
wound strings and the outside edge of the spool.
NOTICE! Do not rest the trimmer on the guard, or it may warp
and interfere with the cutting line.
Note: Devices for retaining extension cords are commercially
available.
5. Replace the spool and the spool retainer; refer to Replacing
the Spool (page 7).
The Toro Promise - Electric Products
A Two-Year Full Warranty for Residential Use for the United States and Canada
The Toro Company and its affiliate, Toro Warranty Company, pursuant to an agreement between them, jointly warrant this product for two years against
defects in material or workmanship when used for normal residential purposes.*
If you think your Toro Product contains a defect in materials or workmanship, if you have questions or problems, and before returning this product call
toll free:
Trimmers:
Blowers:
Snowthrowers:
1-800-237-2654 (US)
1-800-248-3258 (Canada)
1-888-367-6631 (US)
1-888-430-1687 (Canada)
1-800-574-3312 (Mexico)
1-800-808-2963 (US)
1-800-808-3072 (Canada)
To receive a replacement or repair, at our option, return the complete unit to the seller. United States and Canada customers may return their product,
with proof of purchase, to any Authorized Service Dealer. United States customers may also return their product, with proof of purchase, postage
prepaid, to the Toro Service Center, 5500 SE Delaware, Ankeny, IA 50021.
This warranty covers product defects only. Neither The Toro Company nor Toro Warranty Company is liable for indirect, incidental, or
consequential damages in connection with the use of the Toro Products covered by this warranty, including any cost or expense of providing
substitute equipment or service during reasonable periods of malfunction or non-use pending completion of repairs under this warranty.
Some states do not allow exclusions of incidental or consequential damages, so the above exclusions may not apply to you. This warranty
gives you specific legal rights, and you may also have other rights which vary from state to state.
Countries Other than the United States and Canada
Customers who have purchased Toro products exported from the United States or Canada should contact their Toro Distributor (Dealer) to obtain
guarantee policies for your country, province, or state. If for any reason you are dissatisfied with your Distributor’s service or have difficulty obtaining
guarantee information, contact the Toro importer. If all other remedies fail, you may contact us at Toro Warranty Company.
Australian Consumer Law
Australian customers will find details relating to the Australian Consumer Law either inside the box or at your local Toro Dealer.
* Residential use means use of the product on the same lot as your home.
8
Part Number 374-0262 Rev. D