1
M ilw a ukee
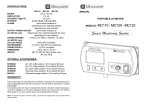
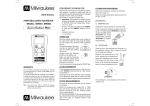
SPECIFICATIONS:
M ilw au ke e
USER MANUAL
SM100
RANGE
RESOLUTION
0.1 pH
ACCURACY (@25°C)
MA911B/1 (included)
ENVIRONMENT
BATTERY TYPE
0 to 50°C, 95% RH max.
1 x 9V alkaline (included)
BATTERY LIFE
approximately 300 hours of use
WEIGHT
MODEL:
±0.2 pH
pH ELECTRODE
DIMENSIONS
PORTABLE
pH METER
0.0 to 14.0 pH
Smart pH Meter
145 x 80 x 40 mm
220 g (with battery) meter only
OPTIONAL ACCESSORIES:
M10004B
M10007B
M10010B
M10000B
MA9015
MA911B/1
MA950
pH 4.01 buffer solution, 20 ml sachet (25 pcs)
pH 7.01 buffer solution, 20 ml sachet (25 pcs)
pH 10.01 buffer solution, 20 ml sachet (25 pcs)
Electrode rinse solution, 20 ml sachet (25 pcs)
Electrode storage solution, 220 ml bottle
pH-electrode with BNC connector and 1 m cable
Portable meter wall fixing kit
WARRANTY:
Note:
11/01
We reserve the right to modify the design, construction and appearance
of our products without advance notice.
ISMIL100
This instrument is warranted from all defects in materials and manufacturing for
a period of two years from the date of purchase.
The electrode is warranted for a period of 6 months.
If during this period, the repair or replacement of parts is required, where the
damage is not due to negligence or erroneous operation by the user, please return
the parts to either dealer or our office and the repair will be effected free of
charge.
SM100
OPERATION:
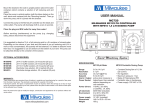
• The meter is supplied complete with
a 9V battery. Slide off the battery compartment cover on the back of the
meter. Install the battery while paying
attention to its polarity.
• Always remove the electrode protective
cap before taking any measurement. If
the electrode has been left dry, soak
the tip (bottom 2.5 cm) in rinse solution (M10000B) for a few minutes to
reactivate it.
• Connect the pH electrode to the BNC
socket on the top of the meter.
• Make sure that the meter has been
calibrated before taking any measurements (see Calibration Procedure)
• Immerse the tip (2.5 cm) of the pH
electrode into the sample.
• Turn the instrument on by pressing the ON/OFF key.
• Allow the reading to stabilize before taking measurements.
• After measurements, switch the meter off and
store the electrode with a few drops of storage
solution in the protective cap.
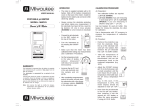
CALIBRATION PROCEDURE:
• Remove the protective cap from the electrode.
• Immerse the electrode tip into a new sachet of
pH7 calibration solution and allow the reading
to stabilize.
• Adjust the pH7 (OFFSET) calibration knob to
display "7.0 pH".
• Open a new sachet of pH4 calibration solution and use a small
quantity to rinse the electrode.
• Immerse the electrode tip inside
the pH4 sachet and allow the reading to stabilize.
• Adjust the pH4/pH10 (SLOPE) calibration knob to read "4.0 pH".
• The calibration is now complete and the meter is ready to
take measurements.
• It is suggested to recalibrate the meter at least once a
month, after a prolonged stocking time and after electrode
replacement.
BATTERY REPLACEMENT:
When the battery becomes weak the
meter will display "V".
When the low battery indicator appears,
the battery has only about 50 hours of
working time left. A low battery will result
in unreliable measurements. It is recommended to replace immediately the
battery.
Battery replacement must only take place
in a non-hazardous area using an alkaline 9V battery.
Turn the meter off, slide off the battery
compartment cover at the rear of the meter
and replace the 9V battery with a new
one. Make sure the battery contacts are
tight and secure, seat the battery in its
compartment and insert the cover again.