1
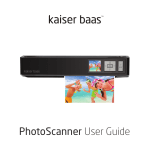
PhotoScanner
User Guide
PhotoScanner
Contents
1. Introduction
1. Features
2. Safety
3. Product Specifications
4. Package Contents
5. Product Description
6. PhotoScanner Settings
7. PhotoScanner Settings
8. PhotoScanner Settings
9. PhotoScanner Settings
10.
PhotoScanner Settings
11.
Using the PhotoScanner
12.
Using the PhotoScanner
13.
Playback Menu
14.Maintenance
15.Maintenance
16.Maintenance
17.
Connecting to a computer
18.Troubleshooting
User Manual
PhotoScanner
2
PhotoScanner
Introduction
Congratulations on the purchase of your Kaiser Baas PhotoScanner.
Please take a few minutes to read through this user guide, which will
provide instructions for you to operate and maintain the product.
Features
• Scan up to A4 size photos and documents
• TFT LCD preview display
• Scan resolution: 150, 300 and 600 dpi
• Scan directly to SD and SDHC memory card
• Save to JPG and PDF formats
• Supports colour and gray scale scanning
User Manual
PhotoScanner
1
PhotoScanner
Safety
• Do not try and disassemble or remodel the Kaiser Baas PhotoScanner.
Doing so may cause the unit to malfunction and may void the warranty.
• Do not place the Kaiser Baas PhotoScanner in places that are exposed
to oil, water or dust.
• Keep your Kaiser Baas PhotoScanner away from heated sources such
as direct sunlight and heaters.
• Do not touch the power plug with wet hands or use defective power
cables as it may cause electric shocks or fire.
• Do not drop the Kaiser Baas PhotoScanner as it may cause serious
damage and may void the warranty.
User Manual
PhotoScanner
2
PhotoScanner
Product Specifications
Scanner type: A4 CIS sheet feed scanner
Display: 1.45” colour TFT LCD (128 x 128 pixels)
Scan speed: 8.7 seconds for A4 colour at 150 dpi,
9.3 seconds for A4 colour at 300 dpi,
33.2 seconds for A4 colour at 600 dpi
File format: JPG, PDF
Power: 5V 1A
Interface: Mini USB, SD card slot, DC-IN
Mass storage support: Windows XP, Vista, Windows 7,
Mac OS X 10.4 / 10.5 / 10.6
Size: 298 x 55.8 x 45 mm
Weight: 440g
User Manual
PhotoScanner
3
PhotoScanner
Package Contents
• 1 x Kaiser Baas PhotoScanner • 2 x Photo sleeves (4” x 6” & 5” x 7”)
• 1 x Power adaptor • 1 x Lens cleaning tool
• 1 x USB cable • 1 x Roller cleaning tool
• 1 x Calibration card • 1 x Quick start guide
• 1 x Warranty card
User Manual
PhotoScanner
4
PhotoScanner
Product Description
On / off & scan button
On-board controls
1.45” TFT LCD screen
Feeding slot
Adjustable paper guide
Mini USB
Power input
SD card slot
Exit slot
User Manual
PhotoScanner
5
PhotoScanner
PhotoScanner Settings
Press and hold the ‘on/off’ button for 1 second to turn on the scanner.
You will see the following options –
Setting
Playback
mode icon is on the left and the scan settings icon is on the right.
Setting
If anSCAN
SD card SYSTEM
has not been inserted, you will see the following message –
SCAN
SYSTEM
CARD
CARD
It is recommended to format the SD card before scanning.
System Setting
Language
Press Format
the ‘right arrow’ button and then press the ‘OK’ button.
System Setting
This will
Factorytake
Default you to ‘Setting’ –
Language
Exit
Format
Setting
Factory Default
Exit
SCAN FORMAT?
SYSTEM
No
Yes
FORMAT?
No
System Setting
CARD
•
English
•
Francais
System Setting
•
•
Espanol
English
•
Portugues
System
Setting
• Francais
Yes
User Manual
PhotoScanner
6
PhotoScanner
Setting
SCAN
SYSTEM
Setting
SCAN
CARD SYSTEM
Press the ‘right arrow’ button to select ‘SYSTEM’ and then press the ‘OK’
button. You will see the following options –
Setting
System Setting
CARD
Language
Format
SCAN
SYSTEM
Factory Default
Exit
System Setting
Language
Format
CARD
PressFactory
theDefault
‘down arrow’ button to select ‘Format’ and then press the ‘OK’
FORMAT?
button.
You will see the following message –
Exit
No
Yes
System Setting
Language
FORMAT?
System Setting
Format
•
English
•
Francais
Factory Default Yes
No
Exit
•
Espanol
•
Portugues
Press the ‘right arrow’ button to select ‘Yes’ and then press the
• English
‘OK’
button.
Scan
Setting
FORMAT?
Francais
It• only
takes a number of seconds to format the SD card and you will then
English
• • Espanol
be
taken
back to the ‘System Setting’ screen.
System Setting
No
Francais
• • Portugues
Yes
Other
options available are ‘Language’ –
• Espanol
•
Portugues
Scan Setting
System Setting
•
•
English
English
Setting
• Scan
Francais
• Francais
•
•
Espanol
Espanol
• Portugues
• Portugues
Scan Setting
Scan Setting
•
English
•
Francais
•
Espanol
Calibration?
User Manual
PhotoScanner
7
Exit
CARD
PhotoScanner
FORMAT?
System Setting
No
Yes
Language
Format
SystemFactory
SettingDefault
You
have
a selection of nine different language options.
Exit
• English
• Francais
You
also have the option of selecting ‘Factory Default’, which will reset all
• Espanol
the
settings back to factory default.
•
Portugues
Select FORMAT?
‘Exit’ and press the ‘OK’ button to go back to ‘Setting’.
No
Yes
To change
the
scan settings, select the ‘SCAN’ icon at the ‘Setting’ screen
Scan Setting
•
English
and
then press the ‘OK’ button.
• Francais
System Setting
•
Espanol
•
Portugues
You
will see the following options –
• English
•
•
Francais
Espanol
Scan Setting
•
Portugues
Colour Mode
Resolution
Scan Setting
File Type
•
English
Calibration
•
Francais
•
Espanol
Before
you can scan, it is recommended to calibrate the scanner first.
• Portugues
Calibration?
Scan Setting
Yes arrow’ button to select ‘Calibration’ and then press the
PressNo
the ‘down
‘OK’ button.
Scan Setting
You will see the following message –
Colour
Gray
Exit
Calibration?
Scan Setting
No
•
150 dpi
•
300 dpi
Yes
Clean?
•Scan Setting
600 dpi
No
Yes
ExitColour
Gray
Exit
Scan Setting
•
JPG
Playback
1
Delete One
User Manual
PhotoScanner
8
System Setting
Language
PhotoScanner
Format
Factory Default
Exit
FORMAT?
Move the
paper guide all the way to the left and then insert the calibration
card into the scanner –
No
Yes
System Setting
•
English
•
Francais
•
Espanol
•
Portugues
OK
ZOO
M
SCA
N
Scan Setting
•
English
•
Francais
•
Espanol
• Portugues
Press
the ‘right arrow’ button to select ‘Yes’ and then press the ‘OK’
button.
Scan Setting
The calibration process will take a few moments to complete. The calibration
card will feed right through and the unit will turn off when completed.
Press and hold the ‘on/off’ button for 1 second to turn on the scanner.
Press the ‘right arrow’ button and press the ‘OK’ button to go to ‘Setting’,
then Calibration?
press ‘OK’ again to select the ‘SCAN’ icon.
For ‘Colour
Mode’
you can select to scan in colour or gray scale. This is
No
Yes
going to be dependent on the photo or document that you want to scan –
Scan Setting
Colour
Gray
Exit
Scan Setting
•
150 dpi
•
300 dpi
Clean?
User Manual
PhotoScanner
9
Calibration?
PhotoScanner
No
Yes
Calibration?
No
Yes
Scan Setting
Colour
Gray
Scan Setting
Colour
Exit
Gray
For ‘Resolution’
you can select to scan 150 dpi, 300 dpi and 600 dpi –
Exit
Scan Setting
•
150 dpi
Clean?
Scan
• Setting
300 dpi
•
150
600 dpi
•
300
Exit dpi
•
600 dpi
No Clean?Yes
No
Yes
Exit
Playback
Scan‘File
Setting Type’ you can select
For
to save in JPG or PDF format –
•
1
JPG
Scan
• Setting
PDF
Delete One
Playback
All Delete All
•
JPG
EXIT
1
Delete
Rotate One
•
PDF
All
Delete
Exit All
Rotate
EXIT
Exit
SCAN
SCAN
When you have finished adjusting the scan settings, press the ‘down arrow’
Scan Setting
Clean
button
to select ‘Exit’ then press the ‘OK’ button.
EXIT
Scan Setting
Clean
EXIT
User Manual
PhotoScanner
10
Scan Setting
•
English
•
Francais
PhotoScanner
•
Espanol
•
Portugues
Scan Setting
Using the PhotoScanner
It is recommended that you use the providedCalibration?
photo sleeve when scanning
Yes
to ensure the best results. Before using theNosleeve,
peel off the protective
plastic sheath from the top and bottom of the sleeve Scan Setting
Colour
Gray
Exit
Scan Setting
•
150 dpi
•
300 dpi
•
600 dpi
Clean?
No
Yes
Make sure that the sealed end of the photoExitsleeve is inserted into the
scanner first to avoid jamming.
Playback
Scan Setting
(light bulb) The photo sleeve is not required
when scanning documents
or for
1
•
JPG
•
PDF
All
photos with a gloss surface.
Delete One
Delete All
Rotate
EXIT
When you are ready to scan your photos or documents, press the
‘SCAN’ button.
Exit
You will see the following message –
SCAN
Adjust the paper guide accordingly and insert your photo
Scan Setting
Clean
or document facing upwards and it will scanEXIT
automatically -
You will see the above message when scanning.
User Manual
PhotoScanner
11
PhotoScanner
Do not press any buttons while the PhotoScanner is scanning.
When the scan has finished, you will see a preview on the LCD screen.
You can use the on-board controls to zoom or to select other photos and
documents that you have scanned to the SD card.
Press the ‘SCAN’ button again when you are ready to scan.
Notes
• Keeping the photo or document flat and level when feeding prevents possible jamming.
• Keep the original photo or document free from finger prints, oil or dust for optimum scanned image quality.
• Remove the photo from the sleeve after scanning to prevent the sleeve from sticking.
• Keep the sleeves in a safe place when not in use to prevent them from accumulating dust.
• Place the photo or document on the right edge of the feed slot and adjust the paper guide so it aligns to the left hand side of the photo
or document.
• Gently push the photo or document into the feeding slot and let go when it begins to feed into the slot.
•
When the scan has completed, a folder will be created on the SD card. Each scanned image is given a file name with the prefix ‘IMAG’ following by a 4 digit sequential number in the order the images are stored. For example IMAG0001, IMAG0002, etc.
• When you have finished scanning, press and hold the ‘on/off’ button for 2 seconds to turn off the PhotoScanner. You can now safely disconnect the power and remove the SD card.
User Manual
PhotoScanner
12
?
es
PhotoScanner
Playback menu
The PhotoScanner has the ability to display previously scanned photos and
documents. Press the ‘OK’ button to enter playback mode -
Clean?
You can use the ‘left arrow’ or ‘right arrow’ buttons to preview the files
on the
SD card.
You have the option of rotating and deleting the files by
No
Yes
pressing the ‘down arrow’ button for each selection Setting
SCAN
SYSTEM
Playback
1
Delete One
All
Delete All
CARD
Rotate
Exit
System Setting
Language
You can
also use the zoom function by pressing the ‘ZOOM’ button during
Format
preview.
Factory Default
TheExitrotation and zoom option is for viewing purposes only. The
orientation of the scanned images will remain unchanged when viewed
on the computer.
Press the
‘up arrow’ button to exit playback mode.
FORMAT?
No
System Setting
•
English
Yes
User Manual
PhotoScanner
13
es
?
es
Scan Setting
Colour
Gray
PhotoScanner
Exit
Scan Setting
•
150 dpi
•
300 dpi
•
600 dpi
Clean?
Maintenance
No
Yes
Exit
For optimal scanning results, the PhotoScanner should be cleaned before use
or having being used for a certain time. The PhotoScanner is provided with
Playback
Scan Setting
accessories to help maintainDelete
the
device. Do not use cleaning implements or
One
1
•
JPG
solvents to clean the PhotoScanner
other than those provided as this may
Delete
All
•
PDF
All
cause damage to the device.Rotate
EXIT
Cleaning the roller:
Exit
To clean the roller, insert an SD card and press and hold the ‘on/off’ button
for 1 second
SCAN to turn on the scanner.
Press the ‘right arrow’ button then press the ‘OK’ button.
Select ‘SCAN’ then press the ‘down arrow’ button until you see ‘Clean’ –
Scan Setting
Clean
EXIT
Press the ‘OK’ button to select. You will see the following message –
Clean?
No
Yes
Playback
1
Delete One
All
Delete All
Rotate
Exit
User Manual
PhotoScanner
14
PhotoScanner
Move the paper guide all the way to the left and insert the roller cleaning
tool with the foam wedge facing downwards –
OK
ZOOM
SCAN
Insert the roller cleaning tool all the way until it stops then select ‘YES’
to clean the rollers.
When the cleaning has finished, the roller cleaning tool will be ejected.
User Manual
PhotoScanner
15
PhotoScanner
Cleaning the lens:
Before cleaning the lens, make sure the PhotoScanner has been turned off.
To clean the lens, hold the handle of the lens cleaner with the foam wedge
facing downwards.
Move the paper guide all the way to the left and insert the lens cleaner. The
cleaning fabric should be facing upwards -
OK
ZOOM
SCAN
Move the lens cleaner from side to side several times and then remove.
User Manual
PhotoScanner
16
PhotoScanner
Connecting to a computer
If your computer does not have the capability to accept SD cards, you can
connect the PhotoScanner to your USB port with the supplied USB cable.
When the PhotoScanner is connected to your computer, you will see the
following icon on the LCD screen –
The PhotoScanner will be detected as a removable device on your computer.
You can then access the files located on the SD card.
SYSTEM
Turn off the PhotoScanner before disconnecting the USB cable.
D
ault
MAT?
Yes
User Manual
PhotoScanner
17
PhotoScanner
Troubleshooting
Q. There are lines on the scanned image or the image is not clear.
A. Check the following –
Are there scratches on the original print? Remove any stains or dust
before scanning.
Has the scanner been used for a long period of time without cleaning or calibration? Follow the instructions for cleaning and calibrating the scanner and try again.
Q. The photo / document gets stuck halfway in the feeding slot.
A. Disconnect the power cord and gently take out the photo / document
that is stuck. Use the provided roller cleaning tool to clean the roller.
Q. I get a ’Memory Card Lock’ message when I press the scan button.
A. This indicates that the tab on the SD card is in the ‘LOCK’ position.
Take out the SD card and move the tab to the non-lock position.
Q. The PhotoScanner feels warm to the touch.
A. It is normal for the scanner to emit a small amount of heat after prolonged use. If there are strange odours coming from the device or if it feels hot to the touch, disconnect the power immediately from the power supply.
Q. Can I purchase additional photo sleeves?
A. Yes, we will have additional photo sleeves that you can purchase.
Please visit our website for more details: www.kaiserbaas.com
User Manual
PhotoScanner
18