1
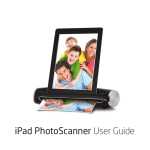
PhotoScanner User Guide
CONTENTS
Introduction
2
Features
2
Safety
3
Product specifications
4
What’s in the box
5
Product diagram
6
PhotoScanner settings
7
Using the PhotoScanner
11
Playback menu
14
Maintenance
15
Connecting to a computer
18
Troubleshooting
19
Spanish version
21
Notes
40
INTRODUCTION
Congratulations on the purchase of your Kaiser Baas PhotoScanner. Please take a few
minutes to read through this user guide, which will provide instructions for you
to operate and maintain the product.
FEATURES
• Scan up to A4 size photos and documents
• TFT LCD preview display
• Scan resolution: 150, 300 and 600 dpi
• Scan directly to SD and SDHC memory card
SAFETY
• Do not try and disassemble or remodel the Kaiser Baas PhotoScanner.
Doing so may cause the unit to malfunction and may void the warranty.
• Do not place the Kaiser Baas PhotoScanner in places that are exposed to oil,
water or dust.
• Keep your Kaiser Baas PhotoScanner away from heated sources such as direct
sunlight and heaters.
• Do not touch the power plug with wet hands or use defective power cables as it
may cause electric shocks or fire.
• Do not drop the Kaiser Baas PhotoScanner as it may cause serious damage and
may void the warranty.
• Save to JPG and PDF formats
• Supports colour and gray scale scanning
2
3
PRODUCT SPECIFICATIONS
WHAT’S IN THE BOX
A 1 x Kaiser Baas PhotoScanner
F 2 x Photo sleeves (4” x 6” & 5” x 7”)
B 1 x Power adaptor
G 1 x Lens cleaning tool
C 1 x USB cable
H 1 x Roller cleaning tool
9.3 seconds for A4 colour at 300 dpi
D 1 x Calibration card
I
33.2 seconds for A4 colour at 600 dpi
E 1 x Warranty card
Scanner Type:
A4 CIS sheet feed scanner
Display:
1.45” colour TFT LCD (128 x 128 pixels)
Scan speed:
8.7 seconds for A4 colour at 150 dpi
File format:
JPG, PDF
Power:
5V 1 A
Interface:
Mini USB, SD card slot, DC-IN
Mass storage support:
Windows XP, Vista, Windows 7,
Mac OS X 10.4 / 10.5 / 10.6
Size:
298 x 55.8 x 45mm
Weight:
440g
Product code:
KBA03034
APN:
9 326903 003544
F
A
H
D
G
4
1 x Quick start guide
B
E
I
C
5
PRODUCT DIAGRAM
PHOTOSCANNER SETTINGS
On / off & scan button
On-board controls
Press and hold ‘on/off’ button for 1 second to turn on the scanner. You will see the
following options:
1.
2.
3.
4.
Setting
1.45” TFT LCD screen
System Setting
Language
CARD
Exit
Format
SCAN
SYSTEM
Factory Default
Exit
1. Playback mode icon is on the left and the scan settings icon is on the right.
2. If an SD card has not been inserted, you will see this message.
Feeding slot
Mini USB
Adjustable paper guide
Power input
3. It is recommended to format the SD card before scanning. Press
the ‘right arrow’ button and the press the ‘OK’ button. This will take you
to ‘Setting’.
4. Press the ‘down arrow‘ button to select ‘format‘ and then press the ‘OK‘ button.
You will see the following message:
SD card slot
FORMAT?
No
6
Exit slot
Yes
Press the ‘right arrow‘ button to select ‘Yes‘ and then
press the ‘OK‘ button.
It only takes a number of seconds to format the SD
card and you will then be taken back to the ‘System
Setting‘ screen.
7
PHOTOSCANNER SETTINGS
PHOTOSCANNER SETTINGS
Other options available are ‘Language‘ as seen below.
Move the paper guide all the way to the left and then insert the calibration card into
the scanner:
Scan Setting
•
English
•
Francais
•
Espanol
•
Portugues
You have a selection of nine different language options.
You also have the option of selecting ‘Factory Default‘, which
will reset all the settings back to factory default.
OK
ZOO
M
SCA
N
Select ‘Exit‘ and press the ‘OK‘ button to go back to ‘Setting‘.
To change the scan settings, select the ‘SCAN‘ icon at the ‘Setting‘ screen and then
press the ‘OK‘ button.
Press the ‘right arrow‘ button to select ‘Yes‘ and then press the ‘OK‘ button.
You will see the following options:
Scan Setting
Colour Mode
Resolution
File Type
Calibration
Before you can scan, it is recommended to calibrate the
scanner first.
The calibration process will take a few moments to complete. The calibration card will
feed right through and the unit will turn off when completed.
Press the ‘down arrow‘ button to select ‘Calibration‘ and then
press the ‘OK‘ button.
Press and hold the ‘on/off’ button for 1 second to turn on the scanner.
Press the ‘right arrow‘ button and press ‘OK‘ button to go to ‘Settings‘.
You will see the following message:
Scan Setting
Calibration?
No
8
Yes
Colour
Gray
Exit
Then press ‘OK‘ again to select the ‘SCAN‘ icon. For ‘Colour
Mode‘ you can select to scan in colour or gray scale. This is
going to be dependent on the photo or document that you
want to scan.
9
PHOTOSCANNER SETTINGS
USING THE PHOTOSCANNER
For ‘Resolution’ you can select to scan 150 dpi, 300 dpi or 600dpi.
It is recommended that you use the provided photo sleeve when scanning to ensure
the best results. Before using the photo sleeve, peel off the protective plastic sheath
from the top and bottom of the photo sleeve.
Scan Setting
•
150 dpi
•
300 dpi
•
600 dpi
Make sure that the sealed end of the photo sleeve is
inserted into the scanner first to avoid jamming.
Exit
The photo sleeve is not required when scanning
documents or for photos with a gloss surface.
For ‘File Type‘ you can select to save in JPG or PDF format.
When you are ready to scan your photos or documents,
press the ‘SCAN‘ button.
Scan Setting
•
JPG
•
PDF
EXIT
When you have finished adjusting the scan settings, press the ‘down arrow‘ button
to select ‘Exit‘ then press the ‘OK‘ button.
You will see the following message:
SCAN
Adjust the paper guide accordingly and insert your photo or document facing upwards
and it will scan automatically.
You will see this message when scanning.
10
11
USING THE PHOTOSCANNER
Do not press any buttons while the PhotoScanner is scanning.
When the scan has finished, you will see a preview on the LCD screen.
You can use the on-board controls to zoom or to select other photos and documents
that you have scanned on the SD card.
Press the ‘SCAN‘ button again when you are ready to scan.
USING THE PHOTOSCANNER
NOTES
• Keeping the photo or document flat and level when feeding prevents possible
jamming
• Keep the original photo or document free from fingers prints, oil or dust for optimum
scanned image quality
• Remove the photo from the sleeve after scanning to prevent the sleeve from
sticking
• Keep the sleeves in a safe place when not in use to prevent them from accumulating
dust
• Place the photo or document on the right edge of the feed slot and adjust the paper
guide so it aligns to the left hand side of the photo or document
• Gently push the photo or document in the feeding slot and let go when
it begins to feed into the slot
• When the scan has completed, a folder will be created on the SD card. Each scanned
image is given a file name with the prefix ‘IMAG‘ followed by a 4 digit sequential
number in the order the images stored. For example IMAG0001, IMAG0002, etc
12
• When you have finished scanning, press and hold the ‘on/off‘ button for 2 seconds
to turn off the PhotoScanner. You can now safely disconnect the power
and remove the SD card
13
PLAYBACK MENU
MAINTENANCE
The PhotoScanner has the ability to display previously scanned documents. Press the
‘OK‘ button to enter playback mode.
For optimal scanning results, the PhotoScanner should be cleaned before use or
or after not having been used for an extended amount of time. The PhotoScanner
is provided with accessories to help maintain the device. Do not use cleaning
implements or solvents to clean the PhotoScanner other than those provided
as this may cause damage to the device.
You can use the ‘left arrow‘ or ‘right arrow‘ buttons to preview
the files on the SD card. You have the option of rotating and
deleting the files by pressing the ‘down arrow‘ button for each
selection.
Playback
1
Delete One
All
Delete All
Rotate
You can also use the zoom function by pressing the ‘ZOOM‘
button during preview.
Press the ‘up arrow‘ button to exit playback mode.
CLEANING THE ROLLER
To clean the roller, insert an SD card and press and hold the ‘on/off‘ button for 1
second to turn on the scanner.
Press the ‘right arrow‘ button then press the ‘OK‘ button.
Select ‘SCAN‘ the press the ‘down arrow‘ button until you see ‘clean‘.
Exit
Press the ‘OK‘
button to select.
Scan Setting
The rotation and zoom option is for viewing purposes only. The orientation
of the scanned images will remain unchanged when viewed on the computer.
Clean
EXIT
Clean?
No
14
You will see the
following message.
Yes
15
MAINTENANCE
MAINTENANCE
Move the paper guide all the way to the left and insert the roller cleaning tool with
the foam wedge facing downwards.
CLEANING THE LENS:
Before cleaning the lens, make sure the PhotoScanner has been turned off. To clean
the lens, hold the handle of the lens cleaner with the foam wedge facing downwards.
Move the paper guide all the way to the left and insert the lens cleaner. The cleaning
fabric should be facing upwards.
OK
ZOOM
SCAN
OK
ZOOM
SCAN
Insert the roller cleaning tool all the way until it stops then select ‘YES‘
to clean the rollers.
16
When the cleaning has finished, the roller cleaning tool will be ejected.
Move the lens cleaner from side to side several times and then remove.
17
CONNECTING TO A COMPUTER
TROUBLE SHOOTING
If your computer does not have the capability to accept the SD cards, you can
connect the PhotoScanner to your USB port with the supplied USB cable. When the
PhotoScanner is connected to your computer, you will see the following icon on the
LCD screen.
Q. There are lines on the scanned image or the image is not clear?
A. Check the following:
Are there scratches on the original print? Remove any stains or dust before
scanning.
Has the scanner been used for a long period of time without cleaning or
calibration? Follow the instructions for cleaning and calibrating the scanner
and try again.
Q. The photo / document gets stuck halfway in the feeding slot?
The PhotoScanner will be detected as a removable device on your computer. You can
then access the files located on the SD card.
A. Disconnect the power cord and gently take out the photo / document that is stuck.
Use the provided roller cleaning tool to clean the roller.
Turn off the PhotoScanner before disconnecting the USB cable.
Q. I get a ‘Memory Card Lock‘ message when I press the scan button?
A. The indicates that the tab on the SD card is in the ‘Lock‘ position. Take our the SD
card and move the tab to the non-lock position.
Q. The PhotoScaner feels warm to the touch?
A. It is normal for the scanner to emit a small amount of heat after prolonged use.
If there are strange odours coming from the device or it it feels hot to the touch,
disconnect the power immediately from the power supply.
Q. Can I purchase additional photo sleeves?
18
A. Yes, we will have additional photo sleeves that you can purchase.
Please visit our website for more details: www.kaiserbaas.com
19
Introducción
22
Características
22
Seguridad
23
Especificaciones del producto
24
Contenido del embalaje
25
Descripción del producto
26
Configuración del escáner de fotos
27
Uso del escáner de fotos
31
Menú de reproducción
34
Mantenimiento
35
Conexión al ordenador
38
Soluciones
39
Inglés versión
Notas
2
40
Spanish
CONTENIDO
Felicitaciones por la compra de su escáner de fotos Kaiser Baas. Por favor tómese
unos minutos para leer esta guía del usuario, la que le proveerá instrucciones para
su operación y mantenimiento.
CARACTERÍSTICAS
• Escanea fotos y documentos hasta tamaño A4
• Pantalla de vista previa TFT LDC
• Resolución de escaneo: 150, 300 y 600 dpi
• Escanea directamente a la tarjeta de memoria SD y SDHC
SEGURIDAD
• No trate de desensamblar ni remodelar el escáner de fotos Kaiser Baas. Hacerlo
podría causar mal funcionamiento y anular la garantía.
• No coloque el escáner de fotos Kaiser Baas en sitios expuestos a aceite, agua o
polvo.
• Mantenga su escáner de fotos Kaiser Baas lejos de fuentes de calor como luz
directa del sol y calentadores.
• No toque el enchufe con las manos húmedas ni utilice cables en malas
condiciones ya que pueden producir choques eléctricos o fuego.
• No golpee el escáner de fotos Kaiser Baas ya que puede causarle serios daños y
anular la garantía.
• Guarda en formatos JPG y PDF
• Soporta escaneo en escala de grises y color
22
23
Spanish
Spanish
INTRODUCCIÓN
CONTENIDO DEL EMBALAJE
A 1 x Escáner de fotos Kaiser Baas
F 2 x soporte para fotos (4” x 6” y 5” x 7”)
B 1 x Adaptador de voltaje
G 1 x Herramienta para limpieza de lente
C 1 x Cable USB
H 1 x Herramienta para limpieza de rodillo
9.3 segundos para hojas A4 en color a 300 dpi
D 1 x Tarjeta de calibración
I
33.2 segundos para hojas A4 en color a 600 dpi
E 1 x Certificado de garantía
Tipo de escáner:
Escáner de alimentación de hojas A4 CIS
Pantalla:
1.45” color TFT LCD (128 x 128 píxeles)
Velocidad de escaneo:
8.7 segundos para hojas A4 en color a 150 dpi
Formatos de archivo:
JPG, PDF
Voltaje:
5V 1 A
Interfaz:
Mini USB, ranura para tarjeta SD, DC-IN
Soporte de almacenamiento
masivo:
Windows XP, Vista, Windows 7, Mac OS X 10.4 /
10.5 / 10.6
Tamaño:
298 x 55.8 x 45mm
Peso:
440g
Product code:
KBA03034
APN:
9 326903 003544
F
A
H
D
G
24
1 x Guía rápida de inicio
B
E
I
C
25
Spanish
Spanish
ESPECIFICACIONES DEL PRODUCTO
CONFIGURACIÓN DEL ESCÁNER DE FOTOS
Botón de encendido/apagado
Controles integrados
Spanish
Spanish
DESCRIPCIÓN DEL PRODUCTO
Presione el botón de encendido/apagado por 1 segundo para encender el escáner:
1.
2.
3.
4.
Setting
System Setting
Pantalla 1.45” TFT LCD
Language
CARD
Exit
Format
SCAN
SYSTEM
Factory Default
Exit
1. El ícono de modo reproducción está a la izquierda y el ícono de configuración del
escáner está a la derecha..
2. Si no ha sido insertada una tarjeta de memoria SD, verá el siguiente mensaje.
Ranura de alimentación
Guía ajustable para papel
Mini USB
Entrada de energía
3. Se recomienda formatear la tarjeta SD antes de escanear. Presione el botón
“flecha derecha” y luego el botón “OK”. Esto lo llevará a “Configuración” .
4. Mantenga presionado el botón de encendido/apgado durante 1 segundo para
encender el escáner:
Ranura para tarjeta SD
FORMAT?
No
26
Ranura de salida
Yes
Presione el botón “flecha derecha” para seleccionar
“SI” y luego el botón “OK”.
Sólo toma unos segundos formatear la tarjeta SD
y luego será guiado nuevamente a la pantalla de
“Configuración de sistema”.
27
CONFIGURACIÓN DEL ESCÁNER DE FOTOS
Otras opciones disponibles son “Idioma”
Mueva la guía para papel completamente hacia la izquierda e inserte la tarjeta de
calibración en el escáner:
Scan Setting
•
English
•
Francais
•
Espanol
•
Portugues
Spanish
Spanish
CONFIGURACIÓN DEL ESCÁNER DE FOTOS
Tiene una selección de nueve idiomas diferentes para elegir.
También tiene la opción de seleccionar “Valores
predeterminados de fábrica”, que restablecerá los valores a los
predeterminados de fábrica.
OK
ZOO
M
SCA
N
Para cambiar las configuraciones de escaneo, seleccione el ícono “ESCANEAR” en la
pantalla de “Configuración”.
Verá las siguientes opciones:
Scan Setting
Colour Mode
Resolution
File Type
Calibration
Antes de poder escanear, es recomendable calibrar primero el
Escáner.
Presione el botón “flecha derecha” para seleccionar
“Calibración” y luego el botón “OK”.
Verá el siguiente mensaje:
Presione el botón “flecha derecha” para seleccionar “SI” y luego el botón “OK”.
El proceso de calibración tardará unos momentos en completarse. La tarjeta de
calibración ingresará hasta el final y la unidad se apagará al completarse.
Mantenga presionado el botón de “encendido/apagado” por 1 segundo para
encender el Escáner.
Pulse el botón “flecha derecha” y presione “OK” para ir a “Configuración”.
Calibration?
No
Yes
Scan Setting
Colour
Gray
Exit
28
A continuación, pulse “Aceptar” de nuevo para seleccionar
el icono ‘SCAN’. Para “Modo en colores” puede seleccionar
escanear en colores o escala de grises. Esto dependerá de
la foto o el documento que quiera escanear
29
USO DEL ESCÁNER DE FOTOS
Para “Resolución” puede seleccionar escanear a 150 dpi, 300 dpi y 600 dpi.
Se recomienda el uso del soporte (incluido con el producto) cuando escanea fotos,
con el fin de obtener un mejor resultado. Antes de utilizar el soporte, retire la funda
plástica protectora superior e inferior.
Scan Setting
•
150 dpi
•
300 dpi
•
600 dpi
Asegúrese de que el borde sellado de la funda
sea insertado en el Escáner primero para evitar un
atascamiento.
Exit
Para “Tipo de Archivo” puede seleccionar guardar en. formato JPG o PDF.
Tenga en cuenta que no se requiere de la funda
para fotos al escanear documentos o fotos con una
superficie brillante.
Scan Setting
•
JPG
•
PDF
Spanish
Spanish
CONFIGURACIÓN DEL ESCÁNER DE FOTOS
Cuando esté listo para escanear sus fotos o documentos,
ajuste la guía para papel adecuadamente y luego presione
el botón “ESCANEAR”.
EXIT
Verá el siguiente mensaje:
SCAN
Ajuste la guía de papel en consecuencia
e insertar su foto o documento que enfrenta
hacia arriba y va a escanear automáticamente.
30
Usted verá este mensaje cuando se escanea.
31
No presione ningún botón mientras se está escaneando el PhotoScanner.
Cuando la exploración haya terminado, aparecerá una vista previa en la pantalla LCD.
Usted puede utilizar los controles de a bordo para hacer un zoom o seleccionar otras
fotografías y documentos que se han escaneado en la tarjeta SD.
Presione la tecla ‘SCAN’ botón de nuevo cuando esté listo para escanear.
USO DEL ESCÁNER DE FOTOS
Spanish
Spanish
USO DEL ESCÁNER DE FOTOS
NOTAS
• Mantener la foto o documento lisos y nivelados durante la alimentación previene
posibles atascos.
• Mantenga la foto o documento originales libres de huellas dactilares, aceites o polvo
para una óptima calidad de imagen escaneada.
• Quite la foto de la funda luego de escanear para evitar que ésta se pegue a la funda.
• Mantenga las fundas en un lugar seguro cuando no las utilice para evitar la
acumulación de polvo.
• Coloque la foto o documento en el borde derecho de la ranura de alimentación y
ajuste la guía para papel para que se alinee a la izquierda de la foto o documento.
• Suavemente introduzca la foto o documento en la ranura de alimentación y libérelo
cuando comience a ingresar en la ranura.
• Cuando el escaneado se ha completado, se creará una carpeta en la tarjeta SD.
A cada imagen escaneada se le asigna un nombre de archivo con el prefijo “IMAG”
seguido de una secuencia numeral de 4 dígitos en el orden en que las imágenes son
almacenadas. Por ejemplo IMAG0001, IMAG0002, etc.
32
• Cuando ha finalizado de escanear, presione el botón de “encendido/apagado”
por 2 segundos para apagar el escáner de fotos. Ahora puede desconectar
de la corriente y quitar la tarjeta SD con seguridad.
33
MANTENIMIENTO
El escáner de fotos tiene la capacidad de mostrar las fotos y documentos previamente
escaneados. Presione el botón “OK” para ingresar en el modo reproducción.
Para óptimos resultados de escaneo, el escáner de fotos debe ser limpiado antes
de su uso o habiendo sido usado durante un determinado tiempo. El escáner de
fotos está provisto con accesorios que ayudan a mantener el dispositivo. No utilice
implementos limpiadores o solventes para limpiar el escáner de fotos que no sean los
provistos ya que pueden dañar al dispositivo.
Puede usar los botones “flecha izquierda” o “flecha derecha”
para ver los archivos en la tarjeta SD. Tiene la opción de rotar y
borrar los archivos presionando el botón “flecha abajo”.
Playback
1
Delete One
All
Delete All
Rotate
También puede utilizar la función de acercamiento presionando el
botón “ZOOM” durante la vista previa.
Presione el botón “flecha arriba” para salir del modo retroceso.
LIMPIEZA DEL RODILLO
Para limpiar el rodillo, inserte una tarjeta SD y presione el botón “encendido/apagado”
por 1 segundo para encender el escáner.
Pulse el botón “flecha derecha” y pulse el botón “OK”.
Seleccione ‘SCAN’ la prensa ‘flecha abajo’ botón hasta que aparezca “limpia”.
Exit
Pulse el botón
“OK” para
seleccionar.
Scan Setting
Tenga en cuenta que la opción de rotación es sólo para fines de visualización. La
orientación de las imágenes escaneadas permanecerá inalterable cuando sean
vistas en la computadora.
Clean
EXIT
Clean?
No
34
Verá el siguiente
mensaje.
Yes
35
Spanish
Spanish
MENÚ DE REPRODUCCIÓN
MANTENIMIENTO
Mueva la guía para papel hacia la izquierda e inserte la herramienta para limpieza del
rodillo con la cuña de espuma hacia abajo.
LIMPIEZA DE LA LENTE:
Spanish
Spanish
MANTENIMIENTO
Antes de limpiar la lente, asegúrese de que el Escáner de fotos ha sido apagado. Para
limpiar la lente, sostenga el asa del limpiador de lente con la cuña de espuma hacia
abajo.
Mueva la guía para papel hacia la izquierda e inserte el limpiador de lente. El tejido
limpiador debe estar mirando hacia arriba.
OK
ZOOM
SCAN
OK
ZOOM
SCAN
Inserte la herramienta de limpieza del rodillo hasta que haga tope luego
seleccione “SI” para limpiar los rodillos.
36
Cuando la limpieza ha finalizado, la herramienta de limpieza será expulsada.
Mueva el limpiador de lente de lado a lado varias veces y luego retírelo.
37
SOLUCIONES
Si su ordenador no tiene capacidad para aceptar una tarjeta SD, usted puede conectar
el escáner de fotos a su puerto USB con el cable USB suministrado. Cuando el escáner
de fotos está conectado a su ordenador, verá el siguiente ícono en la pantalla LDC.
P. Hay líneas en la imagen escaneada o la imagen no es nítida?
Spanish
Spanish
CONEXIÓN AL ORDENADOR
R. Revise lo siguiente:
Están las líneas en la impresión original? Quite cualquier mancha o el polvo antes
de escanear.
Se ha utilizado el escáner por un largo período de tiempo sin limpiar o calibrar?
Siga las instrucciones para limpieza y calibración del escáner y pruebe otra vez.
P. La foto / el documento se atascan en la ranura de alimentación?
El escáner de fotos será detectado en su ordenador como un dispositivo extraíble.
Usted puede ahora acceder a los archivos alojados en la tarjeta SD.
Apague el escáner de fotos antes de desconectar el cable USB.
R. Desconecte el cable de la corriente y retire cuidadosamente la foto / el documento
atascado. Use la herramienta de limpieza del rodillo provista para limpiar el rodillo.
P. Obtengo un mensaje de “Tarjeta de memoria bloqueada” cuando presiono el
botón de escaneo?
R. Esto indica que la pestaña de la tarjeta SD está en la posición “BLOQUEADO”.
Retire la tarjeta SD y mueva la pestaña a la posición desbloqueado.
P. El escáner de fotos se siente templado al tacto?
R. Es normal que el escáner de fotos emita una pequeña cantidad de calor luego de un
uso prolongado. Si hubiera olores raros saliendo del dispositivo o si se siente
caliente al tacto, desconecte de la fuente de energía inmediatamente.
P. Puedo comprar fundas para fotos adicionales?
38
R. Sí, tendremos fundas adicionales para que usted pueda comprarlas. Por favor
visite nuestro sitio web para más detalles: www.kaiserbaas.com
39
NOTES
40
NOTES
41