1
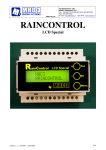
Sensopress LCD Special English edition 2 - 09/2004 - code 5878 1/16 Sensopress LCD with sensor Power Supply Voltage Code Consumption Display Operating Temperature Storage Temperature Operative Range Max. Overpressure Measurement Accuracy Resolution Minimum obtainable Differential Output Relay Available Channels Housing Dimensions Weight Device + Sensor Weight Sensor Provided 117 V~ 50 ÷ 60 Hz TSL00X0100 230V~ 50 ÷ 60 Hz TSL00Y0100 5,5 VA LCD 2x16 0 ÷ +50 °C -10 ÷ +60 °C -0.020 ÷ 9 m H2O 20 m H2O ± 1% FS 1 cm H2O 2 cm H2O 10A 250 V n° 1 NORYL UL94V0 mm 105x90x73 gr. 450 Sensor for Sensopress LCD Housing Code Functioning Princple Dimensions Weight Cable Cable Lenght Installation Operating Range Max. Overpressure Operating Temperature Power Supply Voltage Output Current Stability Thermal Zero Shift Thermal Zero Span Notes Stainless Stell(AISI 316) Brass PRS50B1A1M20000 PRS00B1A1M20000 Ceramic Piezoresistive Capsule,calibrated and thermal compensated mm 32x76 gr 840 PVC (2 Wires+ compensation tube) Standard 20 meters Submersible or External 0 ÷ 9 m H2O 20 m H2O 0 ÷ 50 °C 15÷30 V 20mA max 4÷20mA Rt=250 OHM max +-0,3%f.s./year a 25°C +- 0,02%f.s: /°C +-0,01%f.s./°C Can be used in all type of water with water ph between 5-9 For use in other kinds of liquids,contact the factory Sensopress is a high technology, electronic gauge and level regulator that can be used in sandy drinking water, in liquid food products, or with the help of adequate system solutions, in dirty and corrosive liquids. Measurements rely on a very sensitive pressure sensor, whose signal, transformed and processed by a microcontroller, is converted into "water column height" measured in centimeters. Note. In fact, all displayed values are in mBar. The correct value in cms of water can be obtained by increasing the pressure in mBar by 2 % (1.973 % at 4 °C). edition 2 - 09/2004 - code 5878 2/16 FRONT PANEL of the Sensopress LCD Special The front panel of the Sensopress equipped comes with an LCD display, on which are visualized all the information relative to the device as well as three push buttons with which it is possible to interact and modify the parameters, establish the points of intervention at which to activate or deactivate a command relay of any kind of power equipment (pump, motor) or signal (lights, alarms etc...). The display of the device, when turned on, visualizes the name of the manufacturer, the version of the software and the name of the product: MAC3 V12 SENSORPRESS (FIG. 1) Fig.1 Sensopress presents seven functioning modes, in order: AUTO, LOW, HIGH, MANUAL, DISPLAY, PROTECT,CALIB. In the following table the name of the mode is indicated with its corresponding operation that is carried out: Modalità AUTO LOW HIGH MANUAL DISPLAY PROTECT CALIB Operazione eseguita Indicates: the level of water in the tank, high and low threshold Low threshold setting High threshold setting Manual setting of the eclectrovalve Regulator of the retroillumination of the display Insertion for the device protection Measurement of the water level scale. edition 2 - 09/2004 - code 5878 3/16 AUTO (fig.2) Relay position Level measurement Auto mode High threshold Low threshold Fig.2 After having turned on the device, the AUTO mode is the first to be visualized. The name of the mode (AUTO), the position of the relay (OFF O or ON ), the liquid level, measured in cm., in which the sensor is immersed (Lev:288 cm.), the low thereshold (Low: 027 ) and high threshold (High: 156) of the intervention established by the user. The buttons YES/+, NO/- are not in function. By pressing the button MENU on the display, the present mode and the request to transfer to another mode are indicated.(Fig.3 Table 1) Present mode Fig. 3 Request for transfert to another mode (table1) Tab1e 1 Go to AUTO? Go to LOW? Go to HIGH? Go to MANUAL? Go to DISPLAY? Go to PROTECT? Go to CALIB? Once having picked out the mode that you wish to modify, by pressing the button YES/+you can access it. By pressing the button NO/- however, or by waiting about ten seconds, the device returns to the AUTO mode. edition 2 - 09/2004 - code 5878 4/16 SETTING THE HIGH AND LOW THRESHOLD Low Threshold, Low Mode ( fig. 4) Present mode High threshold Fig.4 Low threshold The LOW mode allows you to set the minimum point of intervention. On the display is shown the name of the mode (LOW), the present maximum threshold level defined by the user (HIGH:156 cm.) and the minimum threshold level to be set (LOW LEVEL: 031 cm.). By pushing the buttons YES/+, NO/- it's possible to increase or decrease the minimum threshold level desired. The minimum threshold level cannot excede the maximum level; if, by mistake, the minimum level should excede the high level, the value of the minimum threshold level will begin again from 000. With the button MENU the value inserted is memorized and the request to pass to a different mode is displayed on the front panel; if no button is pushed, the device returns to the AUTO mode after a few seconds. edition 2 - 09/2004 - code 5878 5/16 ° High Threshold, High Mode (fig. 5) Present mode Low threshold Fig.5 High Threshold The High mode allows you to set the maximum point of intervention. On the display is shown the name of the mode (HIGH), the present low threshold level (LOW: 031 cm) and the maximum level to be set (HIGH LEVEL: 156 cm.). By pressing the buttons YES/+, NO/it's possible to increase or decrease the maximum threshold level desired; the maximum level must not be inferior to the minimum threshold level. If this level is reached, the device begins again from the point 899 cm.; with the MENU button the value that was inserted is memorized and the request to pass to a different mode is displayed on the front panel; if no button is pushed, the device returns to the AUTO mode after a few seconds. edition 2 - 09/2004 - code 5878 6/16 MANUAL SETTING ° MANUAL MODE (fig.6, fig.7) present mode Relay position OFF Fig.6 Request for transfert to relay ON Present mode Relay position ON Fig.7 Request for transfert to relay OFF On the display is shown the name of the mode (MANUAL) and the position of the relay (RELE: OFF, RELE: ON). In the MANUAL mode, by pushing the button YES/+, it's possible to intervene on the rele (relay), moving from ON to OFF and vice versa. The button NO/- is disabled. With the button MENU the request to pass to another mode is displayed. NOTE: Attention: in the MANUAL mode the device does not return to the AUTO mode. edition 2 - 09/2004 - code 5878 7/16 REGULATION DISPLAY ° DISPLAY mode (fig. 8) Present mode Retroillumination Turned ON Fig. 8 Present mode Power save mode Fig. 9 The DISPLAY mode allows you to control the state of the backlighting of the display. When turning on the device the backlighting is inserted and will turn itself off automatically after five minutes of non use. By pressing the YES/+ key, it’s possible to set up the backlighting mode. By using the formulation in fig. 8, the backlighting is continuous, whereas when set up as in fig. 9, it is time scanned (an elapse of 5 min. from the last button pushed). The timer that reactivates the backlighting that is time scanned starts again by pushing any key. On the other hand, with the MENU key you pass to the request to change mode; if no key is pressed, the device returns to the AUTO mode. edition 2 - 09/2004 - code 5878 8/16 INSERTING THE PROTECTION SETTING Protection Mode (password: NO/-,YES/+,YES+,YES/+,NO/-) The password of the device is inserted at the factory and cannot be modified. In the PROTECT Mode there is the possibility of activating or deactivating the protection of the device in such a way as to impede non authorized personnel to modify the parameters; when the device is turned on the protection of the device is deactivated. On the display you will see shown PROTECT: DISABLED if the protection is deactivated, PROTECT: ENABLE if the protection is activated. To activate the protection it is necessary to: (fig. 10) Protection turned on Fig. 10 1. Enter PROTECT mode 2. Press the YES/+ key until the wording PROTECT: ENABLE appears(protection turned on) 3. Press MENU key to memorize Once the password has been activated, it will be requested every time you wish to change a parameter. To disable the protection proceed as follows: (fig. 11) Protection disabled Fig. 11 1. Return to the PROTECT mode 2. Enter the password pressing the YES/+,NO/- Keys in the following sequence: NO/-,YES/+, YES/+,YES/+, NO/-, 3. Press the YES/+ key until the word PROTECT:DISABLED appears (protection disabled) 4. Press Menu key to memorize edition 2 - 09/2004 - code 5878 9/16 PASSWORD entry Fig. 12 NOTE: If you decide to activate the protection device, to access each mode on the display the words ENTER-PASSWORD will be visualized (fig. 12), that is to say that a password made up of five characters will be requested to be introduced with the combination of the buttons YES/+ amd NO/-; if the combination is correct, you will be able to access that mode and thus, modify it; if the combination should result incorrect, you will not be able to effect any change. The password is inserted in the factory with the sequence NO/-, YES/+, YES/+, YES/+, NO/-. It can not be modified edition 2 - 09/2004 - code 5878 10/16 CALIBRATION OF THE LEVEL WATER SCALE: The instruments that leave the MAC3 plant are calibrated, that is to say that they are able to measure the water level in the field of measurement forseen and with the specifics indicated by MAC3. With this in mind, no intervention on the part of the user is required. For various reasons, such as the derating of the components, the substitution of the sensor, a variation in the position of the sensor, etc., the need to effect a new calibration may be necessary. This can be effected, upon request, by the MAC3 technicians. A useful alternative that can be used is an operation that is furnished with the device with just this purpose in mind, thanks to which the user can autonomously effect a calibration. You must have the possibility to subject the pressure sensor to two levels that are the most precise possible, as specified here as follows: ° CALIB In the CALIB mode, you can save the reading effected by the sensor subjected to zero level and subjected to the maximum level (can be selected between 100Cm and 900Cm). In this way, the reading results to be correct in the entire forseen field of measurement. When accessing this mode you have the visualizzation as seen in fig. 15. By pressing the MENU button it's possible to select one of the submenus as shown in fig. 15, 16, 17 passing ciclycally. Fig. 15 Fig. 16 Fig. 17 edition 2 - 09/2004 - code 5878 11/16 "SAVE PRESS ZERO" mode (fig. 15) Make certain that the sensor is subjected to the zero level. It's possible to save the reading of the sensor by pressing the YES/+ button.If the operation has been successful you should have the visualizzationas seen in fig. 18; otherwise you will have the visulizzation as seen in fig. 19: in the case of an unsuccessful attempt a default value is used. That assures an acceptable measurament bat obviously not as good as when the calibration has been sucessful The failure may be due to a real level that is not admissible as a zero level, or some anomaly in the subsystem that makes the pressure measurement. Fig. 18 Fig. 19 The "100cm 900 cm Y" mode (fig. 16 ) By pressing the YES/+ button, it is possible to select the maximum level at which the calibration is made, cyclically. When fig. 16 is visualized, the system is predisposed to save a value that it considers to be 900cm.. When fig. 20 is visualized, the system is predisposed to save a value that it considers to be 100cm.. In this case, by pushing the MENU button, it is possible to select one of the submenus shown in the fig. 15, 20, 21, by passing cyclically from one to the other. edition 2 - 09/2004 - code 5878 12/16 Fig. 20 Fig. 21 The " SAVE 900 cm." mode (fig. 17 ) or "SAVE 100 cm." mode (fig. 21 ) Make certain that the sensor is subjected to the level indicated (900cm. or 100 cm.). It's possible to save the reading of the sensor by pressing the YES/+ button. If the operation has been successful you will have a visualization as in fig. 22; on the contrary you will have a visualization as in fig. 23: in the case of a failure in the operation a default value is used. That assures an acceptable measurament bat obviously not as good as when the calibration has been successful. The failure may be due to a real level that is quite different from the one indicated, or due to some anomaly in the subsystem that makes the pressure measurement. Fig. 22 Fig. 23 With the NO/- button you can return to the AUTO mode; this takes place if no button is pushed. edition 2 - 09/2004 - code 5878 13/16 ELECTROMAGNETIC INTERFERENCES : If the device is placed in an environment where there is a lot of electromagnetic noise present, or if the contacts of the relay, supply some particular loads, the device may show some strange anomalies. The software is able to take measures to restore the correct functioning. In particular, in the AUTO mode, the display is reset at regular intervals of 9 seconds. This is the maximum duration of a written message deteriorated due to NOISE. In the case of particularly strong inductive loads, that is, when the disturbances are such that there are frequent anomalies, we suggest the use of a snubber circuit connected in parallel to the contact of the load. You make a snubber circuit by mounting a resistor in series to a condenser. Fig. 24 shows an example of the wiring diagram. Reccomended values: R1=47 Ohm ½ W, C1= polyester 0,1uF 250 Vac. Fig. 24 Power supply edition 2 - 09/2004 - code 5878 14/16 SERIAL CONNECTION (Optional) The Sensopress has the possibility of being connected to a computer by means of a serial port RS232; the data transmitted from the device can be visualized with the demonstrative software Sensopress LCD Special (fig. 13) which can be downloaded from the MAC3 website www.mac3.it Fig.13 It's also possible to use any communication software while keeping in mind the following parameters: 300 8 none 1 none Byte per second (bps) Data bit Parity Stop bit Flow control RS232 standard connections DB9 Connectors Sensopress 2 5 13 TX 15 GND output Welding view edition 2 - 09/2004 - code 5878 15/16 ELECTRICAL DIAGRAM Sensor Power Supply edition 2 - 09/2004 - code 5878 16/16