1
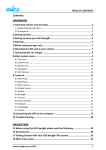
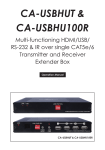
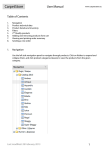
Track’Em™
Version 3.1
Getting Started Guide
Track’Em – Getting Started Guide
Table of Contents
Introduction
3
Running Track’Em over a Network
4
Testing Portable Scanner Communications
4
General Startup Steps
5
Assets (items with unique barcode numbers)
Asset data already exists in electronic format (Excel, other)
Barcode labels exist
Barcode labels do not exist
Asset data does not exist
Barcode labels exist
Barcode labels do not exist
6
7
8
Inventory (Products with identical barcode numbers)
Inventory data already exists in electronic format (Excel, other)
Barcode labels exist
9
Barcode labels do not exist
10
Inventory data does not exist
Barcode labels exist
Barcode labels do not exist
2
11
12
Track’Em – Getting Started Guide
Introduction
While Track’Em is intended to be used right out of the box, it does require the user to complete
basic setup procedures in order to load data and start using Track’Em.
This Getting Started Guide is intended to be used in conjunction with the Track’Em User’s
Manual. The User’s Manual contains all information required to use Track’Em. The material in
the User’s Manual is presented in the order of the on-screen menu options. This Getting Started
Guide contains instructions for getting started that are presented in the order required to best start
using Track’Em. These include:
1.
2.
3.
4.
5.
Deleting sample data from Track’Em database.
Entering data into the Track’Em database.
Printing barcode labels.
Uploading descriptions to the portable barcode scanner.
Conducting initial Cycle Count OR Receive Items functions to set starting inventory
levels.
The Track’Em database allows you to track ASSET and INVENTORY data. Items are considered
an ASSET if they have unique numbers, such as serial numbered office equipment, tools, or legal
documents. Items are considered INVENTORY if 2 units have the same number, such as two
boxes of copier paper.
ASSETS can be assigned a LOCATION, STATUS and a CATEGORY. The status field can
include an actual status code, or any other information (person, job, truck, etc). There are dozens
of additional fields for assets, including serial number, model number (part), date acquired, next
scheduled maintenance, and purchase price.
Moving assets to a location that has been designated as CHECKED OUT = TRUE checks the
asset out. Track’Em assigns a CHECK OUT PERIOD to an asset by looking for a valid check out
period value in the following order: the specific asset’s check out period, the asset’s category’s
check out period, the system wide default check out period. Moving assets back to a location that
has been designated as CHECK OUT = FALSE checks the asset back in. Location table records
can represent physical locations (the library, the tool-room, etc), people (Ms. Smith) or virtual
locations (Job 100).
INVENTORY is stored by location and the on-hand quantity is totaled for each location. Moving
inventory to a location that has been designated to deplete inventory reduces on-hand inventory.
This can include customers, work stations, or physical locations. Inventory is increased in the
system by using the RECEIVE INVENTORY option. The terms PARTS, PRODUCTS, ITEMS
and INVENTORY are used as throughout this manual to define INVENTORY.
All users should complete the steps listed in the section titled General Startup Steps. After
completing those steps, select the subsequent section of the Startup Manual that best fits your
situation.
3
Track’Em – Getting Started Guide
Running Track’Em over a Network
Track’Em can be installed to run on a network so that multiple PC’s can share the Track’Em
database. Follow these directions in order to setup Track’Em to run on a network.
1. Run the Track’Em setup CD on the network server.
2. Run the Track’Em setup CD on each PC (client) that will be using Track’Em
3. Manually change each client’s Track’Em desktop shortcut properties to point to the
Track’Em database located on the network server.
4. If you are using the LABELING MODULE, then you need to manually change the ODBC
DSN to point to the network version of the database. See the ODBC notes in the
LABELING MODULE section of the User’s Manual manual.
Note: The values in the PORTABLE BARCODE SCANNER SETUP FORM should NOT be
changed when running over a network. The scanner should always be connected to a PC on the
network, not the network server.
Testing Portable Scanner Communications
After installing the PT COMMUNICATIONS software and setting up the USB Driver as
described in the Track’Em User’s Manual, use the SET TIME ON PORTABLE SCANNER
option to test the communications to the portable scanner as shown in Figure 1.
Connect the scanner to the PC, turn it on and click the SET TIME ON PORTABLE SCANNER
OPTION. Figure2 and Figure 3 will appear indicating the scanner is properly connected. Consult
the Track’Em User’s Manual for additional details regarding scanner communications.
Figure 1
Figure 3
Figure 2
4
Track’Em – Getting Started Guide
General Startup Steps.
The following steps should be followed after you have reviewed the User’s Manual as well as
reviewed the example data provided with Track’Em.
1. Turn to the SYSTEM ADMIN MENU section of the user’s manual and review the
SYSTEM SETUP screen and make any appropriate changes as necessary.
2. If you are using the optional password protection, add new usernames, passwords and user
numbers.
3. Customize the Menu Title.
4. Delete existing example data using the ERASE TABLES option.
5. Add LOCATION codes, STATUS codes, CATERGORY codes and VENDOR
information. When updating an asset record using the portable data terminal, the location
entry is required and the status entry is optional. Keep in mind that you can substitute
other types of data for location (i.e., people, customers, departments, etc.). Locations are
also required when entering inventory receipt / movement / shipment data.
If this data is also available electronically, follow the steps shown in the IMPORT /
EXPORT SELECTED DATA section of the User’s Manual.
Also note that product location records allow you to set a location as a receiving location
or a shipping (consumption) location. When moving inventory, the following rules apply:
• If the TO LOCATION is NOT a CONSUME LOCATION, then a record is added to
INVENTORY table using the TO LOCATION if there are no inventory records with this
location. If an inventory record with this location already exists, then the entered quantity is
added to the existing quantity.
• If the TO LOCATION is a CONSUME LOCATION, then no record is added to the
INVENTORY table. NOTE: You can track SHIPMENTS by entering a SHIP TO location and
checking the CONSUME box.
Consult the TRACK’EM LABEL PRINTING MODULE section of the User’s Manual
titled “Update Track’Em Database with Label Data – Enterprise Edition” for
information regarding assigning a receiving location.
If you will be using the CHECK IN / CHECK OUT module, assign CHECK OUT
PERIOD values (days) to CATEGORY records at this time. Also, assign CHECK OUT =
TRUE values to Location records as required. Remember, location records can represent
physical locations as well as people.
6. If you plan to print labels using Bartender with Track’Em, verify the settings discussed in
the LABEL PRINTING MODULE - LABEL SOFTWARE SETUP section of the User’s
Manual. Note: If you are running Track’Em from a network drive, you will also need to
change ODBC DSN as discussed in the ODBC SETUP FOR LABELS section of the
User’s Manual.
5
Track’Em – Getting Started Guide
Assets
Follow these steps if asset data already exists in electronic format (ie – Excel or
another type of database) AND asset barcode labels also already exist.
1. Complete the steps shown in the GENERAL STARTUP SECTION of this manual.
Import existing asset data into Track’Em using the steps shown in the IMPORT / EXPORT
SELECTED DATA section of the User’s Manual. The first 20 characters of the field
named “AssetDescription” will be displayed on the portable data terminal (optional).
The LOCATION CODE FIELD is a mandatory field in the Track’Em database. You will
need to import a location code value for all asset records, even if it is a temporary value.
2. You can upload descriptions to the portable scanner by following the steps described in the
TRACK’EM PORTABLE SCANNER SOFTWARE - DATA LOOKUP MENU section of
the user’s manual.
3. You are now ready to use Track’Em to track and check in / check out assets. If you would
like to assign specific CHECK OUT PERIODS (days) to specific asset records, do so at
this time using any of the Asset edit forms.
Follow these steps if asset data already exists in electronic format (ie – Excel or
another type of database) BUT asset barcode labels DO NOT exist.
1. Follow the steps 1 and 2 shown above.
2. Print labels as described on in the TRACK’EM LABEL PRINTING MODULE of the
Track’Em user’s manual. If you need to make modifications to the default asset label,
open the label using Bartender and make the appropriate changes.
Note: This assumes you are using the Track’Em Deluxe Add-On version of Track’Em and
the Bartender software has been properly installed and setup according to the Track’Em
user’s manual section titled TRACK’EM LABEL PRINTING MODULE. You can also
use any other barcode printing software to print your labels.
3. You are now ready to use Track’Em to track assets. If you would like to assign specific
CHECK OUT PERIODS (days) to specific asset records, do so at this time using any of
the Asset edit forms.
6
Track’Em – Getting Started Guide
Follow these steps if asset data does not exist BUT asset barcode labels DO
exist. This includes the barcode labels provided with Track’Em.
1. Complete the steps shown in the GENERAL STARTUP SECTION of this manual.
2. When electronic data does not exist, but barcode labels do, then the easiest method of
entering asset data into Track’Em is to use a tethered barcode scanner and the Track’Em
“Add Assets Simple” form. Merely scan the asset’s existing barcode and type in the
asset’s description. Remember - the first 20 characters of the field named
“AssetDescription” can be displayed on the portable data terminal (Step 3 below).
Optionally, you can use the portable scanner to add assets and their descriptions to the
Track’Em database. You must select ADD NEW ASSETS as described in the SYSTEM
SETUP SYSTEM ADMIN MENU – SYSTEM SETUP section of the user’s manual.
When updating an asset record using the portable data terminal, the location entry is
required and the status entry is optional. Keep in mind that you can substitute other types
of data for location (i.e., people, customers, departments, etc.).
If you would like to assign specific CHECK OUT PERIODS (days) to specific asset
records, do so at this time using any of the Asset edit forms.
3. After asset, location and status data has been entered into Track’Em, you can reload
descriptions to the portable scanner as described in the TRACK’EM PORTABLE
SCANNER SOFTWARE - DATA LOOKUP MENU section of the user’s manual.
4. You are now ready to use Track’Em to track assets.
7
Track’Em – Getting Started Guide
Follow these steps if asset data does not exist AND asset barcode labels DO
NOT exist.
There are two methods of preparing Track’Em when this situation exists. These are:
A. Print Label First.
1. Manually create sequentially numbered asset labels using Bartender so that each asset
label will have a unique serial number. Consult the Bartender on-line help file for
more information regarding how to accomplish this task. Note: You could use any
barcode labeling software to complete this task.
2. After you have printed labels, follow the steps in the section above titled “Asset data
does not exist. Barcode labels exist.”
3. You are now ready to use Track’Em to track assets.
A. Enter Data First
1. Manually enter asset data using the Track’Em forms provided.
2. Print labels as described on in the TRACK’EM LABEL PRINTING MODULE of the
Track’Em user’s manual.
Note: This assumes you are using the Track’Em Deluxe Add-On version of Track’Em
and the Bartender software has been properly installed and setup according to the
Track’Em user’s manual section titled TRACK’EM LABEL PRINTING MODULE.
You can also use any other barcode printing software to print your labels.
3. You are now ready to use Track’Em to track assets. If you would like to assign
specific CHECK OUT PERIODS (days) to specific asset records, do so at this time
using any of the Asset edit forms.
8
Track’Em – Getting Started Guide
Inventory
Follow these steps when product master data already exists in electronic format
(ie – Excel or another type of database) AND barcode labels also exist.
1. Complete the steps shown in the GENERAL STARTUP SECTION of this manual.
2. Import existing product master data into Track’Em using the steps shown in the IMPORT /
EXPORT SELECTED DATA section of the User’s Manual. The first 20 characters of the
field named “ProductDescShort” (Short Description) will be displayed on the portable data
terminal (optional). This data will need to be formatted as either an ASCII comma
delimited text file OR the data will need to be in an EXCEL spreadsheet.
Note: Product numbers and product barcode numbers can be the same or they can be
different. If you need to distinguish different packaging levels of the same product, then
you should use a different barcode number for each packaging level. Both the product
number and barcode number fields are required in the Track’Em product master table.
Note: The product master table does NOT store location or quantity information. These
values are stored in the INVENTORY table.
3. Now that product master information and location information (see GENERAL STARTUP
STEPS), you can upload descriptions to the portable scanner by following the steps
described in the TRACK’EM PORTABLE SCANNER SOFTWARE - DATA LOOKUP
MENU section of the user’s manual.
4. You are now ready to use Track’Em to track inventory. It is recommended that you
conduct an initial Cycle Count OR Receive Items operation using the portable scanner in
order to create accurate inventory records. See the sections titled TRACK’EM
PORTABLE SCANNER SOFTWARE – RECEIVE ITEMS AND CYCLE COUNT
ITEMS in the Track’Em user’s manual.
9
Track’Em – Getting Started Guide
Follow these steps when product master data already exists in electronic format
(ie – Excel or another type of database) BUT barcode labels DO NOT exist.
1. Follow the steps 1 – 3 in the section on the previous page.
2. Print labels as described on in the TRACK’EM LABEL PRINTING MODULE of the
Track’Em user’s manual. If you need to make modifications to the default product label,
open the label using Bartender and make the appropriate changes.
Note: This assumes you are using the Track’Em Deluxe Add-On version of Track’Em and
the Bartender software has been properly installed and setup according to the Track’Em
user’s manual section titled TRACK’EM LABEL PRINTING MODULE. You can also
use any other barcode printing software to print your labels.
3. Now that product master information and location information (see GENERAL STARTUP
STEPS), you can upload descriptions to the portable scanner by following the steps
described in the TRACK’EM PORTABLE SCANNER SOFTWARE - DATA LOOKUP
MENU section of the user’s manual.
4. You are now ready to use Track’Em to track inventory. It is recommended that you
conduct an initial Cycle Count OR Receive Items operation using the portable scanner in
order to create accurate inventory records. See the sections titled TRACK’EM
PORTABLE SCANNER SOFTWARE – RECEIVE ITEMS AND CYCLE COUNT
ITEMS in the Track’Em user’s manual.
10
Track’Em – Getting Started Guide
Follow these steps if product data does not exist BUT product barcode labels
DO exist.
1. Complete the steps shown in the GENERAL STARTUP SECTION of this manual.
2. When electronic data does not exist, but barcode labels do, then the easiest method of
entering product data into Track’Em is to use a tethered barcode scanner and the Track’Em
“Add Product” forms shown in the INVENTORY DATA ENTRY MENU section of the
User’s Manual. Merely scan the product’s existing barcode and type in the description.
Remember - the first 20 characters of the description can be displayed on the portable data
terminal.
This method adds records to the PRODUCT MASTER table. You will need to use the
forms shown in the RECEIVE INVENTORY FORMS section of the Track’Em user’s
manual in order to create current inventory records.
Optionally, you can use the portable scanner to add products and their descriptions to the
Track’Em database. You must select ADD NEW PRODUCTS as described in the
SYSTEM ADMIN MENU - SYSTEM SETUP section of the User’s Manual. Both the
CYCLE COUNT and RECEIVE ITEMS options on the portable scanner will populate
both the PRODUCT MASTER table and the current inventory table. You should first load
LOCATION descriptions as described in General Startup Steps above.
You are now ready to use Track’Em to track inventory.
11
Track’Em – Getting Started Guide
Follow these steps if product data does not exist AND product barcode labels
DO NOT exist.
There are two methods of preparing Track’Em when this situation exists. These are:
A. Print Label First.
1. Manually create product labels using Bartender (ie – do not use the Label Printing
Form provided with Track’Em). Consult the Bartender on-line help file for more
information regarding how to accomplish this task. Note: You could use any barcode
labeling software to complete this task.
2. After you have printed labels, follow the steps in the section above titled “Follow these
steps if product data does not exist BUT product barcode labels DO exist.”
3. You are now ready to use Track’Em to track inventory. Both the CYCLE COUNT and
RECEIVE ITEMS options on the portable scanner will populate both the PRODUCT
MASTER table and the current inventory table. You should first load LOCATION
descriptions as described in General Startup Steps above.
B. Enter Data First
1. Complete the steps shown in the GENERAL STARTUP SECTION of this manual.
2. Manually enter MASTER PRODUCT DATA using the form shown in the
INVENTORY DATA ENTRY MENU section of the User’s Manual.
3. Print labels as described on in the TRACK’EM LABEL PRINTING MODULE of the
Track’Em user’s manual. If you need to make modifications to the default product
label, open the label using Bartender and make the appropriate changes.
Note: This assumes you are using the Track’Em Deluxe Add-On version of Track’Em
and the Bartender software has been properly installed and setup according to the
Track’Em user’s manual section titled TRACK’EM LABEL PRINTING MODULE.
You can also use any other barcode printing software to print your labels.
4. You are now ready to use Track’Em to track inventory. It is recommended that you
conduct an initial Cycle Count OR Receive Items operation using the portable scanner
in order to create accurate inventory records. See the sections titled TRACK’EM
PORTABLE SCANNER SOFTWARE – RECEIVE ITEMS AND CYCLE COUNT
ITEMS in the Track’Em user’s manual.
12