1
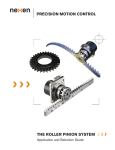
LINEAR MOTION CONTROL PRODUCTS
User Manual
Precision Roller Pinion System
Linear Rack and Pinion Systems
1
FORM NO. FORM
L-21235-J-1014
NO. L-21235-J-1014
In accordance with Nexen’s established policy of constant product improvement, the specifications contained in this
manual are subject to change without notice. Technical data listed in this manual are based on the latest information
available at the time of printing and are also subject to change without notice.
Technical Support: 800-843-7445
(651) 484-5900
www.nexengroup.com
DANGER
Read this manual carefully before installation and operation.
Follow Nexen’s instructions and integrate this unit into your
system with care. This unit should be installed, operated and
maintained by qualified personnel ONLY. Improper installation
can damage your system, cause injury or death. Comply with
all applicable codes.
This document is the original, non-translated, version.
Conformity Declaration: In accordance with Appendix II B of CE Machinery Directive (2006/42/EC):
A Declaration of Incorporation of Partly Completed Machinery evaluation for the applicable EU directives was
carried out for this product in accordance with the Machinery Directive. The declaration of incorporation is set
out in writing in a separate document and can be requested if required.
This machinery is incomplete and must not be put into service until the machinery into which it is to be
incorporated has been declared in conformity with the applicable provisions of the Directive.
Nexen Group, Inc.
560 Oak Grove Parkway
Vadnais Heights, Minnesota 55127
ISO 9001 Certified
Copyright 2014 Nexen Group, Inc.
FORM NO. L-21235-J-1014
2
Table of Contents
General Safety Precautions ---------------------------------------------------------------------------------------------------- 4
System Design Overview ------------------------------------------------------------------------------------------------------- 5
General System Requirements ------------------------------------------------------------------------------------------ 5
Rack Requirements----------------------------------------------------------------------------------------------------------- 6
Pinion Requirements--------------------------------------------------------------------------------------------------------- 6
General Design Guidelines------------------------------------------------------------------------------------------------------7
Installation----------------------------------------------------------------------------------------------------------------------------- 7
Rack Installation--------------------------------------------------------------------------------------------------------------------- 8
Adding Additional Racks --------------------------------------------------------------------------------------------------- 8
GEN A Alignment Tool Provisions-------------------------------------------------------------------------------------------- 9
Roller Pinion Installation--------------------------------------------------------------------------------------------------------11
Shaft Mounted Pinion Installation------------------------------------------------------------------------------------- 11
Flange Mount Pinion Installation (ISO 9409)----------------------------------------------------------------------12
Applying Preload ----------------------------------------------------------------------------------------------------------------- 14
System Alignment Verification ---------------------------------------------------------------------------------------------- 15
RPS System Operation-------------------------------------------------------------------------------------------------------- 16
Disengaging the Roller Pinion----------------------------------------------------------------------------------------------- 16
Lubrication-------------------------------------------------------------------------------------------------------------------------- 17
Warranty -----------------------------------------------------------------------------------------------------------------------------18
3
FORM NO. L-21235-J-1014
GENERAL SAFETY PRECAUTIONS
DANGER
WARNING
Use appropriate guarding for rotating
components. Failure to guard could
result in serious bodily injury.
This product has moving parts that
can crush or cut appendages. Provide
adequate spacing or guarding from any
operating product.
WARNING
WARNING
Failure to properly support the load
before disengaging the RPS system
could cause serious harm to operators
or equipment.
Ensure proper guarding of the product is
used.
Nexen recommends the machine
builder design guarding in compliance with
OSHA 29 CFR 1910 “Occupational Safety
and Health Hazards”.
CAUTION
CAUTION
Use lifting aids and proper lifting
techniques when installing, removing,
or placing this product in service.
Watch for sharp features when
interacting with this product. The parts
have complex shapes and machined
edges.
WARNING
DANGER
This product has moving parts that
can crush or cut appendages. Provide
adequate spacing or guarding from
any operating product.
Use appropriate guarding for rotating
components. Failure to guard could
result in serious bodily injury.
FORM NO. L-21235-J-1014
4
SYSTEM DESIGN OVERVIEW
The machine design guidelines, installation procedures, specifications, and tolerances, listed in this document
are designed to obtain Nexen’s published RPS performance ratings with reasonable effort. In some cases
some of these requirements can be deviated from with a reduction in the R PS system performance.
Contact Nexen to determine if the desired deviation is possible and its effect on system performance.
General System Requirements
•
Unlike traditional rack and pinion drives, the RPS system has zero mechanical clearance and requires a system
preload for proper operation. This preload must remain relatively consistent over the entire run to obtain optimal
system performance and life. To achieve this it is crucial that the guiding system be as parallel as possible to the RPS
system and not converge or diverge at any point. If the system converges, the pinion preload will become excessive
and increase noise, reduce pinion roller bearing life, and potentially bind the system. If the system diverges, pinion
preload will be lost causing backlash, a loss of positional accuracy, increase in noise, and reduction in system life.
The main consideration is that the guiding system and the RPS system are rising or falling at the same place in the
run so the pinion preload remains within specifications. The best way to minimize the variance between the guiding
system and the Roller Pinion system is to machine their mounting locations in a single machining operation. See
Figures 1 and 2 for more details.
•
Make sure that the machine bed and guiding system are rigid enough to prevent deflection that will affect RPS system
preload and pinion alignment.
•
The rack and guiding system installation parallelism tolerances shown in Figure 2 are greater than the system preload.
The RPS system has been designed to provide its rated performance under these conditions.
•
The bottom of the rack and one side must be supported by a step in the machine bed at least half the rack thickness.
The rack should not be supported only by fasteners or pins. See Figure 3 for specifications.
•
Over long distances a single piece machine bed will become impractical requiring a segmented bed. When installing
the guiding system and the RPS rack, their joints should not be located near the machine bed joints but span them
as much as possible.
•
The RPS system generates a separation force between the pinion and rack. Make sure this is accounted for when
selecting the guiding system or evaluating reducer or motor overhung load ratings. See product data for maximum
pressure angle specifications.
•
The RPS system requires a mechanism to achieve proper system preload. It is recommended that the pinion be
moved into the rack not vice versa. The recommended method is to mount the servo drive system on a sliding bracket
that has an adjustment to push it into and pull it away from the rack. Another possible preloading method utilizes a
bracket with eccentric mounting slot pattern. Nexen offers a preloading mechanism that is easy to integrate into your
application as shown in Figure 18. Spring loaded preloading mechanisms shall not be used since the spring force
required to counteract the separation forces are much higher than the allowed preloading force and would cause a
reduction in pinion needle bearing life and increase system noise. See Figure 3 for more details.
•
Under most circumstances, the RPS system requires periodic lubrication. In special cases, Premium and Endurance
Grade RPS can be operated lubrication free if the maximum speed does not exceed 0.5 m/s [1.64 ft/s]. Typically
this will involve dirty environments where contaminates will be attracted/stick to the lubricant on the rack creating
mechanical interference or an abrasive paste that can accelerate wear. Other applications where no rack lubrication
may be beneficial include food processing, clean rooms, coating, and others where low particle emissions are desirable.
If the RPS system is operated lubrication free there may be some reduction in life which could vary depending on
the application. Do not run the RPS system lubrication free unless there is a strong reason to do so. The Standard
and Universal Grades of RPS shall not be run lubrication free under any circumstances. Consult Nexen for more
information regarding alternative lubrication options or lubrication-free applications.
•
Do not use the RPS system in environments with temperatures outside of a -5 - 40º C (23 - 104º F) range‚ or with
wide temperature variations since thermal expansion can effect the preload and meshing of the system. If you have
an application with any of these characteristics consult Nexen.
5
FORM NO. L-21235-J-1014
•
RPS systems are surface treated with various products depending on the model. All standard pinion product offerings
include uncoated, bearing grade steel rollers. Pinion roller corrosion will lead to pinion needle bearing damage and
then system failure. Always protect the pinion from adverse conditions. As the surface treatments vary depending
on RPS model, review surface treatment specifications carefully to determine whether the RPS system is suitable
for your application based on your familiarity with the corrosion resistant surface treatment or through testing. Nexen
makes no claims for RPS corrosion resistance in any application.
•
Nexen can provide additional tapped, untapped or countersunk holes in the side or bottom of the rack or cut the rack
to a specific length for an additional charge.
Rack Requirements
•
CAUTION Handle the rack with care; it is a high precision product. Do not drop it, allow anything to fall on it, or place
•
Five sides of the RPS rack are reference surfaces. The side displaying the part number, or ends that have been
cut (not factory full or half sections) are non-reference surfaces. The side displaying the part number should not be
mounted against the machine bed and cut rack ends must be at the end of the run.
•
Secure the rack using all of the available mounting holes to a precision step in the machine bed. Refer to Table 2
for proper fastener tightening torque. This will ensure the highest degree of rack stability.
•
Install the RPS system at the temperature at which it will be used to minimize thermal expansion or contraction
effecting the positional accuracy of the RPS system.
•
The RPS rack is hardened on the tooth faces only.
•
If joining multiple rack segments a special alignment tool is required and is available from Nexen. The alignment tool
ensures proper pinion meshing and system accuracy when the pinion crosses rack joints. When the adjacent racks
are properly positioned, there will be a 0.1 - 0.2 mm gap between their ends. See Figures 4 and 8 for details.
•
Avoid mounting the rack teeth up since debris could collect on the rack and interfere with the meshing of the RPS
system. If the teeth must be mounted up, shield the RPS system from debris or install an air knife just ahead of the
pinion.
it on non-flat surfaces that could effect rack straightness. Doing so may negatively effect RPS system performance.
Pinion Requirements
•
Verify shaft runout and diameter tolerances meet Nexen specifications before mounting the pinion. See Figure 11.
•
For shaft mounted pinions the shaft length must meet the minimum shaft insertion requirements for proper support and
torque transmission. See the pinion dimensional drawings in the RPS Application and Selection Guide for minimum
shaft insertion values.
•
If using a flange mount pinion verify the dimensions and tolerances of the gearhead flange meet the specifications of
the ISO 9409 standard.
•
Mount the pinion as close to a support bearing as possible to minimize shaft deflection.
•
The pinion roller bearings are sealed, however it is still recommended that the pinion be shielded from liquids, dust,
and debris.
•
Multiple pinions may be used on a single axis to drive a common load. When sizing the RPS system, it is important to
carefully evaluate the loading that is to be seen by each pinion. Perfect load sharing between multiple pinions driving
a common load is difficult to achieve in practice and therefore additional service factors are typically recommended.
Contact Nexen for more information on sizing the RPS system under these conditions.
•
The RPS system can be operated such that the pinion remains stationary while the rack moves. In this scenario,
a supporting structure and guiding system is still required for the rack such that the pinion preload and alignment
remains within specifications.
FORM NO. L-21235-J-1014
6
GENERAL DESIGN GUIDELINES
The following requirements must be met to ensure proper
RPS operation:
A
a) Mount a linear guide rail on a surface parallel to the
RPS rack mounting surface with the same flatness as
the rack mounting surface ash shown in Figure 2.
b) The pinion shaft must be parallel (0.03 mm [0.001 in])
to the rack mounting surface opposite the rack teeth
and the angle between the pinion shaft and the face
of the rack must be 90° ±0.1° maximum as shown in
Figure 1).
// 0.03 mm A
0.03 mm B
// 0.03 mm A
In order to minimize backlash , obtain the highest positional
accuracy, and minimize wear on the rack, the RPS system
must be installed on a rigid, straight, flat mounting surface
with the tolerances shown in Figure 2.
Rack
B
// 0.03 mm B
0.03 mm A
Additional dimensional detail can be found in
Nexen’s product drawings.
Figure 2 Tolerances
Pinion
Shaft
This distance must remain
parallel within 0.03 mm
Parallel [0.001 in]
Rack
Rack
90˚ ± 0.1°
W
1/2 W
The rack must sit on a step at
least one half the width of the
rack for proper support. The
rack should not be supported
by fasteners alone. Pinning the
rack to its mounting surface is
not recommended.
Figure 3 Rack Support Requirements
Figure 1 Pinion Alignment Requirements
Systems may be mounted at any angle as long as the rack,
guiding system and mounting surface remain parallel with
the shaft at a 90° angle from the rack.
c) The pinion shaft must be supported adequately to
ensure full contact of the pinion rollers along the face
of rack teeth.
INSTALLATION
Nexen recommends orienting the rack teeth downward or
to the side so it minimizes the possibility of debris collecting
on the teeth and causing meshing interference. The rack
has 5 reference surfaces and includes all sides except the
side with the product number. The non-reference face
with the product number should not be placed against
the machine bed surfaces. Any rack ends that have been
cut must be located at the end of the run; the pinion must
not cross cut rack ends.
The mounting surface for both the rack and the guiding
system must be parallel within the specifications shown
in Figure 2. This parallelism requirement is best achieved
by machining the mounting locations for both the guiding
system and rack in the same machining operation. (Refer
to PROPER SYSTEM ALIGNMENT and Figures 1 and 2
for Possible Mounting Configurations.)
7
FORM NO. L-21235-J-1014
RACK INSTALLATION
1. Ensure that the mounting surface and rack are
completely clean, free of burrs, or anything that could
interfere with full contact with the mounting surfaces.
6. Once the rack mounting bolts are fully torqued, verify
tooth peak variance is less than ±0.03 mm [±0.001
in] by placing a dial indicator on the movable carriage
with the indicator tip on the tooth peaks. Measure
the tooth peak variance at points throughout the rack
section as shown in Figure 6.
2. With the guiding system in place mount a dial indicator
on the carriage and measure the perpendicularity and
parallelism variance on the two rack mounting surfaces
by moving the carriage down the run and monitoring
the dial indicator readings. Verify they meet or exceed
specifications of ±0.03 mm [±0.001 in.] as shown in
Figure 4. If variance is not within specifications, verify
guiding system installation and correct if possible.
Mark the location of the high point in the mounting
surface the rack bottom sits on.
If the tooth peak variance is out of specifications and
the mounting surface was in specifications dismount
the rack and inspect for dirt, burs, or anything that
would prevent proper rack to mounting surface
seating.
Part
#
Part
#
Second Rack
Figure 6
Figure 4
If the mounting surface is out of recommended
specifications then shimming between the rack bottom
and the mounting surface will be required. Locate the
high point within the rack section and shim all other
points to meet it.
When shimming, it is recommended to support the
rack as much as possible, not just short pieces near
mounting bolts.
3. Start rack installation at the high point in the mounting
surface the rack bottom sits on. This may not be at
the end of the run.
Additional sections of rack will be shimmed as required
throughout the rest of the run to bring the rack tooth
peak variance into specifications relative to the first
rack section.
Adding Additional Racks
4. Apply a serviceable thread locking compound to the
customer supplied mounting bolts, lightly secure the
first rack length to the mounting surface and clamp it
in place while protecting the rack teeth by distributing
the clamp load over several teeth. Make sure the
clamps are close to each bolt as they are tightened
to ensure full rack to mounting surface contact. See
Figure 5. Socket head cap screws are recommended
for maximum pinion shoulder clearance. Make sure
the side of the rack with the part number on it is not
against the mounting surface and any cut rack ends
are at the end of the run.
NOTE: Alignment Tools for each RPS size are required
and available for purchase from Nexen. This tool
is required for proper installation of multiple rack
segment runs.
7. Butt the second rack segment against the first fully
secured rack on the mounting surface and lightly
secure it with fasteners with serviceable thread locking
compound applied so it is in full contact with the
mounting surface but still moveable within the rack
mounting hole tolerances.
5. Tighten the mounting bolts on the first rack alternately
and incrementally 10%, 50%, then fully torque,
working from the center of the rack towards the ends.
Refer to Table 2 for recommended tightening torques.
8. Mount the Alignment Tool between the two racks
utilizing the adjacent tooth roots of each rack while
being careful not to damage the rack or alignment tool
as shown in Figures 7 and 8. The GEN B alignment
tool has a different appearance but functions the same
and has no bolt down provisions. It is hand pressed
into place to set the rack spacing as described on the
next page.
Part Number
Figure 5
Part Number Must Face Out
FORM NO. L-21235-J-1014
First Rack
8
alternately pushing down on opposite ends of the tool.
If not using the bolt down method, skip to Step 12.
Alignment Tool
9. Fasten the Alignment Tool to the mounting surface
using customer supplied fasteners while making sure
the face of the alignment tool is fully seated against
the rack face and tighten to the initial torque value in
Table 1.
10. Tighten the second rack’s bolts to 10% of the torque
values in Table 2.
Part #
11. Torque the alignment tool to the final torque specified
in Table 1.
Figure 7 GEN B ALIGNMENT TOOL
12.Torque the second rack to 50% of the torque listed
in Table 2 working from the middle of the rack to the
ends. Then repeat with 100% torque, as specified in
Table 2.
Alignment Tool
13.Carefully remove the alignment tool, while avoiding
any damage to the rack or alignment tool.
14.Starting on the first rack perform the tooth peak
variance check and extend it to the second rack as
covered in step 6. If the tooth peak variance on the
second rack is out of specifications shim it to match
the first rack. Always reference the runout of additional
rack sections against the first rack installed at the high
point in the run as shown in Figure 9.
Part #
Figure 8 GEN A ALIGNMENT TOOL
The bolt can either pass through the alignment tool
from the top and thread into the machine bed or pass
through the machine bed and thread into the alignment
tool. See Table 1 for bolt sizes depending on method
chosen.
15.Repeat Steps 7 through 14 for any additional rack
sections.
If fastening the alignment tool in place is not possible
or in the case of GEN B, it can also be clamped in
place by placing a small piece of flat stock across the
two alignment tool pins on each rack end and clamping
them down by some other provision.
Part
#
Part
If fastening or clamping is not possible or in the case
of GEN B, the alignment tool can be manually seated
across the rack joint while pressing it forcefully into
the rack. When the adjacent rack section is properly
spaced, the alignment tool will feel solidly seated when
#
Second Rack
Figure 9
First Rack
GEN A ALIGNMENT TOOL PROVISIONS
If clamping is not possible or in the case of GEN B, the
alignment tool can be manually seated across the rack
joint while pressing the pins forcefully into the rack teeth.
When the adjoining rack section is properly spaced, no
movement should be felt when alternately pushing down
on opposite ends of the alignment tool.
When joining multiple sections of rack it is recommended
that the provisions shown in Figure 10 be used whenever
possible.
In some applications this may not be practical. In these
cases the GEN A alignment tool can be clamped in place
by placing the alignment tool in position across the rack
joint and laying a flat steel bar across the pins and clamping
against the steel bar.
9
FORM NO. L-21235-J-1014
Rack width
B
Through Hole
Mounting of Alignment Tool
GEN A
A
C
E Through Hole
G Tapped Hole
E
Rack Mounting
Reference Surface
A
Alignment
Tool
Rack
Segment
D
Alignment Tool
Rack
Segment
I Rack Mounting Through Hole (See Table 2)
Second Rack
Tapped Hole
Mounting of Alignment Tool
GEN A
H Alignment Tool
Mounting Bolt
J Rack
Mounting Bolt
First Rack
Clearance 0.1 - 0.2 mm
Second Rack Reference Level
F Alignment
Tool Mounting
Bolt
Positional view of the rack mounting holes (plan view)
J Rack
Mounting Bolt
E Through Hole
G Tapped Hole
Figure 10
The dimensions below are nominal in mm and applicable only to standard catalog offerings. Refer to Nexen product
drawings and CAD files for your product numbers for precise dimensions. Special and cut sections of rack may not
conform to these dimensions. The RPS 10 & 12 alignment tools do not bolt down so no data is listed for them below.
RPS
Size
A
B
C
D
Through Hole Mounting
E
Tapped Hole Mounting
F
G&H
H
I
J
16
96
32
16
19.5
9
M8 x 1.25
M6 x 1.00
M6-50
7
M6
20
100
100
50
25.5
11
M10 x 1.50
M8 x 1.25
M6-60
9
M8
25
100
100
50
30.5
14
M12 x 1.75
M10 x 1.50
M10-75
11
M10
32
96
32
16
36.5
14
M12 x 1.75
M10 x 1.50
M10-95
14
M12
40
120
160
80
43.5
14
M12 x 1.75
M10 x 1.50
M10-95
18
M16
4014
80
120
60
54.0
14
M12 x 1.75
M10 x 1.50
M10-95
18
M16
50
62.50 62.50 31.25 54.0
14
M12 x 1.75
M10 x 1.50
M10-95
18
M16
Dimensions apply to standard length rack sections. Cut lengths and customs could vary. Refer to drawings for your specific product
numbers. * Bolt length will vary based on machine design.
Table 1
Alignment Tool Mounting Bolt Specifications
RPS
Size
Through Hole
Tapped Hole
Bolt
Size
Tightening Torque
Initial/Final Nm [in-lb]
Thread
Depth
mm [in]
Tightening Torque
Initial/Final Nm [in-lb]
16
M6
1/5 [9/44]
M8
16 [0.63]
1/8 [7/71]
20
M8
1/8 [7/71]
M10
20 [0.79]
1/12 [9/106]
25 & 32
M10
2/28 [18/248]
M12
24 [0.94]
2/30 [18/266]
40 & 4014
M10
3/32 [27/283]
M12
24 [0.94]
3/35 [27/310]
50
M10
3/32 [27/283]
M12
24 [0.94]
3/35 [27/310]
Table 2
Bolt Type
Mounting Material
Steel
Cast Iron
Aluminum
Rack Mounting Tightening Torque for Socket Head Cap Screws (Class 10.9 or better)
M5
8.2 Nm [73 in-lb]
5.4 Nm [48 in-lb]
4.0 Nm [35 in-lb]
M6
16 Nm [140 in-lb]
10 Nm [89 in-lb]
8 Nm [71 in-lb]
M8
31 Nm [275 in-lb]
20 Nm [177 in-lb]
15 Nm [128 in-lb]
M10
68 Nm [602 in-lb]
45 Nm [398 in-lb] (Versa Rack Only)
45 Nm [398 in-lb]
33 Nm [292 in-lb]
M12
120 Nm [1062 in-lb]
78 Nm [690 in-lb]
58 Nm [513 in-lb]
M16
196 Nm [1735 in-lb]
131 Nm [1160 in-lb]
98 Nm [867 in-lb]
Rack Mounting Tightening Torque for Stainless Steel Screws (Class 8.8 or better)
M5
5 Nm [44 in-lb]
5 Nm [44 in-lb]
4.0 Nm [35 in-lb]
M6
10 Nm [89 in-lb]
10 Nm [89 in-lb]
8 Nm [71 in-lb]
M8
19 Nm [168 in-lb]
19 Nm [168 in-lb]
15 Nm [128 in-lb]
M10
41 Nm [363 in-lb]
41 Nm [363 in-lb]
33 Nm [292 in-lb]
M12
70 Nm [620 in-lb]
70 Nm [620 in-lb]
58 Nm [513 in-lb]
M16
137 Nm [1213 in-lb]
131 Nm [1160 in-lb]
98 Nm [867 in-lb]
FORM NO. L-21235-J-1014
10
ROLLER PINION INSTALLATION
Note: There are two pinion mounting styles, shaft
or flange mount. Refer to the following section that
applies to your situation. In either case it is critical to
minimize radial variance. It will effect pinion preload
and positional accuracy throughout the run.
4
Tightening Order
1
Coupling bolts
Inner Coupling Half
Outer Coupling Half
3
Shaft Mounted Pinion Installation
NOTES:
2
•
Refer to product drawings for shaft details.
•
Refer to GENERAL DESIGN GUIDELINES and
Figures 1 and 2 for Roller Pinion mounting
requirements.
•
The pinion should be mounted as close to a shaft
supporting bearing as possible to minimize shaft
deflection and obtain optimal performance.
•
The shaft the pinion is mounted on must meet
minimum shaft insertion requirements as shown
in the RPS Selection Guide drawings for proper
pinion support and maximum torque transmission.
aligned as shown in Figure 12. For RPS32 and
below you will also have to simultaneously ensure the
coupling bolt through holes align with the pinion bolt
holes. On RPS40 and larger the coupling bolts thread
into the other half of the coupling, not the pinion body
so misalignment is not possible. The threaded holes
in the outer coupling end are for coupling removal.
NOTE: Ensure that the slots in the two components
that make up the coupling are not aligned as shown
in Figure 12.
6. Insert the shaft into the pinion and coupling bore.
7. Insert the coupling fasteners into the through holes.
Only use the provided coupling fasteners.
2. Inspect the shaft, pinion bore and the inner and outer
coupling halves to ensure they are clean and have no
defects.
8. Locate the pinion on the shaft and lightly tighten the
fasteners to take clearance out of all the coupling
parts but still allow the pinion to be moved axially on
the shaft. Position the pinion and coupling assembly
on the shaft so that the gap between rack face and
pinion roller bearing shoulders is even on both sides.
As the coupling fasteners are tightened the pinion
will be drawn slightly in the coupling direction so it is
recommended that the pinion and coupling assembly
be offset axially away from the coupling side 3 - 5 mm
[0.1 - 0.2 in] initially so when the coupling fasteners
are fully torqued the pinion ends up centered on the
rack.
3. Put oil that does not contain any pressure additives on
the shaft, the tapered part of the coupling and bolts as
shown in Figure 11. Do not lubricate the bore of the
pinion coupling or shaft where the coupling contacts
it or the torque transmission capacity of the coupling
will be reduced.
Figure 11
Align the outer coupling
slots between the inner
coupling slots
Figure 12 Coupling Installation Details
1. Clean the shaft the pinion will be mounted on and verify
that variance is less than ±0.013 mm [±0.0005 in] as
shown in Figure 11.
<0.030 mm
[<0.001 in]
5
Threaded holes for
coupling removal
<0.013 mm
[<0.0005 in]
9. Equally tighten the coupling fasteners with 25% of
the recommended tightening torque listed in Table
3. Start tightening at the top fastener and alternate
back and forth across the face in a star pattern as
shown in Figure 12. (The number of bolts will vary
with RPS size.) Repeat this procedure with 50% and
then full torque. An additional 1 or 2 repetitions at
full torque are recommended to ensure all fasteners
have reached their target torque values. Progressive
tightening of non-adjacent coupling fasteners is
important to prevent any misalignment of components
while installing the coupling.
apply oil to these areas
4. Insert the outer coupling half into the roller pinion bore
until it bottoms in the roller pinon.
5. Insert the inner coupling half into the outer coupling
half (previously inserted into the pinion) while ensuring
that the inner and outer coupling half slots are not
11
FORM NO. L-21235-J-1014
10. Once the fasteners are fully torqued verify the pinion
is centered on the rack. If not, measure the positional
error and then remove the pinion as described in the
DISENGAGING THE ROLLER PINION section.
Repeat the pinion installation procedure and offset the
pinion by the recorded error plus the previous off set
value. When the pinion is fully torqued and properly
centered on the rack then verify pinion concentricity
at the center of the pinion rollers as shown in Figure
11. Indicated concentric runout on this surface must
be less than ± 0.030 mm [±0.0010 in].
Table 3 Pinion Coupling Bolt Information
Model
Bolt Size
Tightening Torque
RPS10
M3 (4X)
1.9 Nm [16.8 in-lb]
RPS12
M4 (4X)
4.1 Nm [36.3 in-lb]
RPS16
M4 (5X)
3.5 Nm [31.0 in-lb]
RPS20
M5 (5X)
7.0 Nm [62.0 in-lb]
RPS 25 & 32
M6 (5X)
12.0 Nm [106.2 in-lb]
M6 (8X)
12.0 Nm [106.2 in-lb]
M8 (10X)
24.4 Nm [216.0 in-lb]
M8 (8X)
38.0 Nm [336.3 in-lb]
M8 (10X)
32.6 Nm [288.5 in-lb]
RPS40
RPS4014
Figure 14
4. If either of the following conditions are true, the
gearhead itself may contribute to excessive pinion
preload variation, a reduction in pinion life and/
or accuracy. The user should consider having the
gearhead re-worked or replaced.
a. The measured total variance of the mounting face
is greater than 0.013 mm [0.0005 in].
b. The measured total variance of the pilot bore wall
is greater than 0.005 mm [0.0002 in].
Note: In some cases an adapter will be required to
mount the pinion on the reducer. If so proceed with
Step 5, if not skip to Step 13.
CAUTION
5. Clean the adapter flange and pilot where it will contact
the gearhead flange inspecting for contaminates,
burs, or surface defects that would interfere with full
contact between the adapter and gearhead flange.
See Figure 15.
Preload must be applied before putting your
system into operation. Refer to APPLYING
PRELOAD to properly set preload for your
RPS system.
Flange Mount Pinion Installation (ISO 9409)
Pinion Side
Gearhead
Side
1. Clean the gearhead mounting face and pilot bore
inspecting for contaminates, burs, or surface defects
that would interfere with full contact between the
pinion and flange or cause runout.
2. Using a dial indicator, check the rotational flatness of
the face as shown in Figure 13. Position the contact
point of the indicator where the pinion will contact
it. Rotate slowly for a minimum of one complete
revolution and note the total amount of runout.
Figure 15
6. Apply a serviceable thread locking compound to the
adapter mounting screws then assemble the adapter
to the gearhead, leaving the mounting screws snug
but do not tighten at this time as shown in Figure 16.
7. Position a dial indicator at bottom dead center of the
pilot bore wall as shown in Figure 16 and zero the
indicator. Rotate the assembly slowly by using the
gearhead input shaft a minimum of one complete
revolution while noting the dial indicator runout and
mark the angular location in which the lowest reading
occurs throughout the rotation.
Figure 13
3. Position the contact point of the dial indicator at
bottom dead center of the pilot bore as shown in
Figure 14. Rotate slowly for a minimum of one
complete turn and note the amount of total runout in
one rotation.
FORM NO. L-21235-J-1014
12
13. Clean the pinion flange and pilot where it will contact
the adapter (if used) or gearhead flange inspecting
for contaminates, burs, or surface defects that would
interfere with full contact between the pinion and
adapter (if used) or gearhead flange.
14. Apply a serviceable thread locking compound to the
pinion mounting screws and assemble the pinion to
the adapter (if used) or gearhead, leaving the mounting
screws snug but do not tighten at this time.
Figure 16
15.Position a dial indicator on the center of the pinion
rollers as shown in Figure 17 and zero it. Rotate pinion
a minimum of one complete revolution by turning the
gearhead input shaft while noting the amount of total
dial indicator runout and mark the angular location
on the pinion shoulder in which the highest reading
occurs throughout the rotation. When the pinion is
properly centered the concentric runout at the center
of the pinion rollers must be less than ± 0.030 mm [±
0.0010 in].
8. If the measured total dial indicator runout of the
adapter pilot bore is greater than 0.008 mm [0.0003
in], tap gently on the O.D. of the adapter using a soft
hammer at the angular location in which the lowest
reading occurred. Doing this will shift the center of
the adapter closer to the center of rotation.
9. Repeat steps 7 and 8 until the total dial indicator
runout is 0.008 mm [0.0003 in] or less.
10. Tighten the mounting screws to 50% of the specified
torque specified in Table 4 in a star pattern that
allows for an even distribution of axial clamping force.
Then repeat the tightening pattern with 100% of the
recommended torque.
Table 4
Adapter Fasteners
Tightening Torque
Nm [in-lb]
ISO 16/20 (M5x0.8)
6.5 [58]
ISO 16/25 (M6x1.0)
11.5 [78]
ISO 20/25 (M6x1.0)
11.5 [78]
ISO 20/32 (M6x1.0)
11.5 [78]
ISO 32/40 (M8x1.25)
26 [156]
ISO 40/4014 (M10x1.5)
46 [273]
Figure 17
If the measured total indicator variance of the pinion
rollers is greater than ± 0.030 mm [± 0.0010 in], tap
gently on the O.D. of the pinion using a soft hammer
at the angular location in which the highest reading
occurred. Doing this will shift the pinion center closer
to the center of rotation.
16. Tighten the mounting screws to 50% of the specified
torque specified in Table 5 below in a star pattern that
allows for an even distribution of axial clamping force.
Then repeat the tightening pattern with 100% of the
recommended torque in Table 5.
11. Re-torque the mounting screws once more to the fullspecified torque value in Table 4 to ensure full torque
has been reached on all fasteners. Tighten in the same
order as above.
12.Repeat inspection Step 7 and verify the total dial
indicator runout listed in Step 8 is achieved after fully
torquing the adapter. If runout is out of specifications
the adapter should be removed inspecting for
contaminates, burs, or surface defects that would
interfere with full contact between the adapter and
gearhead flange. In some cases indexing the adapter
relative to the gearhead flange can be helpful. Then
repeat the adapter installation procedure starting with
Step 6.
Table 5
Pinion Fasteners
13
Tightening Torque
Nm [in-lb]
RPS 16 (M3 x 0.5-APEX)
1.5 [13]
RPS 16 (M4 x 0.7)
5.3 [47]
RPS 20 (M5 x 0.8)
10 [88]
RPS 25 (M6 x 1.0)
17.5 [155]
RPS 32 (M6 x 1.0)
17.5 [155]
RPS 40 (M8 x 1.25)
40 [354]
RPS 4014 (M10 x 1.5)
70 [620]
FORM NO. L-21235-J-1014
18. Repeat concentric runout inspection Step 15 and
verify concentric runout remains within specifications
after fully torquing the pinion. If the runout is out
of specifications the pinion should be removed
inspecting for contaminates, burs, or surface defects
that would interfere with full contact between the
pinion and adapter (if used) or gearhead flange.
Indexing the pinion relative to the adapter (if used) or
gearhead may help in some cases. Repeat the pinion
installation procedure starting with Step 13.
17. Re-torque the mounting screws once more to the fullspecified torque value in Table 4 to ensure full torque
has been reached on all fasteners. Tighten in the same
order as in Step 16.
APPLYING PRELOAD
Preloading Procedure
If you would prefer to not design your own pinion
preloading mechanism, Nexen offers a high precision push
bolt preloading system that bolts between the machine
frame and servo reducer to simplify machine design and
achieve optimal results. See figure 18.
Nexen Precision
Pinion Preloader
Gearhead
Note: Be careful engaging the pinion and servo assembly
to the rack to avoid damaging the rack teeth or pinion
rollers.
Customer
Machine Frame
1. With a dial indicator mounted on the movable carriage,
measure off the tooth peaks. Move the carriage down
the run taking frequent measurements to locate the
high spot in the run. This is where the pinion preloading
should be done to prevent excessive preload from
occurring elsewhere in the run.
Nexen Roller
Pinion
Adjustment by Elongated Slots
Preload Adjustment
(Preferred Method)
Screw
Figure 18
Part
Nexen Precision Pinion Preloader product numbers and
more information can be found at www.nexengroup.com
on any of the RPS pinion pages under accessories in the
left hand column.
#
High Point In Rack Teeth
Adjustment by Eccentric Slots
To ensure optimal meshing of the roller pins with the
rack teeth, the shaft must be preloaded to 0.010 - 0.015
mm [0.0004 - 0.0006 in] beyond full roller/tooth root
engagement.
Part
NOTE: Do not apply excessive preload. Preloading
beyond 0.015 mm [0.0006 in] will decrease product
life, increase noise, and cause vibration. When the
RPS system is properly preloaded, there will be no
tangential play between the rack and the pinion if the
pinion is not allowed to turn and the carriage assembly
forced back and forth in the direction of travel.
High Point In Rack Teeth
Figure 19 Customer Designed Pinion Preloaders
2. Apply serviceable thread locking compound to the
pinion preloader slider bolts and install the servo and
preload mechanism. Ensure the preload related bolts
are just loose enough to allow the pinion to be pulled
away from the rack teeth. For the Nexen Preloader
System, this is approximately 0.2 - 0.3 Nm [2 - 3 inlbs].
Refer to Figure 19 for suggested preload methods.
FORM NO. L-21235-J-1014
#
14
3. Verify pinion rotational axis is as close to 90° from the
rack run axis, the pinion rotational axis is also parallel
with the tooth tops or rack mounting surface, and the
rack is centered between the pinion bearing flanges
as shown in Figure 1.
7. With the pinion preloaded to specifications manually
traverse the carriage down the run by hand (if possible)
checking for smoothness and uniformity of resistance.
If manually applied motion is not possible, use the
servo motor to traverse the carriage along the run, with
just enough torque output to move it while looking and
listening for resistance to motion.
4. Rotate the preload adjustment screw clockwise to
separate the pinion from the rack. This will ensure
that clearance is initially present. Then seat the pinion
into contact by turning the preload adjustment screw
counterclockwise until a slight resistance is felt and
then back the screw off 1/8 of a turn. This step is
critical to prepare for preload settings.
Table 6
Screw
Tightening Torque
Nm [in-lb]
-
1.7 [15] Max
Preloader Screw
All Models
5. Place a magnetic base dial indicator on the movable
carriage, and locate its probe on the OD of the pinion
flange such that it measures in the direction of preload
travel.
Shoulder Screws (Mtg. Plate)
6. Apply the preload of 0.010 - 0.015 mm [0.0004
- 0.0006 in] with the preload application screw(s)
and then tighten the preload lockdown bolts to
their recommended torques. See Table 6 for Nexen
Preloader System torque values. Typically the preload
will change slightly when the preloader lockdown bolts
are tightened. If tightening the preload bolts causes
the amount of preload to fall outside of specifications
record how much it changed when tightening the
preloader lock down bolts then loosen the preloading
system and repeat the preloading procedure but
adjust the initial preload (more or less) by the recorded
preload deviation. This procedure will ensure that
when the preloader lockdown bolts are tightened the
amount of preload should fall within specifications.
RPS-PRE-064
M8 x 1.25
40 [350]
RPS-PRE-090
M8 x 1.25
40 [350]
RPS-PRE-110
M8 x 1.25
40 [350]
RPS-PRE-140
M8 x 1.25
40 [350]
RPS-PRE-200
M12 x 1.75
120 [1060]
Gearhead Screws (Mtg. Plate)
RPS-PRE-064
M4 x 0.7
5.3 [47]
RPS-PRE-090
M5 x 0.8
10 [88]
RPS-PRE-110
M5 x 0.8
10 [88]
RPS-PRE-140
M6 x 1.0
17.5 [155]
RPS-PRE-200
M8 x 1.25
40 [354]
Preloader Mtg. Screws (2x)
All Models
M6 x 1.0
17.5 [155]
SYSTEM ALIGNMENT VERIFICATION
completely wiped away all the way across the tooth face
over the middle 2/3 - 3/4 of the teeth with some remaining
at the top and bottom. If this section is properly aligned
clean off grease with a solvent and repeat as necessary
to verify the RPS alignment over the entire length of travel
as shown in Figure 20.
Proper roller to tooth meshing is critical and can be verified
by two methods depending on which you find easier to
interpret:
Option 1: Apply a slow drying machinists dye to the pinion
rollers and move the RPS system back and forth over a
short distance (about 1/2 meter). It is important the dye
remain wet so it transfers to the rack teeth and is not
depleted. Analyze the dye pattern transferred to the teeth.
If the meshing geometry is good the dye will be spread
evenly all the way across the tooth face over the middle
2/3 - 3/4 of the teeth with none at the top and bottom. If
this section is properly aligned clean off dye residue and
repeat as necessary to verify the RPS alignment over the
entire length of travel. See Figure 20.
Contact Pattern
Good Alignment
Contact Pattern
Poor Alignment
Figure 20
If the dye or grease contact pattern indicates a meshing
problem, diagnose the problem, correct it, and then repeat
the Applying Preload and System Alignment Verification
procedures.
Option 2: Apply a small amount of high contrast grease
to each rack tooth face over 1/2 meter of rack. Operate
the RPS system back and forth over this 1/2 meter of
travel. If the meshing geometry is good the grease will be
15
FORM NO. L-21235-J-1014
RPS SYSTEM OPERATION
TABLE 7
DANGER
RPS Maximum Speeds*
This product has moving parts that
can crush or cut appendages. Provide
adequate spacing or guarding from any
operating product.
WARNING
Ensure proper guarding of the product is
used. Nexen recommends the machine builder
design guarding in compliance with OSHA 29
CFR 1910 “Occupational Safety and Health
Hazards”.
WARNING
Use appropriate guarding for rotating
components. Failure to guard could
result in serious bodily injury.
WARNING
Never exceed maximum operating speeds
listed for your product. (See Table 7).
Product
Linear Speed
Pinion RPM
RPS10
4 m/s
[13.1 ft/s]
2400
RPS12
8 m/s
[26.3 ft/s]
4000
RPS16
4 m/s
[13.1 ft/s]
1500
RPS20
5 m/s
[16.4 ft/s]
1500
RPS25
8 m/s
[26.2 ft/s]
1920
RPS32
11 m/s
[36.1 ft/s]
1719
RPS40
6 m/s
[19.7 ft/s]
750
RPS4014
6 m/s
[19.7 ft/s]
643
RPS50
6 m/s
[19.7 ft/s]
600
*Standard RPS speed ratings, specials can vary. Review
Nexen specifications for your specific product number.
DISENGAGING THE ROLLER PINION
1. De-couple the load from the RPS system.
Shaft Mount Pinion Removal
WARNING
1. Progressively loosen non-adjacent coupling fasteners
in the same order they were tightened until all are
removed from the coupling (Refer to Figure 12).
Failure to properly support the load
before disengaging the RPS system
could cause serious harm to operators
or equipment.
2. Insert the coupling fasteners into the threaded holes
in the coupling flange and alternately tighten them as
illustrated in Figure 9 to release the locking action of
the coupling.
2. Disconnect the power source, ensuring that no torque
is applied to the roller pinion.
3. Remove pinion preload by loosening the preload
mechanism sliding bolts slightly and then turning the
preload application screw(s) to remove the pinion
preload. You should be able to slightly separate the
pinion from the rack teeth now.
3. Lift the servo/reducer/preload mechanism assembly
from the rack or slide the servomotor/reducer out of
the pinion bore.
4. Inspect the shaft, and all coupling components and
replace any that show excessive wear if the pinion will
be reinstalled. Contact Nexen for replacements.
There are two pinion mounting styles; shaft mount,
and flange mount. Proceed to the following section
that applies to you.
Flange Mount Pinion Removal
1. Remove mounting bolts in an alternating cross pattern.
2. Carefully inspect the mounting bolts and pinion and
flange surfaces for any signs of damage and repair or
replace as necessary if reinstalling.
FORM NO. L-21235-J-1014
16
LUBRICATION
2. Using a swab apply a very small dab of grease on the
middle of each tooth face and roll the pinion back and
forth over the entire length of the run 5 times.
The pinion needle bearings are sealed and lubricated for
life and cannot be serviced.
Nexen recommends lubricating the rack or individual roller
contacts every 2 million pinion revolutions or 6 months,
which ever comes first, but it may need to be lubricated
more frequently based on the application conditions, and
observable tooth or roller wear.
Wipe excess grease from the sides of the rack and pinion
body to prevent grease being thrown off during operation
and for general cleanliness.
Maximum RPS system life will be obtained by following
the recommended lubrication intervals as stated above.
In some special applications the Premium and Endurance
models of RPS rack can be operated lubrication free if
the maximum speed does not exceed 0.5 m/s [1.64 ft/s].
Typically lubrication free applications involve:
When lubricating the RPS system inspect the pinion rollers
and rack teeth for any abnormal wear patterns and ensure
the pinion rollers are not seized or have excessive play.
Wear on the edges of the rack teeth (not uniform across
the tooth face) or rings on the rollers indicate an alignment
problem which should be corrected to obtain maximum
system performance and life.
•
The rollers in new pinions, especially larger sizes, can
seem difficult to turn due to seal drag. This improves as
the pinion breaks in.
Dirty environments where contaminates will be
attracted/stick to the lubricant on the rack creating
mechanical interference or an abrasive paste that can
accelerate wear.
• Food processing
THK AFC is the recommended grease for rack tooth
lubrication although THK AFA grease can also be
used. Both can be found on the RPS product pages of
Nexen’s website under accessories. Greases for special
applications such as food grade, vacuum, or others are
allowed if they use a synthetic base, a polyurea thickener,
and meet the following Kinematic Viscosity Levels:
CST@40C = 25; CST@100C = 5. Contact Nexen for
recommendations on alternative greases.
• Clean rooms or applications where very low particle
emissions are desired
• Vacuum environments
• Applications where periodic servicing is problematic
If the RPS System is run lubrication free there will be some
reduction in life of the RPS system which will vary widely
depending on the application. The Standard and Universal
models of RPS rack cannot be run lubrication free under
any circumstances. Contact Nexen for more information.
The RPS system can be lubricated in two ways:
1. Apply grease to the pinion rollers and roll the pinion
back and forth 5 times over one meter of rack,
repeating the process for each meter of rack.
17
FORM NO. L-21235-J-1014
WARRANTY
Warranties
Nexen warrants that the Products will (a) be free from any defects in material or workmanship for a period of 12 months
from the date of shipment, and (b) will meet and perform in accordance with the specifications in any engineering drawing
specifically for the Product that is in Nexen’s current product catalogue, or that is accessible at the Nexen website, or that is
attached to this Quotation and that specifically refers to this Quotation by its number, subject in all cases to any limitations
and exclusions set out in the drawing. NEXEN MAKES NO OTHER WARRANTY, EXPRESS OR IMPLIED, AND ALL
IMPLIED WARRANTIES, INCLUDING WITHOUT LIMITATION, IMPLIED WARRANTIES OF MERCHANTABILITY AND
FITNESS FOR A PARTICULAR PURPOSE ARE HEREBY DISCLAIMED. This warranty applies only if: (a) the Product
has been installed, used and maintained in accordance with any applicable Nexen installation or maintenance manual
for the Product; (b) the alleged defect is not attributable to normal wear and tear; (c) the Product has not been altered,
misused or used for purposes other than those for which it was intended; and (d) Buyer has given written notice of the
alleged defect to Nexen, and delivered the allegedly defective Product to Nexen, within one year of the date of shipment.
Exclusive Remedy
The exclusive remedy for the Buyer for any breach of any warranties provided in connection with this agreement will be,
at the election of Nexen: (a) repair or replacement with new, serviceably used, or reconditioned parts or products; or (b)
issuance of credit in the amount of the purchase price paid to Nexen by the Buyer for the Products.
Agent's Authority
Buyer agrees that no agent, employee or representative of Nexen has authority to bind Nexen to any affirmation,
representation, or warranty concerning the Products other than those warranties expressly set forth herein.
Limitation on Nexen’s Liability
TO THE EXTENT PERMITTED BY LAW NEXEN SHALL HAVE NO LIABILITY TO BUYER OR ANY OTHER PERSON
FOR INCIDENTAL DAMAGES, SPECIAL DAMAGES, CONSEQUENTIAL DAMAGES OR OTHER DAMAGES OF
ANY KIND OR NATURE WHATSOEVER, WHETHER ARISING OUT OF BREACH OF WARRANTY OR OTHER
BREACH OF CONTRACT, NEGLIGENCE OR OTHER TORT, OR OTHERWISE, EVEN IF NEXEN SHALL HAVE
BEEN ADVISED OF THE POSSIBILITY OR LIKELIHOOD OF SUCH POTENTIAL LOSS OR DAMAGE. For all of
the purposes hereof, the term "consequential damages" shall include lost profits, penalties, delay damages, liquidated
damages or other damages and liabilities which Buyer shall be obligated to pay or which Buyer may incur based upon,
related to or arising out of its contracts with its customers or other third parties. In no event shall Nexen be liable for any
amount of damages in excess of amounts paid by Buyer for Products or services as to which a breach of contract has
been determined to exist. The parties expressly agree that the price for the Products and the services was determined
in consideration of the limitation on damages set forth herein and such limitation has been specifically bargained for and
constitutes an agreed allocation of risk which shall survive the determination of any court of competent jurisdiction that
any remedy herein fails of its essential purpose.
Inspection
Buyer shall inspect all shipments of Products upon arrival and shall notify Nexen in writing, of any shortages or other failures
to conform to these terms and conditions which are reasonably discoverable upon arrival without opening any carton
or box in which the Products are contained. Such notice shall be sent within 14 days following arrival. All notifications
shall be accompanied by packing slips, inspection reports and other documents necessary to support Buyer's claims. In
addition to the foregoing obligations, in the event that Buyer receives Products that Buyer did not order, Buyer shall return
the erroneously shipped Products to Nexen within thirty (30) days of the date of the invoice for such Products; Nexen
will pay reasonable freight charges for the timely return of the erroneously shipped Products, and issue a credit to Buyer
for the returned Products at the price Buyer paid for them, including any shipping expenses that Nexen charged Buyer.
All shortages, overages and nonconformities not reported to Nexen as required by this section will be deemed waived.
Limitation on Actions
No action, regardless of form, arising out of any transaction to which these terms and conditions are applicable may be
brought by the Buyer more than one year after the cause of action has accrued.
Nexen Group, Inc.
560 Oak Grove Parkway
Vadnais Heights, MN 55127
(800) 843-7445
Fax: (651) 286-1099
www.nexengroup.com
ISO 9001 Certified
FORM NO. L-21235-J-1014
18