1
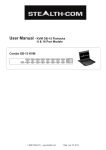
User Manual - KVM Cat6 Flatracks
- 8, 16 & 32 Port Models
Combo Cat6 KVM
1-888-STEALTH - www.stealth.com
Date: July 19, 2013
Legal Information
Information in this document has been carefully checked for accuracy; however, no guarantee is given to the correctness
of the contents. The information in this document is subject to change without notice. We are not liable for any injury or
loss that results from the use of this equipment.
Safety Instructions
Please read all of these instructions carefully before you use the device. Save this manual for
future reference.
■
■
■
■
■
■
■
■
■
■
■
Unplug equipment before cleaning. Don’t use liquid or spray detergent; use a moist cloth.
Keep equipment away from excessive humidity and heat. Preferably, keep it in an air-conditioned environment with
temperatures not exceeding 40º Celsius (104º Fahrenheit).
When installing, place the equipment on a sturdy, level surface to prevent it from accidentally falling and causing
damage to other equipment or injury to persons nearby.
When the equipment is in an open position, do not cover, block or in any way obstruct the gap between it and the
power supply. Proper air convection is necessary to keep it from overheating.
Arrange the equipment’s power cord in such a way that others won’t trip or fall over it.
If you are using a power cord that didn’t ship with the equipment, ensure that it is rated for the voltage and current
labeled on the equipment’s electrical ratings label. The voltage rating on the cord should be higher than the one listed
on the equipment’s ratings label.
Observe all precautions and warnings attached to the equipment.
If you don’t intend on using the equipment for a long time, disconnect it from the power outlet to prevent being
damaged by transient over-voltage.
Keep all liquids away from the equipment to minimize the risk of accidental spillage. Liquid spilled on to the power
supply or on other hardware may cause damage, fire or electrical shock.
Only qualified service personnel should open the chassis. Opening it yourself could damage the equipment and
invalidate its warranty.
If any part of the equipment becomes damaged or stops functioning, have it checked by qualified service personnel.
What the warranty does not cover
■
■
■
Any product, on which the serial number has been defaced, modified or removed.
Damage, deterioration or malfunction resulting from:
Accident, misuse, neglect, fire, water, lightning, or other acts of nature, unauthorized product modification, or
failure to follow instructions supplied with the product.
Repair or attempted repair by anyone not authorized by us.
Any damage of the product due to shipment.
Removal or installation of the product.
Causes external to the product, such as electric power fluctuation or failure.
Use of supplies or parts not meeting our specifications.
Normal wear and tear.
Any other causes which does not relate to a product defect.
Removal, installation, and set-up service charges.
□
□
□
□
□
□
□
□
1-888-STEALTH - www.stealth.com
< Part 1 > Combo Cat6 KVM
- 8 Port
1.1
1.2
1.3
1.4
- 16 Port
- 32 Port
Package contents
KVM port & Cat6 dongle connection
KVM Cascade
Specifications
P.1
P.2
P.3
P.4
< Part 2 > Usage
2.1
2.2
2.3
2.4
2.5
KVM Button
Password
KVM OSD
KVM Hotkey & Remote Console Hotkey
DC power 12V, 24V, 48V Input
1-888-STEALTH - www.stealth.com
P.5
P.6
P.7
P.8
P.9
< Part 2 > Combo Cat6 KVM
< 1.1 > Package Contents
Combo Cat6 KVM
-KVM8-Cat6
-KVM16-Cat6
-KVM32-Cat6
KVM Rear Kit
back
The power of the KVM rear kit may be changed to external power design
based on the LCD console drawer series and model.
-KVM8-Cat6
Cascade
Power
-KVM16-Cat6
-KVM32-Cat6
P.1
1-888-STEALTH - www.stealth.com
< 1.2 > KVM port & Cat6 dongle connection
Combo Cat6 KVM
USB Servers
DVI-USB dongle
CAT 5 / 6 cable
max. 40 meters
USB
DVI-D
Cat6 KVM port
Drawer KVM Rear Kit
PS/2 Servers
USB Servers
PS/2
VGA
VGA-USB dongle
VGA-PS/2 dongle
CAT 5 / 6 cable
max. 40 meters
USB
VGA
DVI-USB dongle
■ To connect DVI-D connector to the computer’s video card
■ To connect USB connector to the computer’s USB port
VGA-USB dongle
■ To connect DB-15 connector to the computer’s video card
■ To connect USB connector to the computer’s USB port
VGA-PS/2 dongle
■ To connect DB-15 connector to the computer’s video card
■ To connect PS/2 keyboard connector to the computer’s keyboard port
■ To connect PS/2 mouse connector to the computer’s mouse port
P.2
1-888-STEALTH - www.stealth.com
< 1.3 > KVM Cascade
■
■
Combo Cat6 KVM
Cascade up to 8 levels, 256 servers
Cascading multiple KVM with cascade cable.
Cascaded KVMs from level 2 to 8 must be the models of -KVM8-Cat6 / -KVM16-Cat6 / -KVM32-Cat6.
When multiple combo Cat6 KVMs cascade together, the master KVM at level 1 will take all control of
other slave KVM switches (e.g. level 2 to 8).
Master KVM
Drawer KVM Rear Kit
Cascade
To console VGA port
Standalone KVM
Slave KVM
level 2
Standalone KVM
Slave KVM
level 3
Standalone KVM
Slave KVM
level 4
Standalone KVM
Slave KVM
level 5
Standalone KVM
Slave KVM
level 6
Standalone KVM
Slave KVM
level 7
Standalone KVM
Slave KVM
level 8
■
6ft Combo KVM cascade cable
P.3
1-888-STEALTH - www.stealth.com
< 1.4 > Specifications
Combo Cat6 KVM
-KVM8-Cat6
▀
-KVM16-Cat6
-KVM32-Cat6
KVM Port
Number of ports:
8, 16 or 32
Connector:
RJ-45
Connectivity:
DVI-D / VGA connector dongle up to 40 meters (132 feet) via
Cat6 / Cat5 cable
▀
Local Console
Nil for LCD console drawer version
▀
Management
Multilingual OSD:
English, French, German, Spanish, Italian, Russian, Simplified Chinese,
Japanese
Hotkey combination:
Scroll-lock, Cap-lock, Num-lock, Alt, Ctrl & Win
Security:
Password enable & disable, up to 8 users profile for port access
PC Selection:
Front button, OSD menu & hotkey
▀
Expansion:
Up to 256 servers by 8-level cascade
▀
Compatibility
▀
▀
Multi-platform:
Mix PCs, SUN and Mac G3 / G4 Mac / iMac
Support:
Windows 7 / Vista / 2003 / XP, Linux, Unix
Power
Input:
100 or 240V AC at 50 or 60 Hz via IEC type cord OR
AC / DC power adapter [email protected] (optional)
Option DC:
12V / 24V / 48V DC input
Consumption:
Max. 24 Watt, Standby 5 Watt
Environmental
Operating:
0 to 50°C
Storage:
-5 to 60°C
Relative humidity:
90%, non-condensing
Shock:
50G peak acceleration (11ms, half-sine wave)
Vibration:
58~100Hz / 0.98G (11ms / cycle)
P.4
1-888-STEALTH - www.stealth.com
Part 2. Usage
Combo Cat6 KVM Usage
2.1 KVM Button
Power ON
■ Turn off all servers and KVM switches
■ Make sure all cables / connectors are properly connected
■ Recommended Power ON sequence is monitor, KVM switch then computer
Front Panel - Port LED Indications
8 ports
Bank no.
PC port LEDs
Channel
button
Bank
button
16 ports
32 ports
Bank no.
7-Segment BANK LED indication
PC port LEDs
Online : Blue LED on indicating a PC is connecting to the port
Active : Green LED on indicating a selected channel
Channel button
Press to select channel from 01 to 32
Bank button
Select the bank from 1 to 8
P.5
1-888-STEALTH - www.stealth.com
< 2.2 > Password
Combo Cat6 KVM Usage
The password is enabled by default, the default password is “00000000” eight zeros (Do not use “0” on
number pad)
■ Enable password
1. Press the KVM hotkey Scroll Lock + Scroll Lock + U
2. Logout the KVM by pressing the hotkey Scroll Lock + Scroll Lock + P
3. In SUPERVISOR level, enter “00000000” eight zeros in user name & password field
(Do not use “0” on number pad)
4. In USER level, press Space bar + Enter in user name & password field
Remark: Automatic logout after 10 minutes of inactivity
■
Set your own user name & password
1. Login the KVM in SUPERVISOR level by pressing “00000000” eight zeros in user name & password
field
2. Call KVM OSD menu by pressing the KVM hotkey Scroll Lock + Scroll Lock + Space Bar
3. Press F1 to the MAIN MENU
4. Select “USER SECURITY”
5. Set password in SUPERVISOR & USER level
a. In the left-top row “S” (SUPERVISOR), press Enter to set your own user name & password
b. In the row 1 to 8 (USER), press Enter to set your own user name & password
6. Press Enter to save the setting or press Esc to cancel the editing without any change
Remark: a. Blank has underscore, while SPACE doesn’t have
b. Press any alphanumeric key to move to next input item. SPACE is treated as a valid
character
■
Change your password
1. Login the KVM in SUPERVISOR level by pressing your own user name & password
2. Call KVM OSD menu by pressing the KVM hotkey Scroll Lock + Scroll Lock + Space Bar
3. Press F1 to the MAIN MENU
4. Select “USER SECURITY”
5. Change password in SUPERVISOR & USER level
a. In the left-top row “S” (SUPERVISOR), press Enter to change your user name & password
b. In the row 1 to 8 (USER), press Enter to change your user name & password
6. Press Enter to save the setting or press Esc to cancel the editing without any change
Remark: a. Blank has underscore, while SPACE doesn’t have
b. Press any alphanumeric key to move to next input item. SPACE is treated as a valid
character
■
■
Disable your password
1. Press the KVM hotkey Scroll Lock + Scroll Lock + U
2. Logout the KVM by pressing the KVM hotkey Scroll Lock + Scroll
3. You don’t need user name & password to access the KVM OSD menu
Lock + P
Forget your password
Please contact your supplier for further support
Remark:
■ You must press the KVM hotkey within 2 seconds
■ A beep sound will be heard for successfully entering the KVM hotkey
P.6
1-888-STEALTH - www.stealth.com
< 2.3 > KVM OSD
Combo Cat6 KVM Usage
OSD Menu
OSD operation
next to the system name
The PC is powered on
next to the system name
The PC is selected
F1
Access F1 MAIN MENU
F2
Logout the OSD menu
F3
Previous menu
Esc
Cancel / Quit
Enter
Complete / Switch to selected port
Switch to previous or next port
PgUp/PgDn
Switch to previous bank or next bank
1/2/3/4
Display port 01 ~ 08 / 09 ~ 16 / 17 ~ 24 / 25 ~ 32
Remark: Display port 17 ~ 32 for 32 port model only
F1 Main Menu
01 LANGUAGE
OSD language change
02 PORT NAME EDIT
Define port name
03 PORT SEARCH
Quick searching by port name
04 USER SECURITY
Change password
05 ACCESS LIST
Define user access authority
06 HOTKEY
Change hotkey
07 TIME SETTINGS
Modify scan display time interval
08 OSD MOUSE
Modify OSD mouse speed
P.7
1-888-STEALTH - www.stealth.com
< 2.4 > KVM Hotkey & Remote Console Hotkey
Combo Cat6 KVM Usage
Local Console Hotkey
Function
Scroll Lock + Scroll Lock + Space Bar
Calling OSD menu
Right-button mouse + Esc
Calling OSD menu
Scroll Lock + Scroll Lock +
Switch to previous port
Scroll Lock + Scroll Lock +
Switch to next port
Scroll Lock + Scroll Lock +
PgUp / PgDn
Switch to previous bank or next bank
Scroll Lock + Scroll Lock +
Bank no. + Port no.
Switch to specific port
Scroll Lock + Scroll Lock +
B
Turn the buzzer ON and OFF
* Default the buzzer is ON
Scroll Lock + Scroll Lock +
P
Logout the KVM if password security is
ON. Show up the status windows
Advance hotkeys (for Supervisor login only)
Scroll Lock + Scroll Lock +
S
Activate auto-scan mode for connected
servers
*Press any key to exit the auto-scan
mode
Scroll Lock + Scroll Lock +
R
Reset all the KVM settings to factory
default
*Except User Security settings
Scroll Lock + Scroll Lock +
U
Disable and enable password security
*Default security is ON
Scroll Lock + Scroll Lock +
L
To enable / disable the screen saving
function and 10 minutes auto-logout
*Default the screen saving is OFF
Remarks:
Example of “Scroll Lock + Scroll Lock + Bank no. + Port no.”
- Bank No. : 1 to 8
- Port No. : 01 to 32
- e.g. Bank 1 Port 4 : Scroll Lock + Scroll Lock + 1 + 0 + 4
- e.g. Bank 2 Port 16 : Scroll Lock + Scroll Lock + 2 + 1 + 6
■ You must press the hotkey within 2 seconds
■ A beep will be heard on successful activation
■ The numeric keypad is not supported, while in OSD screen, the arrow keys, PgUp, PgDn, and Enter keys
are supported
■
Remote Console Hotkey
Function
Scroll Lock + Scroll Lock +
C
Toggle switch between remote & local port
Scroll Lock + Scroll Lock +
Q
Turn the buzzer ON & OFF
*Default the buzzer is ON
Scroll Lock + Scroll Lock +
S
Activate auto-scan mode for remote & local port
*The scan time interval is 5 seconds
Scroll Lock + Scroll Lock +
A
Auto-adjust the video signal
P.8
1-888-STEALTH - www.stealth.com
< 2.5 > DC Power 12V, 24V, 48V Input
Model
Combo Cat6 KVM Usage
12V
24V
48V
Input voltage:
12-Volt
24-Volt
48-Volt
Input range:
9 ~ 18V
18 ~ 36V
36 ~ 75V
- No load
50 mA
50 mA
50 mA
- Full load
4950 mA
2450 mA
1220 mA
Output voltage:
12-Volt
12-Volt
12-Volt
Output current:
4.16A
4.16A
4.16A
84%
85%
85%
Input rating
Input current
Output rating
Efficiency
Remarks:
■ Package does not include power cord
The company reserves the right to modify product specifications without prior notice and assumes no responsibility
for any error which may appear in this publication.
All brand names, logo and registered trademarks are properties of their respective owners.
Copyright 2013 Stealth.com Inc. (Stealth Computer) All rights reserved.
P.9
1-888-STEALTH - www.stealth.com